
This page contains information about the artisan Irlene, including how to recruit her, what items she can craft and how to upgrade her artisan tier.
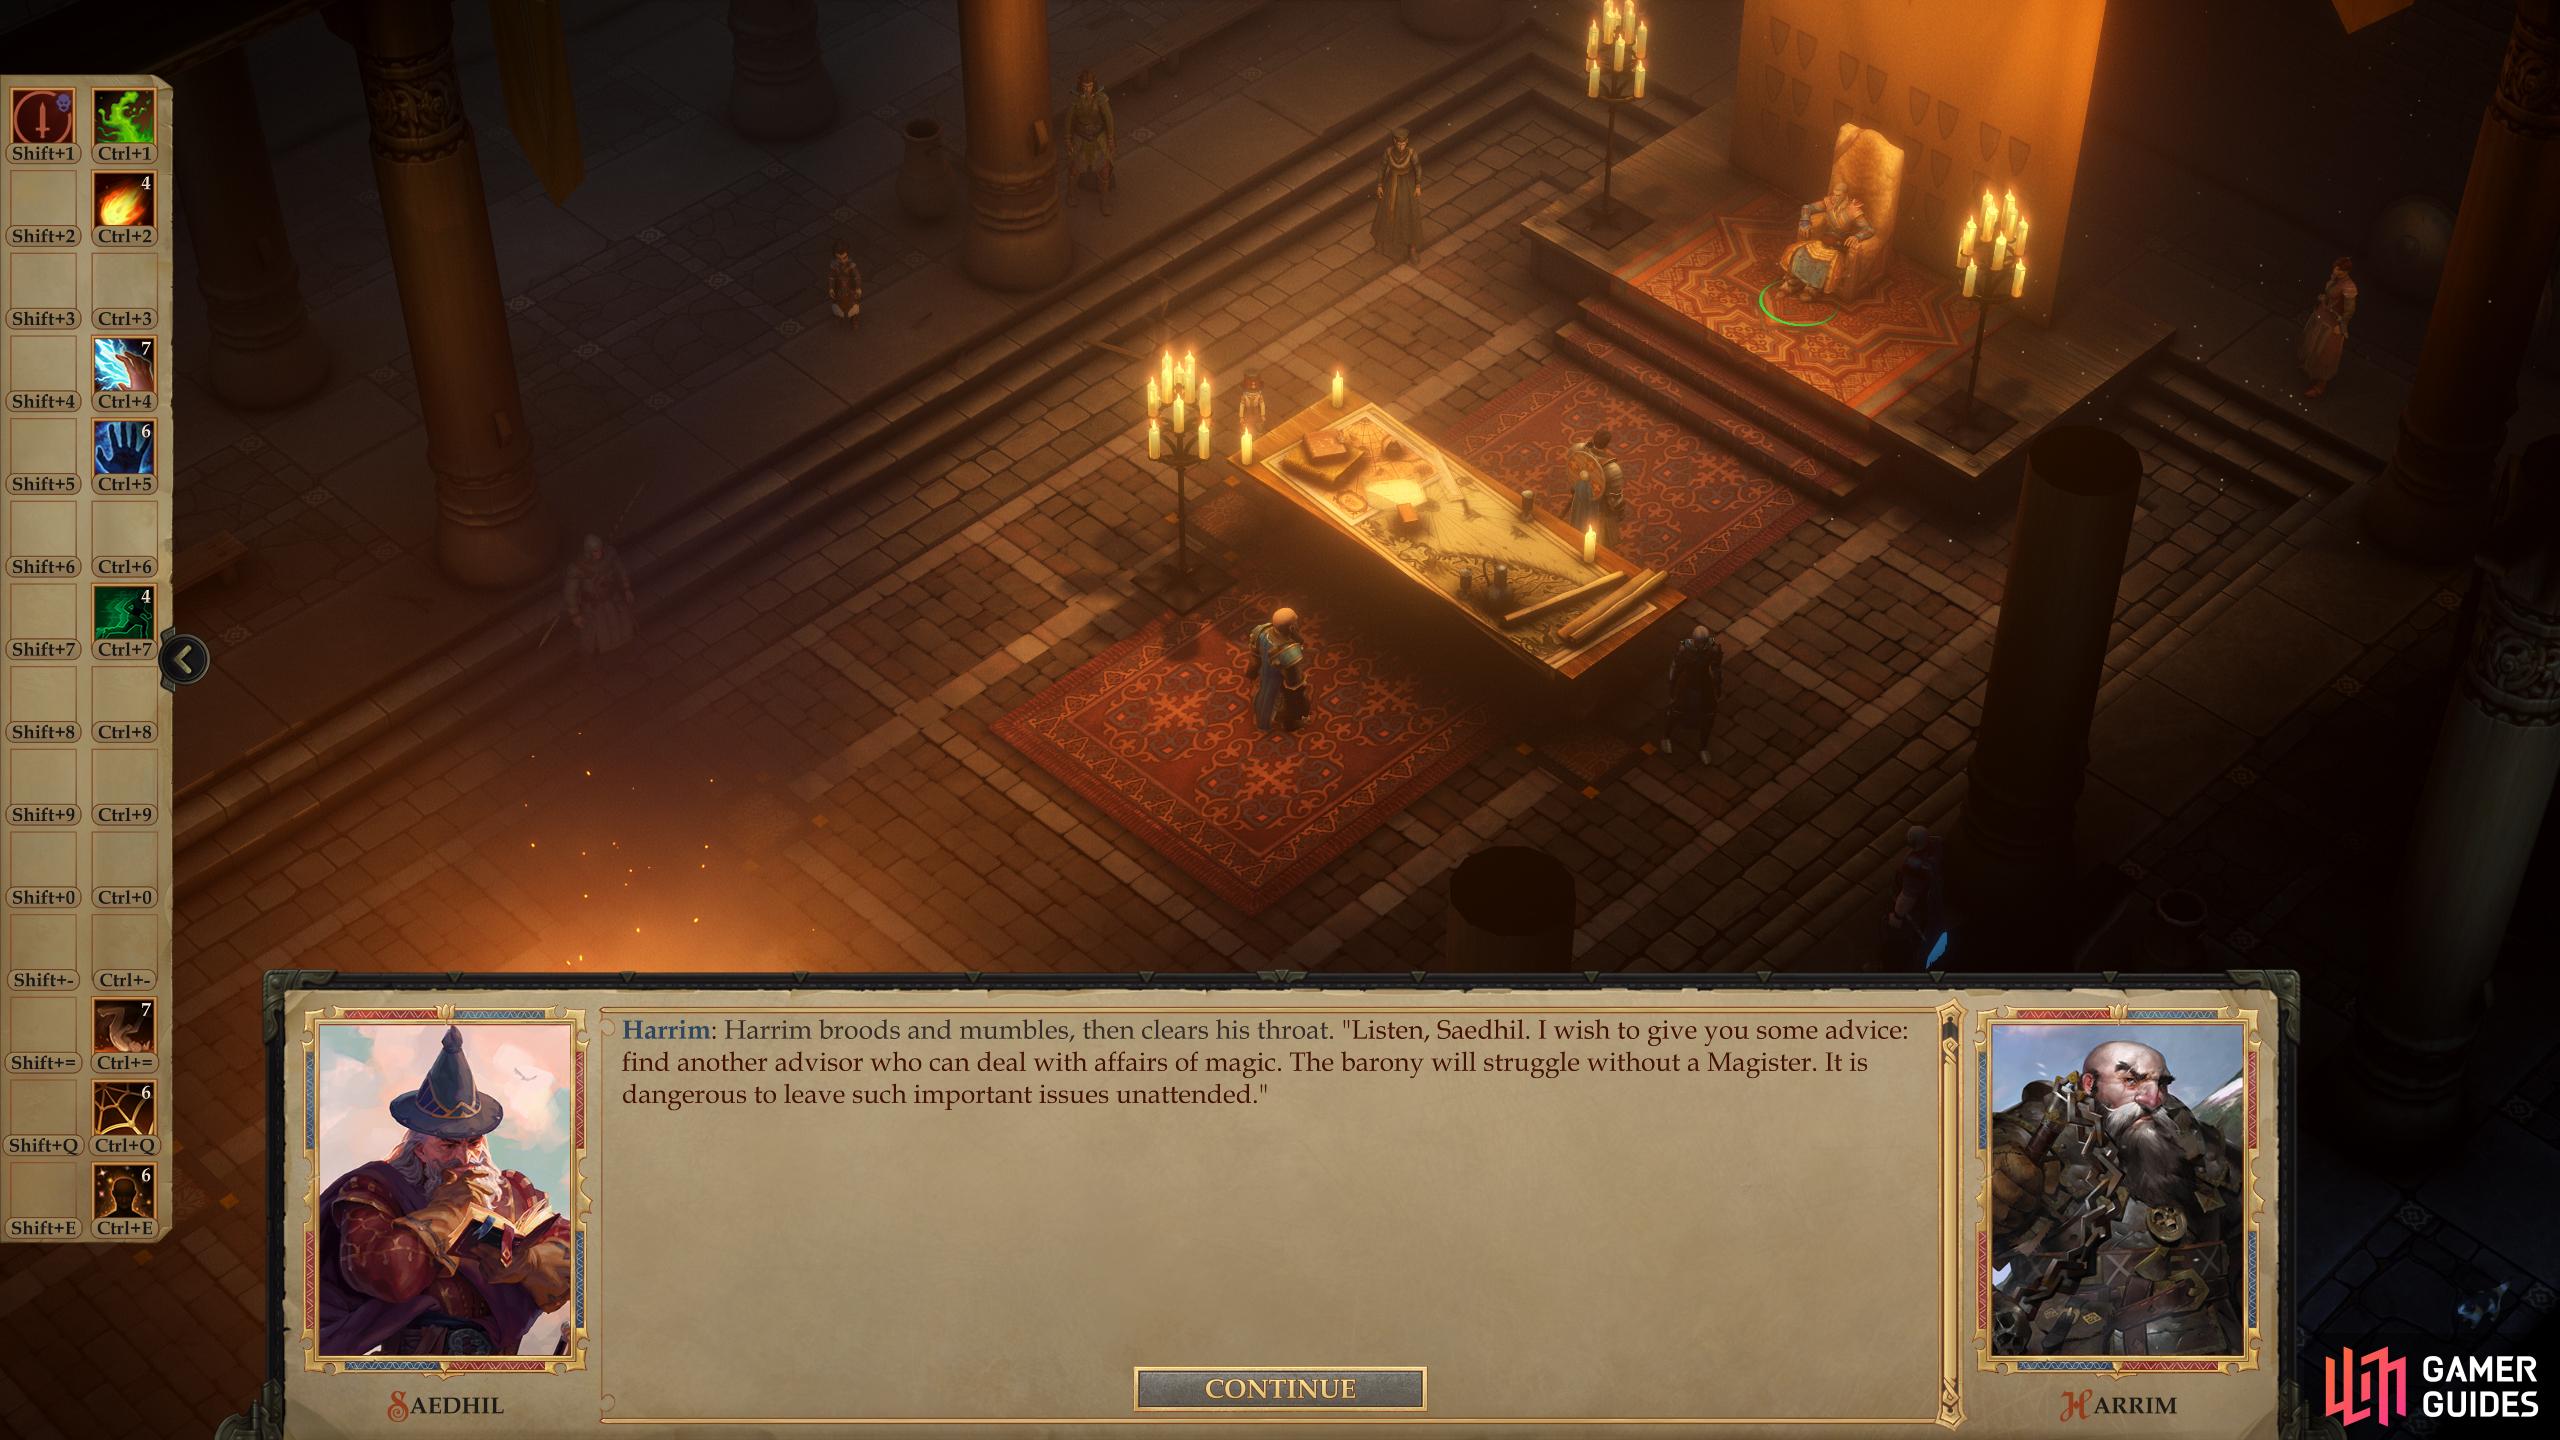
(1 of 3) Upgrade your Divinity stat until your High Priest delegates some responsibilities to a new appointee - the Magister.
Irlene is odd in a few ways; first, she’s not actually the artisan of the goods being crafted, instead, she’s merely a representative who can acquire these goods for you. Second, she’s not drawn to your court by annexing new territory, but rather by gaining the Magister advisor, which will only occur once you’ve boosted your Divine Kingdom Stat to Rank IV (again, it’s the point total that matters, not the actual rank, but they kind of go hand-in-hand). Consequently, she’s not set up in any of your new territories - you’ll need to build her workshop directly in your capital.
Irlene introduces herself as somebody who can “acquire magical rarities”, which gives little insight into what, exactly, she can offer you. As it turns out, she can funnel you a variety of rods, scrolls, staves and wands, making her exclusively useful to spellcasters. Once you slog through her masterpiece quest, she’ll give you the Grandmaster’s Rod, which allows them to enhance up to three spells per day with the Maximize and Empower metamagic feats. These spells also ignore spell resistance and magic immunity.
Recruiting Irlene
Irlene should show up in your throne room after you unlock the Magister advisor, which will occur once your Divine Kingdom Stat hits Rank IV. She’ll outright ask you to build her a workshop in exchange for her services - no quest involved. Find a spot to build Irlene’s Magical Rarities Shop, which will set you back a mere 30 BP, and you’ll be good to go.
A Simple Favor - Irlene’s Masterpiece Quest
Recruit Irlene and build Irlene’s Magical Rarities Shop, then wait for her to smuggle in your first item.
Once she delivers an item, she’ll ask for your help, only elaborating when you go speak to her in your capital. Seek her out in the western corner of your capital and she’ll tell you that her gopher, Ollie, has gone missing, and with him the shipment she was expecting. You need to find him - and more importantly, the Chest of Genuine Gemstones he was hauling if you’re ever going to get this exquisite item Irlene is promising you. For talking to Irlene you’ll gain 180 XP.
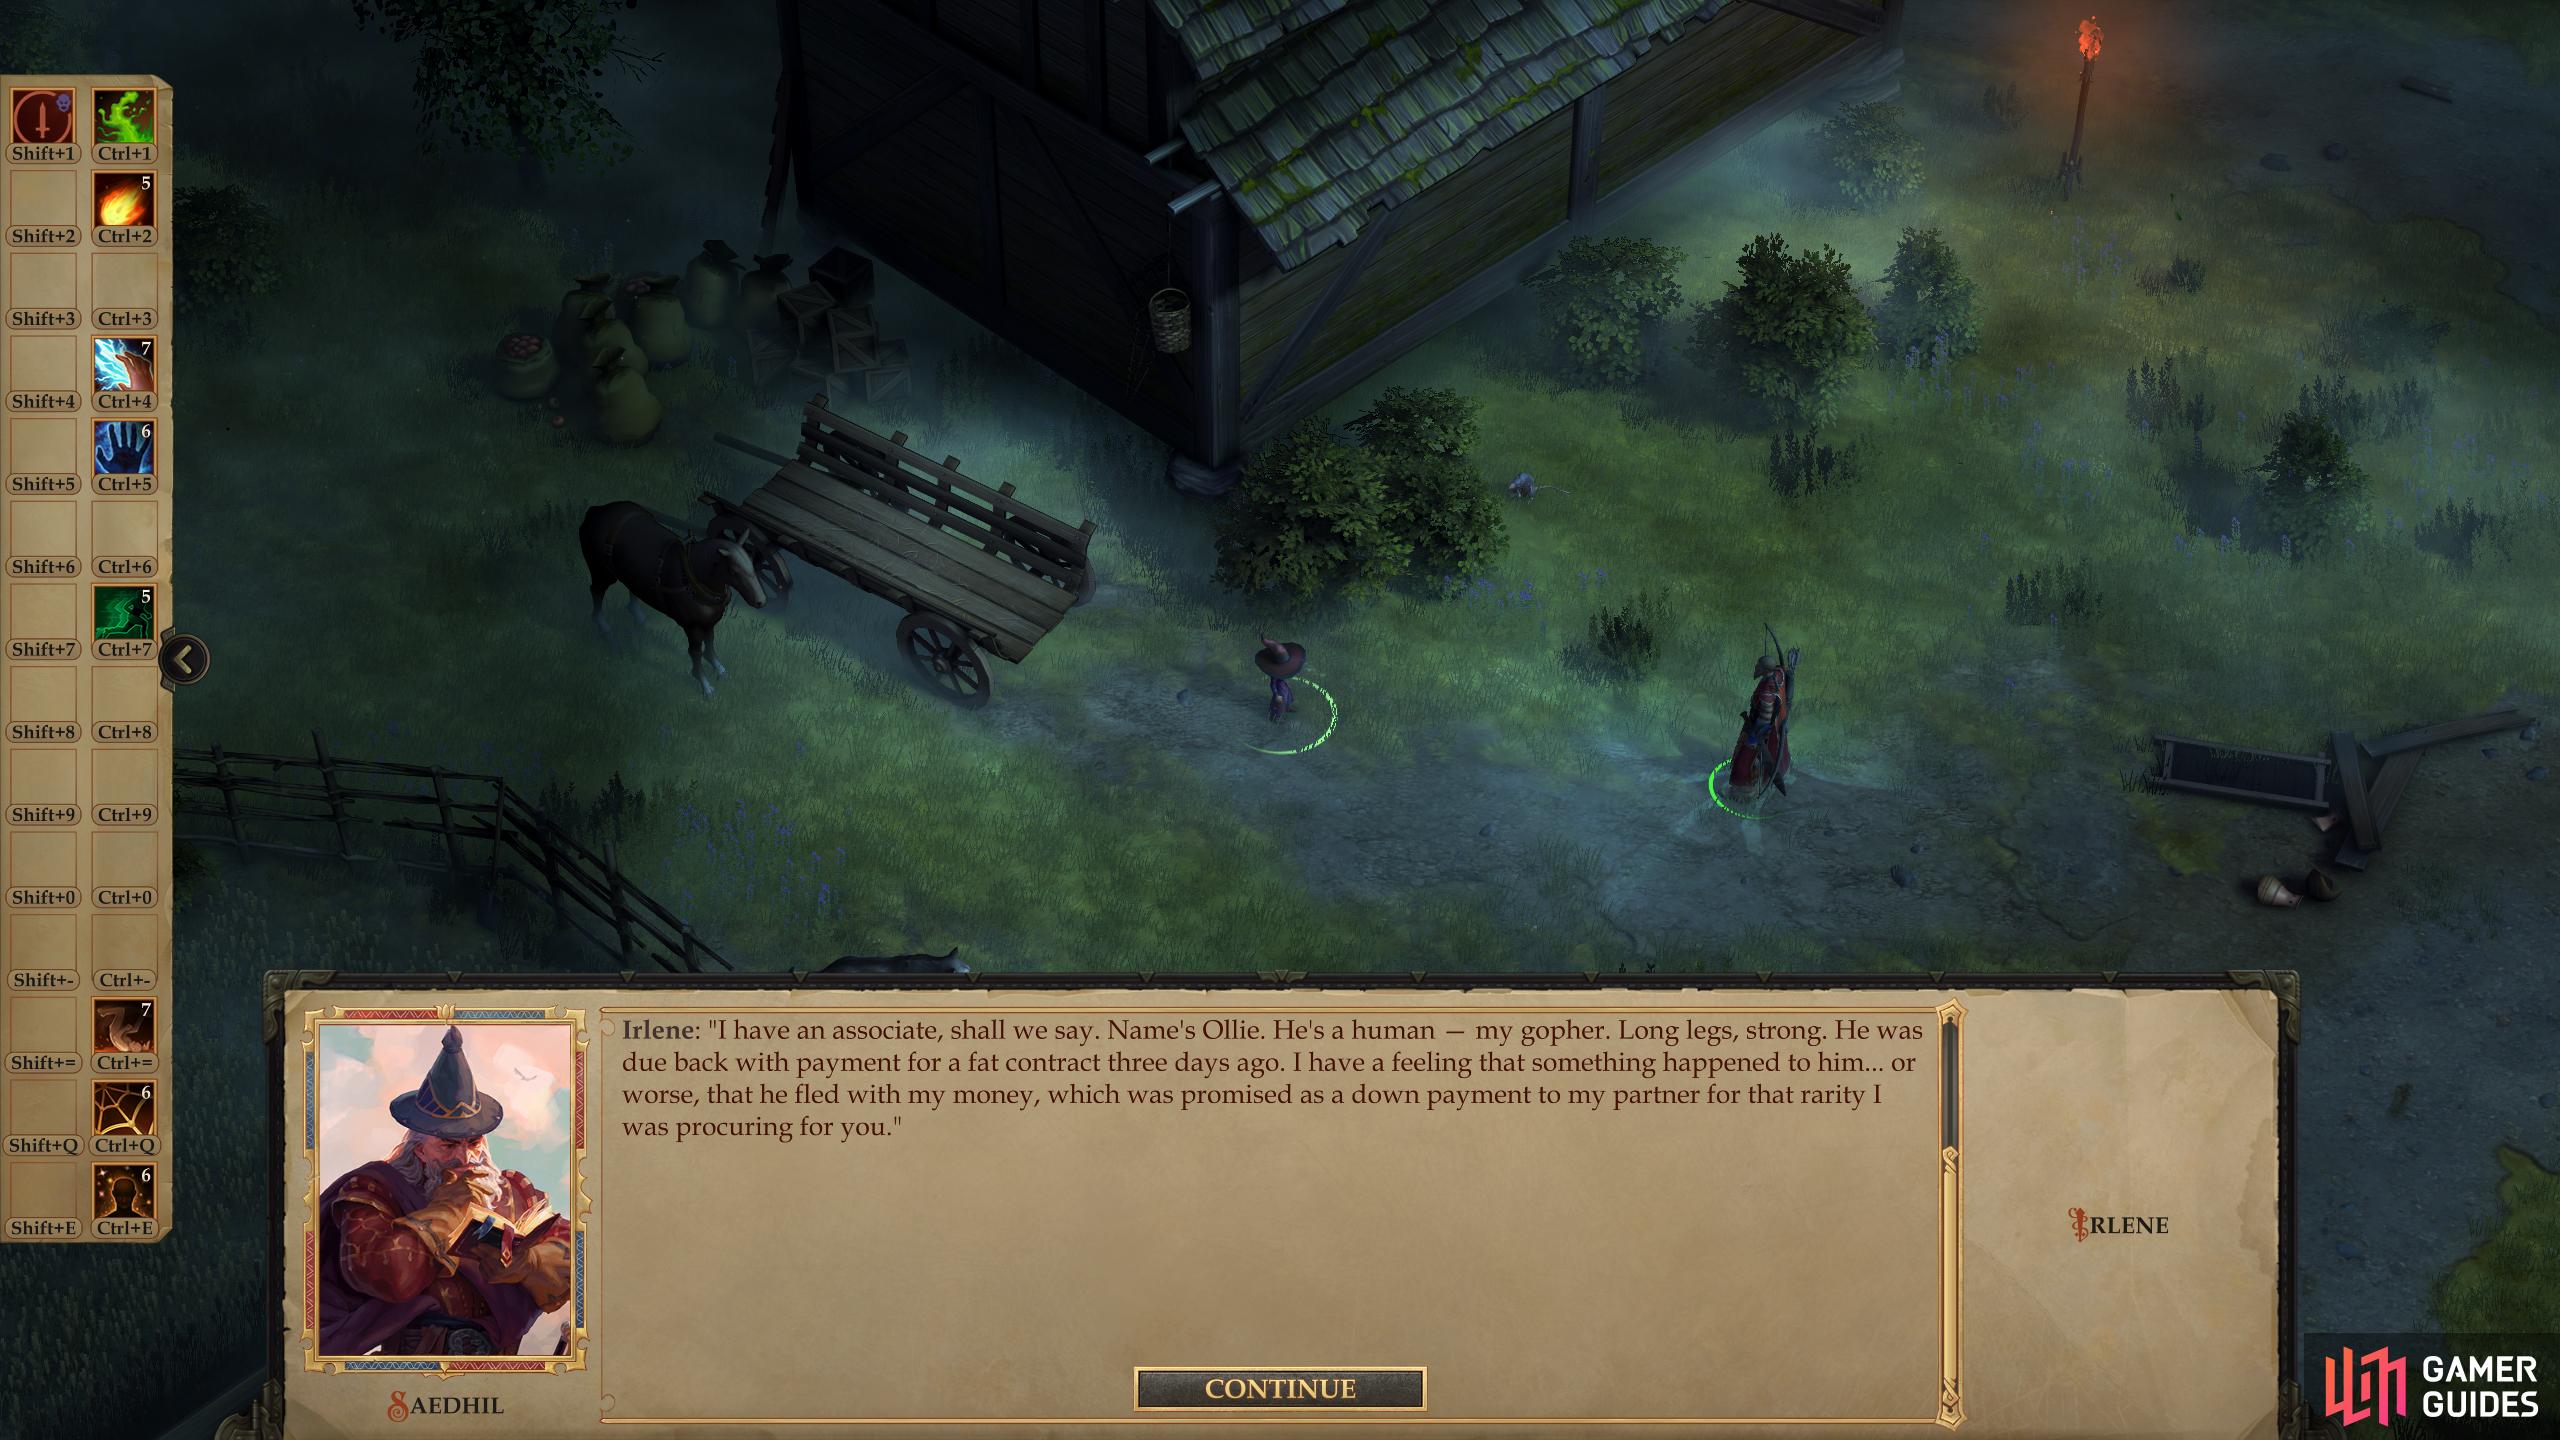
Talk to Irlene in your capital and she’ll ask you to recover some wayward gems.

Talk to Lidika in Lake Silverstep Village to learn the approximate whereabouts of Irlene’s gopher, Ollie.
Finding the Chest of Genuine Gemstones
Travel to the Lake Silverstep Village area (follow the link provided for a walkthrough of this area, if you need it) and find Lidika near the southwestern edge of the village, who will tell you that her husband Ollie - Irlene’s gopher - mentioned “going to the southern border to grab something from some cleft”. This step is optional, but it does give you information about where to go.
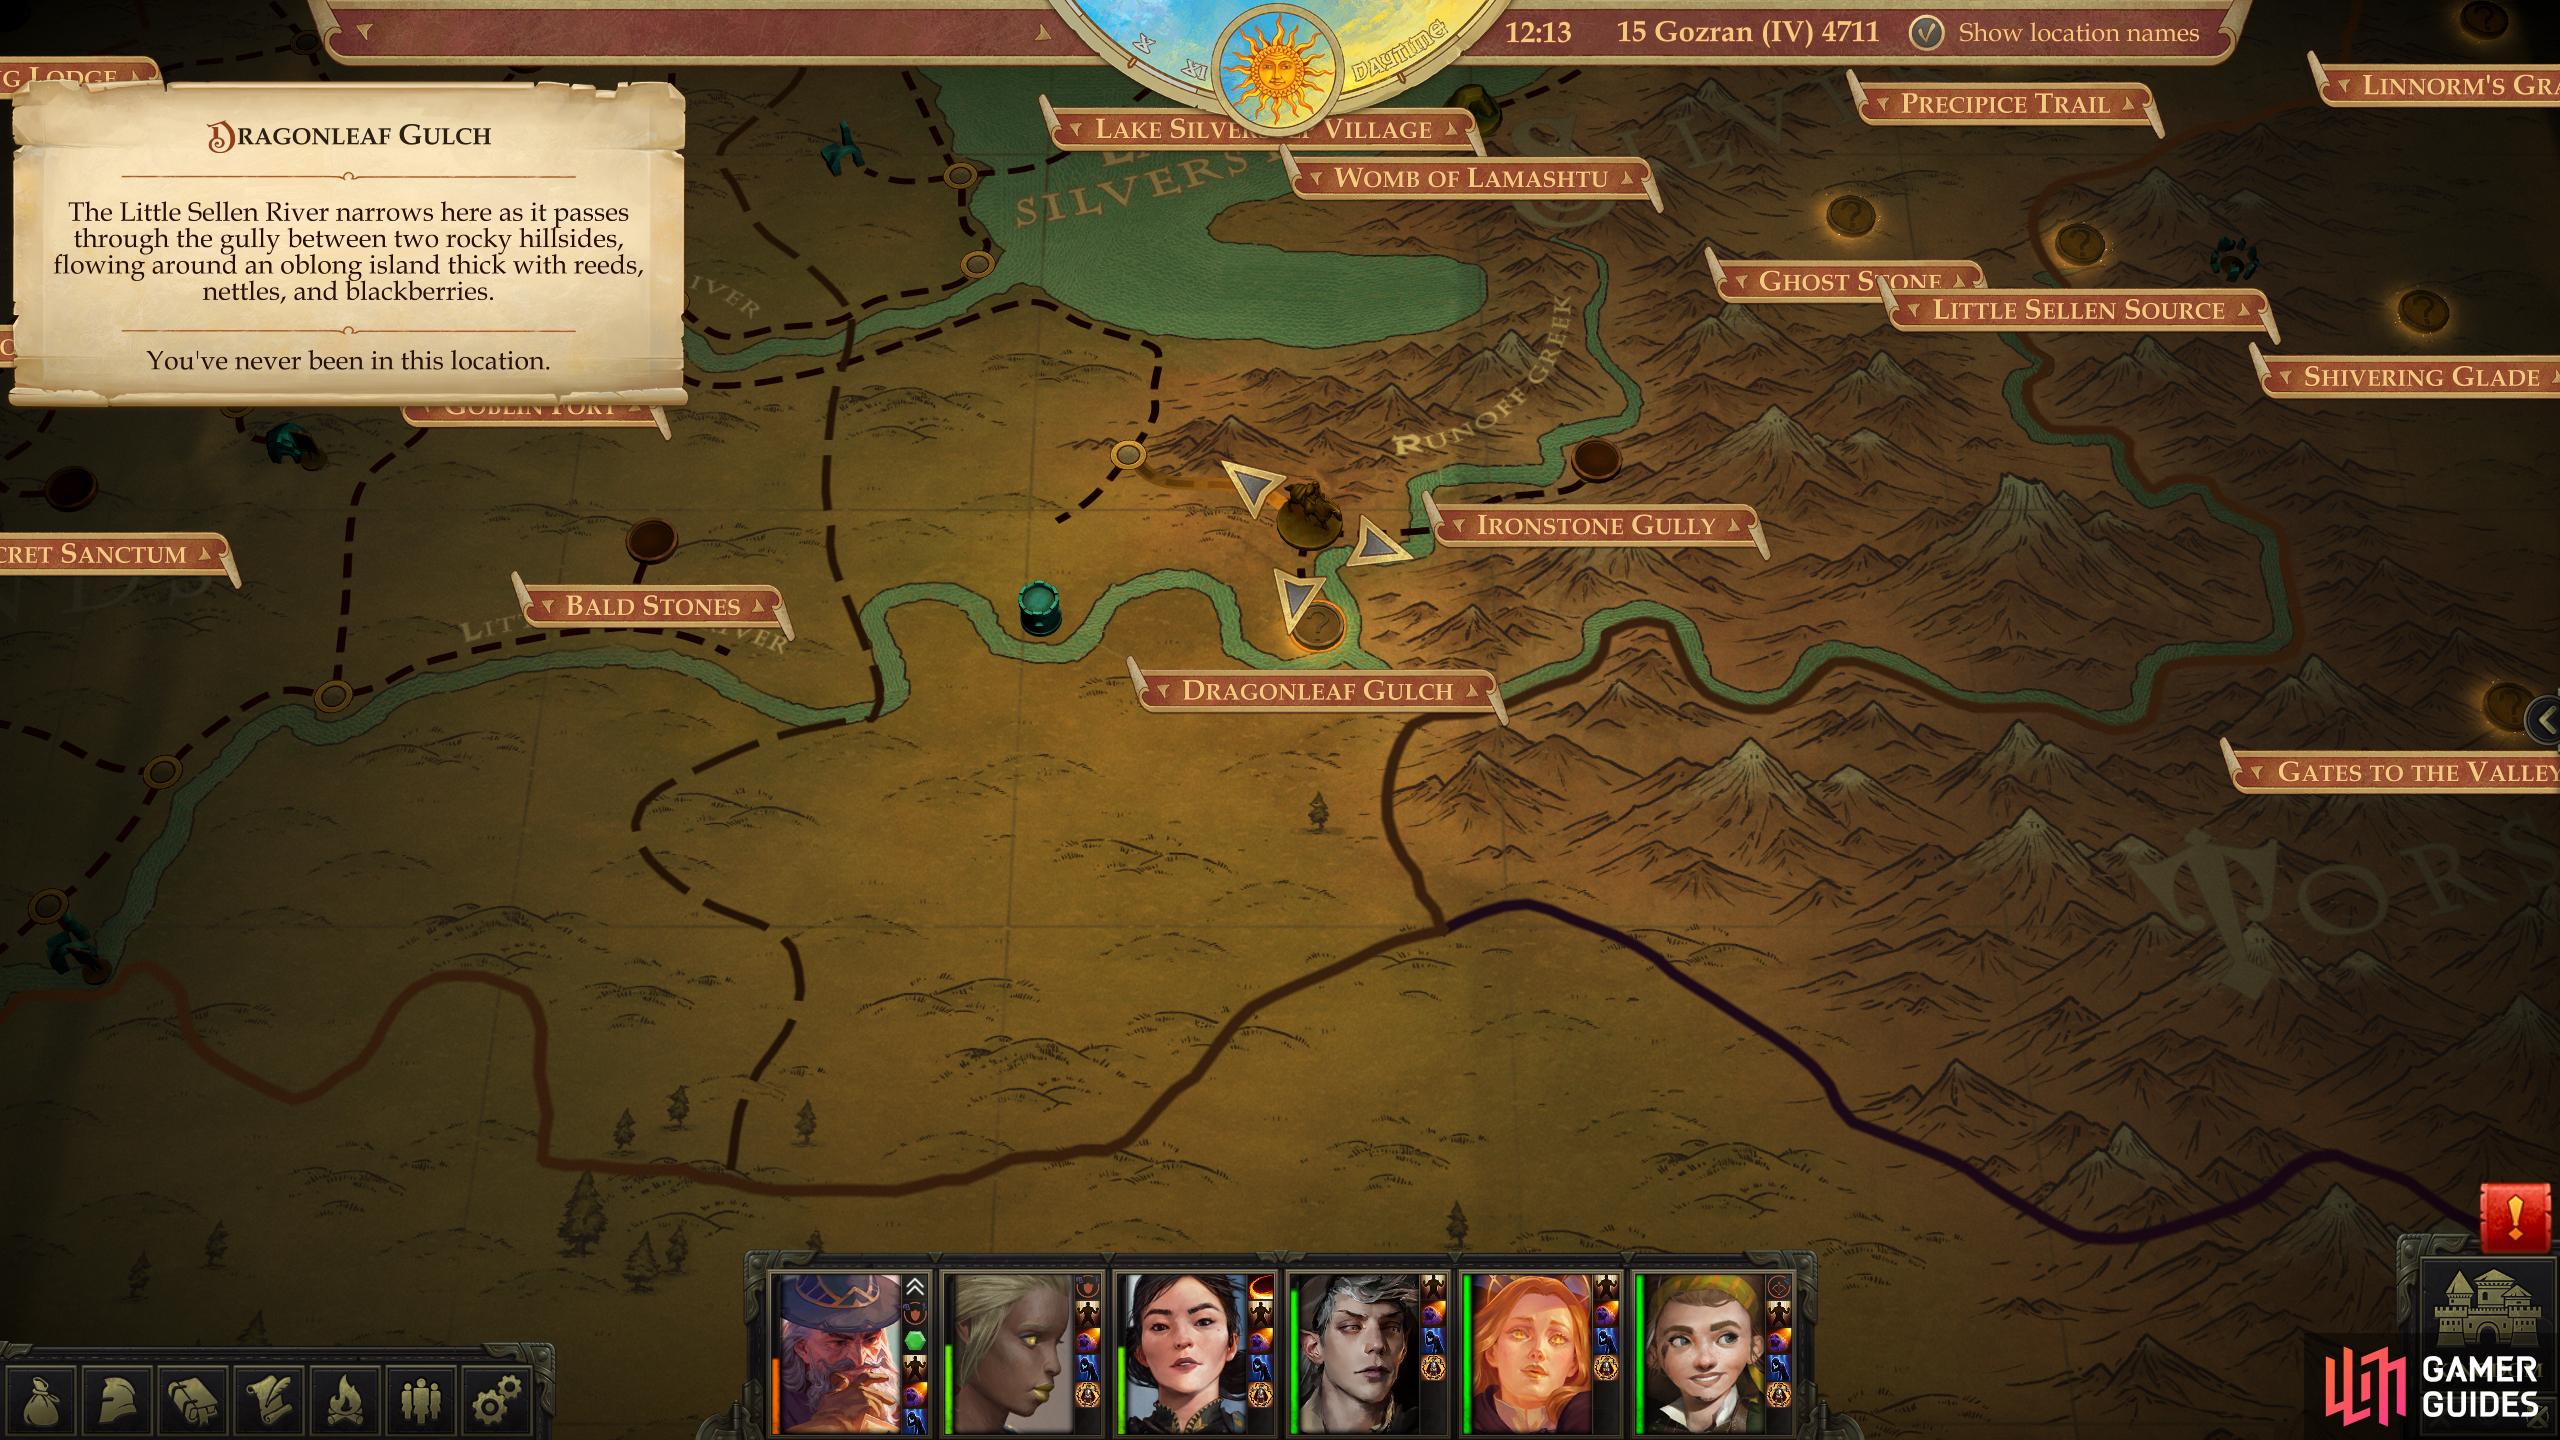
Location of Dragonleaf Gulch on the map.
Next, make your way to the Dragonleaf Gulch area, which is south of Lake Silverstep Village, along the Runoff Creek (again, follow the link for a walkthrough of this area). To reach Dragonleaf Gulch from Lake Silverstep Village, follow these directions:
- West (across Lake Silverstep)
- South
- Southwest (along the Gudrin River)
- West (along the Gudrin River)
- West (along the Gudrin River, to the Bridge Over the Gudrin River)
- South (across the Gudrin River)
- East (along the Gudrin River)
- East (along the Gudrin River)
- East (along the Gudrin River, path veers south)
- Southeast
- South
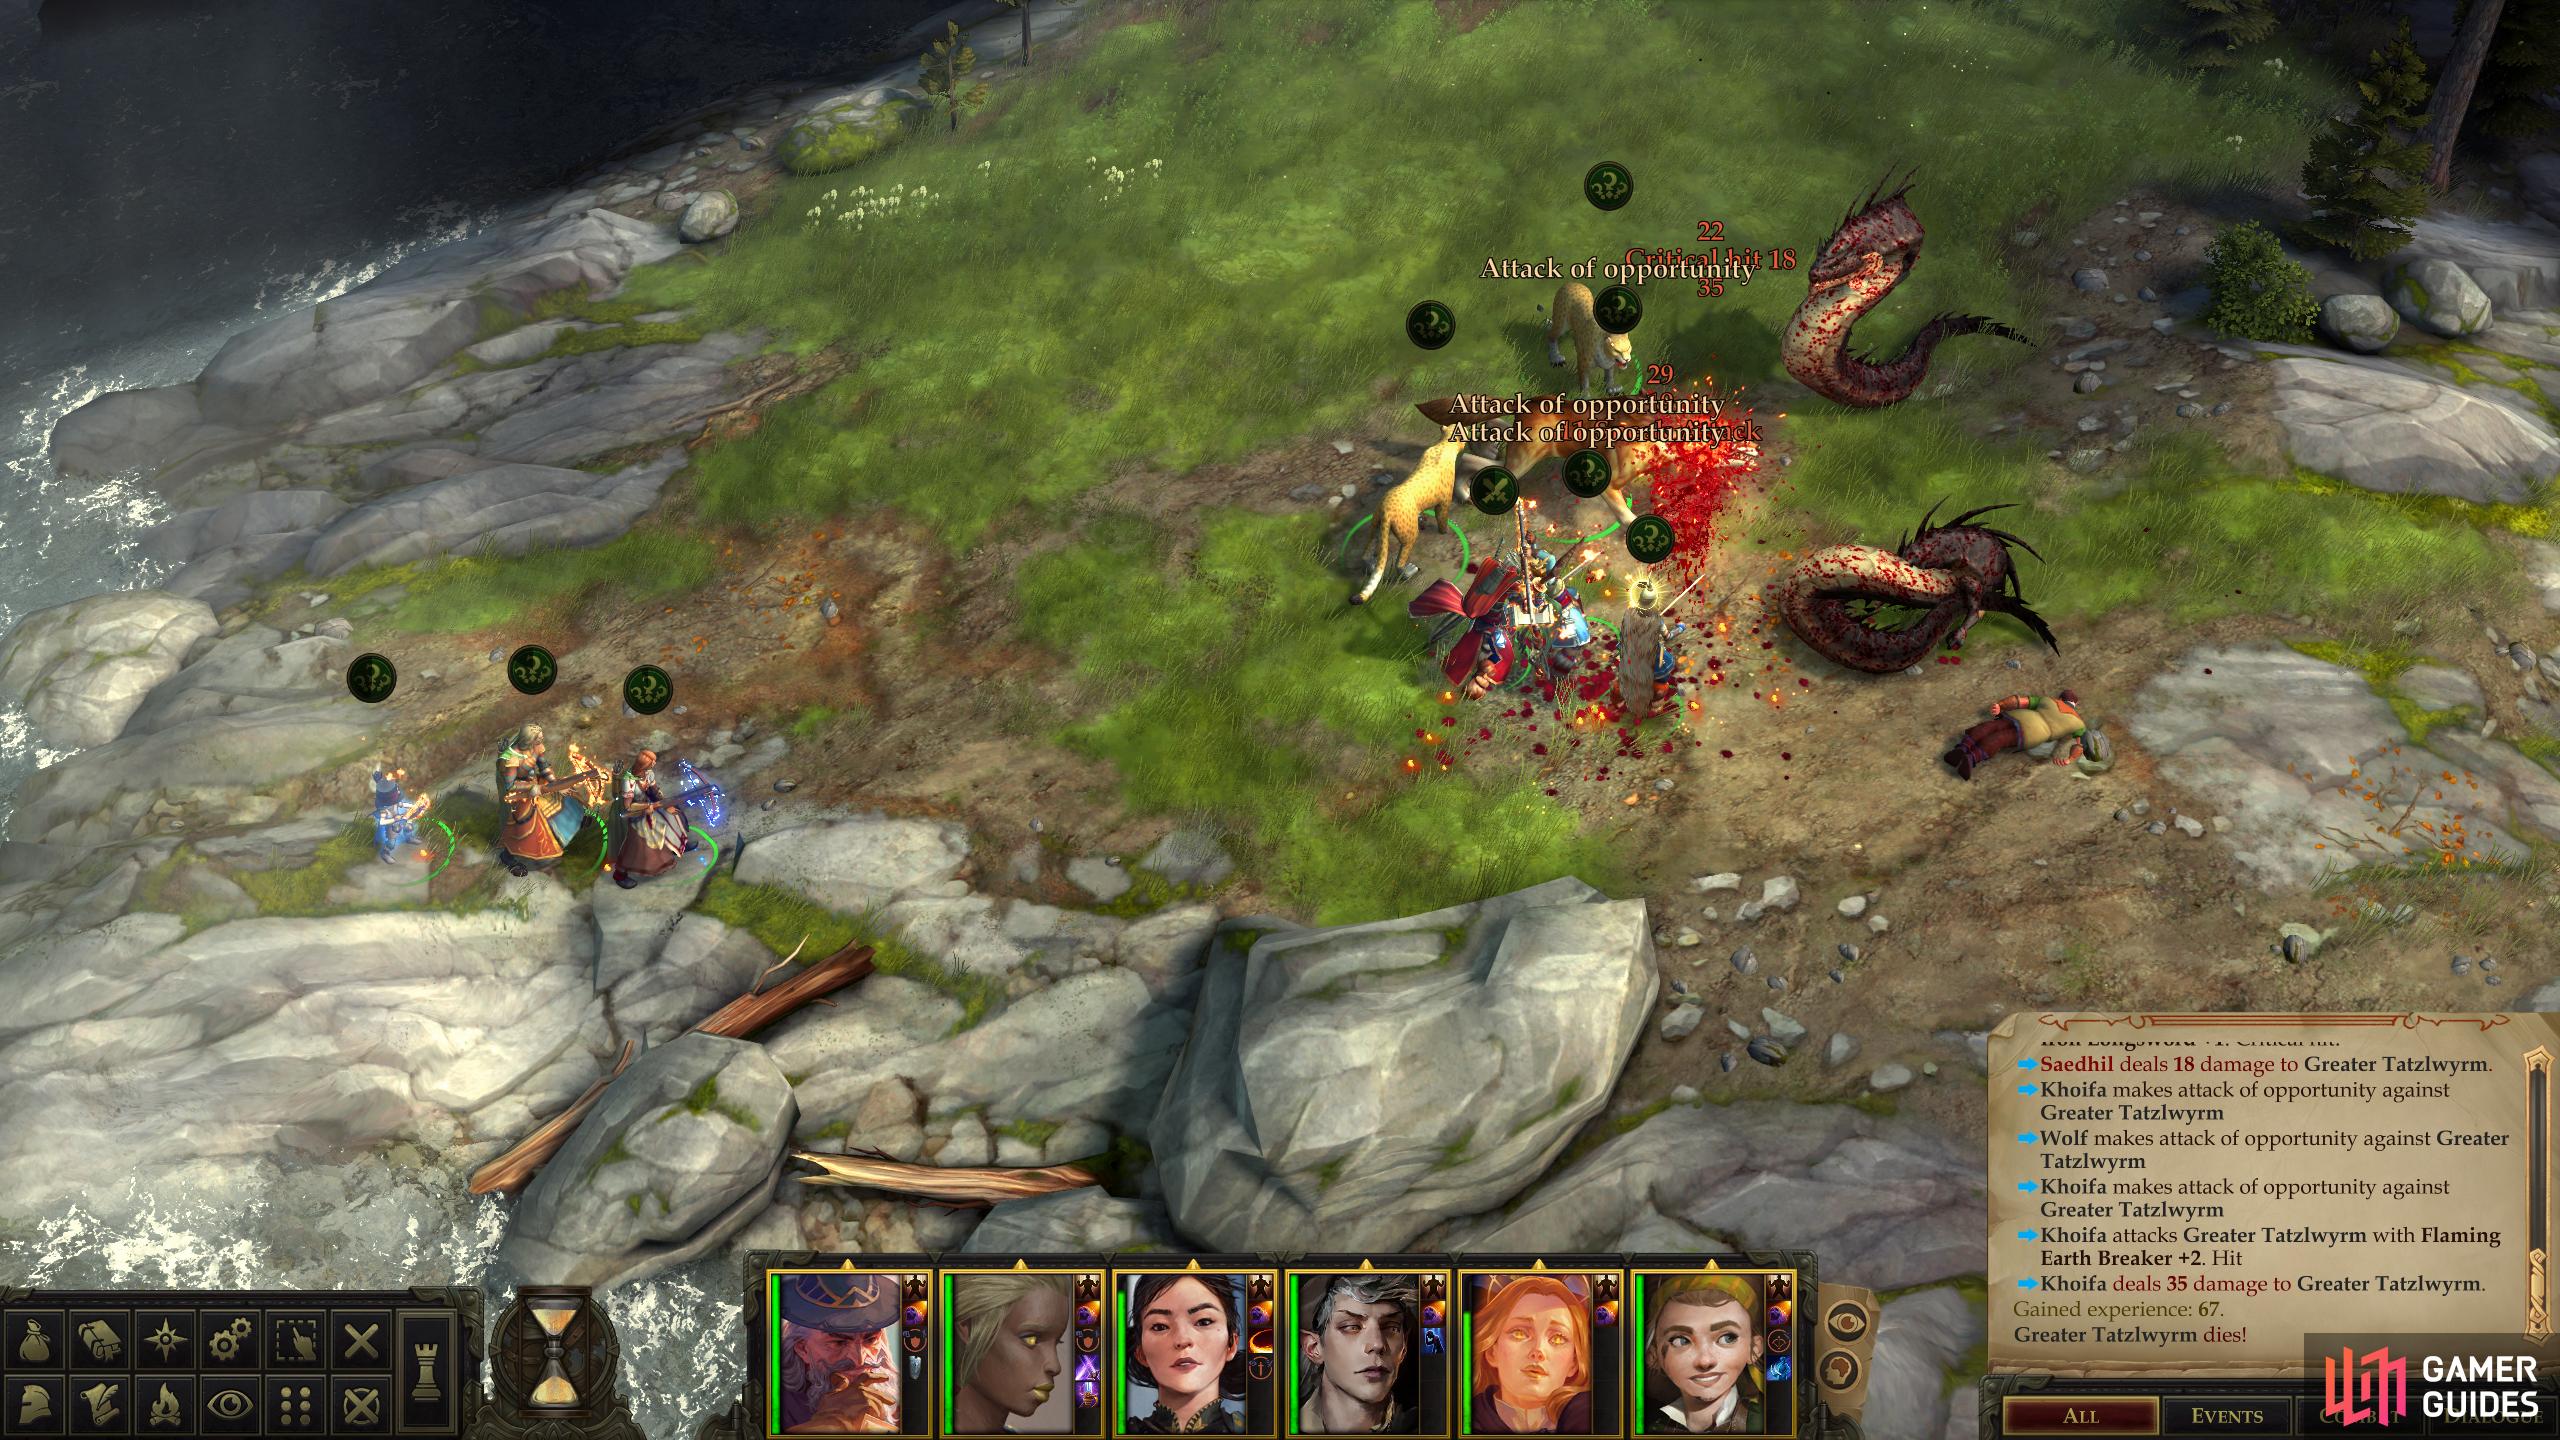
With this quest active, you’ll find a pair of Tatzlwyrms feasting on a corpse. Kill them and loot the corpse to obtain the Chest of Genuine Gemstones
Ollie’s Widow
Another optional step, now that you’ve found out Ollie’s fate, return to Lidika and tell her the news. You’ll get several options:
- [Lawful Good] will set Lidika up for life, costing you 1 BP per week, which, frankly, seems pretty excessive.
- [Neutral Good] you’ll give Lidika 100 gold to tide her over.
- [Chaotic Good] in a bit of karmic justice, you’ll give Lidika the gems Ollie died smuggling… but this fails the quest.
- [Let Lidika go] you give Lidika nothing.
Considering we’re only earning around 50 BP every week, burning 1 BP/week on this is an intolerable burden, so if you must be charitable, we suggest just paying some gold - it’s much cheaper and easier to obtain.
Assuming you found and kept the gems, return to Irlene in your capital and give them to her for a measly 180 XP. After that, she’ll tell you to buzz off for a week, promising good news. Given that XP reward, however, one can guess the quest isn’t over, nor will the upcoming news be good.
After recovering the gems, Irlene will ask for another favor - fetch her a unicorn horn.
The Unicorn Horn
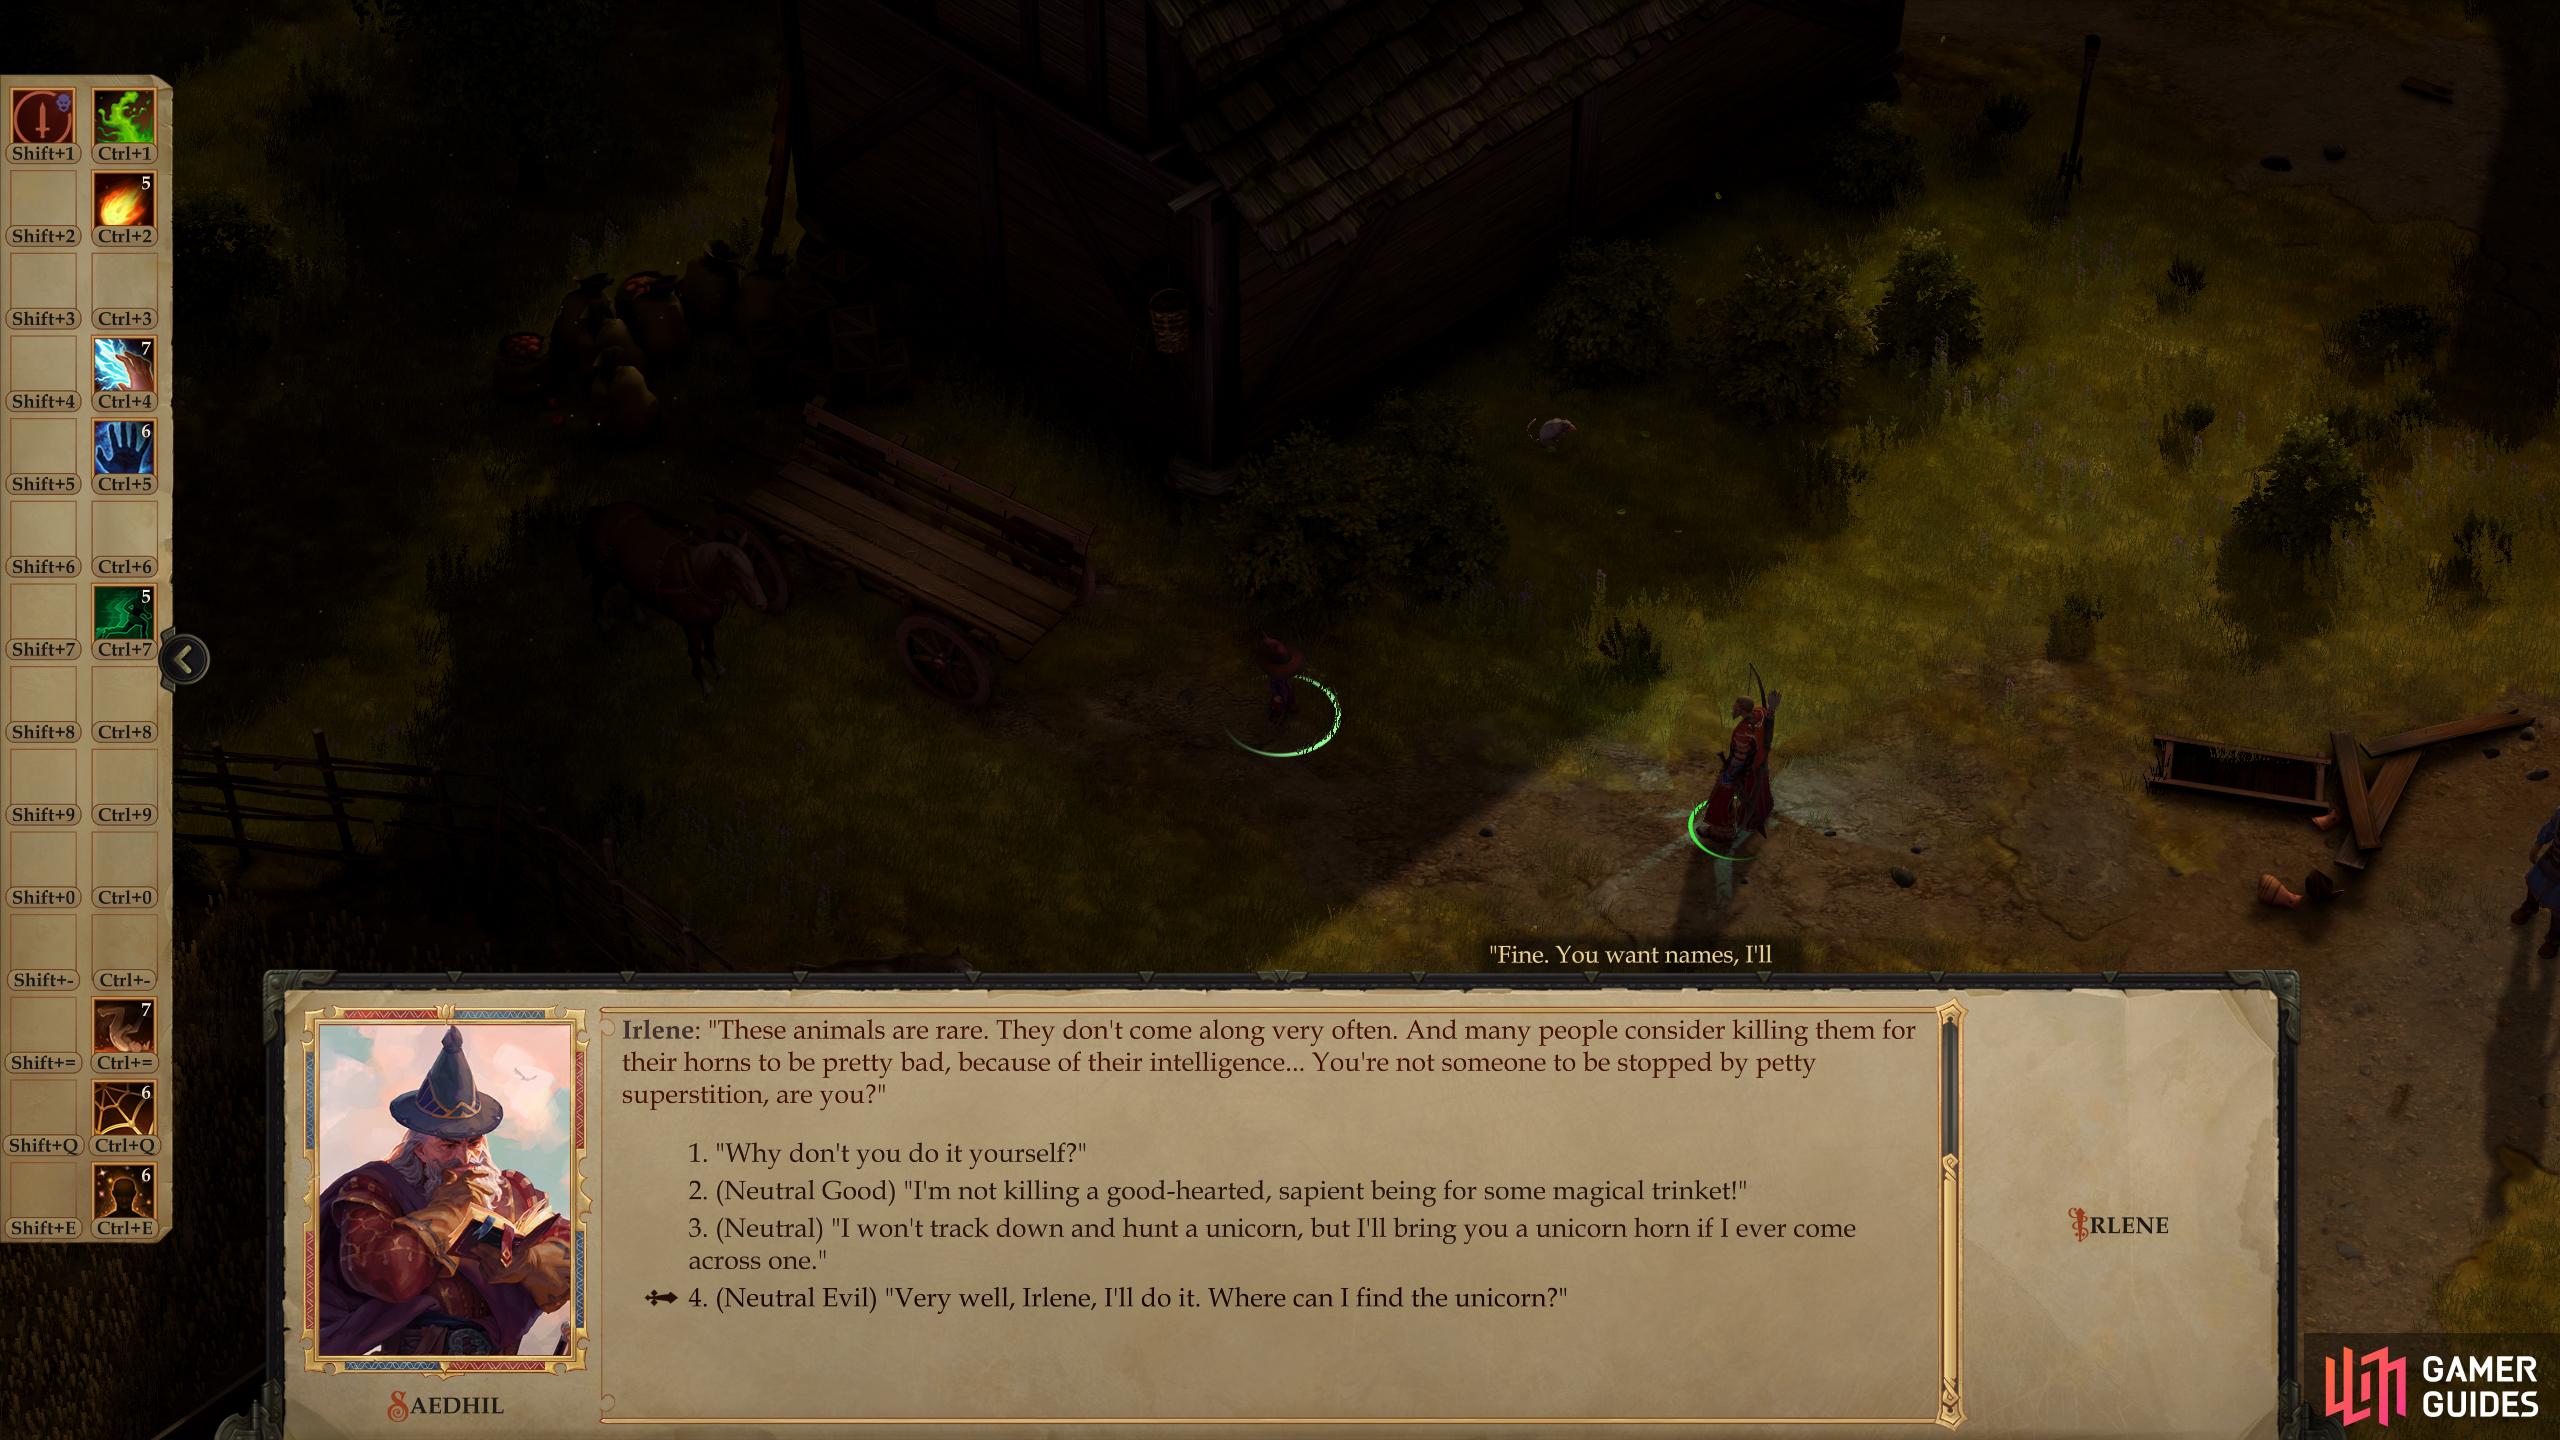
Return to Irlene after the prescribed period of time and you’ll get another 180 XP… and an excuse as to why your order isn’t finished yet. A complication has arisen, and now she needs a Unicorn Horn to complete her task. Not only are these beasts rare, but the act of harvesting such a horn is… morally suspect, at best. You’ll get several options:
- [Neutral Good] ends the quest.
- [Neutral] refuses to hunt a unicorn, delaying the completion of this quest until Chapter 5.
- [Neutral Evil] accepts to hunt down the unicorn.
If you must be moral, be noncommittal and pick the [Neutral] option, which will delay the quest considerably - Irlene will still bring you items, but you won’t get the boost to her Artisan Rank from completing this quest until late in the game, and she won’t start on her Masterpiece until later, as well. It’s a hindrance, but the only way you’re completing this quest now is via the [Neutral Evil] option.
Hunting Unicorns
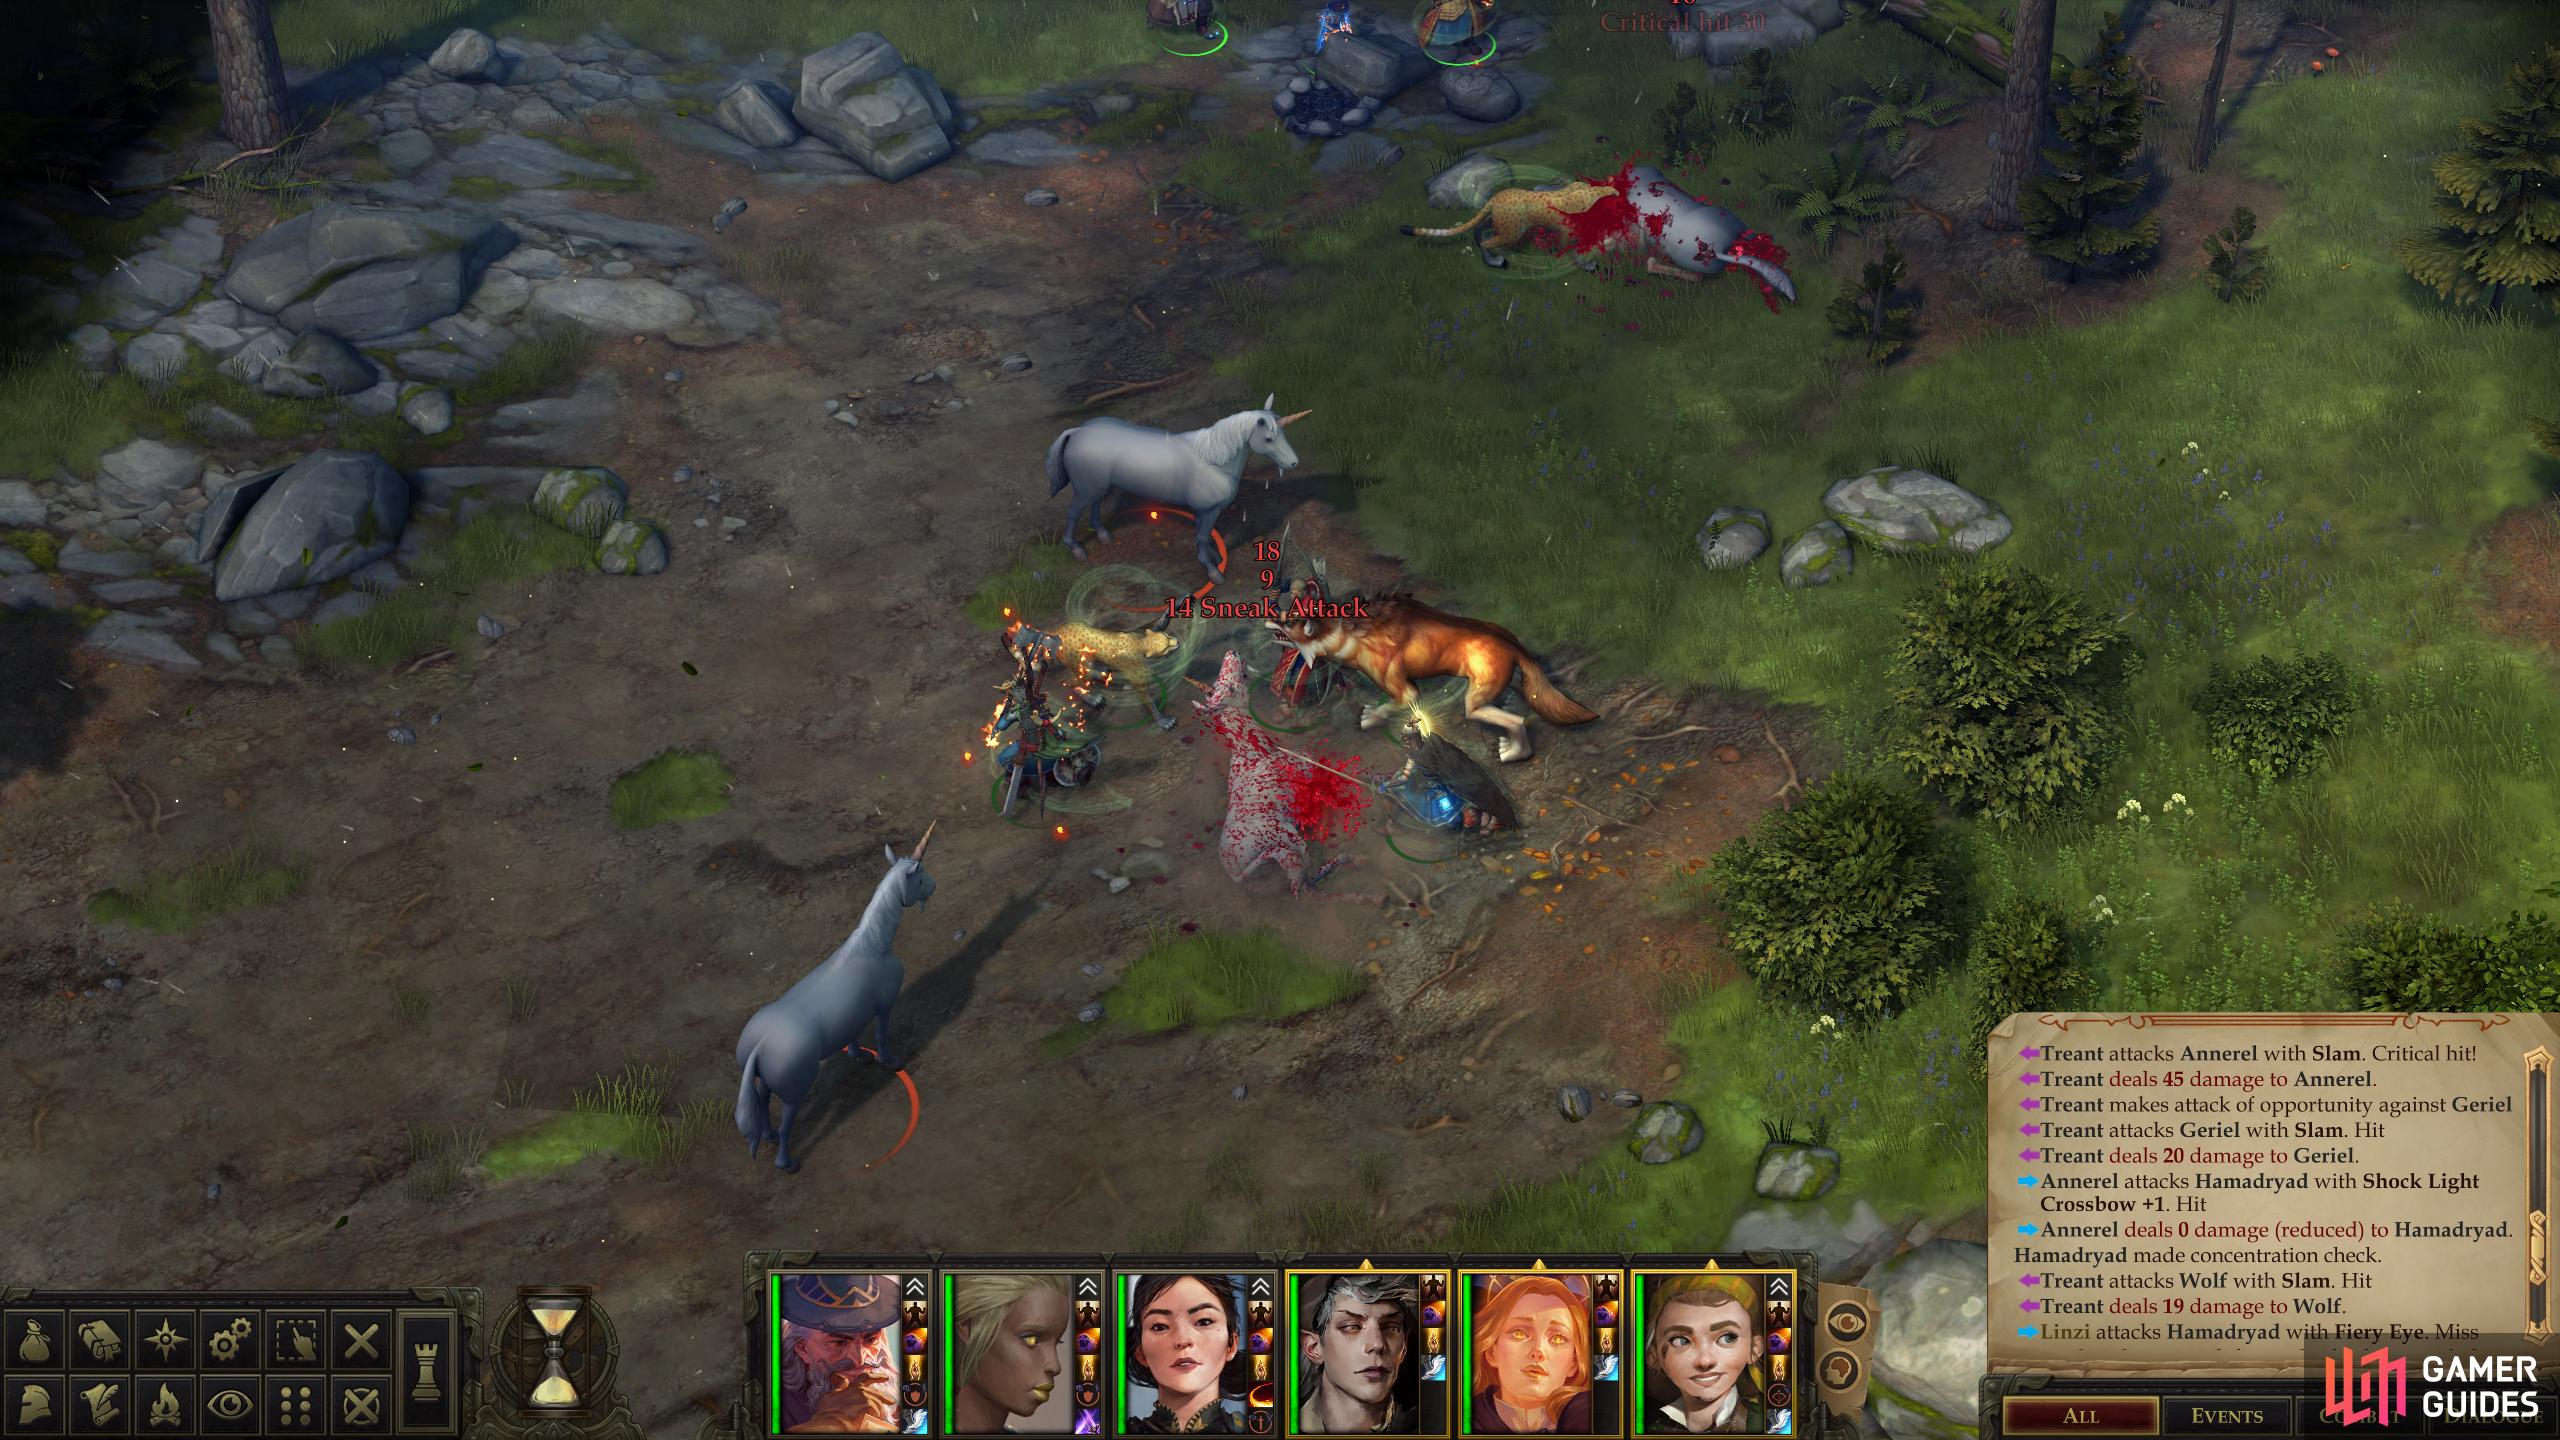
If you picked the [Neutral Evil] option, you’ll need to head to the Southern Narlmarches and wander around until you get into an encounter with unicorns - you’ll know it’s the right one, because you won’t get the option to skip/avoid it. There are several Unicorns prancing about, including a Noble Unicorn, who honestly isn’t much more of a threat than the others, which is to say, not at all. They’re neutral and won’t attack you unless you start hostilities.
Move to the northern end of the map - your actions here will have consequences, and positioning yourself wisely will mitigate said consequences - with your warriors facing south and your casters and archers behind them to the north. Buff up with Haste (other buffs are useful, but may not be necessary) then attack the unicorns, slaughtering them with contemptuous ease.
After they’re dead, a Hamadryad will appear and condemn your actions, and she’s here to do more than verbally chastise you. She’s also not alone, summoning three Treants to help her punish you. The treants are muscle, dealing decent damage but possessing only a mediocre Attack Bonus and defenses, they can safely be ignored… just so long as you keep your squishy characters clear of them. One will spawn to the east and another two to the south, which is why you made your way north before harvesting the unicorns - as it stands, your casters should be safe if you flee to the west.
The Hamadryad is the real threat, possessing a high Armor Class, a decent store of Hit Points and Damage Reduction 10/cold iron, she can take a few hits to bring down. For her part, she’ll start out by casting Confusion (you can try to draw her fire with Animate Dead, but they can clog up the works and make it harder for you to take her down in a timely manner), which can turn your own party against each other. We suggest just throwing the kitchen sink at her and, with Haste still actively, hopefully you can cut her down quickly.
When she’s dead, loot her for a Speed Composite Longbow +2, a Ring of Protection +2, Bracers of Archery and a Cloak of Resistance +2. The Hamadryad alone almost makes this worth the stain of evil. Speaking of which, any of the four unicorns you slew will yield a Unicorn’s Horn. Waste not, want not.
Return to Irlene with the horn in hand to completing the quest, earning 780 XP in the process.
Craftable Items - Irlene
Below you’ll find lists of all the items Irlene can craft:
| Rods | Tier | Effect |
|---|---|---|
| Rod of the Fearless | 0 | +3 Saves vs fear, Quicken 3rd level or lower spells 3x/day. |
| Rod of Undeath | 1 | +2 bonus to Necromancy spell’s DC, Extended 6th level or lower spells 4x/day. |
| Rod of Power Source | 3 | +4 bonus to Conjuration spell’s DC, Empower 6th level or lower spells 5x/day. |
| Rod of Flaming Vengeance | 5 | All spell damage becomes fire damage, +1 Caster Level, +3 bonus to Evocation spell’s DC. Maximize 9th level or lower spells 5x/day. |
| Scrolls | Tier | Effect |
|---|---|---|
| Scroll of Angelic Aspect | 0 | As per spell. |
| Scroll of Poison | 0 | As per spell. |
| Scroll of Rage | 0 | As per spell. |
| Scroll of Volcanic Storm | 1 | As per spell. |
| Scroll of Vampiric Shadow Shield | 2 | As per spell. |
| Scroll of Dispel Magic, Greater | 3 | As per spell. |
| Scroll of Holy Sword | 4 | As per spell. |
| Scroll of Stormbolts | 5 | As per spell. |
| Staves | Tier | Effect |
|---|---|---|
| Prowling Cheetah | 0 | Quarterstaff +1, extra attack per round, user can cast Mass Feather Step 3x/day. |
| Burned Oak | 2 | Quarterstaff +2, user can cast Fire Snake 2x/day and Burning Hands at will. |
| Black Raven’s Staff | 4 | Quarterstaff +3, user can cast Waves of Fatigues 3x/day and Ray of Enfeeblement at will. |
| The Call | 5 | Quarterstaff +4, user can cast Summon Monster VIII 2x/day and Glitterdust at will. |
| Wands | Tier | Effect |
|---|---|---|
| Wand of Burning Hands | 0 | As per spell. |
| Wand of Mirror Image | 1 | As per spell. |
| Wand of Call Lightning | 2 | As per spell. |
| Wand of Cape Wasps | 3 | As per spell. |
| Wand of Death Ward | 4 | As per spell. |
| Wand of Dictum | 5 | As per spell. |
Artisan Tiers - Irlene
Below are the various ways to increase Irlene’s artisan rank, hence the tiers of items she can craft:
| Event | Irlene’s Artisan Tier |
|---|---|
| Build Irlene’s Magical Rarities Shop | Irlene Tier +1 |
| Upgrade Irlene’s Magical Rarities Shop | Irlene Tier +1 |
| Complete Chapter 4 | Irlene Tier +2 |
| Finish “A Simple Favor” | Irlene Tier +1 |
| Arcane Rank 6 | Irlene Tier +1 |
| Relations Rank 3 | Irlene Tier +1 |
| Relations Rank 6 | Irlene Tier +1 |
No Comments