

Travel: Temple of the Elk
From Thorn Ford you largely start out going in the same directions to reach the Temple of the Elk as you took to reach the Technic League Encampment:
- West
- Northwest
- Southwest
From the Technic League Encampment, just head northeast once to reach the empty node the aforementioned directions take you to. However you get there, from this empty node head:
- North
- West
- Southwest
- Northwest
Such a long trek will probably leave you fatigued, however, so when you arrive don’t be afraid to set up camp and rest before entering the area; you’re going to want to be at your best for this area, and perhaps a little more than that…
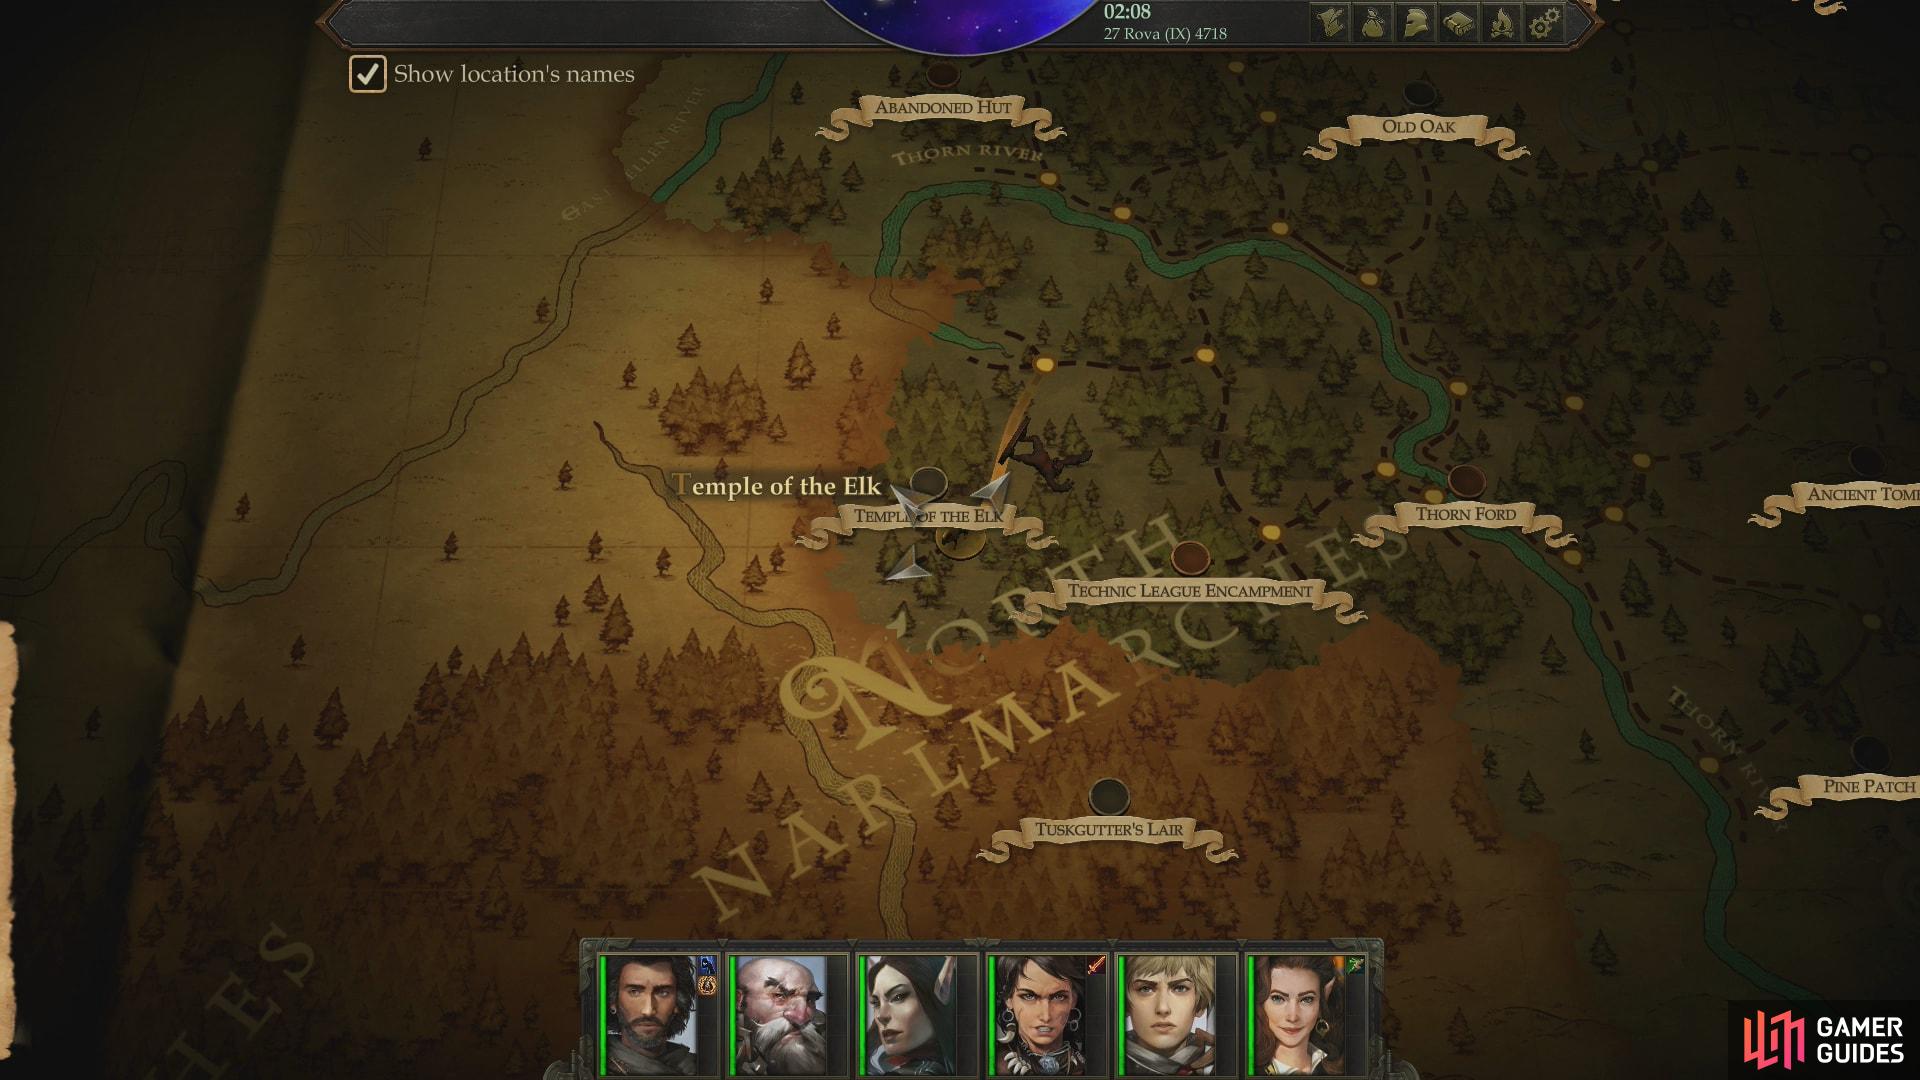
You’ll locate the Temple of the Elk south of the Abandoned Hut.
There’s a decidedly strong foe in the area which may just be too much for a 2nd-level party right now. Limited levels, limited companions, limited gear, limited tactical flexibility, and all that. Plus, your power increases substantially every time you level up for the first few levels. This fight is, like the major bandit attack on Oleg’s Trading Post, a benchmark battle where there’s little substitute for just having dramatically stronger characters. If you’ve been following the guide and not been getting into too many unnecessary random encounters, you might be tantalizingly close to level three right now (we had no fewer than 4,500 experience in any of our playthroughs).
Give the area a try, and if you find it too difficult, don’t fret - you’ll just need to train. You can do this by exploring and indulging in every random encounter you come across, or by skipping ahead to the Old Sycamore area just long enough to level up - there are plenty of monsters wandering about there to level you up.
Defeat the Temple Guardians
From where you arrive, head west to encounter the Guardian of the Bloom again, who will offer positive reinforcement and a warning. Beasties lurk about, and they must be exorcised to rid the place of the evil Druid’s influence. Continue west and pass a [Perception 15] check to find a Token of the Dryad in some foliage, then turn northwest into some ruins to encounter a trio of Primal Giant Frogs. These are the least of the foes here, and you should have no trouble dispatching them - if you do, you should seriously consider leveling up!
Investigate a pool and a statue in the middle of the ruins, then turn southwest to face a more dire challenge. Three Primal Ferocious Wolves lurk just outside the ruins, and they fight like other wolves you’ve encountered in that they’re keen on performing trip attacks, after which they’ll get an Attack of Opportunity against the prone victim. With three wolves attempting this at once, it can get rather painful, so position your party just outside the entrance to the ruins and bottleneck the wolves. There’s no good reason you shouldn’t fight them with a six-on-one advantage.
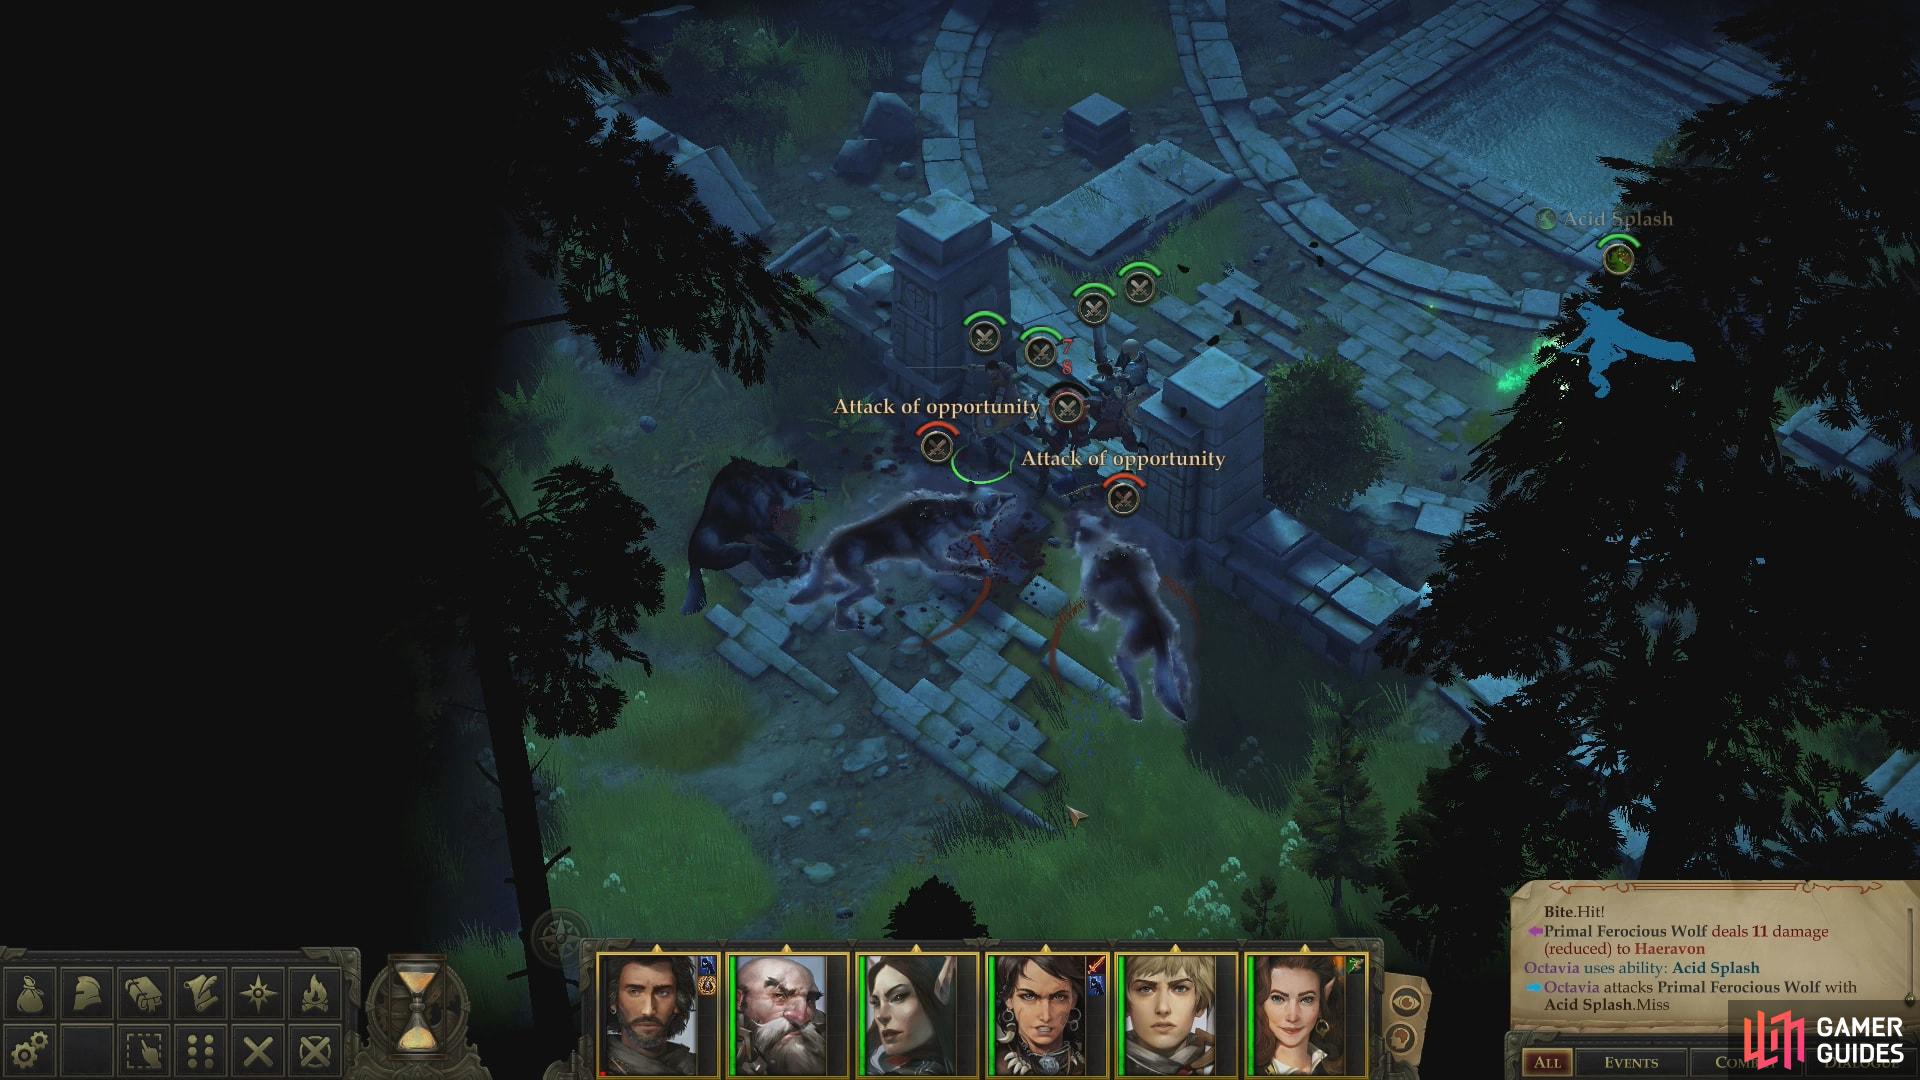
Attacking the wolves brazenly could lead to grief, as they can trip opponents and entitle each other to Attacks of Opportunity.
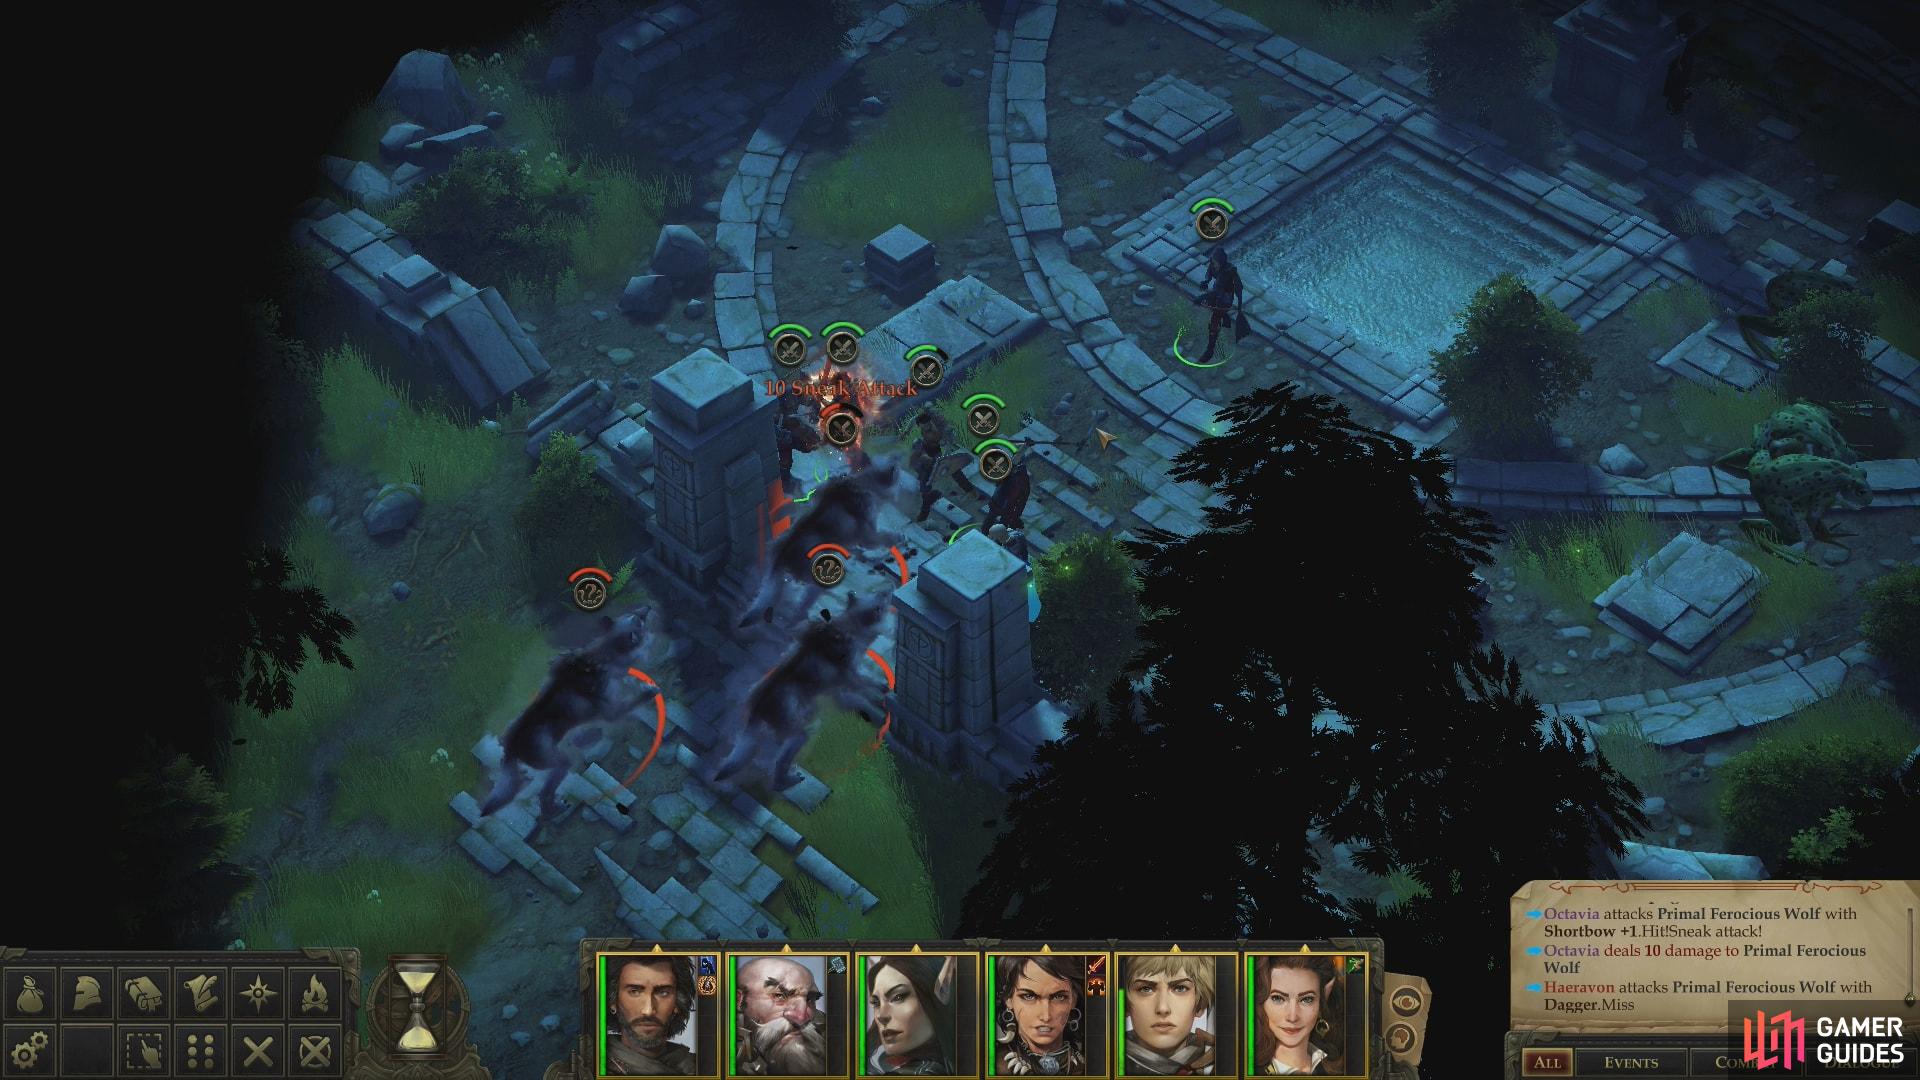
If you can manage to bottleneck them, however, you’ll make the fight considerably easier.
Defeat the wolves, then return to the center of the ruins and from there head northwest. The area outside the ruins here is the demesne of a Primal Dire Boar, and if you want any excuse to delay the hunt for Tuskgutter, this might give you a few. This boar hits hard and has a high Attack bonus, so expect to suffer some damage here. Still, if you surround the pig and heap punishment upon it with your entire party, it should fall before you do. Once it’s dead, continue northwest and loot some foliage to find another Token of the Dryad.
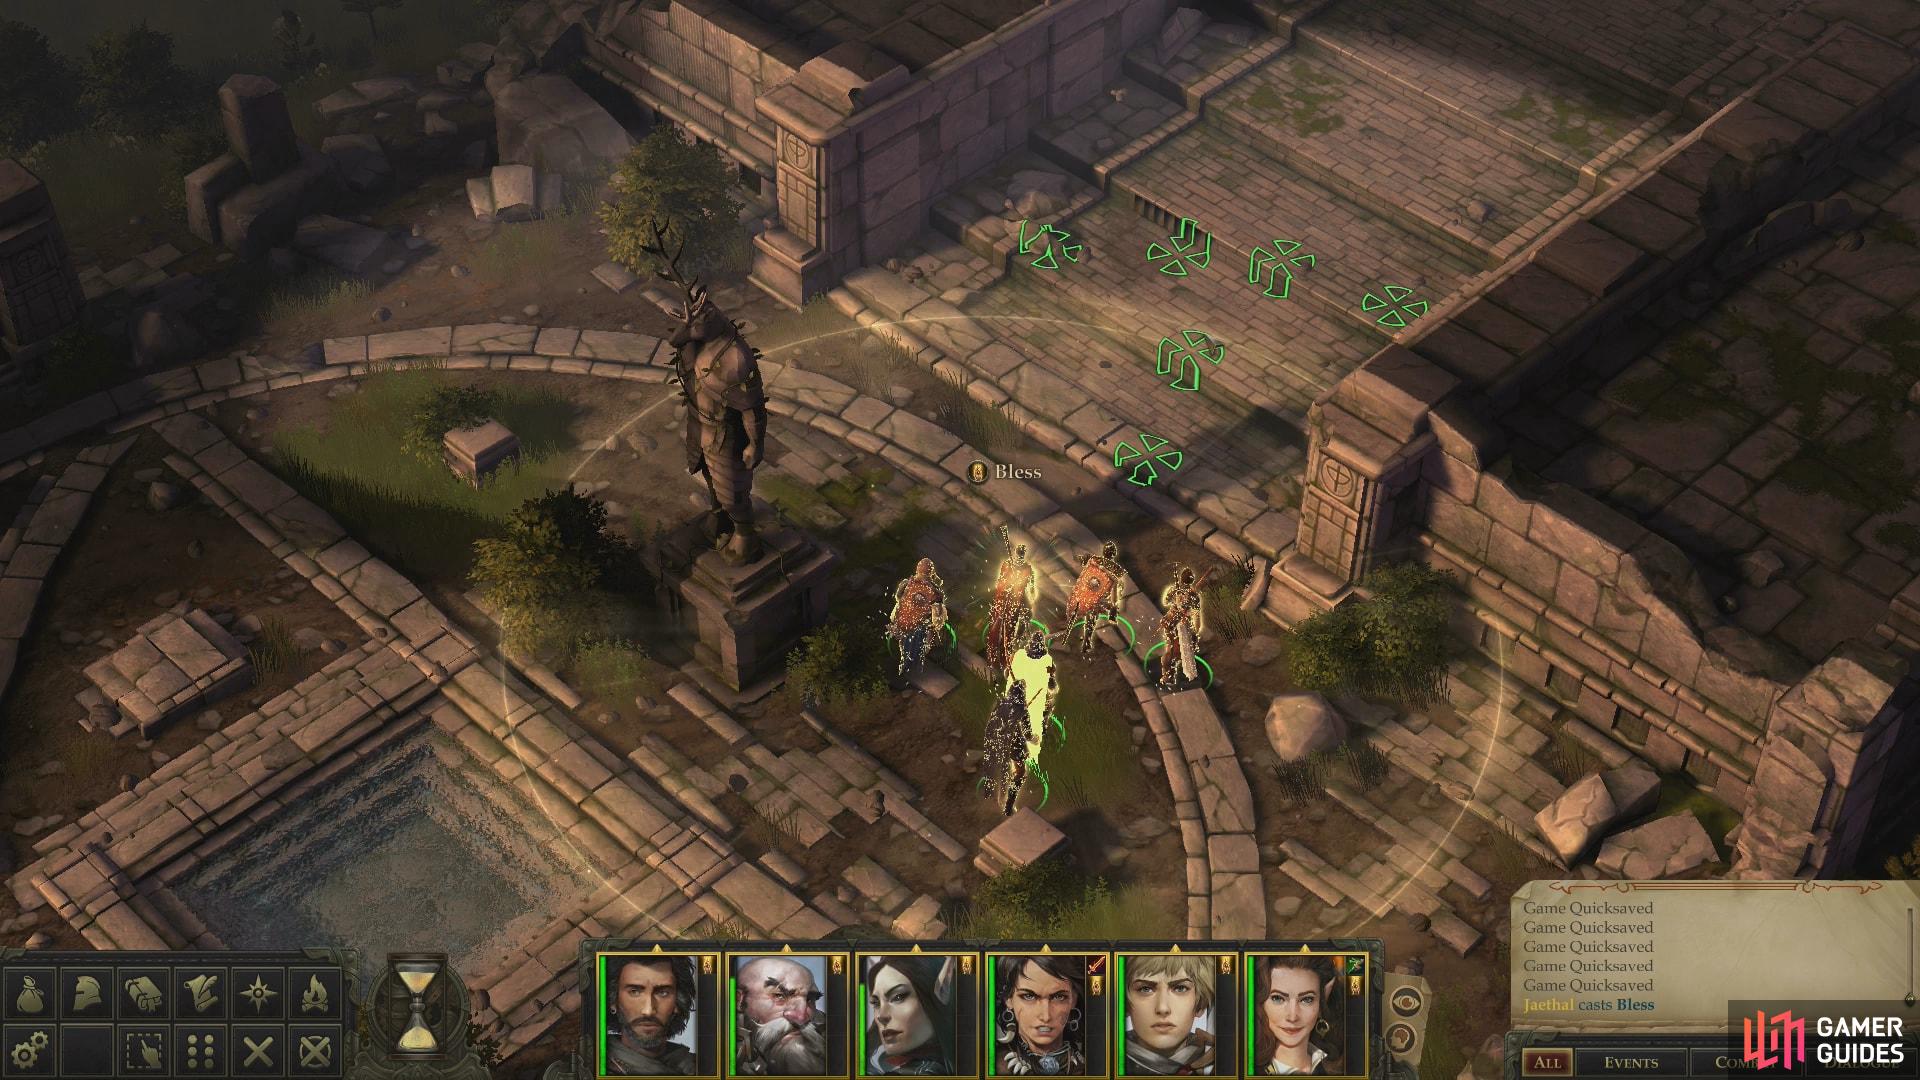
The last, greatest challenge lies ahead. Return to the center of the ruins, heal as much as possible, then turn your attention to some stairs to the northeast. At the top of these stairs you’ll find a Bear-Like Treant fighting a man named Tristian. Don’t expect him to remain standing for long, however, after which the bear will turn its attention to you. Like the Primal Dire Boar, the Bear-Like Treant hits very hard and has a high Attack Bonus. It’s also fairly well-protected with HP, Armor Class and Damage Reduction, and can perform Stunning Blow attacks.
A level three party that is mindful to flank, use spell-buffs (Mage Armor, Shield, Shield of Faith, Blur, Mirror Image, Bless) and/or bardsong should cut through it without too much trouble, but a level two party might struggle due to their lower HP and Attack bonuses. Ray of Enfeeblement can also slow down its offense a bit, and every advantage will help. If you have access to Color Spray the spell may hinder it for a short period of time, and the Treant-Like Bear’s Will Save isn’t really up to the challenge of resisting such a spell if cast by a competent Wizard.
A level two party with two custom warriors (including the protagonist) and a custom Sorcerer spamming Color Spray had little trouble taking this beast down, whereas a level two party using pre-generated companions on another playthrough found this encounter nigh impossible. Your mileage may vary depending on what characters you have at your disposal.
Talk to Tristian
Vanquish the Mutated Bear and talk to its victim, Tristian, who will identify himself as a priest of Sarenrae and be… somewhat less than honest about how he fared in the fight. He’ll also confirm that defeating the temple’s guardian beasts should dispel the fog, but unfortunately the fog won’t dissipate immediately. More on that in a bit, but in the meantime, finish your conversation with Tristian and he’ll offer you his services. He’s not as battle-hardy as Harrim, but Tristian’s divine magics are significantly superior.
Tristian is a fine healer, and while he’s not quite as strong as one you can make yourself, aside from the Animal Companion you could otherwise get with a mercenary, he’s not so much weaker that there’s a pressing need to replace him. Unfortunately, his stats aren’t really the issue, as story events may deprive you of his services in the future. For that reason, you should ensure you have a viable backup - preferably a mercenary of your own creation, or failing that, keep Harrim competent.
Loot a sack to the north to score a Quarterstaff +1, two Potions of Remove Curse, a Scroll of Call Lightning and some mundane goods, then search either wing of the ruins. On the end of the northern wing you can pass a [Perception 17] check to obtain some treasure, including a Potion of Cure Light Wounds and a Potion of Mage Armor, while you can search a root on the southern wing for some GP and gems.
Now is a fine time to return to Oleg’s Trading Post, rest up, sell whatever treasure you’ve accumulated, and get prepared to finally resume pursuit of Tartuccio. After all, you have to wait for the fog to lift, and you might as well be productive while you wait. You can also use this opportunity to talk to your three new companions, if you wish.
No Comments