
This quest is a bit easy to miss, as despite being part of the ongoing Prove Your Worth questline, the details are left vague. You know that Amiri’s spoiling for a fight with another beastie but what, specifically, she’s looking for (apparently all the owlbears, venomhodags and trolls don’t count) remains unclear unless you bring her exploring with you in the early phases of Troll Trouble, likely during the Swamp Witch’s Hut Expedition.
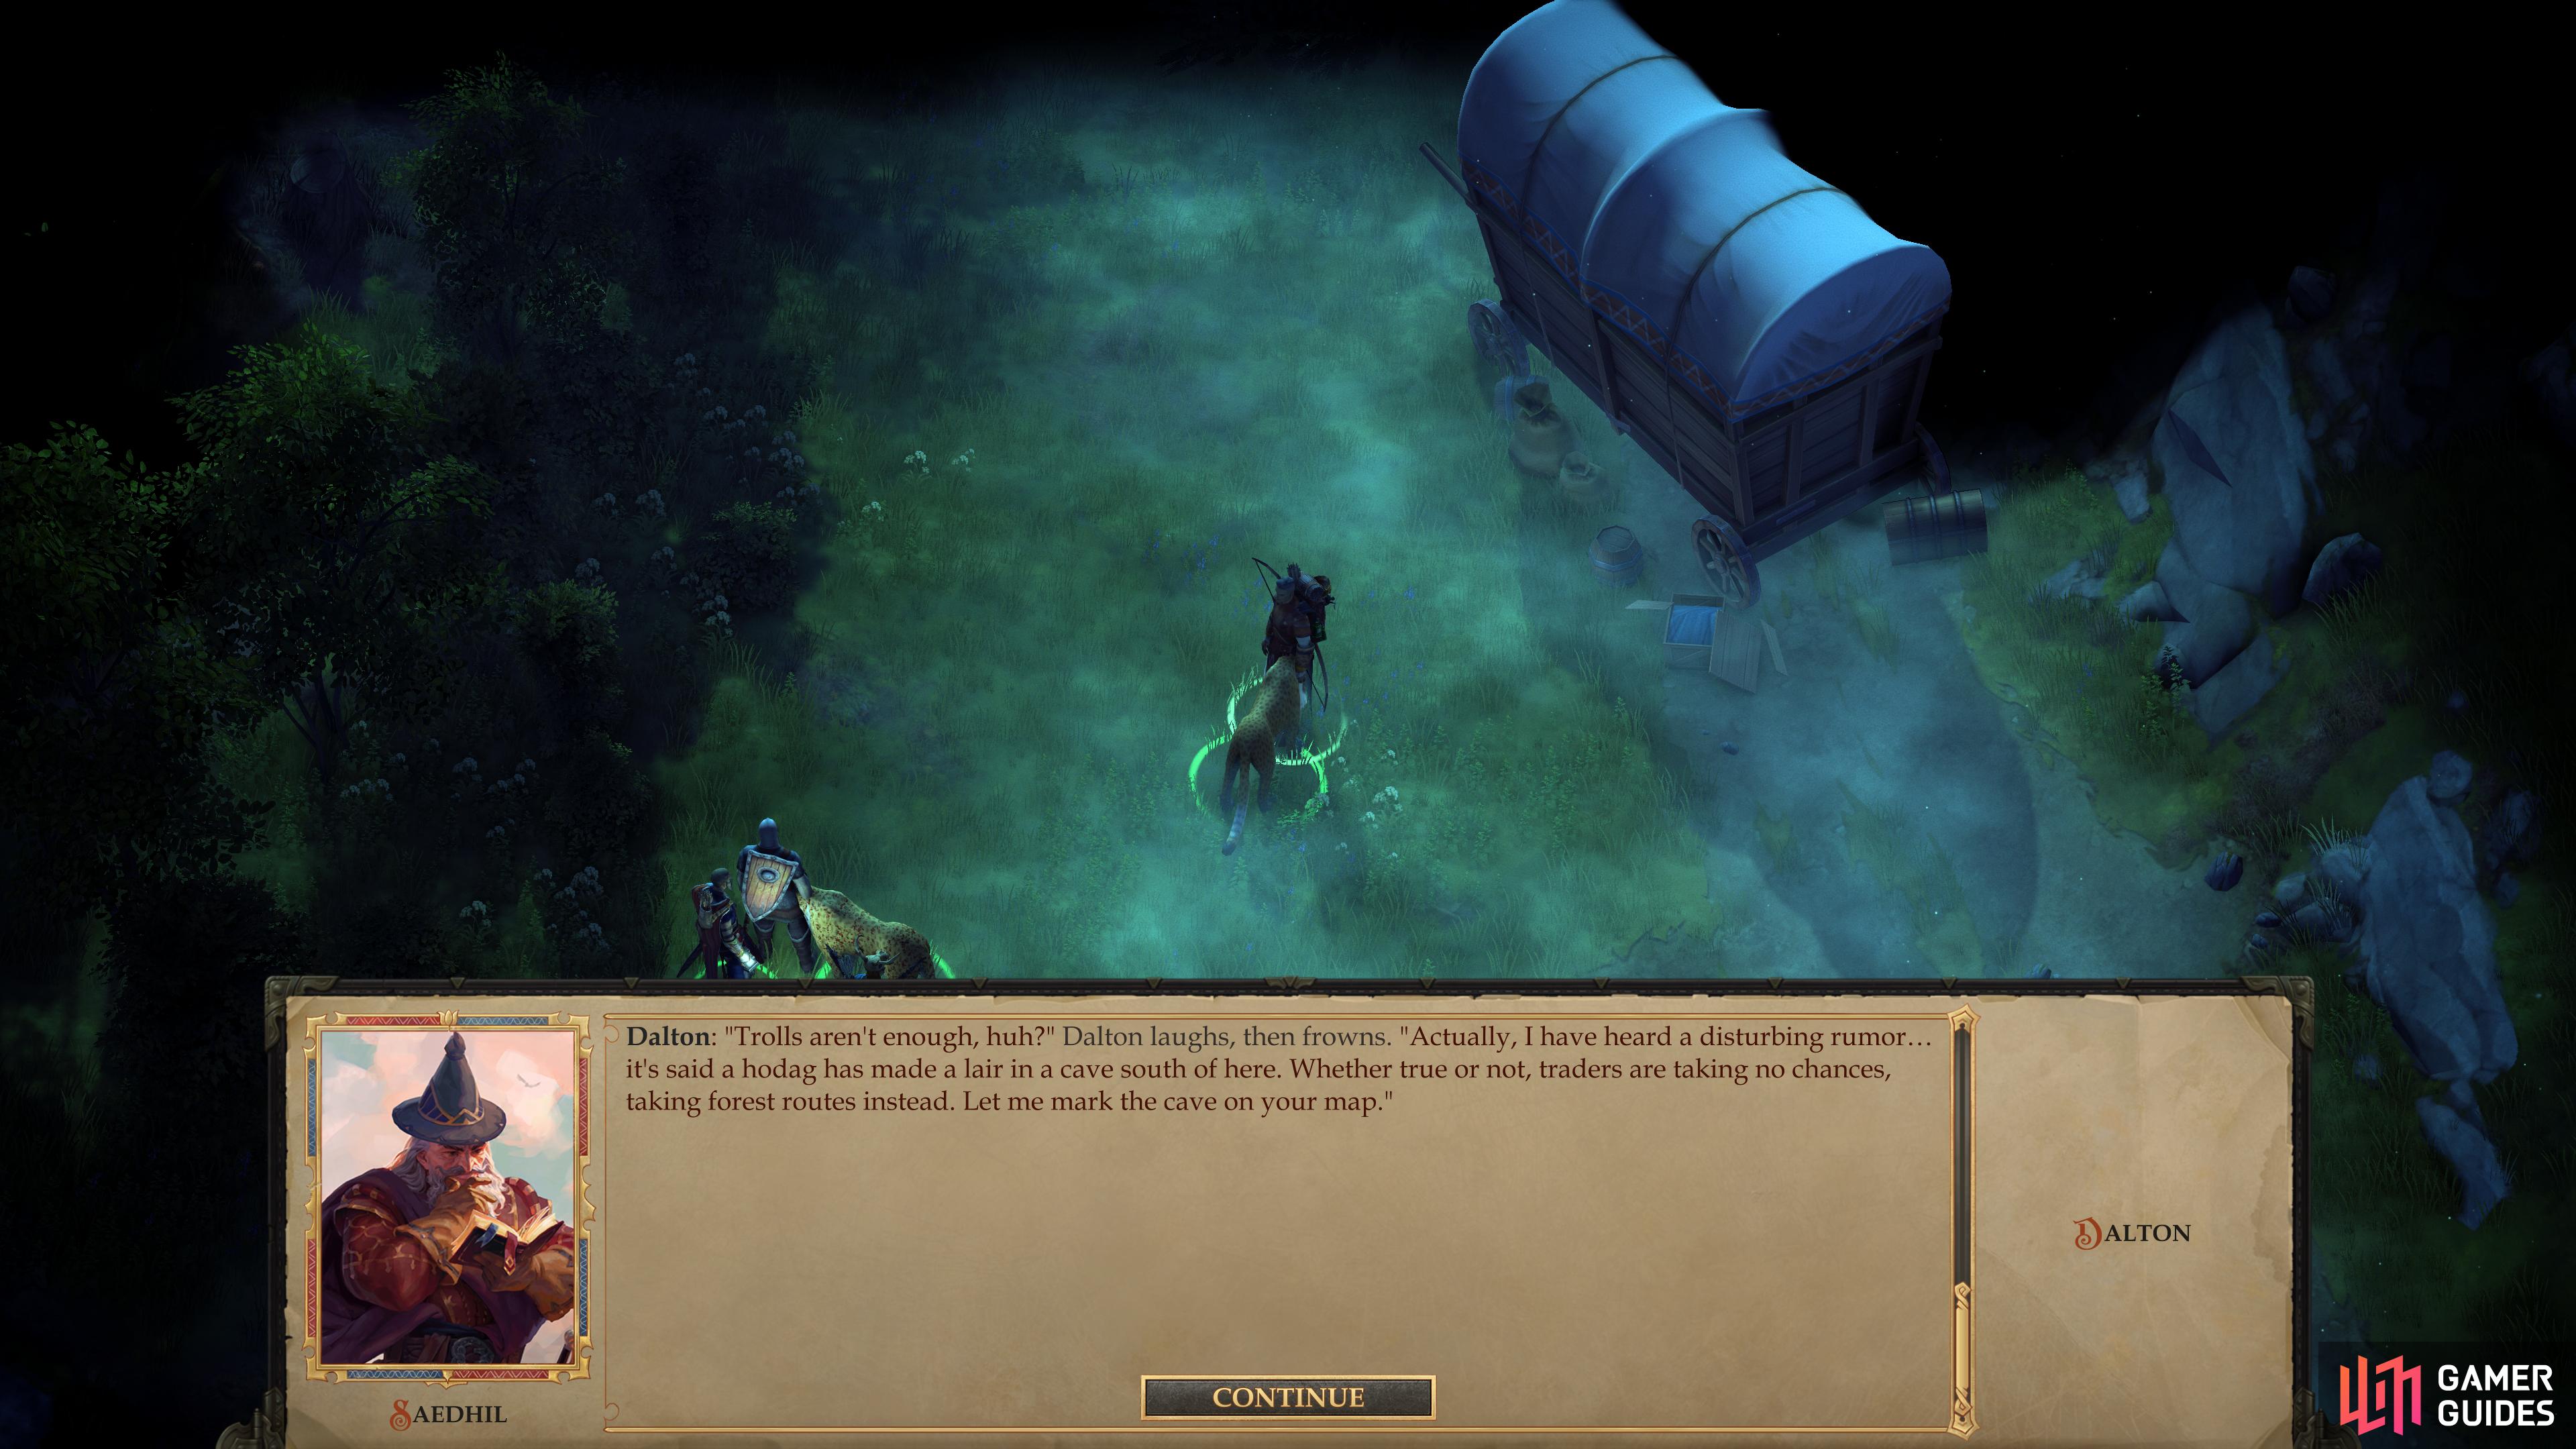
You can learn about the Hodag Lair by talking to Dalton.
During your wanderings in the Southern Narlmarches you’ll trigger a (not-so) random encounter with a merchant named Dalton. Defeat the trolls attacking him, then ask him ”Any other dangers on the road?” to get him to mark the Hodag Lair on the map for you. If Amiri is with you, she’ll express murderous glee about the prospect of fighting said heretofore unencountered foe.
This, then, is your next target for the quest Prove Your Worth.
You’ll have to drag Amiri south with you whenever you find the time. As far as we’re concerned, Amiri isn’t a top-tier companion, suitable for only being a back-row damage dealer, and she won’t even excel at that, considering how powerful a mercenary alternative can be. That being the case, we’re not inclined to drag her south with us during important business, so we’ll leave this quest until after we’re done with Troll Trouble. As far as the walkthrough goes, an ideal time is during the dull between Troll Trouble and Season of Bloom, specifically for when we get the companion quest Easier to Ask Forgiveness…. During that quest we’ll need to return south to the Swamp Witch’s Hut area with Linzi, and while we’re down here, we might as well bring Amiri along so we can subsequently make a trip to the Hodag Lair.
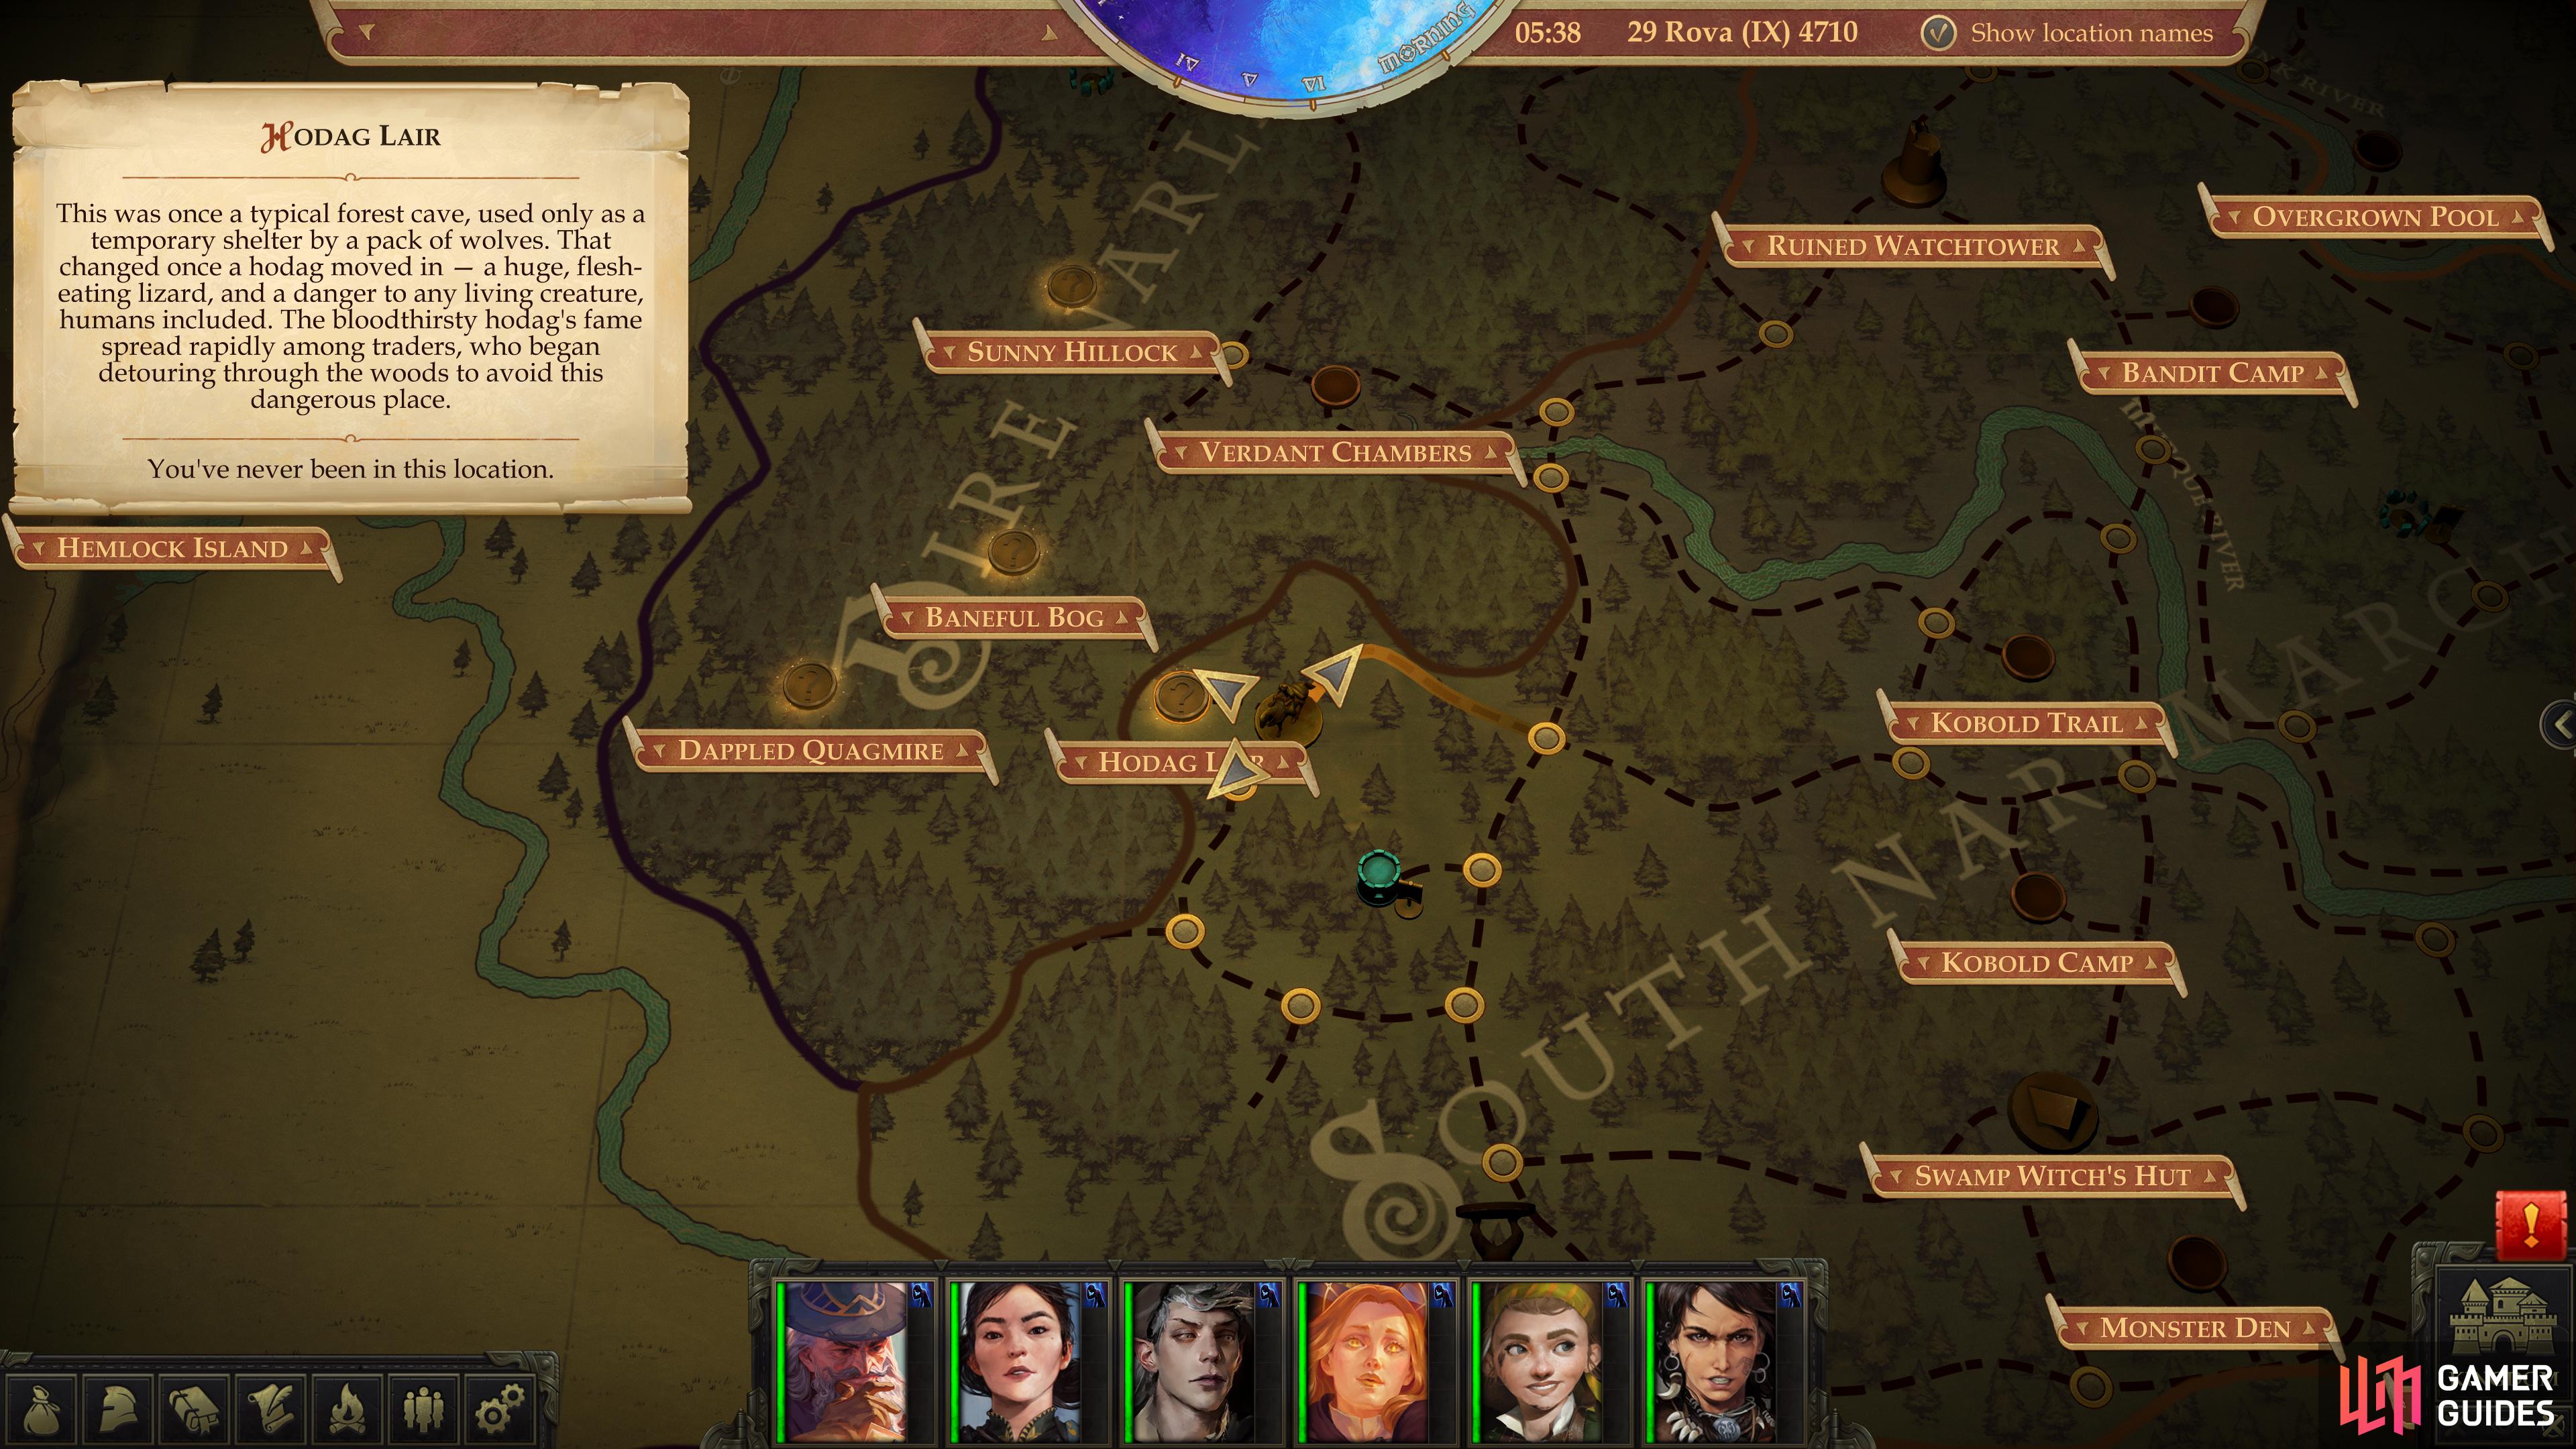
The location of the Hodag Lair on the map.
To reach the Hodag Lair from the Swamp Witch’s Hut area, follow these directions:
- West
- North
- West
- Northwest
- North
- Northeast
- Northwest
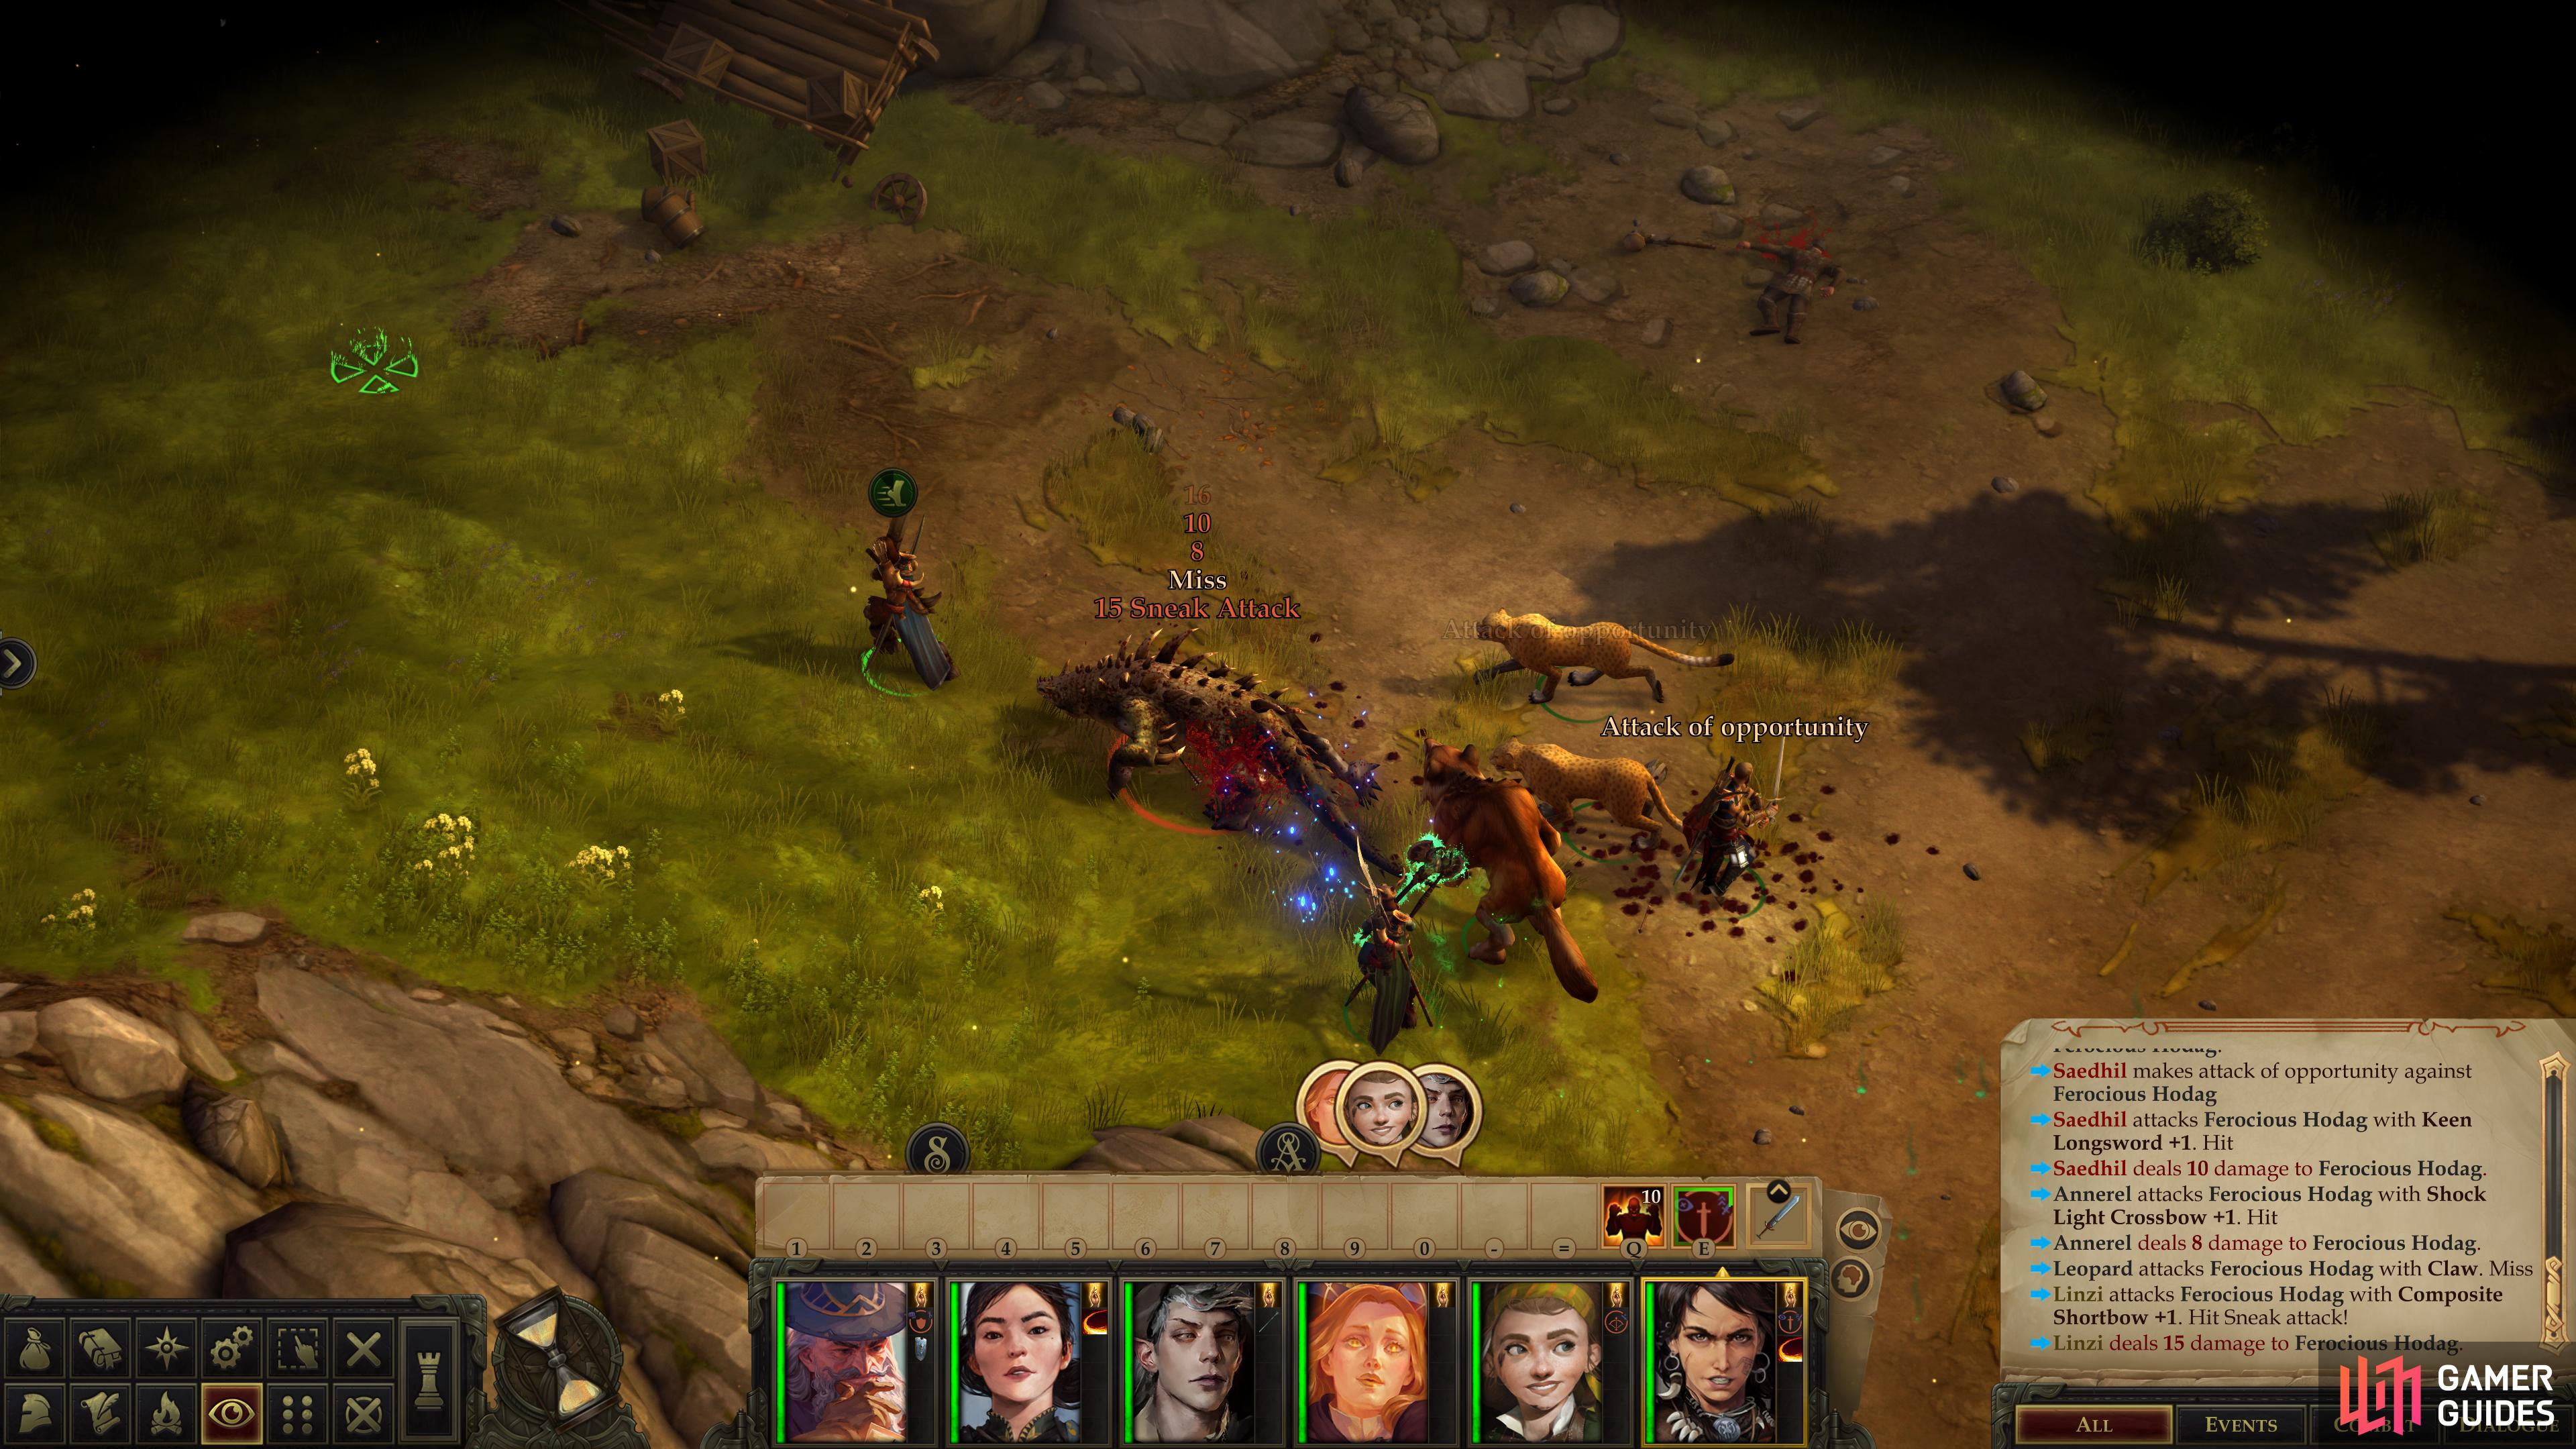
(1 of 3) Defeat the Ferocious Hodag - it’ll hasten its demise by chasing Amiri regardless of its own safety.
Once you enter the Hodag Lair, head forward and Amiri will once again initiate dialogue and try to rush off to best the beast on her own. The Ferocious Hodag will reciprocate, and to back up our opinion on Amiri’s competence as a stand-alone warrior, she probably doesn’t have a chance of winning this slugfest. That being the case, when you regain control immediately select your whole party, have Amiri retreat behind them, and attack the Ferocious Hodag with everybody else. It’s not a terribly powerful foe, having at best a mediocre Armor Class and Attack bonus, and it’ll make even easier prey out of itself by pursuing Amiri even at the expense of its own safety.
Cut it down and Amiri will celebrate, in the process earning yoru 112 XP and 375 XP. Loot a corpse for some baubles and potions, pick a Greatclub +2 off the ground nearby, loot two crates in a wagon to the west, then head east to find a pile of branches [Perception 7] hiding a Shard of Knight’s Bracers.
| Reward |
|---|
| 112 XP |
| 375 XP |
Once the Ferocious Hodag is defeated, the quest Prove Your Worth will finally end.
No Comments