

Hunting Mirrors
Now that you’ve cleared all three levels of the House at the Edge of Time, this quest should be rather simple. You should already be in World State 0, so simply head back to the first floor and return to the hub room southeast of where you found Valerie. From there, continue down a hallway southeast until you reach another hallway running southwest/northeast, where three rooms can be found branching off the hallway to the southeast. Enter the central of the three rooms to find a mirror and interact with it and pick the dialogue options “Hey! Do you hear me?”, “Can I help you in any way?” and finally “Fine, I’ll try.” to start the quest Mirror Memories.
Now you need to hunt down three other mirrors, which will display the wizard’s story and allow him to move on to his long overdue rest once he learns how things ended. You’ll have to hit them in the correct order, however, and if you slip up you’ll need to restart.

Find the first mirror along the southern end of the first floor
then head to the hub room southeast of the room where you found Valerie to find the second mirror.
The first mirror requires little work on your part. Stay in the same World State and return to the hub room southeast of where you found Valerie, southwest of the throne room, and interact with the mirror there. Note in the text that follows the words “Get to the stairs! To the second floor!”
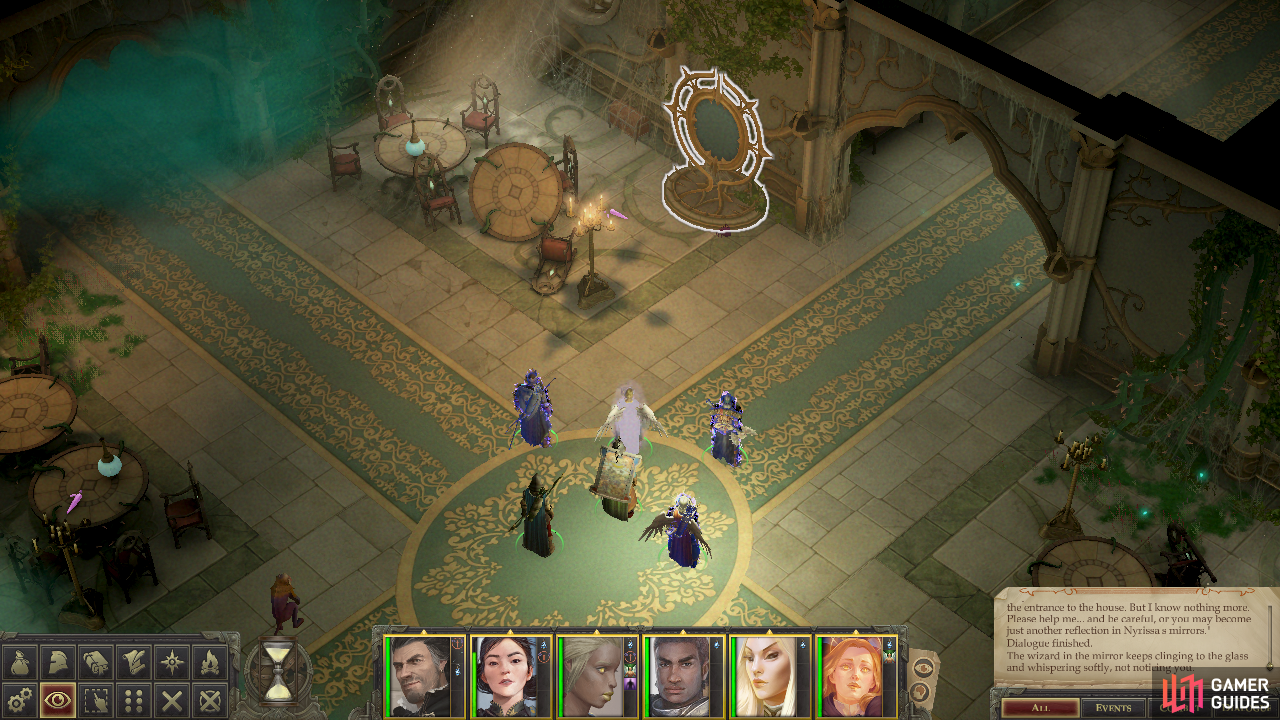
For the next mirror, make your way to the second floor and find some mist - any mist will do - and use it to transition to World State 1. Once done, make your way to the banquet hall and interact with the mirror in the eastern corner to witness the next bit of story. The similarities to your own situation are unavoidable, but more importantly you’ll learn that the final mirror is in the basement.
The Wriggling Man and the Knurly Witch
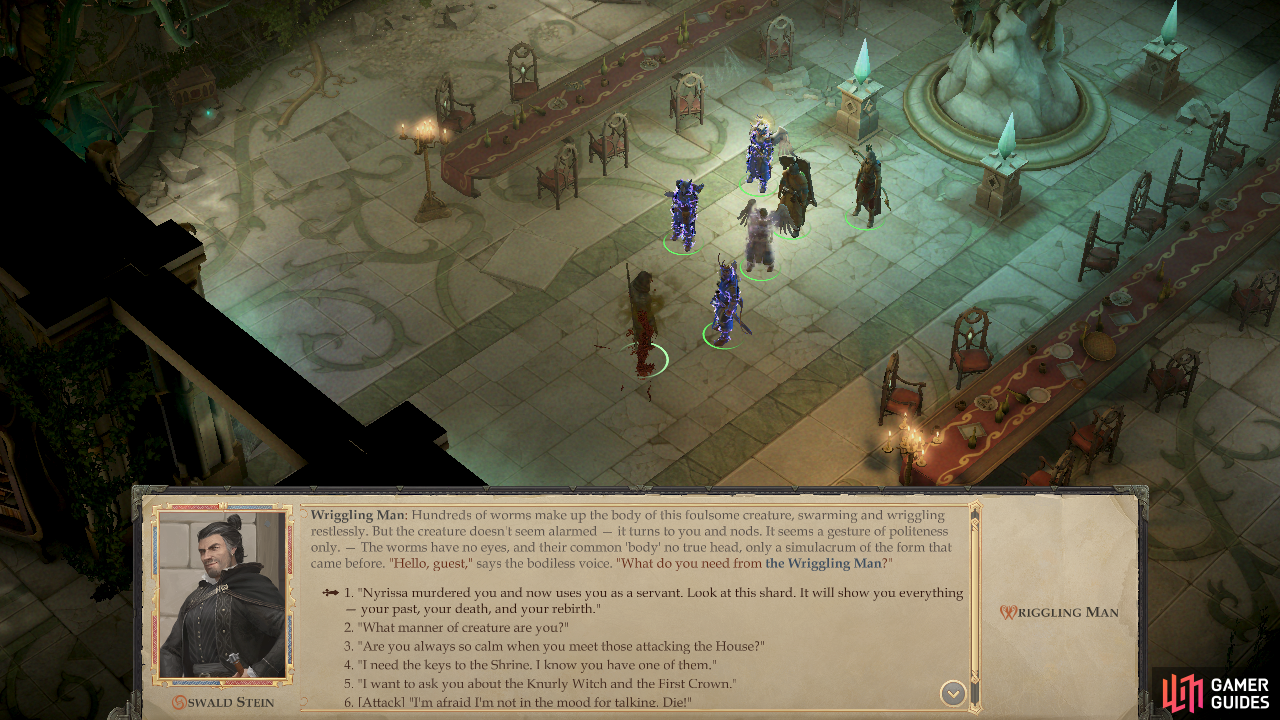
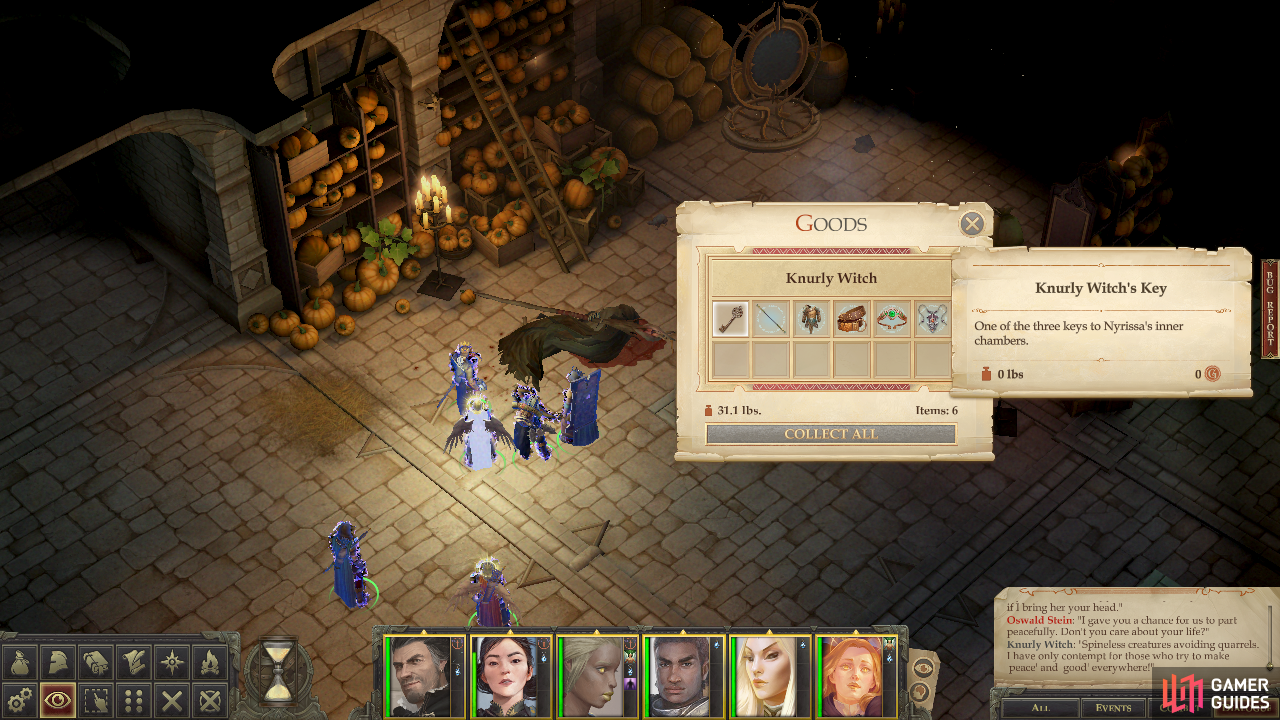
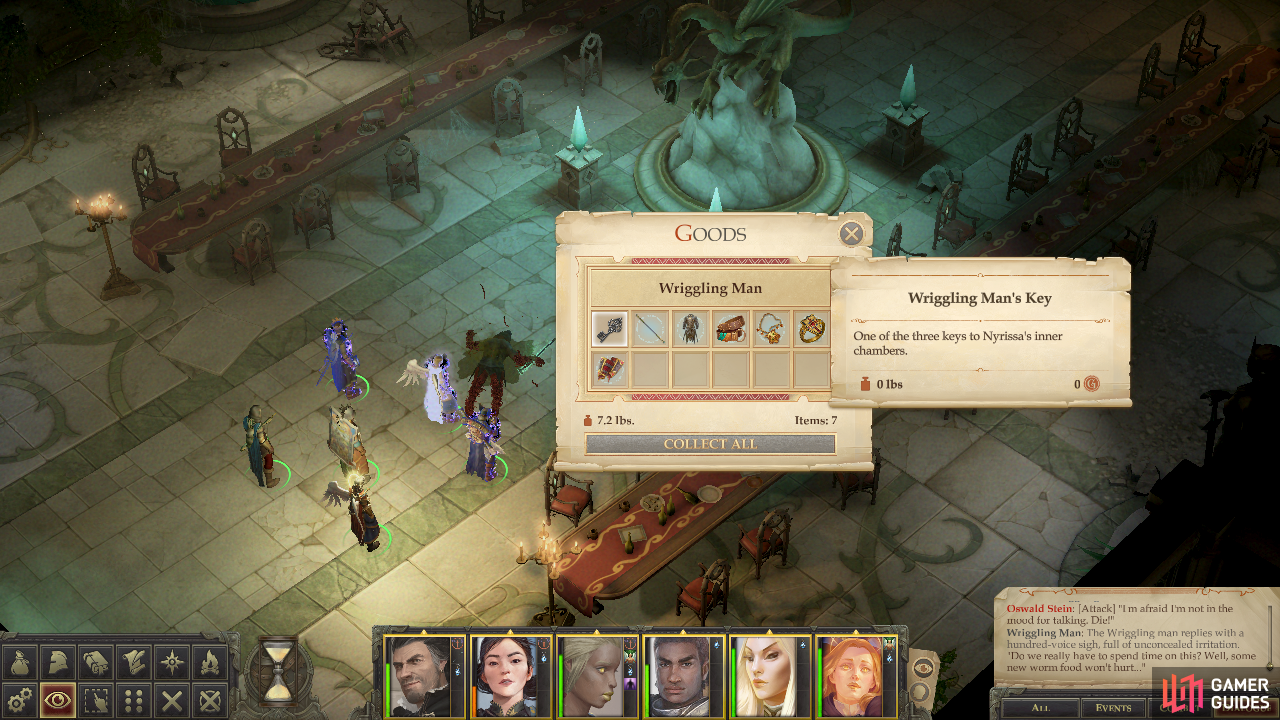
You’ve gone as far as you can with this quest without dealing with Nyrissa’s lieutenants, and in fact one of the main perks of completing this quest is that it helps you with these upcoming encounters. If you simply wish to fight them normally, you don’t need much help to achieve that outcome - just talk to either of them and pick a fight. You can find the Knurly Witch in the room near the well room in the basement in World State 0, while The Wriggling Man resides in the banquet room also in World State 0.
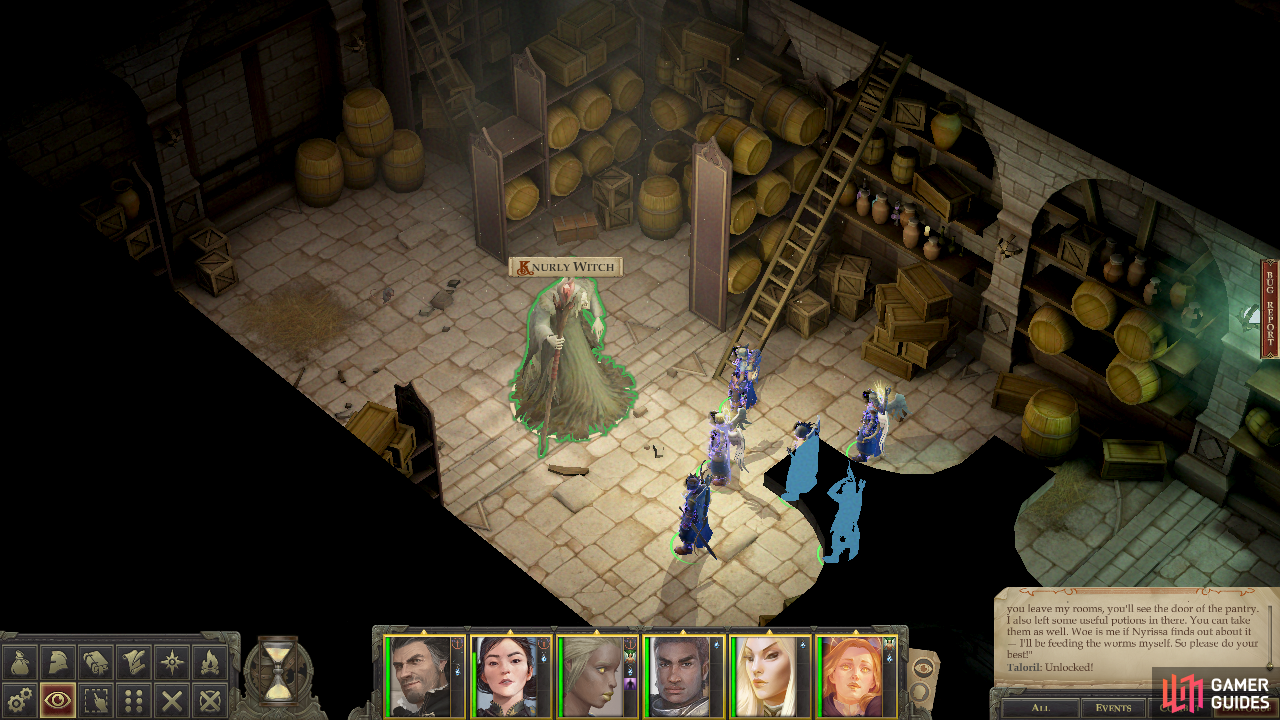
You can get a key to the pantry by talking to the Knurly Witch
wherein you’ll find the final mirror.
A fight with The Wriggling Man can be avoided entirely by completing the quest Mirror Memories, but the Knurly Witch must be dealt with before this can be achieved, as the final mirror you need is in a pantry - a room the Knurly Witch possesses the key to. Fortunately you need not actually fight her to get into this pantry. You can simply talk to The Wriggling Man and pick the dialogue option “I need the keys to the Shrine. I know you have one of them.”. Do this and he’ll ask you to kill the Knurly Witch for him - your response after this doesn’t matter, just the knowledge that The Wriggling Man is offering his key in exchange for his rival’s demise is enough.
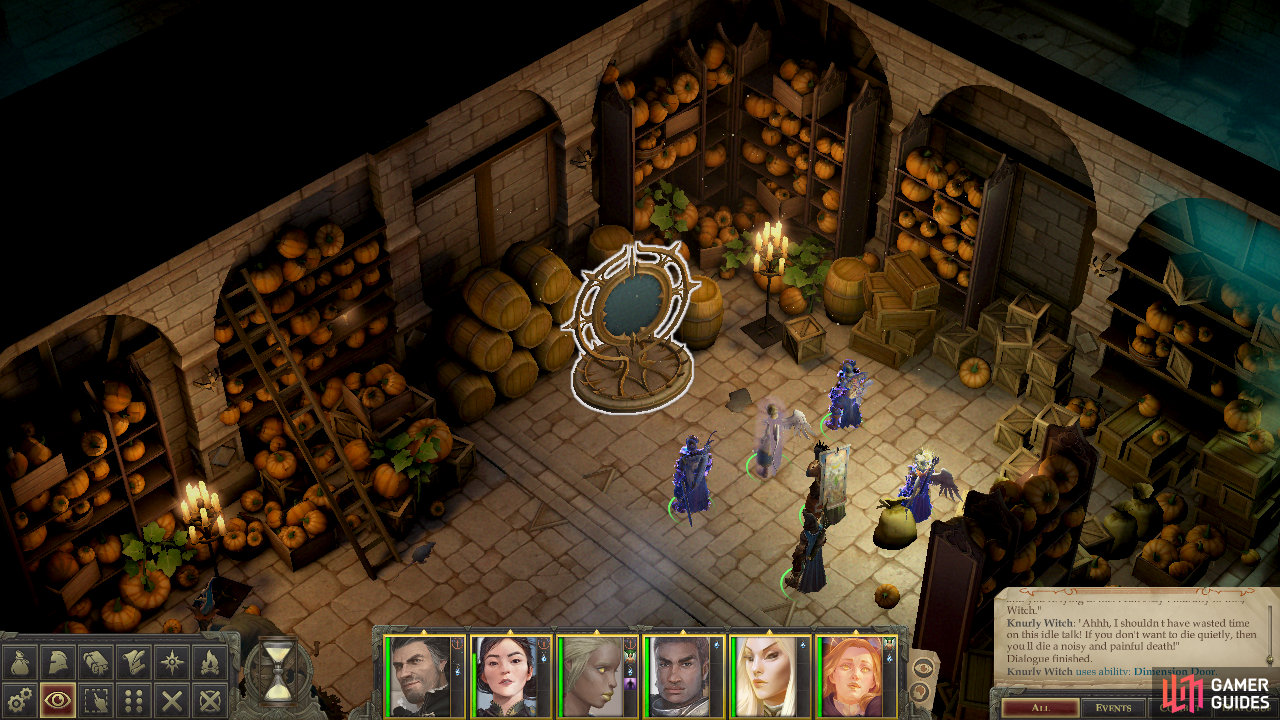
If you’ve had this interaction with The Wriggling Man, when you talk to the Knurly Witch you can pick the dialogue options “You know, I talked to the Wriggling Man. He offered me his key to Nyrissa’s Shrine in return for your death.” then “All right. Give me the key and you can go.”. After you possess the Key to the Pantry, simply head southeast across the hallway to find the door to this pantry. The final mirror you need is in the northern corner of the pantry, just be wary of the traps [Perception 36] [Trickery 36], which are located around three vents in the room.
Even without talking to The Wriggling Man first you can gain access to the pantry. Simply talk to the Knurly Witch and pick the dialogue option: “You… don’t look like a dweller of the First World. Who are you?”. After this you’ll need to pass a [Lore (Nature) 40] check the get the following option “Creatures like you are called annis hags, and when you and your ‘sisters’ gather into a coven - it doesn’t bode well for anyone else in the area, right?” after which say “You must not be very happy with your service to Nyrissa?” then pass a [Perception 46] check to get the option “You don’t look like Nyrissa’s poor prisoner.”. Finally respond with “You belong to a race of dangerous and unpredictable creatures, killers and cannibals - and you’re lying to me. I can’t say I like any of this, Witch.” to annoy the Knurly Witch into departing for the pantry, which you’ll now be able to access… although you’ll have to kill a pair of Dweomercats, first.
In the either case, the Knurly Witch will teleport into the pantry. If she sicked two Dweomercats on you, she’ll just be waiting for you to chat with her, but if she gave you the Pantry Key she’ll appear after you disarm the traps and loot some treasure. In the latter case, she’ll initiate dialogue and you’ll be forced to fight her, so if you use the threat of The Wriggling Man to get access to the pantry, just avoid any looting and/or trap disarming for now.
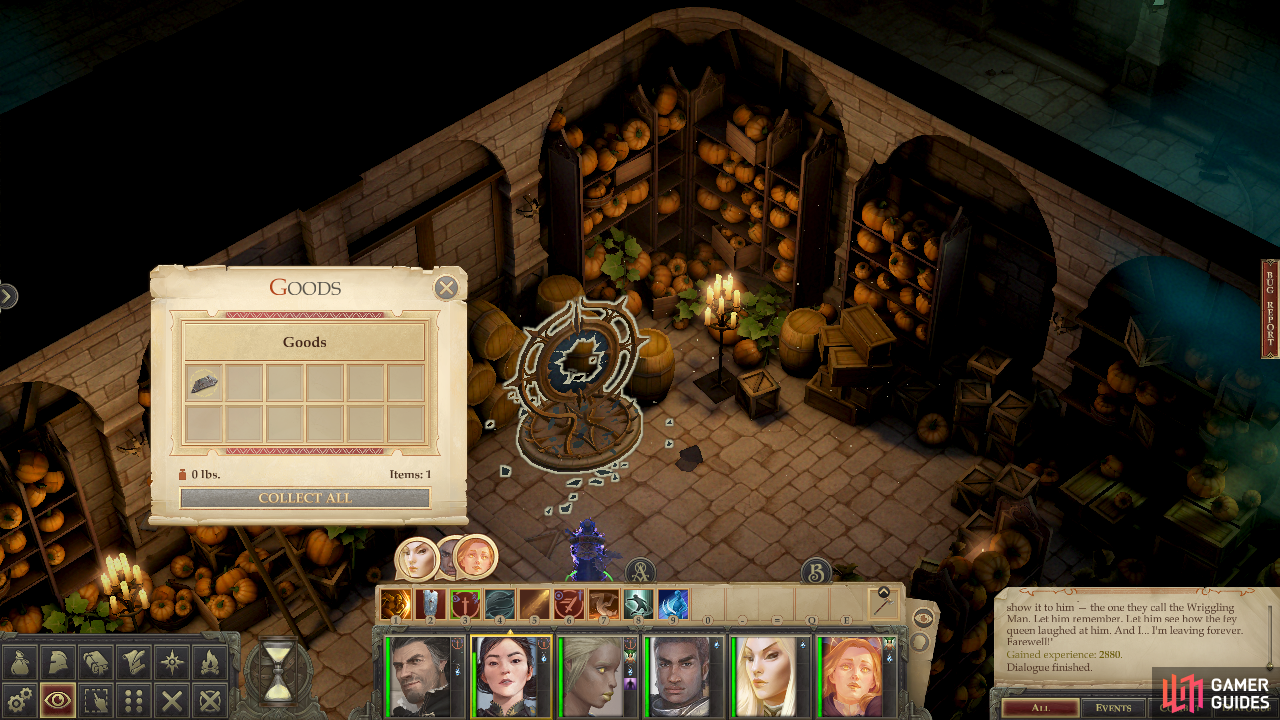
Grab a shard from the final mirror
then share the knowledge you’ve gained to avoid a fight with the Wriggling Man.
However you get into the pantry - assuming you aimed to avoid a fight with the Knurly Witch - interact with the mirror in the northern corner of the room to witness the final mirror memory and learn of both the wizard’s past and present. When the conversation ends, do as the wizard in the mirror bid you and loot the shattered mirror for a Shard of Mirror. If you have this relic in your possession when you talk to The Wriggling Man you’ll now be able to pick the dialogue option “Nyrissa murdered you and now uses you as a servant. Look at this shard. It will show you everything - you past, your death and your rebirth.”, which will allow you to avoid the fight with him entirely.
That still leaves you to get the key from the Knurly Witch, however, and both the Knurly Witch and The Wriggling Man’s fights will be covered below, however unnecessary they are. Once you’re done with those, skip ahead to the header “The Third Key”.
Battle: Knurly Witch
There are many ways of dealing with the Knurly Witch, but first let’s go over the cheese. The Knurly Witch isn’t immune to Baleful Polymorph, and since it’s one of the few one-shot spells in the game, it’s always worthy of consideration. Sure, it won’t kill her outright, but she’ll be incapable of using spells or spell-like abilities, functionally making her helpless to successfully fight back. That said, her Fortitude Save is quite high - at best your casters will likely have around a 15% chance of getting this to stick. On top of that she’s got Spell Resistance 31, and again, that means there’s probably around a 40% - 50% chance that a high level caster with Greater Spell Penetration will fail to bypass her Spell Resistance. So, the odds aren’t great, but you can cast Baleful Polymorph on her before even starting a fight with her! In fact, you can stick her with Baleful Polymorph, then go through all her dialogue (mentioned above) - she apparently doesn’t seem to notice she’s been transformed into a dog! Whether you take the super cheap approach mentioned above, or simply try to hit her with Baleful Polymorph when she teleports into the pantry (or when the fight actually starts), it’s one viable strategy for coming out victorious with little fuss, however long the odds are.
For a more fair and conventional fight, you’ll go through her dialogue and get her to teleport into the pantry… either after sicking some Dweomercats on your or not. She has no support in the pantry aside from some traps, which you can avoid well enough, although her numerous debilitating spells makes any traps a latent danger for confused or panicked characters. Ideally you’ll simply go through the dialogue options and pass a [Lore (Nature) 40] check and a [Perception 46] check to frustrate her into entering the pantry, whereupon you’ll be able to disarm her traps before talking to her and starting a fight.
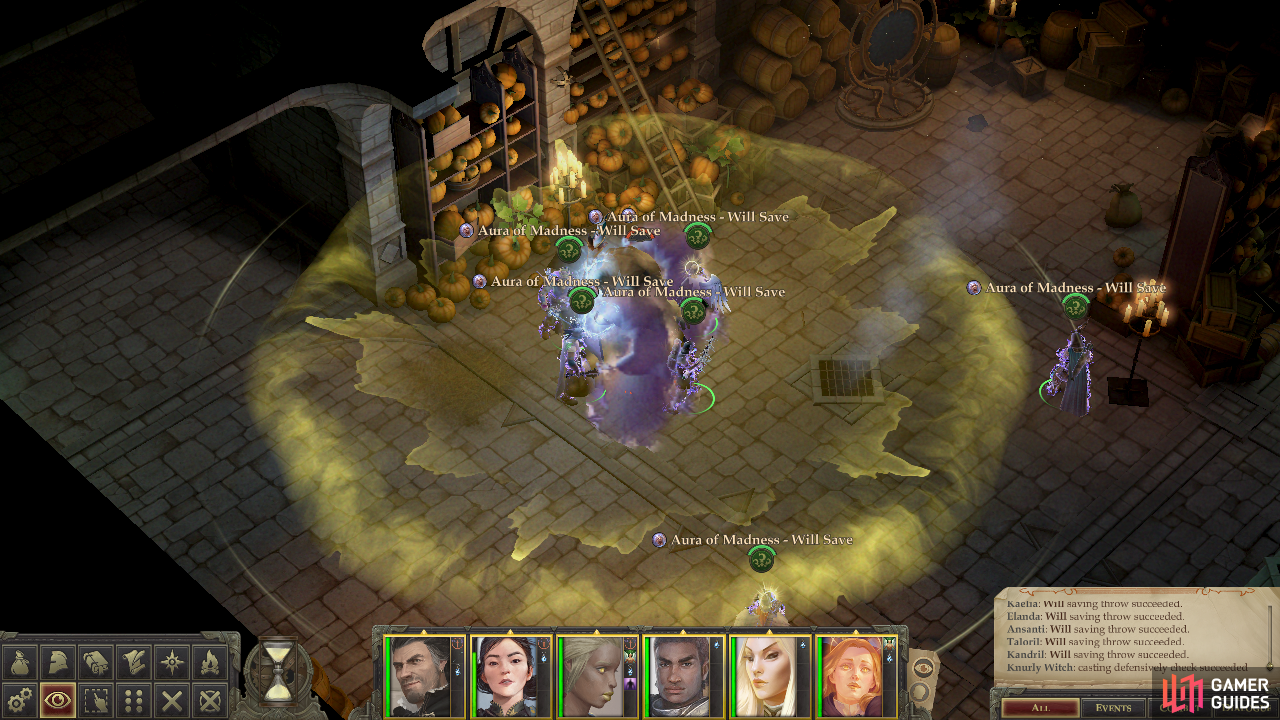
The Knurly Witch’s Aura of Madness threatens to confuse your party
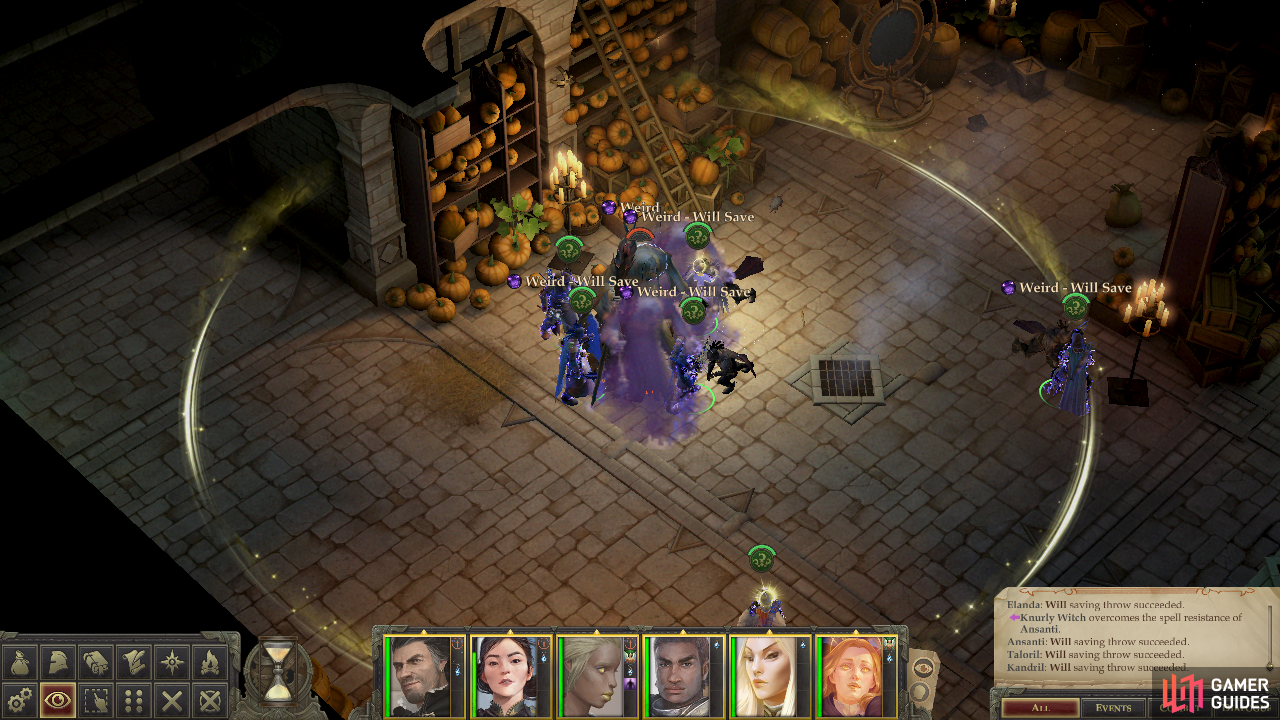
She’s also capable of casting dangerous spells like Weird.
She’s a 20th-level Cleric with a mighty arsenal of spells. In order, she’ll cast: Mirror Image (she gets this for free), Shield of Faith, Cloak of Chaos, Weird (Will 33), Banshee Blast (Ref 30 and possibly (Will 30), Death Clutch (Fort 32) x3, Plague Storm: Bubonic Plague (Fort 30), Cacophonous Call (Will 26), Confusion (Will 28), Waves of Ecstasy (Will 31), Boneshatter (Fort 29) x5, Waves of Ecstasy (Will 31), Boneshatter (Fort 29) x1, Destruction (Fort 31) x4, Cloak of Chaos and finally Harm, after which she’ll wade into melee combat with her staff.
Before she casts any offensive spells she’ll activate her Aura of Madness (Will 38), which has a good chance of confusing your entire party and starting out the fight in a bad way. If you’re not in melee range she’ll resort to spells more or less in that order, otherwise she’ll start out mixing some Harm spells in to the beginning of her attack routine. It should also be noted that the six Boneshatter spells and four Destruction spells will likely target the same character if necessary, only moving to a new target if she kills it. Obviously spell-buffing extensively is necessary for this fight, and buffing as many characters as possible with Mind Blank will go a long way. Without it your warriors probably have little chance of resisting most of the Knurly Witch’s mind-affecting effects, and it’s worth noting that Heal - or better yet, Mass Heal - both cure Confusion.
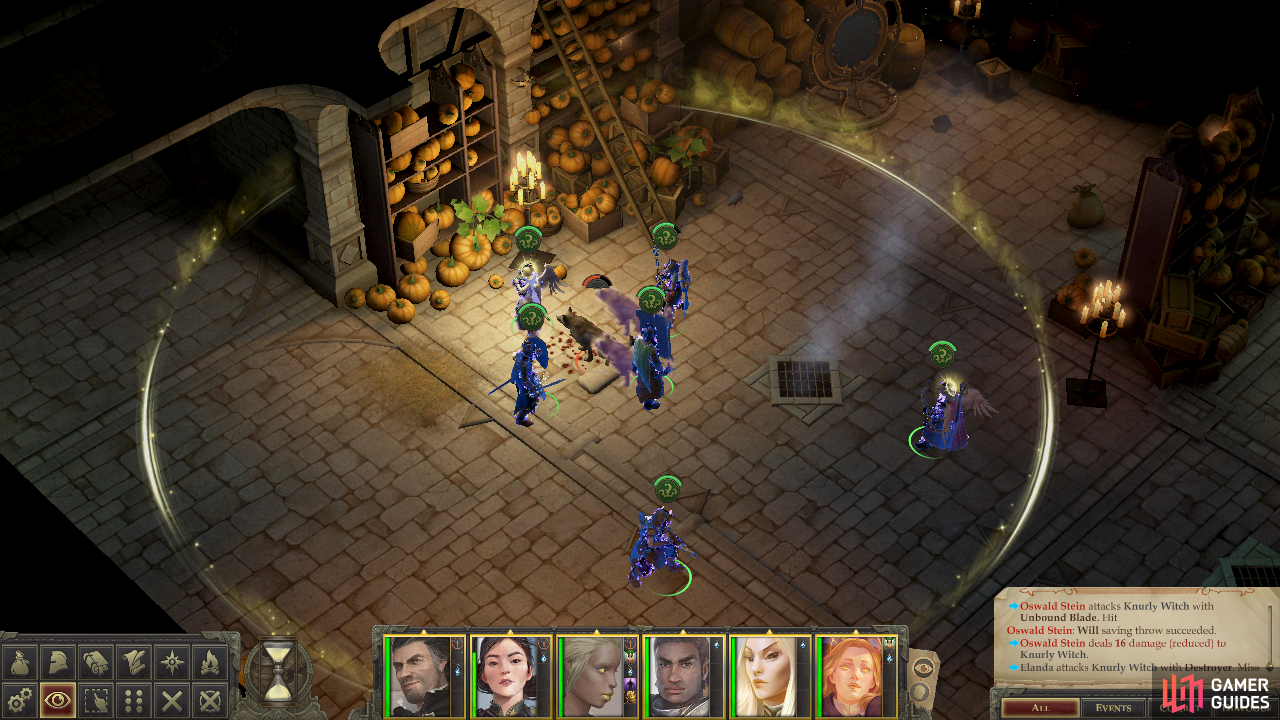
If the Knurly Witch allows you to talk to her before the fight, wisely position your spellbuffed party around the Knurly Witch so as to flank her. You’ll want those flanking bonuses to help bypass her whopping Armor Class score of 45, although a well-spec’d warrior with a powerful weapon should be able to hit this fairly regularly. Her other defenses against physical attack aren’t inherently great, as she possesses a surprisingly lackluster DR 5/bludgeoning. Her 400+ Hit Points will keep her in the fight for a few hits, but is by no means insurmountable, or even really exceptional anymore.
Although the odds are long, if you hit the Knurly Witch with Baleful Polymorph the fight will be all but over.
However you defeat her, loot the Knurly Witch for her key.
As for your caster, her Spell Resistance has already been noted, but her saves are also generally high. Her Will Save is especially troublesome, while her Reflex Save is her lowest save. Still, given her Spell Resistance you’ll probably want to go for more debilitating spells than something that merely does direct damage or Chains of Light. Again, Baleful Polymorph will likely have at most a 5% or so chance of getting past both her Spell Resistance and Saving Throw, but if it hits, it’ll all but end the fight. Insanity has an even lower chance and is somewhat less debilitating. Failing that, something like Finger of Death or Destruction both have a higher chance of affecting her than Baleful Polymorph, and while they won’t end the fight outright, they can potentially shave off nearly half her life, which might (depending on the actions of your warriors) put her in the range of Death Clutch or Power Word: Stun.
However you go about it, put the Knurly Witch down, then loot her remains for the Knurly Witch’s Key, Gyronna’s Amulet, which gives the wearer a +5 insight bonus to Armor Class (stacks with natural/deflection bonuses!) and the permanent effect of Mirror Image, a Headband of Inspired Wisdom +4, a Belt of Mighty Constitution +6, a suit of Hide Armor +5 and a Corrosive Quarterstaff +2.
After the Knurly Witch is defeated, loot the pantry for two chests. If you switch World States you’ll find the room occupied by some Ghostly Guards, including two Ghostly Mage Guards. While this can be a nuisance fight, it’s also one you’ll be well rewarded for, as a chest in this version of the room contains Remnant, a greatsword +5 that deals 2d6 damage damage per hit, or 3d6 if the wielder is good-aligned and the target is evil.
Battle: The Wriggling Man
There’s no reason you should have to fight The Wriggling Man, but if you do, it’s an entirely different sort of encounter than the Knurly Witch. First, you can throw out most of the conventional spell strategies, as he’s outright immune to single-target spells like Baleful Polymorph, Disintegrate, Finger of Death, Insanity, etc. Only area-of-effect spells will do, and even then he’s also immune to poison, disease and mind-effecting affects. This pretty much negates most debilitating spells outright, so you’ll need to either focus on elemental attacks, or physical damage.
He’s not an easy target for your warriors, either, as his Armor Class is somewhat higher than the Knurly Witch’s, at 49. He also has Damage Reduction 15/- and only takes half damage from slashing and piercing attacks while being outright immune to critical hits and precision damage, so no lucky shots and no sneak attacks. His total Hit Points are fairly low, at 250, but he’s got Fast Healing 20, meaning that superficial damage won’t have time to accumulate.
Use your casters to whittle down The Wriggling Man’s health
and claim the second key from him once victorious.
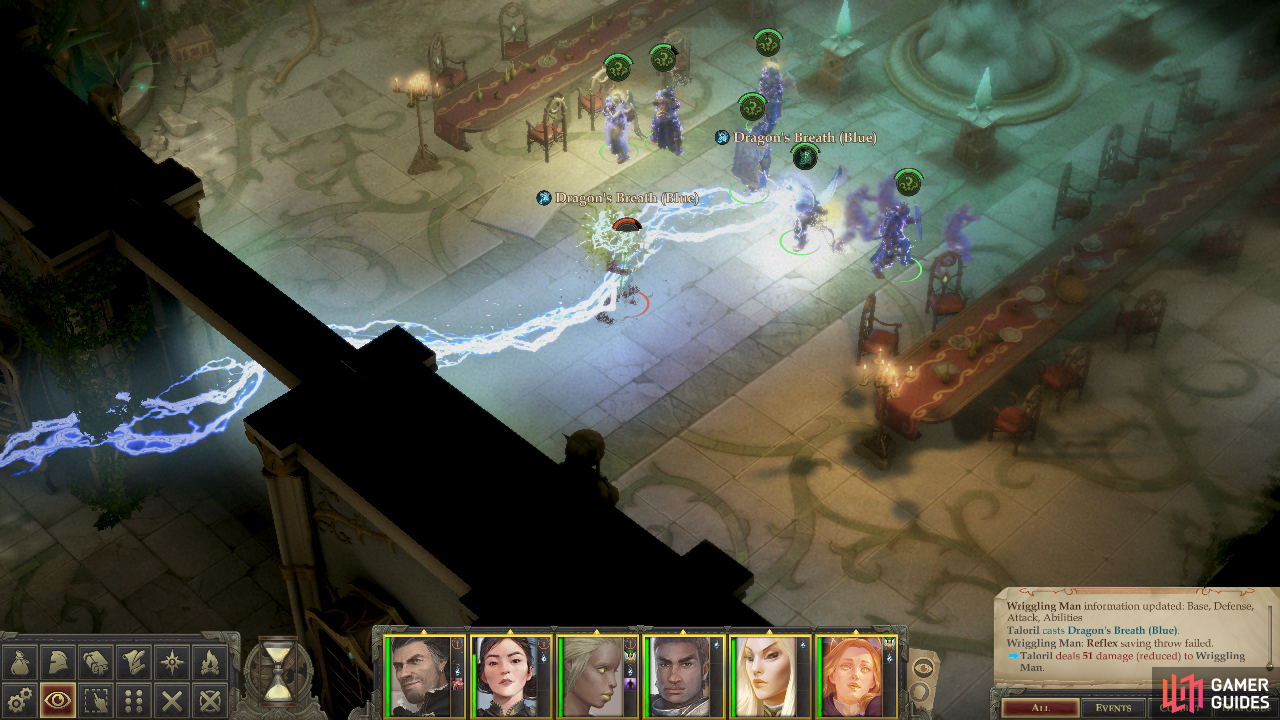
That being the case, you’ll probably want to focus on area-of-effect magic damage, but keep in mind he’s also got Fire Resistance 10 and cold Resistance 30, so shoot for spells like Horrid Wilting, Dragon’s Breath (blue) or Stormbolts. His Saving Throws are universally mediocre and against these spells he’s got little resistance and two or three casters battering him for 50+ damage per turn is the sort of mathematics that result in victory.
Of course, The Wriggling Man wont be standing there waiting for you to kill him. As a 20th-level Wizard his own goal is to blast you with as much area-of-effect misery as possible. He’ll typically start out by protecting himself with Shield (further boosting his already silly Armor Class) before conjuring up two minions - an Infested Summoned Air Elemental and an Infested Summoned Bulette. Neither of these are terribly powerful, but they can distract your casters with their area-of-effect Worm Infestation ability, so sic your warriors on them to keep them both busy so your casters can focus on The Wriggling Man.
After that, The Wriggling Man will be somewhat scary by using one of your own staples against you - Baleful Polymorph, after which he’ll work down his spell book casting offensive spells and resummoning his minions (up to three times) as needed. He’ll cast Tsunami, Clashing Rocks, Elemental Assessor at first, before moving down to Chain Lightning, Disintegrate and Acidic Spray. When those are used up he’ll resort to Lightning Bolt, Fireball and Acid Arrow. Protect yourself ahead of time with spells like Spell Resistance and the ever-useful Protection from Energy and Resist Energy. The resistances will take the edge off some of The Wriggling Man’s attacks, at least, while Spell Resistance cast by a high-level caster could end up blocking up to 50% of The Wriggling Man’s spells.
Vanquish The Wriggling Man, then loot him for The Wriggling Man’s Key, Bracers of Armor +8, an Amulet of Natural Armor +5, a Belt of Physical Form +6, a Ring of Protection +5 a Dark Master’s Robe (gives a whopping +8 bonus to Intelligence and Charisma, +5 bonus to Concentration checks and +10 bonus to Knowledge: Arcana skill checks) and another Corrosive Quarterstaff +2. The only upside to killing The Wriggling Man in combat over simply using the knowledge gained by completing Mirror Memories is a larger experience reward.
Head southeast into the mist in the mist-filled room
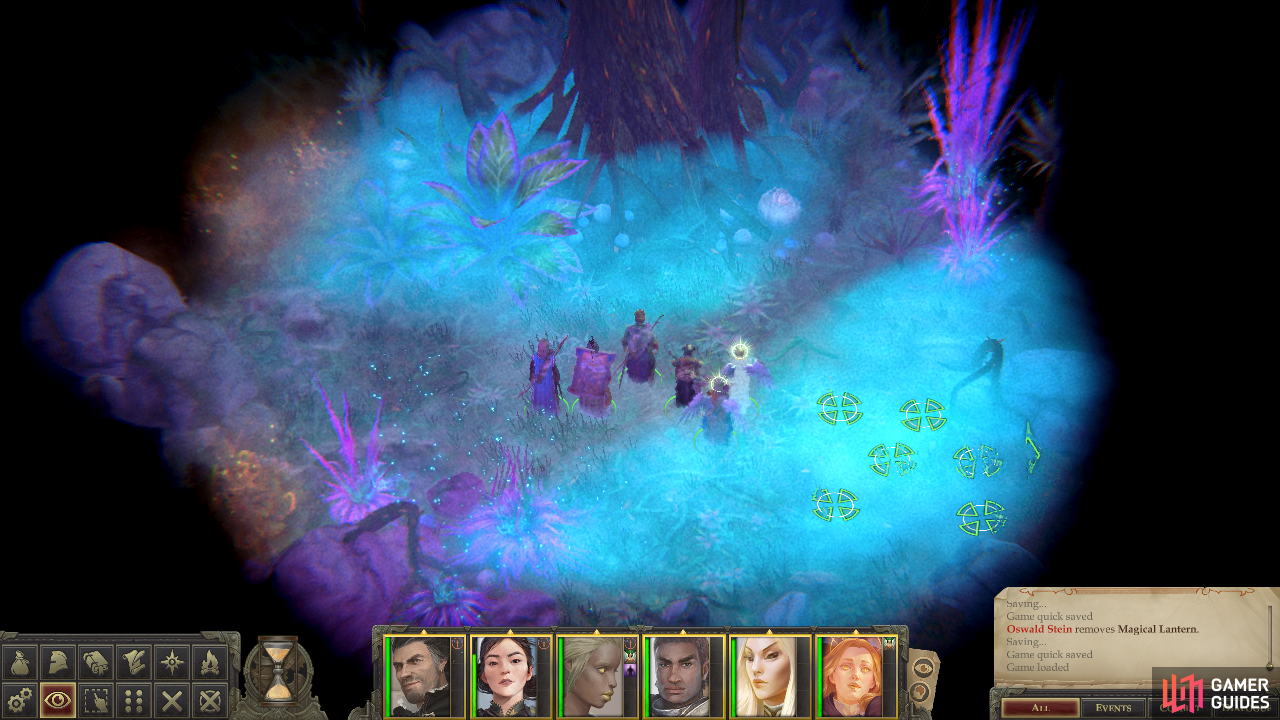
then head southeast again in the First World mist area to reach the location of the third key.
The Third Key
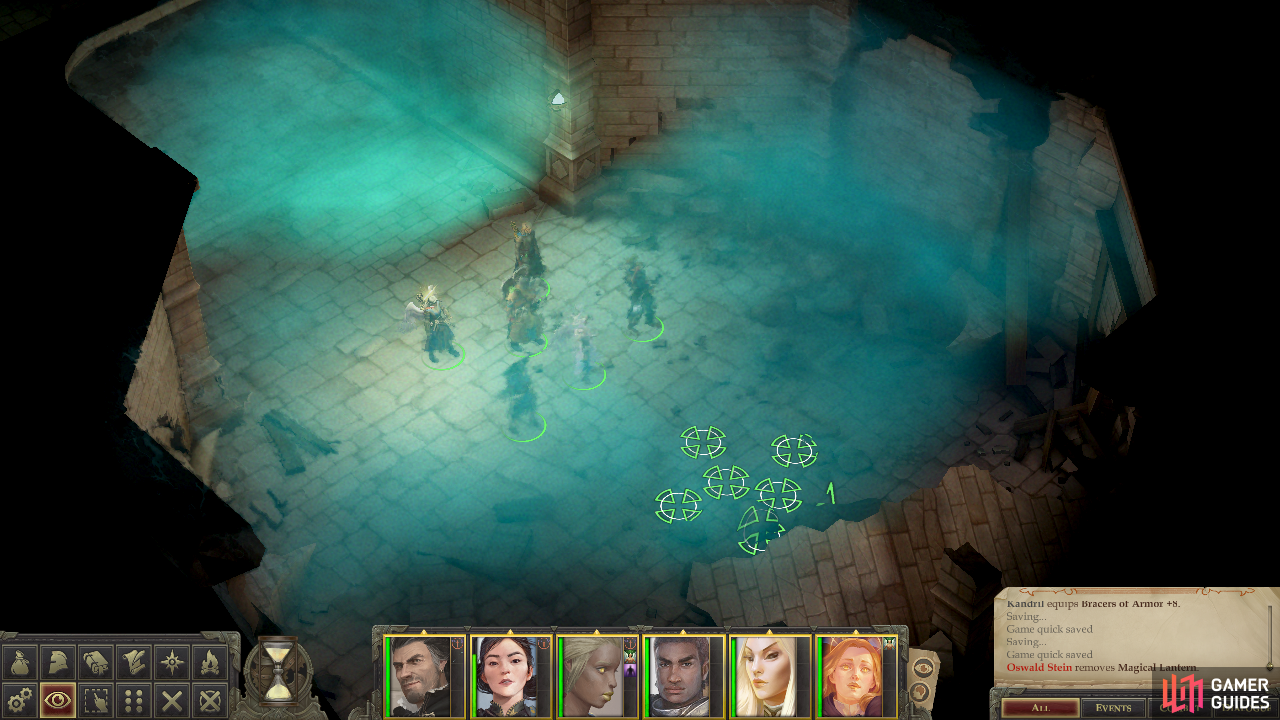
With Mirror Memories completed and the Knurly Witch and The Wriggling Man dispatched, you need merely acquire the third and final key. It’s no easy matter, but… well, there’s nothing for it. Head back to the mist room in the basement, keep your Magic Lantern equipped and pass through the first shroud of mist, then take it off and head south into the mist to trigger teleportation to the misty, First World hub area. Before you move on, spellbuff for a melee encounter, then head into the southeastern mist to reach the isolated chamber with the tree.
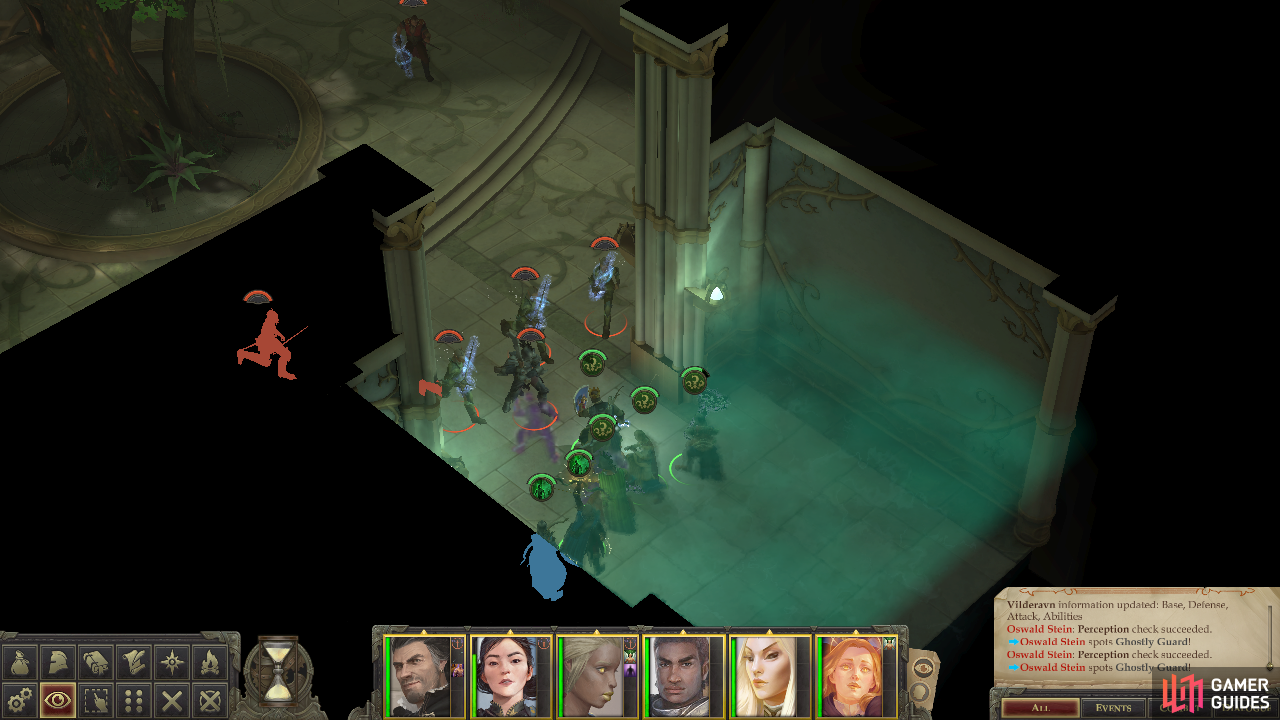
Defeat the Vilderavn and accompanying enemies
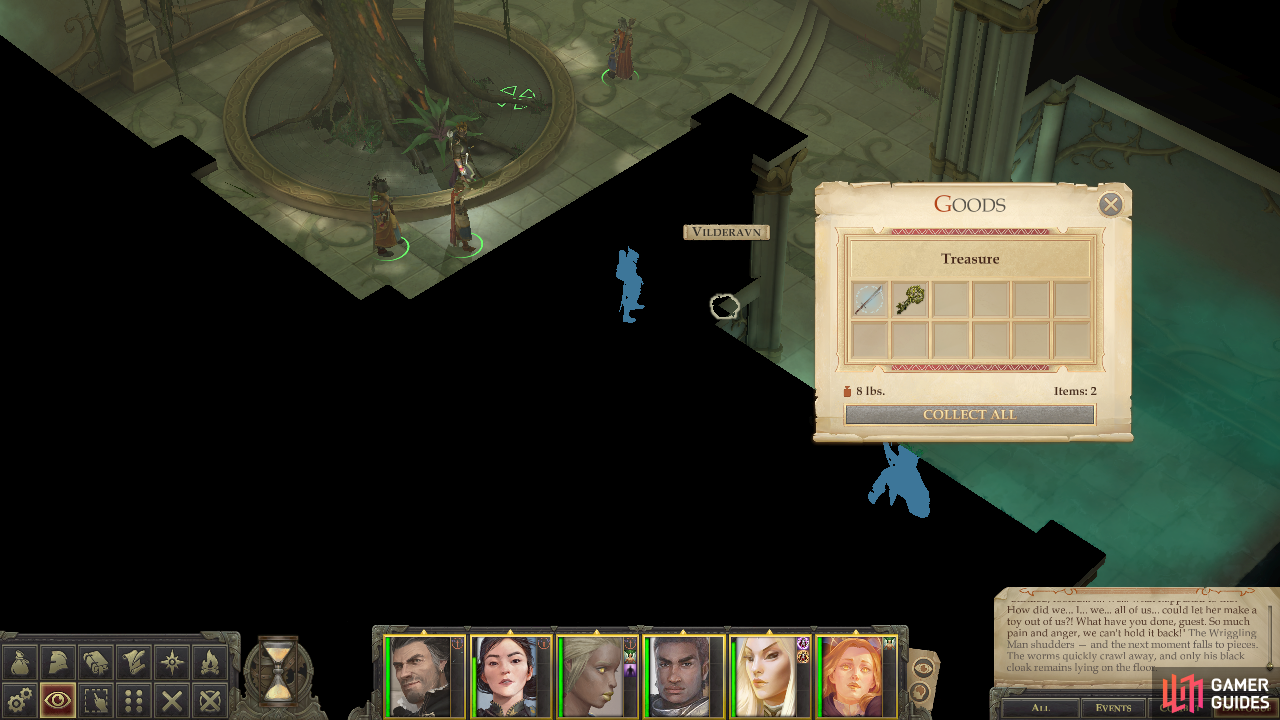
and claim the third and final key.
When you came here earlier in a previous World State, the chamber was empty save for a chest containing a Light Shield +5. Now, it’s occupied by several Ghostly Guards, two Ghostly Mage Guards and a new type of fey - the Vilderavn. The Vilderavn isn’t as strong as the Knurly Witch and The Wriggling Man were, boasting an Armor Class score of merely 36 and just under 300 Hit Points. His defense is bolstered somewhat by his Damage Reduction 15/cold iron, magic and good. Against spells, his saves aside from Reflex are somewhat suspect, but his Spell Resistance score of 29 will keep him somewhat safe. That said he’s immune to death spells, paralysis, slow, fear and curses (including Baleful Polymorph) so you may be best served by casting area-of-effect damaging spells with your casters.
Defeat them by whatever means necessary and loot the Vilderavn for a Keen Falchion +5 and Nyrissa’s Third Key. Be sure to also loot a chest north of the tree to score a Greater Ring of Balance which is a wonderful ring… if your alignment is True Neutral. Ah well…
With that you should have all three keys, meaning you should rest, sell and buy whatever you might need and generally prepare for the final fight. The way to Nyrissa is clear. Leave the room where you fought Vilderavn by heading into the mist, then when you appear in the misty First World hub area head northwest to return the hub room in the first level, from which it’s a simple matter to head to the second floor via the throne room, or to return outside, as you needs demand.
No Comments