Jaethal in Fury
This quest is acquired through a kingdom event during chapter 2, Troll Trouble. Jaethal will approach you in your throne room, citing an urgent matter. She has reason to believe that a travelling merchant, named Enneo, is responsible for or has something to do with her death. Her evidence? Enneo is in possession of Jaethal’s old dagger. As with any accusation of murder, an investigation must follow. Enneo claims that he found the dagger in the carcass of a boar, the body of which can be found in the Old Sycamore area.
Boar at the Old Sycamore
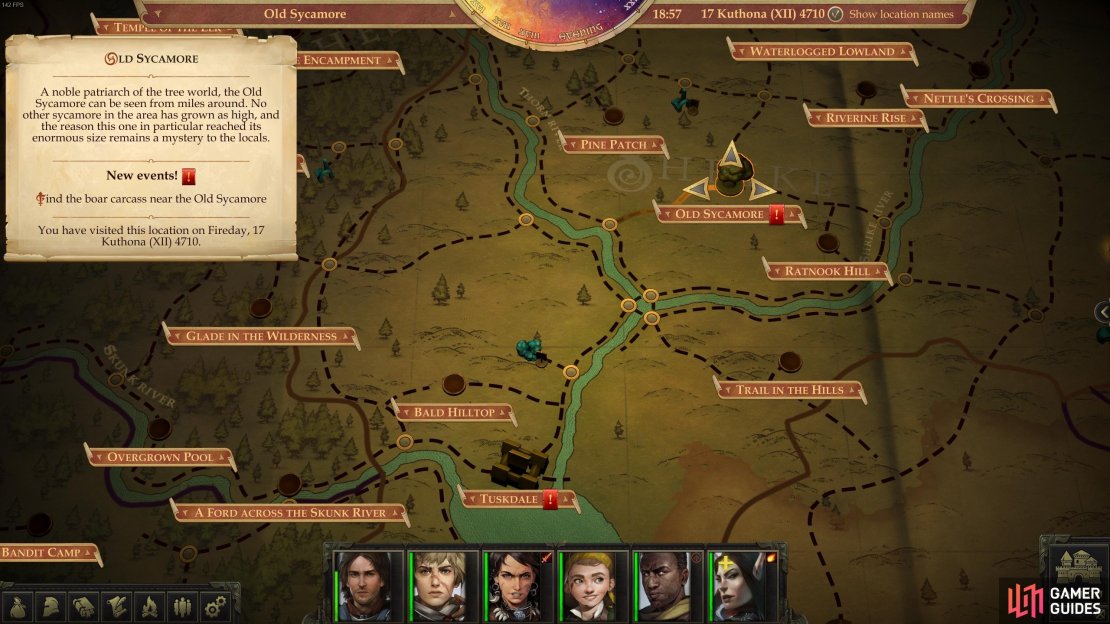
To reach the Old Sycamore area from your capital (default name Tuskdale), take the following directions:
- Northeast
- North
- Northeast
- Northeast
- Northwest
- East
The location of Old Sycamore (top right) in relation to your capital, Tuskdale (bottom centre).
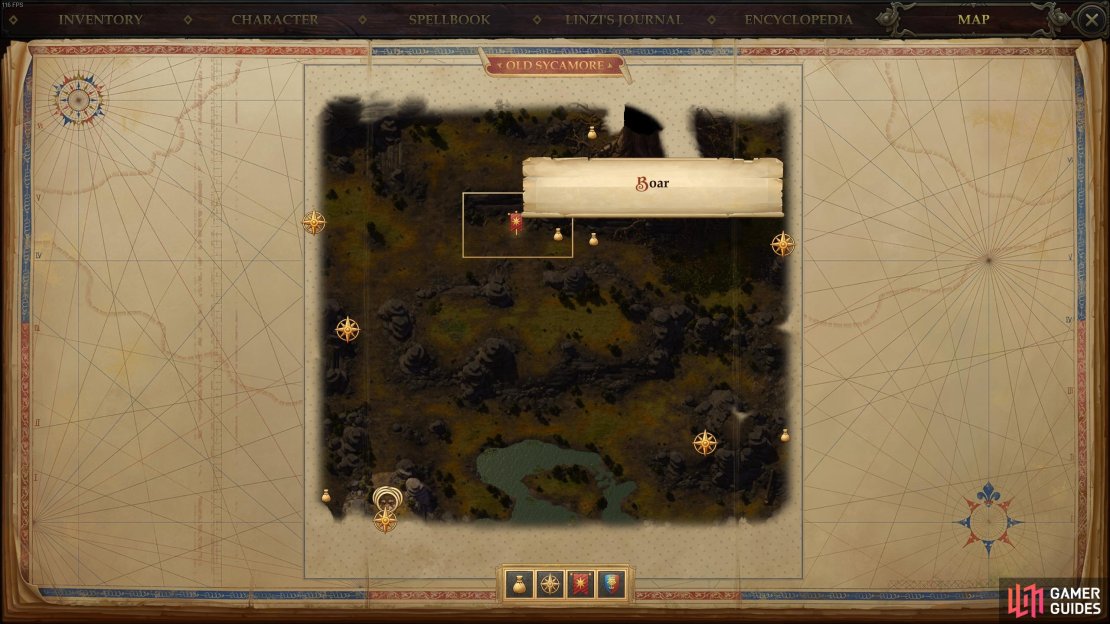
Once you’re in the Old Sycamore area, head north beyond the entrance to the Old Sycamore Depths, then head northeast as the land opens up. You’ll find the boar just below a cliff edge at the centre-left of the region (see above screenshot for the precise location). The boar’s body is just east of the ramp leading up to the centipede-infested plateau at the northern end of the map - the plateau which just so happens to house the eponymous “old sycamore” and the entrance to the Mite’s lair.
(1 of 3) The location of the boar on the map of Old Sycamore.
Once you’ve found the boar, interact with its corpse to trigger a dialogue with Jaethal. She determines that the boar must have sustained its mortal wounds somewhere else, and died here after travelling a fair distance. She also observes that the wounds are consistent with those which might be inflicted by a dagger such as hers.
If you pass the initial Lore (Nature) check, you’ll have the option to choose the dialogue “There’s not much blood around the wound. - Looks like it was inflicted once the blood had already curdled. After the beast’s death, not before.”. This will provide you with enough information to confirm Jaethal’s observations (and earn you 240 Experience in the process).
If you failed the initial Lore (Nature) check and don’t want to reload the earlier suggested hard save, you can examine the evidence by selecting [Lore (Nature) 20] “Dissection of the carcass might help. Perhaps we’ll learn something new.” (worth 45 Experience) and “[Perception 17] “We should carefully examine everything around here. If the boar was already wounded when it came here, there must be a trail of blood somewhere.” (worth 45 Experience).
Once you’ve learned enough information to proceed, you’ll earn 112 Experience and the journal will update. You can now leave the area and proceed with the next task: travel to the newly revealed Thorn River Bank area, west of Old Sycamore.
| Reward |
|---|
| 240 XP |
| 45 XP |
| 45 XP |
| 112 XP |
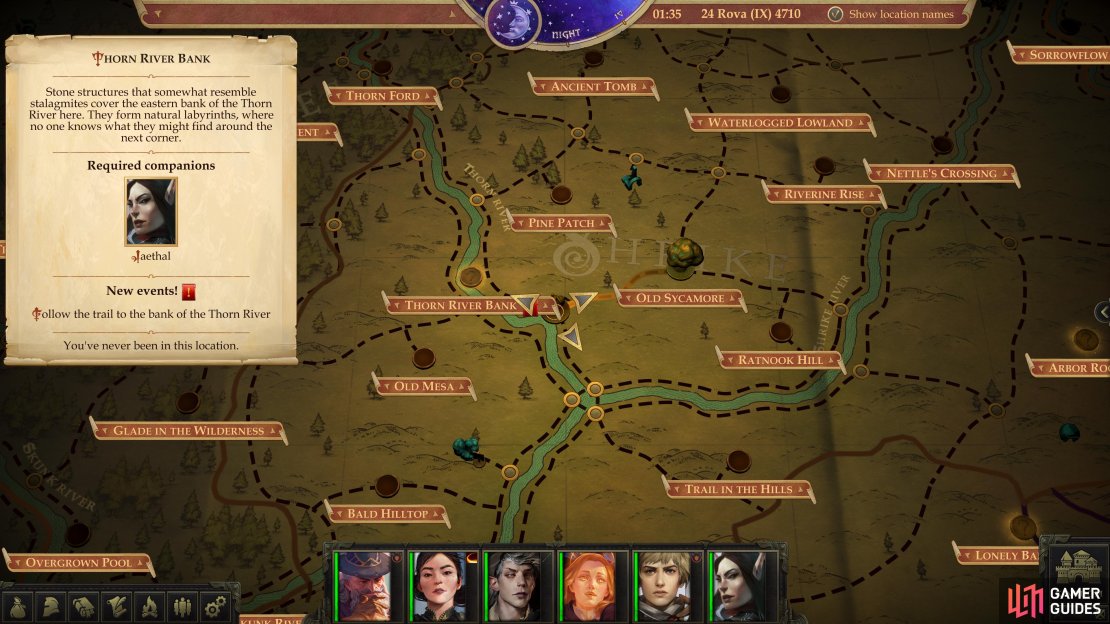
The location of the Thorn River Bank area on the map.
Thorn River Bank
Do what you will, leave the Old Sycamore area, then, take the following directions to reach the Thorn River Bank:
- West
- Northwest
- Southwest
You’ll arrive along the eastern end of this area. From where you start, follow the stream west until it bends southwest, at which point note a trap [Perception 18] [Trickery 18] to the west. Ignore the trap for now, but do seek out a pile of rocks west of the stream to score an Ancient Rostlandic Coin, then follow the stream southwest to find two Dire Boars, which should be no match for your party at this point in the game. Kill them, then backtrack east to find a small hill along the southeastern corner of the map, upon which you’ll find [Perception 12] a Potion of Shield of Faith.
(1 of 3) Nab an “Ancient Rostlandic Coin” from near the river.
Return to where you fought the boars, then continue west and northwest through the gap in the rocks. Here you’ll find a log with some more minor loot, revealed by a [Perception 12] check. Northeast of the log are three small traps (including the one you may have spotted earlier). Send in your stealthiest trickster to disarm them [Perception 19] [Trickery 19], and then prepare to confront a group of five “Young Elves” to the northwest.
This mixed group of foes consists of a 7th-level Fighter with a bow, an 8th-level Alchemist who will happily pelt you with missiles, a 7th-level Fighter with a sword and shield, a 5th-level Bard and a 7th-level Rogue with two daggers. None of these foes are terribly powerful from a pure stats perspective, but the Bard will happily use “Inspire Competence” to boost his allies along with spells like Hideous Laughter to debilitate your characters. The shoe does not fit the other foot well, so make her and the Alchemist your priorities, as others are relatively weak without spell support. Don’t be shy about using spells of your own, either - this fight probably doesn’t require much assistance, but their compact formation makes a Glitterdust nigh irresistible…
Once the elves fall, Jaethal will initiate a dialogue and revive one of the fallen. You can question her newfound ability, but it’s the Young Elf that Jaethal revived with the most pressing objections. Question the elf to learn why they attacked your party seemingly unprovoked, and then heed the advice of your companions before deciding her fate.
You will have two basic options, aligning with either [Neutral Evil] (condemning the elf to an undead existence), or [Chaotic Good] (allowing the elf to die as she wishes). Both will result in 225 Experience, so choose whichever fits with your alignment, but note that Jaethal will be slightly displeased if you allow the elf to die. You’ll get a chance to make another choice afterwards, either [Lawful Good], [Chaotic Neutral] or [Neutral Evil], but aside from the alignment shift and perhaps pandering to Jaethal’s sensibilities, none of them matter much.
| Reward |
|---|
| 225 XP |
After the chatter, loot the elves for a variety of masterwork weapons, an Elven Curved Blade +1 and a Ring of Protection +1 and their campsite for some mundane items, then head northeast to find a Megaloceros which can easily be slain for some meat, and a small pouch of loot behind it.
With the area cleared, all you need to do is return to your capital and speak with Jaethal to discover that Enneo has fled, implicating him as the prime suspect. Jaethal will state her intentions to find him alone and the quest will complete, earning you 750 Experience. You can pass a [Lore (Religion) 18] check to unlock a dialogue option and make a [Lawful Neutral] reply, but they don’t affect the outcome of the quest.
| Reward |
|---|
| 750 XP |
If you went north with the aim of completing multiple quests in one go (namely Sorrowflow and Shelyn’s Chosen), then there’s no reason to head back to the capital yet - just keep it in mind for when you’re done with your business up here and consider heading to Oleg’s Trading Post to see to the aforementioned Shelyn’s Chosen.


No Comments