
This quest will begin after An Ancient Curse ends, shortly after An Ancient Curse, Part 2 begins (when there are 186 days left on the An Ancient Curse, Part 2 counter, to be precise). It’ll appear as a generic “Visitor Waits in the Castle” event, where a peasant woman named Jenna will meet you in the throne room and beg you to find her missing son, Tig.
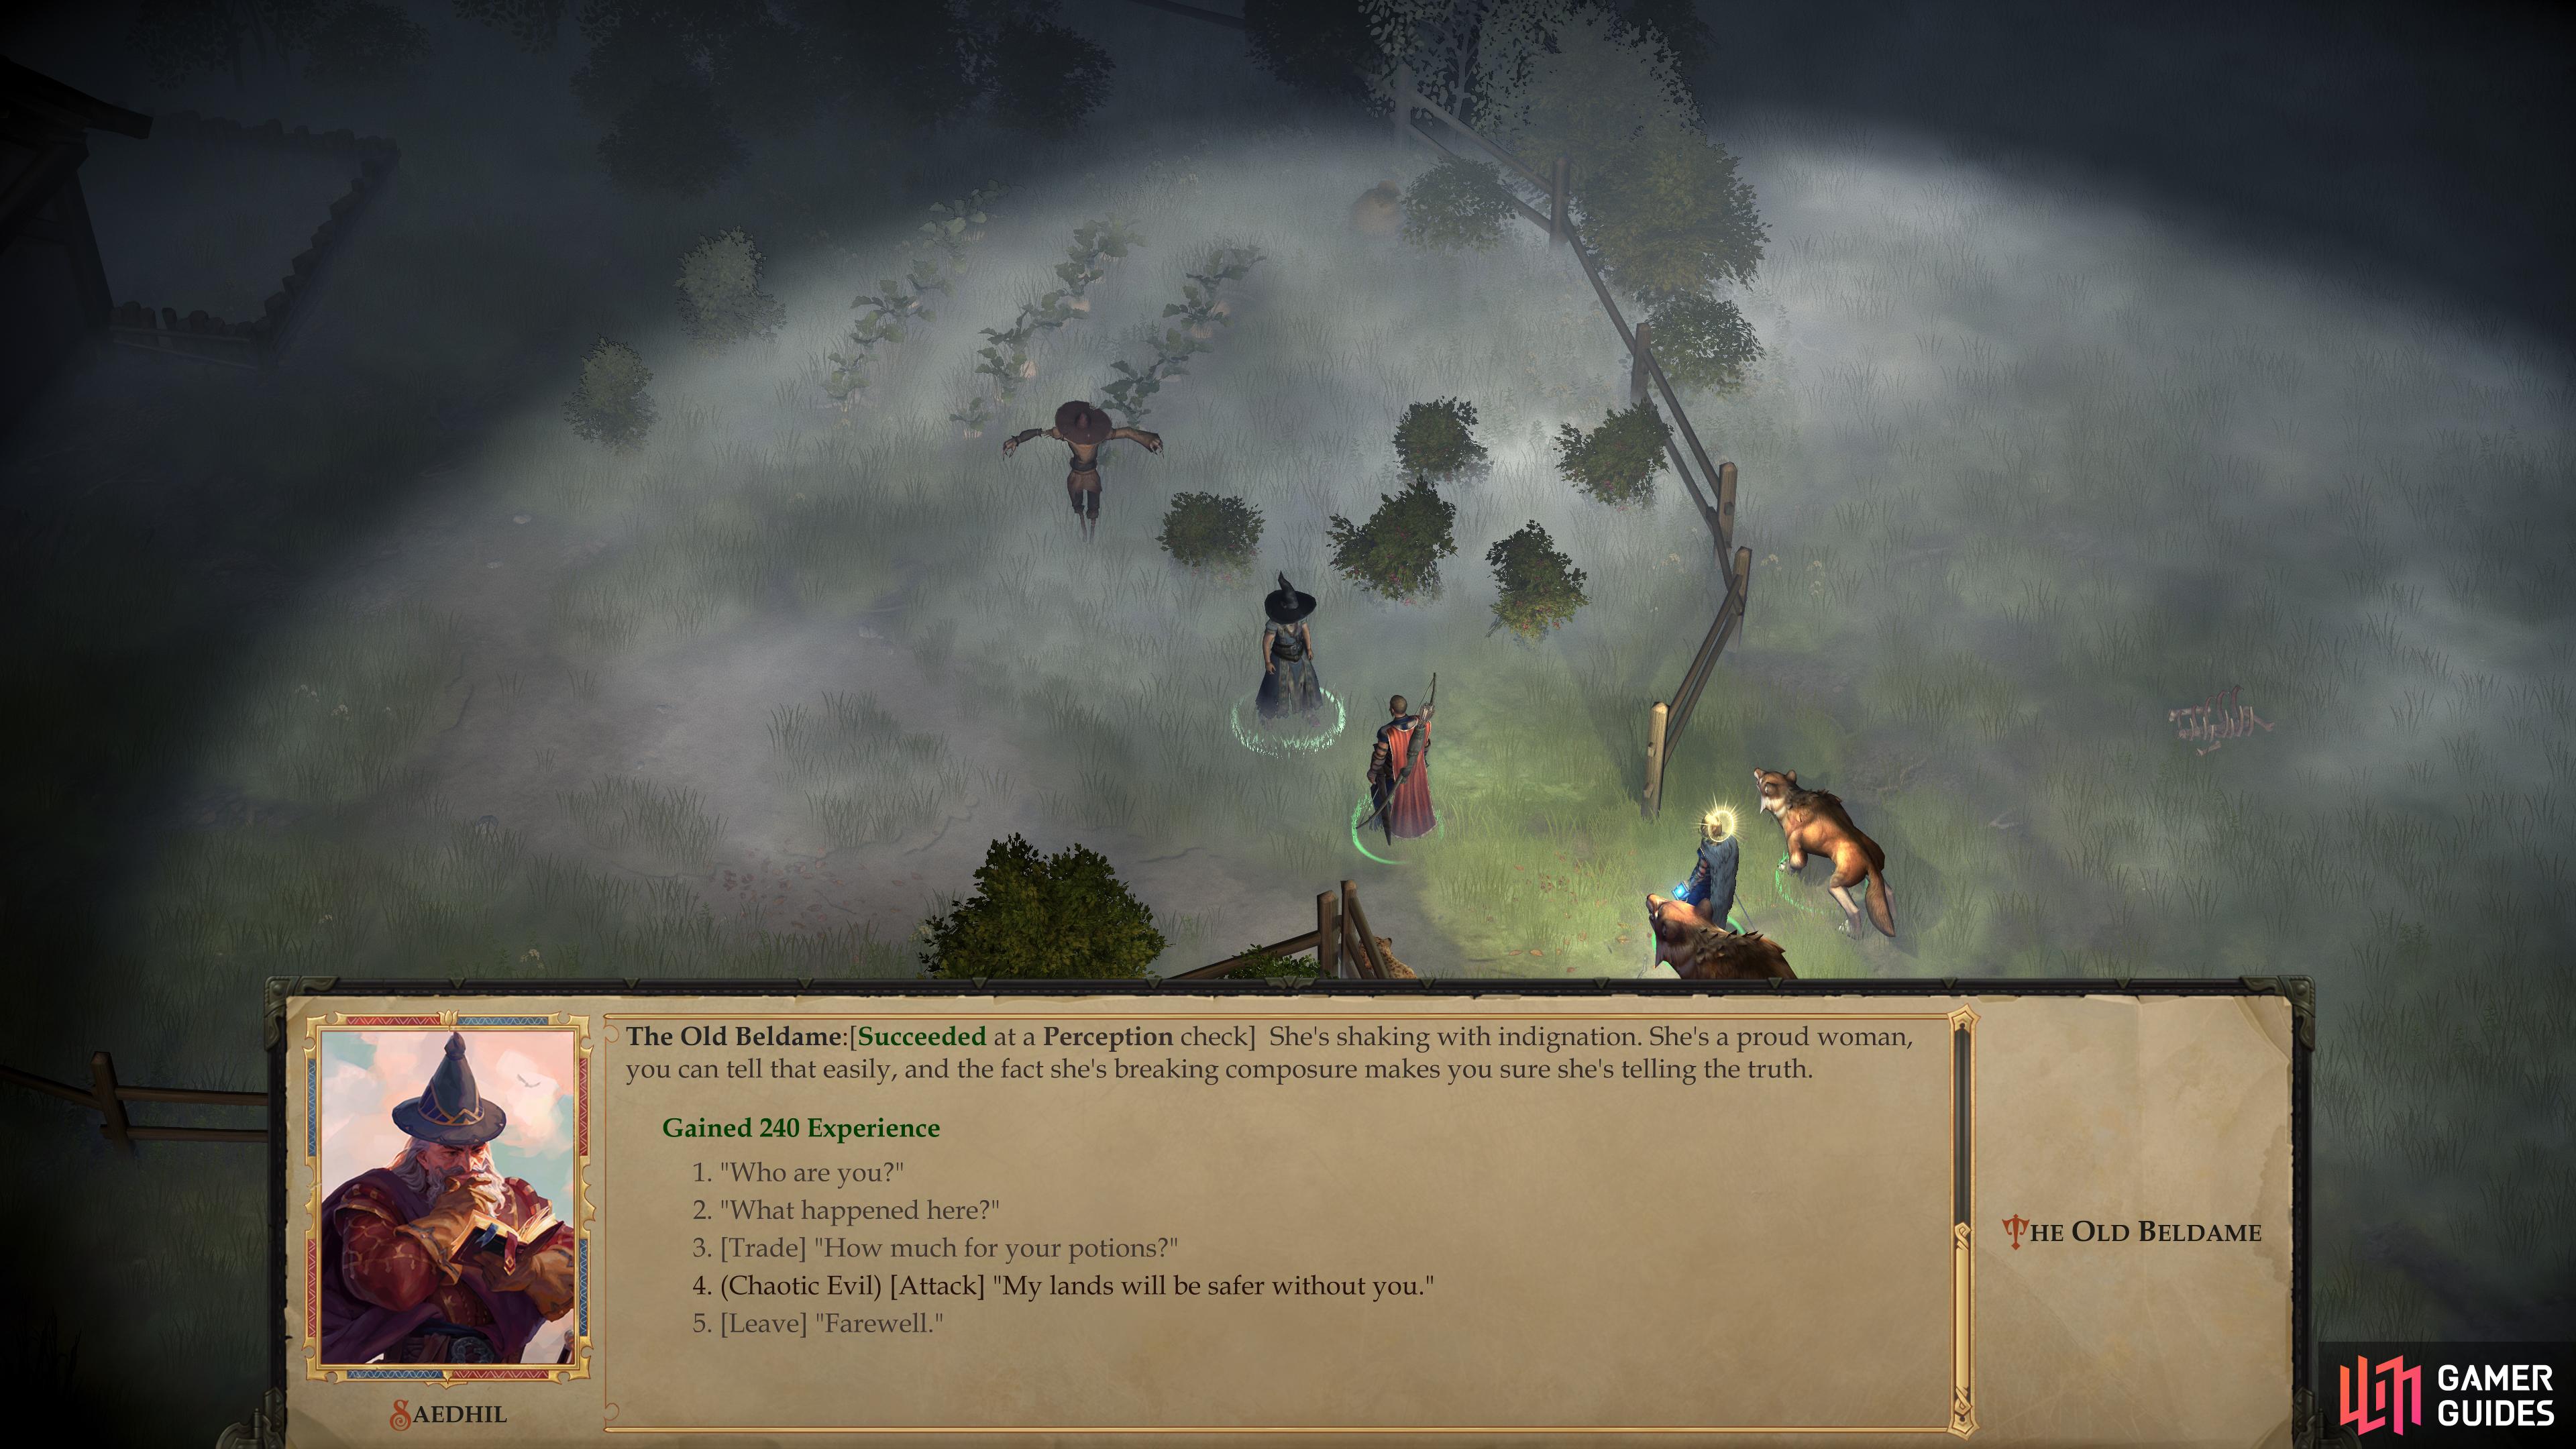
Talk to the Old Beldame to exhaust a lead.
Witch Runaround
Your first stop in this quest is the Swamp Witch’s Hut, where you’ll need to ask the Old Beldame about the missing kid. In response, she’ll instantly bring up cannibalism, which… doesn’t exactly make her look less guilty. If you succeed at a [Perception 26] check, however, you’ll be able to discern whether the witch is lying or not, gaining some XP in the process.
| Reward |
|---|
| 240 XP |
Well, that was a waste of time. Nothing to do now but return to Tuskdale and have a chat with Jenna, who should still be waiting in your throne room. When you talk to her, she’ll seem genuinely surprised that the witch didn’t abduct the boy before. By process of elimination, she concludes that an altercation between the two may have caused the scamp to run off to Candlemere Lake.
Searching Candlemere Lake
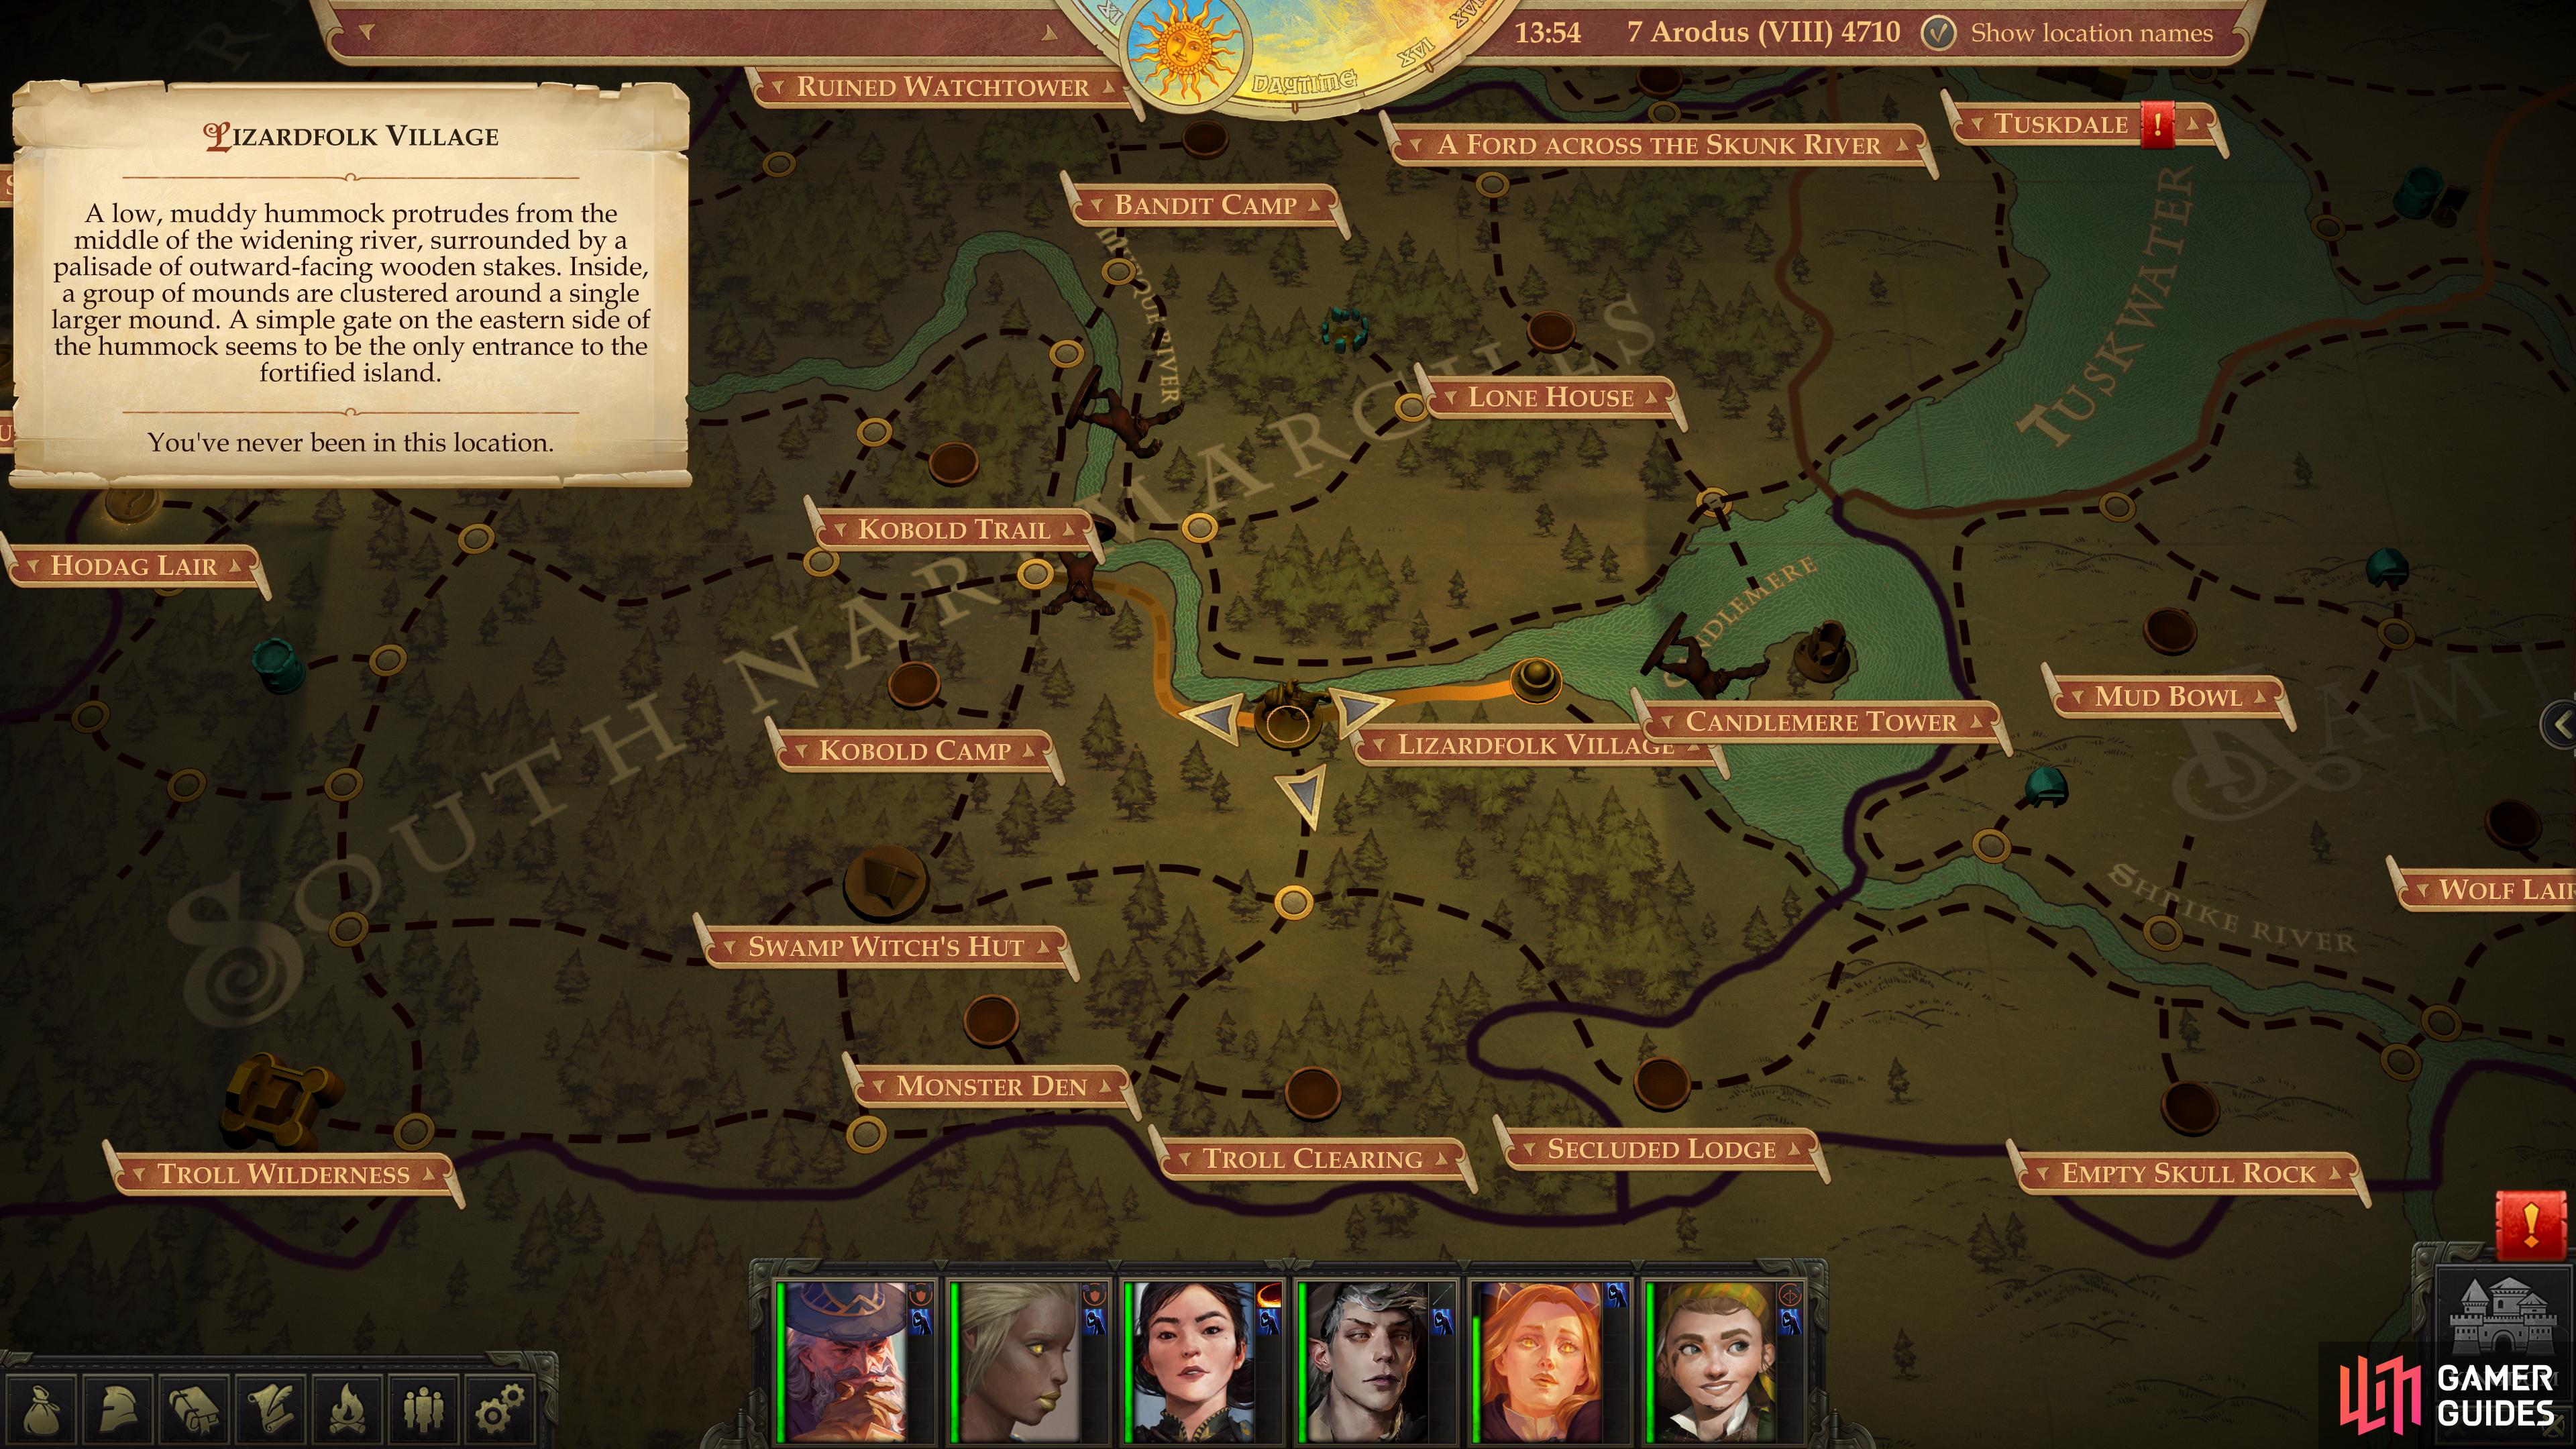
Leave Tuskdale once again and note that Candlemere Lake is southwest of the capital, just south of the larger body of water, the Tuskwater. Looks like you’ll just need to explore the coast of Lake Candlemere and hope you stumble upon a lead. From your capital, follow the directions below:
- West
- Southwest to reach landmark: A Ford Across the Skunk River
- South (cross the Skunk River)
- East to reach empty node from which you can reach Candlemere Tower
- Southwest (along Candlemere Lake and the Murque River)
- West (path veers north)
- Southwest (cross the Murque River)
- Southwest (path veers south)
- East (path winds south then east)
- East to Lizardfolk Village
There are two random encounters you’re likely to find along this journey, which is the primary purpose of all this running around, along with other practical aims such as treading new ground and moving closer to your ultimate objective. If you don’t get these encounters (the second one is the one that really matters) just roam the coast of Lake Candlemere and along the Murque River until you get it.
Random Encounter: Troll Vanquisher
In one random encounter you may find a trio of trolls near a river. When the trolls spot you they’ll recognize you and comment on your recent feats before wisely deciding to flee. You can attempt to chase them down and with a bit of luck you’ll pick some of them off, but otherwise there’s little else to do with this encounter.
Help a beleaguered group of Lizardfolk led by Rashor,
then talk to him and he’ll tell you a bit about Lizardfolk tribal culture.
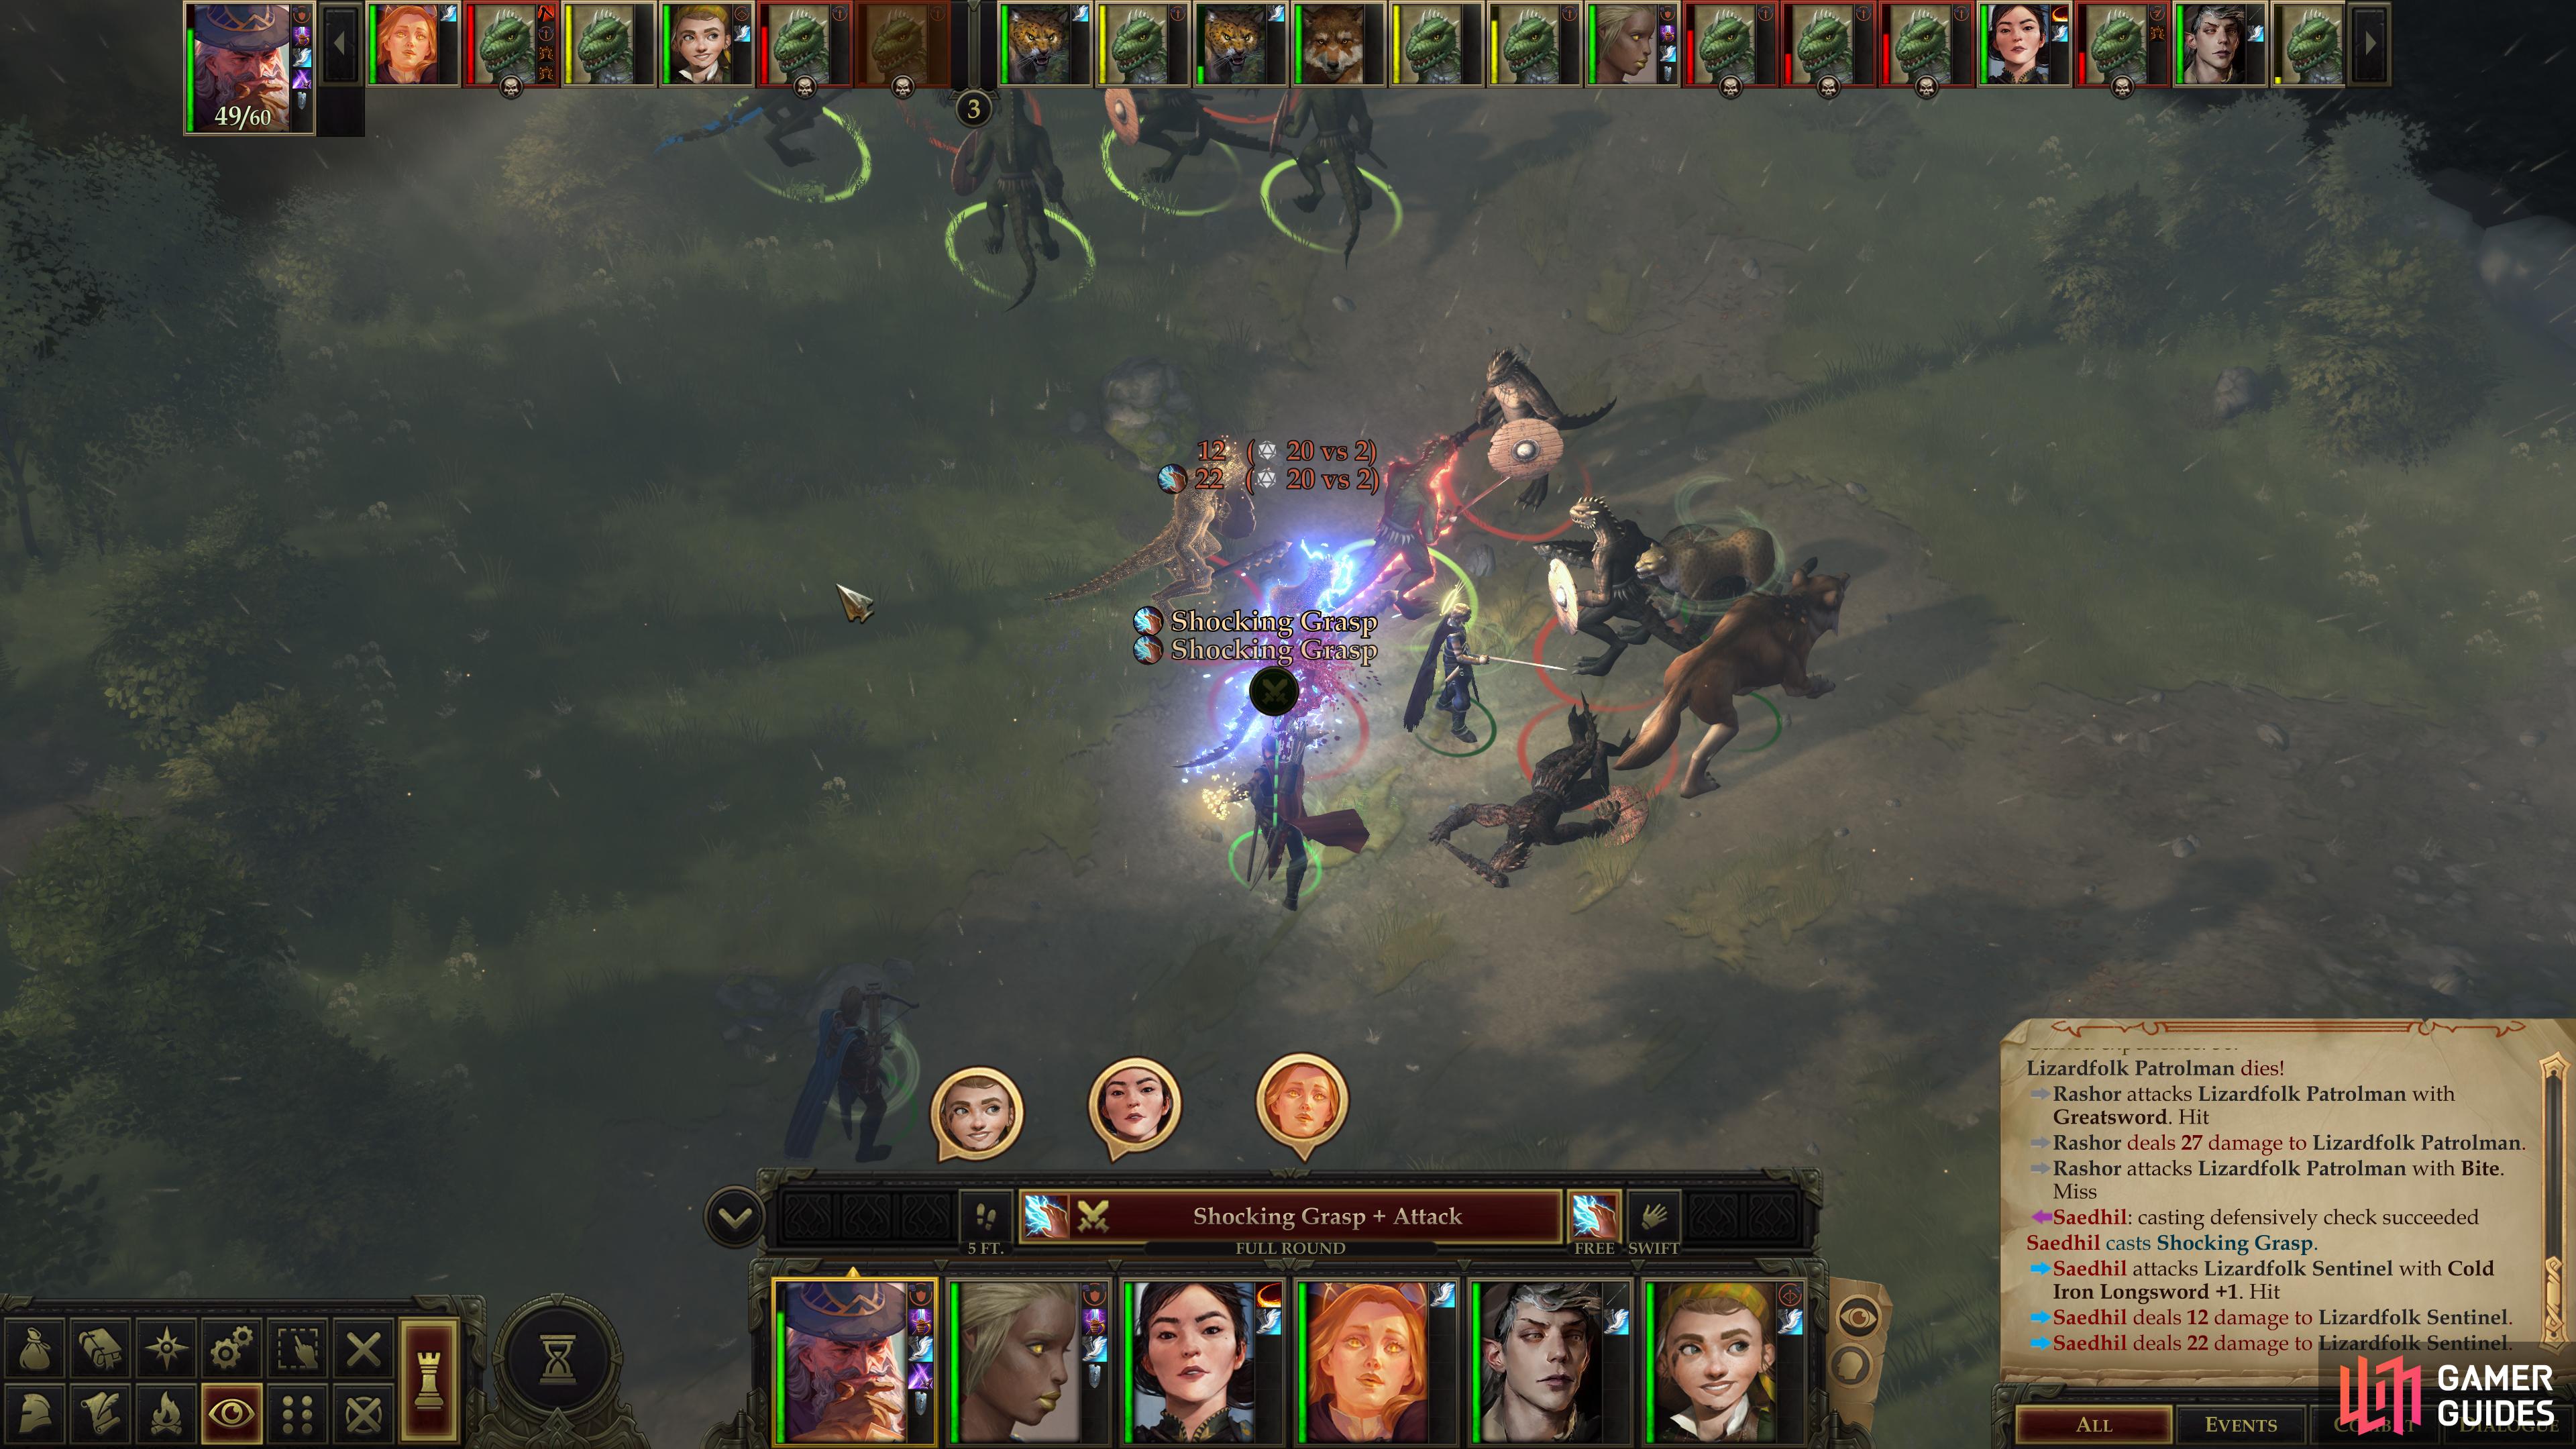
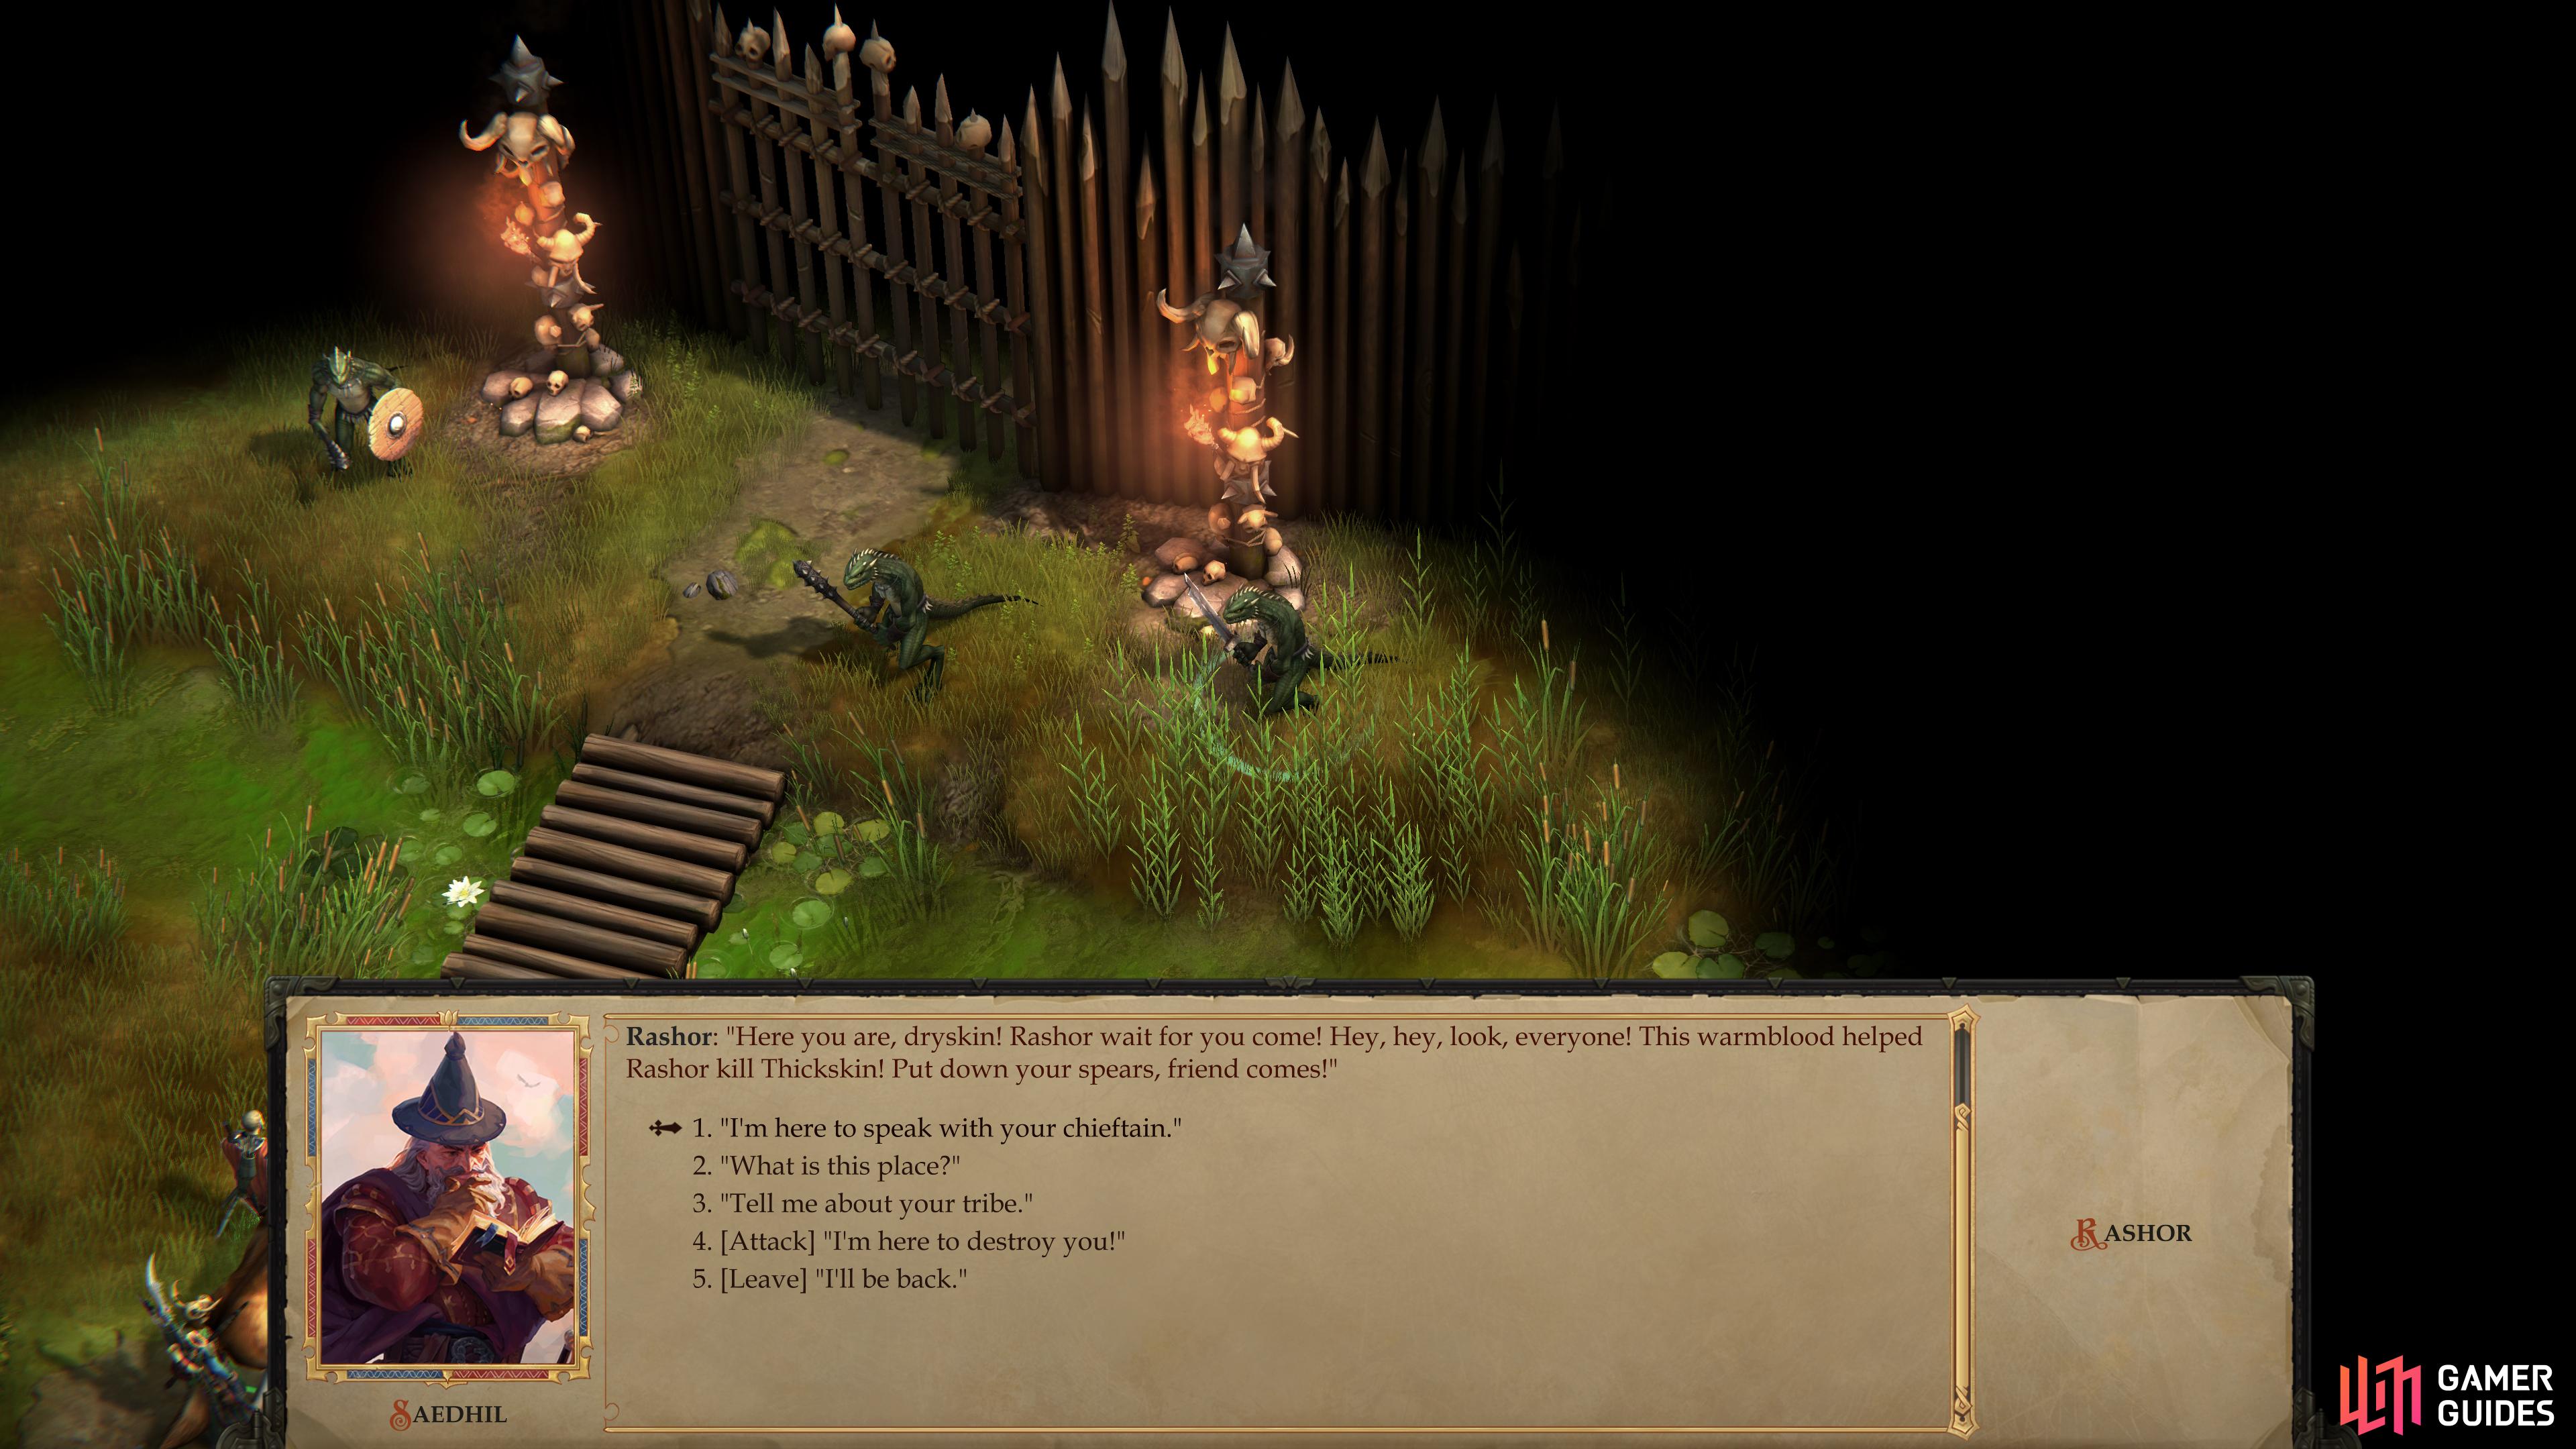
Random Encounter: Rashor’s Rebels
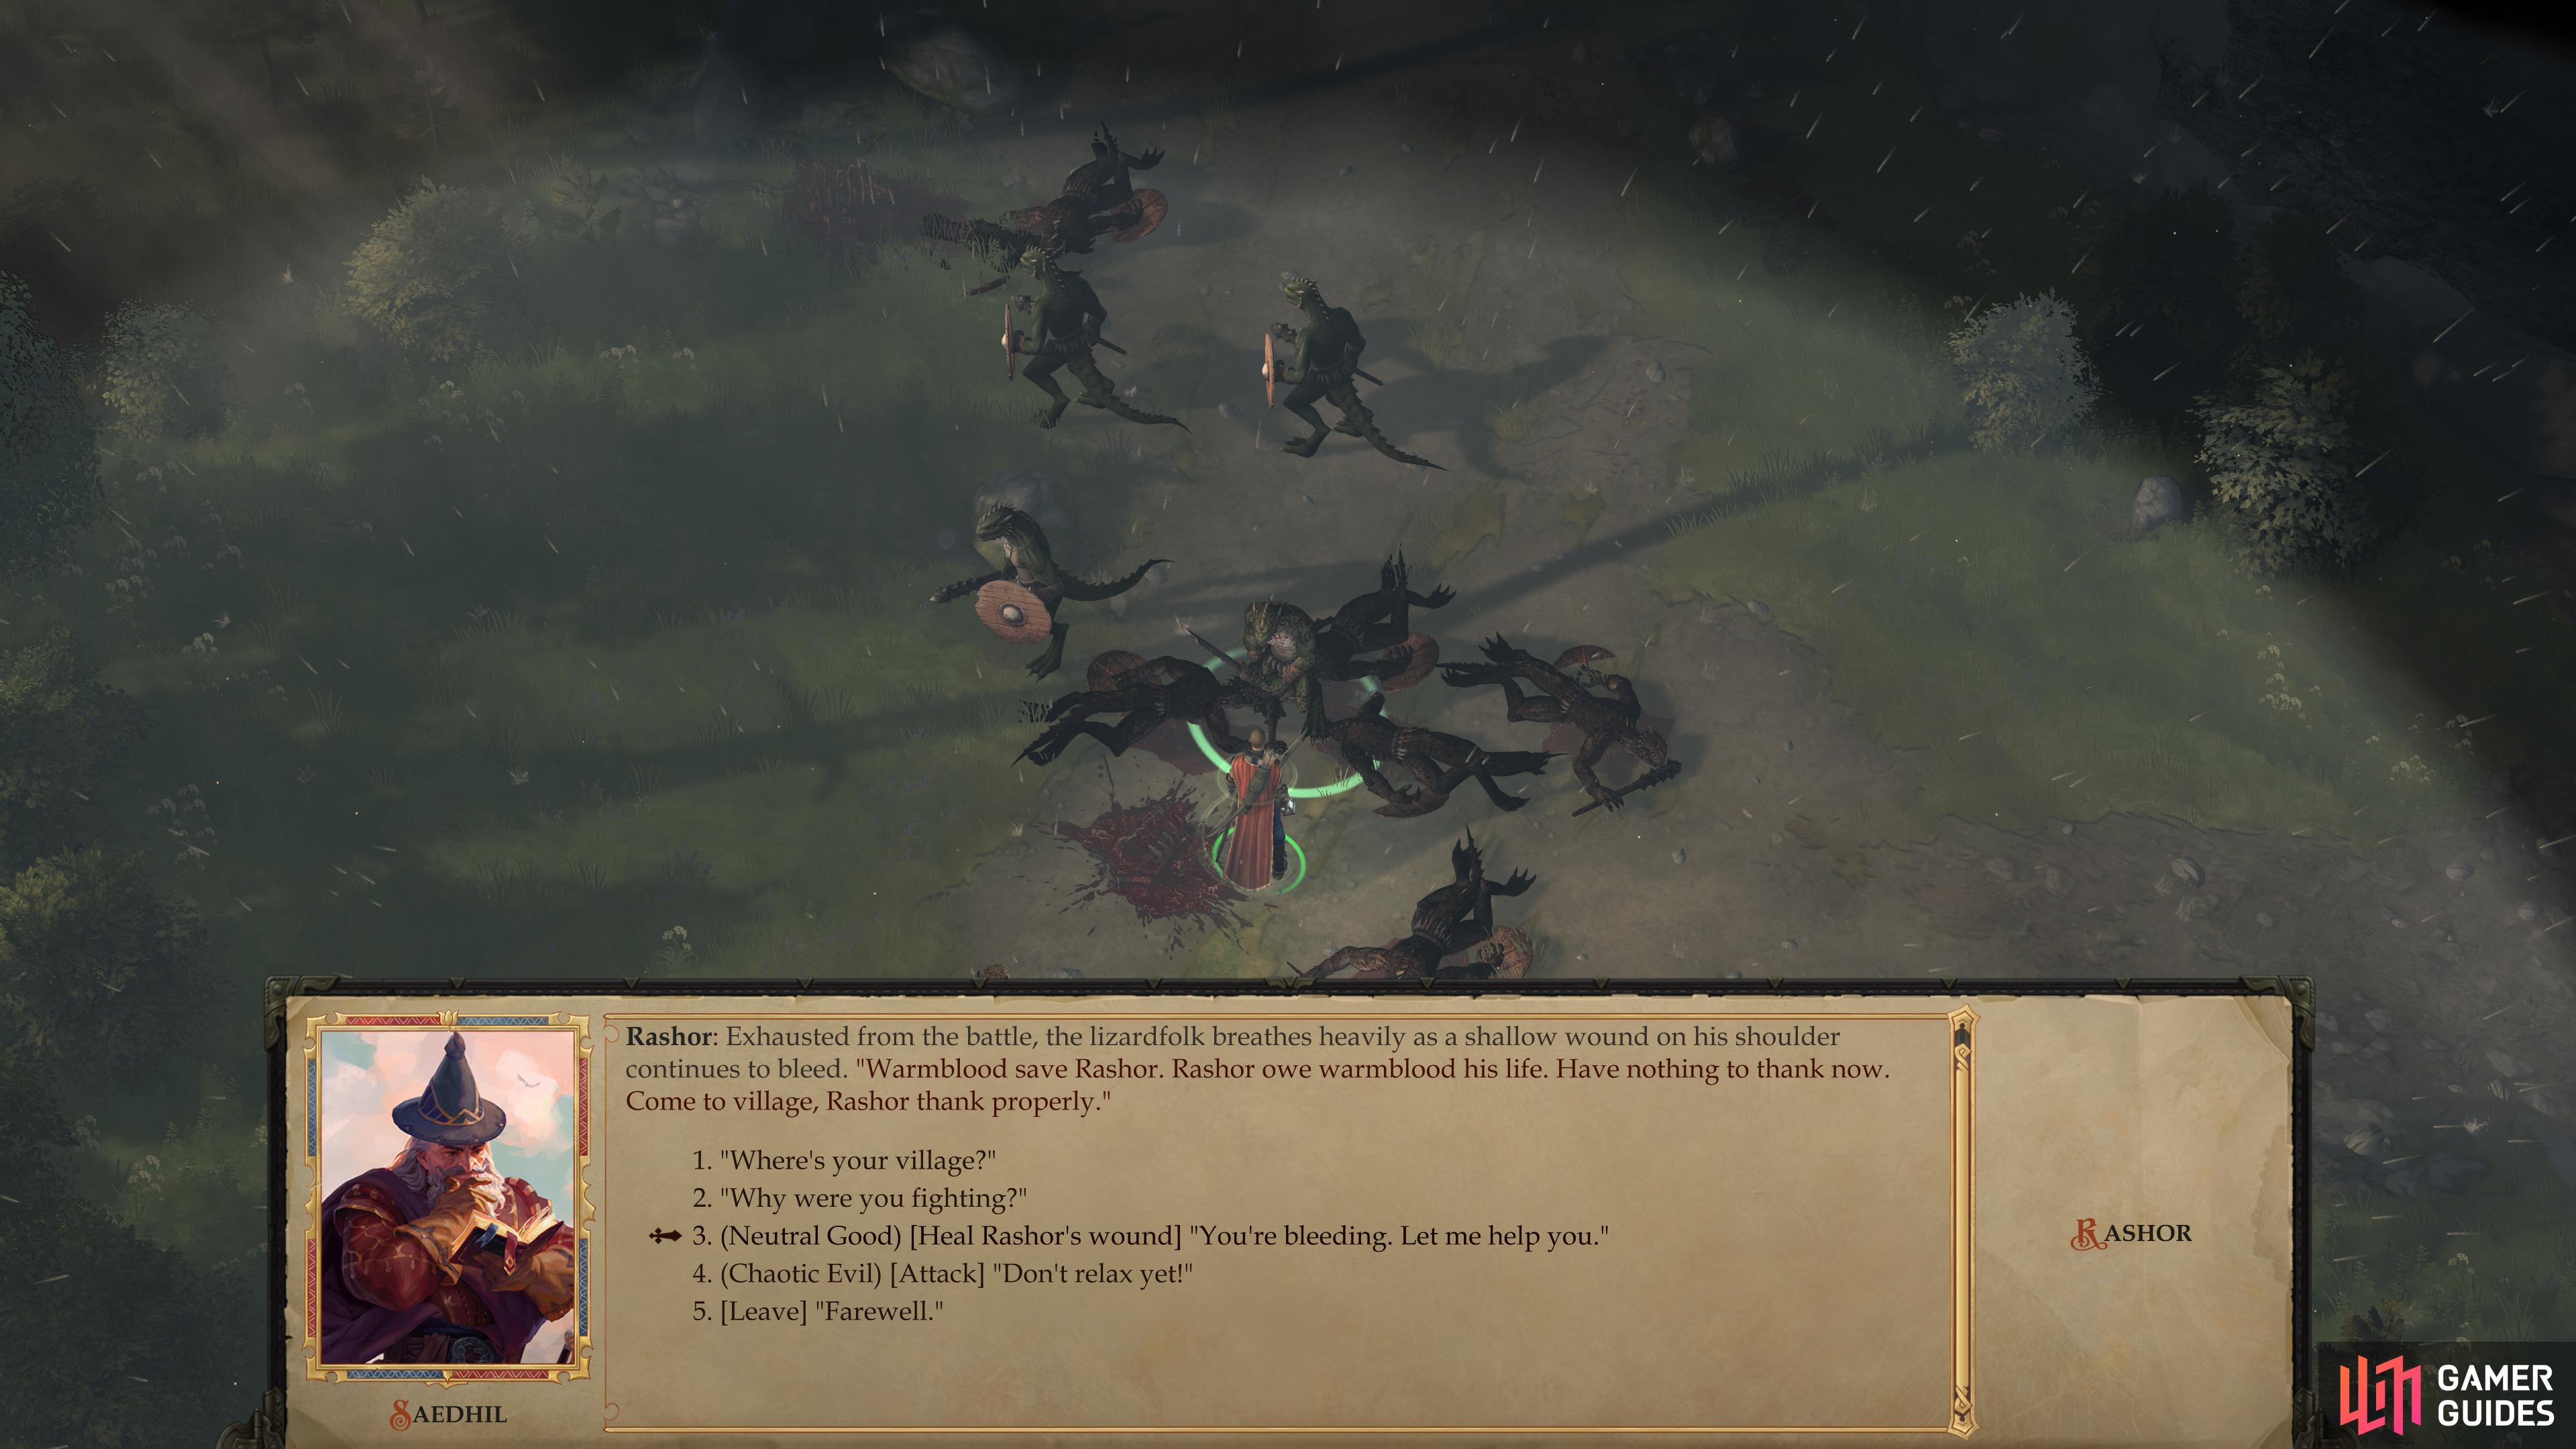
The more interesting encounter involves two groups of Lizardfolk fighting, the smaller of which is led by an individual named Rashor. Fight off the hostile Lizardfolk (4x Lizardfolk Sentinels and 6x Lizardfolk Patrolmen) - which have decent Hit Points, Attack and damage output, but terrible Armor Class - then talk to Rashor afterwards.
If you start out by healing Rashor ([Neutral Good]) you’ll gain some experience, after which you can exhaust his other dialog options to learn that there are two types of lizardfolk, the “Longtail” tribe and the “Thickskin” tribe. Rashor belongs to the former and claims to be no enemy to humans (save for the odd tasty traveler, of course) and paints the Thickskins as irredeemably belligerent. Most importantly, Rashor will have invited you to his village, which is on the southern end of Candlemere Lake. Having no other leads, perhaps you can look for Jenna’s son there? If you choose the standard [Chaotic Evil] action to attack Rashor, you can nab a Greatclub +1 off of him.
| Reward |
|---|
| 67 XP |
Outside of the Lizardfolk Village you’ll find an exile named Kagar the Rattler, who will tell you about the situation with the reptiles beyond.
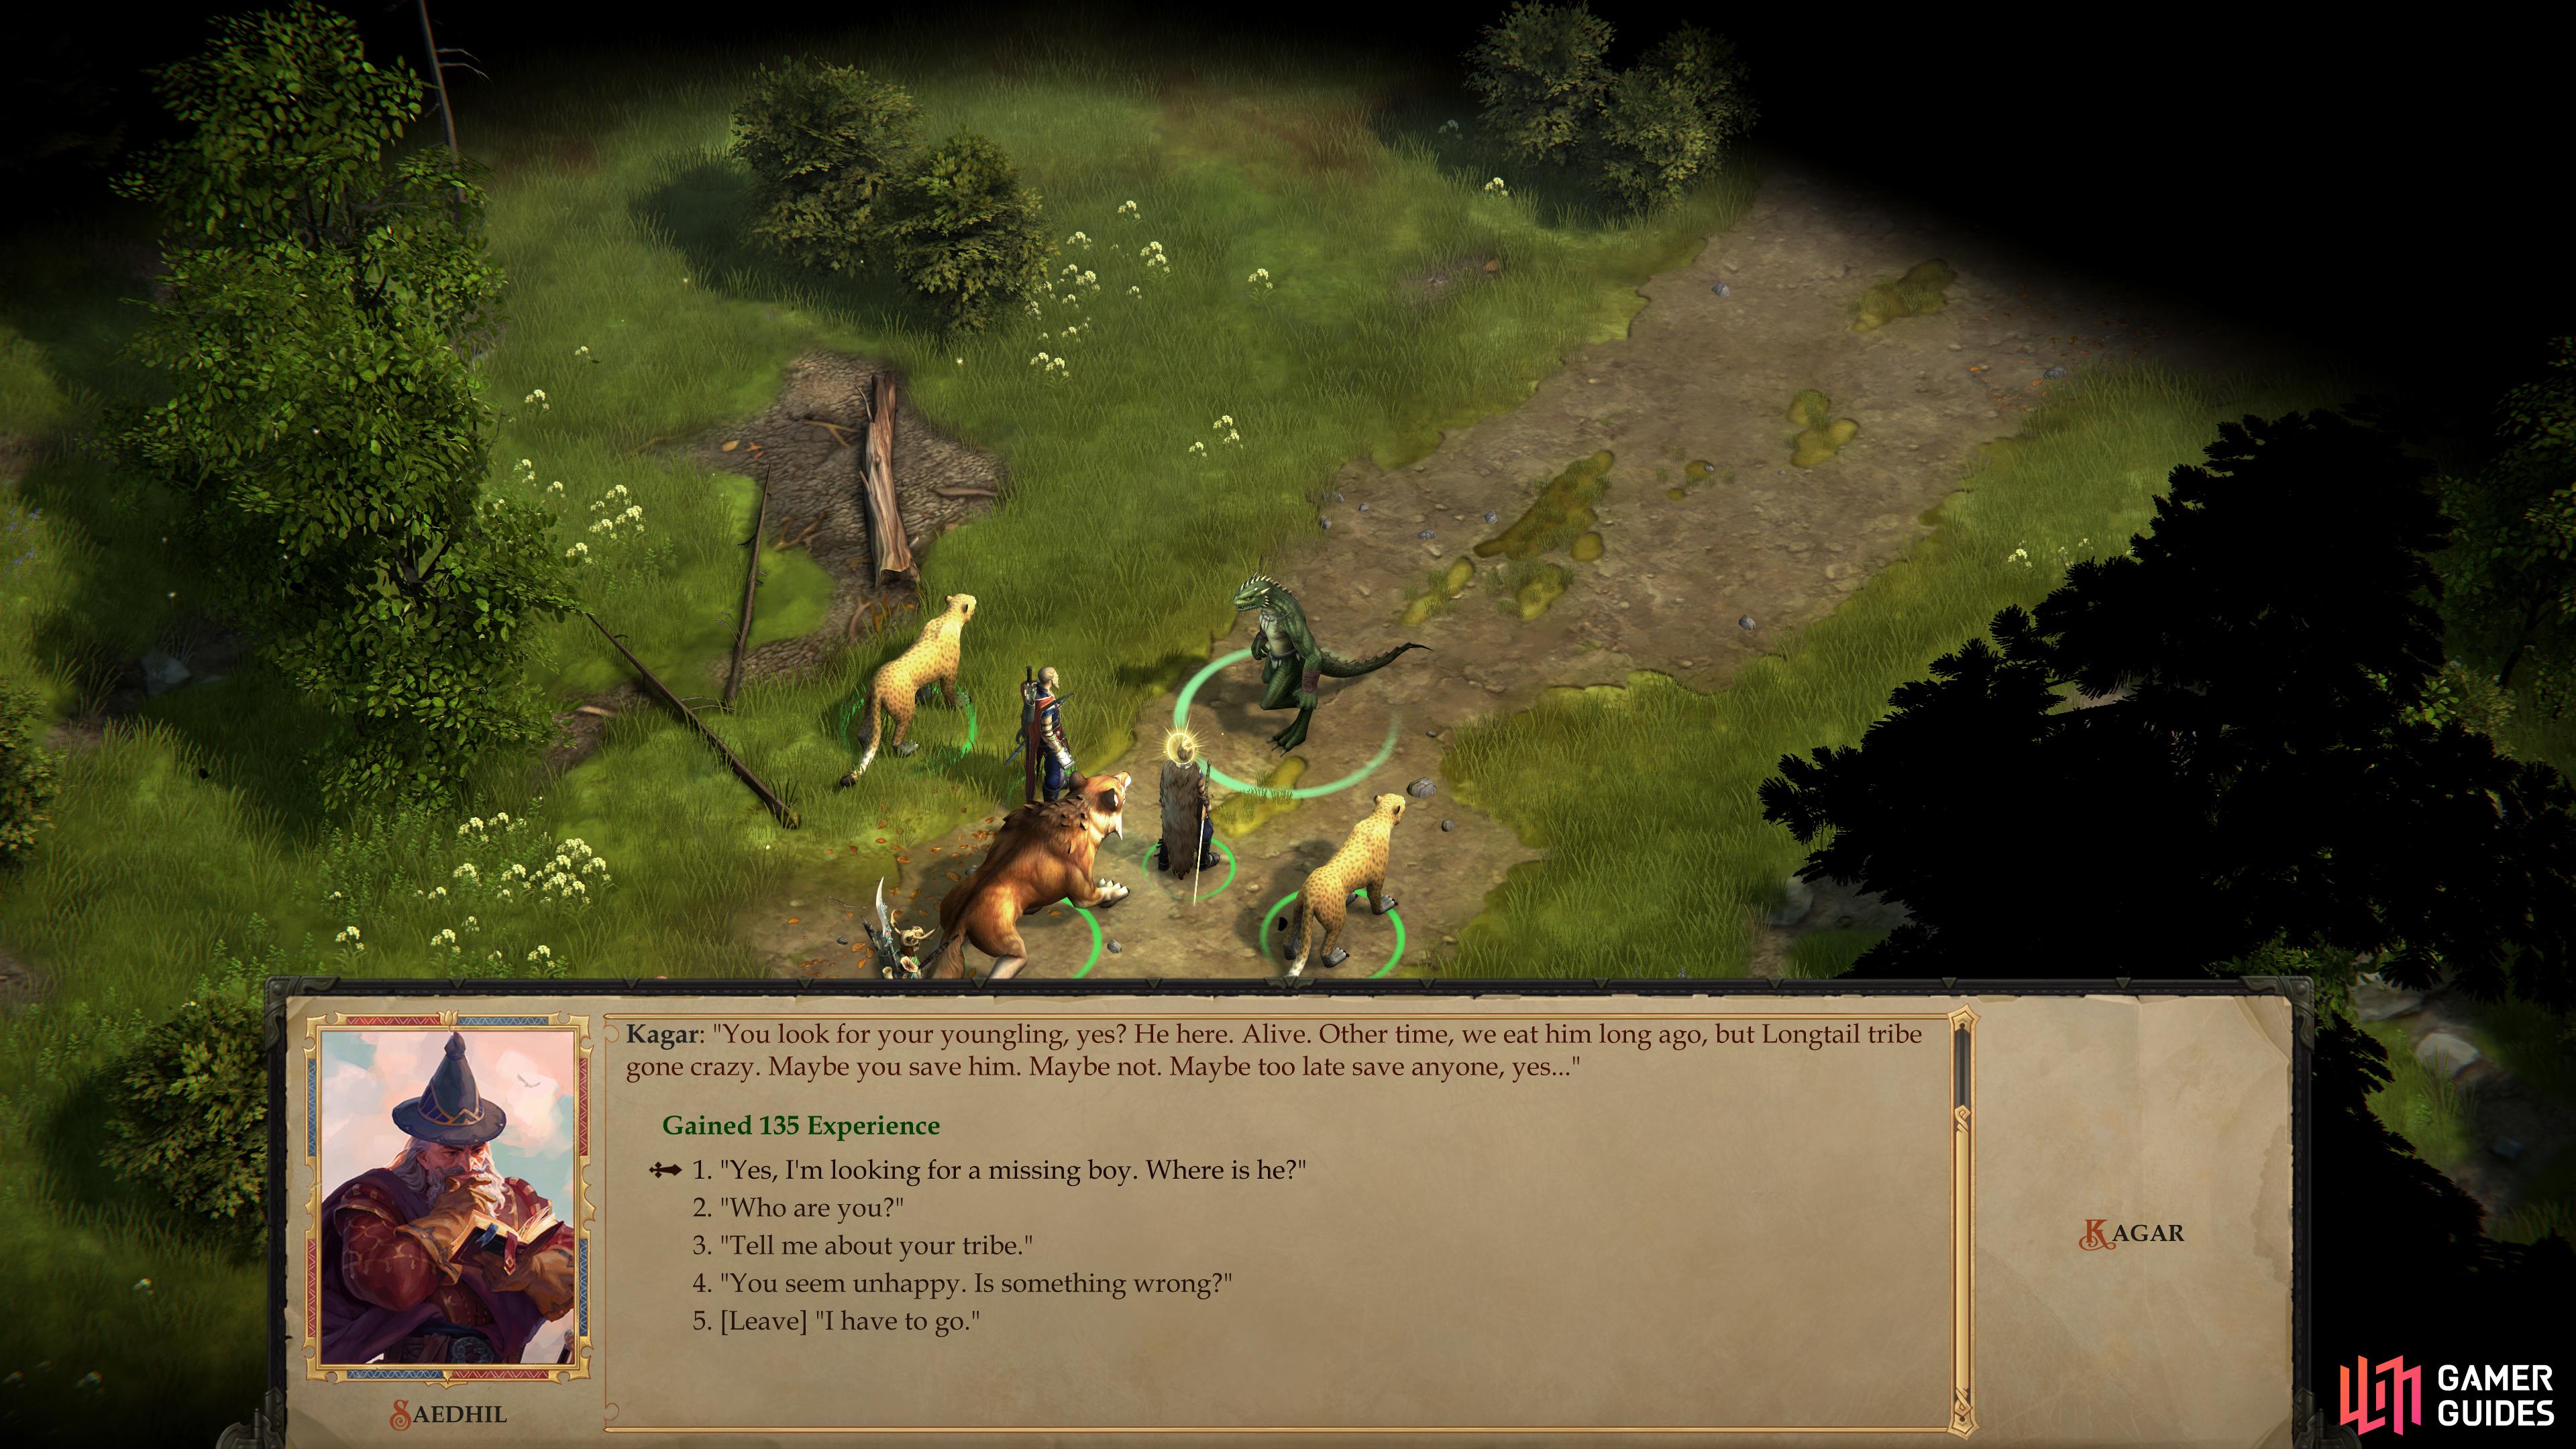
Lizardfolk Village: Kagar the Rattler
Sure enough, near where the Murque River empties into Lake Candlemere you should find the Lizardfolk Village map marker.
Travel there and when you arrive you’ll immediately be pestered by an elderly lizardfolk named Kagar, who wastes little time confirming that the “youngling” you’re looking for is here. Since it seems you’re bound to be searching this area in depth - which will doubtlessly involve dealing with lizardfolk tribal politics - you’d be well served by questioning Kagar thoroughly and learning about their past glory and present problems. Apparently a “Great Ancestor spirit” claiming to be the invincible hero Strishchak came from the “Forbidden Island” in the middle of Lake Candlemere and convinced their leader - Chief Vesket - of its authenticity. Naturally the spirit has made some… esoteric demands, but its aid in battle with the Thickskins has thus far earned it the loyalty of the Longtails. Unfortunately for you, Jenna’s son, Tig, is in the lizardfolk village, forcing you to meddle in this business.
| Reward |
|---|
| 135 XP |

(1 of 4) The wilderness around the Lizardfolk Village is crawling with various reptiles and amphibians.
Lizardfolk Village: Exploring the Wilderness
There are two ways to get into the Lizardfolk Village, once of which involves diplomacy, the other, subterfuge. We’re not going to advocate for either option yet, but the latter case forces us to brave the marshes nearby, which is crawling with hungry, hostile wildlife. Hungry, hostile wildlife that guards treasure. Might as well keep our options open and go explore the wilderness around the village, kill what we must, collect what treasure we can, then consider our options further from there.
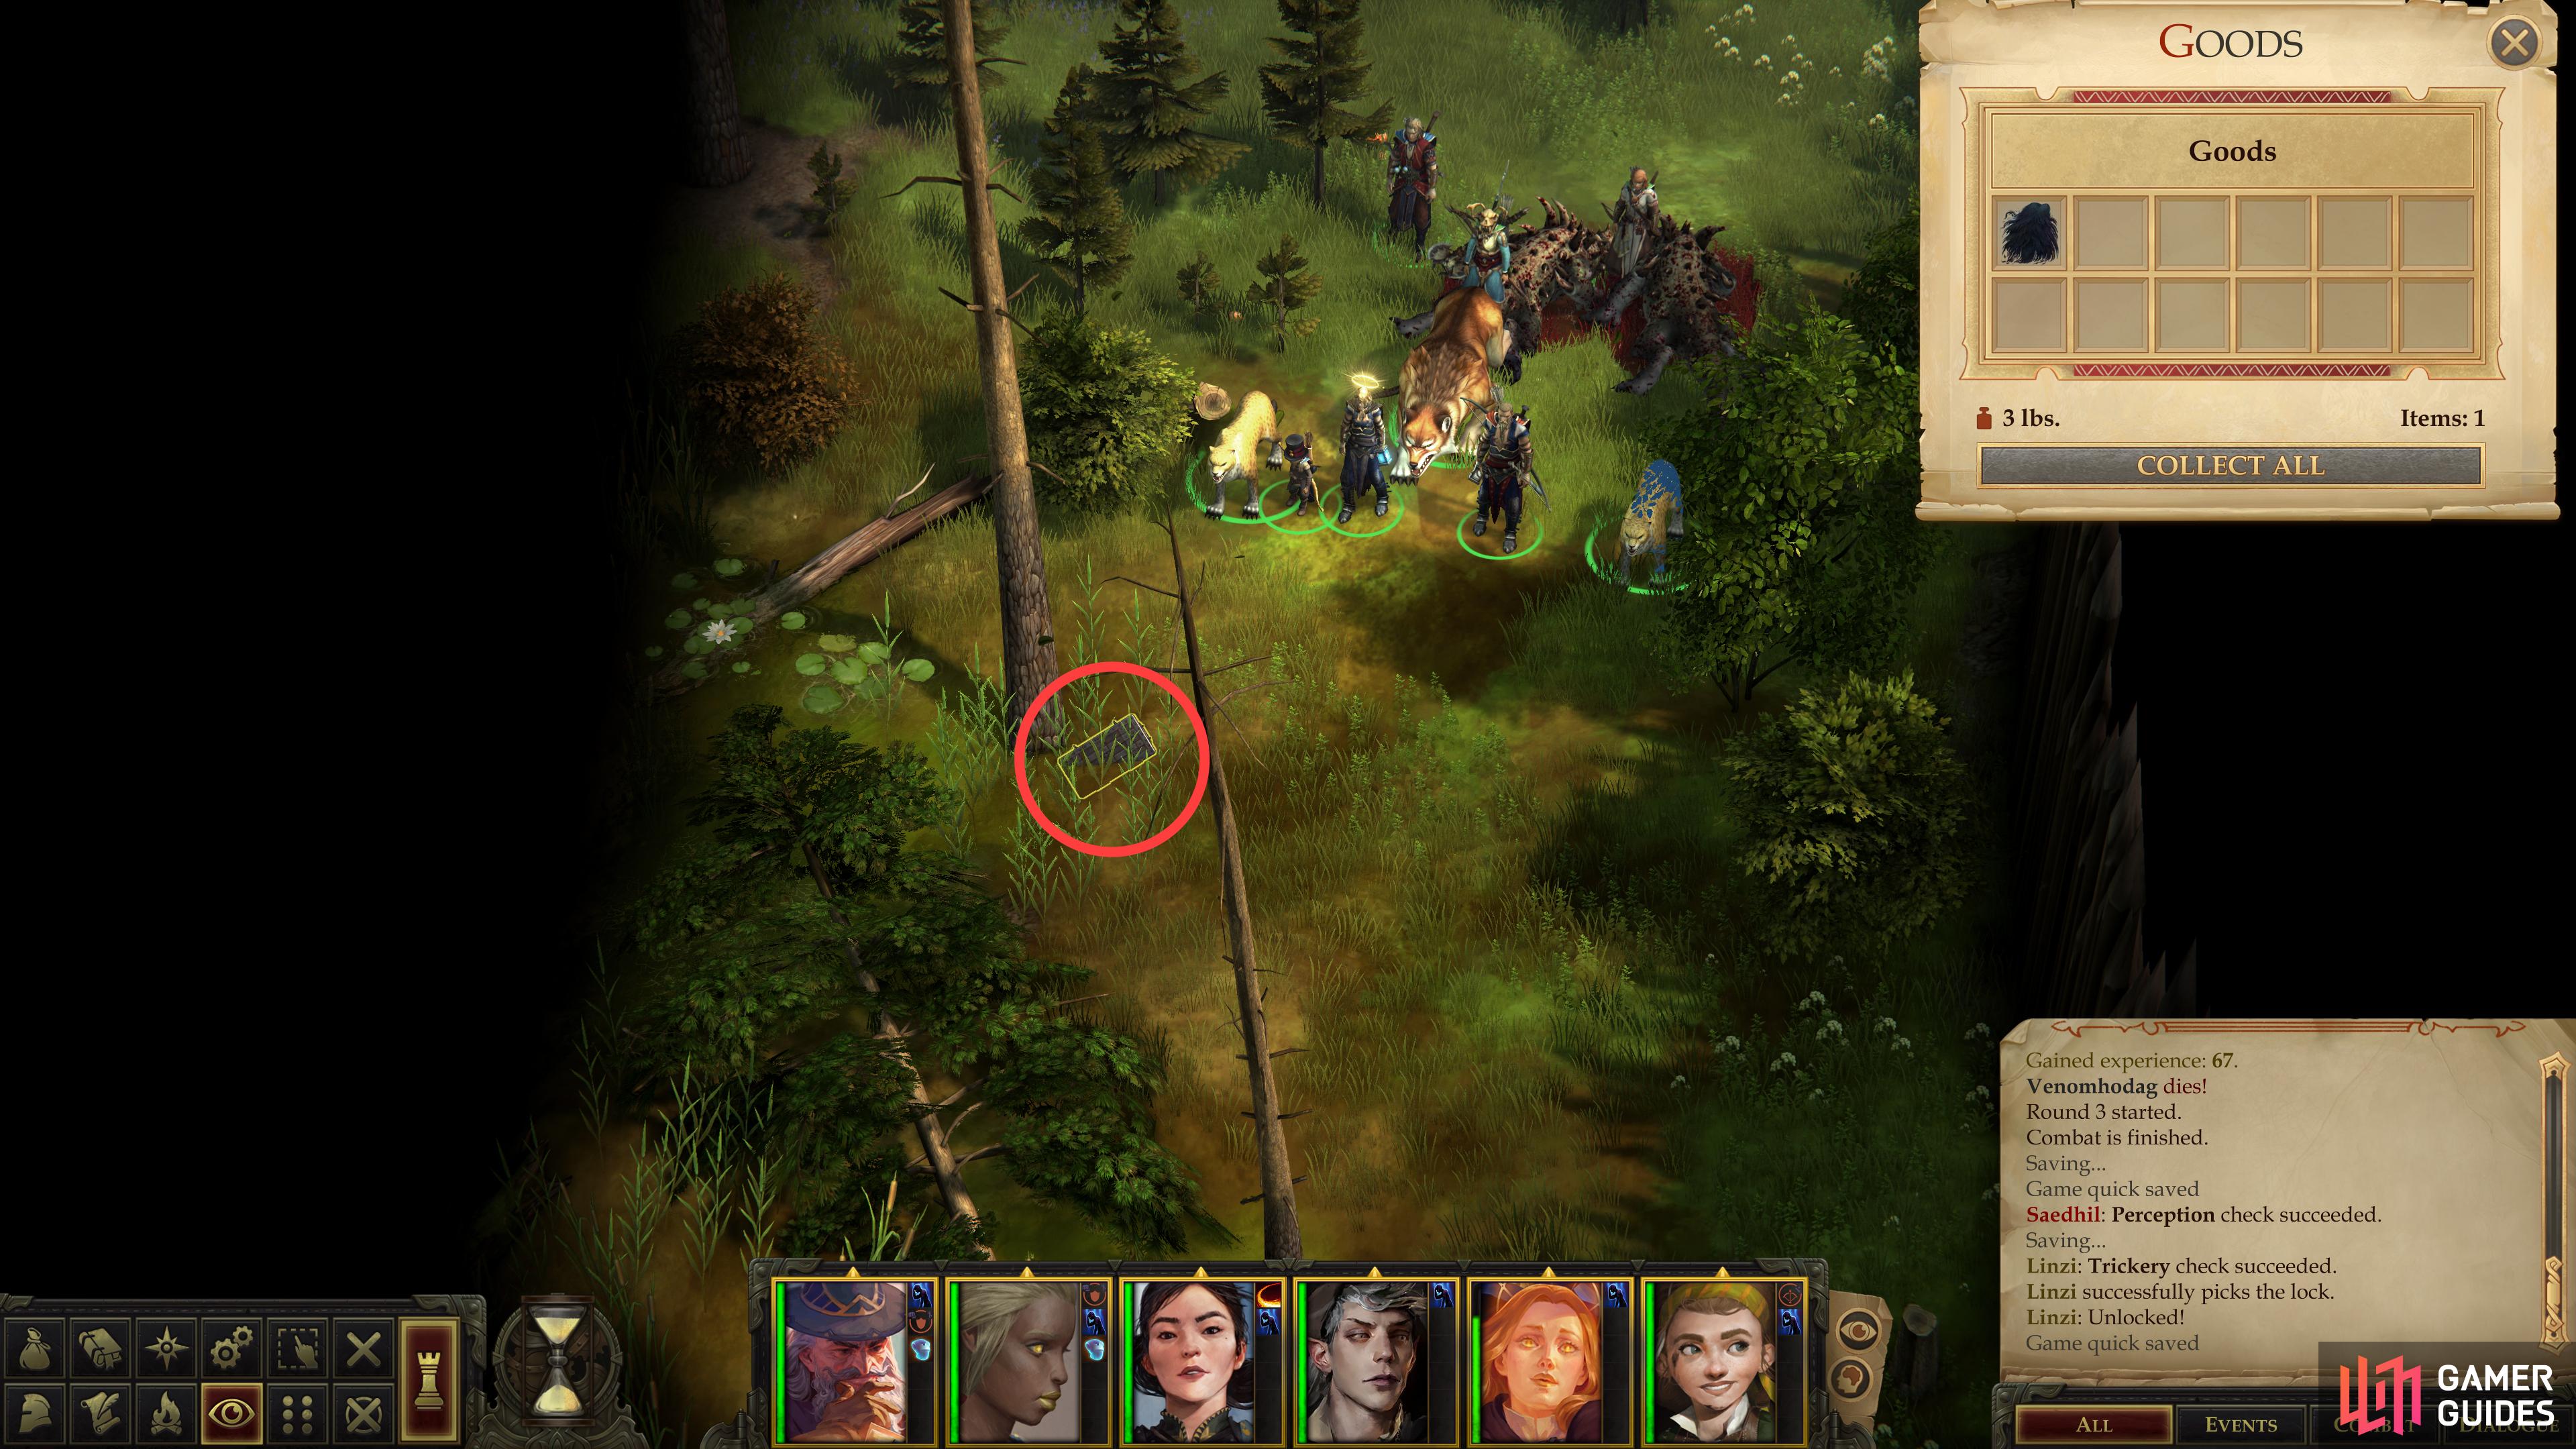
From where you encounter Kagar head east into the wilderness to find several Greater Monitor Lizards - paltry foes that frankly feel a chapter removed. Crush them, loot some branches for a Token of the Dryad, then continue east to find several Giant Poisonous Frogs nesting in a swamp. Again, these foes are pushovers, and even without spellbuffs you shouldn’t have a problem putting them down. Once you do, search for a chest [Perception 21] hidden under an overturned boat that contains a Dart +2 and some other, less compelling loot.
Next continue north along the eastern edge of the map and shortly you’ll find yourself running along the eastern palisade of the Lizardfolk Village. Continue north until you find another Giant Poisonous Frog along with two Greater Giant Frogs - a step down in competition in an area full of unimpressive foes. Crush them, then loot a stump for another Token of the Dryad.
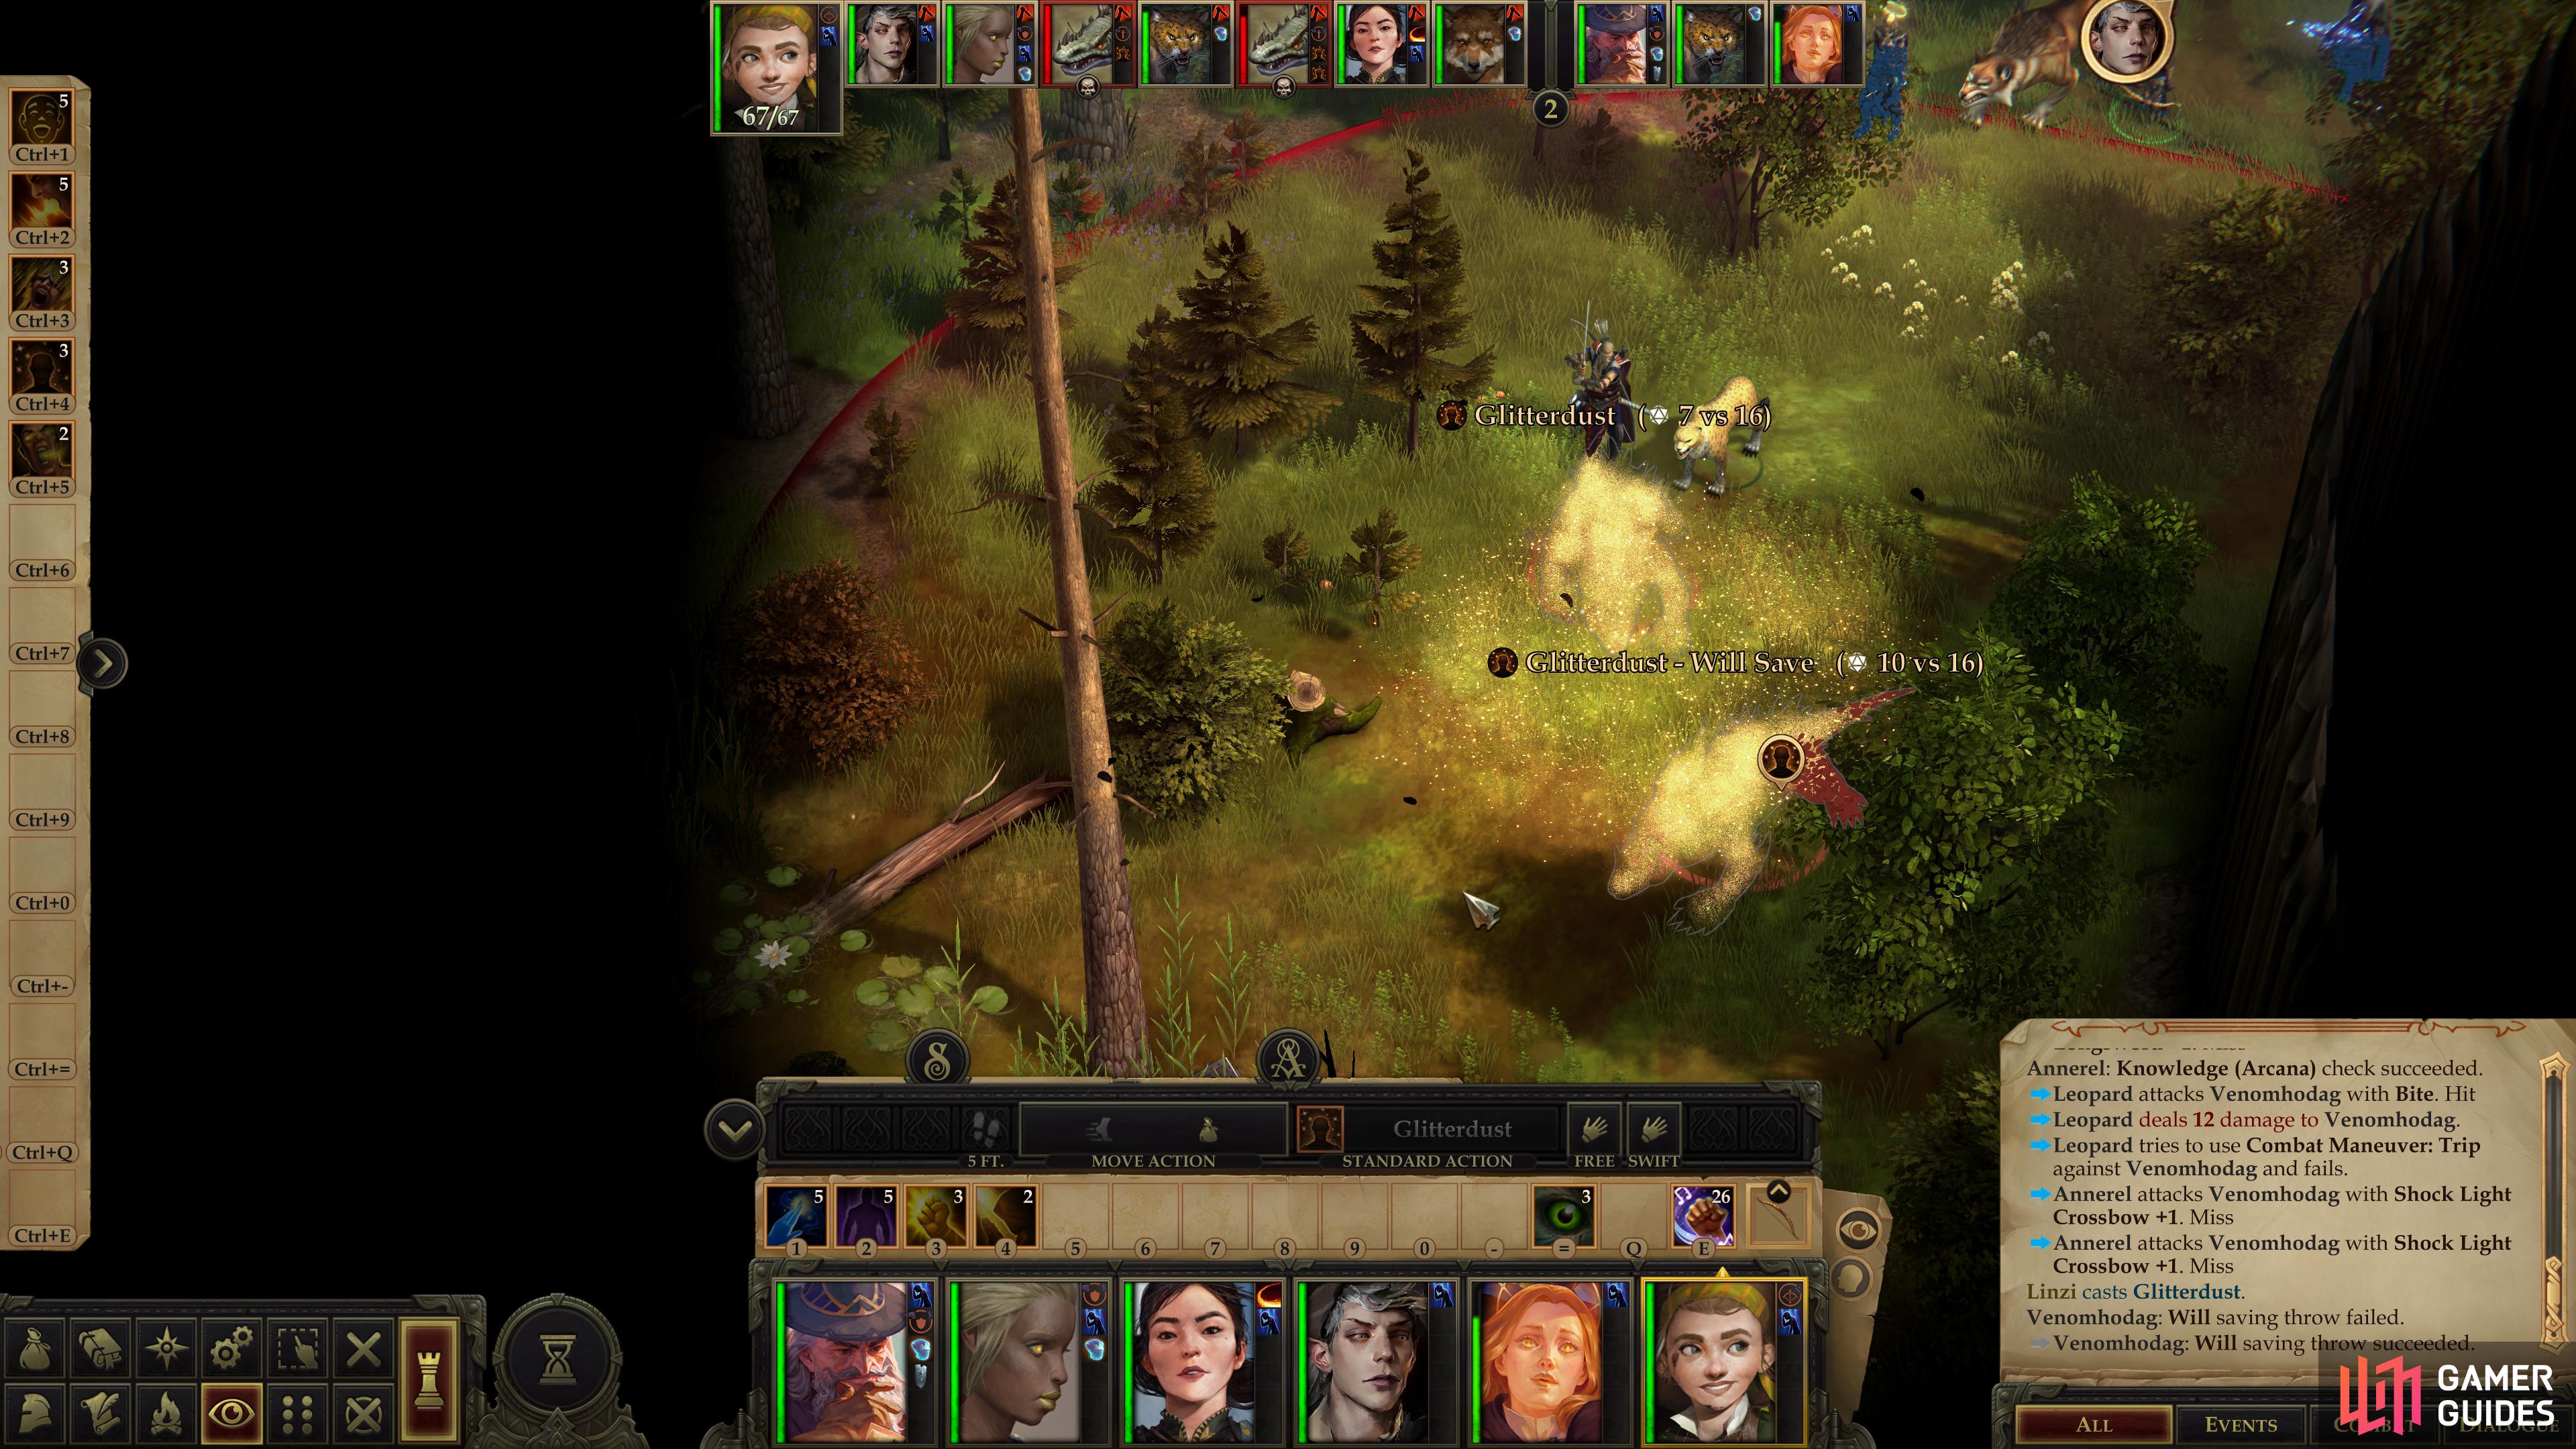
Use Glitterdust to neutralize the concealment the Venomhodags enjoy,
then search a chest to find a “Cloak of Shadows”.
If you’re keen on greater challenges, don’t fret, as there’s a somewhat more robust encounter to the west. Make your way west along the northern end of the map and you’ll find a pair of Venomhodags lurking in ambush. You may be familiar with these critters from the Swamp Witch’s Hut steak, but even if you aren’t, all you need to know is they have a moderate Attack bonus, a low Armor Class and can inflict poison with their attacks, of which they get many. Their most defining feature, however, is their concealment, which will cause 50% of all incoming attacks to miss outright. The answer, of course, is Glitterdust, so be sure to lead with a tank to lure the Venomhodags out, blast them with Glitterdust, then cut them down. Not a great challenge, but at least the Venomhodags were worth using a spell on.
Continue south from the Venomhodags and keep an eye out for a chest [Perception 25] [Trickery 19] hidden in a swamp. Unlock it and loot it to score a Cloak of Shadows, which gives the wearer a +10 bonus to all Stealth checks and immunity to blindness and dazzling. With that, the area outside of the palisade is cleared. Time to get inside the Lizardfolk Village.
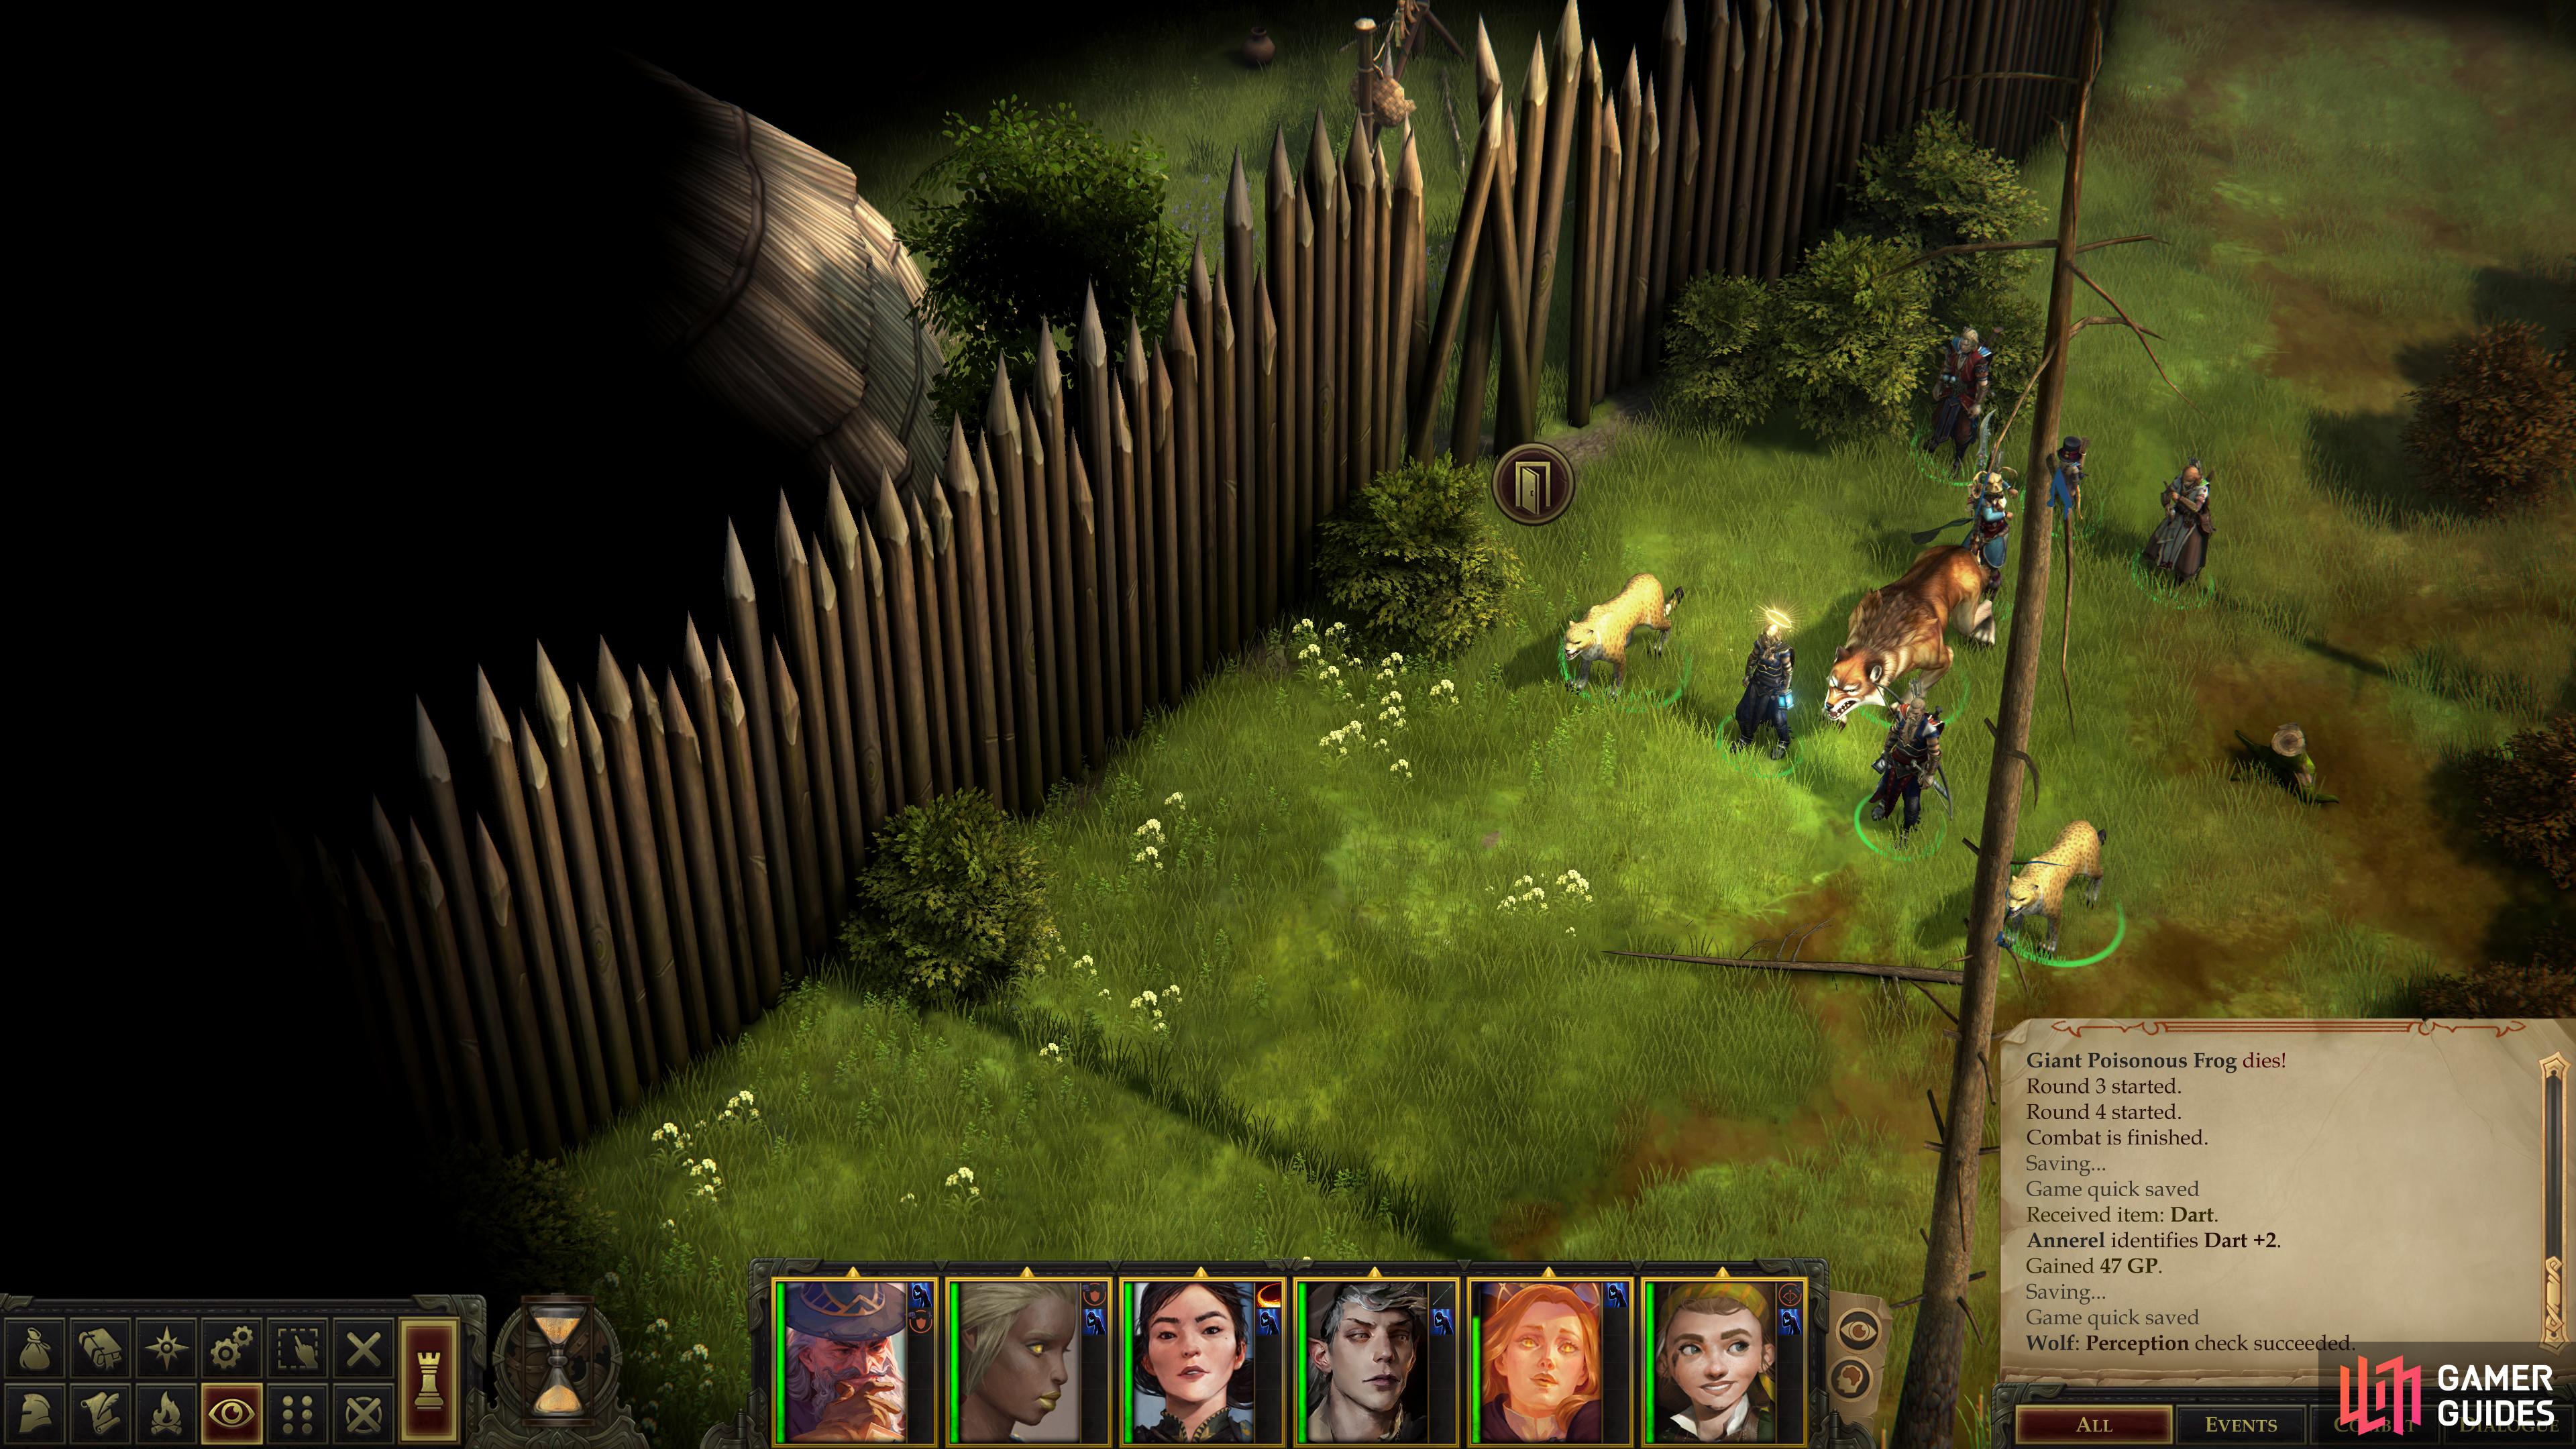
To get inside the Lizardfolk Village, you can either explore a weak spot in the wall,
or try to talk you way in through the front gate a - task made significantly easier if you helped Rashor earlier.
Lizardfolk Village: Entering the Lizardfolk Village
There are two ways to get into the Lizardfolk Village: either via the front gate, or by sneakier, less direct means. If you want to try your luck with diplomacy, continue north to reach a bridge leading to the Longtail village where you’ll be called out to by the lizardfolk guarding the gate. If you rescued Rashor earlier, he’ll have made it back home and will get you inside. Otherwise, you’ll either have to succeed at a [Diplomacy 15] or [Intimidate 15] check, or give the guards ten Camping Supplies and Ration to bribe your way inside.
If you wish to sneak in, make your way east, then north along the moat and walls respectively that surround the village, stopping to dispatch several Greater Monitor Lizards as you go, assuming you didn’t do so earlier. When you spot a damaged section of palisade, approach and pass a [Perception 15] check to spot a suitable ingress point. When you interact with it you’ll get a short Illustrated Book Episode where you need to pick the option [Athletics 15] We climbed over the palisade. then Without wasting any time, we entered the hut.. If instead of the latter option you pick We came out to meet the lizardfolks., you’ll be forced into a dialogue similar to the one you’d find at the gate, allowing you to bribe your way to meeting the Lizardfolk King with ten Rations or pass an [Intimidate 15] or [Diplomacy 15] check. Avoiding the lizardfolk after sneaking into the village will allow you to reach Tig quickly, which will be covered under the heading [Lizardfolk Village - The Great Ancestor], below.
(1 of 5) Perhaps due to a bug, Vesket receives a +8 size bonus to Attack and Armor Class, making him extremely dangerous.
Lizardfolk Village: An Audience with the King
If you ended up interacting with the lizardfolk - either at the gate or after sneaking in, the best case scenario will see you brought before their king, Chieftain Vesket. Ask him some questions if you wish; he’ll largely tell you more boastful versions of what Kagar said. More importantly, if you pass a [Perception 20] check (checked automatically during dialogue) you’ll notice that the Lizardfolk King, despite all his bravado, is a bit worn out.
When you’re done listening to the reptile boast, be sure to say “Your tribe is holding a human child. I came to take him back.”, which will elicit a prompt denial from Chieftain Vesket. You’ve got many possible ways to resolve this, but if your protagonist is [Lawful] or [Evil], you’ll get alignment dialogues that’ll get you what you want, otherwise you’ll have to pass a [Diplomacy 20], [Intimidate 20] or [Lore (Religion) 20] check to achieve the same end.
| Reward |
|---|
| 45 XP |
| 45 XP |
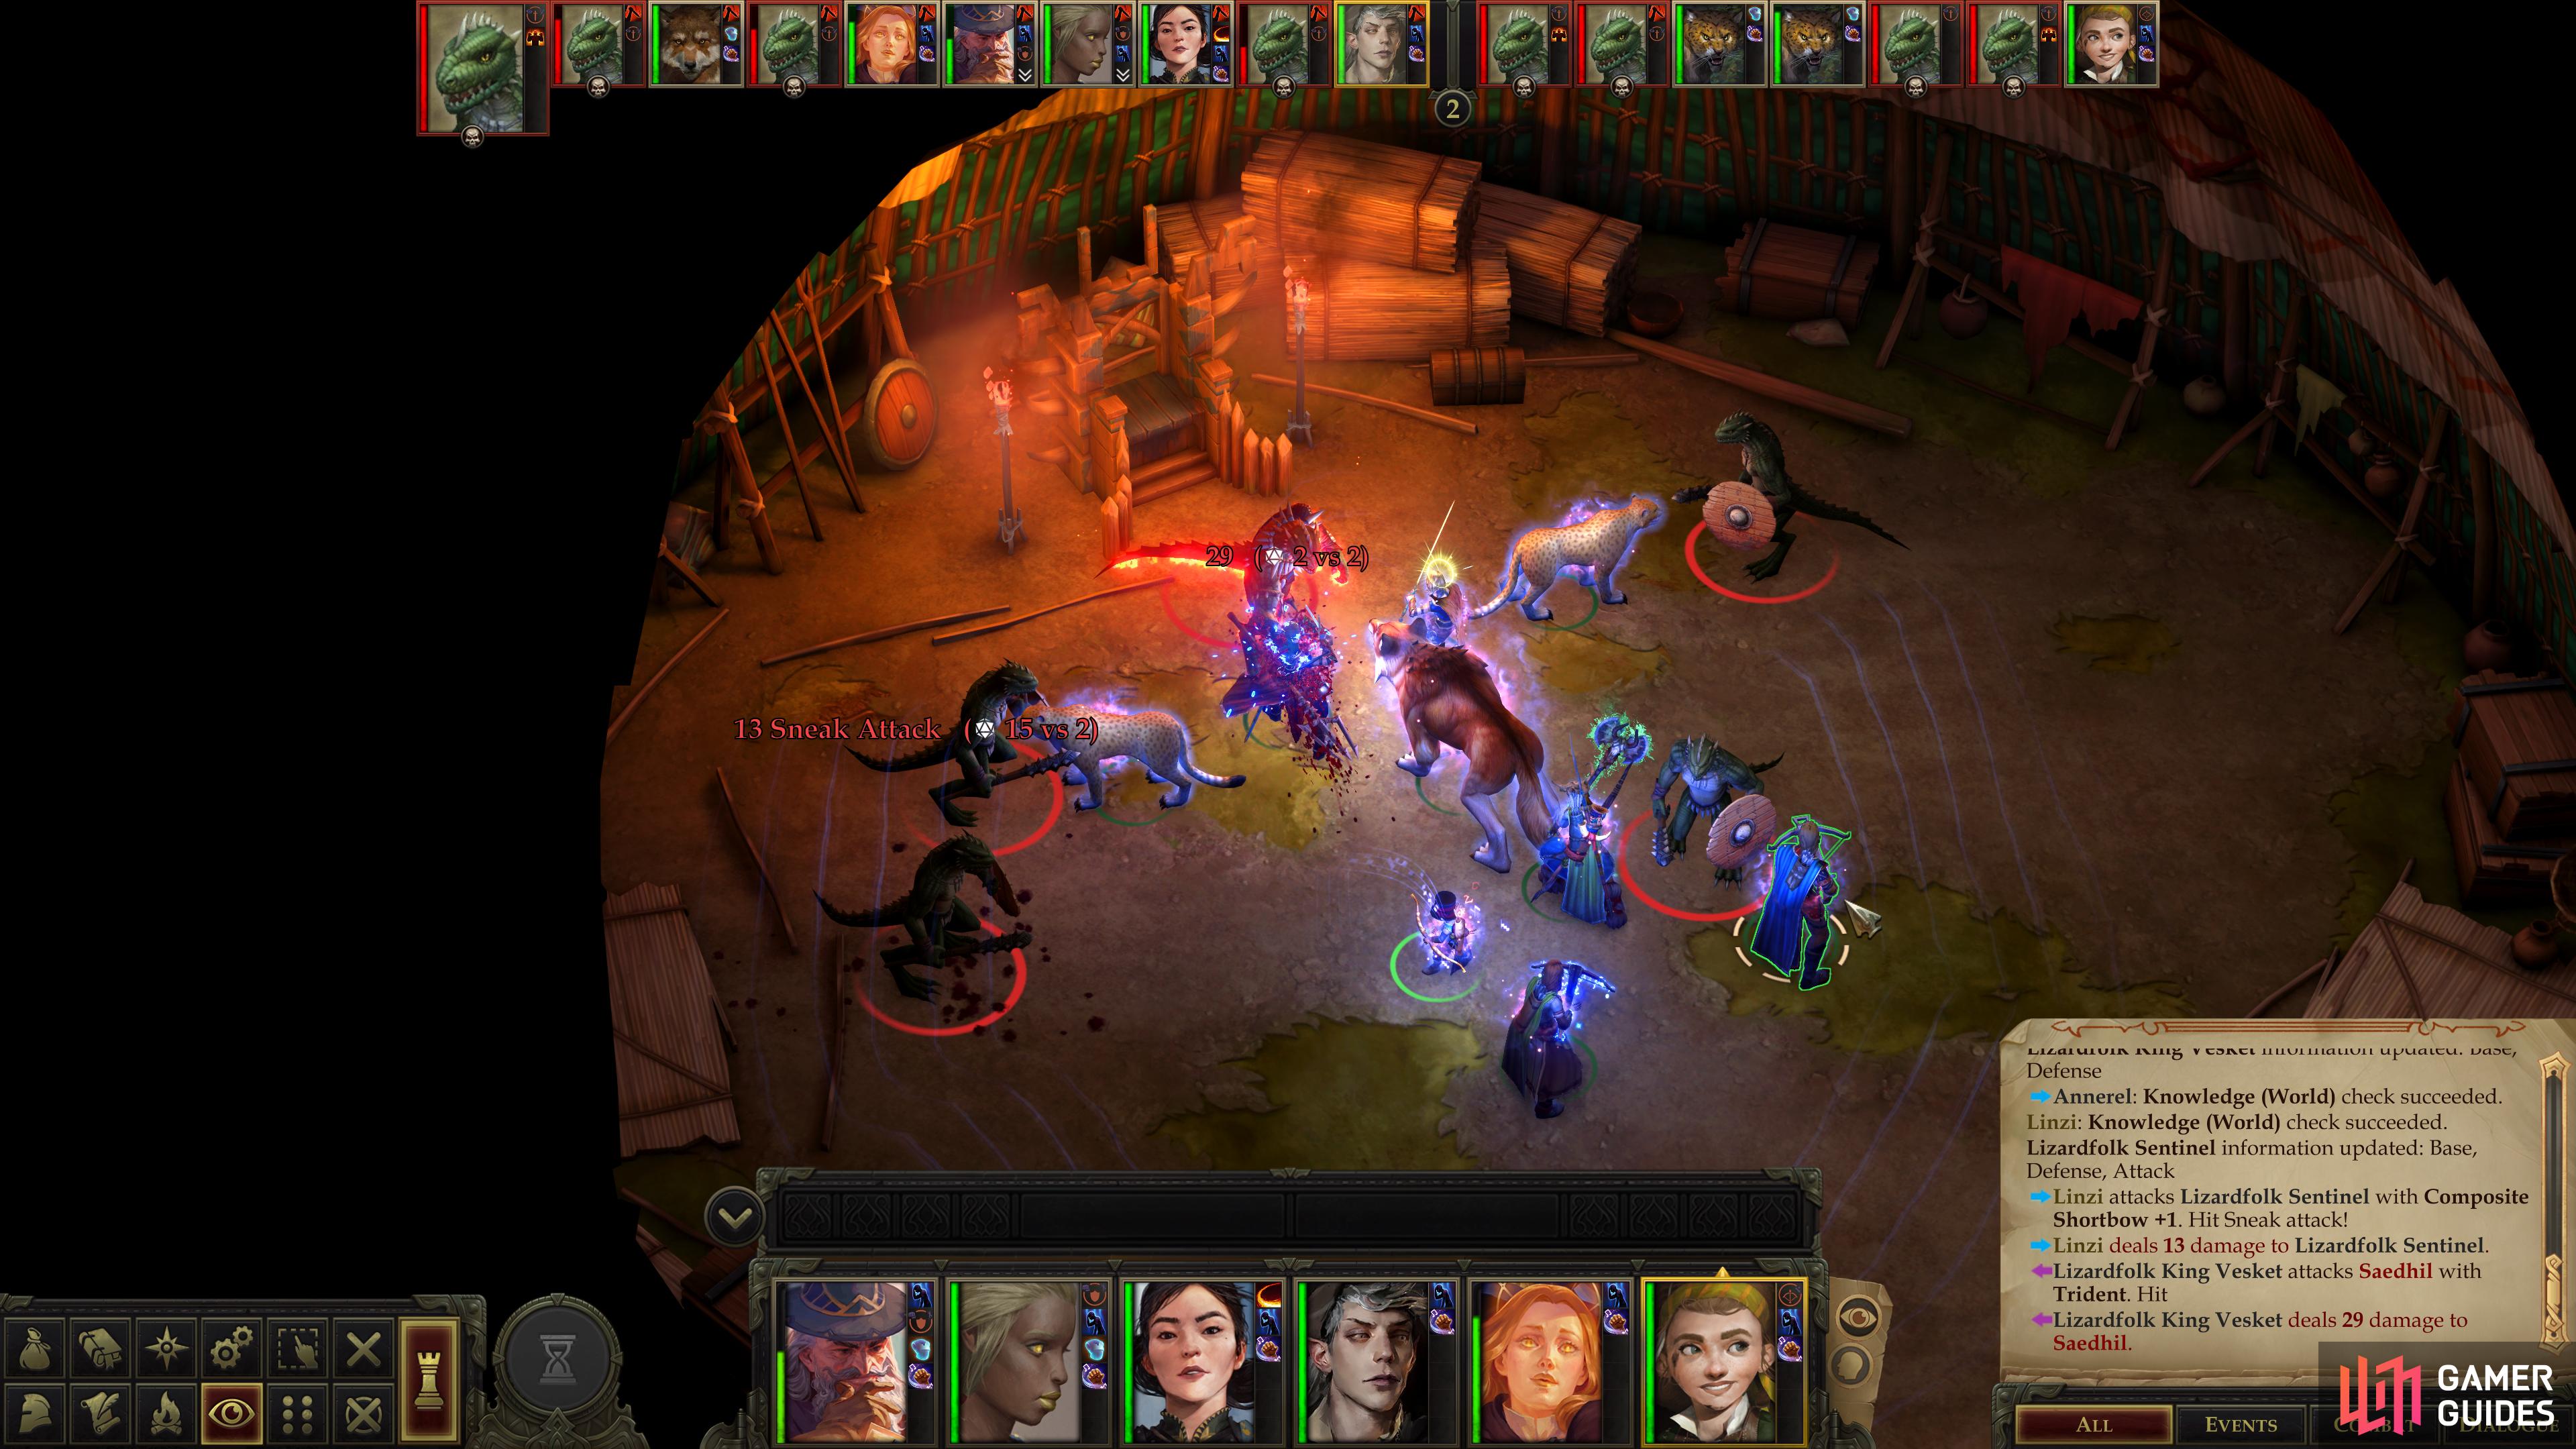
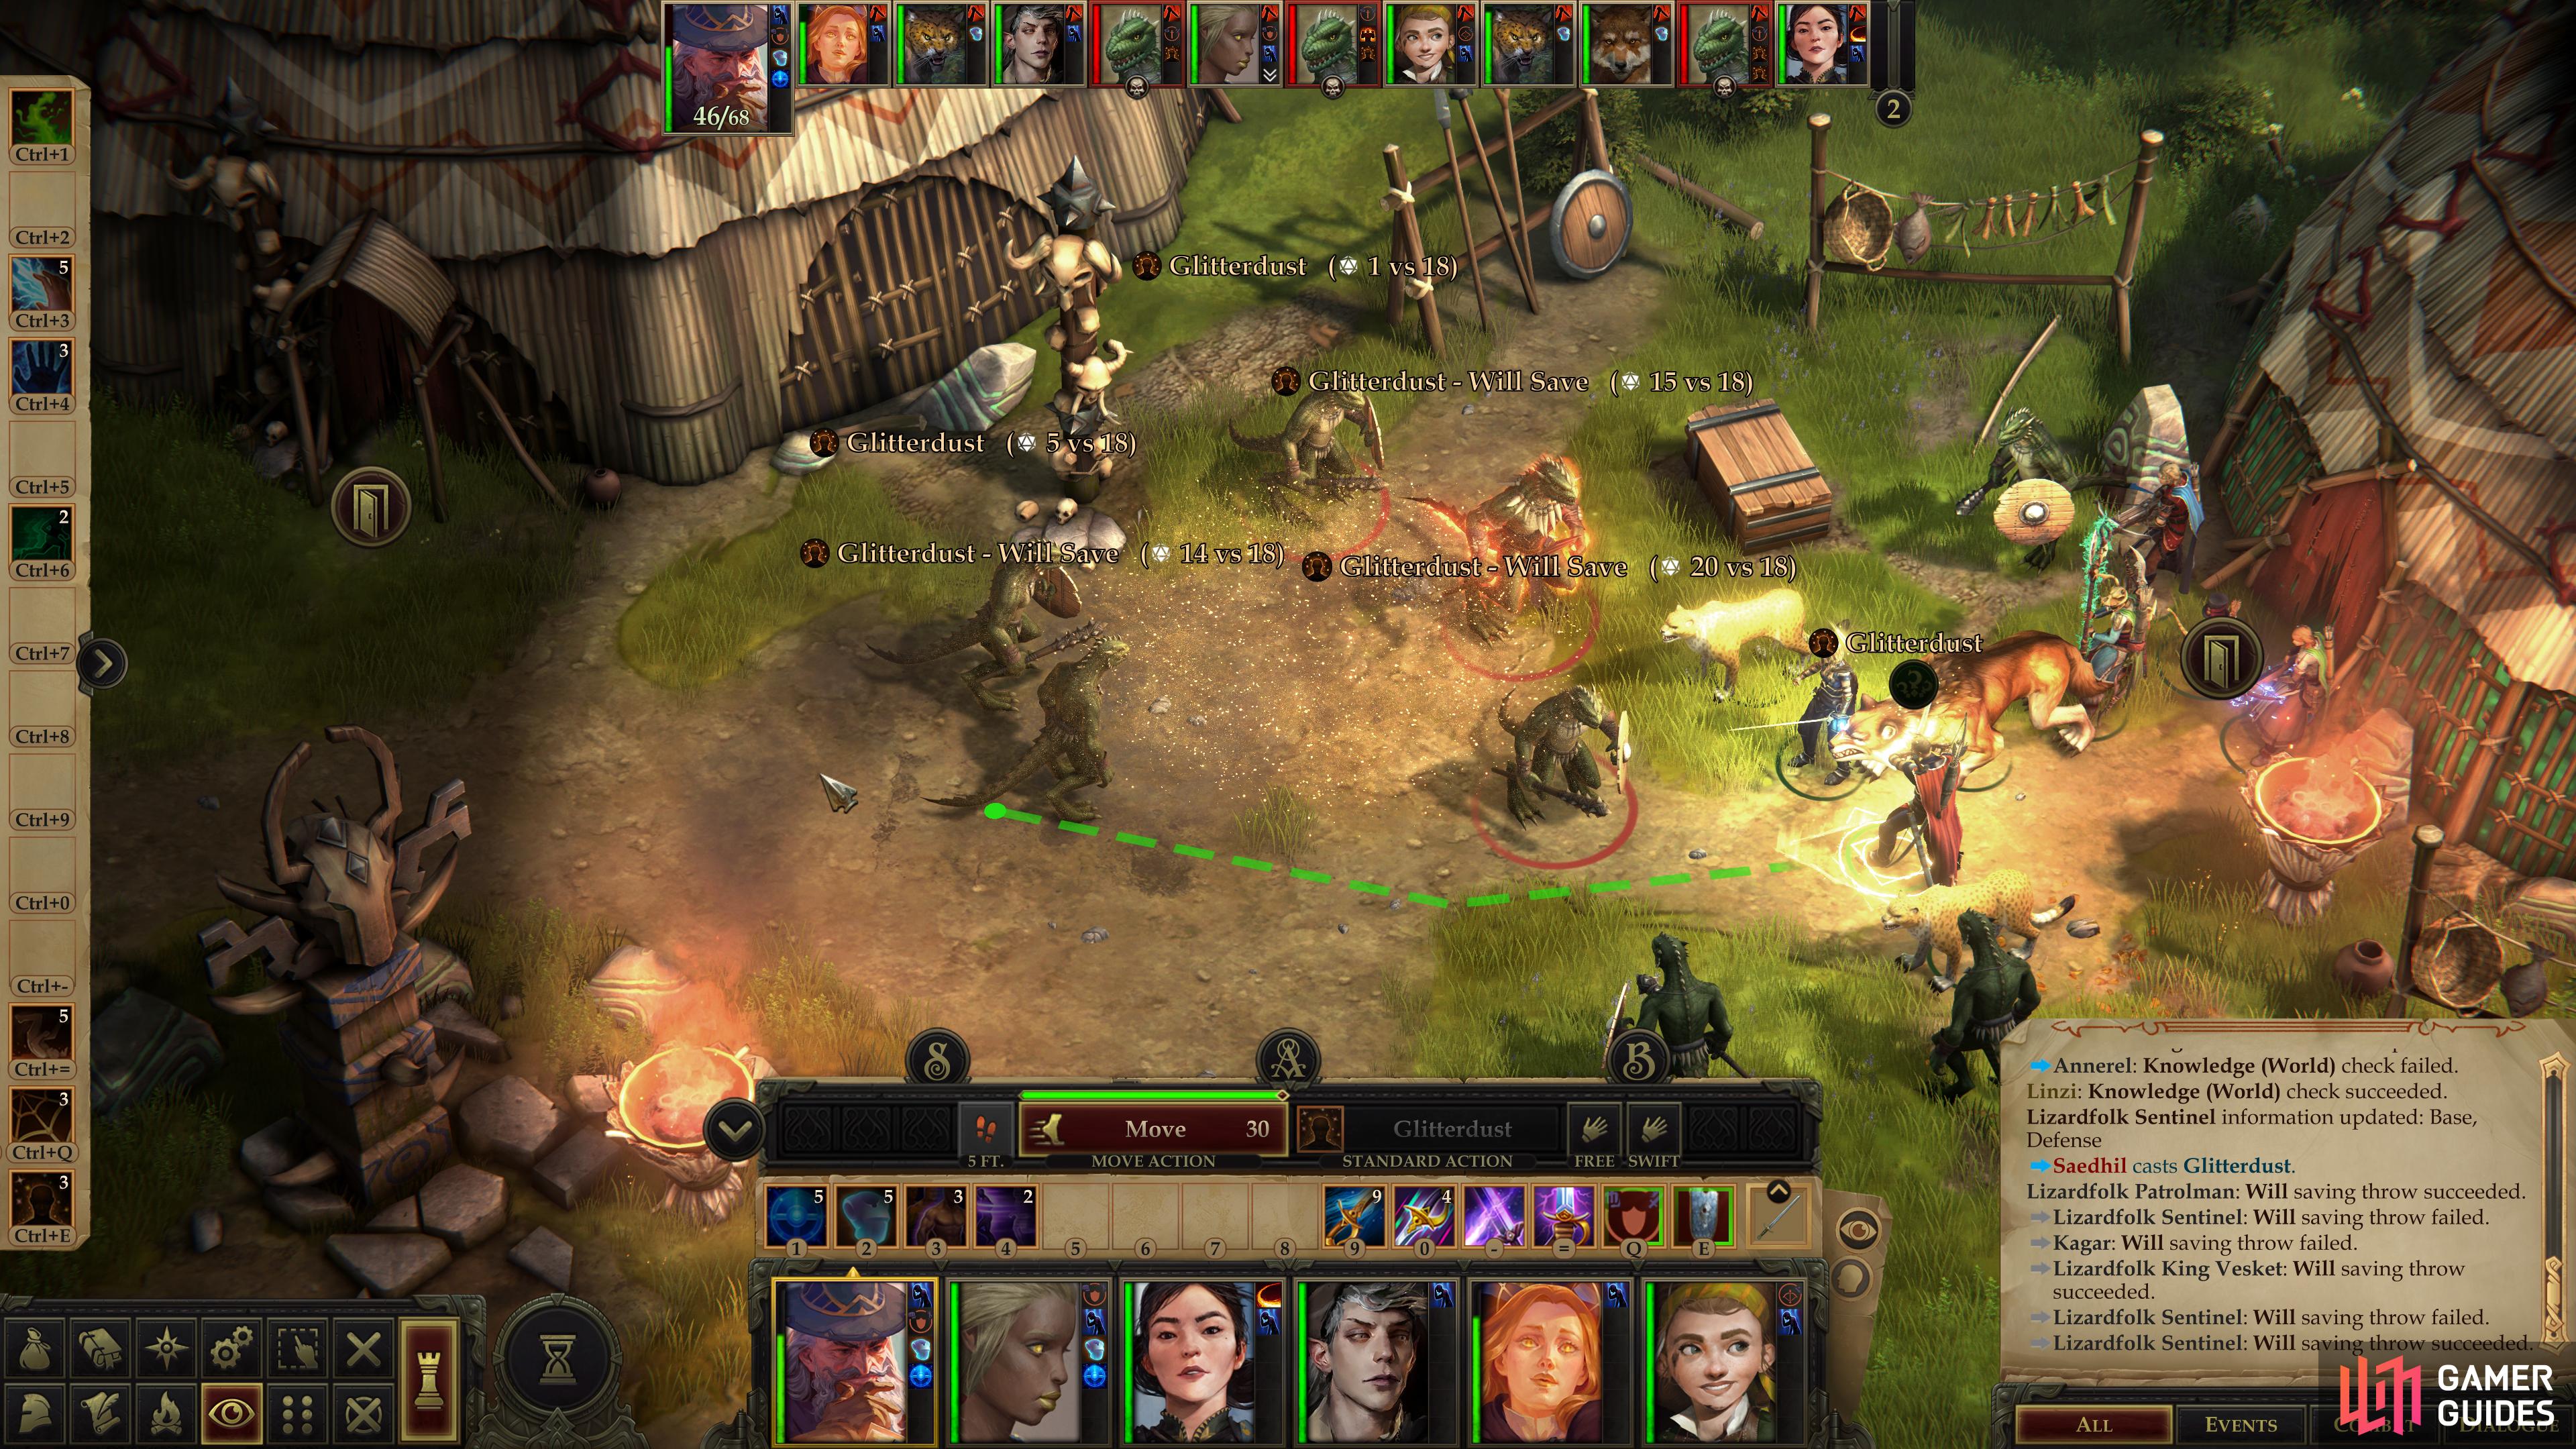
Failing all that, you can simply resort to violence, which will pit you against the Lizardfolk King and four Lizardfolk Sentinels. The lesser Lizardfolk are little threat to you, having stats you’ve long since outgrown, but the Lizardfolk King is a bit stronger, having a decent Attack Bonus and a respectable number of HP. By now, however, his Armor Class is barely a hindrance to your best of warriors, and he’ll struggle to hit your tanks. Debuffing them with Slow and buffing yourself with Haste should be all you need to overwhelm your foes. Just be wary, as, after the fight progresses for a bit, the lizardfolk in the king’s dwelling will be joined by some reinforcements, including some Lizardfolk Patrolmen and two Greater Monitor Lizards. Don’t let them catch your squishy characters by surprise.
Should you emerge victorious from a conflict with the lizardfolk you’ll be able to loot the fallen king for Bound Thunder (a Shock Trident +1 that deals +1d6 electrical damage and can be used to cast a 10d6 Lightning Bolt once per day), a suit of Hide Armor +1 an Amulet of Natural Armor +1 and King Vesket’s Key. Further treasures lie in a nearby chest [Trickery 37] (also unlocked with King Vesket’s Key, including a Diamond, an Emerald and a Shard of Knight’s Bracers, among other, less valuable gems. Keep in mind that you don’t have to fight the lizardfolk to loot this chest, should your Trickery skill be up to the task. They won’t attack if you pick the lock and plunder the chest.
If you kill the king, you’ll have to fight the rest of the lizardfolk in the village when you leave the king’s hut, which is honestly not that tough of a fight. This of course will void any potential interactions you could have had in the village which, honestly, are less lucrative than simply killing them would have been. Oh well.
Lizardfolk Village: Explore the Lizardfolk Village
Assuming you didn’t kill the Lizardfolk King and talked him into letting you speak to this “Great Ancestor” spirit that’s been terrorizing the village, you’ll be able to leave the king’s hut at your leisure (after hopefully looting his chest!). At this point you’ll finally have free reign to explore the village, which is fortunate as there’s some loot worth grabbing and conversations worth having before you meet the Great Ancestor.
First, loot a weapon rack near the king’s hut to score some Masterwork Longspears, a Masterwork Shortspear and a Trident +1, all of which will fetch some worthwhile gold from any merchant. Various fishing racks are less lucrative, but you can score some Rope, Acid Flasks and other marginal treasures from some sacks near a hut to the west of the king’s hut.
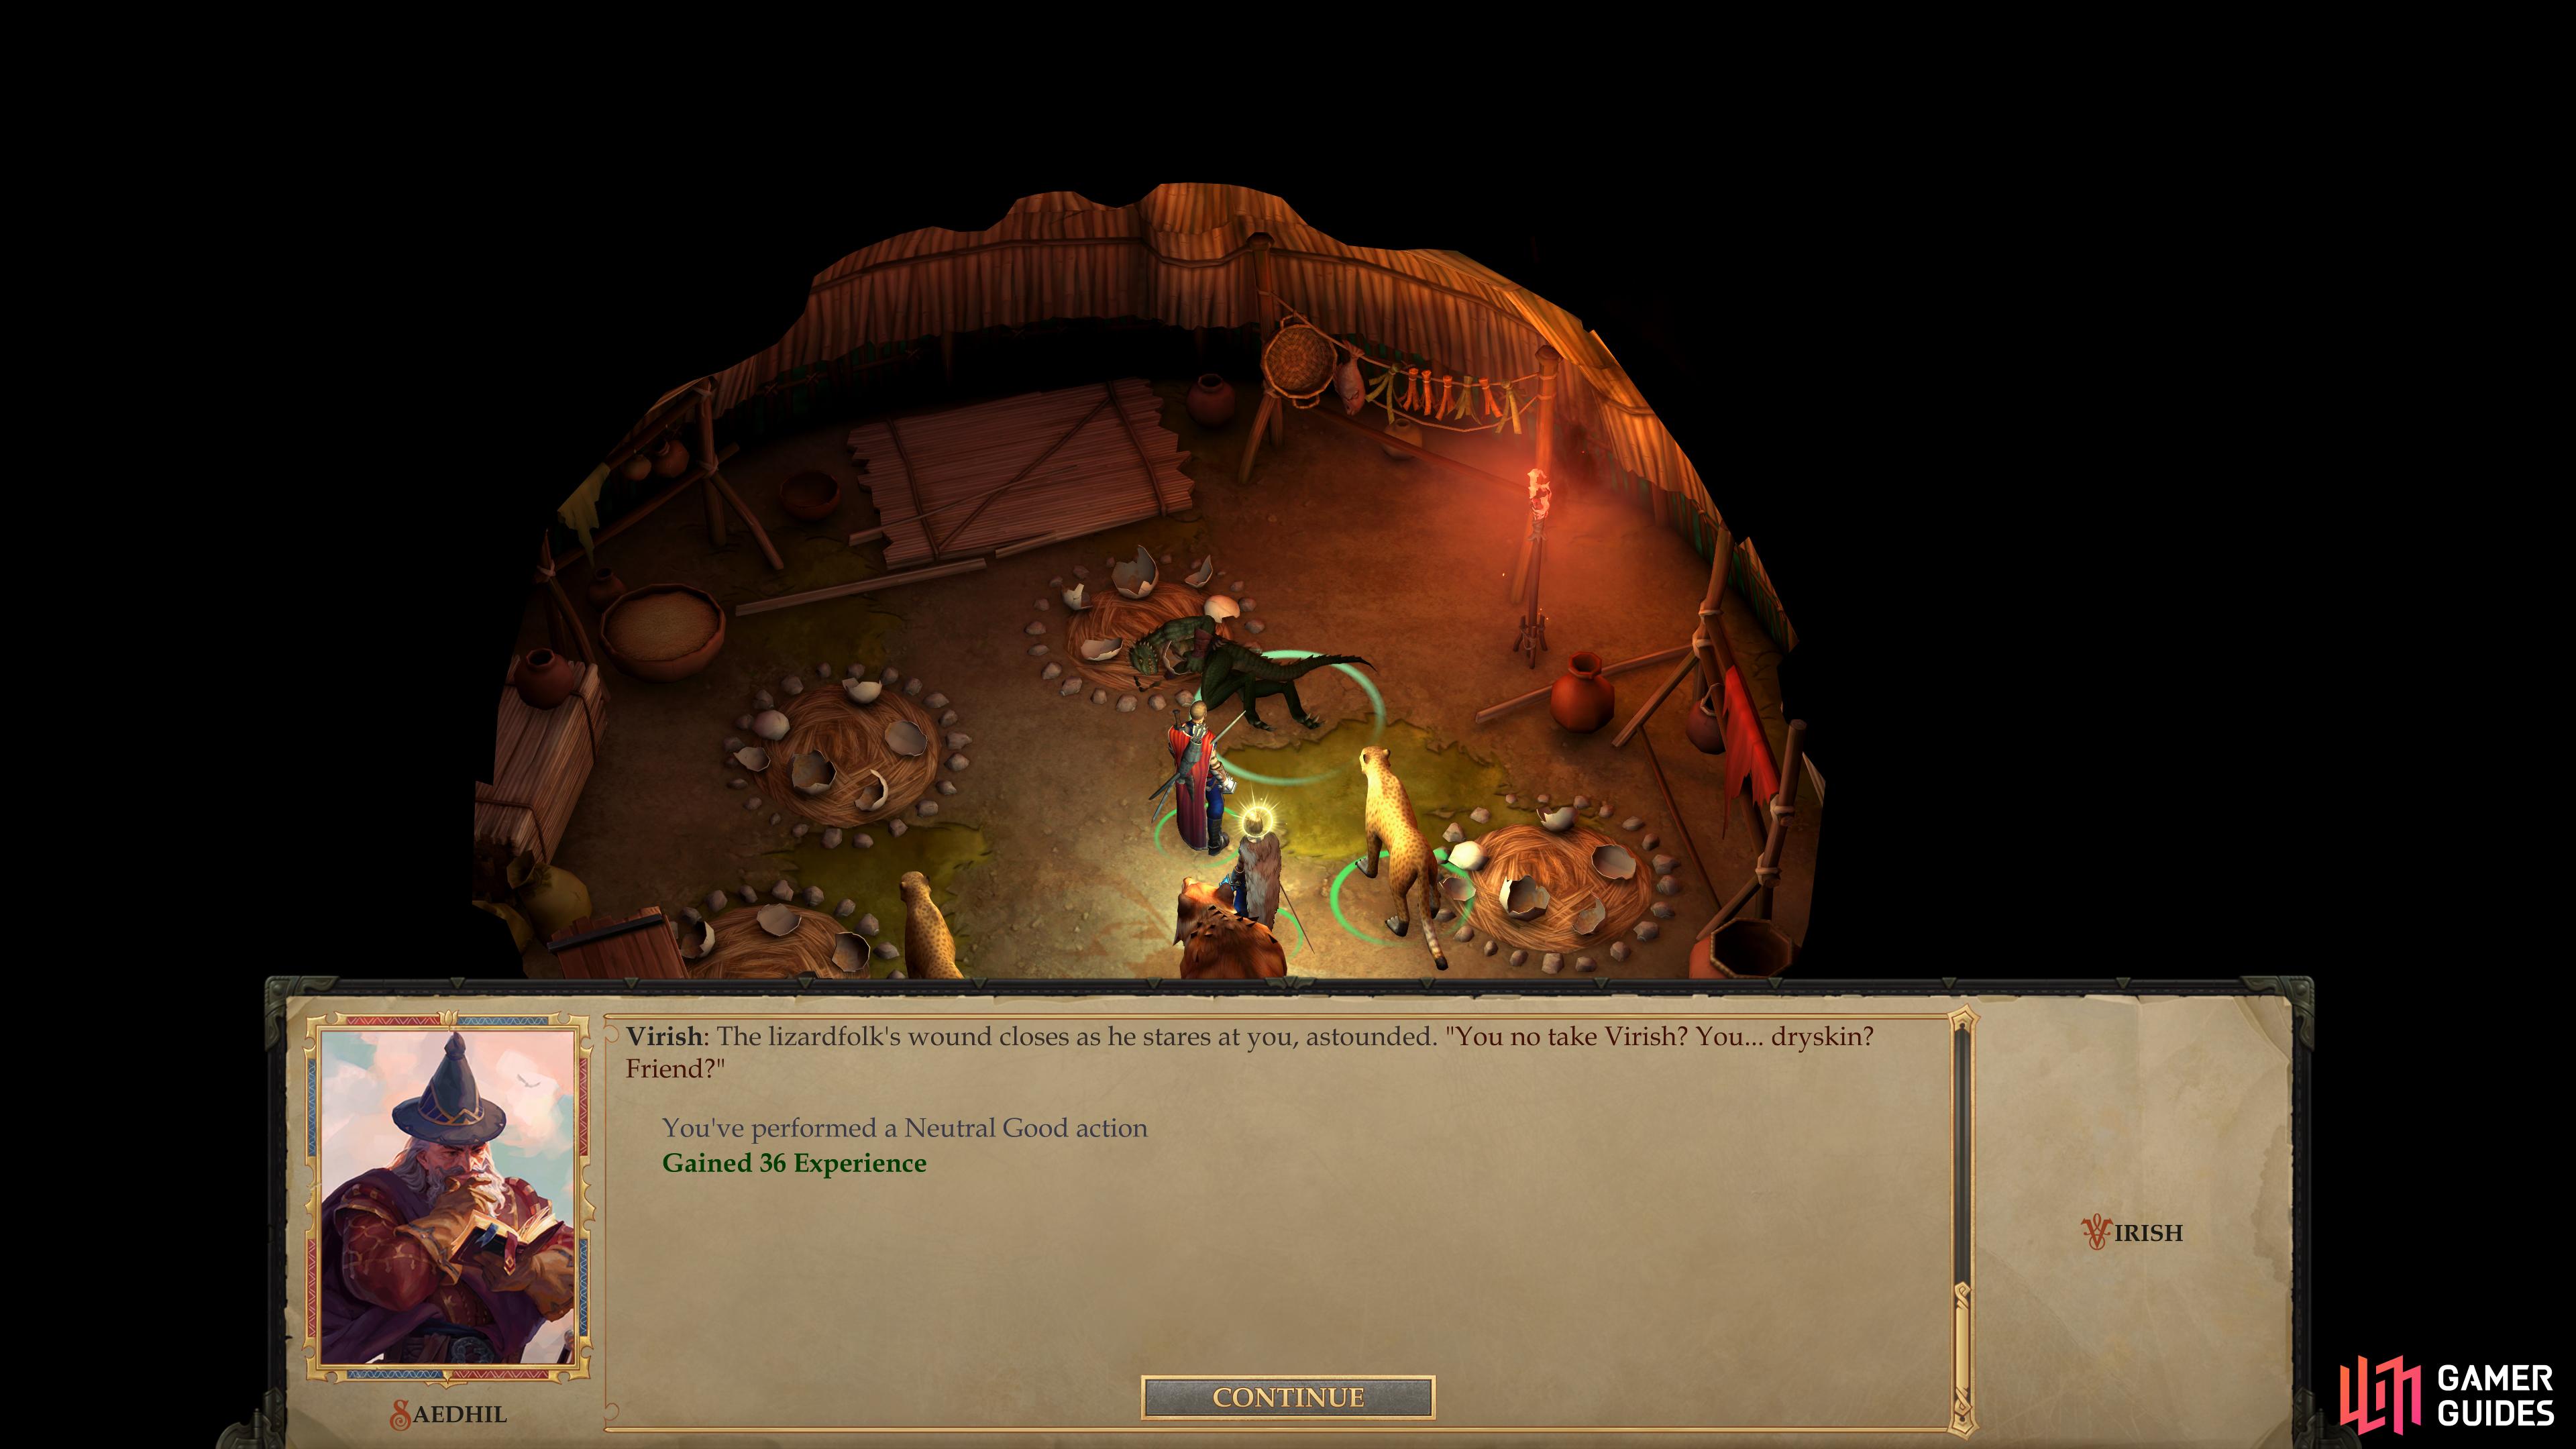
Speaking of which, enter the hut west of the king’s hut (marked on your map as the “Clutch Hut”, inside of which you’ll find a lot of broken eggs and a wounded lizardfolk named Virish. Talk to Virish and question him to learn that the Great Ancestor apparently lied about an impending famine, in response to which the Longtails cannibalized their young. While a necessity in genuine lean times, since there’s no actual famine this just constitutes the eradication of a potential generation the Longtails couldn’t afford to lose. After learning what you can from Virish, either put him out of his misery [Chaotic Neutral] or heal him [Neutral Good], the latter of which will earn you some experience and demonstrate your goodwill to this wretched creature.
| Reward |
|---|
| 36 XP |
With that done, loot some containers to the west for various food items, and a crate for a Potion of Cure Light Wounds, some Acid Flasks and some gems. Once done, head back outside and continue southwest to find an urn you can loot by another lizardfolk hovel, inside of which you’ll find a Taldan Warrior’s Dog Tag. Further southwest is another lizardfolk, Fashor, whom you can talk to, and like most lizardfolk you’ve met he’s instantly suspicious of your motives.
Question him about your missing “youngling” and he’ll reveal the sadistic side of the Great Ancestor, which disturbingly seems to have plans for the poor child. You can also pass a [Diplomacy 20] check to get Fashor’s sincere opinion on the Great Ancestor, whose actions seem to have caused quite a bit of quiet discontent among the Longtails. End the conversation with either a [Lawful Evil] or [Neutral Good] response to flavor your relationship with the Longtails and earn some experience.
| Reward |
|---|
| 45 XP |
| 36 XP |
Finally make your way to the east to find a small garden, near which the lizardfolk Tassath and Shalur argue. Interject yourself into their conversation to find out that the Great Ancestor’s reign of arbitrary bad advice has continued, this time targeting the Longtail’s crops. Instead of useful “heal-herb”, the Great Ancestor has demanded the crop to be replaced with “dope-weed”, instead. After hearing both sides of the argument, you’ll be given a chance to comment: either pick the [Lawful Evil] action to recommend following the advice of a supposed elder no matter how stupid it is, recommend they just flip a coin to decide [Chaotic Neutral] or urge them to apply some common sense, even if it means rebelling against authority [Chaotic Good]. Picking either the [Lawful Evil] or [Chaotic Good] options will earn you some experience.
| Reward |
|---|
| 72 XP |
If you have the Glitterdust spell you’ll be able to expose Count Shimmerglow.
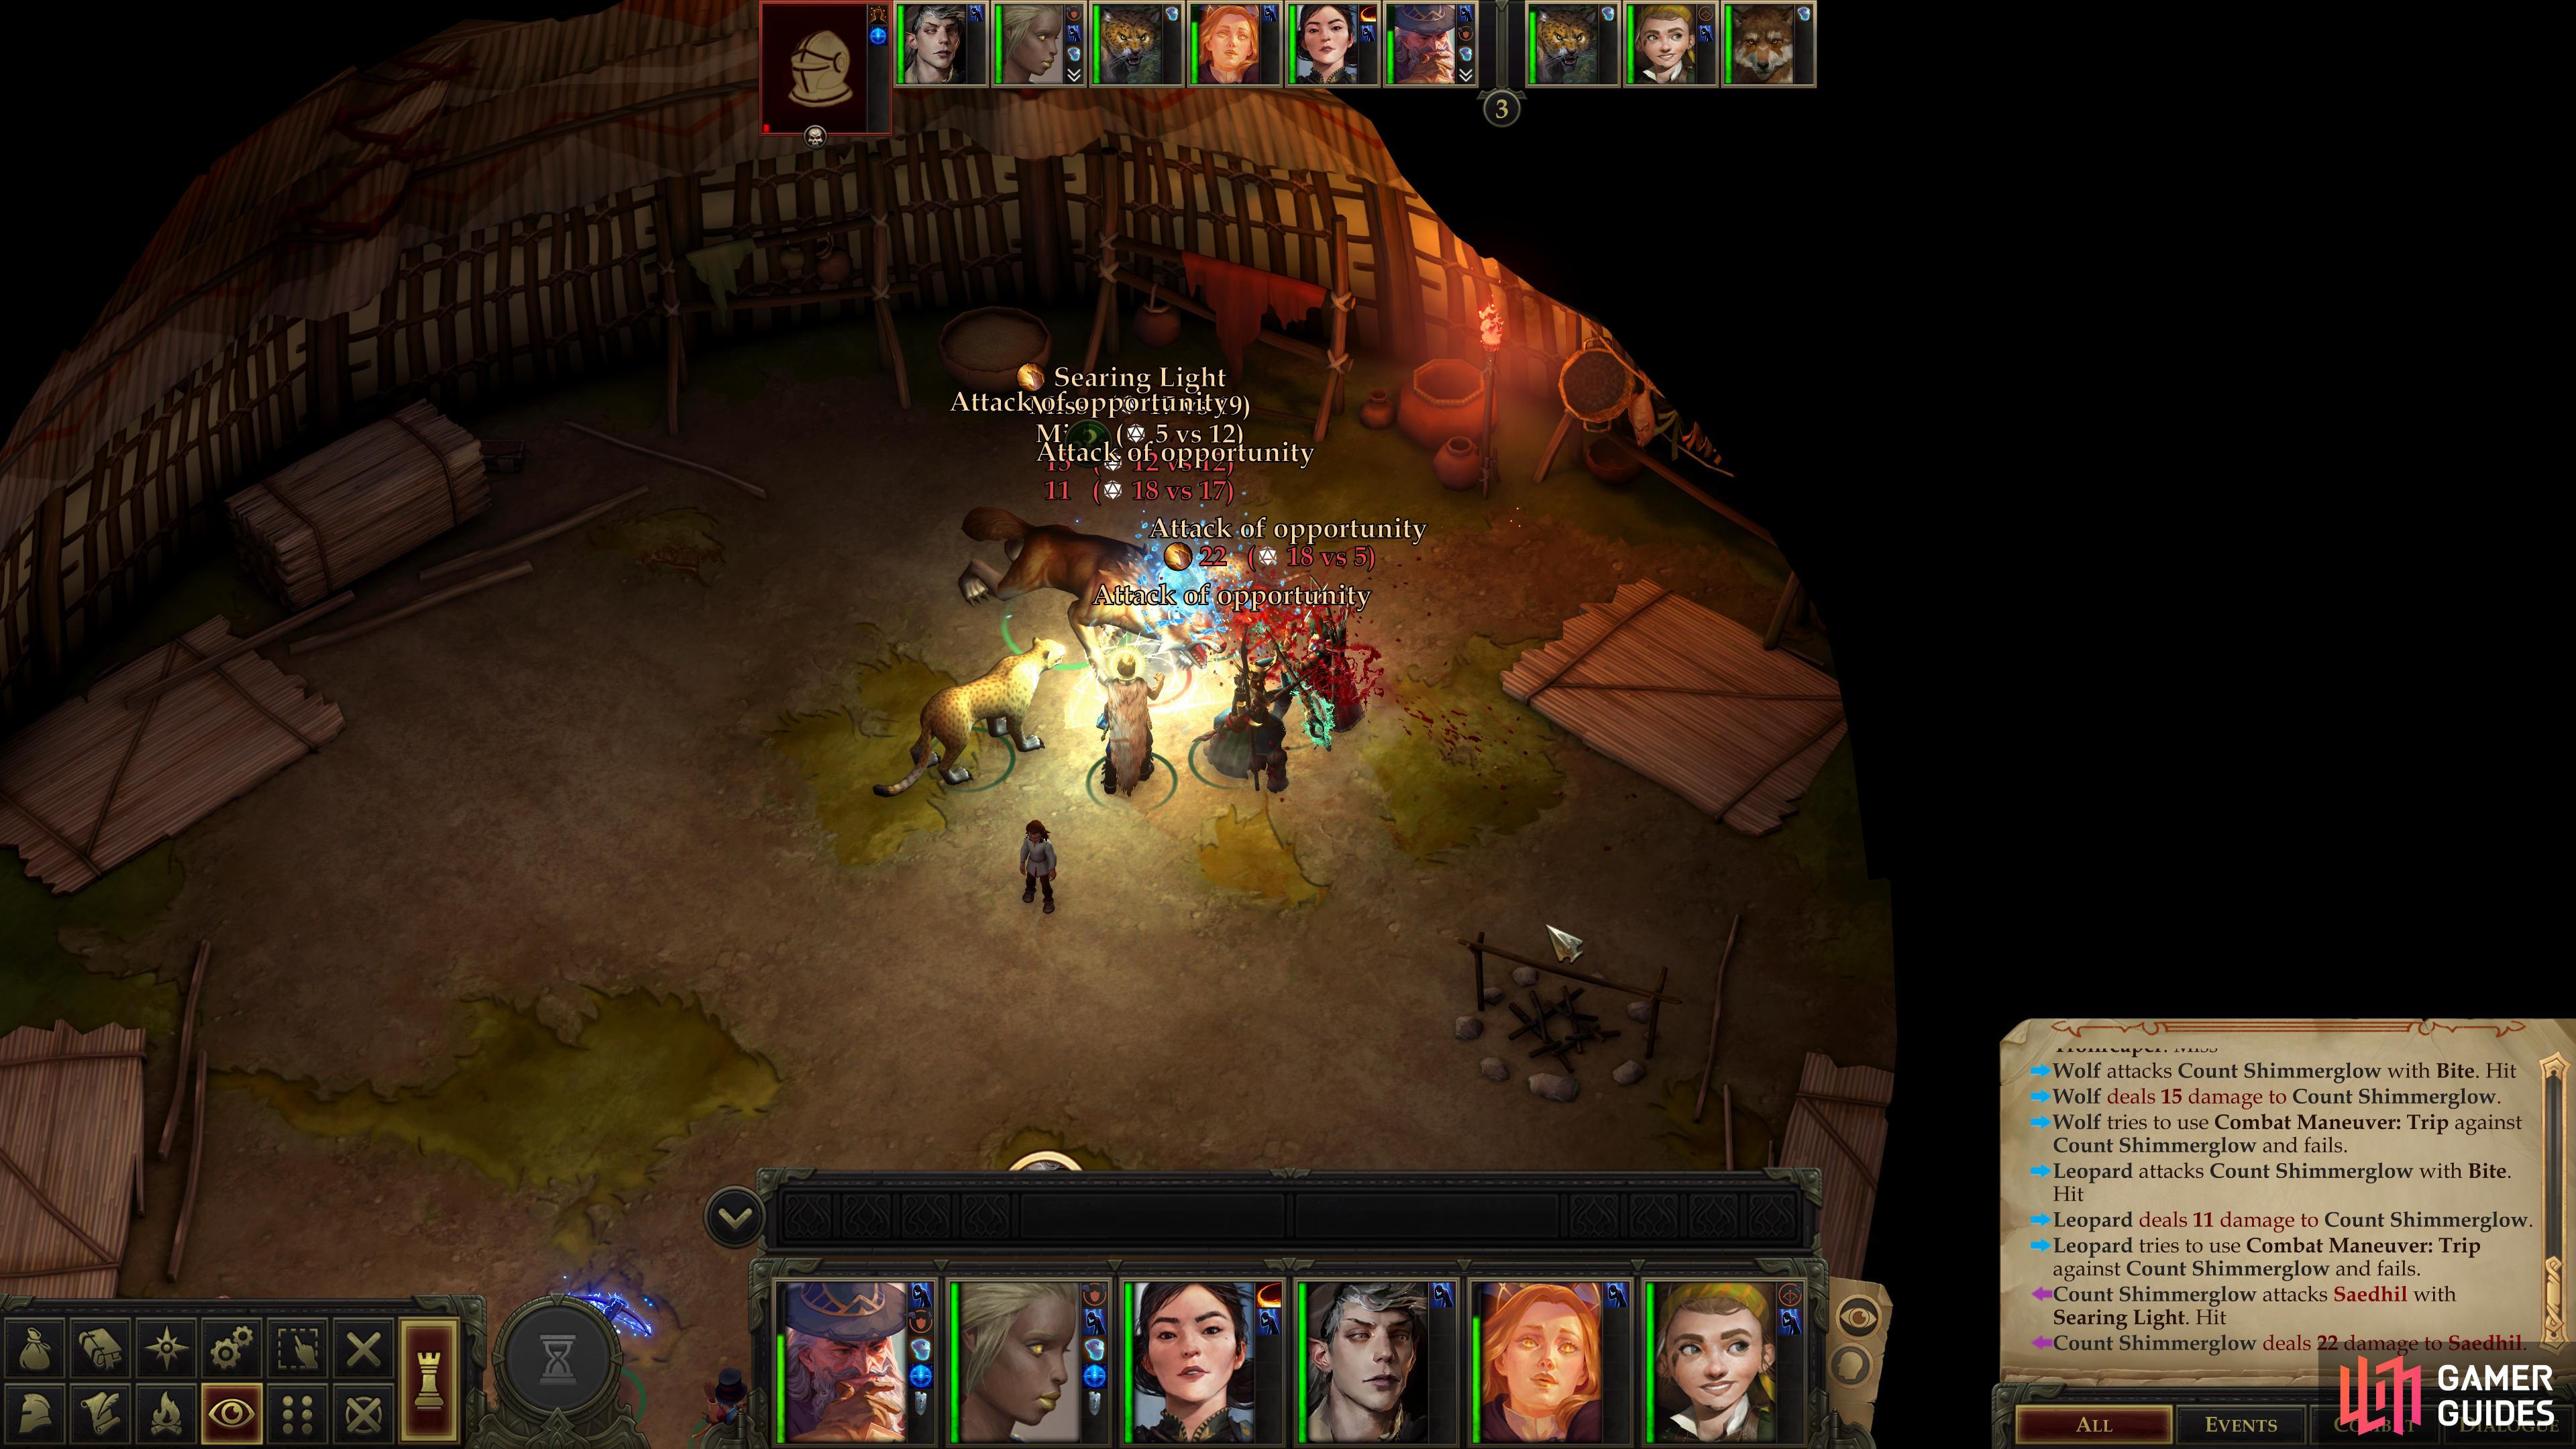
The critter has a high Armor Class, but if you surround it you should prevail.
Lizardfolk Village: The Great Ancestor
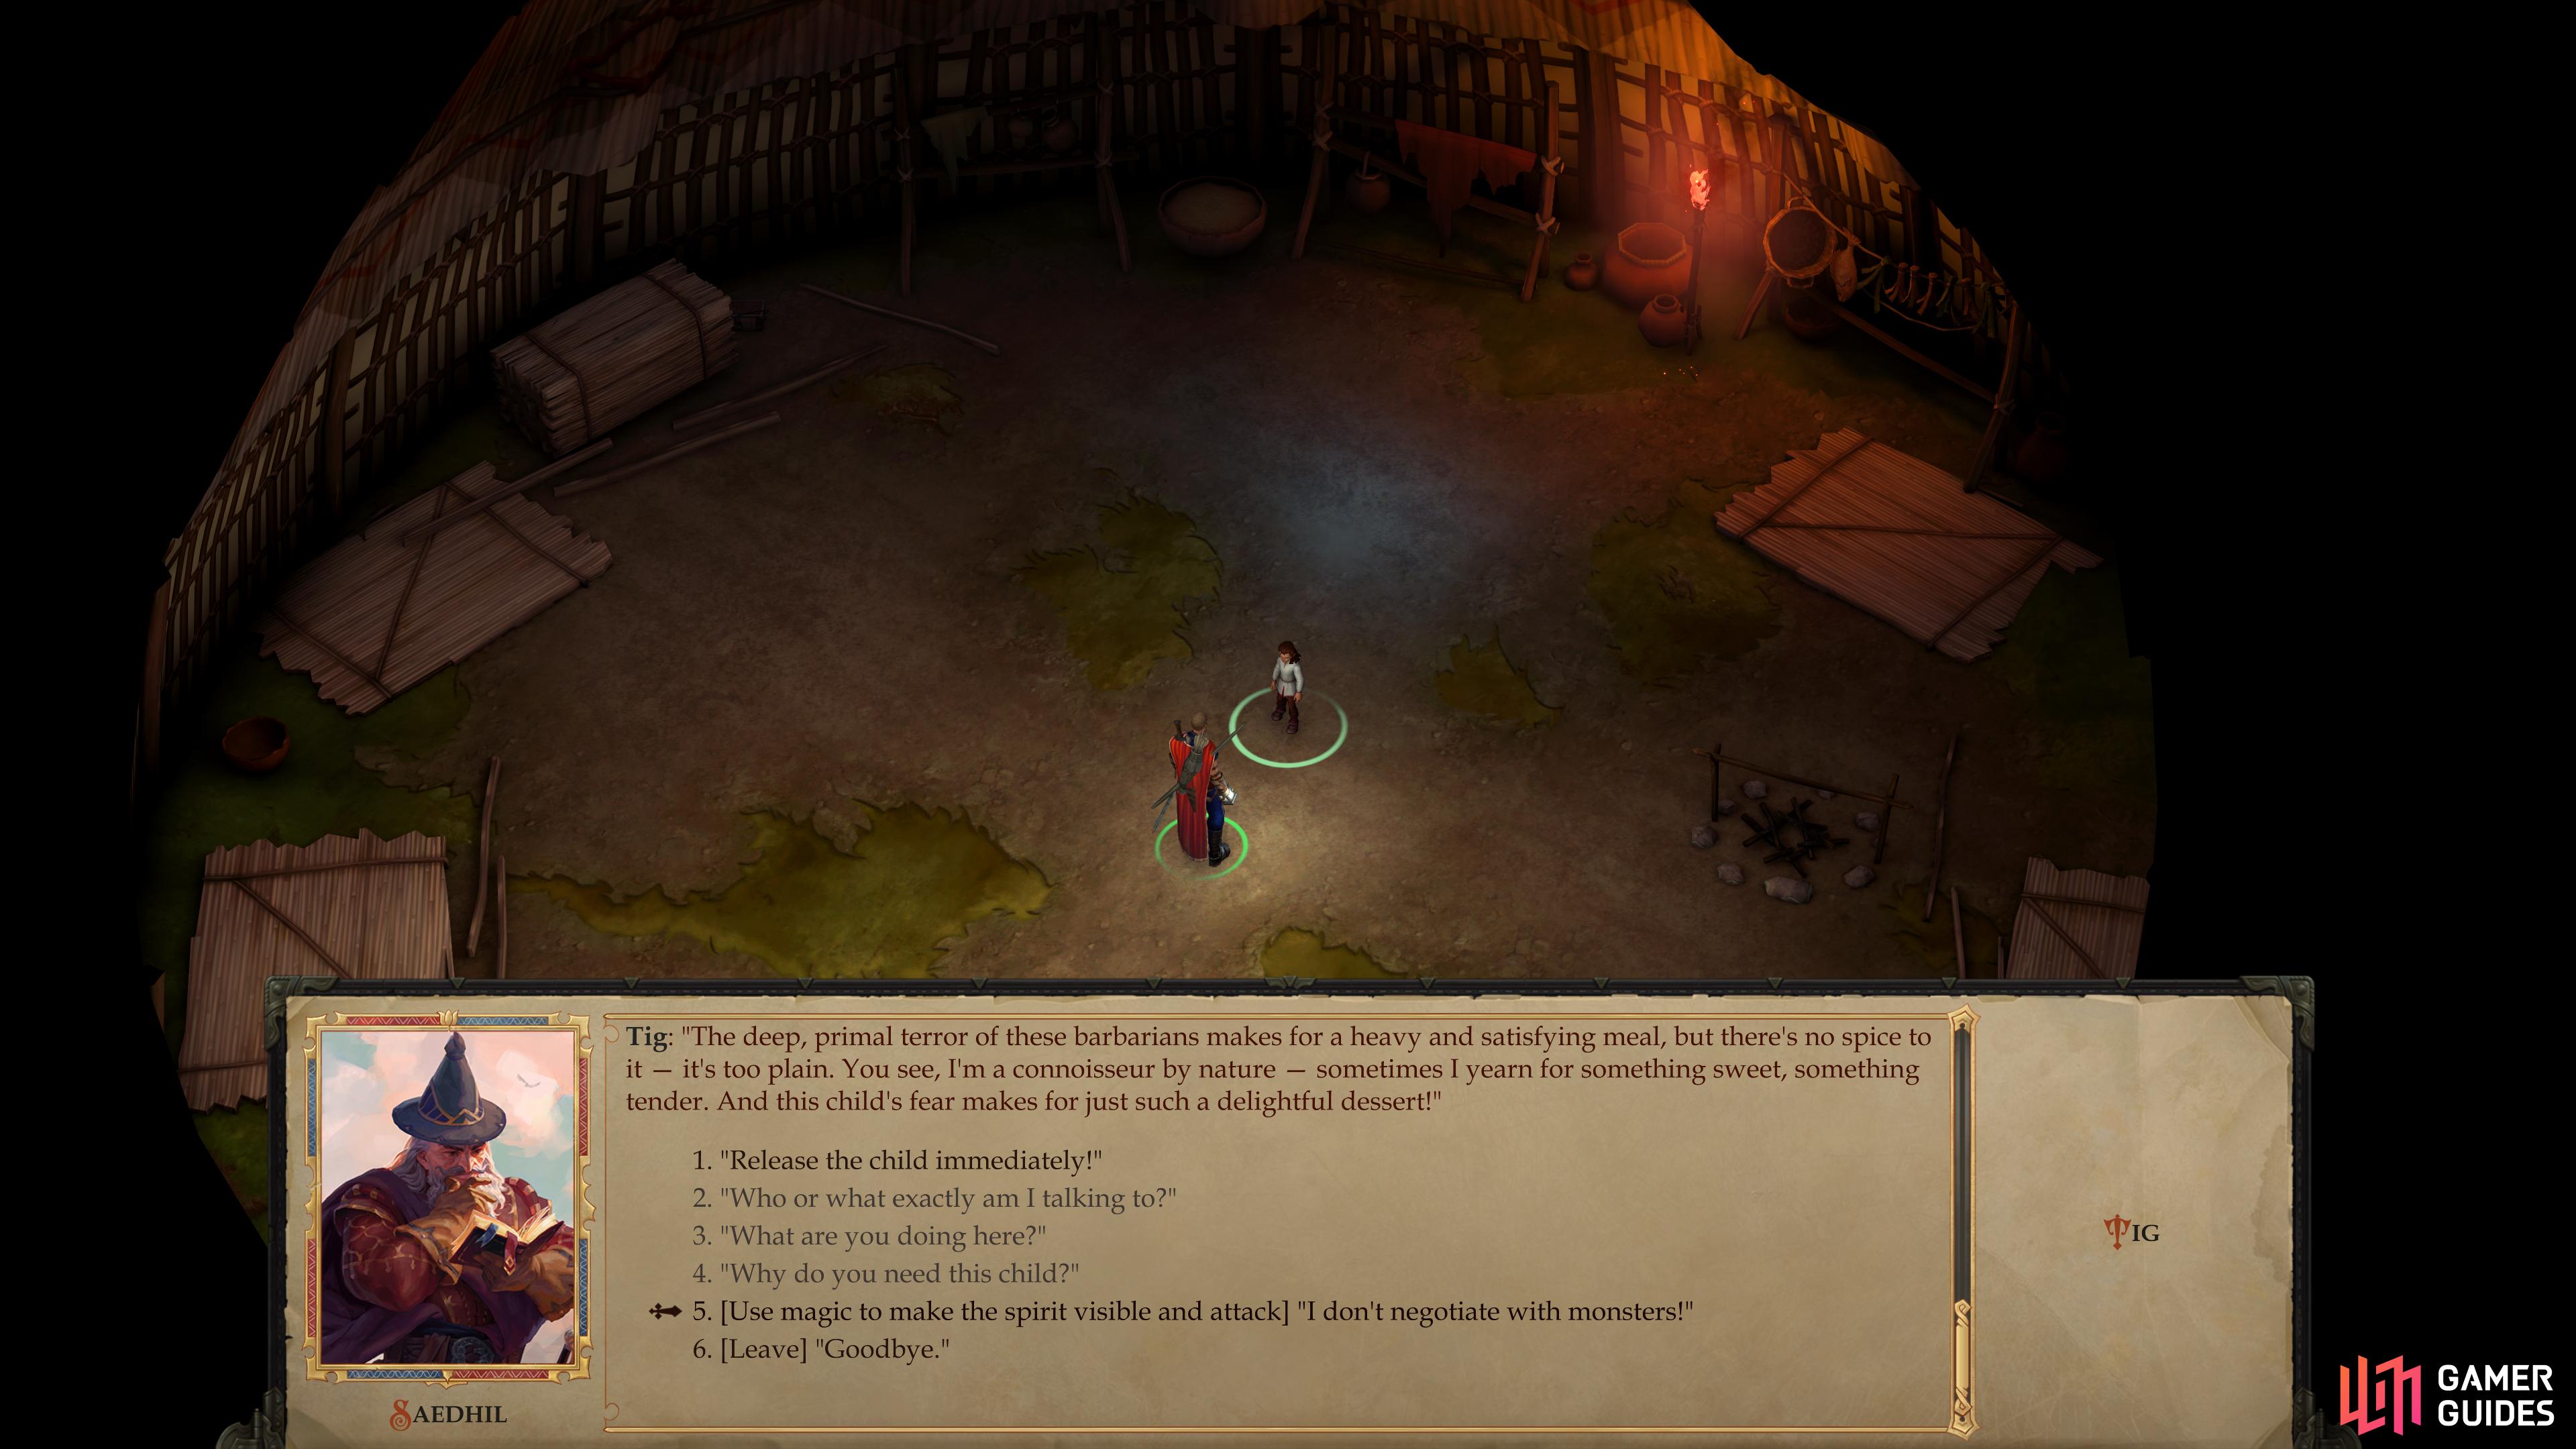
After you’re done pestering the poor Longtail reptiles, make your way to the hut east of the king’s hut (marked on your map as the “Spirit Hut”. Inside you’ll finally find Tig, but when you talk to him you’ll quickly notice that something is amiss… the fact that Tig refers to “the boy” as a separate entity.
Pick the dialogue option “Who or what exactly am I talking to?” to get a [Knowledge (Arcana) 20] check that lets you know that whatever you’re speaking with, it’s external to Tig. Fortunately it doesn’t seem to be possessing the boy, but rather it’s using lesser magic to conceal itself somewhere nearby. There’s also a hidden [Lore (Religion)] check you’ll get when talking to Tig, which you should endeavor to pass (it’ll appear after you attempt the aforementioned [Knowledge (Arcana)] check), which, if you pass, you should follow up with What are you doing here?” for some more XP.
| Reward |
|---|
| 45 XP |
| 112 XP |
If you have the Glitterdust spell prepared you’ll get the dialogue option [Make the spirit visible and attack] “I don’t negotiate with monsters!”. The statement itself is probably untrue, but hey, it’s clear this being, while malignant, isn’t omniscient. This will cause the spirit - Count Shimmerglow - to appear behind Tig. It’s a pretty simple combatant, using Shield to boost its already high (but not insurmountable) Armor Class, after which it’ll repeatedly cast Searing Light. The spell hurts, but nowhere near as much as some foes you’ve fought, and isolated, Count Shimmerglow really doesn’t have much of a chance.
The only possible complication to this fight is if you ended the conversation (pick the dialogue option [Leave] “Goodbye.”) before attacking, in which case Count Shimmerglow will summon the Lizardfolk King and his lackeys. You’ll end up fighting the same assortment of lizardfolk here as you would have had to fight if you picked a fight in the king’s hut earlier, but with the added disadvantage of Count Shimmerglow pelting you with magic during the fight. There’s absolutely no reason you should put yourself in this position, as you can pick a fight with the Lizardfolk King any time you wish via dialogue, and you can expose and attack Count Shimmerglow at any time as well. If you do end up in this unadvised situation, the same tactics generally apply: Haste and Slow are essential buffs and debuffs, and Hideous Laughter should suffice to thwart the Lizardfolk King long enough for you to take him down.
Either way, be sure to talk to Tig after defeating Count Shimmerglow to send him on his way back to Tuskdale. Count Shimmerglow doesn’t drop any loot, although there is a hidden [Perception 25] chest in the northeastern corner of the hut that contains some potions and scrolls.
After dealing with Count Shimmerglow, you’ll have to deal with King Vesket, although the encounter will be easier here.
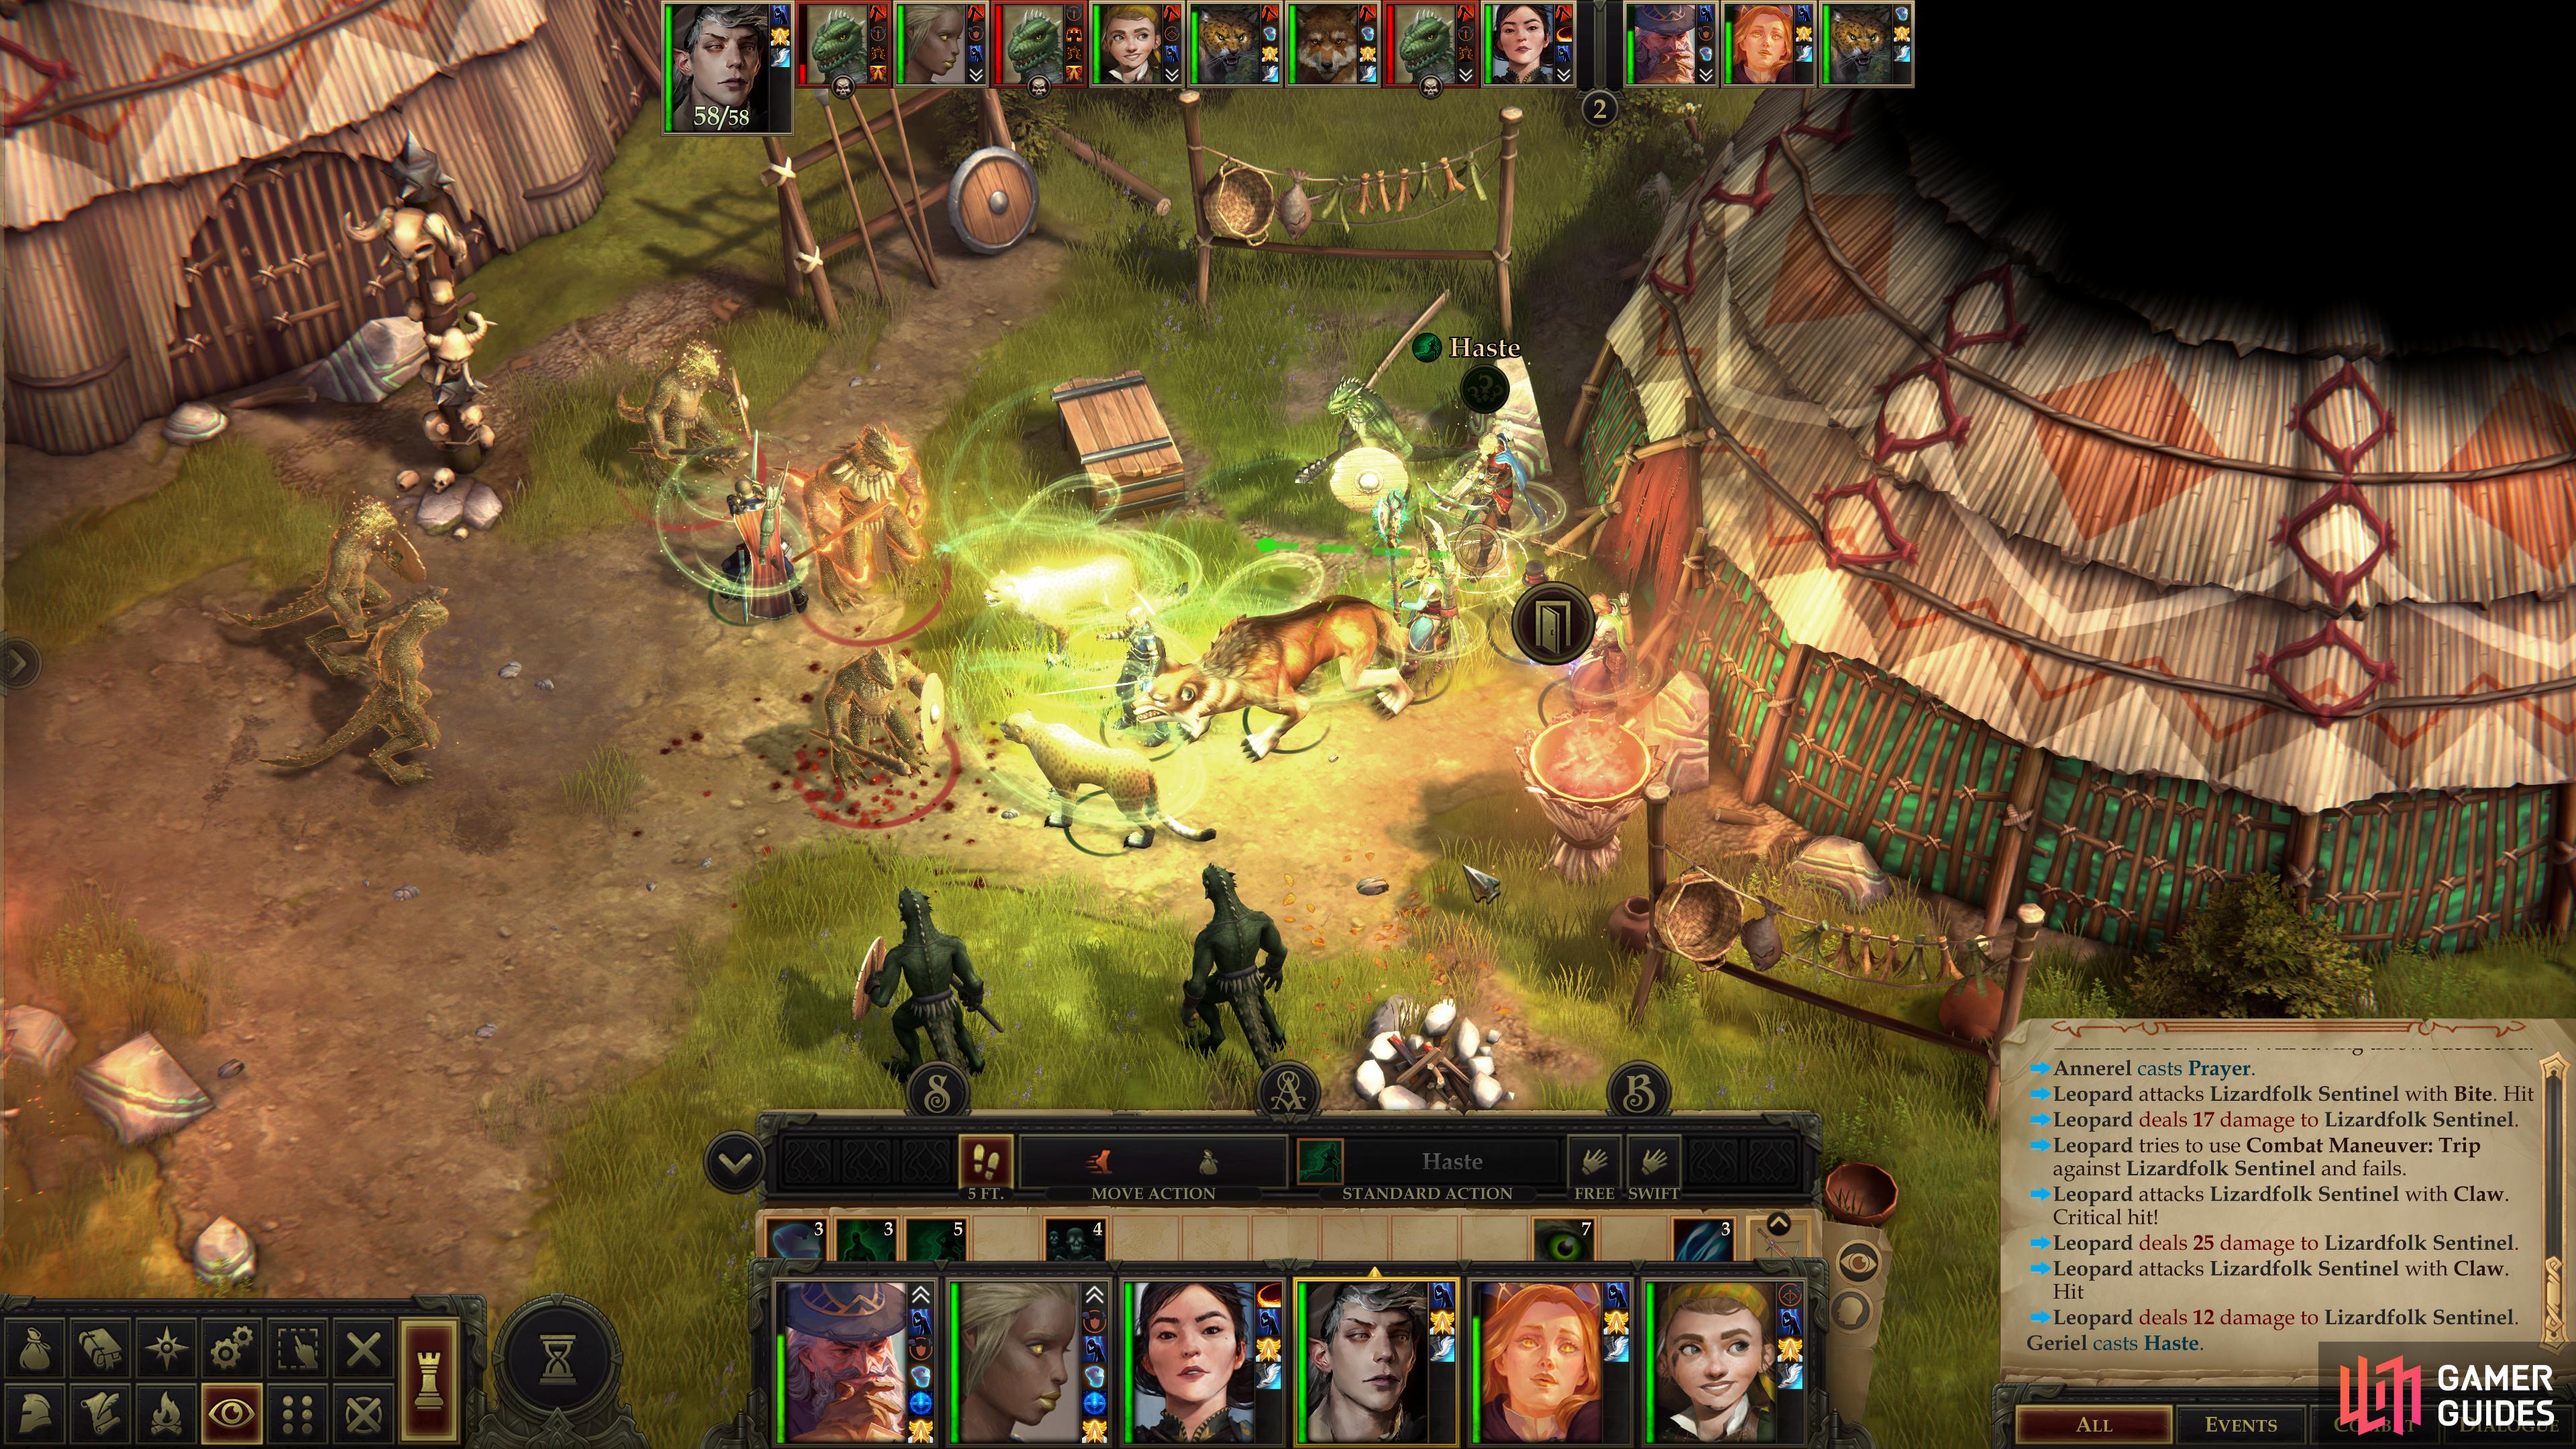
Spells like Glitterdust, Hideous Laughter and Haste are still key to victory.
Your business with the lizardfolk isn’t quite over yet, however, as when you leave the Spirit Hut you’ll witness an altercation between Kagar and the Lizardfolk King. Despite his acquiescence earlier, it seems that he’s since changed his mind about the authenticity and/or benevolence of the Great Ancestor… or maybe he’s just not on board with you killing the spirit? In any case, he chooses to vent his anger out on you, and the fact that this time most of the other Lizardfolk refuse to join him (save for two Lizardfolk Sentinels) essentially constitutes a vote of no-confidence on Chieftain Vesket and the Great Ancestor.
Kill the Lizardfolk King and loot him for his Bound Thunder weapon, a suit of Hide Armor +1 an Amulet of Natural Armor +1 and King Vesket’s Key. Before leaving the village grounds you can talk to Kagar one more time to inquire into the fate of the Longtails and their future plans, if you wish.
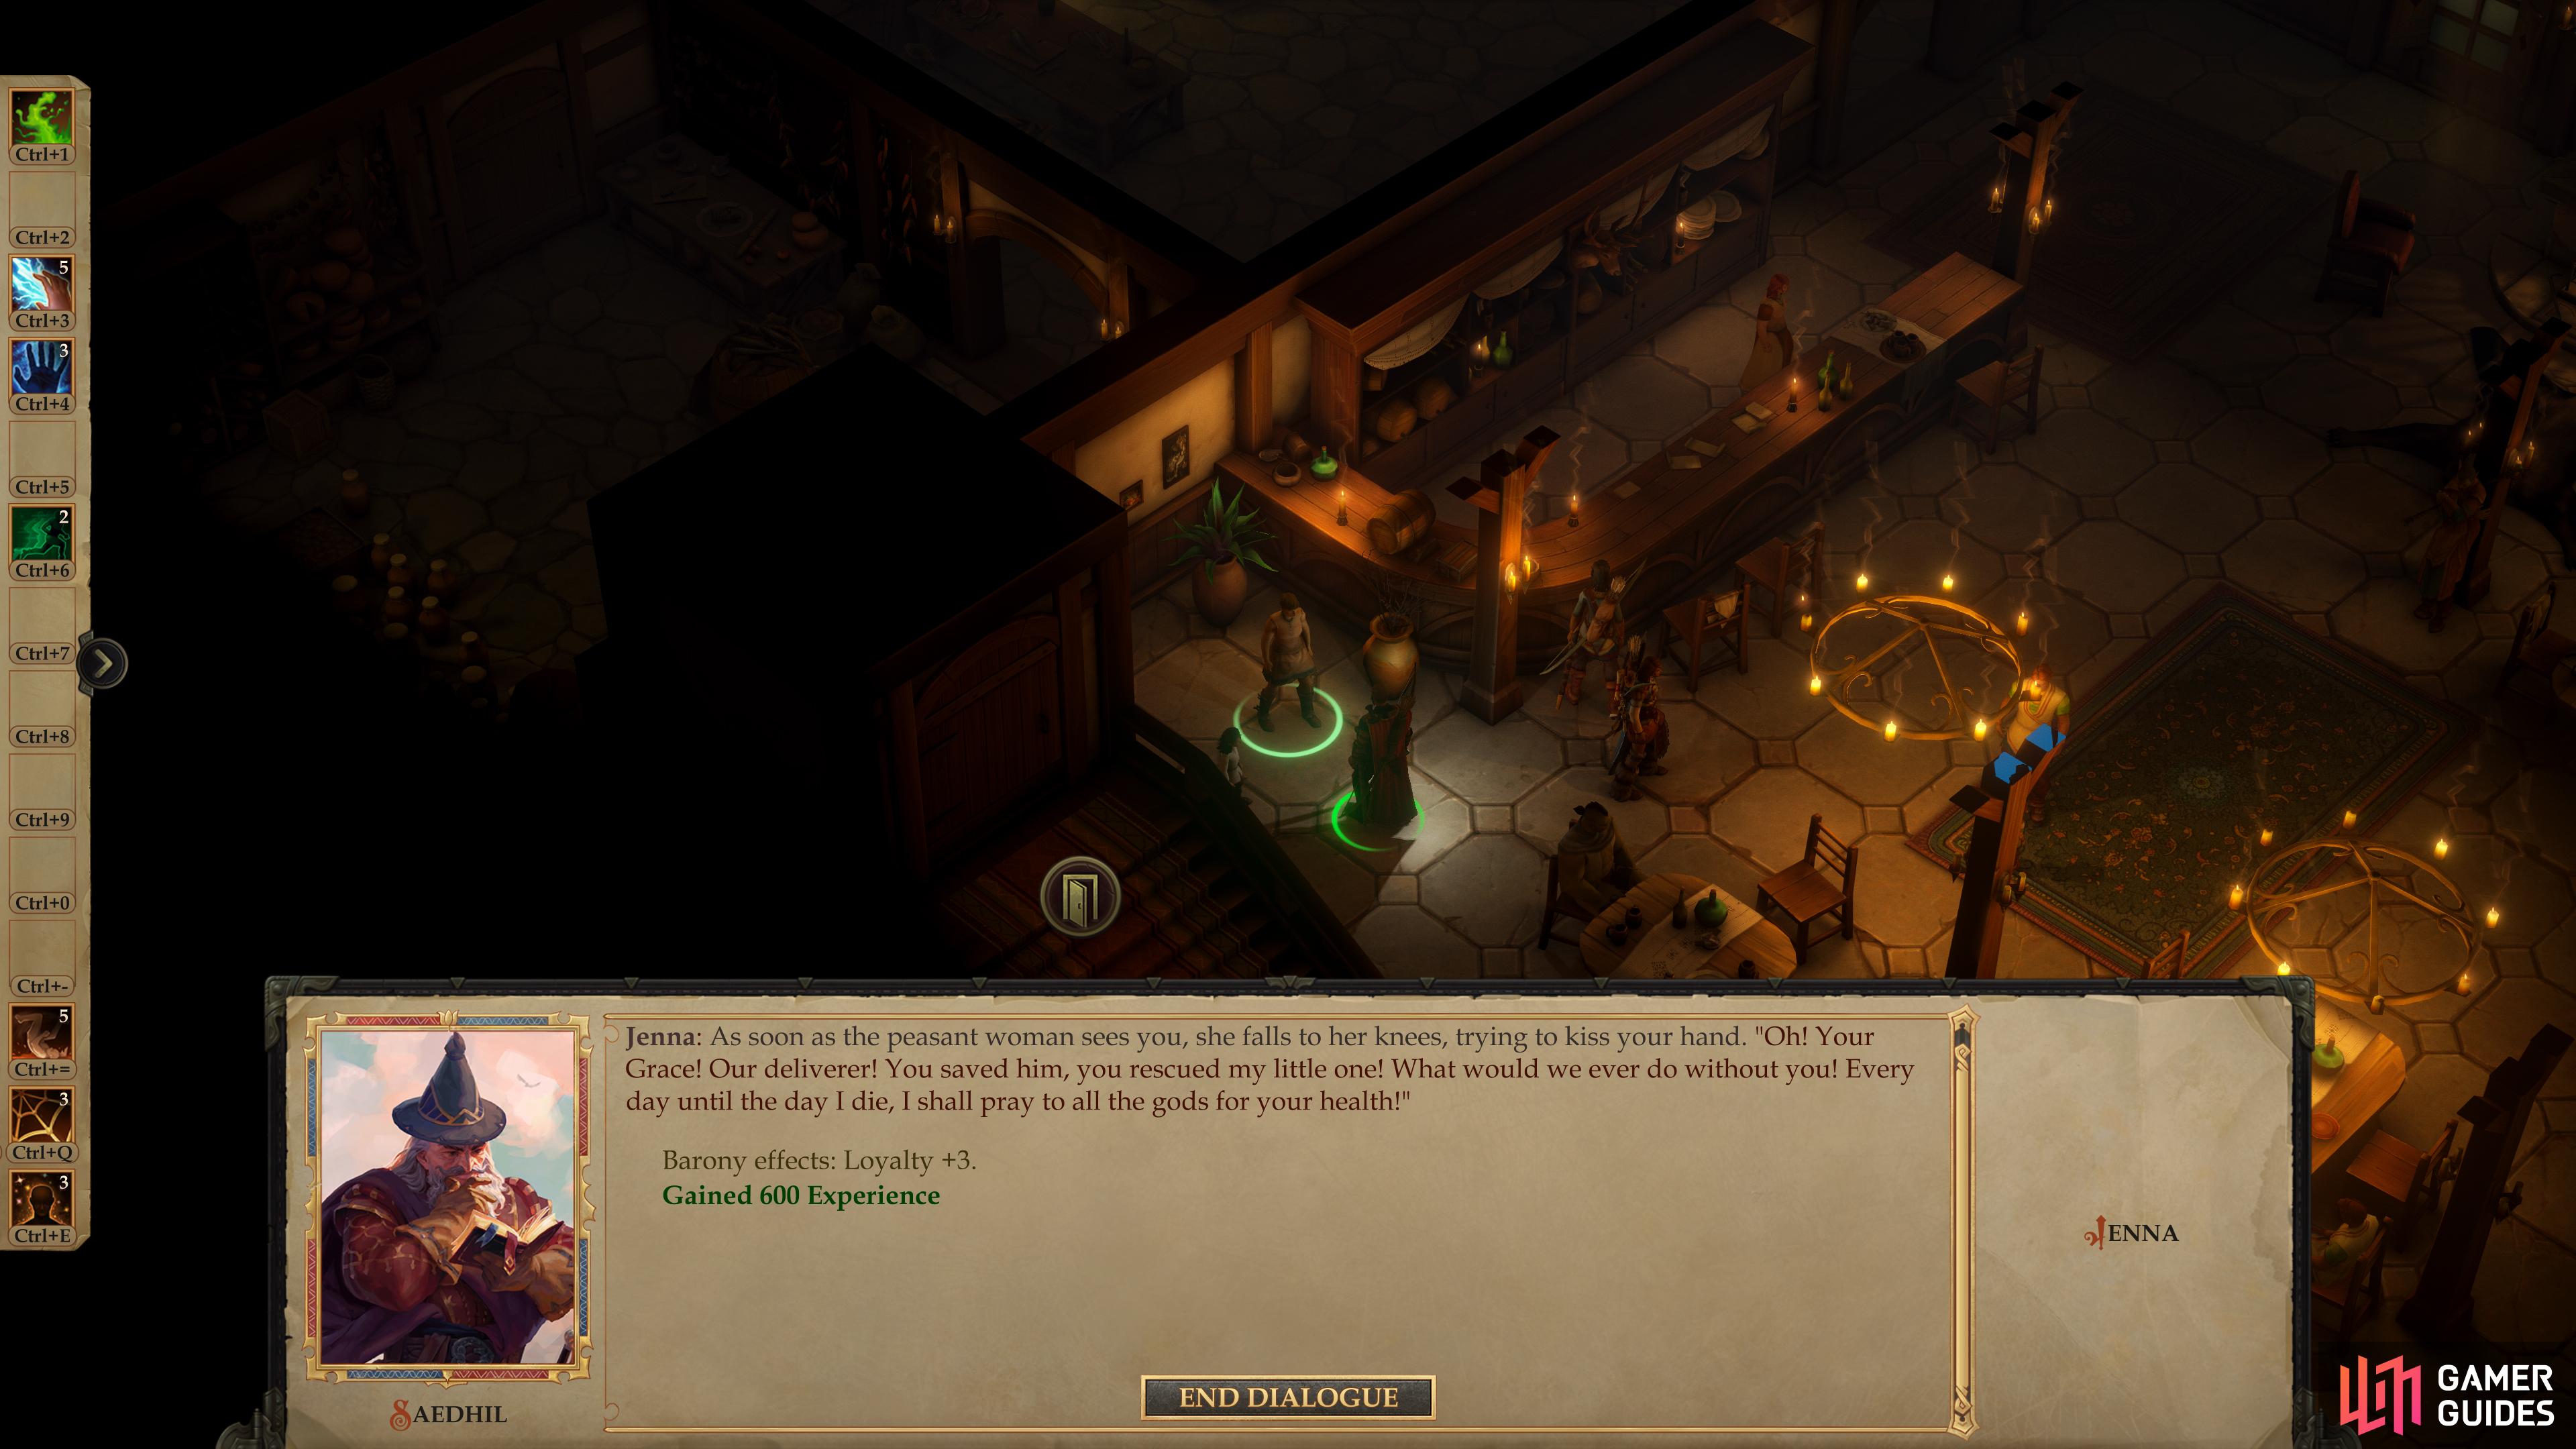
Return to Jenna for your reward, which will be higher if you saved Tig.
Tig Returned
Whew. With that ordeal resolved, return to Tuskdale and talk to Jenna in the tavern. If something went amiss and Tig didn’t make it, the traumatized mother will leave the tavern without a word, but you’ll still get 300 Experience for your effort. If you successfully rescued Tig, however, you’ll be treated somewhat more warmly and more importantly you’ll earn 600 Experience as well as +3 Loyalty*.
| Reward |
|---|
| 300 or 600 XP |
| Loyalty +3 |
No Comments