

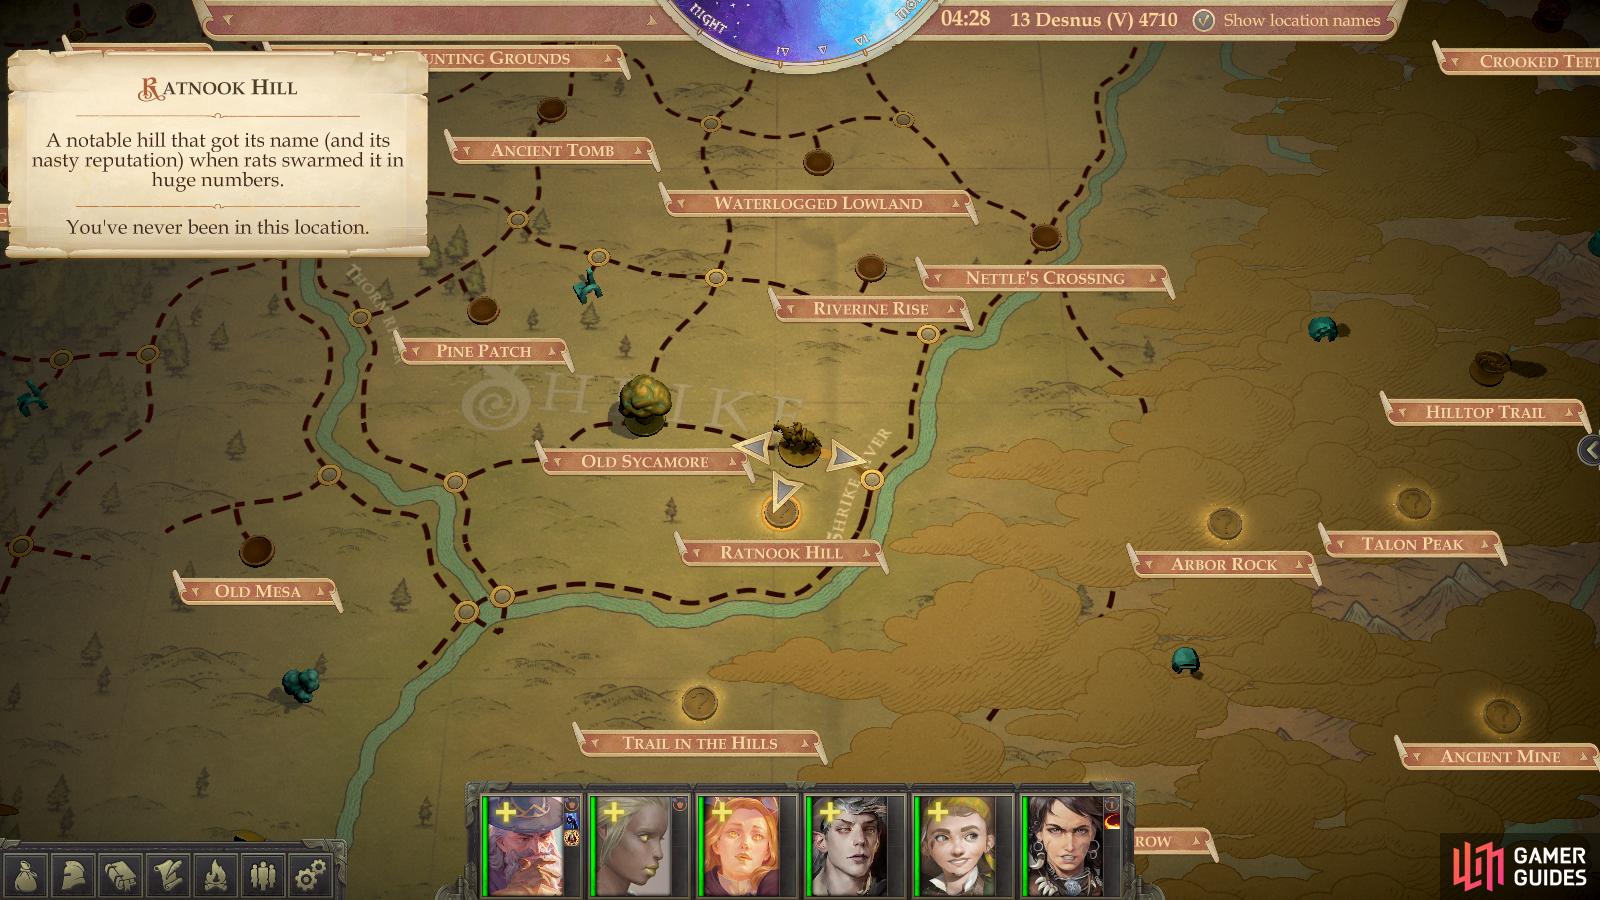
Despite being in the Shrike region (just southeast of the Old Sycamore, in fact), this is a very dangerous area for low-level parties. You should probably postpone a visit here until you’re in Chapter 2, with an average party level closer to ten than to five. To find it you can just follow the Shrike River southwest from Nettle’s Crossing.
You’ll arrive on the southwestern edge of the area map, from which you can head either north or east, ultimately aiming to head uphill to reach the northeastern edge of the area. Along the way, however, are numerous dangerous traps [Perception 21] [Trickery 21], which are both a hindrance, and a cheap source of experience. If that’s not enough of an indicator of the danger that awaits you, the corpses lying around should be. The one near the southwestern edge of the map indicates feeding by rodents, while the one to the northeast, near a cave, possesses an Ancient Rostlandic Coin. Another, more potent trap [Perception 32] [Trickery 32] awaits near the entrance, but it doesn’t appear to have any immediate effect - perhaps it’s an alarm?
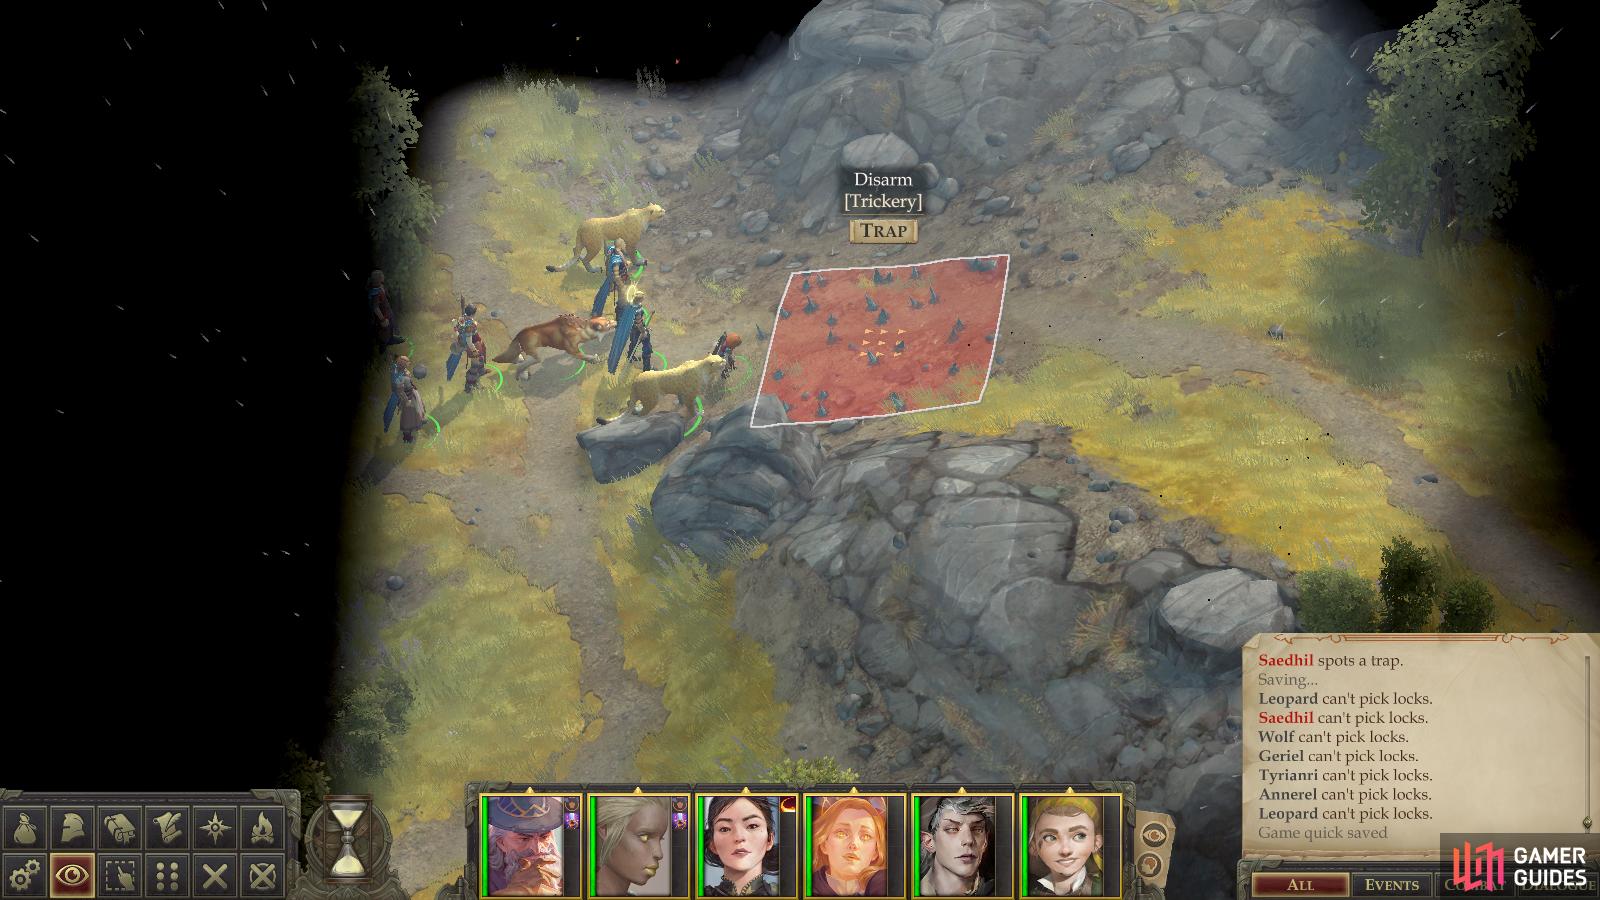
Disarm a series of traps

and buff considerably near the entrance to a cave.
Disarm the traps, loot the corpse, then enter the cave to find the critters that call this area home - a pack of Wererats. As 8th-level Rogues, these Wererats boast a high Armor Class (due in large part to Dexterity and buffs) and Attack Bonus (although not so high a well-protected character can’t mitigate most of their attacks), and while their damage output isn’t outstanding, those Rogue levels mean they’ll be scoring Sneak Attacks, which will increase the damage significantly. While it may seem like a wise idea to split your forces to avoid provoking Sneak Attacks, it may be a better idea to concentrate on one foe at a time to quickly eliminate them. While their HP are decent enough for their level, they’re not outstanding, although their Damage Reduction 10/silver will likely blunt your offense significantly. Speed things up with direct damaging spells or debilitating spells (anything that targets Will Saves - like Hideous Laughter work stupendously well) and finish them off with fire or acid… or you could just wait for some friendly fire…
Okay, you probably won’t have much of a choice on this last bit, and it’s not all a good thing. Further in the back is another Wererat who will join the fray after a short delay. This Wererat is an 8th-level Alchemist who is content to stand back and throw bombs at you from afar. He’s got an even higher Attack Bonus than his Rogue counterparts and deals more damage per attack (not to mention it’s an AoE that can hit multiple characters - including his own allies), but you can mitigate this somewhat with resistance to fire - Resist Energy is a wise preparation for this encounter.

Suffice to say, you should buff sufficiently ahead of time - the closer you get your tanks to an Armor Class of 30+, the better off you’ll be, and Resist Energy, Communal would be just lovely. Once in the cave, focus on one of the Rogues until it falls, then dispatch the other before finally turning your attention on the Alchemist. This encounter is possible for a well-tuned party in Chapter 1, but there’s no shame in waiting until later.
Exterminate the wererats, then loot the two by the door to score a Shock Shortsword +1, a Masterwork Shortsword, Padded Armor +1, and a Belt of Incredible Dexterity +2 from one of them, and a Kukri +1, a Keen Kukri +1 and a suit of Leather Armor +2 from the other. The bomb-throwing rat leaves behind a Masterwork Club, a Bombardier’s Vest, a Headband of Vast Intelligence +2 a Potion of Resist Cold and a Potion of Remove Curse. Finally, loot a crate at the northwestern end of the cave to find a variety of gems, a Potion of Vanishmiscellaneous goods that a merchant will pay good coin for, and a variety of cheeses. Har. Once that crate is emptied you should also find a chest containing a Wand of Shield.
No Comments