


Description
This page offers a guide on the level, Through the Meteor Storm in Melty Molten Galaxy. This is the second level available to you in this galaxy.
Light the Beacons
Head over to the shore of the large lava lake and you’ll come across two unlit beacons. You’ll need to guide the li’l cinder nearby across the beacons to light them. When both are lit, a Launch Star will spawn and you can head over to the next section of this level.
You’ll need to use a li’l cinder to light the beacons.
Thwomp Planet
On this small planet, you’ll need to make your way along a path covered in thwomps. Make sure you don’t get squashed by the thwomps as you’ll instantly lose a life and have to begin at the start of the level again. Whilst making your way underneath the thwomps, you should also watch out for the comets! Especially, near the end of the planet, you’ll need to dodge a lot of comets. At the end of the path, you’ll be able to use a Launch Star to take you over to a new section of the level.
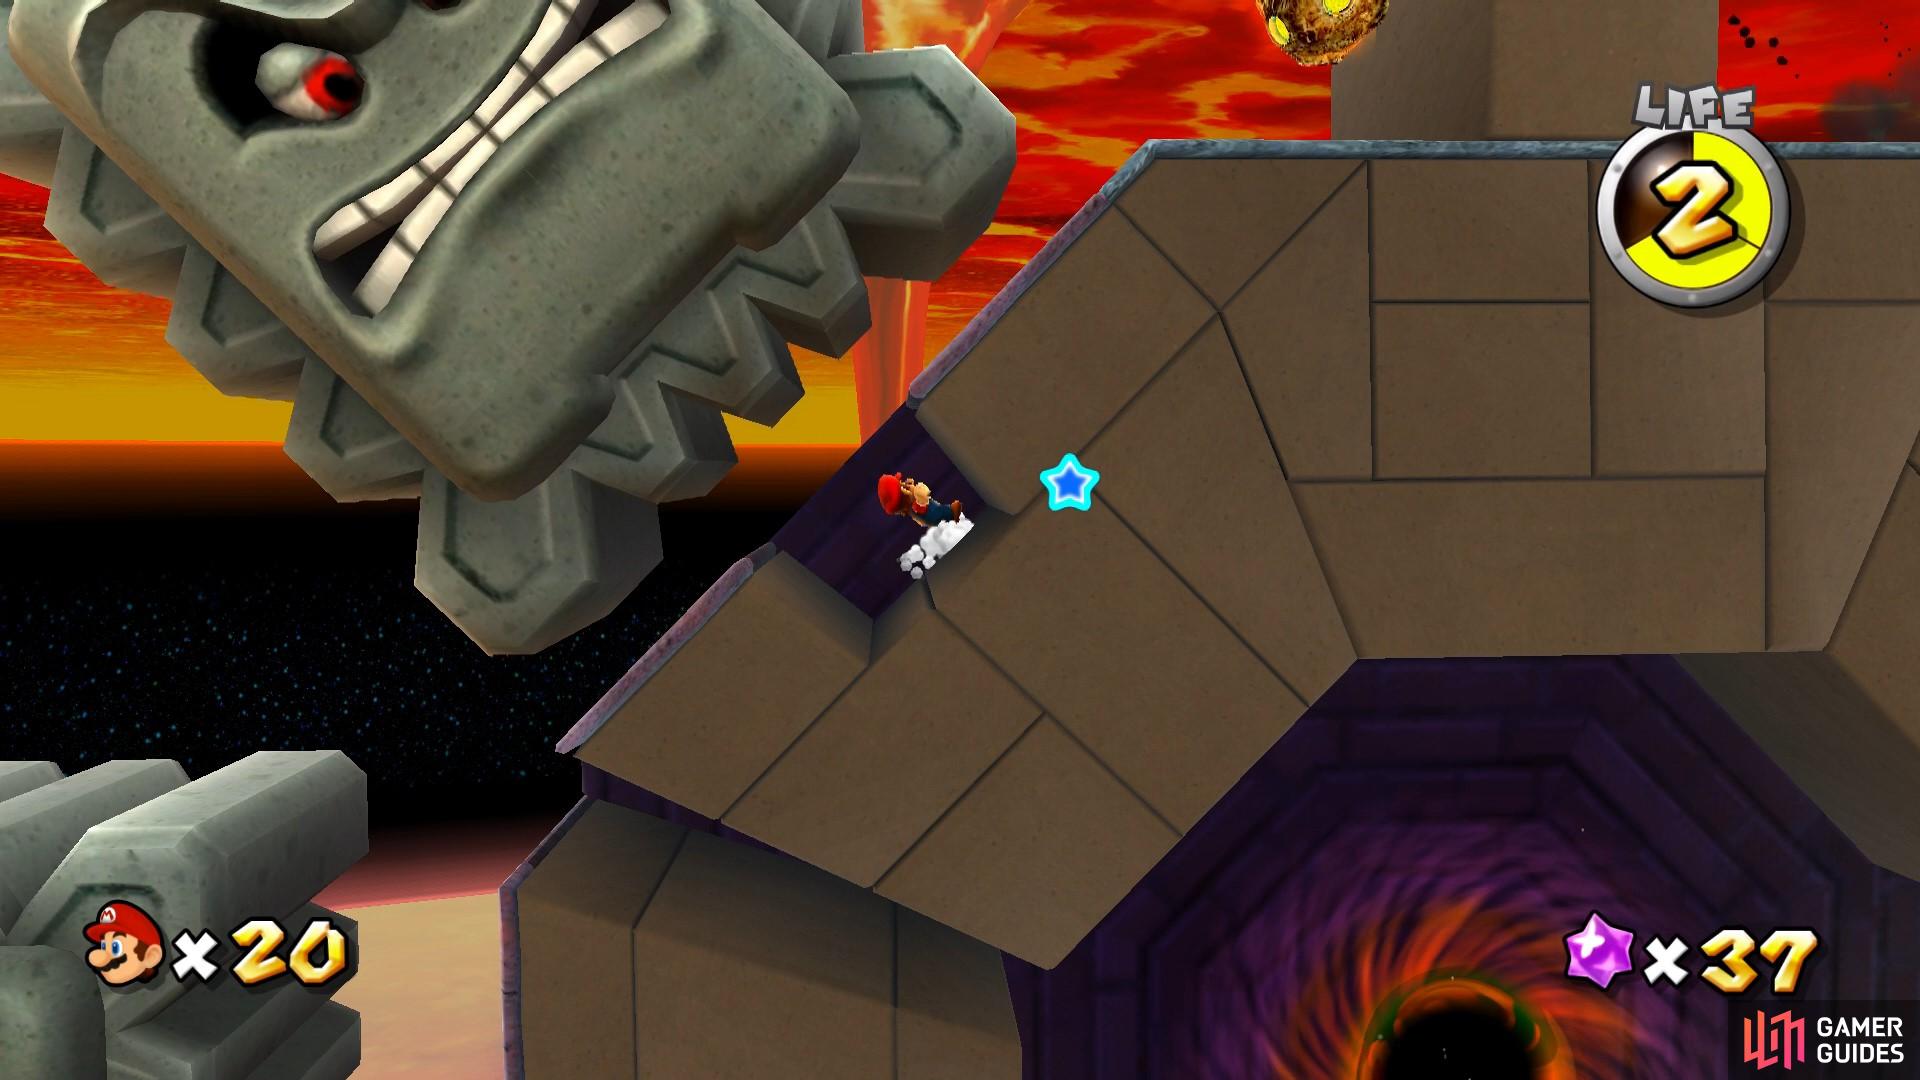
Use the alcove beneath the third thwomp to hide from being squashed.
Collect the Star Chips
On this holey platform across the lava, you’ll need to grab five Launch Star chips. There’s one to the right of where you begin, then another hidden within a wooden crate that’s behind some fire jets. The other three star chips are on the upper half of this platform over the lava. A Launch Star will spawn in the upper half of the platform.
Guide the Bullet Bill
On this planet, you’ll firstly need to head all the way to the end where you’ll find a Bullet Bill blaster. Then, you’ll need to lead the Bullet Bill all the way to the top of the planet again so that it’ll smash into the cage blocking the Launch Star. During your dash back to the top, you’ll need to spin attack or avoid the li’l cinders so that the Bullet Bill doesn’t smash into them. You’ll also need to dodge round the stone wall obstacles to reach the top of the planet again.

Guide the Bullet Bill to the otherside of the planet to smash the cage covering a Launch Star.
When you successfully explode the cage, use the Launch Star to take you over to the final section of this level.
Star Ball over the Lava
In this final section, you will need to jump up onto the Star Ball and take it across the precarious lava platforms. You will need to use motion controls to move the ball around. You can do this in handheld or docked; if you choose to play handheld then you’ll need to tilt the whole Switch console and if you’re using the Joy-Cons or a Pro Controller whilst the Switch is docked, then you tilt and move around with those instead. You can also jump by pressing A/B. You can also brake whilst rolling and bring the ball to a fairly quick stop if you tilt your controller/console inwards (or towards you).
Whilst it may look a little risky at first glance, the easiest way across the first section of this journey is to jump over to the stone platform with the 1-up Mushroom on it. To make the jump, you’ll need to build up a little speed ahead of the jump. This is a great short cut and also means you can avoid having to make the scary journey across the moving platforms in the alternate route.
When you’ve made it across the shortcut, continue north towards the rotating lava cylinder. This section is riddled with holes that are sometimes a bit hard to spot until it’s too late. The best way to get through this section is to speed up when the path is clear and to slow down and wait for paths between the holes. You could jump over the holes but this is a little risky and it’s advised that you’re more cautious in this section.
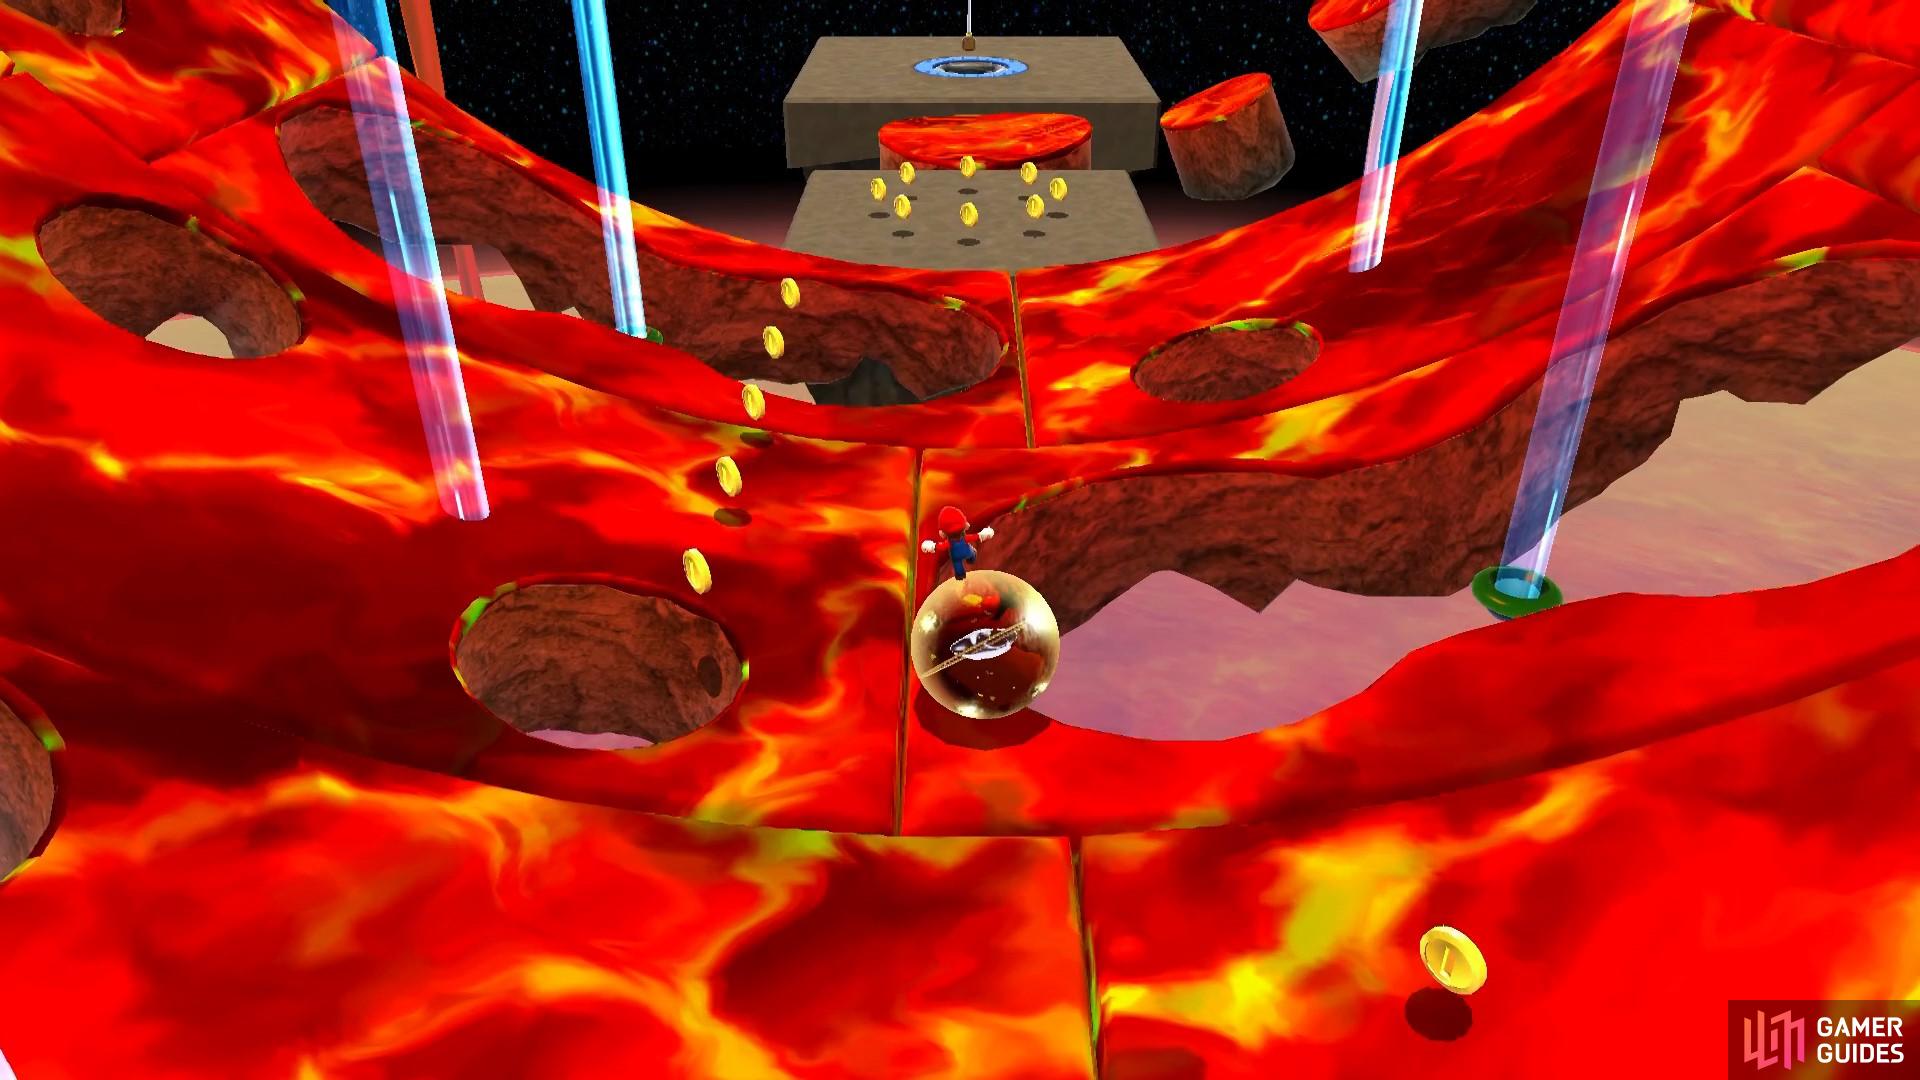
Carefully guide the Star Ball through the holes in the lava cylinder.
When you reach the end of the rotating lava cylinder, you’ll need to make a scary jump onto another moving lava platform in order to get to the finishing hole. Wait for the larger platform to come round as it’s definitely a safer option compared to the smaller platform that comes before it. When you make the jump, roll into the hole in the final platform to burst open the Star Ball so you can fetch the Power Star from the top of the flag pole!
No Comments