
In Elden Ring, you’ll find yourself up against numerous challenging Bosses, many of which are optional. This page will detail where you can find every Boss in the Mountaintops of the Giants region, including the three bosses located in the Forbidden Lands, which connects Altus Plateau to Mountaintops of the Giants. However, this page does not cover the bosses located in the Miquella’s Haligtree legacy dungeon.
All Boss Locations in Mountaintops of the Giants, Elden Ring
Ancient Hero of Zamor (Mountaintops of the Giants)
The Ancient Hero of Zamor (Mountaintops of the Giants) boss is located at Giant-Conquering Hero’s Grave, west of Giants’ Mountaintops Catacombs. This boss is capable of inflicting the Frostbite debuff with a number of attacks, including a breath of frost attack during which the boss breathes a cone of frost on the ground in front of it. This can be dodged fairly easily, but a more difficult frost attack occurs if you stay within melee range of the boss for too long. It will then create a shockwave of frost damage in a radius around it, which can be difficult to avoid if you don’t dodge or run away immediately. The boss will sometimes generate a whirlwind of frost around it at the same time, making it difficult for you to land melee hits for its duration. The boss can also imbue its primary weapon with frost, allowing it to generate Frostbite with each successful hit. In addition to this, it will employ a number of spinning, swipe, and charge attacks as part of its melee attack combo routine, while occasionally goading you into attacks before sidestepping, potentially leaving you vulnerable if you’ve committed to a heavy attack.
Anastasia Tarnished-Eater (Mountaintops of the Giants)
The Anastasia Tarnished-Eater (Mountaintops of the Giants) invasion can be found northwest of the Inner Consecrated Snowfield Site of Grace, in western Mountaintops of the Giants. This invader enemy wields a large butcher knife with decent reach. Anastasia has a number of attacks that you’ll need to look out for. One of the most common consists of Anastasia gripping the blunt edge of the knife, jumping in the air and slamming down towards you. This is fairly easy to avoid with a quick dodge or roll. There’s also an overhead slash attack that Anastasia will often execute on its own, but will also sometimes follow it up with a second slash and a final jump & slash. All of these are easy to get to grips with. The most damaging attack that Anastasia can use consists of consecutive slashes with the knife, during which at least three strikes will be executed. It can be difficult to avoid these once they get going and you may get caught if you try to interrupt them, so you’ll be safer staying back and waiting for the attack to end.
Borealis the Freezing Fog
The Borealis the Freezing Fog Greater Boss can be found at the Freezing Lake, in northeast Mountaintops of the Giants. This fight is similar to most other dragon fights in the game, making it one of the easier encounters, especially if you choose to fight it on your mount. You can easily flank the dragon as you strike at its legs, but you’ll need to be careful to avoid the occasional stomp attack. There’s also a special stomp attack that the boss will sometimes use which inflicts Frostbite. This is preceded by a fairly long animation during which the dragon raises one of its hind legs high in the air for about two seconds, giving you plenty of time to notice it and get out of the way. Another thing to be cautious of is the dragon’s tail swipe attack, which will sometimes be used as you’re hitting the hind legs from behind. The dragon will also use a frost breath attack which can be easily avoided by running away from the radius in front of it, but if you do get caught this will also inflict Frostbite. Other than these notable attacks, there’s also the relatively rare bite attack you’ll need to be cautious of, especially when you’re positioned in front of the dragon.
Black Knife Assassin (Ordina, Liturgical Town)
The Black Knife Assassin (Ordina, Liturgical Town) boss can be found within Ordina, Liturgical Town. More specifically, you’ll find it in the northern part of the town after entering the evergaol. This is a fight much like other Black Knife Assassins, during which the most deadly attacks come in waves of swift dagger strike combos. One of the best moments to strike the boss is immediately after they execute a leap and slam attack. This will see the boss pause in position for a few brief moments as it pulls the weapon from the ground. You can use this opportunity to execute a few swift strikes of your own, or charge a more powerful heavy attack or spell. The assassin has the ability to close in to melee range from a great distance within a split second, so you’ll need to be ready to dodge, roll, parry or block attacks even when it seems like the boss is far away. There’s also a special attack that it can use during which it casts red magic from its weapon. This can be avoided with a quick dodge or roll if you keep an eye on when the weapon turns red, with a burning sound.
Black Blade Kindred (Forbidden Lands)
The Black Blade Kindred (Forbidden Lands) can be found guarding the path to the Grand Lift of Rold Site of Grace, in southeast Mountaintops of the Giants. This boss primarily wields a twinblade weapon, but it also has a secondary one-handed axe that it will sometimes use, changing up its attack patterns in the process. The boss uses a number of swift melee attacks with both weapons, but it also has some bloodflame-esque magic attacks. These can inflict significant damage upon impact, but also cause damage over time, making it particularly important that you avoid them. One of these attacks consists of the boss raising its axe in the air and over its head, before slamming it down into the ground. This creates a wall of magic which will inflict massive damage if you’re caught by it, but it can be avoided with a quick dodge or roll backwards. Using the twinblade, the boss will spin the weapon around rapidly in front of it, generating a whirlwind of magic. The radius of this whirlwind will increase for as long as the attack goes on, before disappearing as the boss finishes with a melee strike. Using either weapon, the boss can also roar and inflict a shockwave of magical damage, which can hit you even when the boss isn’t facing you if you’re within range.
Bloody Finger Okina
The Bloody Finger Okina invasion can be found directly west of Foot of the Forge Site of Grace, in southeast Mountaintops of the Giants. This invader wields the deadly Rivers of Blood katana, which inflicts a significant amount of blood loss build up (50). Okina will also use a smaller secondary weapon in the form of a knife, allowing them to dual-wield. They’re highly mobile and will pursue you relentlessly, but most of the attacks can be blocked or parried with relative ease. Alternatively, you can dodge or roll away from them. The main attack that you need to be concerned with here is the Corpse Piler skill, which is the default skill for the Rivers of Blood katana. This consists of a series of swift slash attacks which inflict massive damage and blood loss build up. If you’re caught by all of these attacks it’s essentially a death sentence, especially if you don’t have much of a health pool. The easiest way to notice when this attack us about to be used is by paying attention to where the katana is positioned in relation to Okina. When they draw the katana back behind them (to the right hand side), the attack is imminent and it’s time to move.
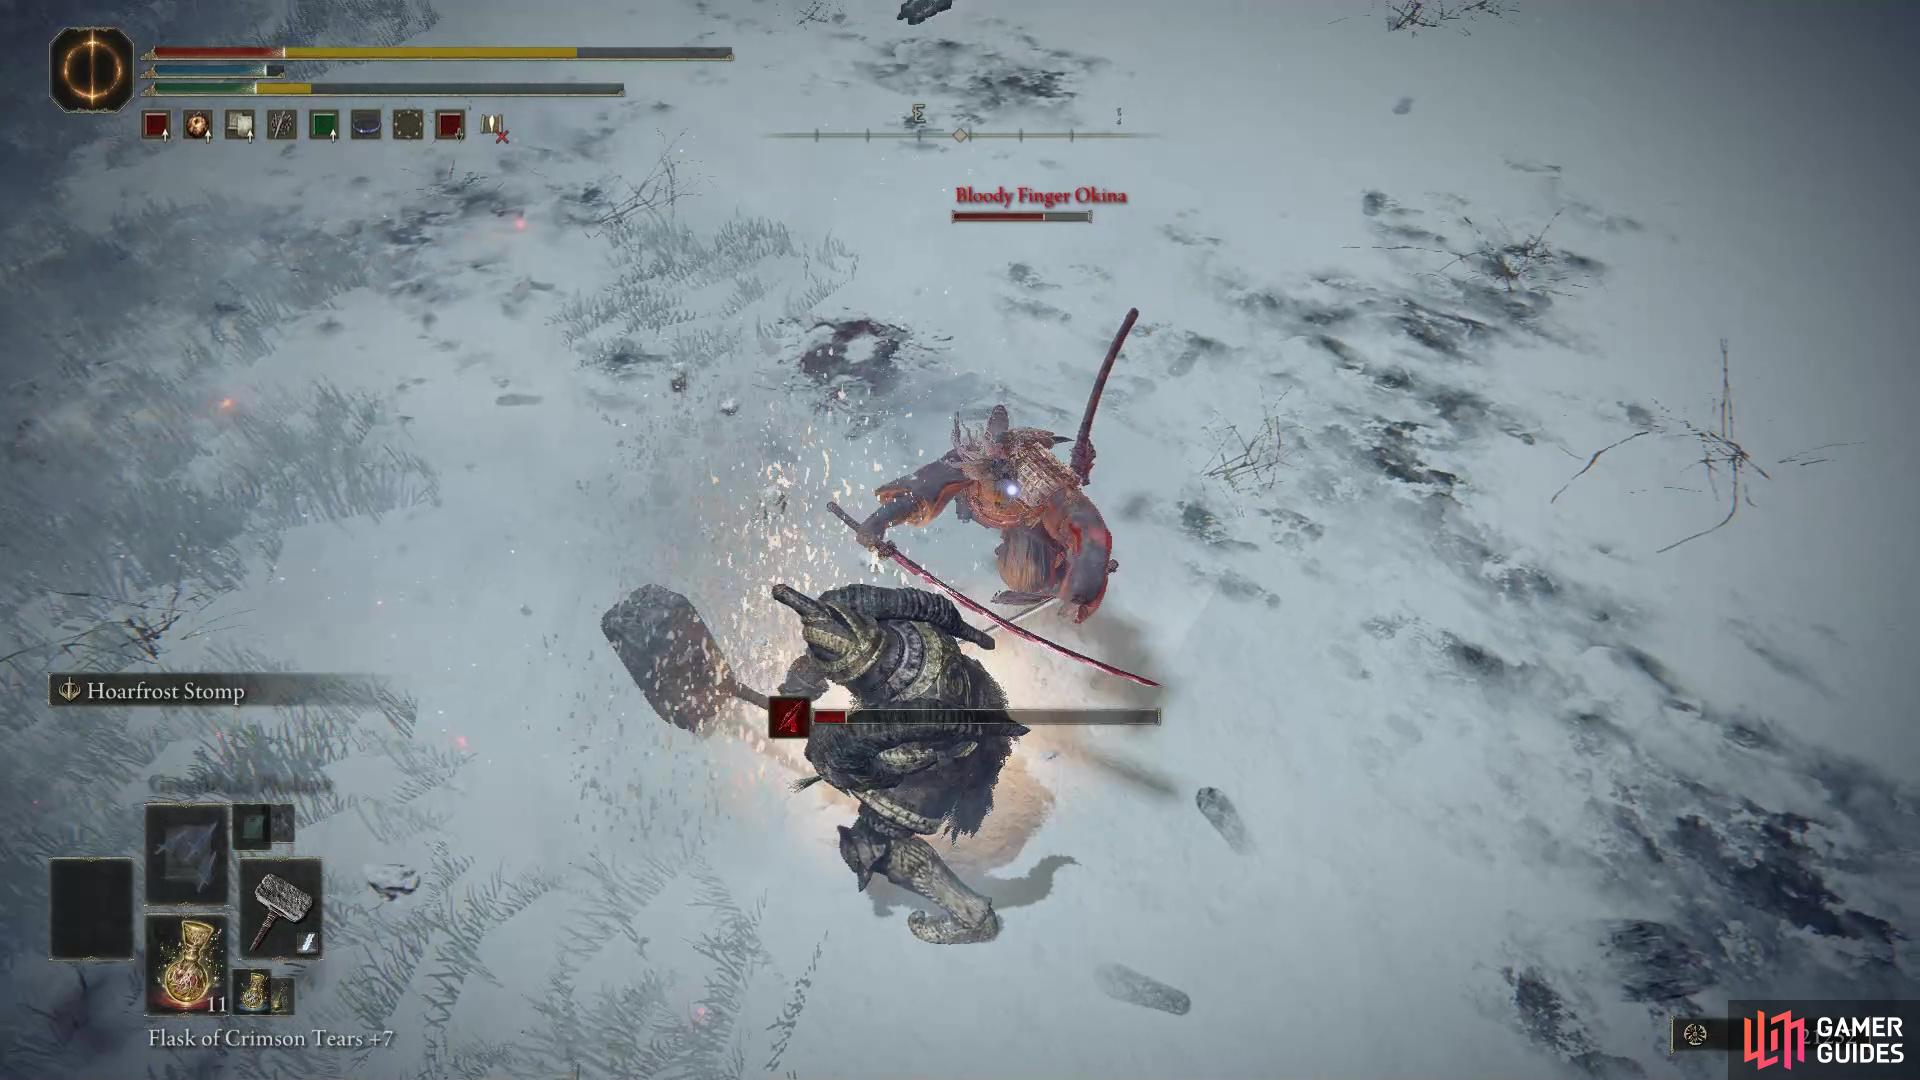
Bloody Finger Okina.
Commander Niall
The Commander Niall boss is located at the Church of the Eclipse, in northeast Mountaintops of the Giants. This is one of the more difficult fights in the area, especially since you need to kill two Banished Knights at the beginning of the fight, while Commander Niall is also pursuing you. It’s a good idea to take out the dual-wielding knight first, since you can effectively stun lock them with consecutive attacks if you go all out at the beginning. If you allow this knight some breathing space however, it can kill you within just a few strikes if you’re not careful. The knight with the sword and shield is more difficult to take down without being hit, since it has an effective defence against stun locking. A leaping heavy attack is perhaps the easiest way to catch this knight off guard, but you’ll need to continuously create enough space for you to do this by kiting both the knight and Commander Niall around the area, while avoiding a scenario where you’re backed into a corner. The knight with the shield is able to charge towards you after slamming the shield into the ground, inflicting Frostbite upon impact. The easiest way to avoid damage from this is by rolling into the knight as it reaches you, which should allow you to avoid being hit altogether.
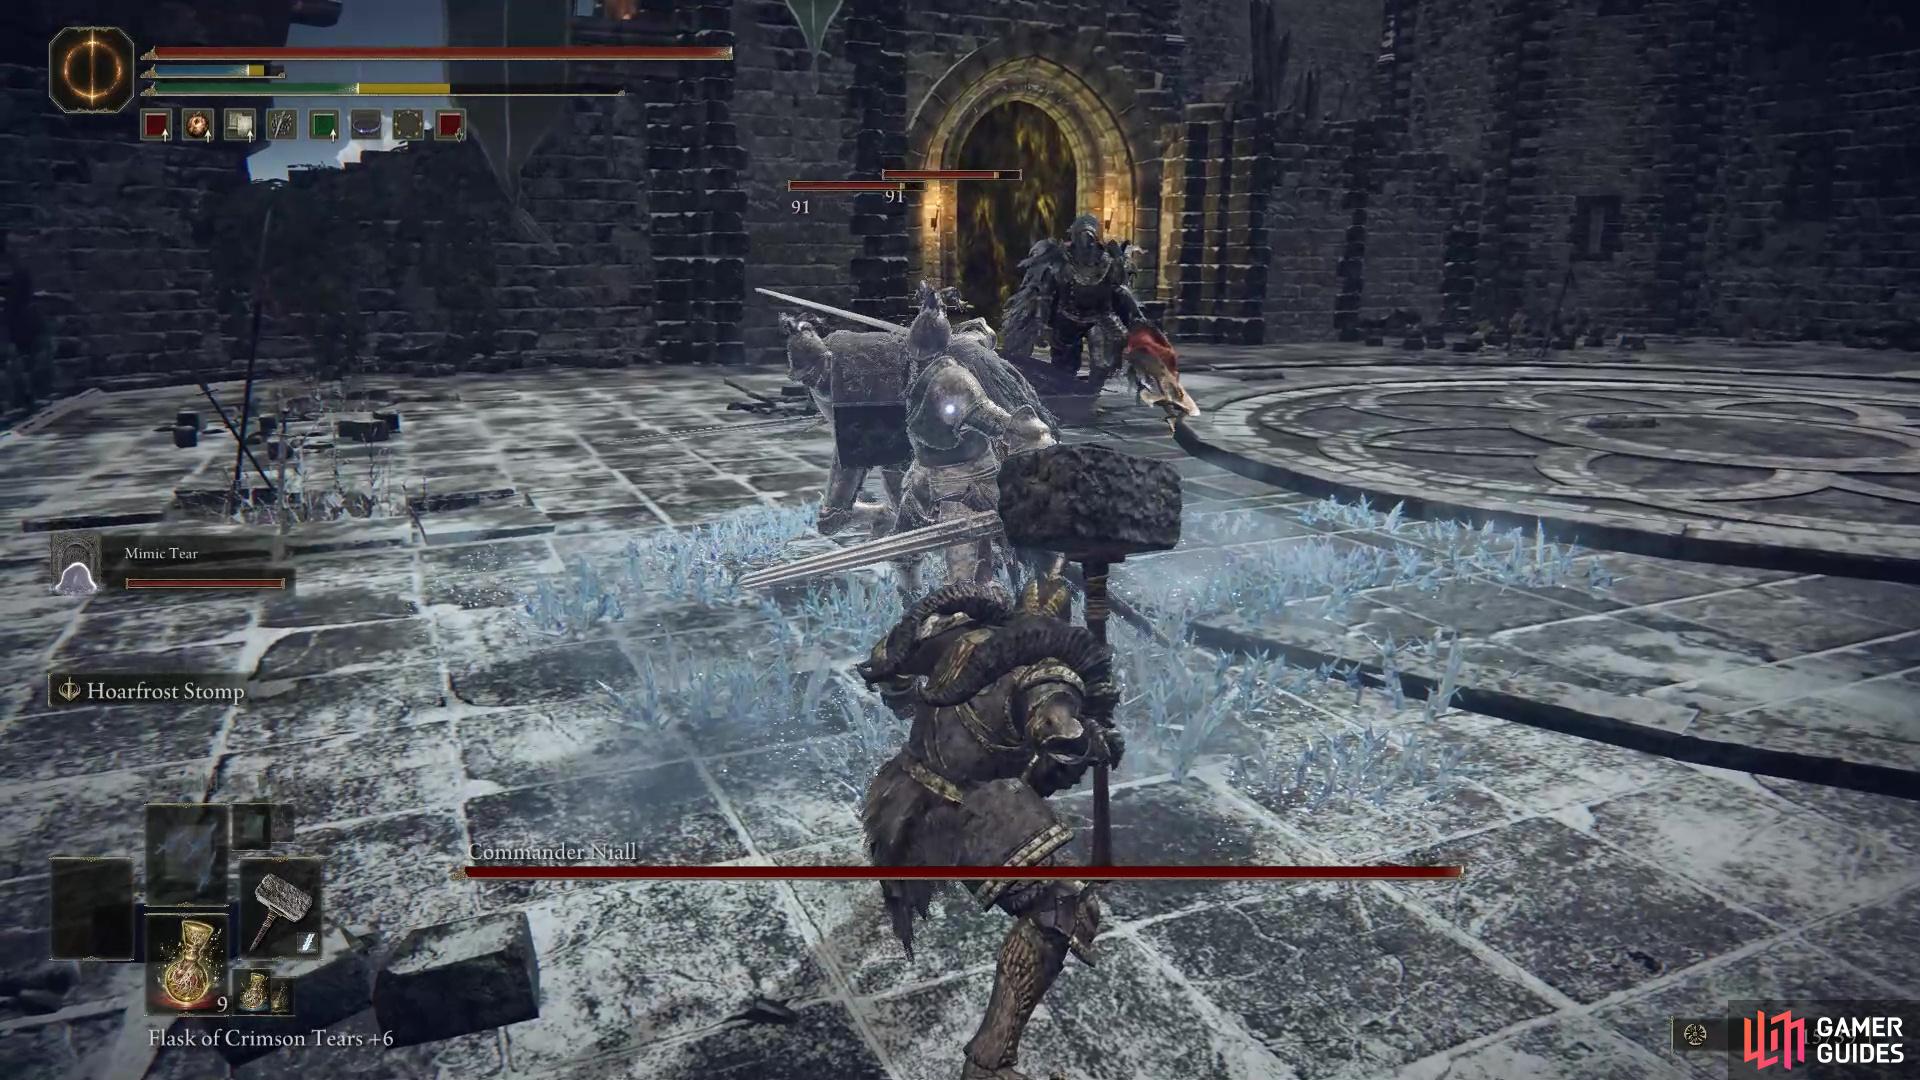
Commander Niall.
The fight with Commander Niall properly begins once the two knights have been dealt with, as he’ll start to use all attacks available to him. This boss has a tendency to spam slam its halberd into the ground after many of its attacks. Each time this happens, a whirlwind will form around the boss, which inflicts Frostbite if you’re caught in it. You can dodge or roll away from this, but you’ll need to be extra careful to avoid being too close to give yourself enough time. The boss will sometimes follow up whirlwind attacks with sweeping halberd stabs or slashes. These can inflict massive amounts of damage, especially since they’re often infused with lightning. You’ll notice that Niall’s right foot has a blade attached to it, which he’ll sometimes use with a sweeping kick. It’s fairly easy to see when this is coming, but you’ll need to get used to the animation to ensure that you can avoid it every time, as it also comes infused with lightning damage. This foot blade slash attack can be used at close range, but the boss will also sometimes jump in the air and slam it down on you, closing the distance within just a few split seconds.
Chief Guardian Arghanthy
The Chief Guardian Arghanthy invasion can be found at the Guardian’s Garrison, southwest of the Whiteridge Road Site of Grace in eastern Mountaintops of the Giants. This invader can be found at the top of the garrison ramparts. Arghanthy wears light armor and uses fire magic, but they’re also wielding a large shield. There are numerous fire attacks that Arghanthy will cast, including a short-range attack which essentially acts as pulses of fire stabbing you. This one is easily avoided with a quick dodge or roll, but a more deadly attack comes in the form of a flamethrower-like spell. This will hone in on you as you move around, but you can step back far enough so that the range of the attack can’t reach you. However, to do this you’ll need to make sure that you avoid being cornered by Arghanthy at all times. Another spell that you’ll want to avoid (especially in a corner) consists of Arghanthy casting sigils of fire all around them, before lighting them up causing bursts of flame to erupt vertically. This won’t cause you any problems so long as you’re far enough away, but if you’re in a tight spot as they begin to cast the sigils, you should move out of the vicinity as soon as possible. As ever, leaping heavy attacks will be especially effective here, but you can also try flanking to cast powerful spells.
Death Rite Bird (northeast Mountaintops)
The Death Rite Bird (northeast Mountaintops) boss is located west of the Snow Valley Ruins Overlook Site of Grace, just east of the Minor Erdtree. This boss will only spawn at night, so you may need to wait at a nearby Site of Grace before you can find it. This is a similar fight to the other Death Rite Bird bosses in Caelid and Liurnia of the Lakes, but it has more health and can inflict more damaging attacks. If you’ve fought either of the Death Rite Birds in the earlier regions, you’ll notice many of the same melee attacks here in the form of a sweeping slash, overhead slam, foot stomp, and a leaping stab. The boss will also use necromancy magic to generate an explosion. This will cast fire on the ground in a large radius, so you’ll need to stay back until it clears to avoid damage. Another magical attack is generated from its wings, during which numerous projectiles are fired from the wings as they begin to glow, landing in an area around you. You’ll be able to discern where the projectiles will land before they actually make contact with the ground by looking for white patches on the ground. So long as you avoid these, you should be able to evade most of the projectiles. Aside from all these attacks, the boss can also roar, inflicting a brief stun and minor damage, but this will only impact you if you’re directly facing the boss.
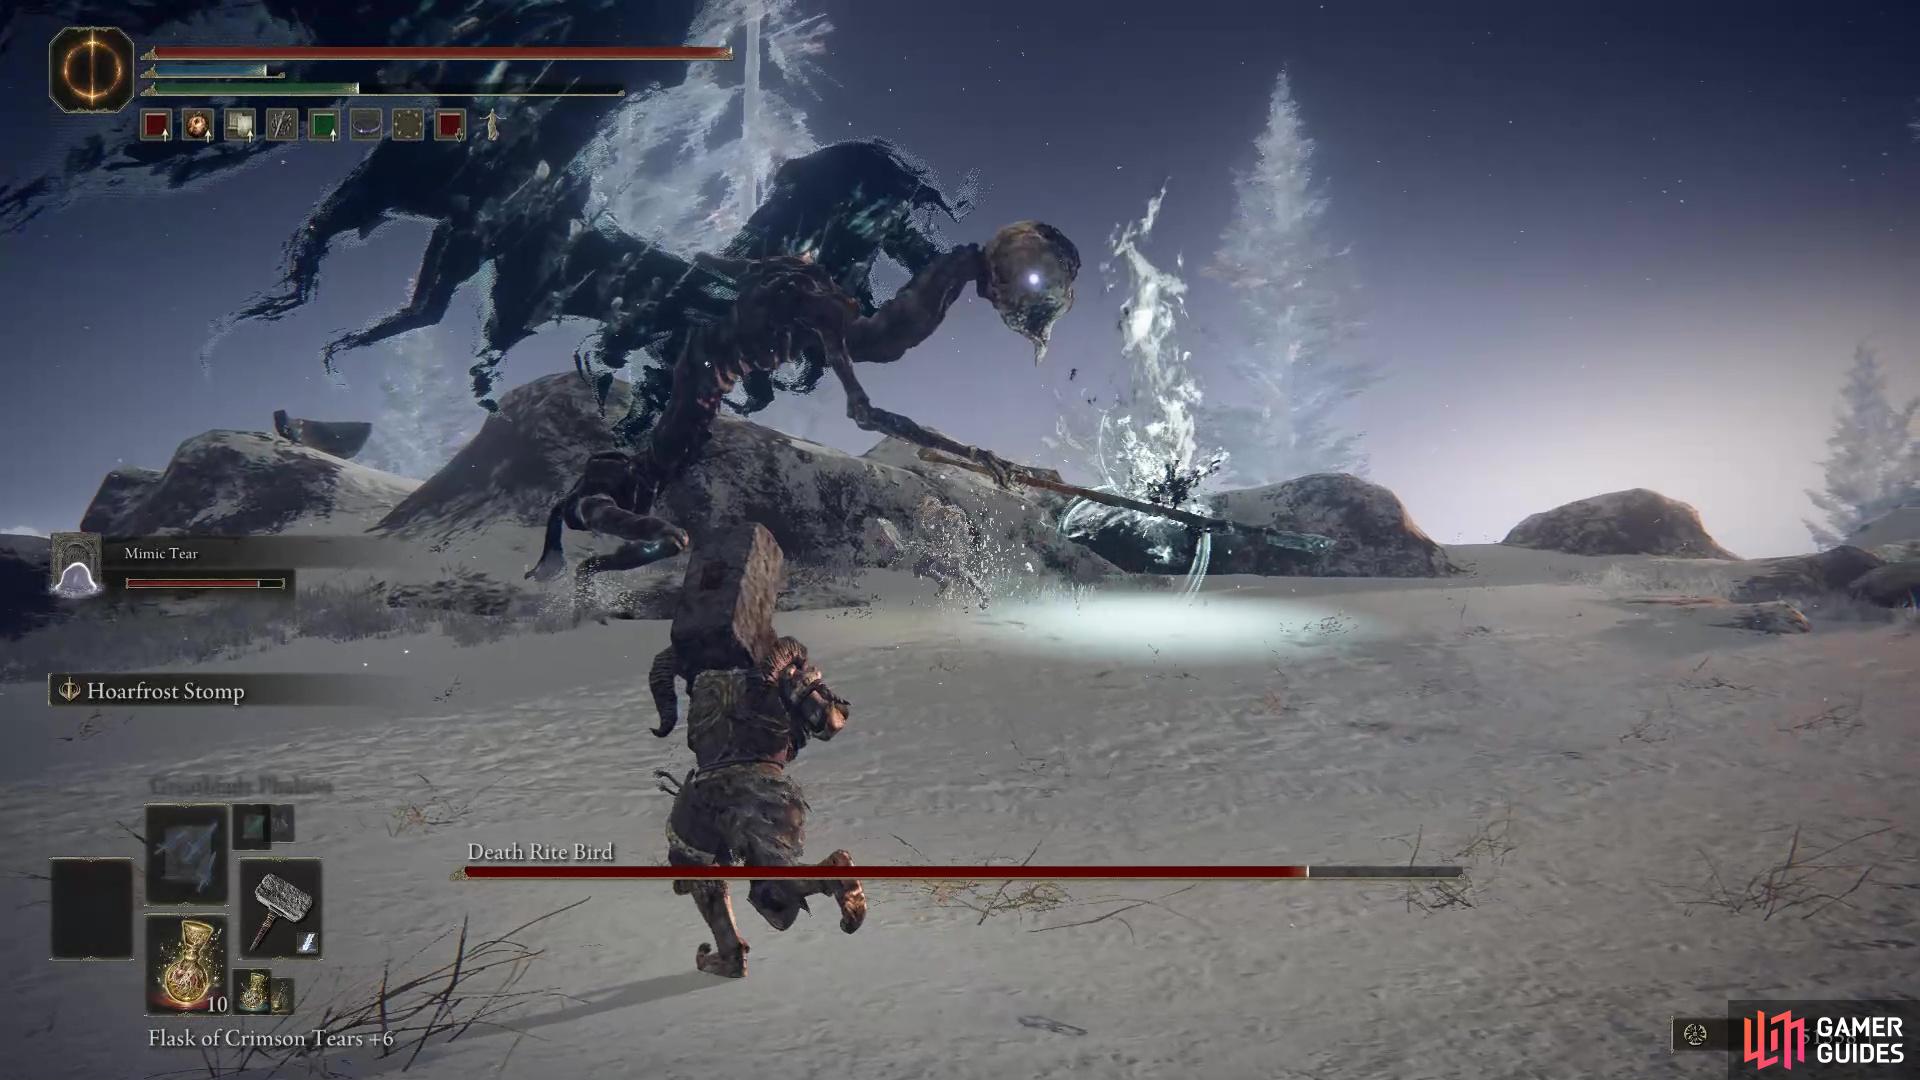
Death Rite Bird (northeast Mountaintops).
Fell Twins (Forbidden Lands)
The Fell Twins (Forbidden Lands) bosses are located on the southeastern bridge leading from Altus Plateau to the Forbidden Lands. You won’t see them the first time that you cross over the bridge, but if you turn back you’ll notice that everything turns black, and the boss fight begins. The Fell Twins will be in the distance at the beginning of the fight, giving you plenty of time to summon Spirit Ashes. As boss fights in Elden Ring go, these two are among the easiest. They don’t have much health and their attacks are fairly predictable. One wields a sword and the other an axe, but their attack patterns are similar with either weapon. They use a lot of overhead slam attacks, kicks and punches, but most of these can be interrupted with a big enough weapon. If you’re a ranged class, both enemies can be kited fairly easily. The main attack that you’ll want to avoid from both is a charging grab attack, as this will lead to an animation lock that you can’t escape, and which inflicts massive damage.
Fire Giant
The Fire Giant Legend Boss can be found southeast of the Foot of the Forge Site of Grace, in southeast Mountaintops of the Giants. This boss is surprisingly swift for such a large foe, at least in the beginning of the fight. The main thing you’ll want to focus on is breaking the bone splint which is located on the Fire Giant’s left leg, tied together with red hair. Once you’ve done this, you’ll see the exposed wound on the lower leg, which you can now hit for more damage. The easiest way to do this is while mounted on Torrent, which allows you to maneuver between the legs of the giant which avoiding its stomp attacks. As you’re under the boss, it will also generate a ball of fire which will gradually expand in size until it explodes. You’ll want to avoid this by riding off just before the explosion, but it won’t inflict any damage up until this point. However, the giant will also cast vertical walls of fire from the ground around him, so you’ll need to run from these as well. The boss will sometimes swipe at your with its shield as you’re under it, so watch out for this too.
Once you’ve brought the boss down to half health, a cutscene will begin which leads into the second phase of the fight. During this phase the giant will lose its left leg, but it will begin to use more fire attacks including a meteor shower which it summons from the hole in its stomach. The boss will also begin to summon fire balls and vertical walls of flame at the same time, making it difficult to get within melee range when this happens. Another new fire attack involves fire balls being thrown at you, and fire being spurted out from the hole in its stomach. In addition, the boss will now roll around on the ground in different directions. This can inflict damage if you’re caught in the roll, so be ready to avoid it. Ultimately, the best way to avoid most of the attacks from the giant is to stay behind it wherever possible, as you whittle down its health.
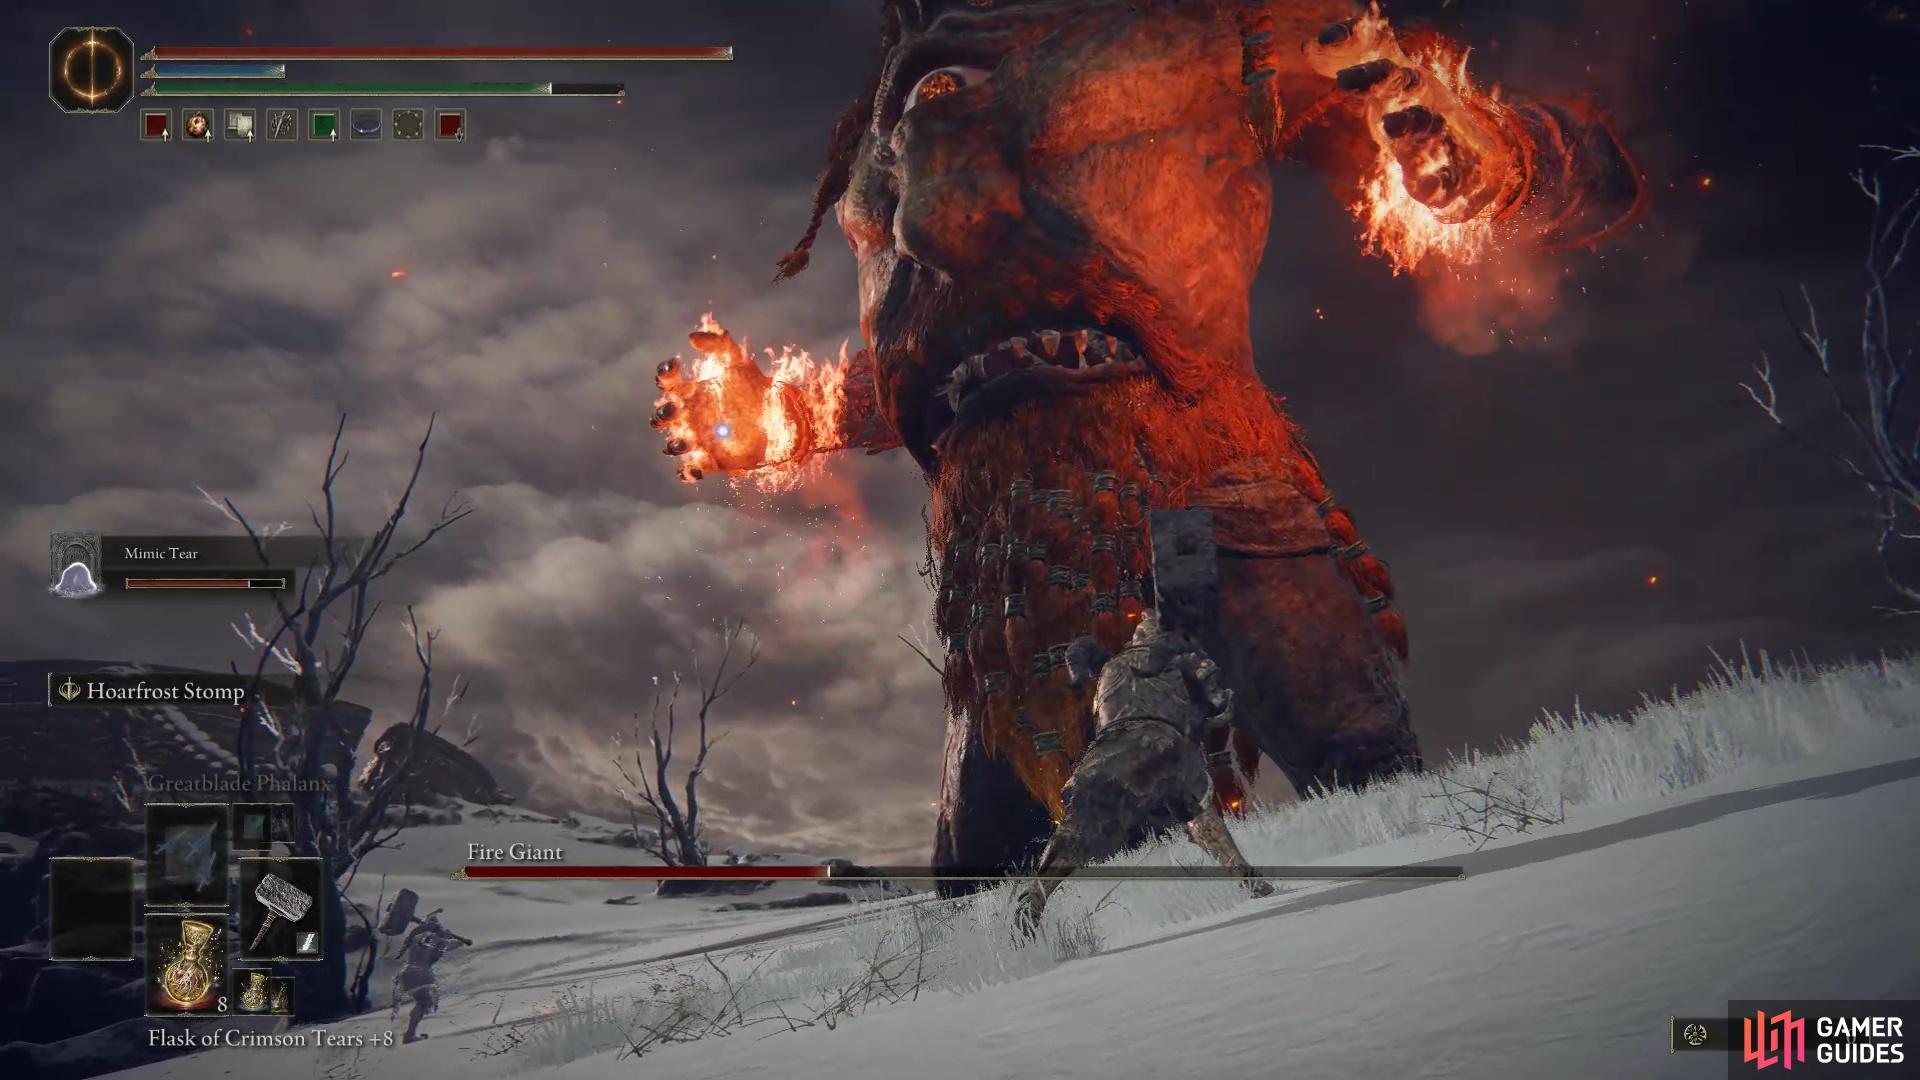
Fire Giant.
Fire Prelate
You’ll find these Fire Prelate Elite Enemies at Giant-Conquering Hero’s Grave and Giants’ Mountaintop Catacombs. You can activate the Site of Grace at either of these locations for easy access to nearby Fire Prelates, allowing you to kill one and then rest at the site to reset the enemy. The Fire Prelates wield a whip which has an impressive reach, but you should be able to attack it from afar while staying out of its range if you keep your distance. Since there’s a Site of Grace nearby, you can use all of your most damaging attacks without worrying about consuming too much FP for one encounter.
Godskin Apostle & Godskin Noble (Spirit-Caller Snail)
The Godskin Apostle & Godskin Noble (Spirit-Caller Snail) encounter is located at Spiritcaller’s Cave, on the western shores of the Freezing Lake. Here you’ll find the seemingly defenceless Spirit-Caller Snail, which will swiftly summon a Godskin Apostle & Godskin Noble. These two have exactly the same attacks as the ones you’ve encountered in earlier regions of the game. The good news is that you can fight both one after the other, rather than both at the same time. You’ll be facing the Apostle first, which uses swift slashes and spinning attacks in the first phase of the fight. After it loses half of its health, it will begin stretching its body and using more blackflame magic abilities, including a fireball. The Noble wields a deceptively large rapier which has more reach than you might first expect, so you’ll need to be ready to avoid consecutive attacks from this. If you get too close to the Noble for too long, it will use deflective melee abilities. However, if you remain at a distance, it will often cast a wall of blackflame magic before launching fireballs at you through it.
Golem Archer
The Golem Archer Elite Enemy can be found guarding the path southwest of the eastern Minor Erdtree, in northeast Mountaintops of the Giants. This is essentially the same as other Golem Archers that you’ve encountered in earlier regions, such as the one outside Castle Morne in the Weeping Peninsula. They are fairly slow enemies who are most deadly from a distance, but you can run rings around them pretty easily on your Torrent mount.
Juno Hoslow, Knight of Blood
The Juno Hoslow, Knight of Blood invasion can be found east of Shack of the Lofty, in northwest Mountaintops of the Giants. This is a tough invader who wields two deadly whips and is extremely quick on his feet. Juno also has the ability to teleport short distances, throwing you off in the process. The teleport will usually act as a way for Juno to disappear in the same spot, allowing him to evade your attacks at the last moment. This can be frustrating if you’ve just used a powerful attack which uses focus points, so you’ll need to be careful with your timing. Ranged classes have the option of kiting Juno around the area while inflicting damage, but keep in mind that he can close the gap incredibly quickly, especially if he teleports towards you. As a melee class, you’ll need to be patient with this fight and avoid spamming attacks, since it only takes a few hit from Juno’s whips to bring you down, and they can be executed within just a couple of seconds.
Lesser Red Wolf of Radagon
This Lesser Red Wolf of Radagon Elite Enemy can be found in the area northeast of the Consecrated Snowfield. The fight is somewhat similar to the encounter at the Raya Lucaria Academy. The wolf will use a lot of pounce attacks combined with glintstone magic, but it’s much weaker than the boss counterpart and is particularly easy to defeat on your Torrent mount.
Lion Guardians (Castle Sol)
The Lion Guardians (Castle Sol) are essentially the same as the others that you’ve encountered in earlier areas. They are extremely swift, powerful beasts who wield a sword from their right arm, while also utilizing claw swipes and bites. You’ll need to be ready to block, parry, or evade the swift claw and bite attacks, while also getting the timing right on the delayed sword attacks. the main difference here is that these lions can breath frost at you with a roar, which inflicts Frostbite. This is easy to avoid so long as you move behind the lion or to the side of it, while capitalizing on the pause in melee attacks with some strikes of your own. The longer this fight goes on the more dangerous it will be, so try to use your most damaging attacks to bring the lions down quickly.
Night’s Cavalry Duo (Mountaintops of the Giants)
The Night’s Cavalry Duo (Mountaintops of the Giants) can be found escorting a carriage southwest of the Inner Consecrated Snowfield Site of Grace, in western Mountaintops of the Giants. This is another one where the cavalry bosses share the same attacks as others, but this time you’ll be fighting two of them if you’re unlucky, one wielding a flail and the other a glaive. If you’re careful as you approach the carriage, however, you’ll be able to pick off just one of the bosses and fight them alone in the snowfields. You’ll need to be careful to avoid the attention of the other boss and the nearby adds, but even if you bring a few into the fight you shouldn’t have much trouble here.
Roundtable Knight Vyke (Lord Contender’s Evergaol)
The Roundtable Knight Vyke (Lord Contender’s Evergaol) boss can be found at Lord Contender’s Evergaol, west of the First Church of Marika Site of Grace, in northeast Mountaintops of the Giants. This is a fairly tough boss who uses red lightning with many of his attacks. As an NPC, the boss is able to heal himself with a flask which is capable of replenishing most of his health, but he can only use this once. The boss can fire bursts of lighting which rain down on your location, but you can avoid these just by running in the opposite direction. A more deadly attack consists of the boss hovering in the air as he generates waves of lightning which are cast out in four directions from him. So long as you’re paying attention to where the waves are heading, you should be able to avoid them by stepping between them. However, you can also run as far away as possible from the boss to avoid the attacks. One of the most damaging attacks from the boss consists of a leaping attack which ends in the boss slapping his spear down on you. This isn’t the most visually impressive attack, but it is one of the more deadly nonetheless.
Rotten Duelist
The Rotten Duelist Elite Enemy can be found northwest of Ordina, Liturgical Town. These are essentially weaker versions of the Putrid Grave Warden Duelist, but they dual-wield instead of using one large axe. You can farm these from the nearby Site of Grace for a chance to obtain the Rotten Battle Hammer and pieces of the Rotten Duelist Set.
Runebear
The Runebear can be found in the Consecrated Snowfield, south of the Minor Erdtree in western Mountaintops of the Giants. This is the same as other Runebear enemies that you’ve fought, only slightly weaker than the boss versions. This Runebear is just as aggressive and relentless with its attacks, but it can also breath frost to inflict the Frostbite debuff. The main attack that you’ll want to avoid from this enemy is the grab, which will inflict massive damage if you’re caught by it.
Sanguine Noble (Invader)
The Sanguine Noble (Invader) can be found northwest of the Inner Consecrated Snowfield Site of Grace, in western Mountaintops of the Giants. This invader is an aggressive enemy who wields two daggers which build up blood loss. Their attacks are relentless and they can inflict massive amounts of damage in a short space of time, so you’ll need to be extremely careful to avoid being caught off guard by a flurry. The noble can also cast magical projectiles from the daggers if you keep your distance, but you’ll generally have an easier time if you can kite the noble while inflicting magic damage. Alternatively, don’t be afraid to use your most damaging melee attacks. The noble may inflict a lot of damage, but he’s more of a glass cannon than anything else. It won’t take many powerful hits to bring him down. The only complicating factor here is that there are stray dogs in the area, which can easily join the fight if you stumble upon them. If this happens, take them out as soon as possible so that you can focus on the noble.
Tibia Mariner (Mountaintops of the Giants)
The Tibia Mariner (Mountaintops of the Giants) can be found northwest of the Snow Valley Ruins Overlook Site of Grace, in northeast Mountaintops of the Giants. As with other Tibia Mariner bosses, this is one of the easiest fights in the game. The boss doesn’t have many attacks, and those it does (the occasional oar strike) are so weak that they’re hardly worth mentioning. You can kill this boss reliably in under a minute. However, there is a chance that it will summon a giant skeleton to aid him in the fight. If this happens, you should focus on the skeleton before turning your attention back to the mariner, as the skeleton can inflict a lot of damage if left unchecked.
Ulcerated Tree Spirit (Mountaintops of the Giants)
The Ulcerated Tree Spirit (Mountaintops of the Giants) is located within the Giants’ Mountaintop Catacombs, in southeast Mountaintops of the Giants. You’ll need to unlock the door to the boss room by turning right from the Stake of Marika, then following the path north to the elevator. Take this down to the bottom and then turn left from the door, heading south to the next elevator. Continue south at the bottom and then turn west up the stairs, taking the path south up the next set of stairs to a room with blade traps. Time your run through these heading south, then turn left and go up the stairs to the east, following the path north up another set of stairs. At the top of these turn left to find a hole you can drop down at the edge of the wall, under a small archway. From here you can turn west and jump down into the room below, then look north to find another hole in the ground, through which an elevator passes. Wait for the elevator to go up, then jump down and head south, turning left and following the path around to the lever on the other side of the room. Pull this and then jump down, heading north through the hallway to the elevator at the end. Take this up and continue north to find the door to the boss room now opened.
This Ulcerated Tree Spirit is similar to others that you’ve encountered in earlier regions, with the same set of attacks. See our How to Beat Ulcerated Tree Spirit page for a detailed strategy guide.
No Comments