
Mohg, Lord of Blood, is an optional boss in Elden Ring. At least it was optional before the Shadow of the Erdtree announced that you need to defeat him to access the DLC area the Land of Shadow. You can find Mohg at his palace, aptly named Mohgwyn Palace. The nearest site of Grace to him is the Dynasty Mausoleum Midpoint, where a short elevator ride to the north will lead to the boss arena. Read on to find out how you can reach this location and how you can defeat him, making you ready for the DLC.
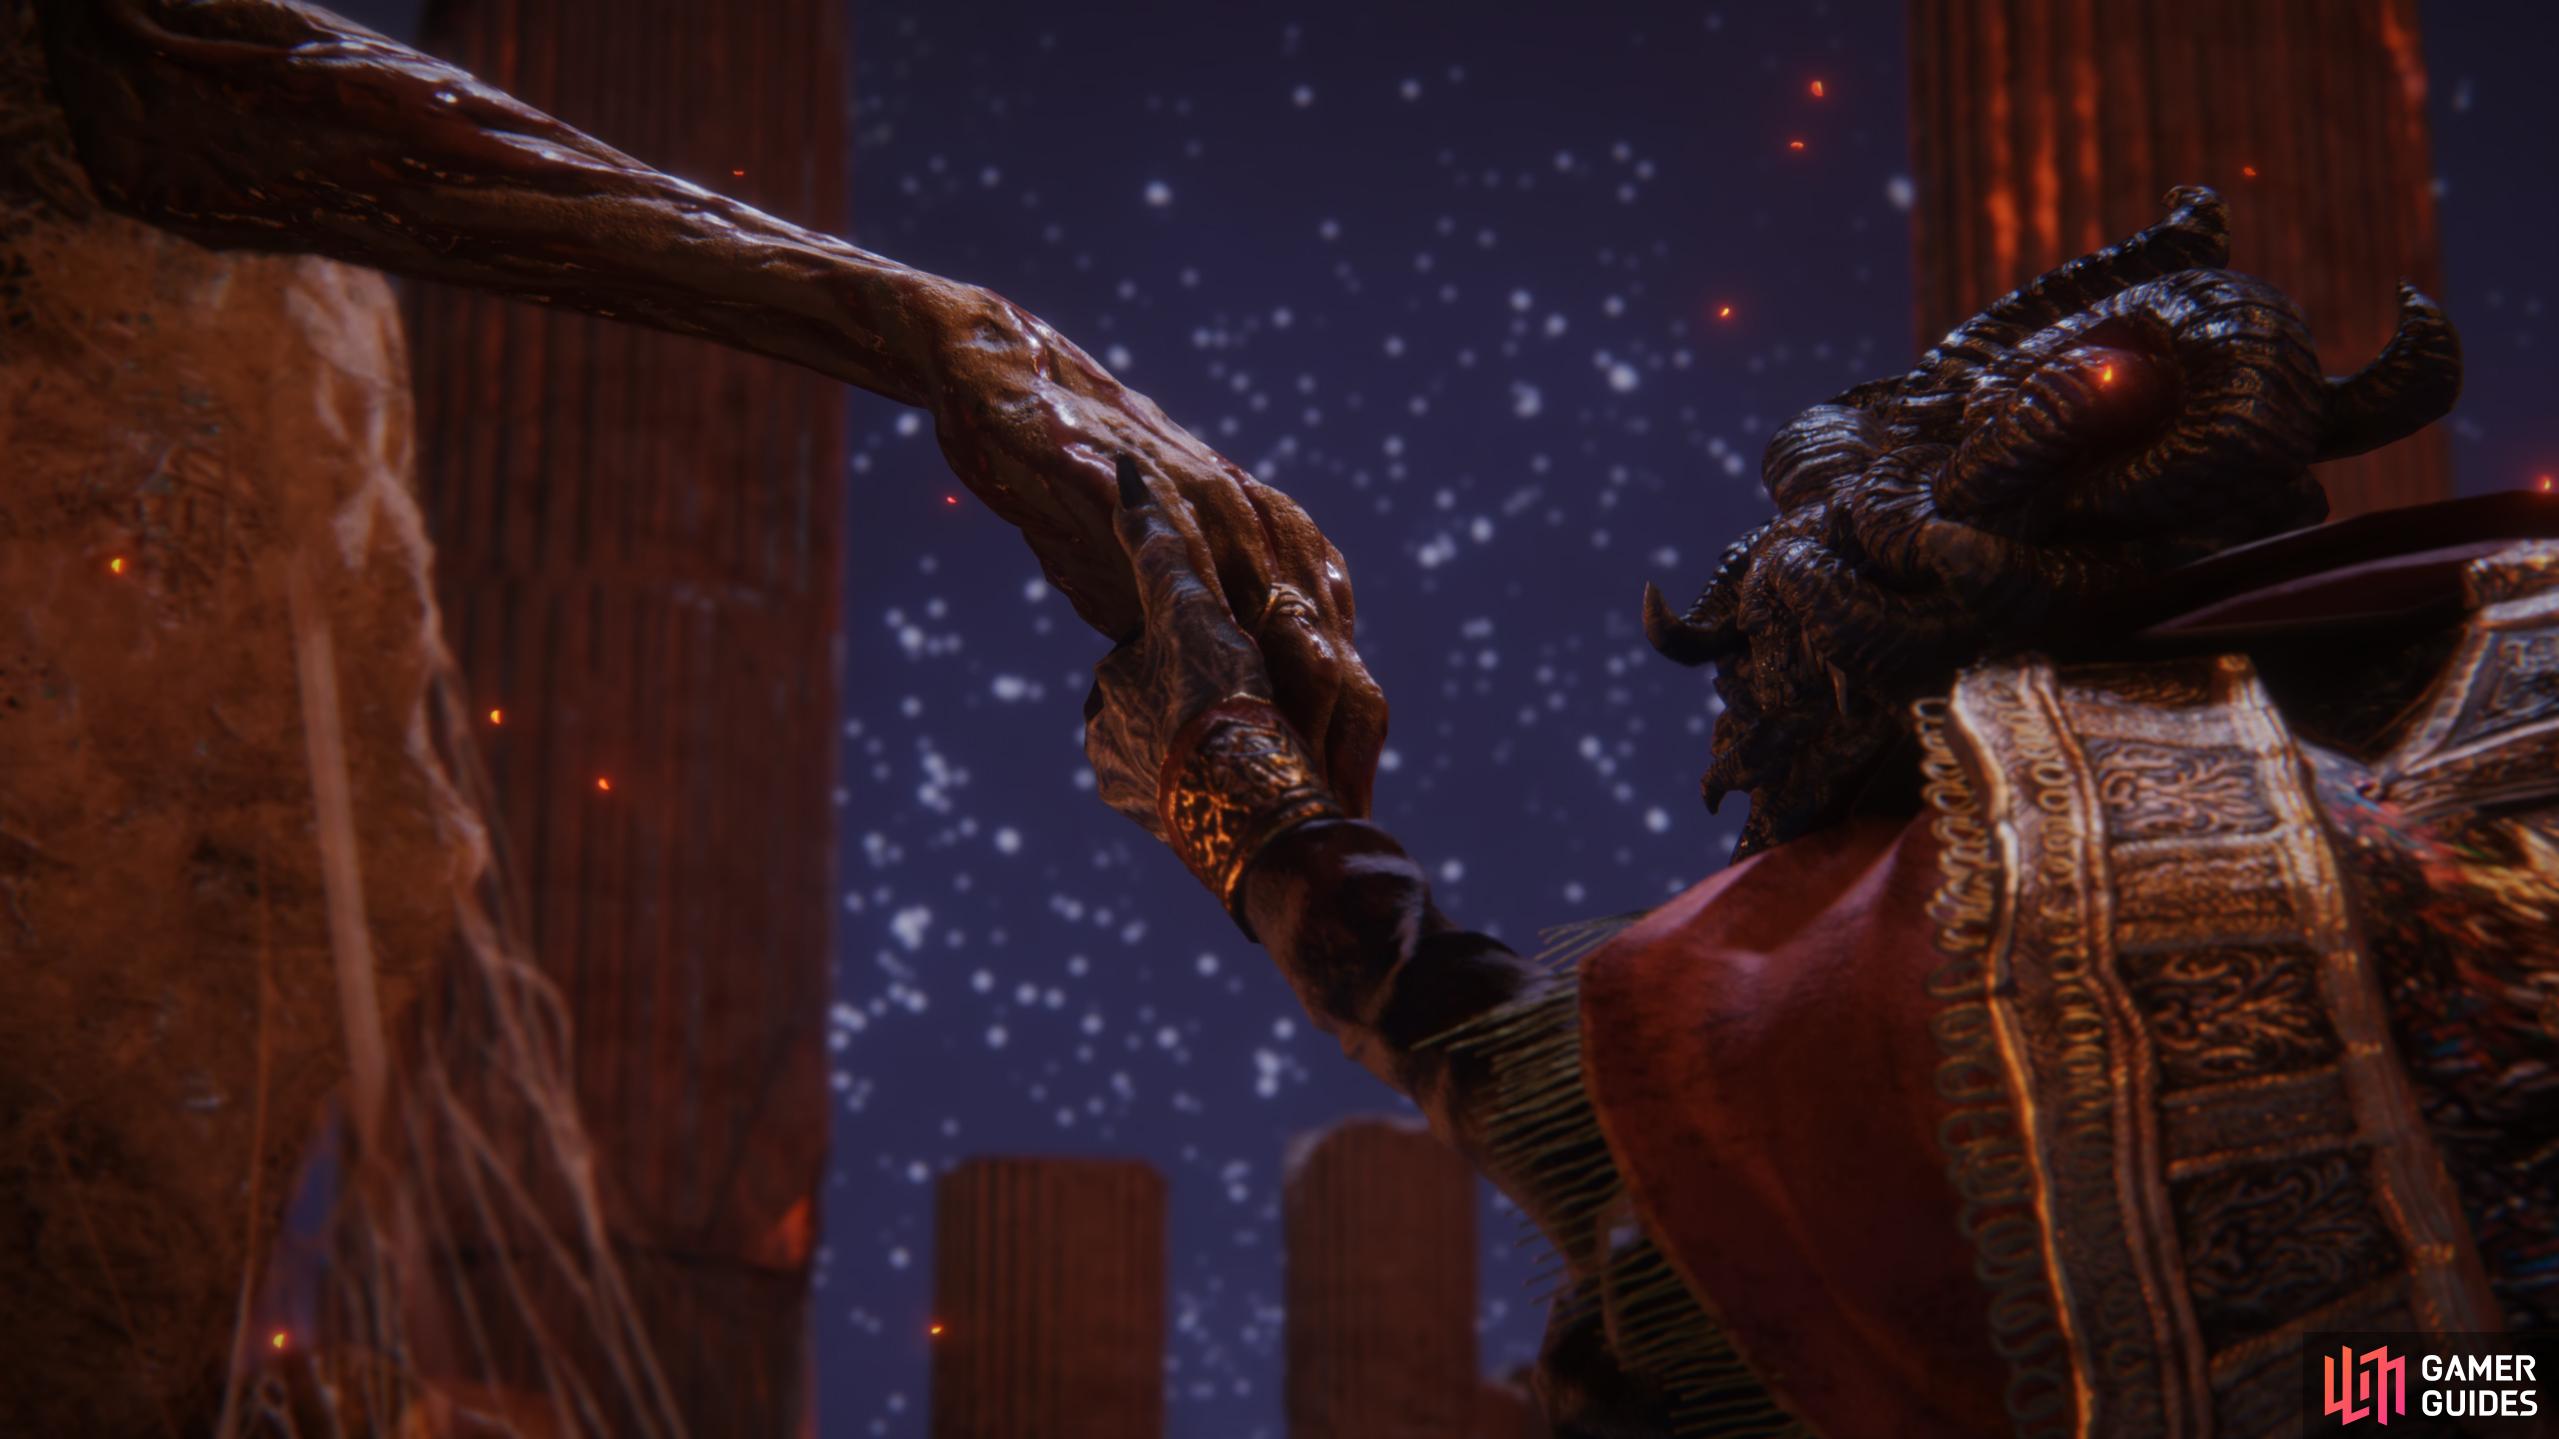
Mohg, Lord of Blood, is gatekeeper to the Shadow of the Erdtree DLC.
Quick Jump
If you’re looking for a specific piece of information on the Mohg battle, use these handy links below to jump right to the action!
Mohg, Lord of Blood Location
There are two ways to get to Mohg, one of which allows you to meet him earlier, but naturally, this method means you’ll be at a huge disadvantage due to your level. Although, if you’re good at avoiding attacks, this won’t matter. The other way is recommended because you’ll have a lot more stuff on you, like more flasks, better equipment, higher level, and more.
-
Method 1 - Pureblood Knight’s Medal: The first method involves you completing White-Faced Varré. Read our full White-Faced Varré Quest Walkthrough to get you through this. In short, you’ll need to use the Pureblood Knight’s Medal you get for completing it, and it’ll transport you to Mohgwyn Palace. Then from there, you can make your way to the boss arena, which we’ll explain in the method below.
-
Method 2 - Consecrated Snowfield: This is the recommended way to get to Mohg, as you’ll come here a lot later in the game. To access the area where Mohgwyn Palace resides is via a waygate situated northwest of the Yelough Anix Ruins in the Consecrated Snowfield. Teleport to the Ordina, Liturgical Town, site of Grace, and head southwest from there. The waygate is near the edge of the cliff on the lower platform, west of the spires. Note that this waygate is inactive until you defeat the nearby invader.

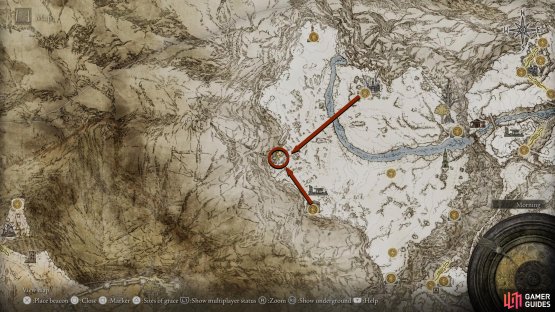

(1 of 2) The teleporter can be found in the west of Consecrated Snowfield.
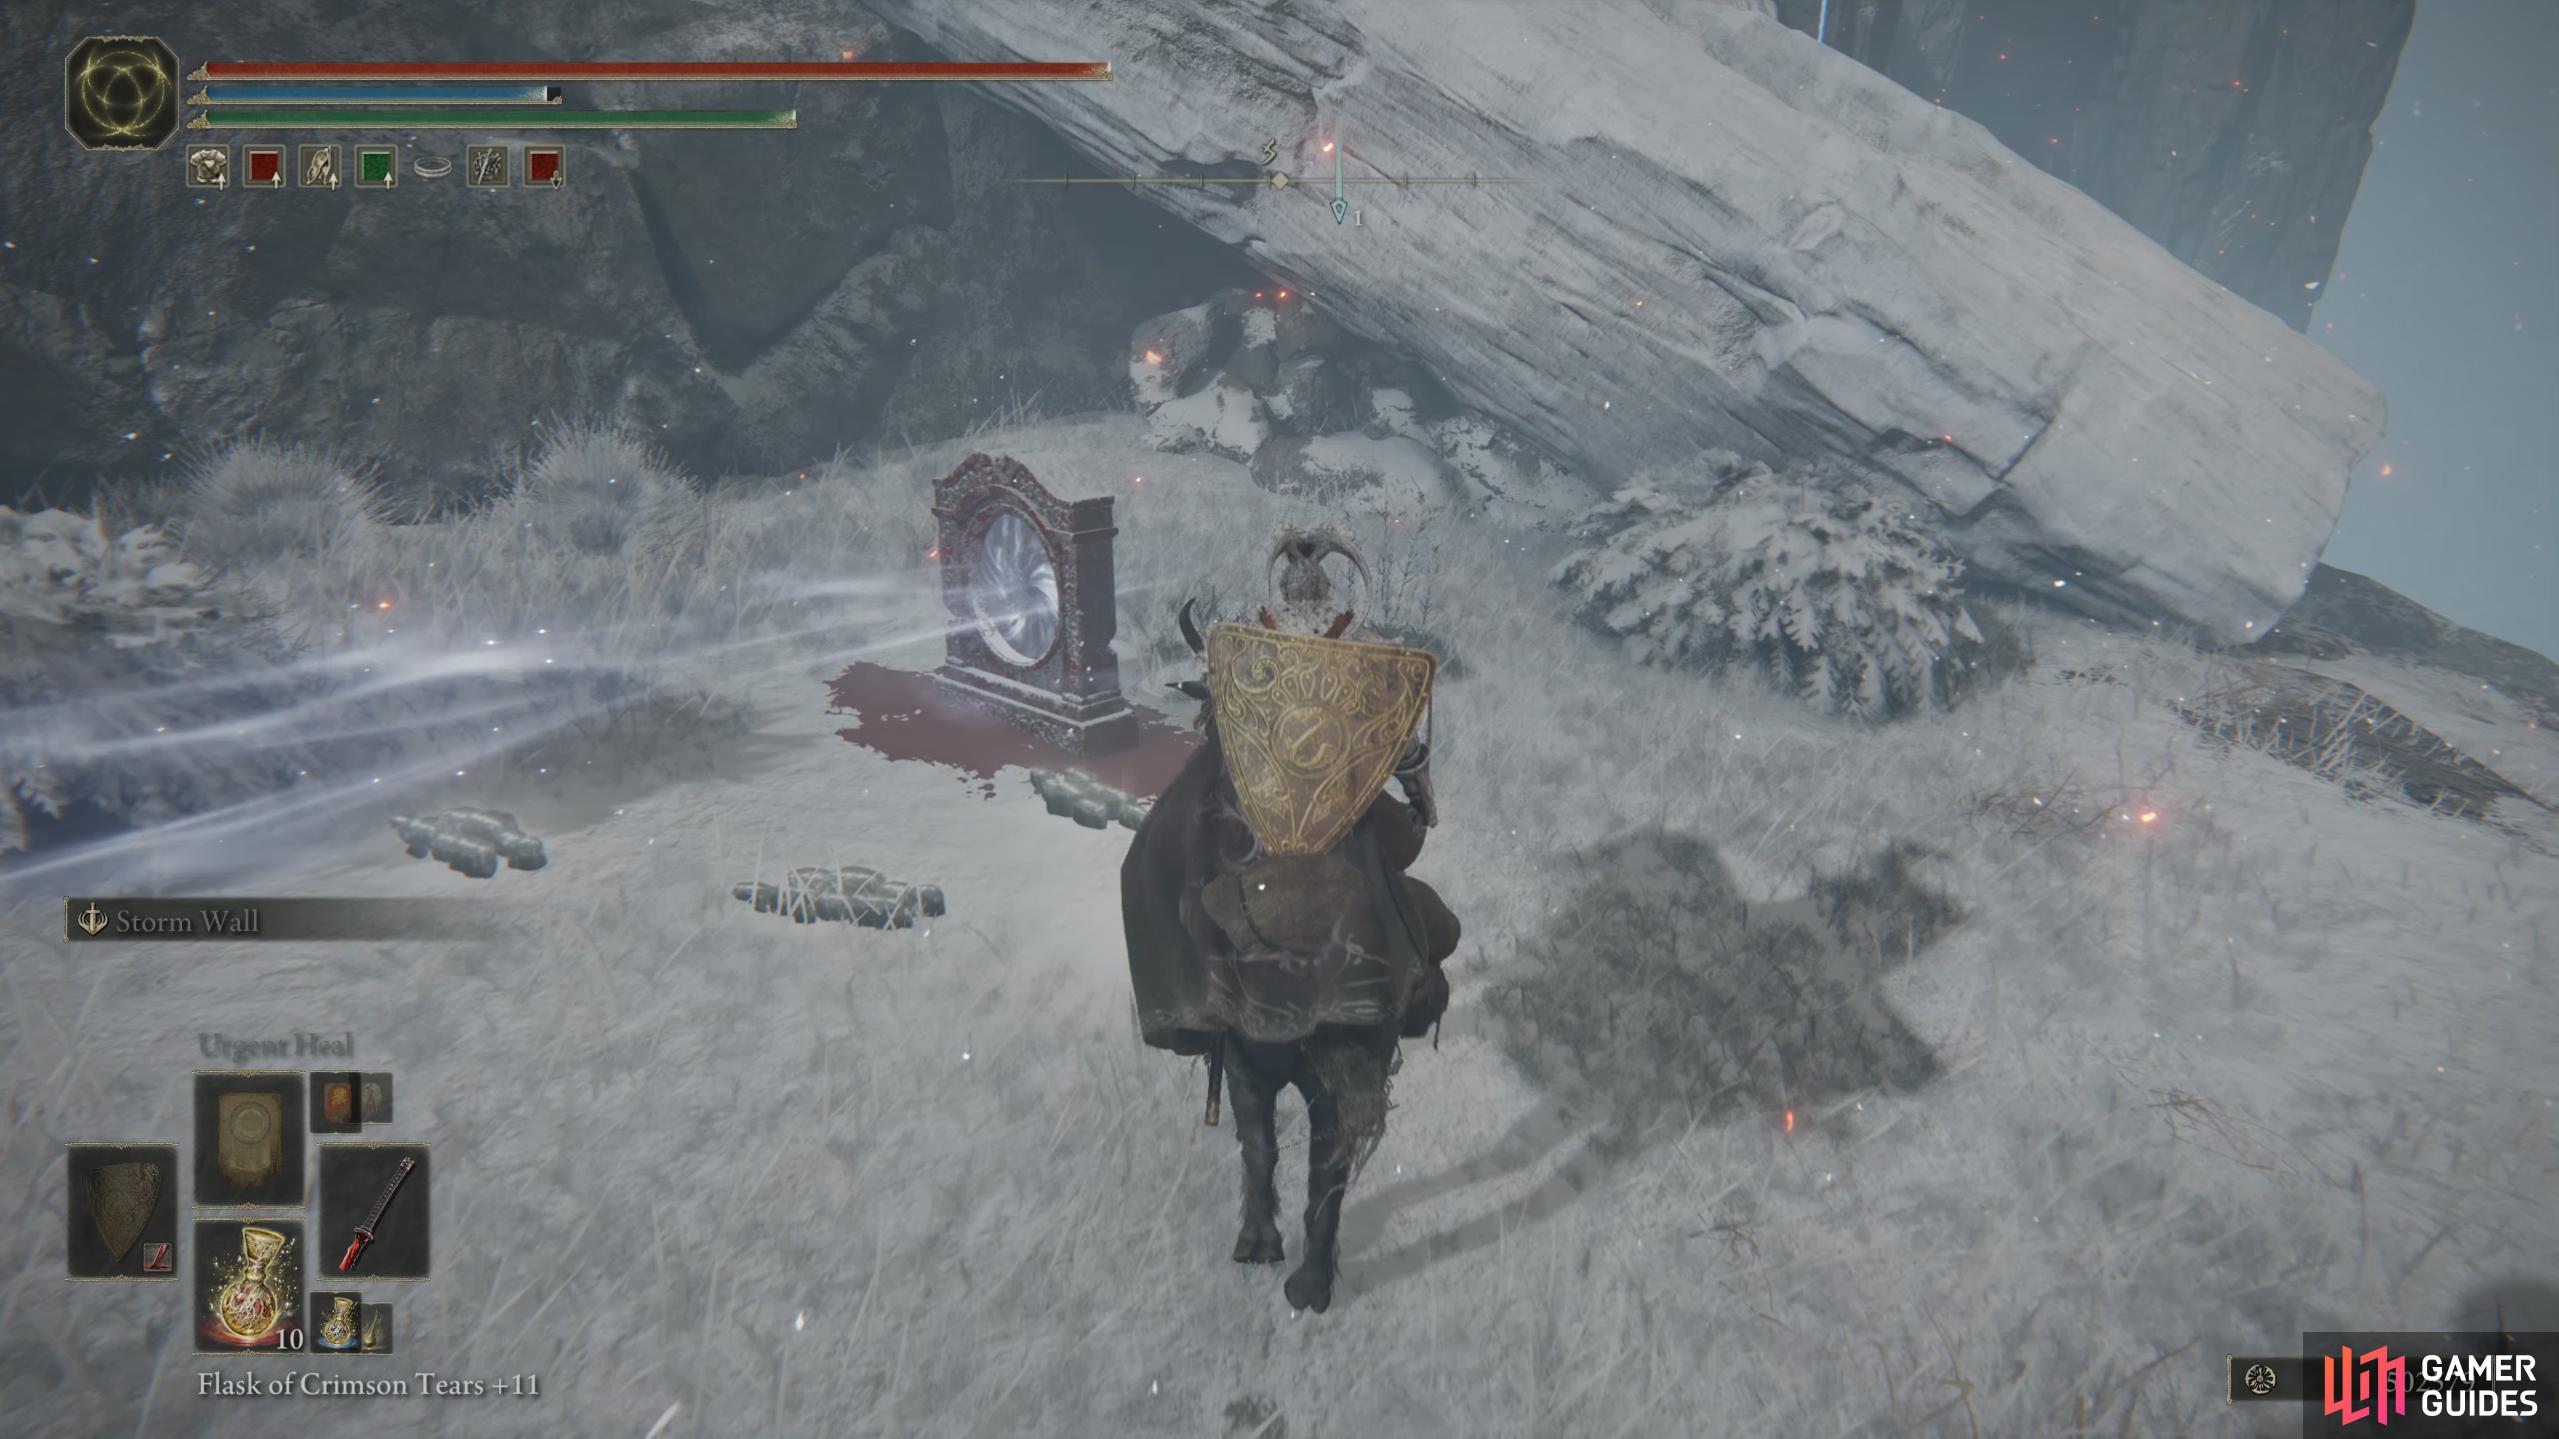
The teleporter can be found in the west of Consecrated Snowfield. (left), You’ll need to defeat a NPC invader nearby to unlock it. (right)
Method 1 will take you close to Mohgwyn palace by placing you at the Dynasty Mausoleum, meanwhile method 2 will put you at the Palace Approach. The area itself isn’t too big, but it does have a lot of mountains blocking your path. Because of this, you’ll want to head around the north/northeast part of the map before heading southwest. There are also a lot of nasty enemies in this location. Fortunately, you can ride your steed, and doing so, will make this a lot easier to navigate. When you reach the Dynasty Mausoleum, you’ll be kicked off your steed, and you’ll have to make the rest of the trip by foot.

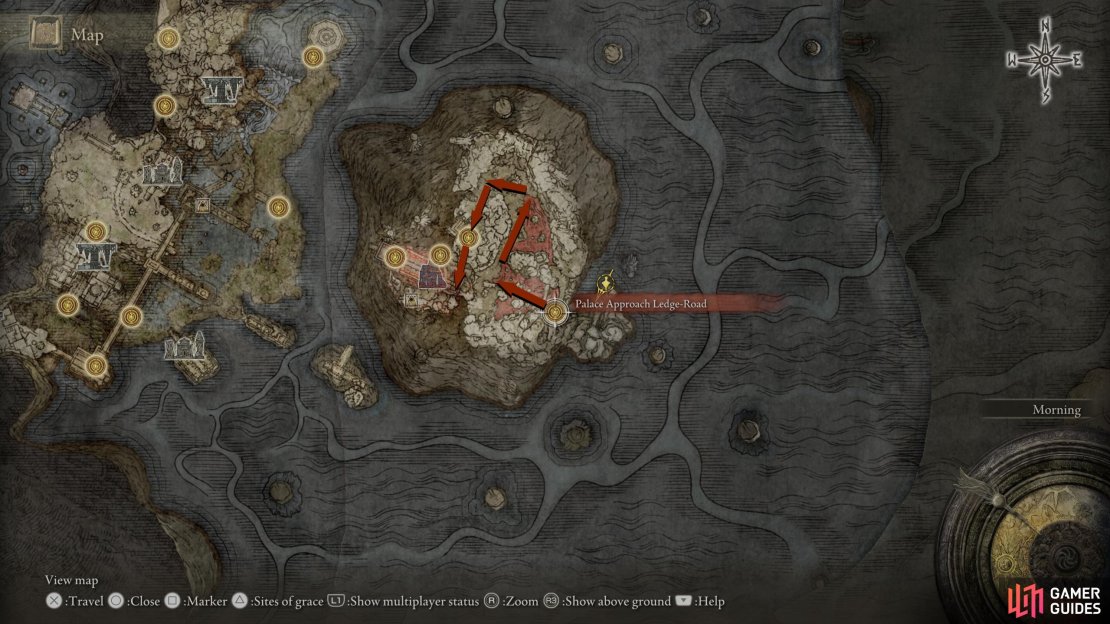


(1 of 3) Follow the route on this map to find Mohg. If you go another way, you’ll be impeded by mountains.
In the Dynasty Mausoleum, take the stairs leading up in the southeast to find the Dynasty Mausoleum Entrance site of Grace. From here, run to the top following the linear path while defeating/avoiding the enemies, and you’ll soon reach the Mausoleum. Once again, follow the dark path up, and you’ll soon find a strong NPC to fight. This enemy can deal a lot of Bleed damage, so only fight it if you have a way to negate that, otherwise, run past it. Note that this enemy will respawn after a short period of time and chase you through the Mausoleum.
To the left of the NPC is an Isolated Merchant who has a few goods to sell you, including Stanching Boluses (useful against Mohg). Once you’re done with the merchant, continue up to the right, and continue until you can go left or right again. Left will lead to an item (smithing stone) while right is the correct way to go. At the top of the path, you’ll find another site of Grace, Dynasty Mausoleum Midpoint. This is the last Grace before Mohg who can be found by following the path up the stairs to the south and using the elevator to the west.

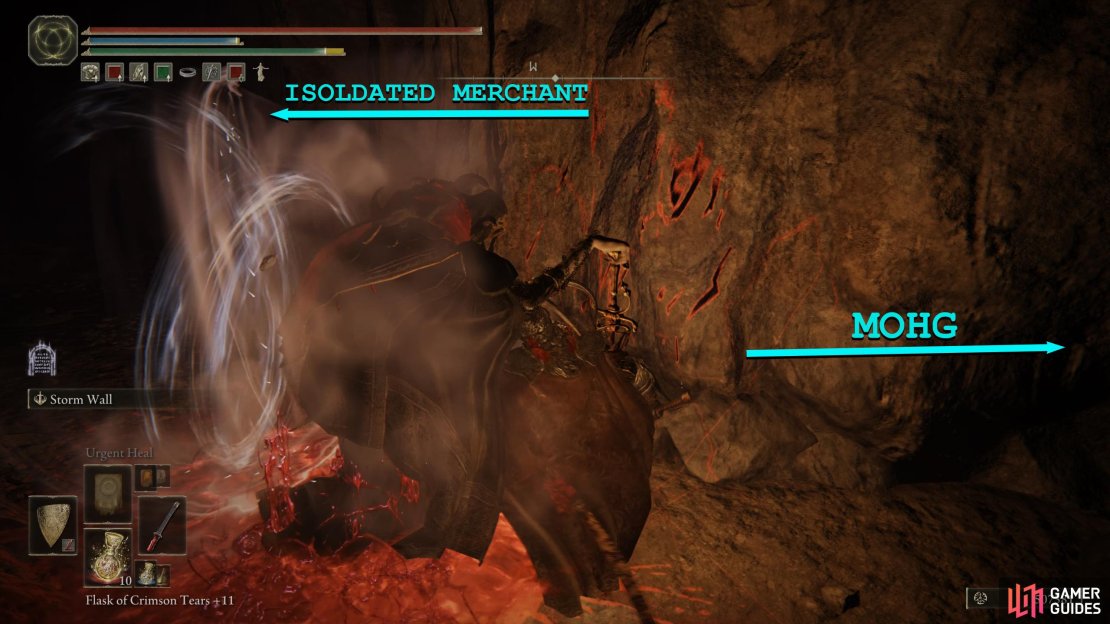


(1 of 3) At the first intersection, a respawning NPC will appear. Left will take you to a merchant, right will take you to Mohg.
Mohg, Lord of Blood Attacks
Before we get onto the strategy, let’s take a look at what attacks you can expect to see from Mohg.
| Attack | Description | How to Avoid |
|---|---|---|
| Trident Combo | This is a 2-3 hit combo of horizontal swipes. Sometimes a third hit will occur where he performs an overhead slam. | Roll through each swing as they occur while aiming to get to his back. If he uses the overhead slam, you’ll have a longer window to attack him. |
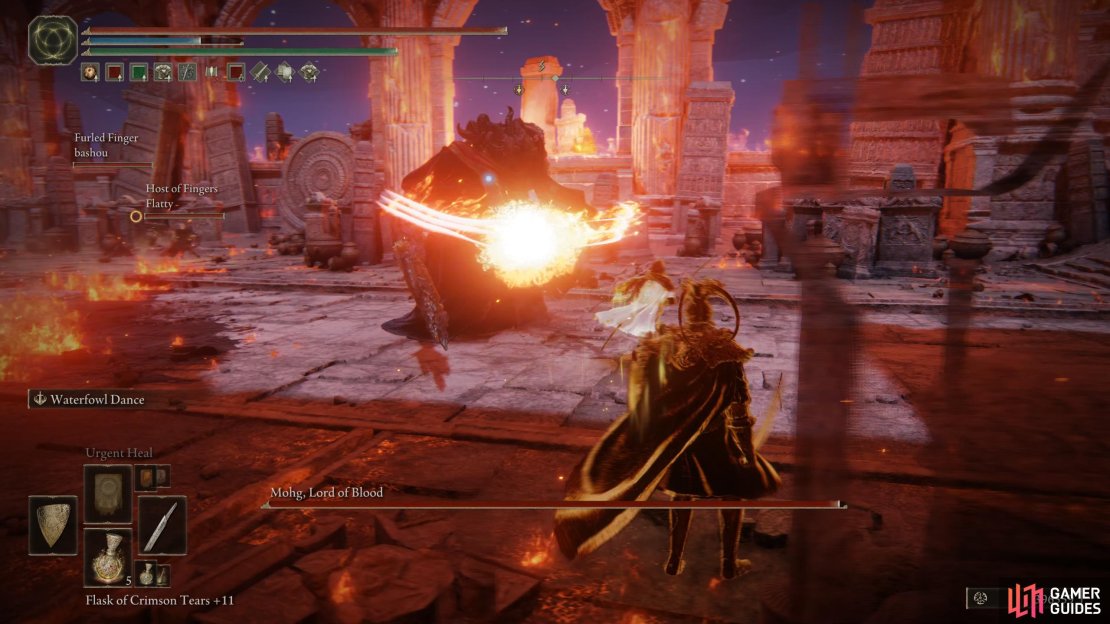
| Explosive Trident | Mohg plunges the trident into the ground, creating an explosion. The trident will glow before the explosion. | Run/roll away as soon as you see him plunge the trident in the ground. The area of effect is fairly large and will hit you if you’re anywhere near it. |
| Bloodflame Talons | You’ll see this attack a lot. Mohg will swipe across the arena, producing a clawmark, which explodes shortly after. This can be followed up with a lunging attack or the Trident Combo. | The simple method to avoid this attack is to run/roll away, but be careful of any follow-up attack that may occur afterward. |
| Bloodtax | A simple thrust attack with his bloodflame-covered trident that can deal moderate damage while also inflicting bleed build-up. | Like most thrust attacks, rolling to either side will avoid it. |
| Bloodboon | Mohg will unleash bloodflame across the arena. This specific attack will come in the form of three different variations; a wide arc, a shower above him, or a narrow cone. | You can roll through the wide arc variant, and rolling to the side can avoid the cone. The shower only occurs if you’re right next to Mohg. If he uses this, get to his back for a couple of attacks before rolling away. |
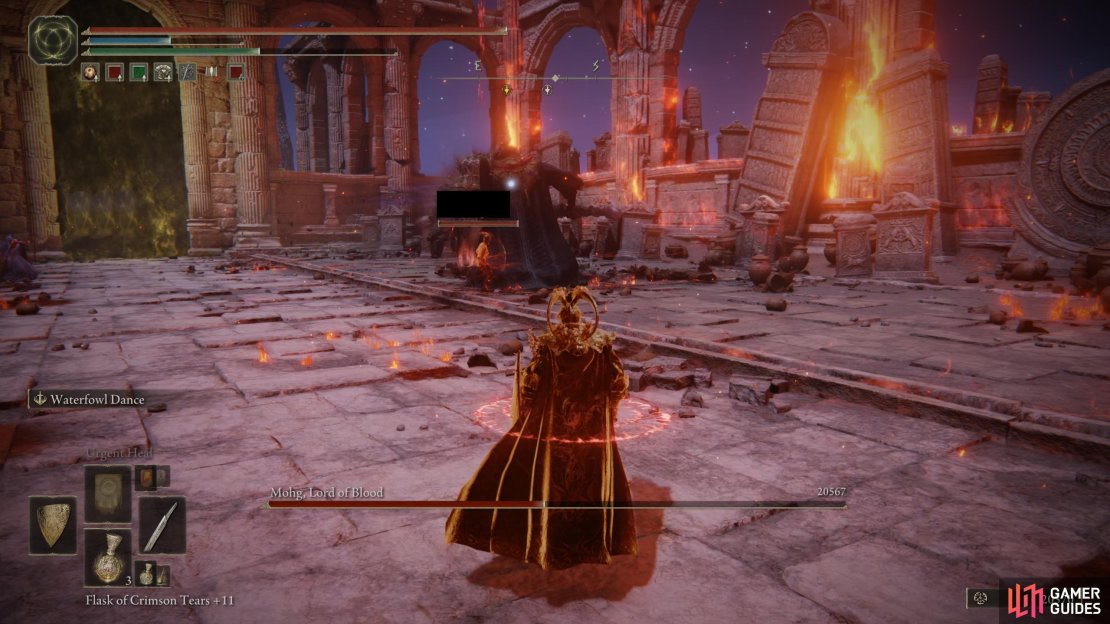
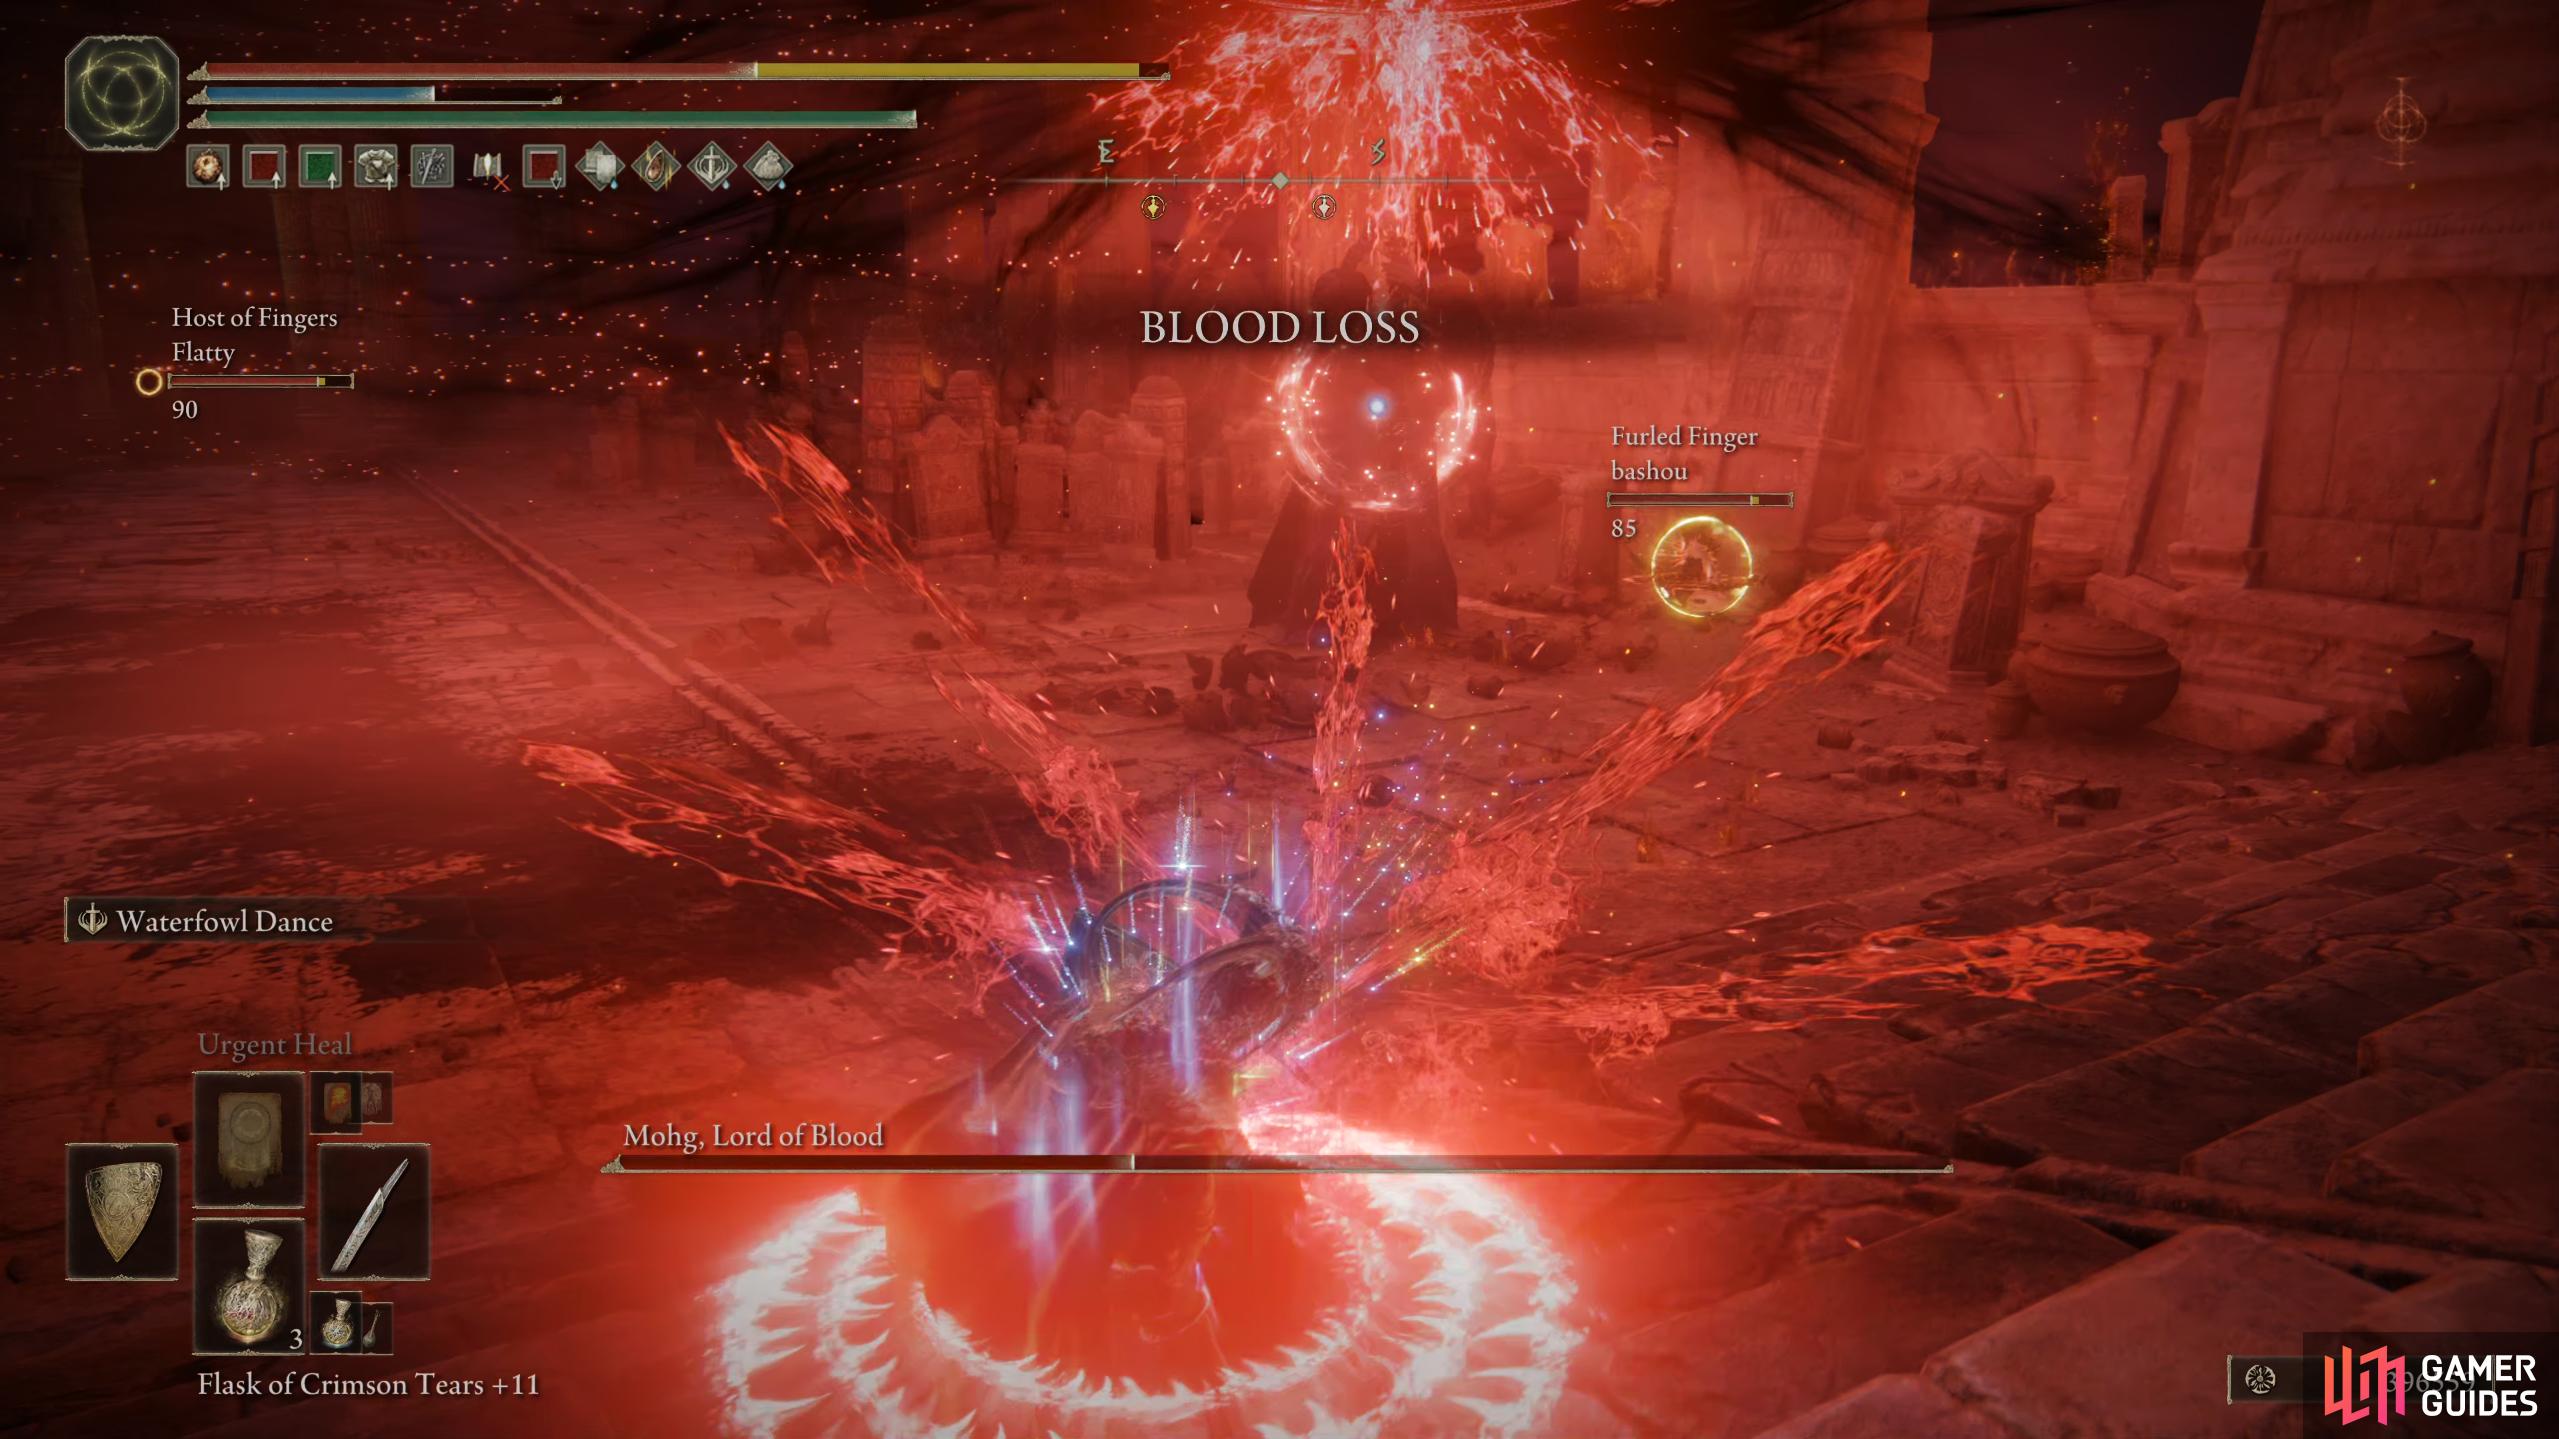
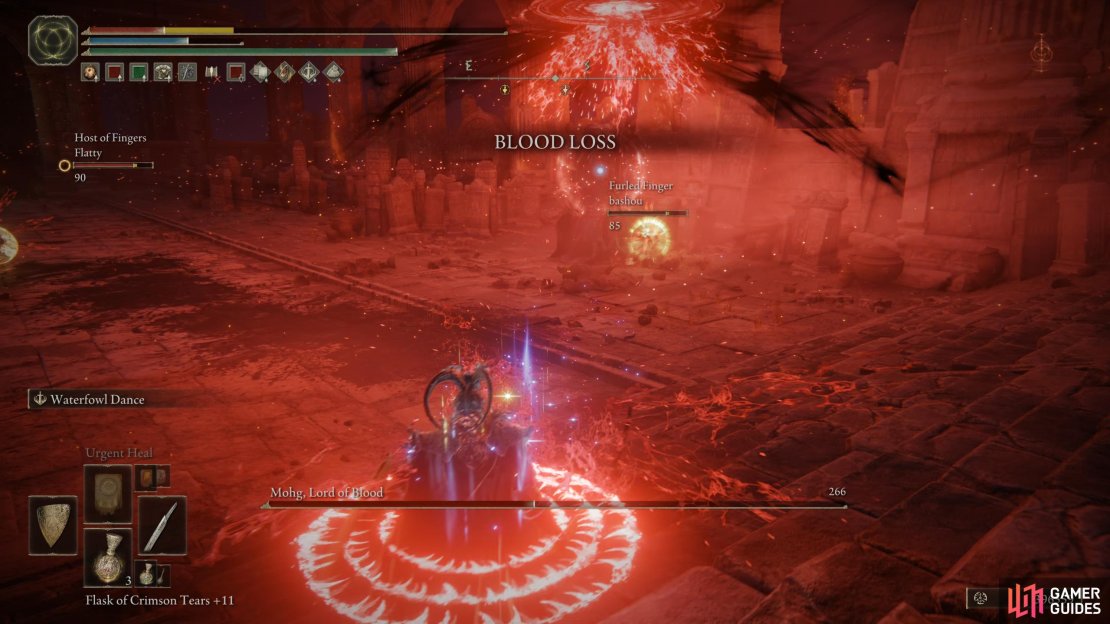
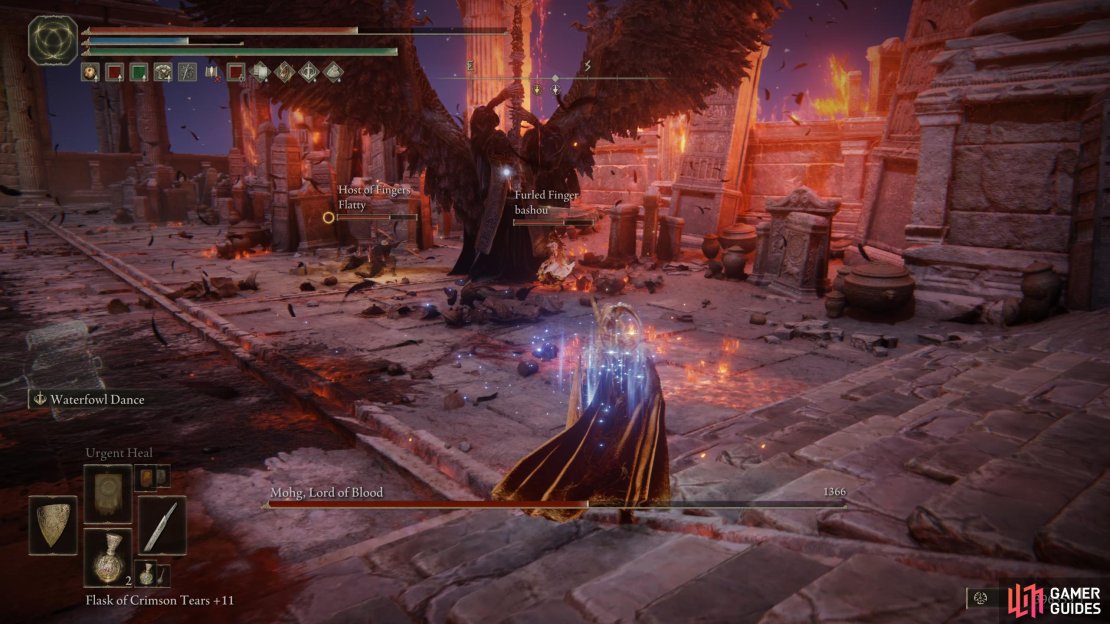
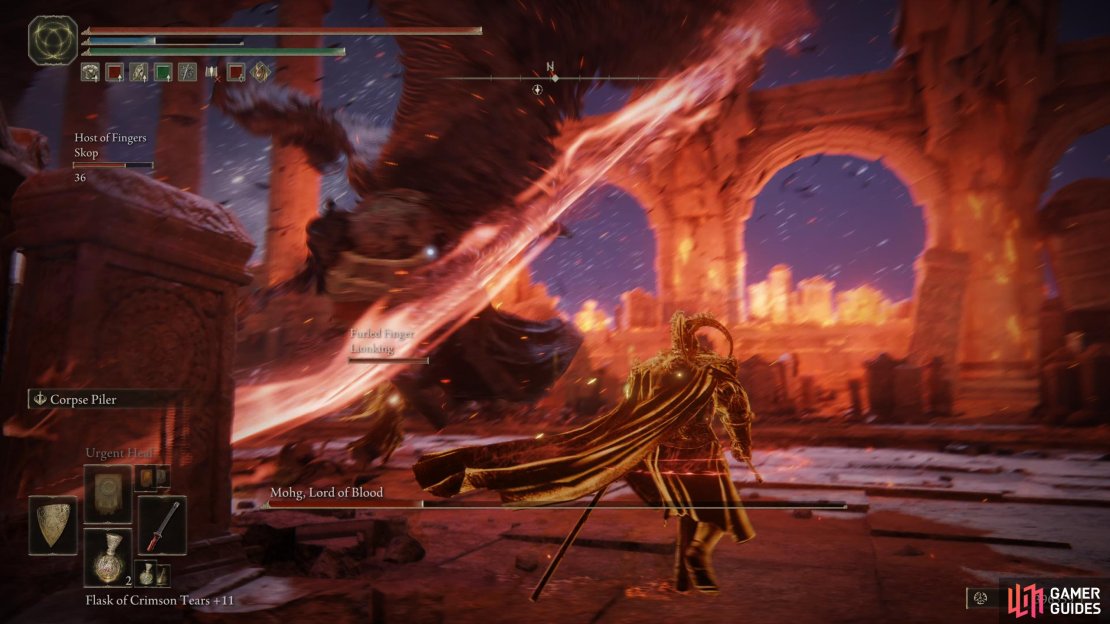
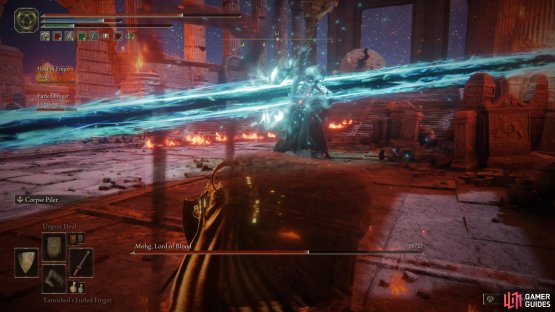
| Bloodboon Ritual | Throughout the battle, Mohg will place red rings around you and your allies. This happens three times on specific health thresholds (~40-45%, 25-30%, and 10%) and each time will have him count down Tres, Duo, Unnus (3, 2, 1). Although this “attack” doesn’t do anything right now, it sets up his Nihil attack that first happens during the phase change. | There’s no way to avoid these rings, as it’s one of the main mechanics of the battle. This attack itself doesn’t have a counter, as there is nothing to counter. |
| Nihil | This attack makes use of the rings he’s placed on you via Bloodboon Ritual. Around the 40-50% mark, he’ll raise his trident three times, screaming Nihil! This will heal him while causing tremendous damage to you each time he raises his trident. | This attack will kill you unless you have an absurd amount of health and other resistances. Use the Wondrous Flask mixed with Opaline Bubbletear and Purifying Crystal Tear to greatly negate this damage, and use your flasks to top up your health each time you lose some. After the attack, he’ll grow some wings, and phase two will begin. |
| Winged Assault | During phase 2, Mohg will make use of his wings and take to the skies before unleashing bloodflames across the arena. This is followed up with a dive attack at your location. | Rolling toward Mohg is your best bet to avoid this attack. Roll once to avoid the flames and again when he dives at you. |
| Bloodflame Charge | In phase 2, Mogh will charge at you across the arena, leaving behind a trail of bloodflame. | Dodge to the sides to avoid the attack and avoid the bloodflame left behind. |
| Bloodflame Trident | Mohg will stab his trident into the ground and flick it back out, unleashing bloodflames. | Either get some distance to avoid the impending flames, or roll past the first attack and punish him after the bloodflames have been unleashed. |


(1 of 6) Trident Combos: Mohg has various combos that start as horizontal slashed and end up in a slam or a stab.
Mohg, Lord of Blood Strategy
Although Mohg’s moniker is the “Lord of Blood” he is in fact relatively weak to it. There are lore reasons for this, but we won’t bore you with the details. To make the battle easier, we recommend equipping the best physical, robustness, and fire-resistant talismans you have, as Mohg will use a plethora of attacks that deal these types of damage. In general, Mohg will be hitting you with his Bloodflame attacks (deals Bleed and Fire) or his Trident attacks (physical), which is why the above talismans are recommended. Other useful stuff to make the battle easier are:
-
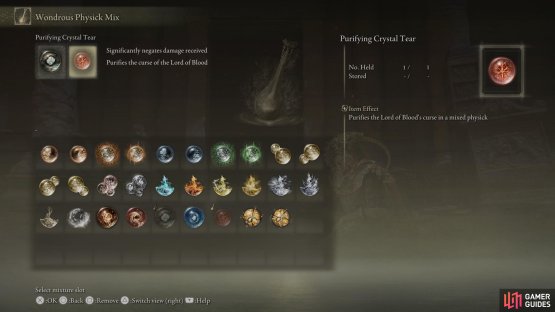
Wondrous Flask mixed with Opaline Bubbletear and Purifying Crystal Tear: At half health, Mohg will use Bloodboon Ritual that will drain large chunks of your health, which can and will outright kill you. This flask will help you survive the attack.
-
Mohg’s Shackle: This can only be obtained in the pipe room of the Subterranean Shunning-Grounds area, guarded by two large crayfish. Read our Subterranean Shunning-Grounds Guide to find it. This useful item can trivialize the first phase, as it’ll stun Mohg for some time when he’ll be defenseless. If you have a good build, you can decimate phase 1.
-
Mimic Tear: By now you should know how much Mimic Tear can aid you in Elden Ring and this fight is no different, especially if it’s leveled up.
-
Black Knife Tiche Spirit Ashes: Similar to the Mimic Tear, the Black Knife Tiche Spirit is ridiculously strong. You can get this by defeating Alecto, Black Knife Ringleader.
-
Comet Azur: For sorcerer builds, Comet Azur will tear Mohg apart, provided you can keep your distance from him.
-
Bleed Weapons: As mentioned above, Mohg is weak to Bleed (I know). Weapons such as Rivers of Blood and Eleonora’s Poleblade to name a couple are especially good against Mohg as their weapon arts are fairly quick and deal a lot of Bleed damage in a short time.
-
Lord of Blood’s Exultation Talisman: Raises attack power when blood loss occurs in the vicinity. This will raise your attack power by 20% for 20 seconds.
-
Summons: If all other methods fail. Summoning online players makes defeating him a lot easier, provided you can avoid his attacks.
Mohg is a difficult boss who has hard-hitting attacks and likes to cover the arena in bloodflames that deal damage while also building up blood loss, especially in the second phase. Once you get the attacks down, the first phase isn’t too bad, and it’s even easier if you use Mohg’s Shackle on him. The main part of phase 1 is to apply the curses to you from Bloodboon Ritual (red rings), so that when you take him down to half health and phase 2 begins, you’ll either die or expend a lot of your flasks trying to stay alive. It is imperative that you use the Wondrous Flask mixed with Opaline Bubbletear and Purifying Crystal Tear during the phase change to survive this attack, although you can survive it by other means.
The second phase is what I like to call the bloodflame phase, due to the fact that Mohg will constantly fly around, unleashing bloodflames across the arena that persist after. This makes it incredibly frustrating as you will constantly take damage while you try to avoid his attacks. The only way to avoid this somewhat is to reposition, but that area you move to will soon become bloodflames, so you’ll need to keep moving around the arena to the few spaces that don’t have any.
(1 of 2) Mohg’s Shackle: Use the shackle in phase.
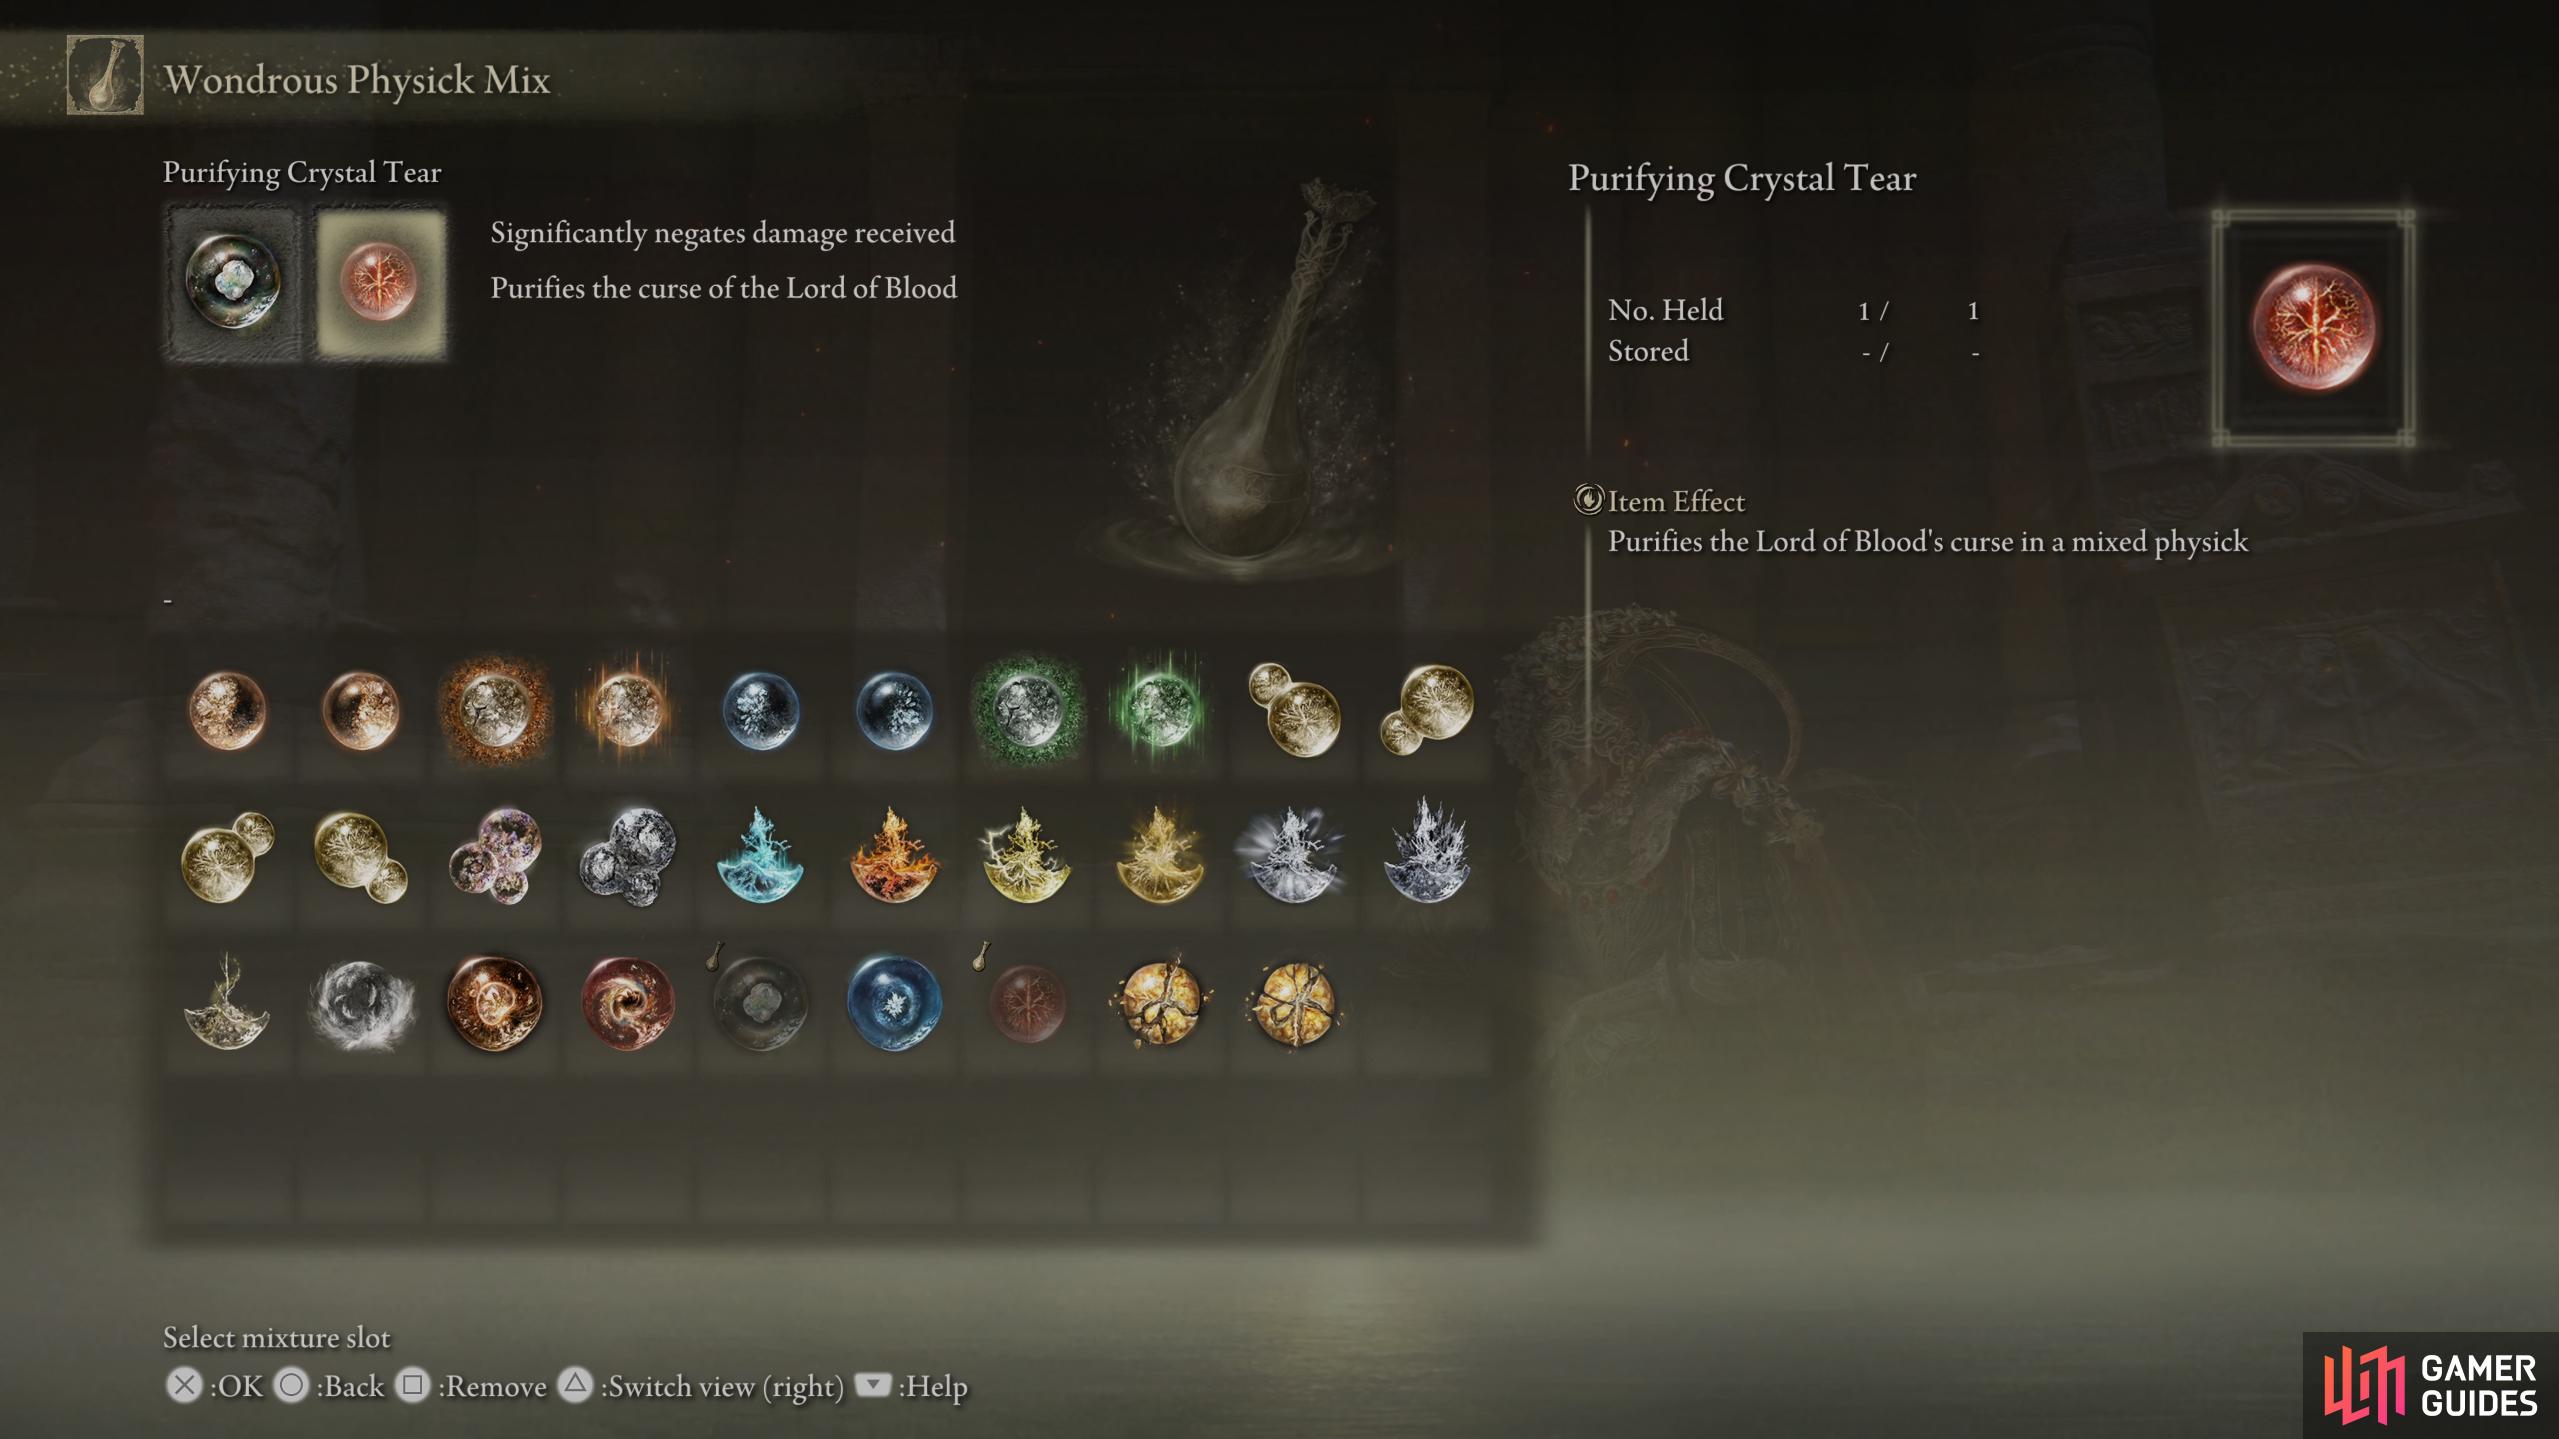
Mohg’s Shackle: Use the shackle in phase. (left), Wondrous Physick Mix: Place the Opaline Bubbletear and the Purifying Crystal Tear inside the Wondrous Physick Flask. (right)
Phase 1
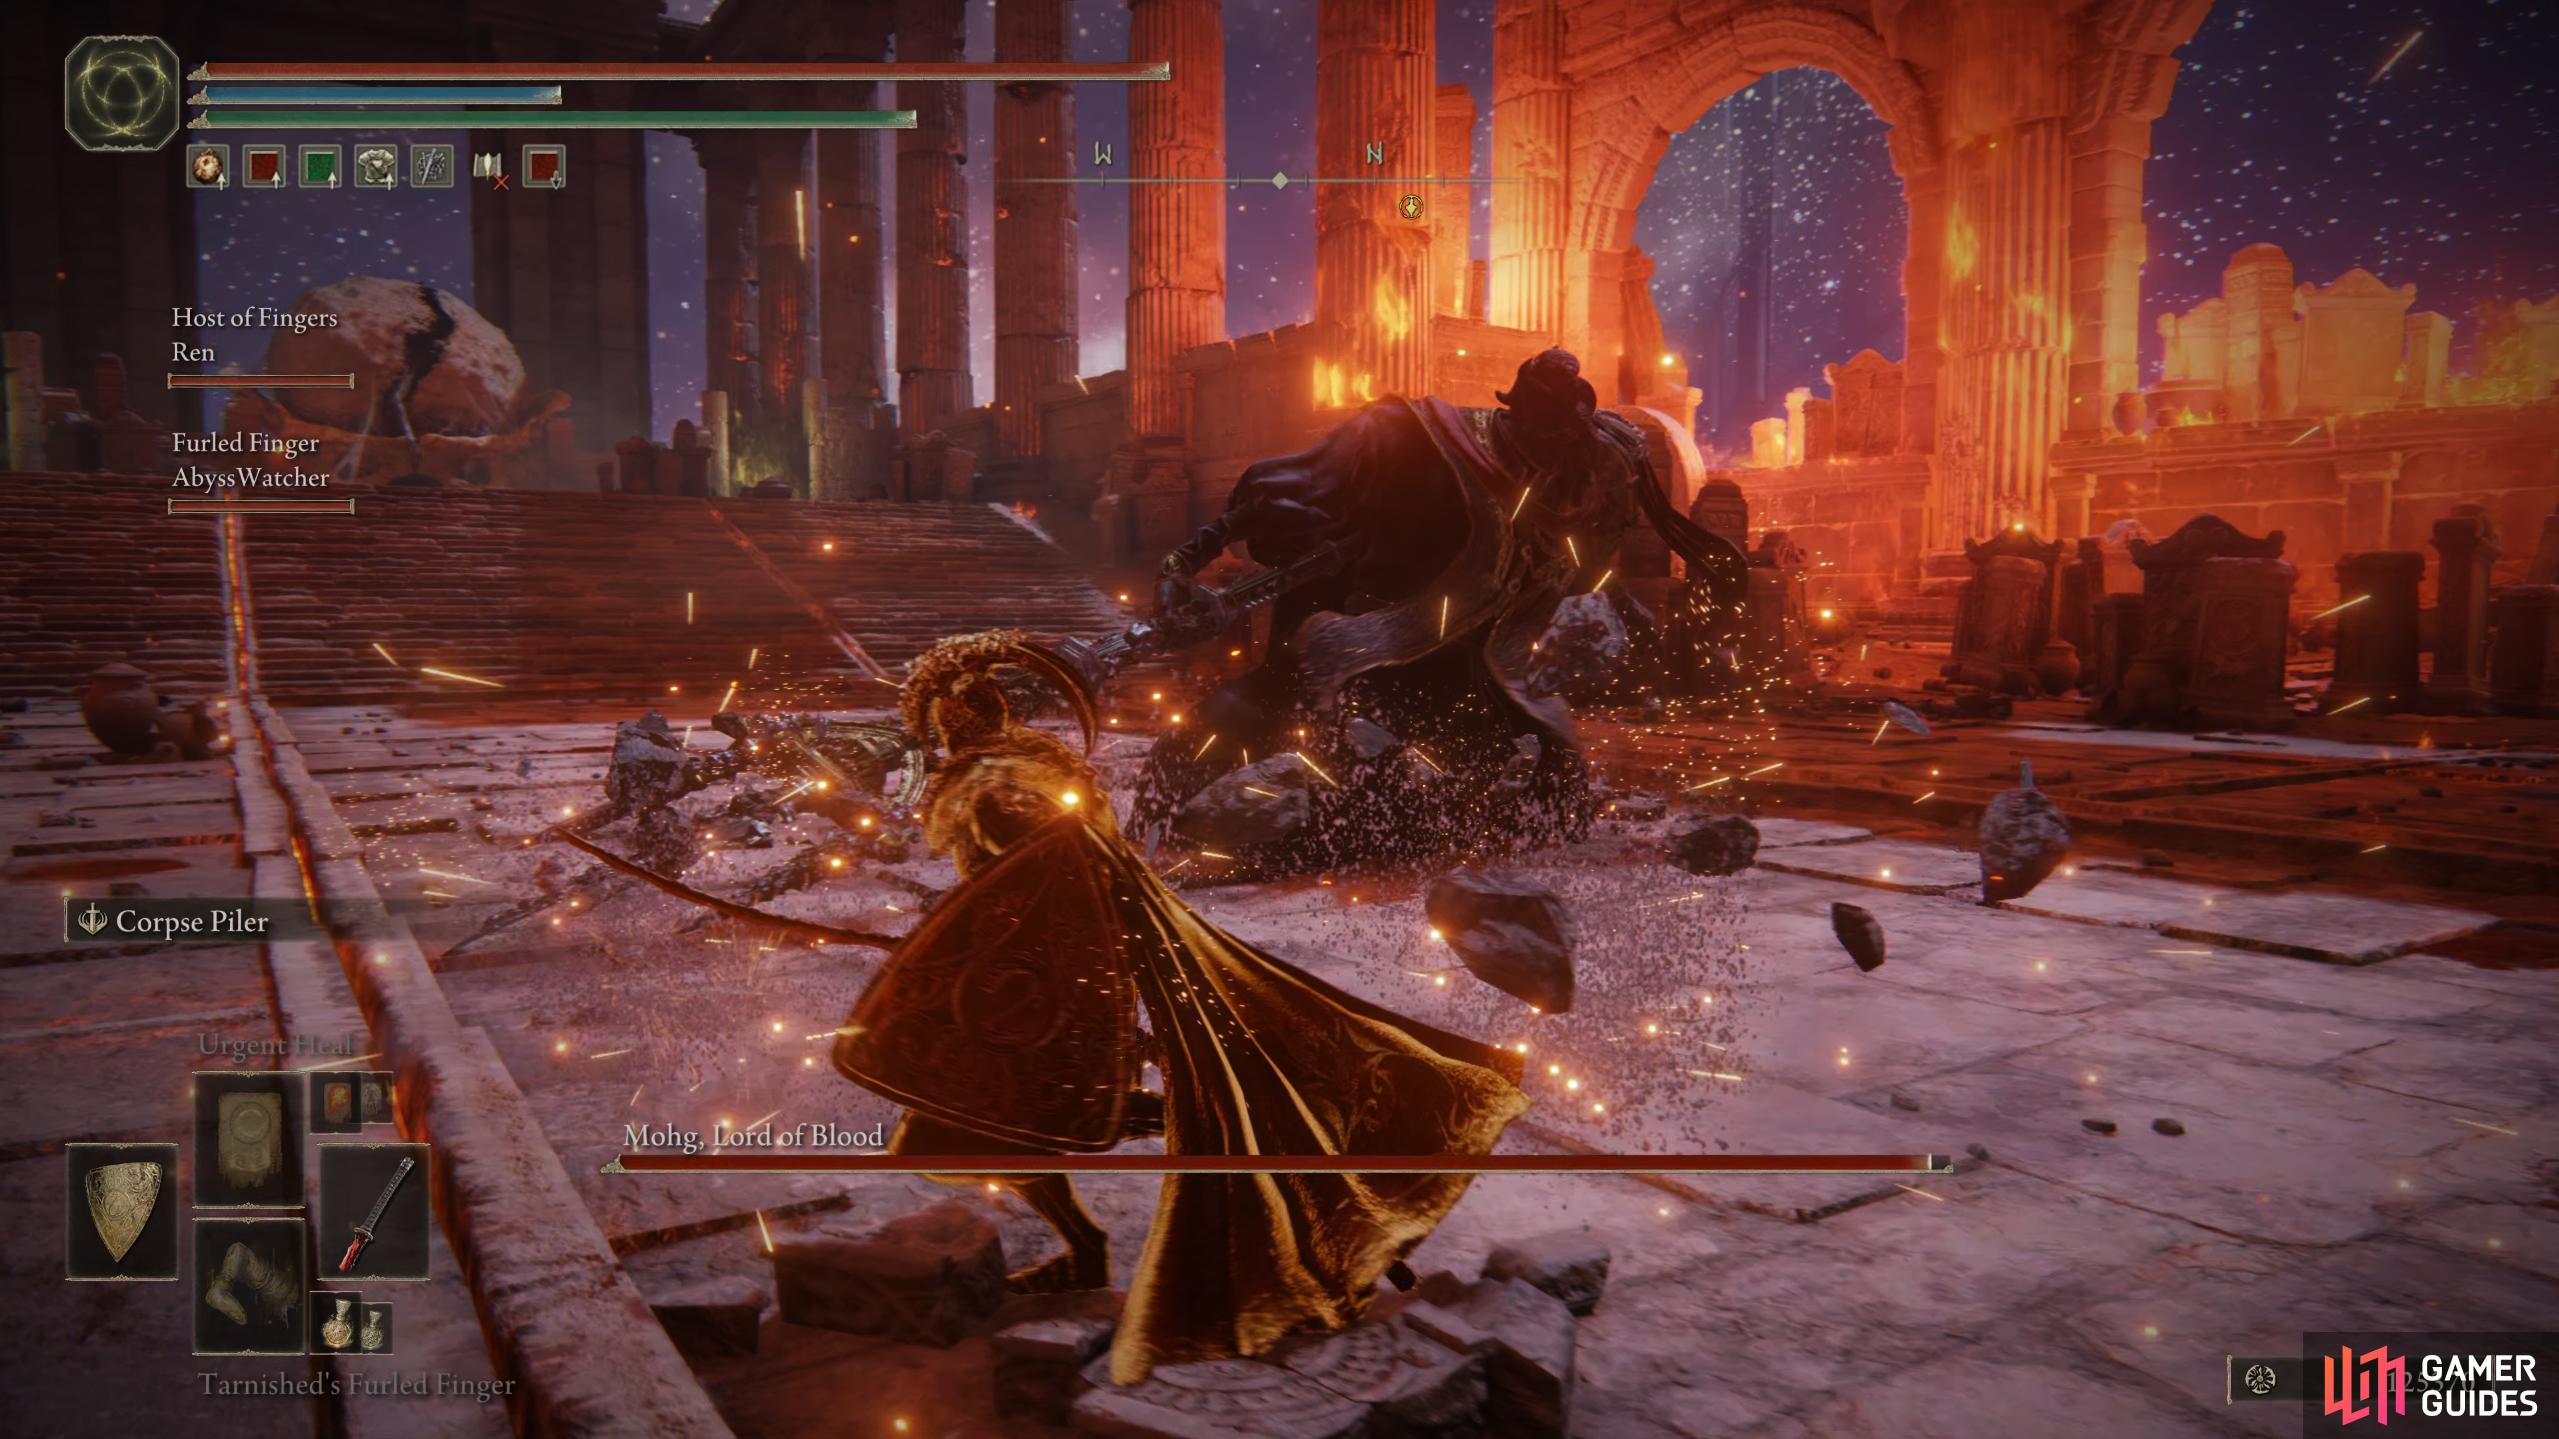
The majority of phase 1 will consist of Mohg predominantly using his trident attacks, and each attack has a slight delay, which can make it tricky to avoid them. Although, with more attempts, you’ll get this down. A lot of these attacks are slow, sweeping, horizontal attacks with the odd overhead slam thrown in. As there is a slight delay between attacks, better players can get a couple of attacks on Mohg between each attack, especially if you have weapons with a quicker attack speed. Another thing to note about Mohg’s trident attack is they can end differently. Just when you think the combo will end with a horizontal slash, he’ll use an overhead slam instead, so always be ready to dodge to the side if that occurs. However, if Mohg walks away after an attack, the combo will be over. It’s good to keep this in mind.
Outside the trident attacks, Mohg will use a couple of bloodflame attacks, predominantly Bloodflame Talons and Bloodboon. For the most part, these spells are telegraphed and easy to avoid although sometimes Mohg will follow up Bloodflame Talons with a combo, so back away to avoid the flames and wait to see if it occurs, otherwise you could be caught off-guard and take a lot of damage. However, Mohg should not be underestimated in phase 1, as he still has attacks that will hurt you. The main part of this phase is Mohg setting up Bloodboon Ritual where he’ll place three blood curses on you indicated with a red ring around your body as well as an audible cue saying either Tres, Duo, or Unus (3, 2, 1). When he casts this, he’ll leave himself open for attacks. As he is casting it, he’ll swing his trident to the right, leaving the left side open. This is a good time to get some attacks of your own in. The last blood curse (unus) will be around the 50% mark, which indicates phase 2.

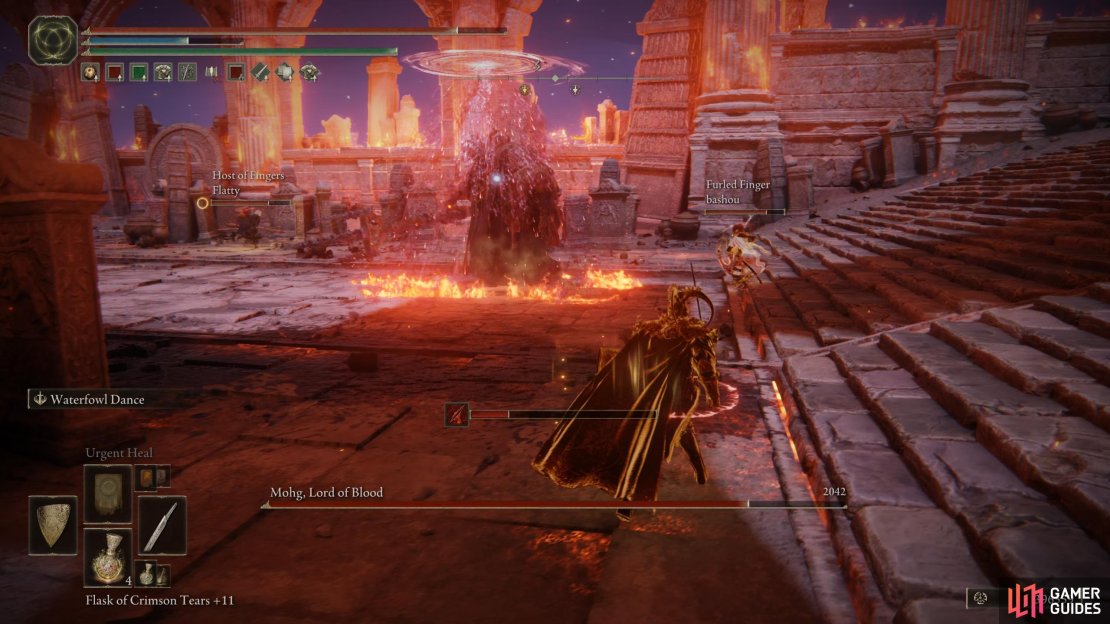
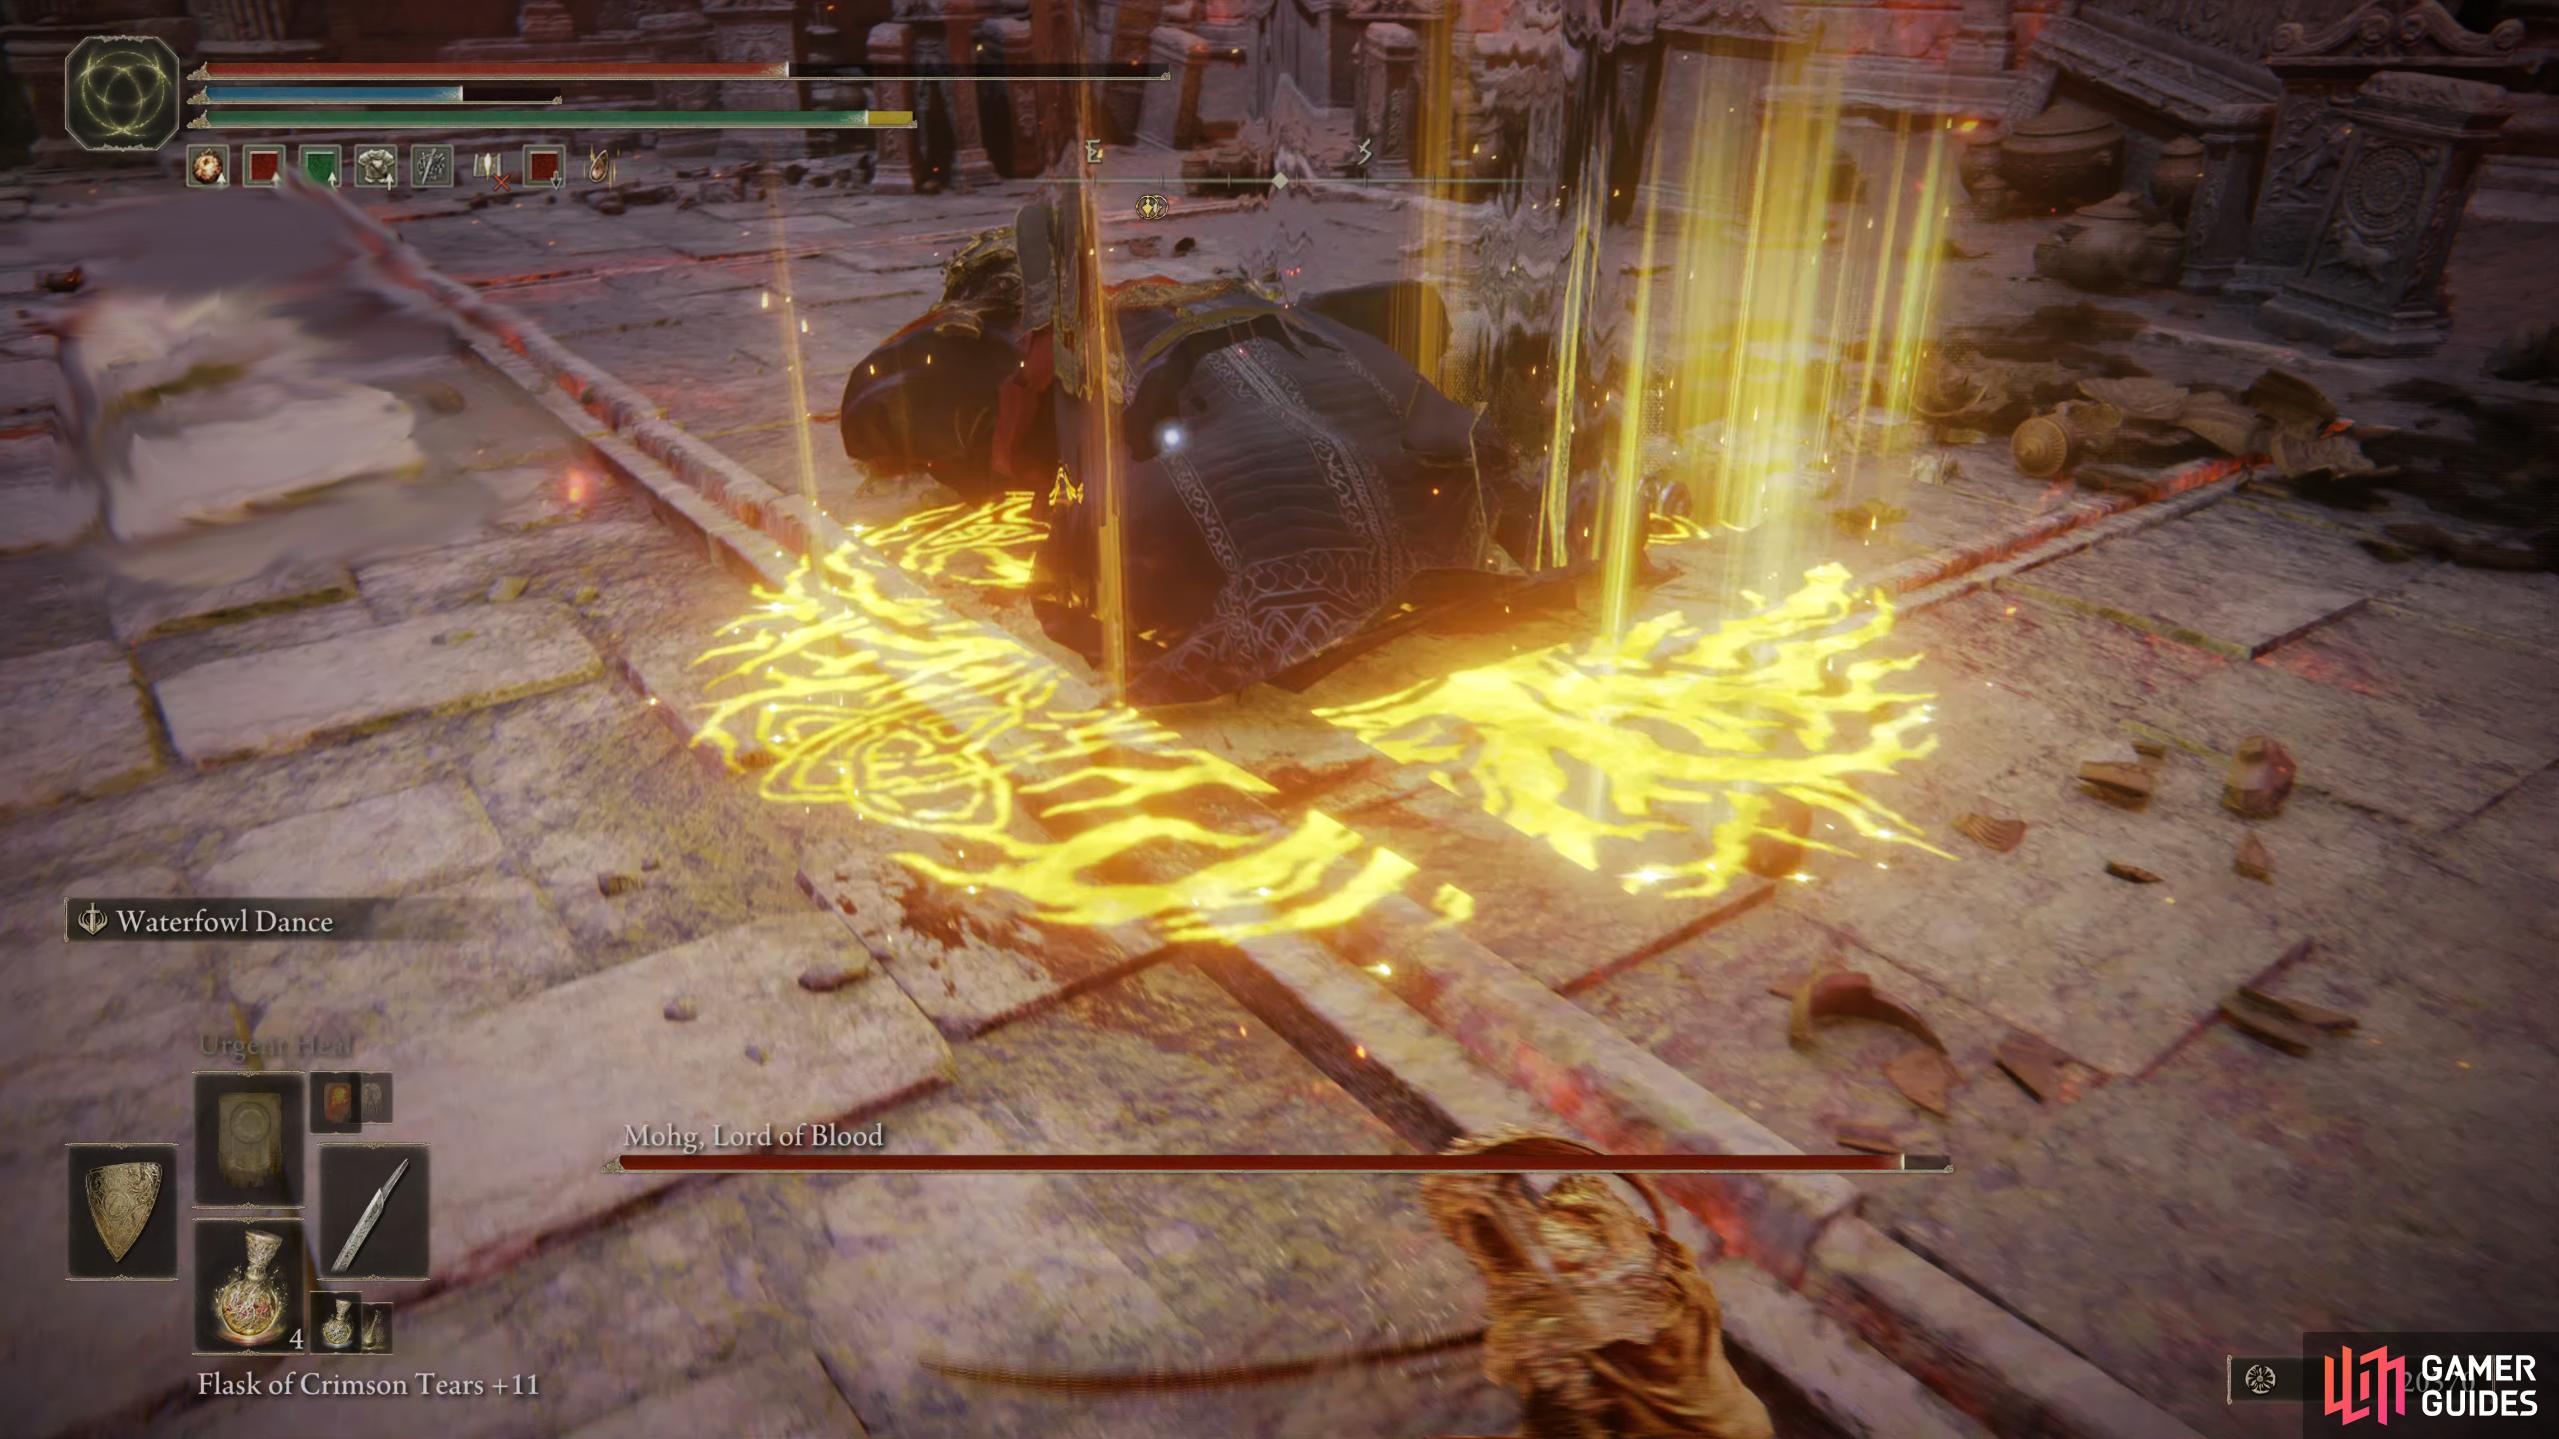
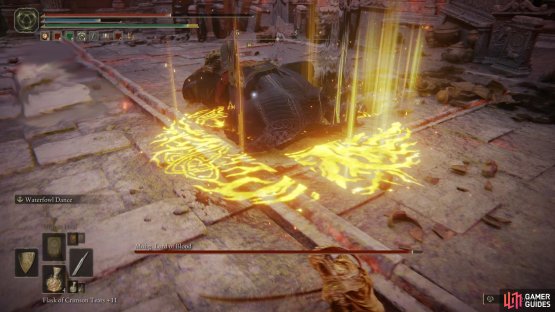
(1 of 3) Nihil!: During the phase change, Mohg will cast Nihil! This will deal significant damage while healing Mohg.
Phase 2
During the transition to phase 2, Mohg will cast Nihil! (Nothing!). This will remove a blood curse each time Mohg raises his trident, dealing significant damage while also healing himself. At this stage, use your Wondrous Flask mixed with Opaline Bubbletear and Purifying Crystal Tear to negate some damage, and use your flasks to top up your health. Once the attack finishes, Mohg’s trident will be trenched in bloodflame, and gain some wings.
Phase 2 is by far the most difficult part of this battle. He will zip around the arena using his wings for flight while unleashing bloodflame across the arena. Not only does the bloodflame stay on the floor, but he’ll create more of it with every swing of his trident due to it being caked in the stuff. Any attack Mohg does, be it a slam, a slash, a charge, or magic, bloodflames are going across the floor. Standing on the bloodflames will make you take damage while building up your blood-loss gauge before it deals a large chunk of damage. We recommend having Staunching Boluses on hand to recover before it fills up.

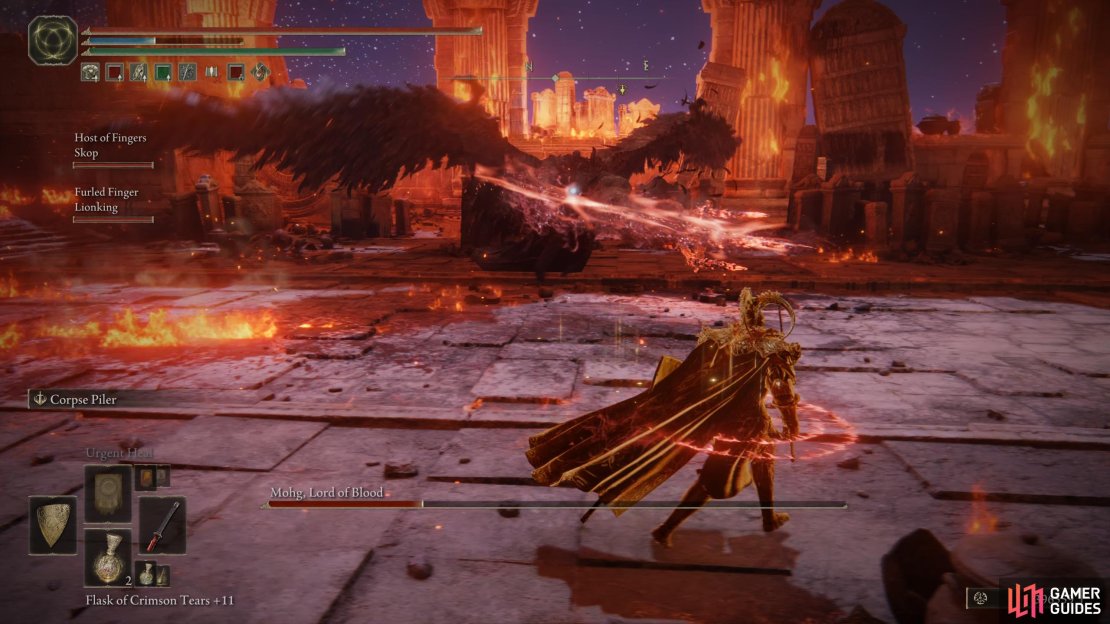
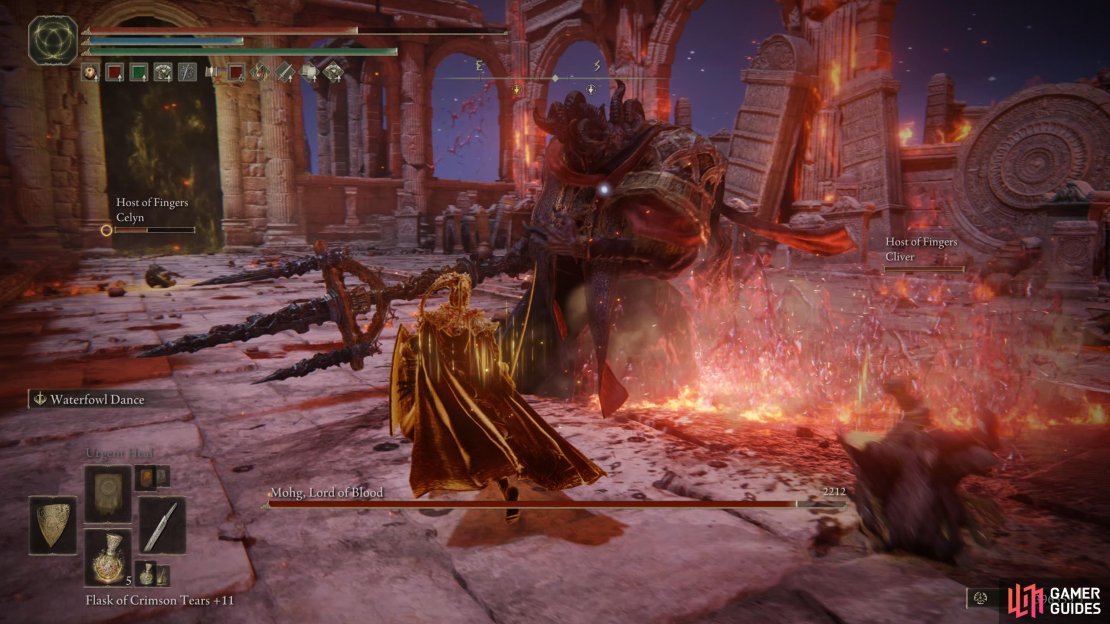
(1 of 2) Winged Assault: This is usually followed up with a diving slash.
Outside of the bloodflames, Mohg’s attack will come at you more quickly, and he’ll take to the skies often where he’ll fling bloodflames at you before diving at your location. The same openings from the first phase apply, as his combos still have that slight delay and you can still get a few attacks on him between each swing provided bloodflames don’t block your path. All in all, this phase is all about positioning, which is easier said than done. You want to reposition into areas of the arena where bloodflames aren’t present, dodge the attacks, and deal some of your own before moving to another position when the bloodflames make it too hard to stay there anymore.

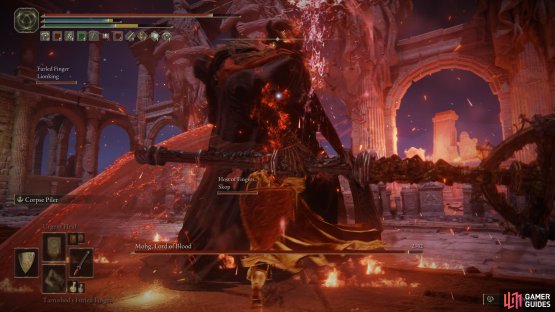
(1 of 2) Mohg takes a lot of bleed damage, so Rivers of Blood is a great skill to use on him.

Mohg takes a lot of bleed damage, so Rivers of Blood is a great skill to use on him. (left), Alternatively, powerful sorceries can deal just as much, if not more. (right)
For magic-builds, you’re kind of at a disadvantage with Incantations due to his high resistance against them, but you can feast if you’re using sorceries. The regular big hitters such as Comet Azur will destroy him if you’re built for it. Final note, Bleed works very well against Mohg, but this will increase his damage by 20%, so it’s a double-edged sword, still, we recommend using a Bleed build of some kind to make the battle easier. If you have the Lord of Blood’s Exultation Talisman, you will get the attack boost too. Defeating Mohg, Lord of Blood will reward you with 420,000 runes, Mohg’s Great Rune, Remembrance of the Blood Lord, and now, access to the Shadow of the Erdtree DLC.
No Comments