Ravatogh, The Vesperpool, Myrlwood and countless sidequests have now fallen under your merciless onslaught, but there’s one more dungeon worth plundering before you board your long-awaited ship - Malmalam. You passed by the dungeon when you were escorting Iris to Cape Caem, and before that Sania tried to send you there on one of her frog-hunts. Now, however, Dave beckons you to Malmalam, to so Malmalam Thicket you shall go. Also, there’s the typical dungeon goodies you can expect to plunder there, and a component that’ll allow you to upgrade the Force Stealer. Plenty of good reasons to explore Malmalam, and attend to any follow-up quests afterwards.
Mystery Map XIV
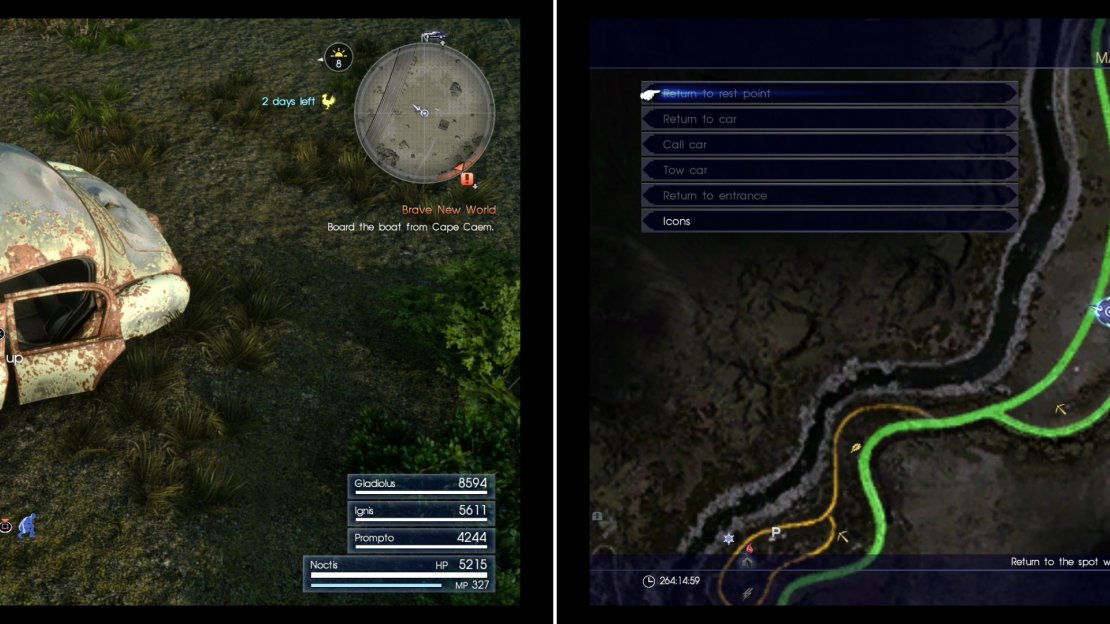
Before you go, however, there’s one more item in roughly the same area as where you found your last Rainbow Frog. Return to the Fort Vaullerey Parking Spot and drive/ride/walk south down the highway past Fort Vaullerey itself. Keep going until, your left (east of the highway) you spot a water tower. What? Landmark! Jump over the guard rail here and make your way to the water tower, from which you should turn north-east to find a trail. Follow the trail north-east and when it starts to bend east, follow another trail to the north until you find a shack, near (west of) which is a broken-down car. Head over to the car to find Mystery Map XIV , the appropriation of which starts “Scraps of Mystery XIV”.
Search inside a car south of Fort Vaullerey to find Mystery Map XII (left) at the indicated area on the map (right).
Malmalam Trail
Return to the Regalia and travel to the Malmalam Thicket Parking Spot, then follow the road south-west past Telghey Haven Campground to find the bridge crossing the river, beyond which is the trail that runs up to Malmalam Thicket. Don’t expect an uneventful journey, however, as you’re likely to be pestered by Spiracorns, Killer Bees, Seadevils and Shieldshears.
Fortunately, there’s also some treasure to be found along the way. From the bridge head north-west across some rocks to find the “Malmalam Thicket” sign. From this sign turn south and head through some trees until you hit the sheer rocks formations that always seem to exist to form convenient boundaries to areas. Follow these rocks (and the trees that line them) to the north-west to find a Treasure Spot ( Ancient Dragon Tooth ), then make your way north to find the trail leading back to Malmalam. Follow the trail uphill to the north and when it turns sharply to the south-west, continue north, veering off the trail to find another Treasure Spot ( Mega Phoenix ).
Head back south to reunite with the trail and follow it until you find… Dave!, who is actually south-west of where the quest icon indicates he should be. Talk to him and he’ll stop sagely pondering a sign before telling you about Malmalam Thicket and its peculiar “no hunters” policy. Frustratingly for Dave, another hunter broke the rules and went missing in Malmalam, and he needs somebody who isn’t technically a hunter to go look for the Dog Tag. That somebody, of course, would be you.
House of Hexes
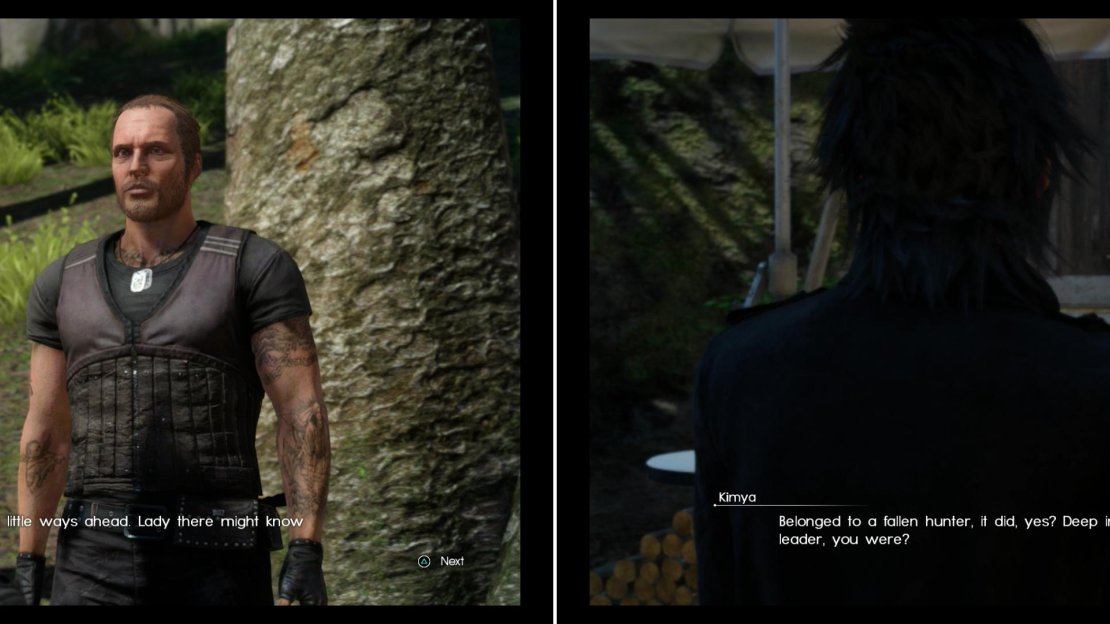
After talking to Dave and updating “The Witch of the Woods” follow the trail to the north and when you find a break in the rocks to the south-west veer off the trail in that direction to find another, unmarked trail that runs south-west and south, eventually ending at the “House of Hexes”. Since magic is associated with the royalty of Lucis, you’d think Noctis and company would be interested in any so-called witches lurking about, but no, this all flies completely under the radar. Talk to the “witch” - Kimya - outside of her house to learn about the hunter (and to discover that she’s probably more closely related to Yoda than Noctis, based on her manner of speaking), then peruse her wares, should you have a shopping itch that needs scratched.
House of Hexes (Items)
| Items | Price |
|---|---|
| Potion | 50 Gil |
| Hi-Potion | 100 Gil |
| Elixir | 400 Gil |
| Hi-Elixir | 800 Gil |
| Phoenix Down | 1,000 Gil |
| Antidote | 10 Gil |
| Gold Needle | 50 Gil |
| Smelling Salts | 50 Gil |
| Maiden’s Kiss | 100 Gil |
Get a lead from Dave (left) then follow up on it by talking to the Yoda-impersonator at the House of Hexes (right).
Mystery Map XIII
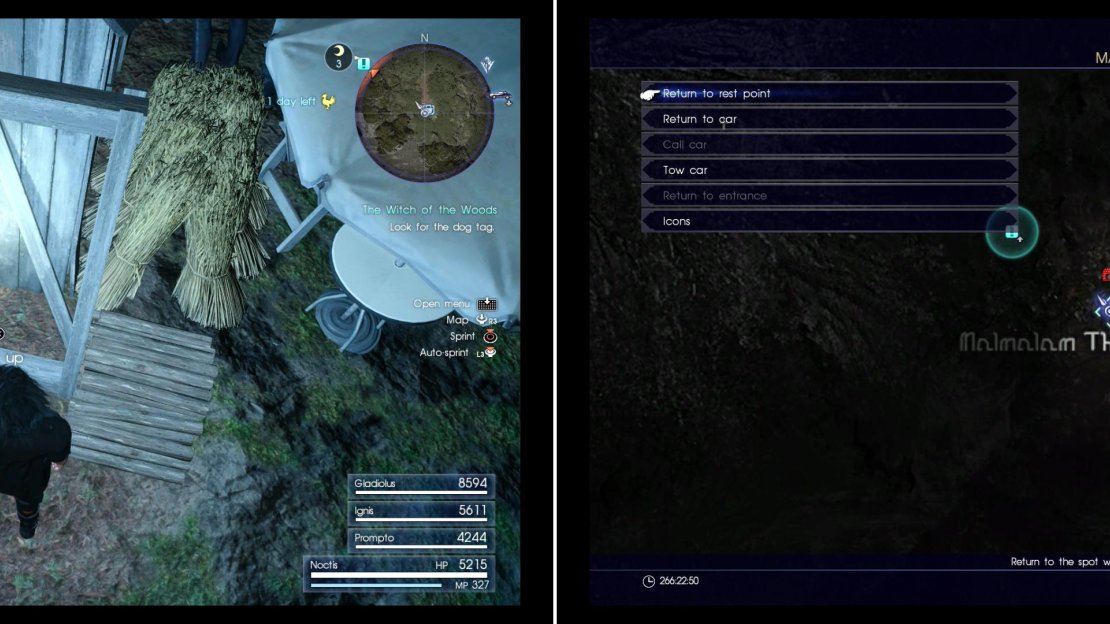
Leave the Yoda-impersonator alone, but before you enter Malmalam Thicket, it’s time to score one last bit of treasure - the final Mystery Map. Head over to the southern side of the house and search against the wall to find a variety of frames and planks stacked up. On the ground behind the frame you’ll find Mystery Map XIII, which starts “Scraps of Mystery XIII”. If you’ve been following this guide you should have all the maps, but until you’re ready to tackle Crestholm Channels , there’s no need to go searching for the locations indicated on them.
Search behind a wooden frame along the southern end of the House of Hexes to find Mystery Map XIII (left) at the area indicated on the map (right).
Into Malmalam Thicket
Make your way back north to the trail leading to Malmalam Thicket and continue following it until you finally reach the entrance to the dungeon - the obligatory rocky passage that seems to connect most dungeons to the world map. Make your way through the linear tunnel, killing beasties that vary depending on what time it is. If you’re here at night, expect to encounter Imps and Flan, while during they day you’ll have to prune some Mandrakes. Along the way be sure to keep an eye out for some loot spots ( Giant Crab Pincers ) and ( Thunderbolt ), the latter of which is a new greatsword.
Eventually you’ll reach a more open chamber occupied by a Soldier Wasp, which will be significantly less annoying if you have a Ribbon. Explore to the south-east to find a Food Spot (Malmashroom) which will teach Ignis the recipe “Three Mushroom Kebabs”. This meal is noteworthy for its “Resilient” property, which “prevents most status effects”. Basically, you can use this meal to substitute for Ribbons, which is handy if you know you’re going to be dealing with foes that inflict nasty status ailments. It’s worth harvesting some Alstrooms, Vesprooms and Malmashrooms specifically for this purpose.
Kellebram Haven Campground
Grab a loot spot ( Prismatic Shard ) near the Food Spot, then continue down the tunnel and kill more Soldier Wasps, and plunder another loot spot ( Sapphire Bracelet ) before eventually reaching a stream. Kill a Shieldshears, then note the tell-tale signs of a haven ahead. Elevated flat stone platform, glowing runes… yep, welcome to Kellebram Haven. Make your way north-west across the stream, at which point your party will warn you about the current, and the running water can, at times, hinder your movement much like the stamina-draining slope in Ravatogh, specifically on inclines. Otherwise, though, it’s nothing more than a nuisance.
Rest up if you need to, and if you’re at all worried about the fight ahead, considering snarfing down a meal with helpful combat buffs: anything that boosts your Attack and Hit Points will do fine. The more trouble you had getting here, the more you should consider buffing yourself with a good meal. When you’re ready to go, you’ll want to turn your attention upstream, to the north-west, as the south-eastern path is a dead end.
Grab a loot spot ( Oracle Ascension Coin ) opposite the fire elemental deposit, then continue upstream, being way of stamina drain as you ascend an incline. In the shallows above you’ll be greeted by some Shieldshears, some Mandrakes and a Soldier Wasp. If you somehow didn’t find a Gigantoad (and presumably some Slimy Oil) for Sania earlier, this is where the Gigantoad she sent you to kill would be lurking. Obviously, it’s much easier to wait for it to rain and go hunting for one anywhere in Duscae.
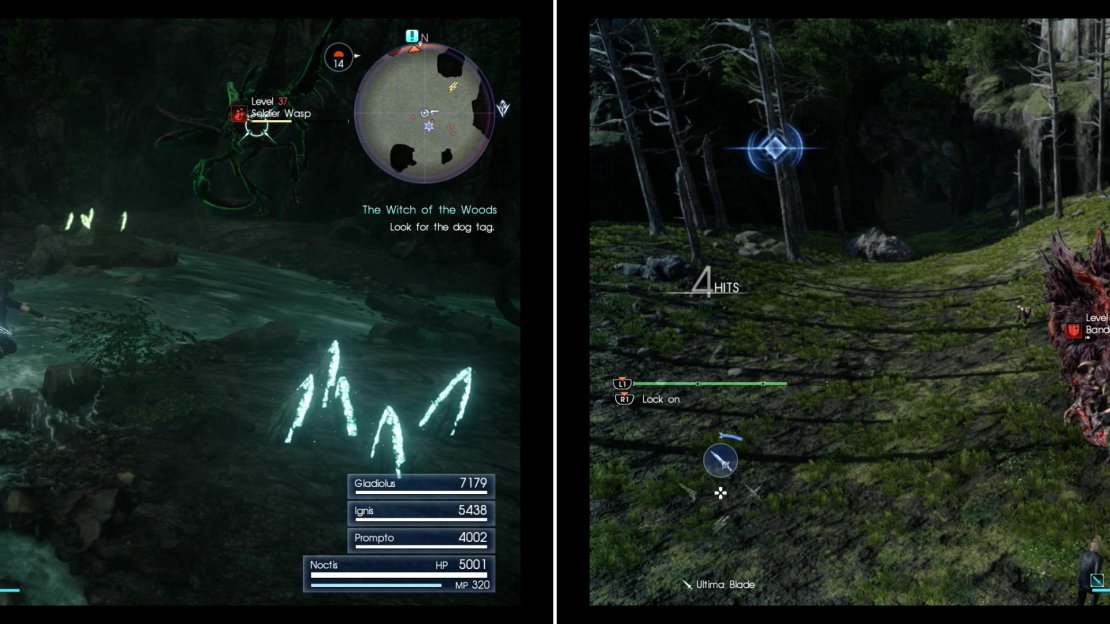
Once the beasts are all dead you’ll be able to draw from the ice elemental deposit and lightning elemental deposit as you will. If you’re hankering for more treasure, you’ll find a loot spot ( Delta Daggers ) on a ledge to the south-east, while another loot spot ( Golden Hourglass ) awaits beyond a stone arch to the north-east. Collect these goodies, then head north up a waterfall (or leap up the rocky slope near it), then turn south to find another loot spot ( Moon Pendant ) on a rock. Turn around and continue north up a ramp and through a tunnel to reach a… well, a thicket. Unfortunately you’re not alone here, however, as this area is home to a Bandersnatch.
Upstream from the Kellebram Haven Campground you’ll have to fight a variety of beasts (left) but none are as ferocious as the Bandersnatch in the depths of Malmalam Thicket (right).
Boss Battle: Bandersnatch
The Bandersnatch (level thirty-eight) is a massive foe, one of which also occupied a depression near the Hammerhead Outpost at the beginning of the game. If you stumbled upon this beast at those tender levels, you likely learned real quick where you stood in the pecking order. Now, however, you should be up to the challenge.
This massive, prehistoric beast has a variety of attacks, including swipes with its tail or massive tusks, charge attacks and leap attacks (which can both be blocked and countered) a side-rush and a roar area-of-effect attack. Simply put, it’s dangerous from all sides, and you need to be ready to warp away or phase if you suspect an attack. The beast has over 75,000 HP, and to whittle this down, use polearms, machinery and lightning, all of which it’s weak to (they do 120% normal damage), but avoid fire and light elemental attacks, as it’s resistant (50% normal damage) to both.
Tomb of the Pious
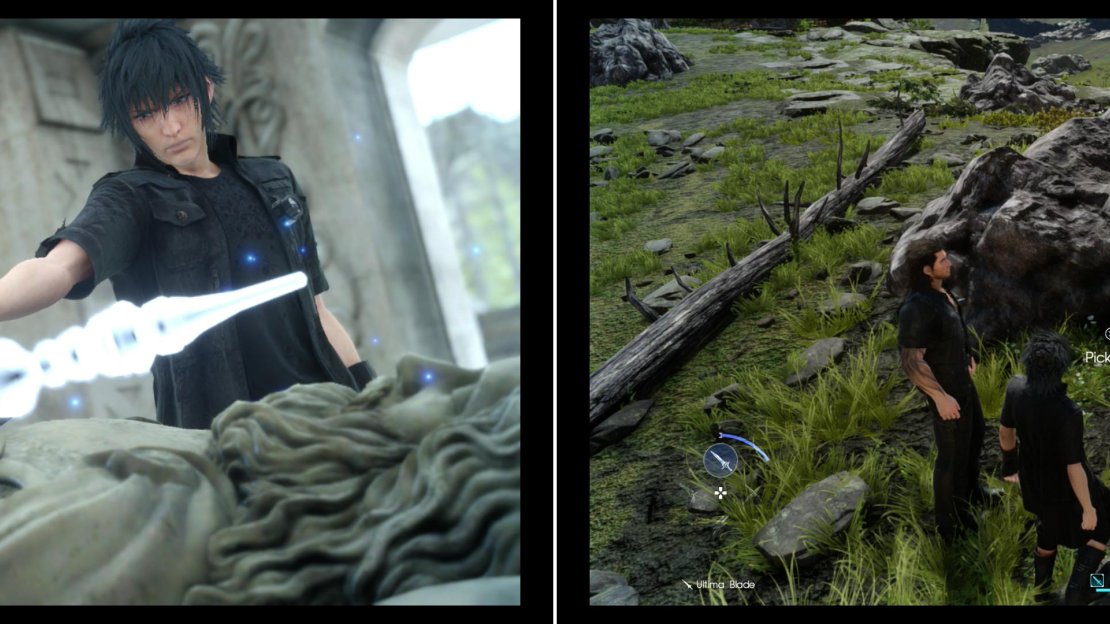
After the beast falls note that you obtained a Monster Claw, which is just the item you need to upgrade the Force Stealer. Before you go make a superior greatsword, however, continue north to find another Royal Tomb, inside of which you’ll be able to claim the Scepter of the Pious . You’re acquiring quite the arsenal.
| Objective | Reward |
|---|---|
| For exploring the depths of Malmalam Thicket | EXP 3,000 |
The Witch of the Woods
This quest from Dave has been more complicated than his usual fare, but no matter, you’ve almost chased down this Dog Tag. Leave the Tomb of the Pious and from the entrance head west to find the Sullied Dog Tag merrily glowing away near a boulder and a tree. Time to leave Malmalam Thicket, but before you leave the area entirely, be sure to visit the House of Hexes and talk to Kimya again, to get a stock message for Dave and learn a bit about her potions. When she’s done babbling, return to the Regalia and travel back up to Meldacio Hunter HQ to find Dave waiting in his customary spot. Give him the Sullied Dog Tag, tell him what the witch told you (more or less) and he’ll have a little heart-to-heart with you. Aww… don’t be down on yourself, Dave, you’re great just the way you are.
| Objective | Reward |
|---|---|
| For finding the Sullied Dog Tag | EXP 2,500 / Mega Phoenix x5 |
Claim the Scepter of the Pious from the Tomb of the Pious (left) then explore the wilderness west of the royal tomb to find the Sullied Dog Tag.
No Comments