

Den A
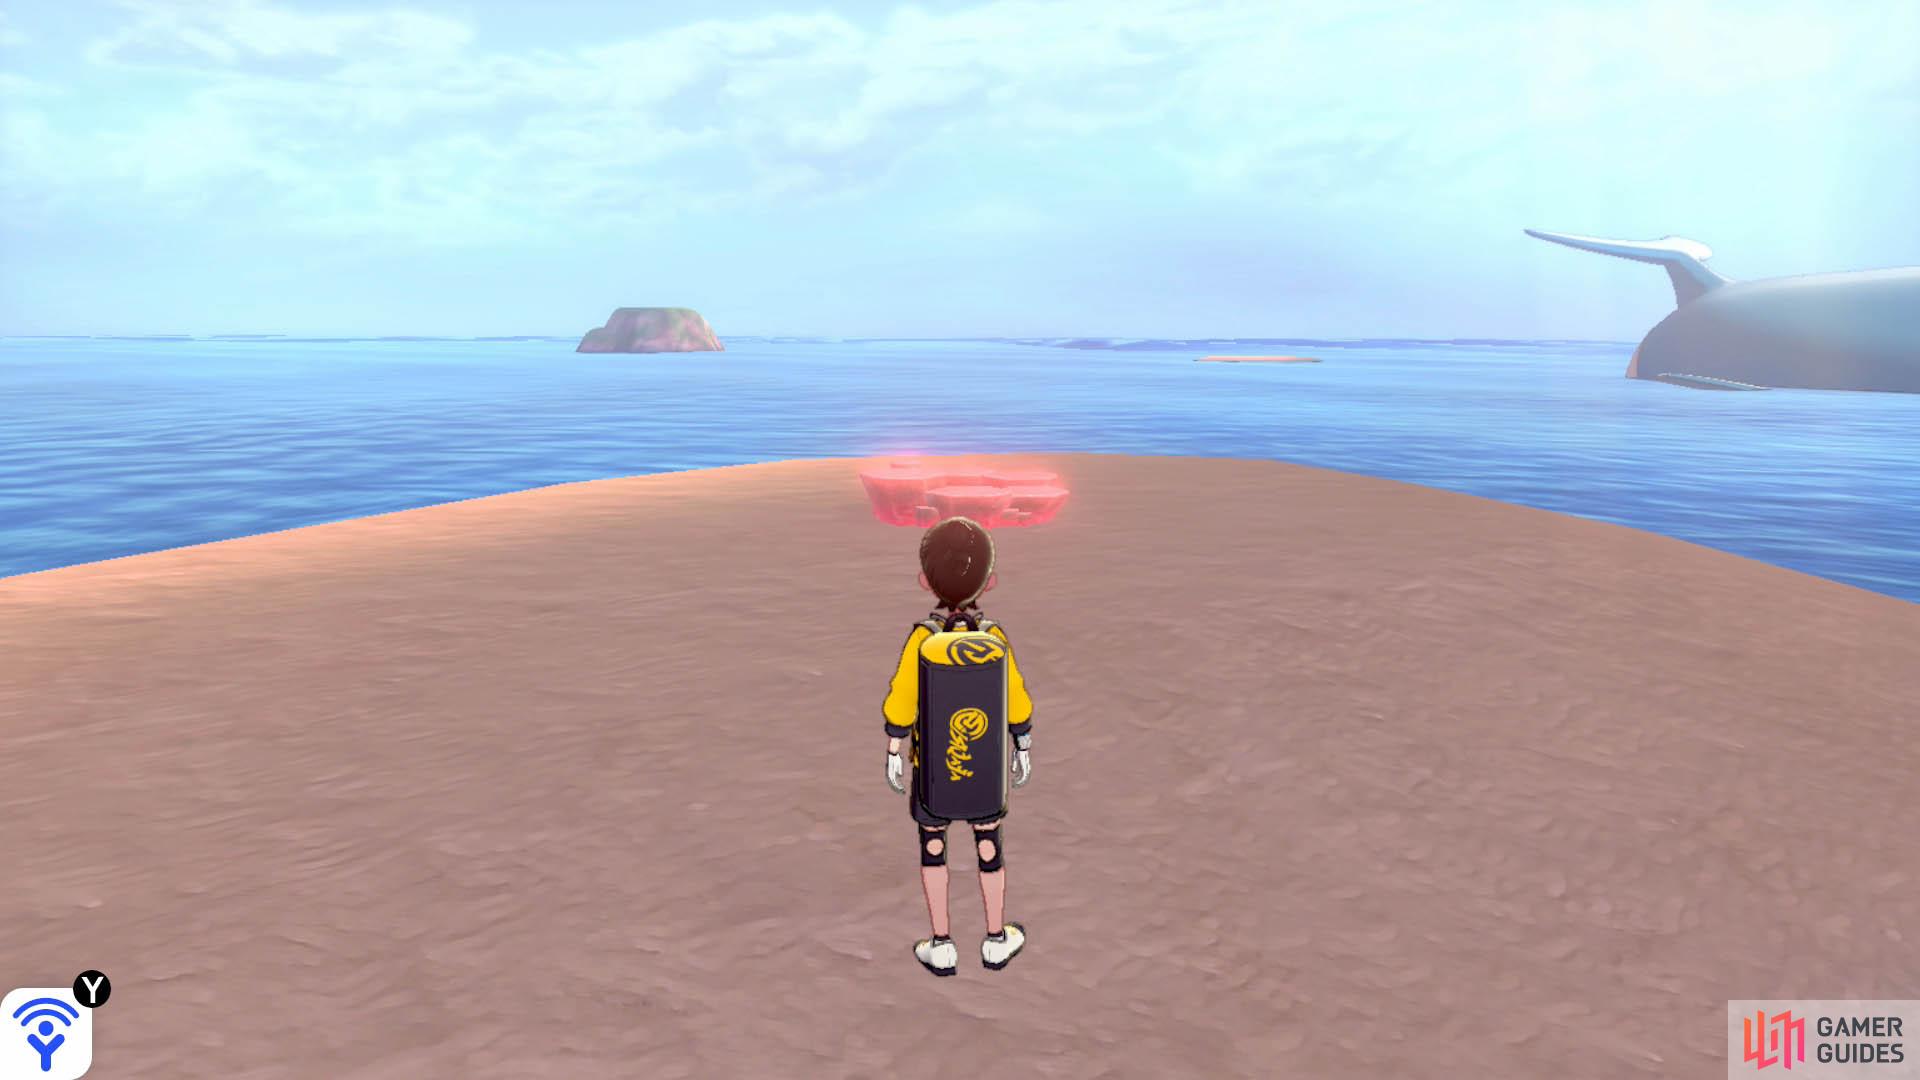
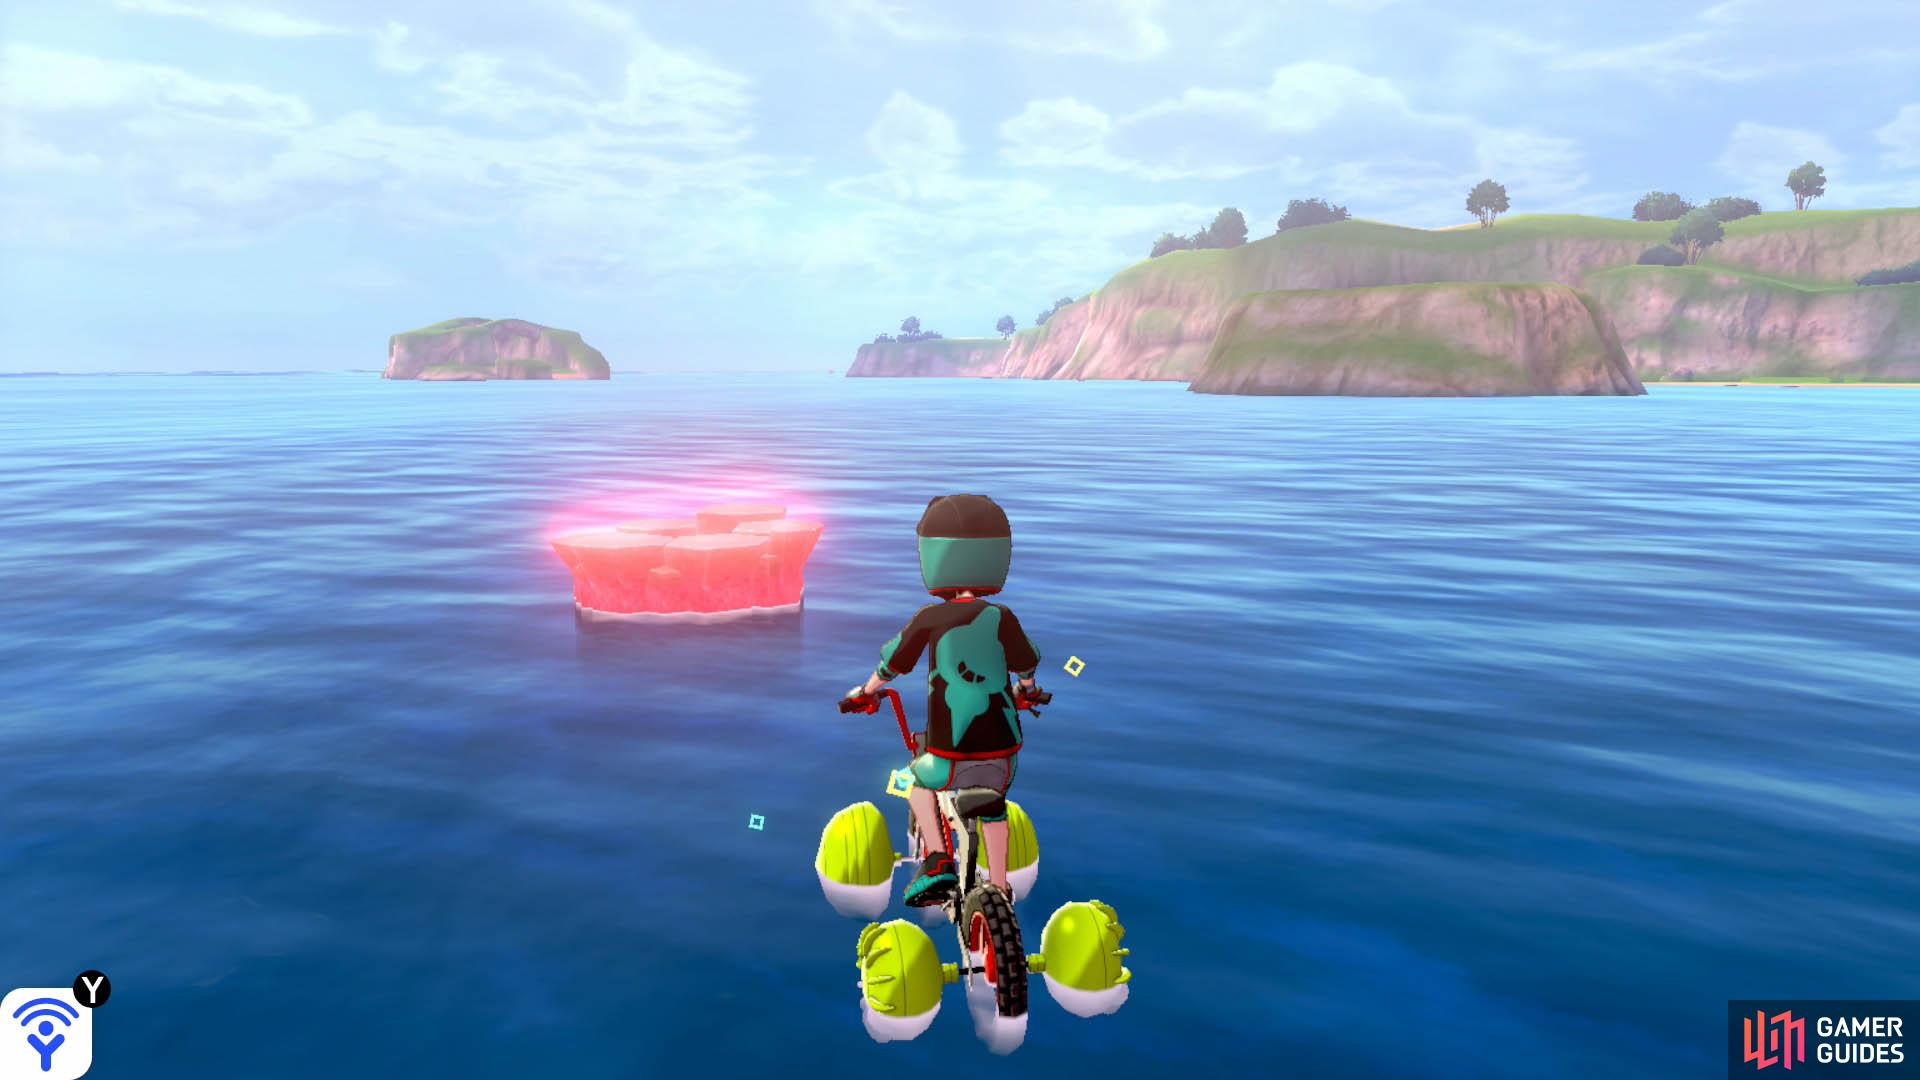
Head for the islet directly opposite Armor Station. With your back facing Armor Station, turn slightly left. Swim towards the longer islet directly ahead. This den is located on the top half of that islet.
Common Den
| Name | Type | Encounter Rate |
|---|---|---|
 Chansey Chansey |
Normal | ☆☆☆/☆☆☆☆/☆☆☆☆☆ - 5% |
 Chinchou Chinchou |
Water/Electric | ☆ - 60%, ☆☆ - 30% |
 Clauncher [Sword] Clauncher [Sword] |
Water | ☆ - 40%, ☆☆ - 50%, ☆☆☆ - 30% |
 Skrelp [Shield] Skrelp [Shield] |
Poison/Water | ☆ - 40%, ☆☆ - 50%, ☆☆☆ - 30% |
 Staryu Staryu |
Water | ☆☆ - 20%, ☆☆☆ - 25% |
 Wailmer Wailmer |
Water | ☆☆☆ - 25%, ☆☆☆☆ - 25% |
 Wishiwashi Wishiwashi |
Water | ☆☆☆ - 15%, ☆☆☆☆ - 25% |
 Wailord Wailord |
Water | ☆☆☆☆ - 15%, ☆☆☆☆☆ - 25% |
 Lanturn Lanturn |
Water/Electric | ☆☆☆☆ - 15%, ☆☆☆☆☆ - 20% |
 Starmie Starmie |
Water/Psychic | ☆☆☆☆ - 15%, ☆☆☆☆☆ - 20% |
 Clawitzer [Sword] Clawitzer [Sword] |
Water | ☆☆☆☆☆ - 15% |
 Dragalge [Shield] Dragalge [Shield] |
Poison/Dragon | ☆☆☆☆☆ - 15% |
 Sharpedo Sharpedo |
Water/Dark | ☆☆☆☆☆ - 15% |
Rare Den
| Name | Type | Encounter Rate |
|---|---|---|
 Blissey Blissey |
Normal | ☆☆☆/☆☆☆☆/☆☆☆☆☆ - 5% |
| Clauncher [Sword] |
Water | ☆ - 60%, ☆☆ - 30% |
| Skrelp [Shield] |
Poison/Water | ☆ - 60%, ☆☆ - 30% |
| Staryu |
Water | ☆ - 40%, ☆☆ - 25% |
| Wailmer |
Water | ☆☆ - 25%, ☆☆☆ - 30% |
 Pelipper Pelipper |
Water/Flying | ☆☆ - 20%, ☆☆☆ - 25% |
| Lanturn |
Water/Electric | ☆☆☆ - 25%, ☆☆☆☆ - 25% |
 Seadra Seadra |
Water | ☆☆☆ - 15%, ☆☆☆☆ - 25% |
| Clawitzer [Sword] |
Water | ☆☆☆☆ - 15%, ☆☆☆☆☆ - 40% |
| Dragalge [Shield] |
Poison/Dragon | ☆☆☆☆ - 15%, ☆☆☆☆☆ - 40% |
| Lanturn |
Water/Eletric | ☆☆☆☆ - 15%, ☆☆☆☆☆ - 20% |
| Starmie |
Water/Psychic | ☆☆☆☆ - 15%, ☆☆☆☆☆ - 20% |
| Sharpedo |
Water/Dark | ☆☆☆☆☆ - 15% |
Den B
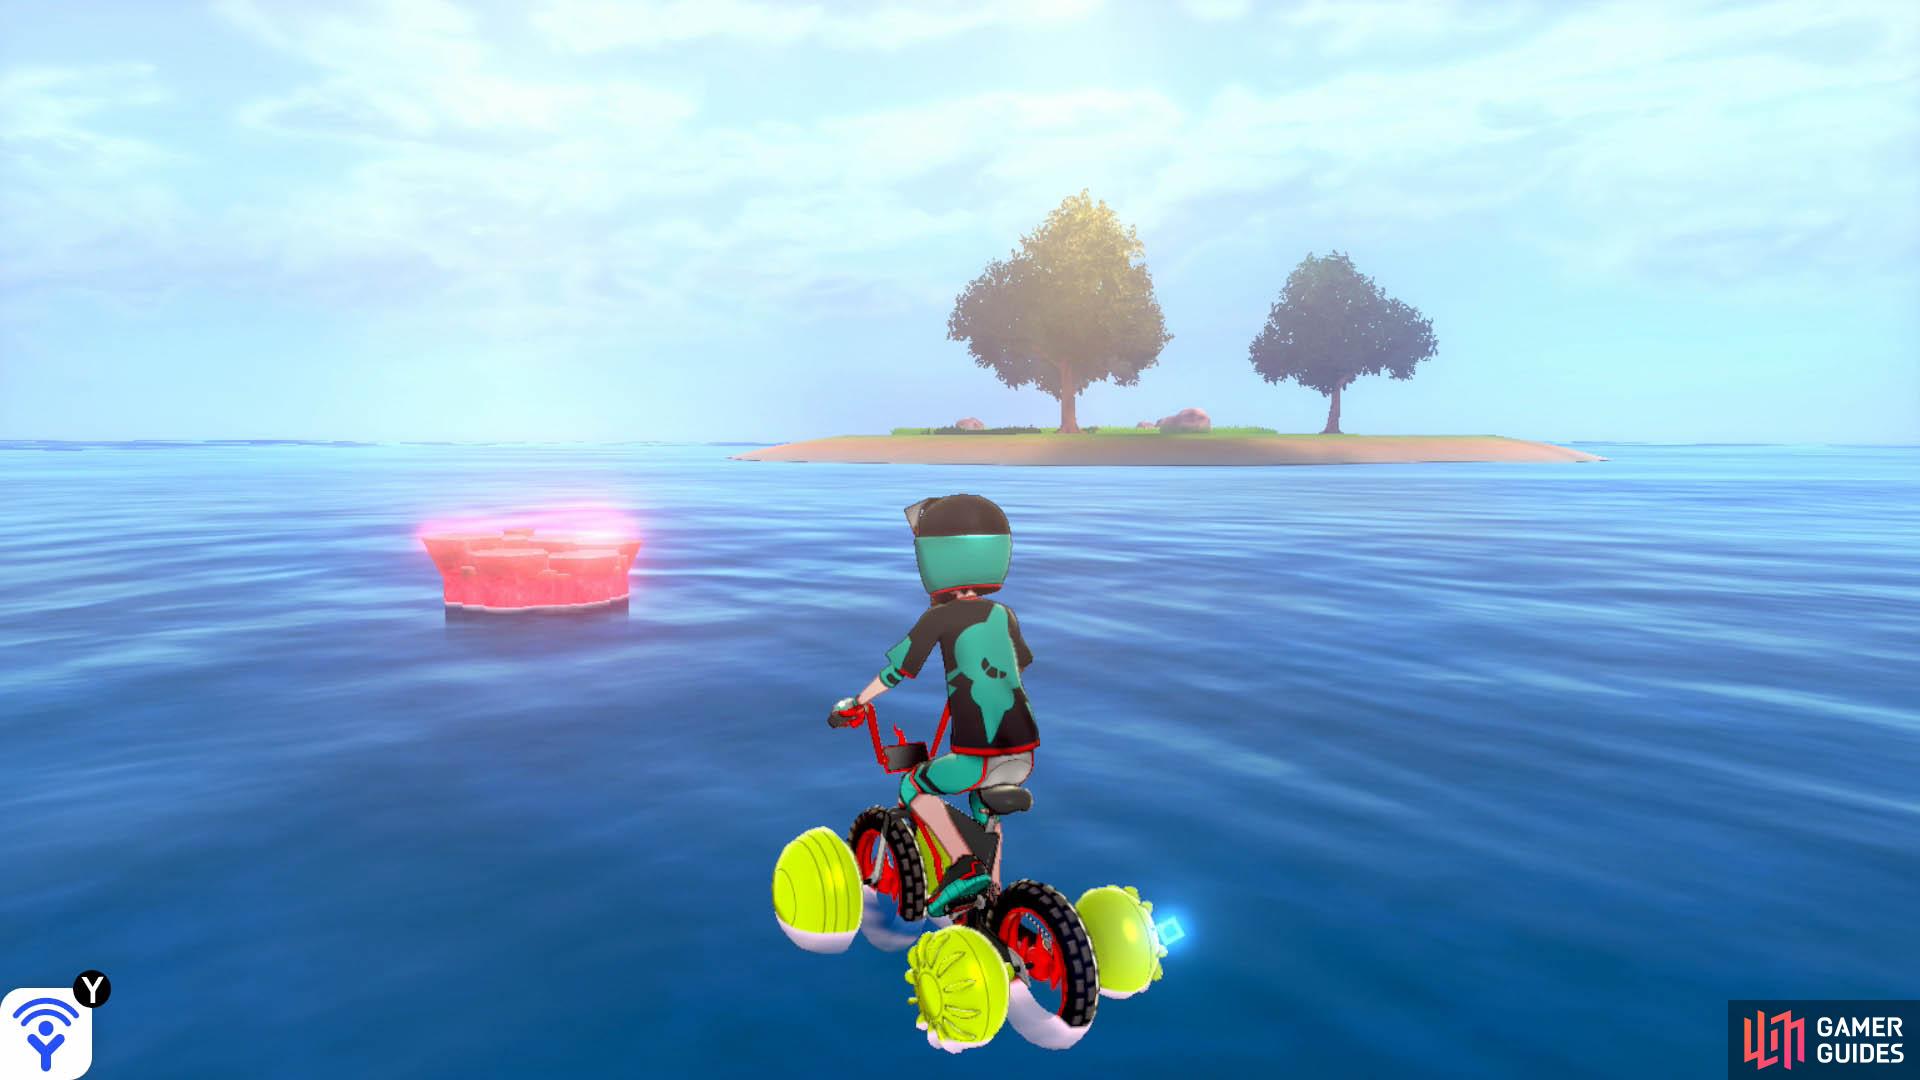
From Den A, turn so the mainland is on your left. In the distance, there should be an island with three trees (might seem like two). Slightly left, there’s another small, circle-shaped islet. Head for the islet first. Then travel straight ahead to the den that’s to the left of the island with three trees.
Common Den
| Name | Type | Encounter Rate |
|---|---|---|
| Chansey |
Normal | ☆☆☆/☆☆☆☆/☆☆☆☆☆ - 5% |
 Carvanha Carvanha |
Water/Dark | ☆ - 60%, ☆☆ - 55%, ☆☆☆ - 30% |
 Pawniard Pawniard |
Dark/Steel | ☆ - 40%, ☆☆ - 25% |
 Zorua Zorua |
Dark | ☆☆ - 20%, ☆☆☆ - 25% |
| Sharpedo |
Water/Dark | ☆☆☆ - 25%, ☆☆☆☆ - 25%, ☆☆☆☆☆ - 15% |
 Malamar Malamar |
Dark/Psychic | ☆☆☆ - 15%, ☆☆☆☆ - 40%, ☆☆☆☆☆ - 20% |
 Drapion Drapion |
Poison/Dark | ☆☆☆☆ - 15%, ☆☆☆☆☆ - 25% |
 Bisharp Bisharp |
Dark/Steel | ☆☆☆☆ - 15%, ☆☆☆☆☆ - 20% |
 Zoroark Zoroark |
Dark | ☆☆☆☆☆ - 15% |
Rare Den
| Name | Type | Encounter Rate |
|---|---|---|
| Blissey |
Normal | ☆☆☆/☆☆☆☆/☆☆☆☆☆ - 5% |
| Zorua |
Dark | ☆ - 60%, ☆☆ - 55%, ☆☆☆ - 30% |
| Carvanha |
Water/Dark | ☆ - 40%, ☆☆ - 25% |
 Inkay Inkay |
Dark/Psychic | ☆☆ - 20%, ☆☆☆ - 25% |
 Krokorok Krokorok |
Ground/Dark | ☆☆☆ - 25%, ☆☆☆☆ - 25% |
| Malamar |
Dark/Psychic | ☆☆☆ - 15%, ☆☆☆☆ - 25% |
 Thievul Thievul |
Dark | ☆☆☆☆ - 15%, ☆☆☆☆☆ - 20% |
| Zoroark |
Dark | ☆☆☆☆ - 15%, ☆☆☆☆☆ - 20% |
| Sharpedo |
Water/Dark | ☆☆☆☆ - 15%, ☆☆☆☆☆ - 20% |
 Liepard Liepard |
Dark | ☆☆☆☆☆ - 20% |
 Krookodile Krookodile |
Ground/Dark | ☆☆☆☆☆ - 15% |
Den C
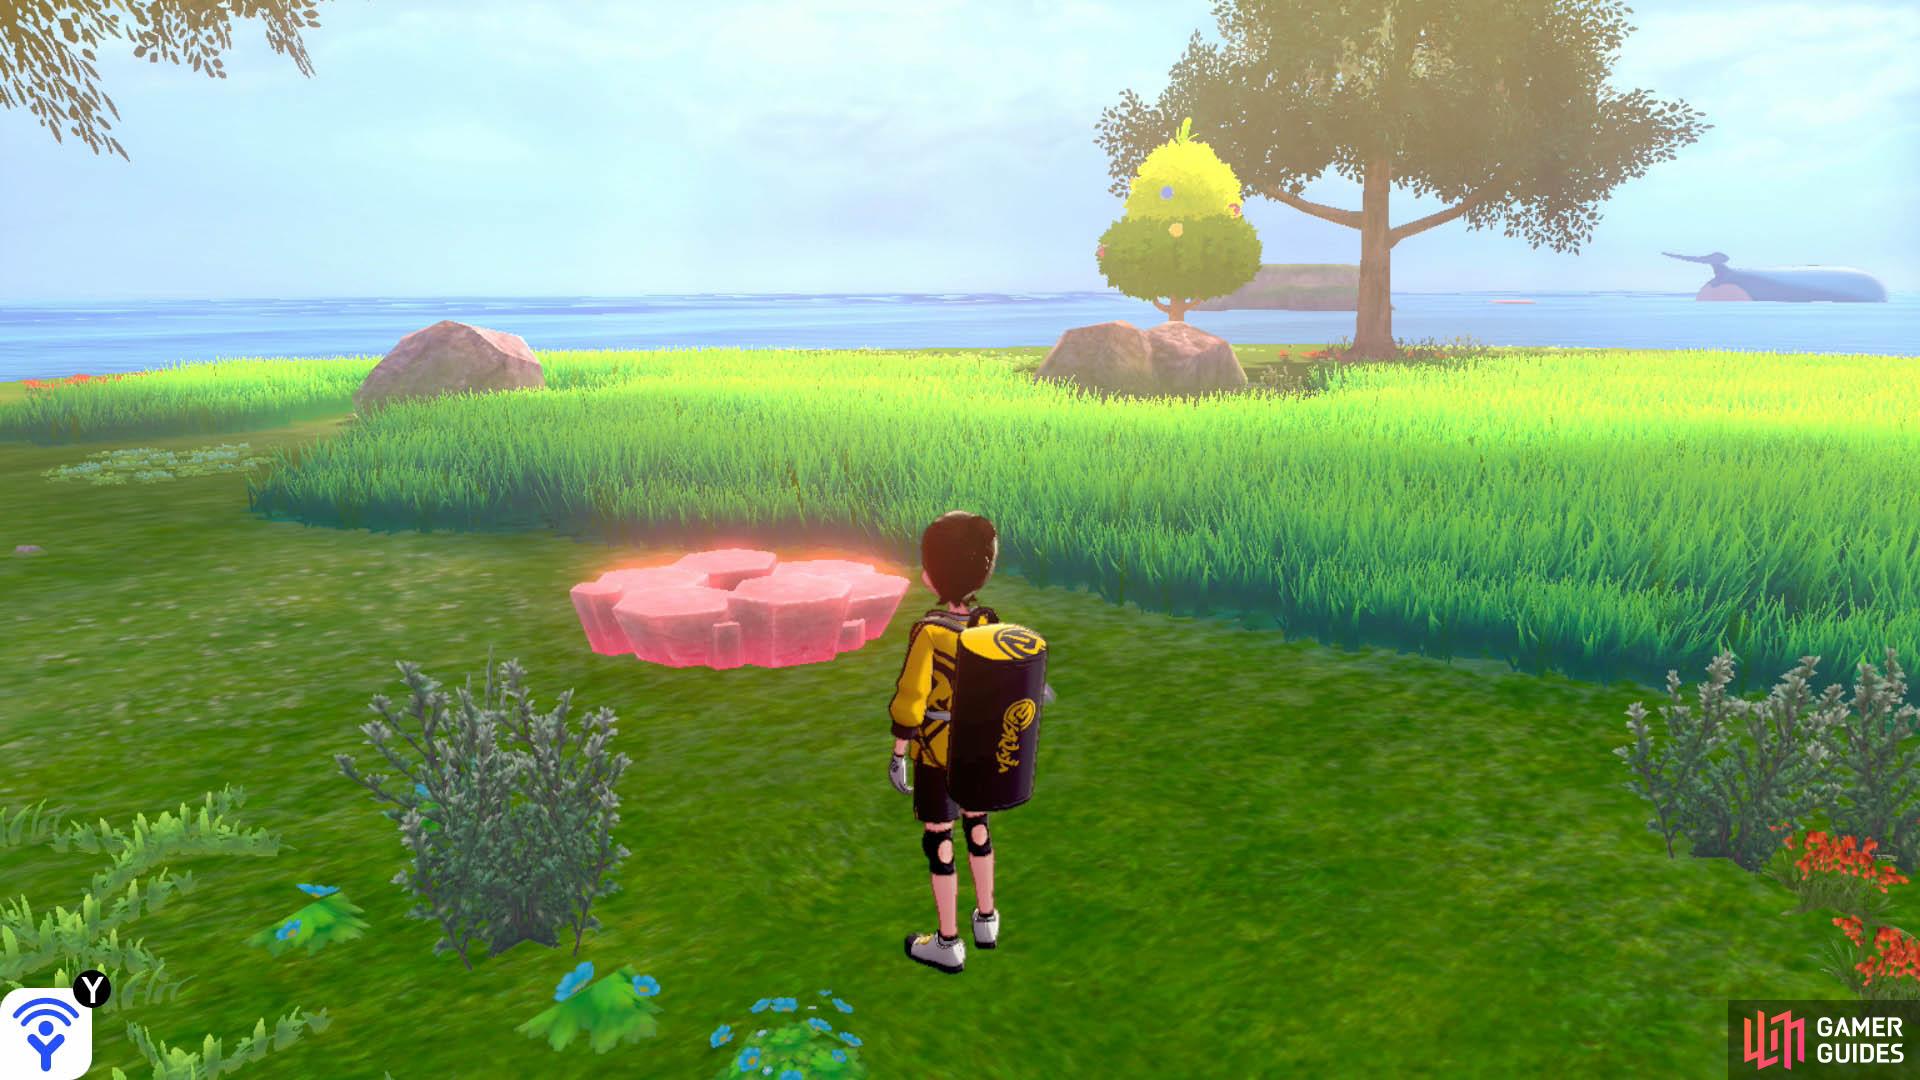
Swim towards the island with three trees (Ditto Island). This den is located near the centre of the island, past the tall grass.
Common Den
| Name | Type | Encounter Rate |
|---|---|---|
| Chansey |
Normal | ☆☆☆/☆☆☆☆/☆☆☆☆☆ - 5% |
 Ditto Ditto |
Normal | ☆/☆☆ - 100%, ☆☆☆/☆☆☆☆/☆☆☆☆☆ - 95% |
Rare Den
| Name | Type | Encounter Rate |
|---|---|---|
| Blissey |
Normal | ☆☆☆/☆☆☆☆/☆☆☆☆☆ - 5% |
| Ditto |
Normal | ☆/☆☆ - 100%, ☆☆☆/☆☆☆☆/☆☆☆☆☆ - 95% |
Den D
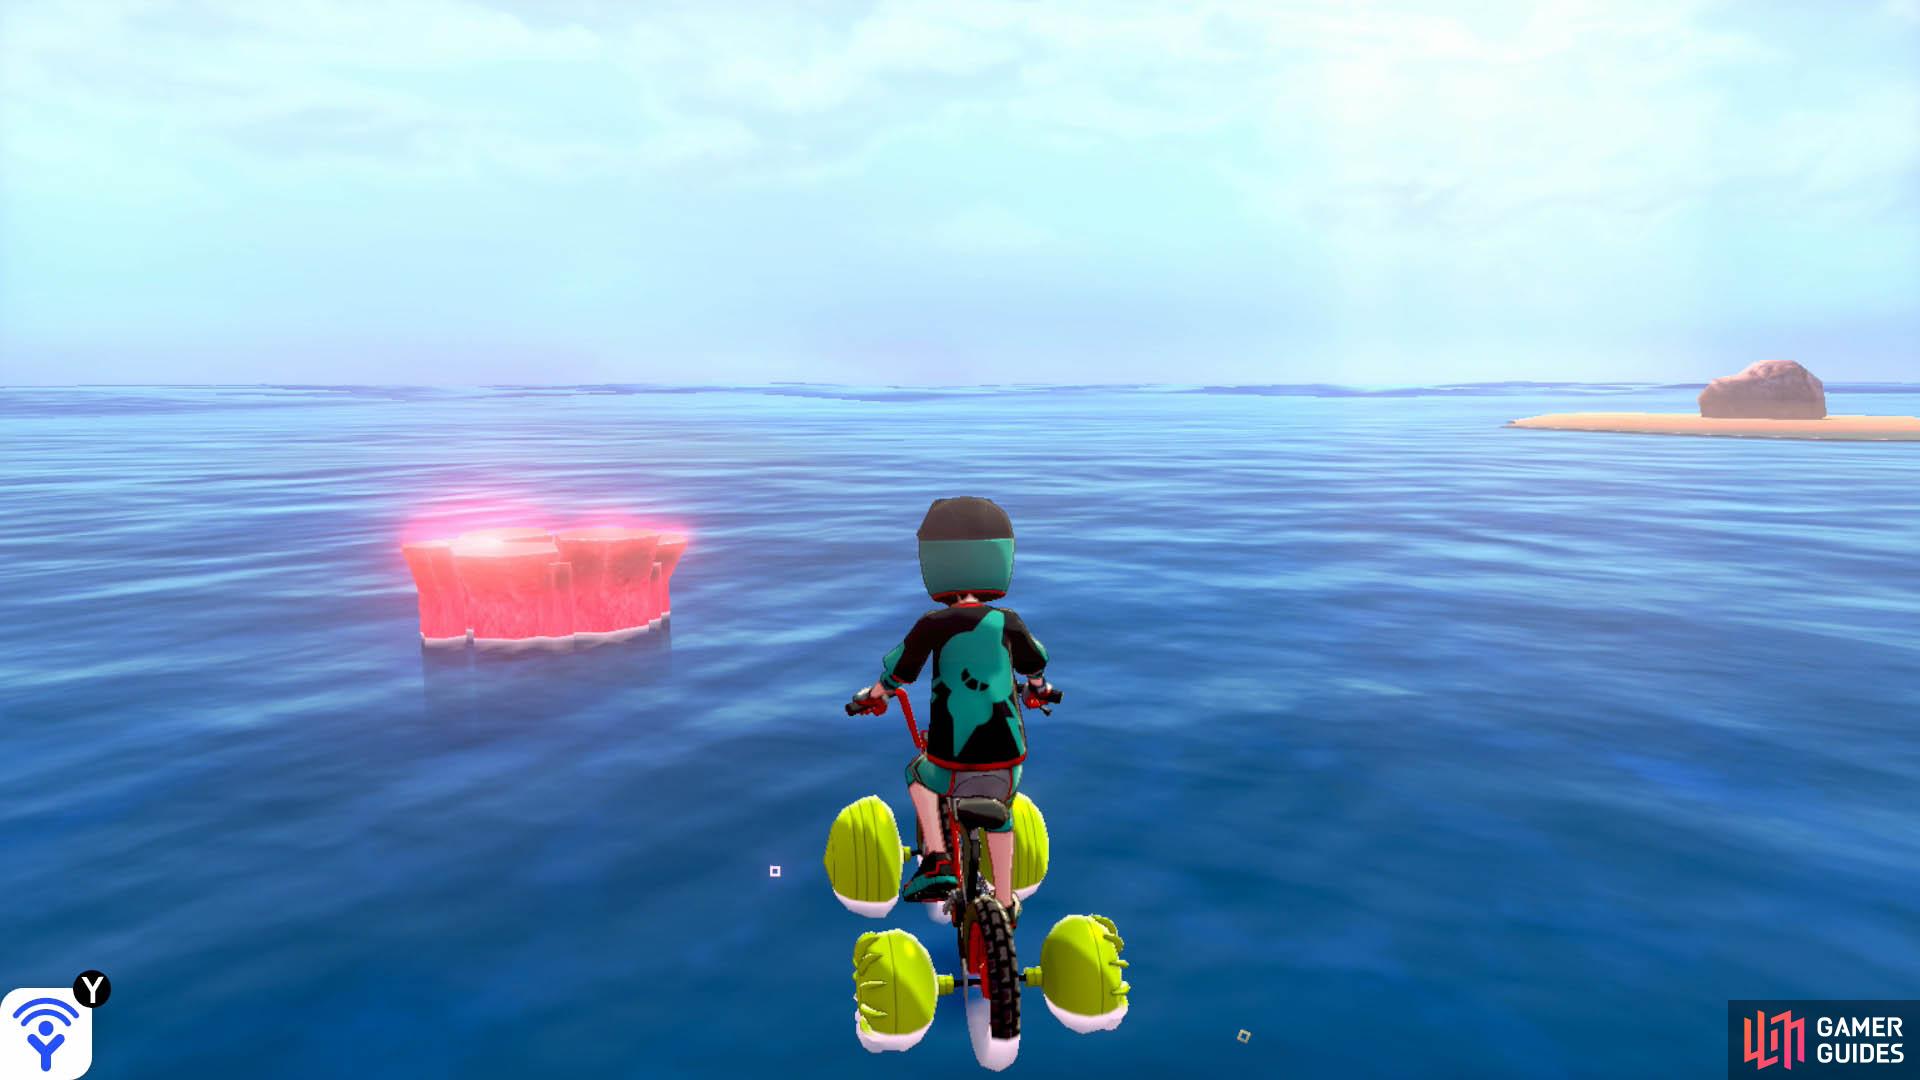
Return to the first islet, directly opposite Armor Station. Straight ahead, in the distance, there should be a den that’s near an islet with a boulder. That’s the den you’re looking for. Expect an incoming Sharpedo.
Common Den
| Name | Type | Encounter Rate |
|---|---|---|
| Chansey |
Normal | ☆☆☆/☆☆☆☆/☆☆☆☆☆ - 5% |
 Fletchling Fletchling |
Normal/Flying | ☆ - 60%, ☆☆ - 30% |
 Woobat Woobat |
Psychic/Flying | ☆ - 40%, ☆☆ - 25% |
 Rufflet [Sword] Rufflet [Sword] |
Normal/Flying | ☆☆ - 25%, ☆☆☆ - 30% |
 Vullaby [Shield] Vullaby [Shield] |
Dark/Flying | ☆☆ - 25%, ☆☆☆ - 30% |
 Emolga Emolga |
Electric/Flying | ☆☆ - 20%, ☆☆☆ - 25%, ☆☆☆☆ - 15%, ☆☆☆☆☆ - 20% |
 Fletchinder Fletchinder |
Fire/Flying | ☆☆☆ - 40%, ☆☆☆☆ - 50% |
 Braviary [Sword] Braviary [Sword] |
Normal/Flying | ☆☆☆☆ - 15%, ☆☆☆☆☆ - 40% |
 Mandibuzz [Shield] Mandibuzz [Shield] |
Dark/Flying | ☆☆☆☆ - 15%, ☆☆☆☆☆ - 40% |
 Swoobat Swoobat |
Psychic/Flying | ☆☆☆☆ - 15%, ☆☆☆☆☆ - 20% |
 Talonflame Talonflame |
Fire/Flying | ☆☆☆☆☆ - 15% |
Rare Den
| Name | Type | Encounter Rate |
|---|---|---|
| Blissey |
Normal | ☆☆☆/☆☆☆☆/☆☆☆☆☆ - 5% |
 Hoothoot Hoothoot |
Normal/Flying | ☆ - 60%, ☆☆ - 30% |
 Pidove Pidove |
Normal/Flying | ☆ - 40%, ☆☆ - 25% |
| Rufflet [Sword] |
Normal/Flying | ☆☆ - 25%, ☆☆☆ - 30% |
| Vullaby [Shield] |
Dark/Flying | ☆☆ - 25%, ☆☆☆ - 30% |
 Tranquill Tranquill |
Normal/Flying | ☆☆ - 20%, ☆☆☆ - 25% |
| Swoobat |
Psychic/Flying | ☆☆☆ - 25%, ☆☆☆☆ - 25% |
 Noctowl Noctowl |
Normal/Flying | ☆☆☆ - 15%, ☆☆☆☆ - 25% |
 Unfezant Unfezant |
Normal/Flying | ☆☆☆☆ - 15%, ☆☆☆☆☆ - 20% |
| Talonflame |
Fire/Flying | ☆☆☆☆ - 15%, ☆☆☆☆☆ - 35% |
| Emolga |
Electric/Flying | ☆☆☆☆ - 15%, ☆☆☆☆☆ - 20% |
| Braviary [Sword] |
Normal/Flying | ☆☆☆☆☆ - 20% |
| Mandibuzz [Shield] |
Dark/Flying | ☆☆☆☆☆ - 20% |
Den E
From Den D, turn so the mainland is on your right. Swim to the islet with a boulder, then gaze ahead in the distance. There should be a den that’s between two rocky islands. Swim towards that den. Alternatively, if you return to the first islet, opposite Armor Station, it’s in the middle of the sea if you look slightly to the right.
Common Den
| Name | Type | Encounter Rate |
|---|---|---|
| Chansey |
Normal | ☆☆☆/☆☆☆☆/☆☆☆☆☆ - 5% |
 Pinsir [Sword] Pinsir [Sword] |
Bug | ☆ - 60%, ☆☆ - 50%, ☆☆☆ - 50%, ☆☆☆☆ - 40%, ☆☆☆☆☆ - 20% |
 Heracross [Shield] Heracross [Shield] |
Bug/Fighting | ☆ - 60%, ☆☆ - 50%, ☆☆☆ - 50%, ☆☆☆☆ - 40%, ☆☆☆☆☆ - 20% |
 Dwebble Dwebble |
Bug/Rock | ☆ - 40%, ☆ - 25% |
 Dottler Dottler |
Bug/Psychic | ☆☆ - 25%, ☆☆☆ - 30% |
 Crustle Crustle |
Bug/Rock | ☆☆☆ - 15%, ☆☆☆☆ - 25% |
 Scyther Scyther |
Bug/Flying | ☆☆☆☆ - 30%, ☆☆☆☆☆ - 45% |
 Orbeetle Orbeetle |
Bug/Psychic | ☆☆☆☆☆ - 15% |
 Scizor Scizor |
Bug/Steel | ☆☆☆☆☆ - 15% |
Rare Den
| Name | Type | Encounter Rate |
|---|---|---|
| Blissey |
Normal | ☆☆☆/☆☆☆☆/☆☆☆☆☆ - 5% |
| Scyther |
Bug/Flying | ☆ - 60%, ☆☆ - 30%, ☆☆☆ - 25%, ☆☆☆☆ - 25% |
| Pinsir [Sword] |
Bug | ☆ - 40%, ☆☆ - 25%, ☆☆☆☆☆ - 20% |
| Heracross [Shield] |
Bug/Fighting | ☆ - 40%, ☆☆ - 25%, ☆☆☆☆☆ - 20% |
 Shuckle Shuckle |
Bug/Rock | ☆☆ - 25%, ☆☆☆ - 30% |
 Whirlipede Whirlipede |
Bug/Poison | ☆☆ - 20%, ☆☆☆ - 25% |
| Crustle |
Bug/Rock | ☆☆☆ - 15%, ☆☆☆☆ - 25% |
 Scolipede Scolipede |
Bug/Poison | ☆☆☆☆ - 15%, ☆☆☆☆☆ - 20% |
 Accelgor Accelgor |
Bug | ☆☆☆☆ - 15%, ☆☆☆☆☆ - 20% |
 Escavalier Escavalier |
Bug/Steel | ☆☆☆☆ - 15%, ☆☆☆☆☆ - 20% |
| Scizor |
Bug/Steel | ☆☆☆☆☆ - 15% |
Den F
From Den E, swim over to the rocky island that’s closest to the mainland; it should also be the one nearest to you. This den is found behind the rocky island, on the mainland side. You can also come here from the shore opposite Armor Station. Swim forward with the mainland on your right.
Common Den
| Name | Type | Encounter Rate |
|---|---|---|
| Chansey |
Normal | ☆☆☆/☆☆☆☆/☆☆☆☆☆ - 5% |
 Jangmo-o [Sword] Jangmo-o [Sword] |
Dragon | ☆ - 60%, ☆☆ - 30% |
 Goomy [Shield] Goomy [Shield] |
Dragon | ☆ - 60%, ☆☆ - 30% |
 Horsea Horsea |
Water | ☆ - 40%, ☆☆ - 25% |
 Applin Applin |
Grass/Dragon | ☆☆ - 25%, ☆☆☆ - 30% |
| Seadra |
Water | ☆☆ - 20%, ☆☆☆ - 25% |
 Druddigon Druddigon |
Dragon | ☆☆☆ - 25%, ☆☆☆☆ - 40%, ☆☆☆☆☆ - 25% |
 Hakamo-o [Sword] Hakamo-o [Sword] |
Dragon/Fighting | ☆☆☆ - 15%, ☆☆☆☆ - 25% |
 Sliggoo [Shield] Sliggoo [Shield] |
Dragon | ☆☆☆ - 15%, ☆☆☆☆ - 25% |
 Gyarados Gyarados |
Water/Flying | ☆☆☆☆ - 15%, ☆☆☆☆☆ - 20% |
 Flapple [Sword] Flapple [Sword] |
Grass/Dragon | ☆☆☆☆ - 15%, ☆☆☆☆☆ - 20% |
 Appletun [Shield] Appletun [Shield] |
Grass/Dragon | ☆☆☆☆ - 15%, ☆☆☆☆☆ - 20% |
 Kingdra Kingdra |
Water/Dragon | ☆☆☆☆☆ - 15% |
 Kommo-o [Sword] Kommo-o [Sword] |
Dragon/Fighting | ☆☆☆☆☆ - 15% |
 Goodra [Shield] Goodra [Shield] |
Dragon | ☆☆☆☆☆ - 15% |
Rare Den
| Name | Type | Encounter Rate |
|---|---|---|
| Blissey |
Normal | ☆☆☆/☆☆☆☆/☆☆☆☆☆ - 5% |
| Horsea |
Water | ☆ - 60%, ☆☆ - 30% |
| Druddigon |
Dragon | ☆ - 40%, ☆☆ - 25%, ☆☆☆☆ - 15%, ☆☆☆☆☆ - 20% |
 Turtonator [Sword] Turtonator [Sword] |
Fire/Dragon | ☆☆ - 25%, ☆☆☆ - 30%, ☆☆☆☆ - 15%, ☆☆☆☆☆ - 20% |
 Drampa [Shield] Drampa [Shield] |
Normal/Dragon | ☆☆ - 25%, ☆☆☆ - 30%, ☆☆☆☆ - 15%, ☆☆☆☆☆ - 20% |
| Jangmo-o [Sword] |
Dragon | ☆☆ - 20%, ☆☆☆ - 25% |
| Goomy [Shield] |
Dragon | ☆☆ - 20%, ☆☆☆ - 25% |
| Seadra |
Water | ☆☆☆ - 25%, ☆☆☆☆ - 25% |
| Hakomo-o [Sword] | Dragon/Fighting | ☆☆☆ - 15%, ☆☆☆☆ - 25% |
| Sliggoo [Shield] |
Dragon | ☆☆☆ - 15%, ☆☆☆☆ - 25% |
 Noivern Noivern |
Flying/Dragon | ☆☆☆☆ - 15%, ☆☆☆☆☆ - 20% |
| Kingdra |
Water/Dragon | ☆☆☆☆☆ - 20% |
| Kommo-o [Sword] |
Dragon/Fighting | ☆☆☆☆☆ - 15% |
| Goodra [Shield] |
Dragon | ☆☆☆☆☆ - 15% |
Den G
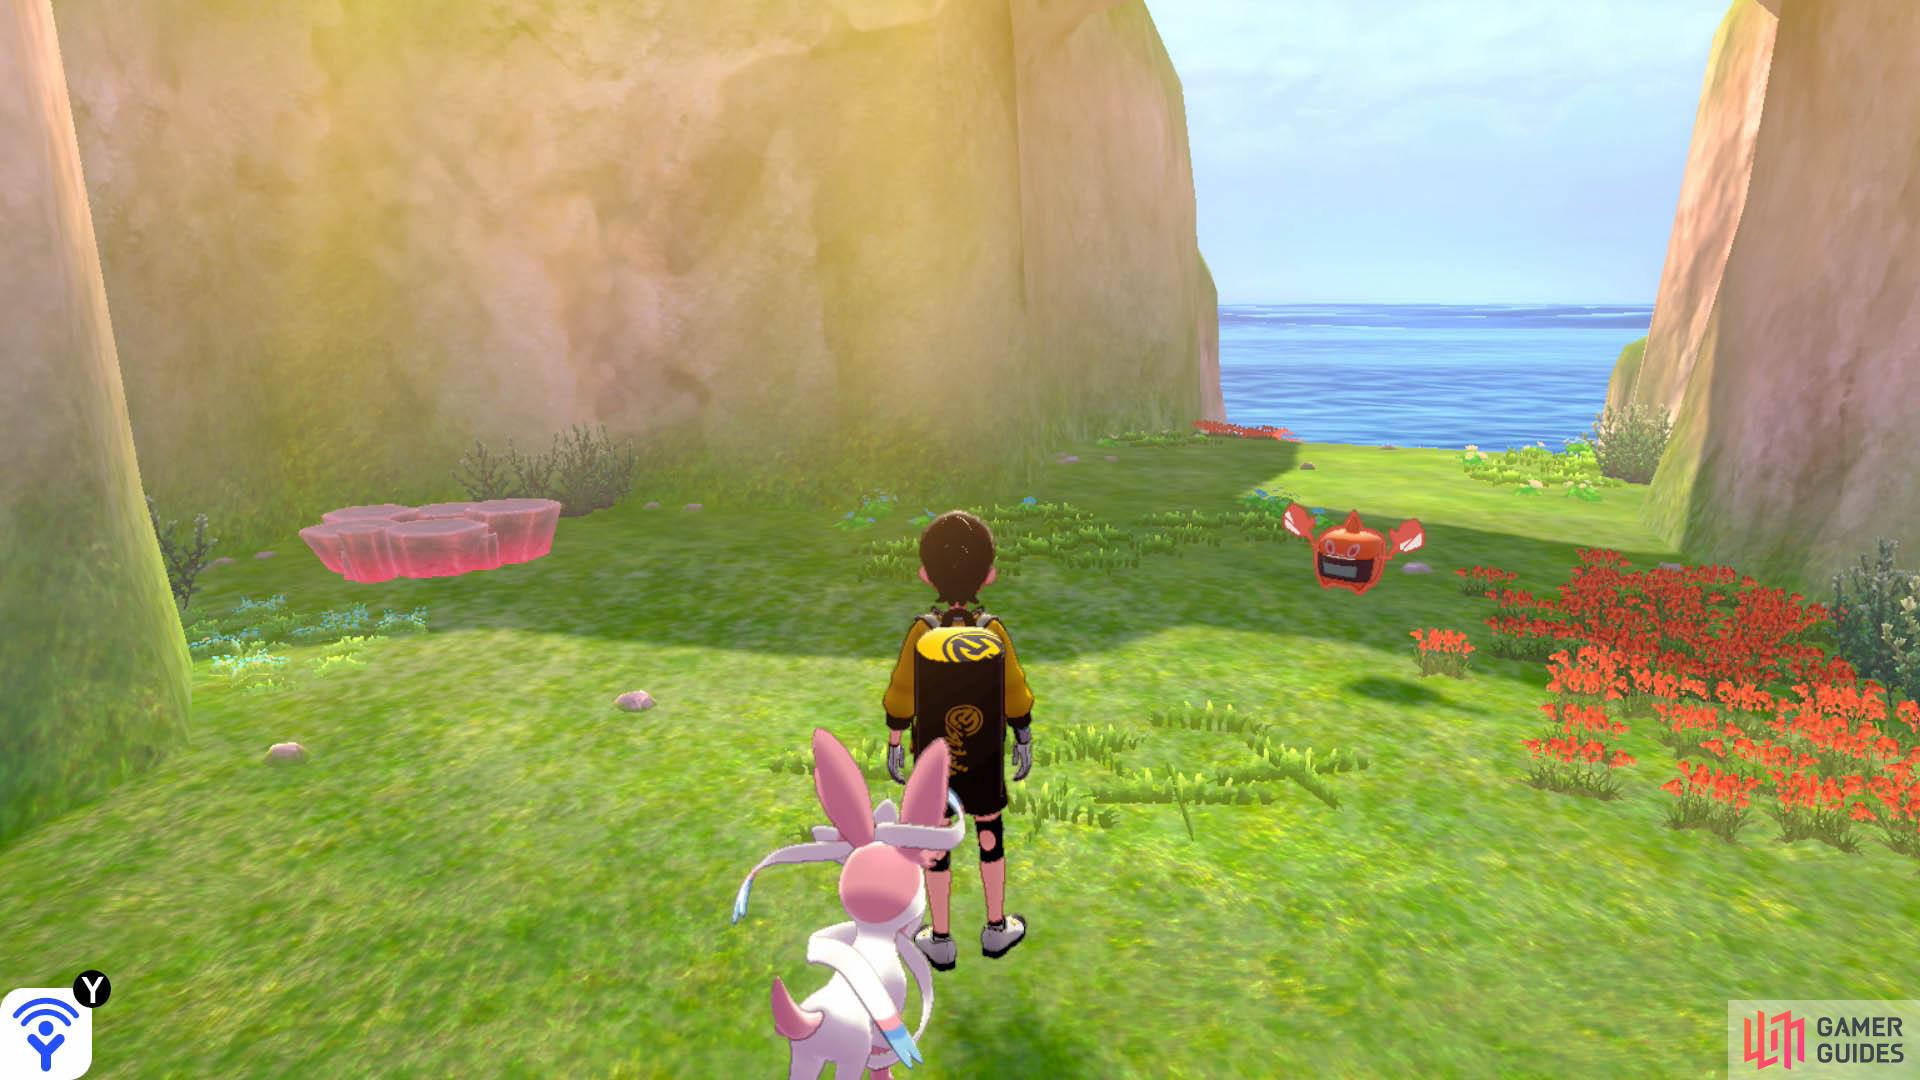
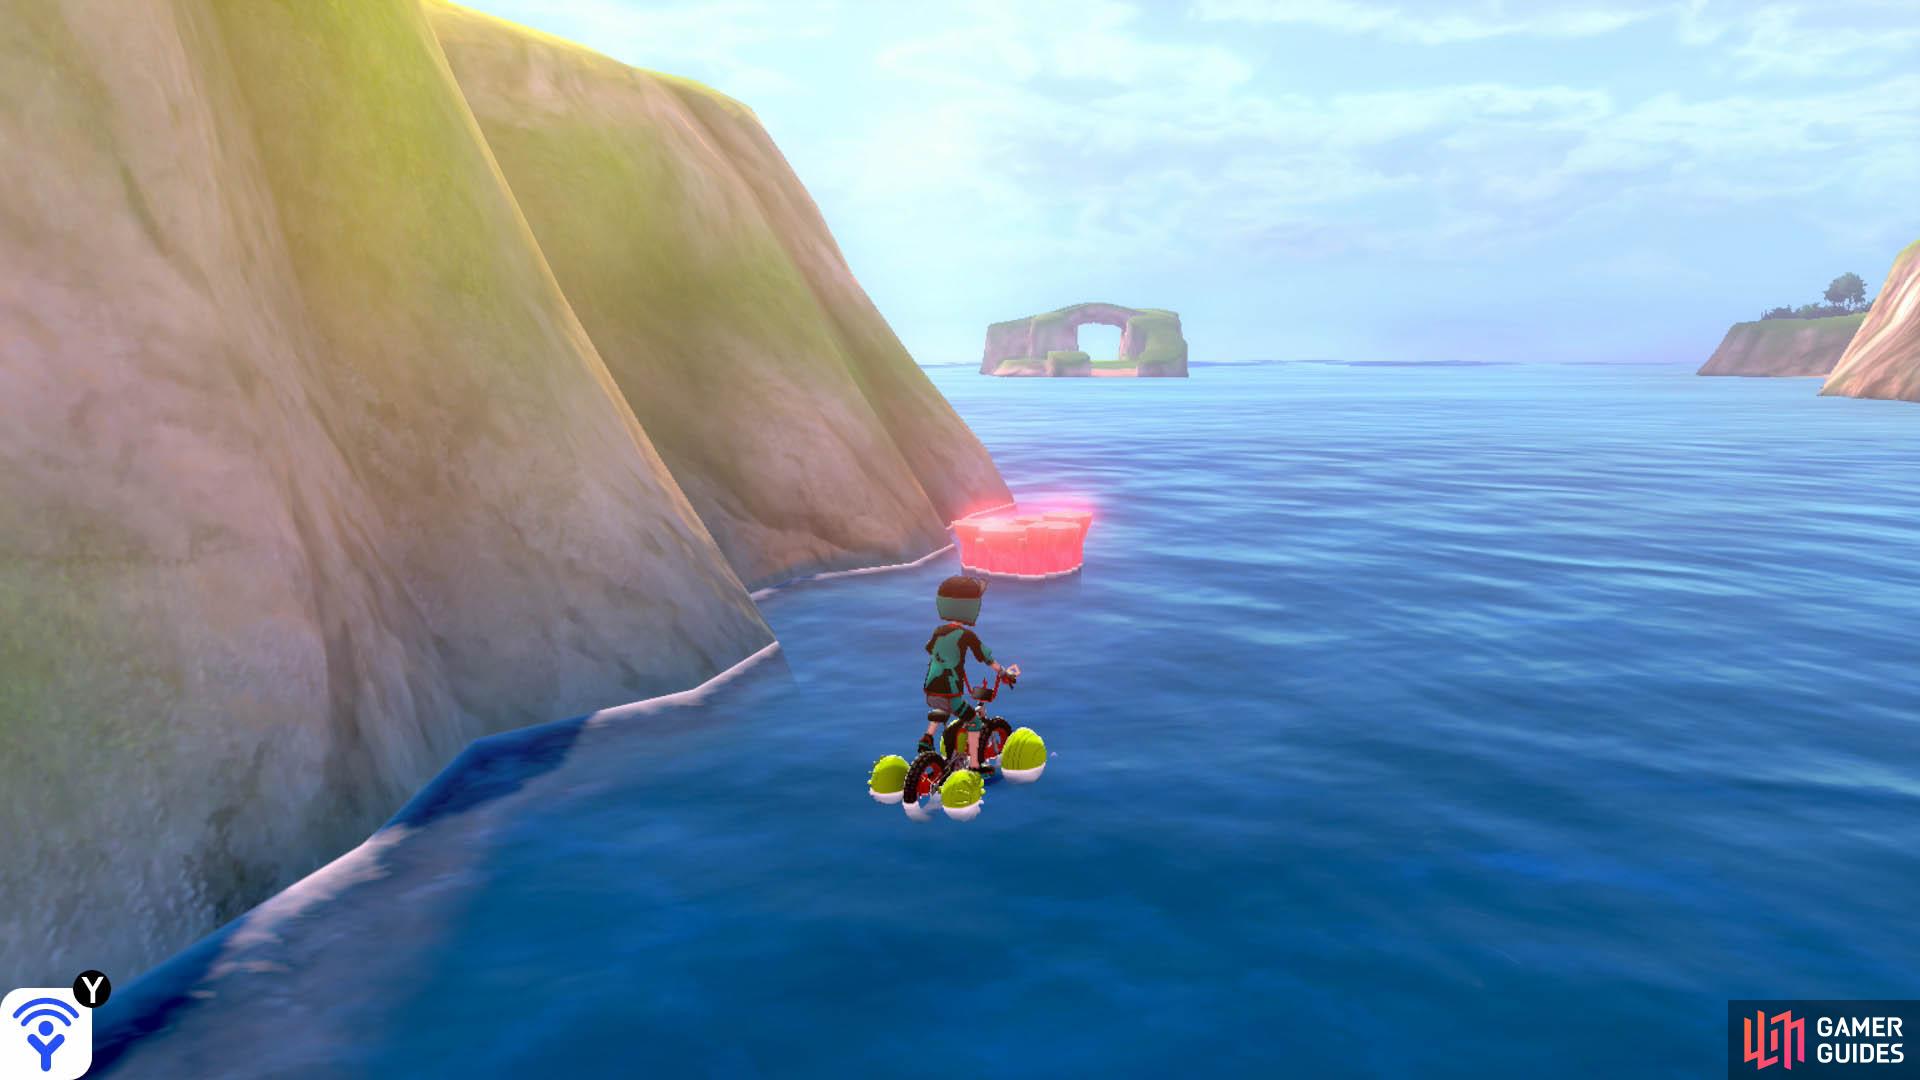
From Den F, swim forward with the mainland on your right. Head towards the island with an archway. This den is located near the centre of the island, next to a roaming Rotom.
Common Den
| Name | Type | Encounter Rate |
|---|---|---|
| Chansey |
Normal | ☆☆☆/☆☆☆☆/☆☆☆☆☆ - 5% |
 Magikarp Magikarp |
Water | ☆ - 60%, ☆☆ - 30% |
 Tentacool Tentacool |
Water/Poison | ☆ - 40%, ☆☆ - 25% |
| Staryu |
Water | ☆☆ - 25%, ☆☆☆ - 30% |
 Shellder Shellder |
Water | ☆☆ - 20%, ☆☆☆ - 25% |
 Tentacruel Tentacruel |
Water/Poison | ☆☆☆ - 25%, ☆☆☆☆ - 40%, ☆☆☆☆☆ - 25% |
| Gyarados |
Water/Flying | ☆☆☆ - 15%, ☆☆☆☆ - 40%, ☆☆☆☆☆ - 25% |
| Starmie |
Water/Psychic | ☆☆☆☆ - 15%, ☆☆☆☆☆ - 20% |
 Cloyster Cloyster |
Water/Ice | ☆☆☆☆☆ - 15% |
 Blastoise Blastoise |
Water | ☆☆☆☆☆ - 10% |
Rare Den
| Name | Type | Encounter Rate |
|---|---|---|
| Blissey |
Normal | ☆☆☆/☆☆☆☆/☆☆☆☆☆ - 5% |
| Magikarp |
Fairy | ☆ - 60%, ☆☆ - 30% |
| Tentacool |
Grass/Fairy | ☆ - 40%, ☆☆ - 25% |
| Staryu |
Water/Fairy | ☆☆ - 25%, ☆☆☆ - 30% |
 Binacle Binacle |
Fairy | ☆☆ - 20%, ☆☆☆ - 25% |
| Tentacruel |
Psychic/Fairy | ☆☆☆ - 25%, ☆☆☆☆ - 40%, ☆☆☆☆☆ - 25% |
| Gyarados |
Steel/Fairy | ☆☆☆ - 15%, ☆☆☆☆ - 40%, ☆☆☆☆☆ - 25% |
| Starmie |
Psychic/Fairy | ☆☆☆☆ - 15%, ☆☆☆☆☆ - 20% |
 Barbaracle Barbaracle |
Grass/Fairy | ☆☆☆☆☆ - 20% |
| Blastoise (Gmax) |
Water/Fairy | ☆☆☆☆☆ - 5% |
No Comments