

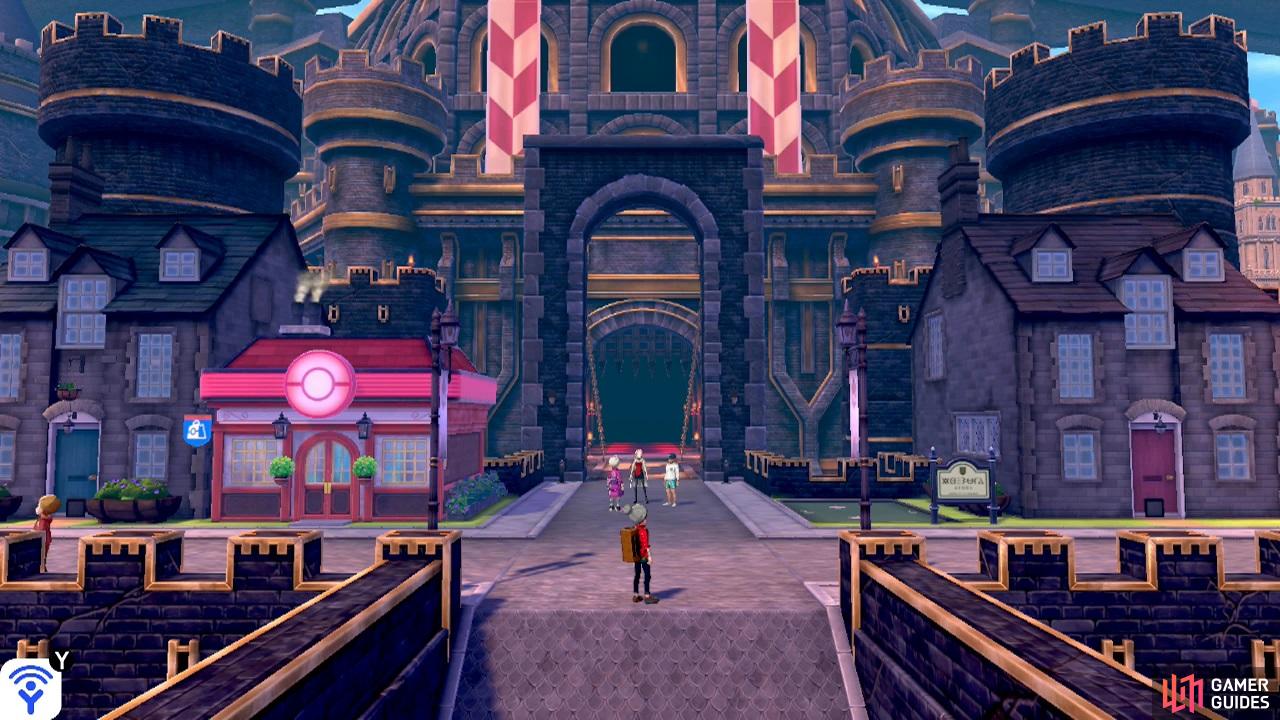
Hammerlocke isn’t a city you’d see in real life, but perhaps a fairy tale.
Up ahead, you should see a familiar-looking trio; go see what they’re up to. When you regain control, hop into the Pokémon Center on the left. Chances are you’ll need to replenish your Pokémon and supplies. Of note, the Poké Mart clerk on the right sells special Poké Balls and Battle Items. Below him is a League staff member acting as the BP Shop.
Outside, enter the house to the left of the Pokémon Center. Inside, speak to the man to trigger a rather peculiar battle.
Black Belt Brian
| Pokémon | Level | Type |
|---|---|---|
 Cottonee Cottonee |
2 | Grass/Fairy |
Make no mistake, that is indeed a level two Cottonee! However, there’s a catch. If you hit it with a single-hit move, it will survive thanks to its Focus Sash. It will then use Endeavor to drop your Pokémon’s HP to 1. But don’t panic, as it’ll be too slow to attack on the next turn. If you have a multi-hit move like Double Kick or Rock Blast, you can bypass its Focus Sash.
Afterwards, you’ll receive a Focus Sash for yourself. Just remember that it disappears after it activates, so only use it during non-story battles (like multiplayer battles or the Battle Tower). Exit the house and travel west along the street. After the street bends, you’ll find a boutique, battle café and hair salon. At the café, you can participate in a daily double battle.
Café Master Bernard
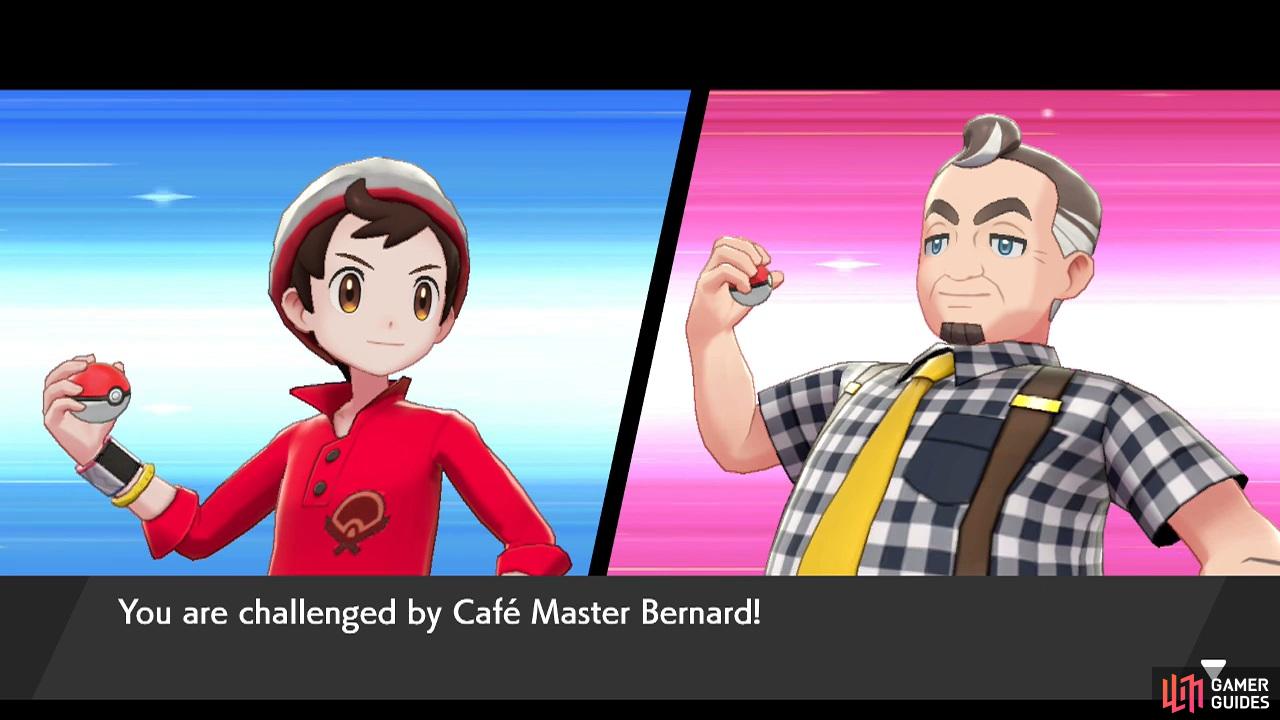
Bernard has two evolved food-based Fairy-types!  Slurpuff is an evolved
  Swirlix, while
  Alcremie is an evolved
  Milcery. As you’d expect, they’re weak to Poison and Steel. Slurpuff plays the role of support, by using Helping Hand to boost Alcremie’s damage. Alcremie is the attacker, preferring to use Dazzling Gleam to hit both of your Pokémon.
Once you’ve done enough shopping, continue west along the street. At the next bend, there will be a young child playing with a  Noibat, with her parent or guardian watching. Go north from this group and pick up the 2 Hyper Potions in the corner. Then follow the street once more. After a while, there will be a drawbridge. On the other side is another Pokémon Center.
Before going inside, go left a bit and search the corner of the low fence for 2 X Attacks. Inside this Pokémon Center, the right Poké Mart clerk is selling TMs. Of particular interest are the four TMs that can change the weather. Next, continue a short distance west from the Pokémon Center. Above is the entrance to the vault, currently being guarded.
Below is a court where a Pokémon battle seems to be taking place. Go over to the benches on the right and retrieve the Muscle Band behind the bottom bench. Then head left towards the opposite corner. Over here, there’s a woman who wants to trade her  Togepi for your
  Toxel. Togepi is very rare, while you should have received a Toxel from the Pokémon Nursery on Route 5.
On top of that, you can catch Toxel in the northern half of the Wild Area (from Motostoke Riverbank and upwards), usually when there’s a thunderstorm. Or Route 7, available after beating two more Gyms. Regardless, head back to the main path and go another short distance west. To the left is another drawbridge, leading to Route 6, but an annoying goon is there.
Meanwhile, standing below is a lad who wants to borrow your  Applin. You can catch one of these on Route 5 or certain zones in the Wild Area near Hammerlocke during specfic weather. Lend him your Applin and, after watching the drama unfold, you’ll receive a Tart Apple (Sword) or Sweet Apple (Shield), which you can use to evolve your Applin into something stronger.
They always have to pick an obscure place to hide!
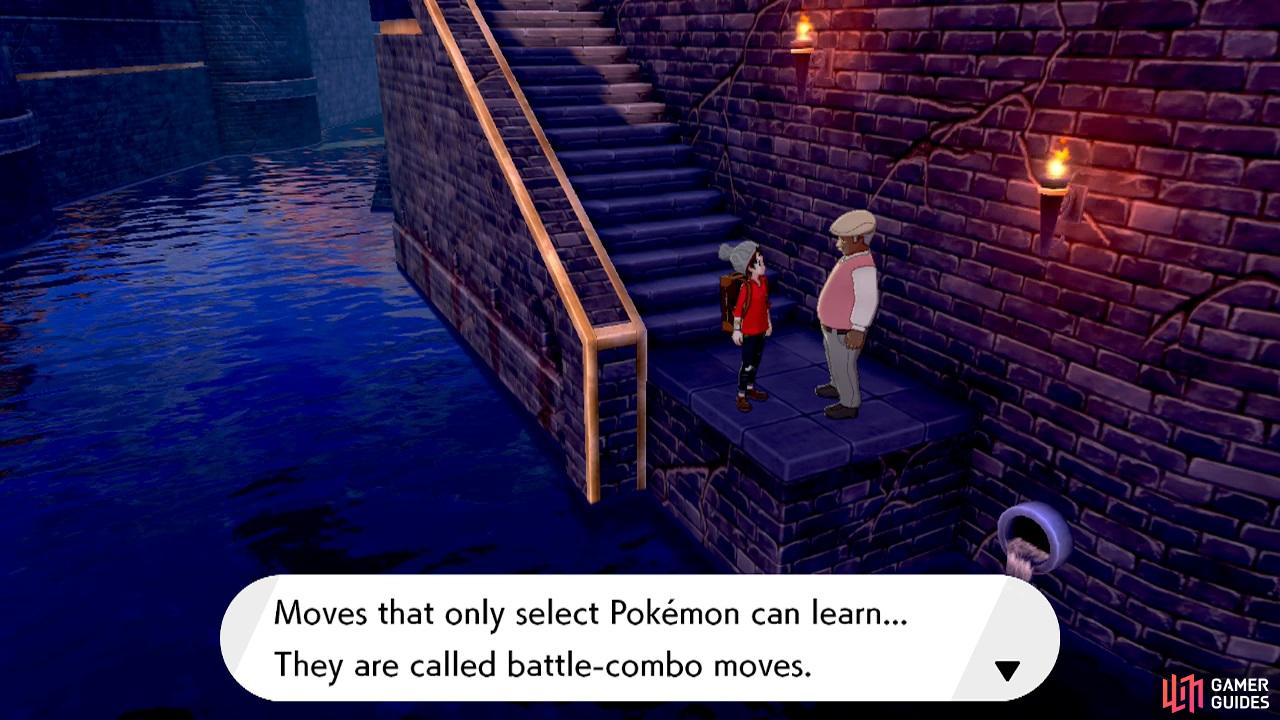
From here, head south through the nearby side path. At the bottom of the steps, there’s a man who’ll teach special “battle-combo” moves.
That’s the west side all explored; head all the way back to the first Pokémon Center (you can use the flying taxi if you’re lazy to walk), then start traveling east. Speaking of the flying taxi, to the right of the stadium entrance, there are designated spaces for flying taxis to park. Go over here and search around the corner for a Nugget.
Next, head inside the first house on the right. The people inside all love Pokémon. On the right is a young boy who’s the Best Friends Ribbon Giver. He’ll check how happy your Pokémon are–and give it a fancy ribbon if it’s super happy. On the left is a woman who’s the Effort Ribbon Giver. She’ll check if your Pokémon has max EVs and award the corresponding ribbon.
Certain Pokémon, like baby Pokémon, require high friendship to evolve.
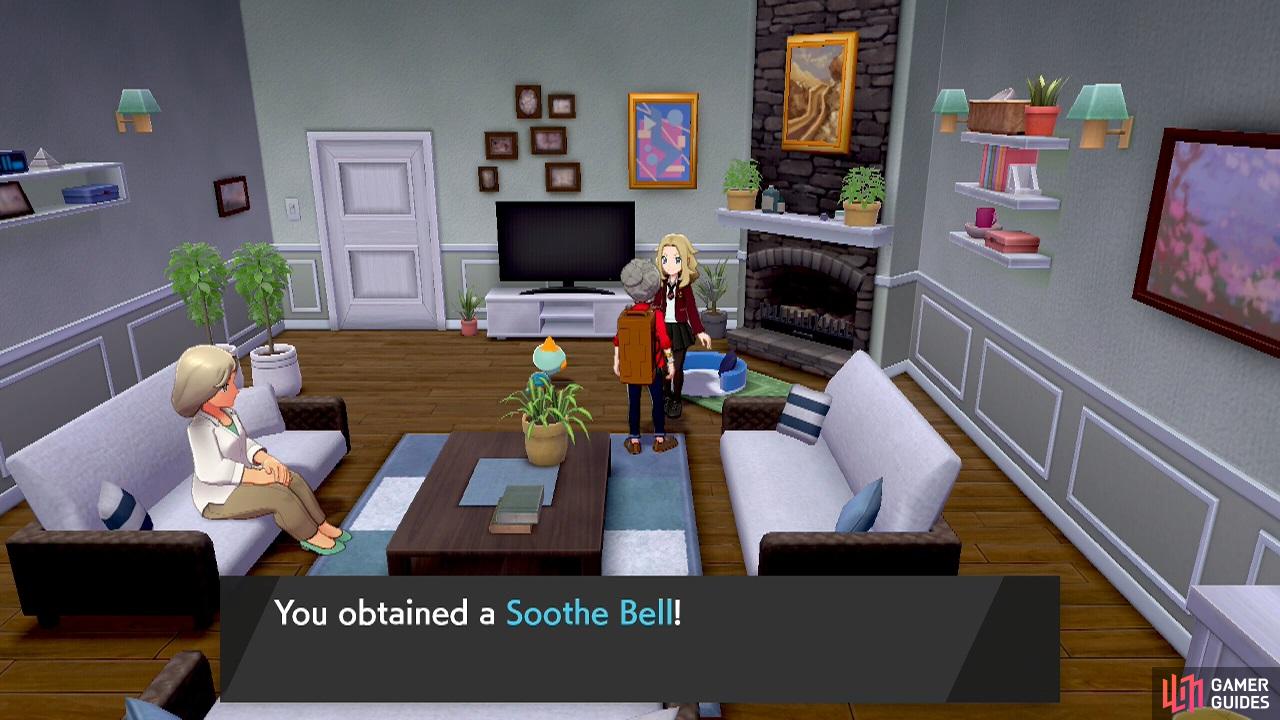
Finally, chat to the Lass near the back to receive a Soothe Bell. Have a Pokémon hold this and their friendship will increase faster. Go back outside and continue following the street east. After the street bends, there are a row of houses that you can visit. Of note, go and visit the second house. There’s a gentleman who’ll give you a weather-related hold item each day.
Past the row of houses, there will be steps leading up. Meanwhile on the right is the train station. East from the train station is the entrance to Route 7, but alas there’s no way through. Go up the steps. When you reach the top, grab the Strawberry Sweet sitting to the left. Then go right from the Poké Ball statue. Head for the bottom-right corner to find some Wise Glasses.
While you’re here, chat to the little girl standing to the left of the wooden door. Agree to deliver her Old Letter. However, the recipient lives in Ballonlea, so it’ll be a while before you can fulfil your promise. You’re all done! Make your way back to the city entrance, via flying taxi again if you must. Then head directly north into Hammerlocke Stadium.
These balls were originally hand-crafted by Kurt from the Johto region.
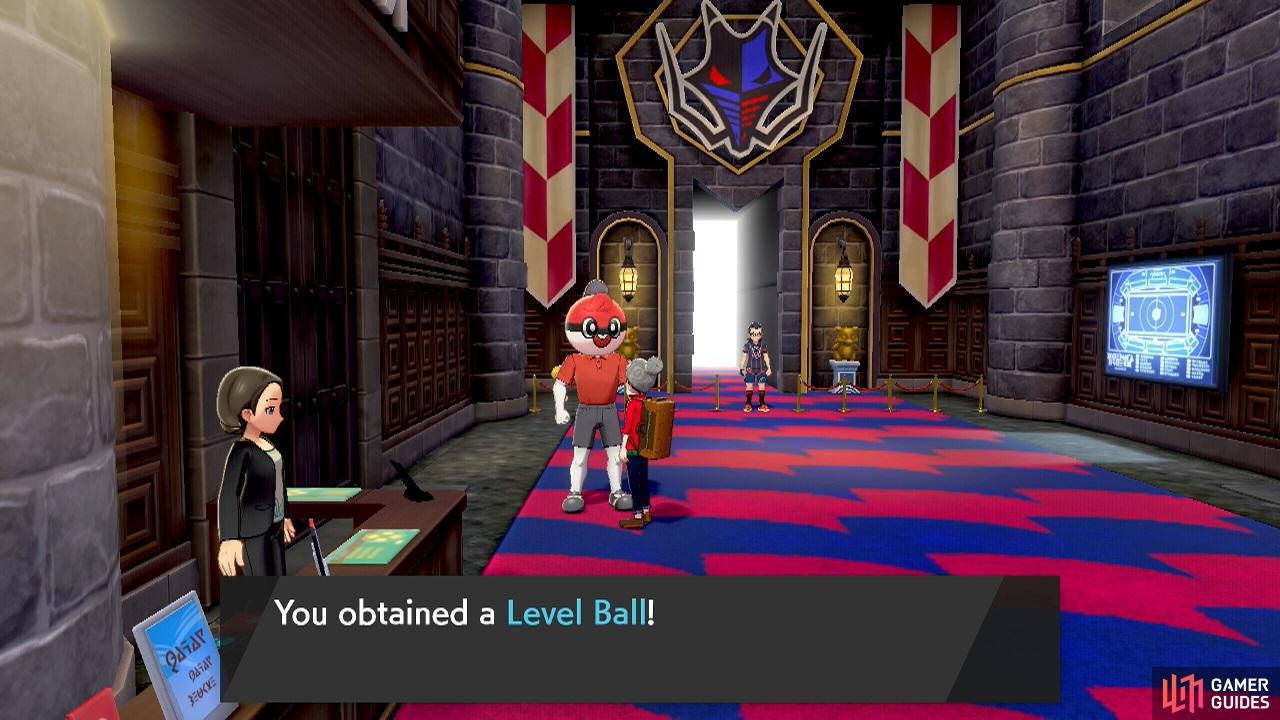
You’ll meet up with Oleana and Chairman Rose at the stadium. Once the pair have gone, go over to the Ball Guy standing next to the reception. You’ll receive a rare Level Ball from him. This works better if the Pokémon you’re catching is lower Level. It’s a very rare ball, so again, save it for something special. That’s all for now; exit the stadium.
Back outside, begin heading west from the first Pokémon Center. You’ll run into Leon. After he leaves, head for the vault to the left of the second Pokémon Center. You could fly over there if you want. This time, Raihan will be standing in front of the entrance. Approach him and you’ll be taken inside; you’ll also receive Raihan’s League Card.
Next, go up the stairs on the left, then open the door at the end. You’ll emerge outside, but higher up. Go around and up the stairs on the right. Stop before going up the next set of stairs. Continue right and grab TM29 Charm off the floor. Now go up the stairs and through the door above. Sonia will be waiting for you inside. You’ll learn some more about Galar’s secretive history.
Afterwards, Sonia will give you 2 Revives. Leave the way you came. On your way back, Raihan will stop you for a moment. When you’re back in control, exit back to the main steet. Finally, head all the way west. You’ll travel across a drawbridge that was previously being occupied by Team Yell. After crossing the drawbridge, you’ll reach the exit to Route 6.
No Comments