

Similar to Brawlers’ Cave, it’s pretty easy to find the  Diglett here, since the cavern is more restrictive and there’s less complicated terrain around. To find every single Diglett, you will need a bike that can travel over water. If you don’t have it, you might want to come back later so you can gather all the Diglett in one go. It’s up to you!
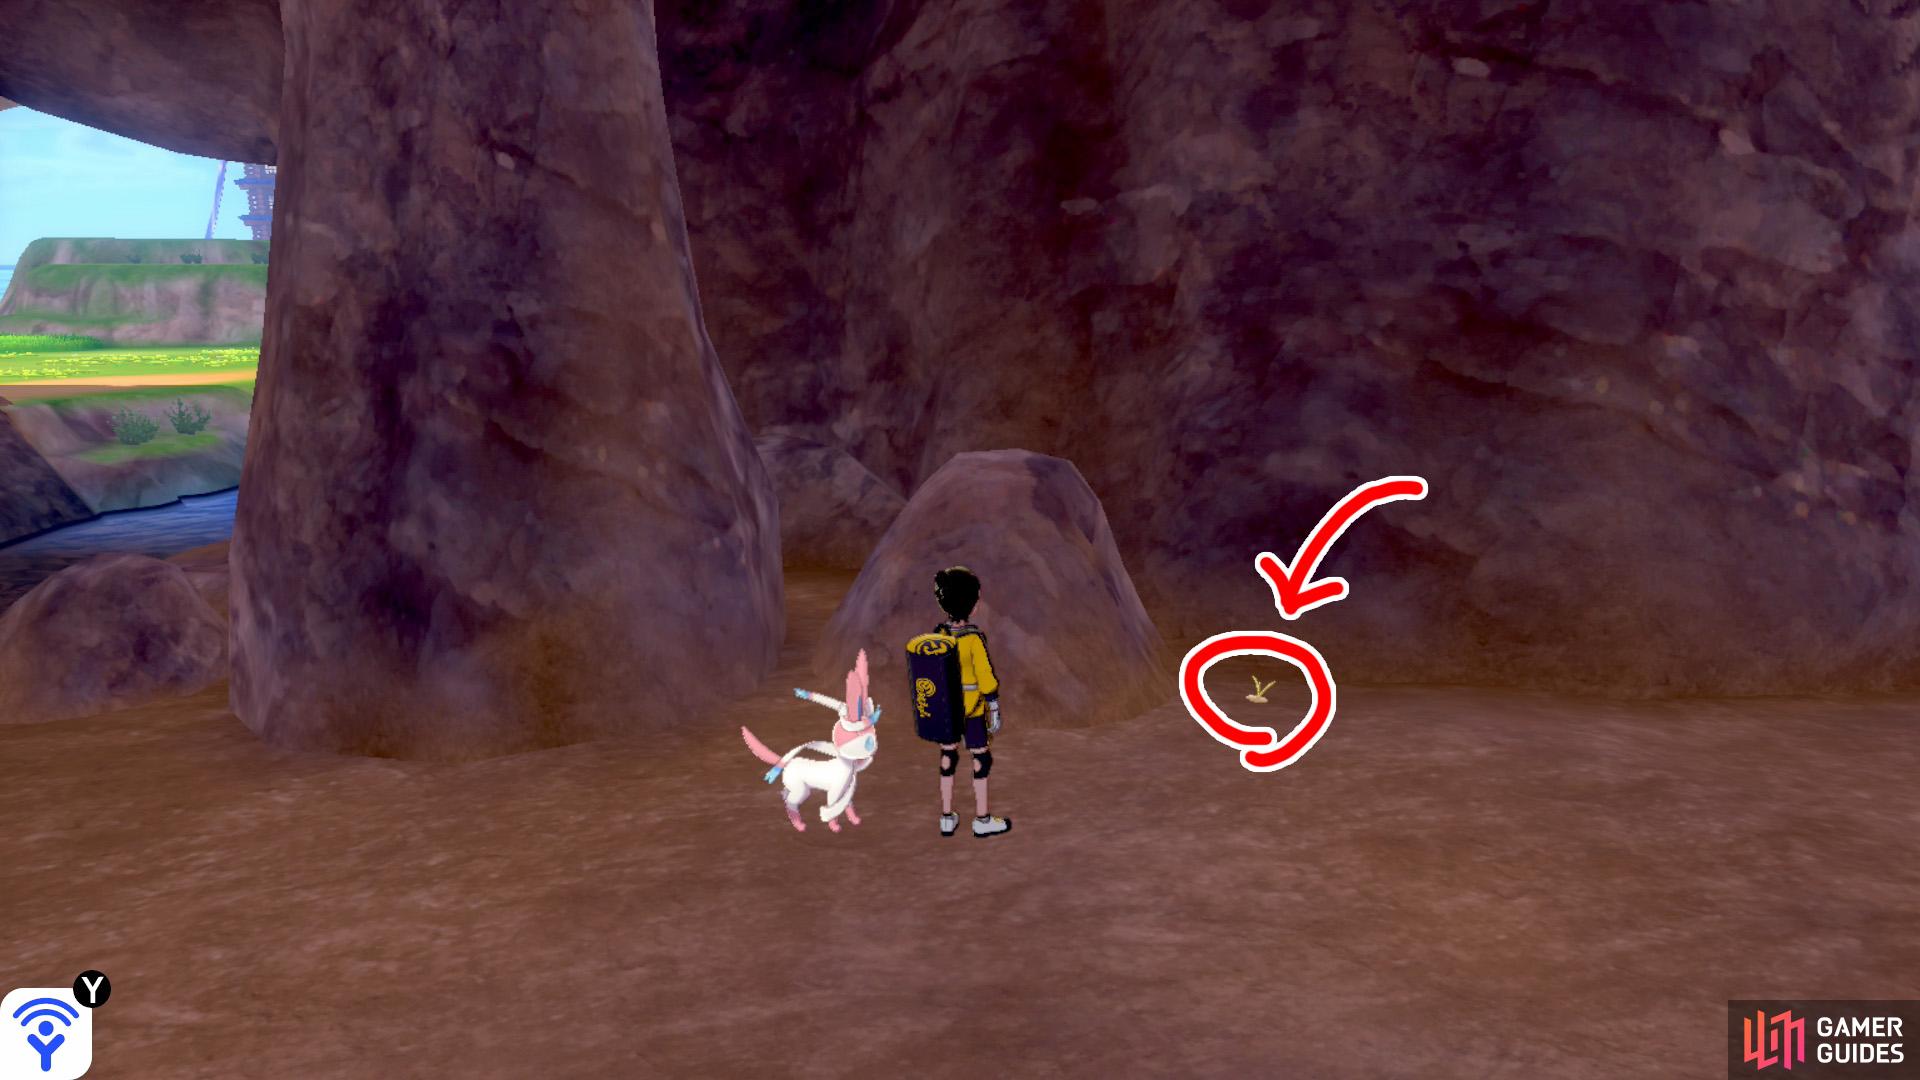
(1 of 4) 1/7: Starting from the Challenge Beach entrance, turn left and go across the natural bridge. The feisty thing is hiding past a pillar and rock on the left side.
1/7: Starting from the Challenge Beach entrance, turn left and go across the natural bridge. The feisty thing is hiding past a pillar and rock on the left side.
2/7: From Diglett 1, go down the slope along the left side. You’ll reach an area with wild Pokémon. Check behind the rock on the left.
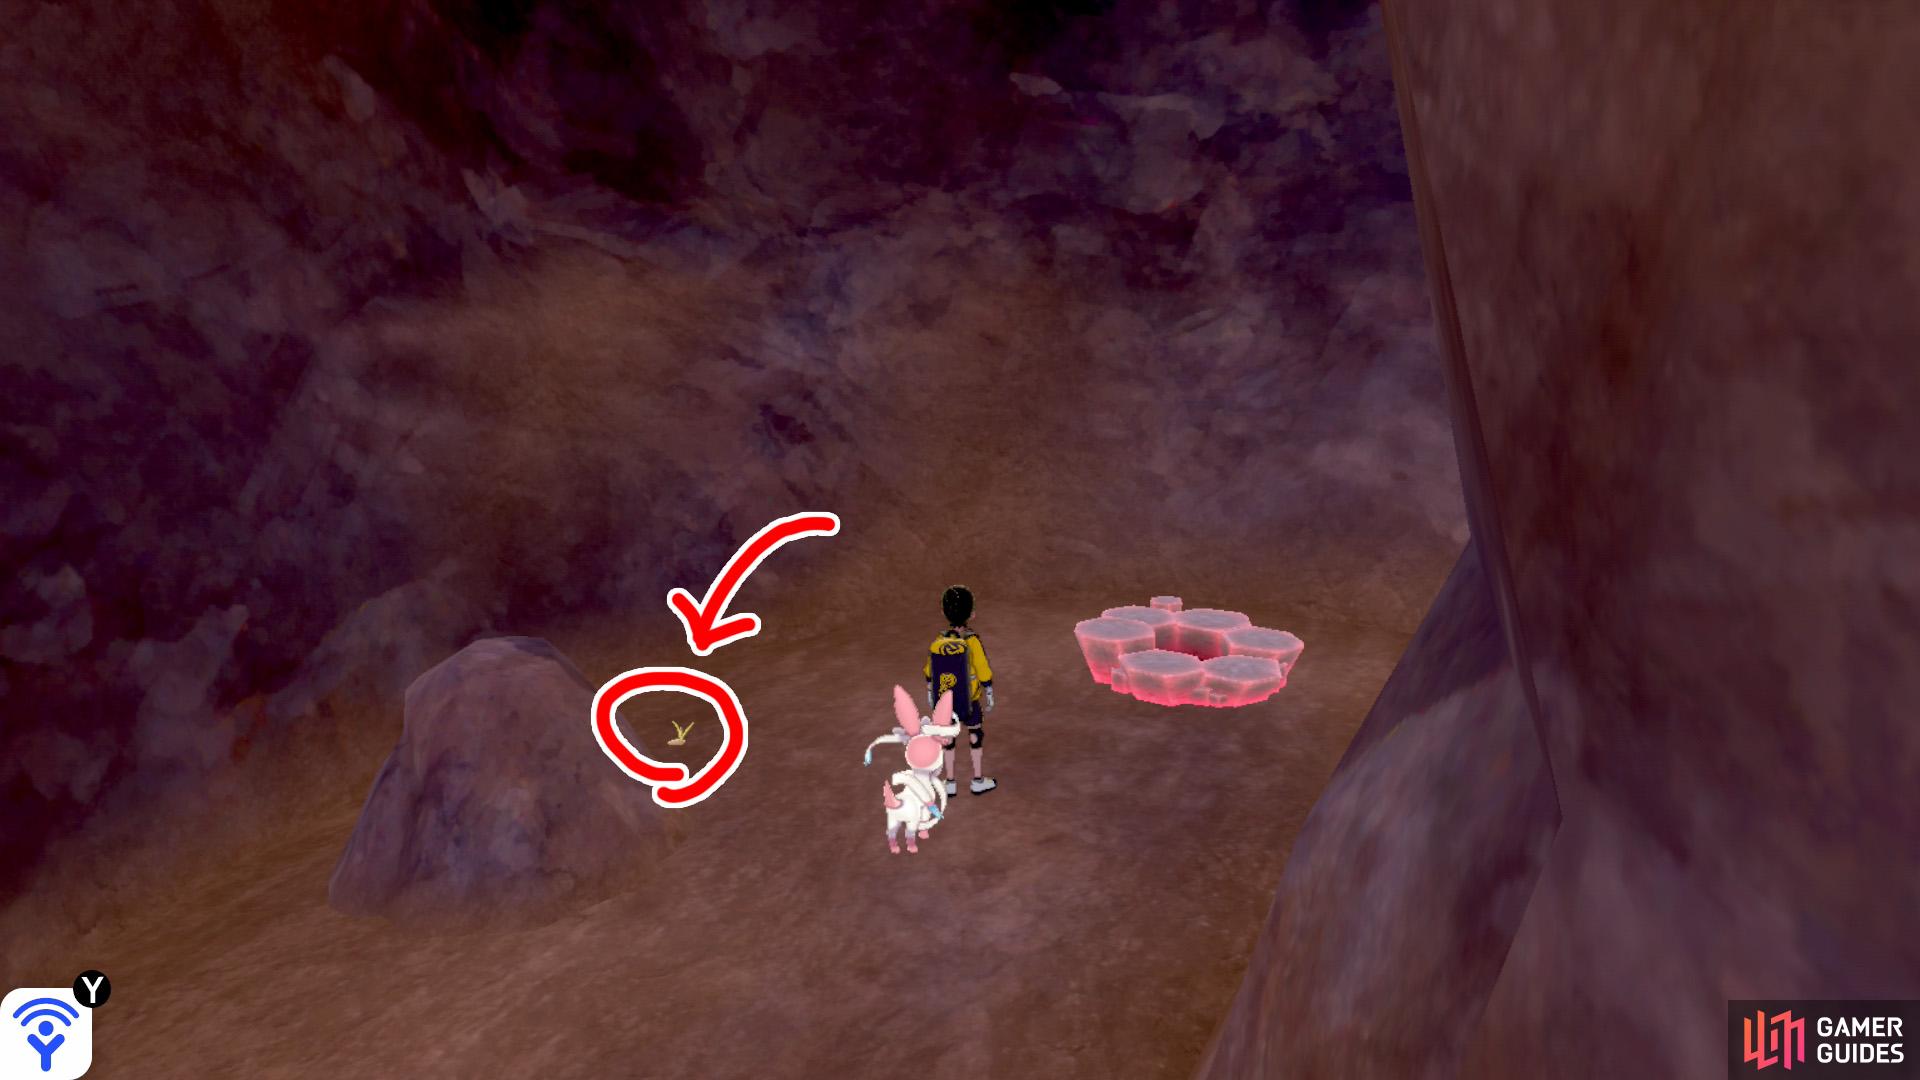
3/7: From Diglett 2, head deeper into this part of the cavern. There will be three Pokémon Den here. Check towards the left for Number 3.
4/7: Go back to Diglett 1, where the path splits in multiple directions. Head up the slope along the middle. As the ground levels off, check immediately to the left. It’s next to a somewhat pointy rock.
(1 of 3) 5/7: You’ll need the water-traversing bike for this. Head into the underground stream that’s just ahead. After a while, there’s a place where you can land on the left. It’s behind the rock on the left.
5/7: You’ll need the water-traversing bike for this. Head into the underground stream that’s just ahead. After a while, there’s a place where you can land on the left. It’s behind the rock on the left.
6/7: Go back to Diglett 1 and head along the path towards the right, where the ground starts off level. Go into the stream on the right. It’s watching you from the raised land on the right, halfway towards the exit.
7/7: From Diglett 6, return to dry land on the left. Start heading for the exit to Loop Lagoon. Several paces before the exit, it’s next to a small rock on the left.
No Comments