

Back at Sonia’s lab, Sonia will show you something interesting. By using her Power Spot detector, she can determine where the sword and shield weirdos are. When you open your map, look at where Turffield is–there should be an exclamation mark. Once you’re back in control, leave the lab and head over to Turffield Stadium. Quickest way would be by flying taxi.
As you step into the stadium lobby, you should see Milo up ahead. Plus somebody else… Piers? Go over to them to learn what the situation is. Apparently, a Dynamaxed Pokémon has gone out of control on the stadium grounds. If you’re ready, agree to help them deal with the runaway Pokémon.
Max Raid Battle

| Pokémon | Level | Type |
|---|---|---|
 Tsareena Tsareena |
??? | Grass |
In this raid battle, you’ll fight alongside Hop’s starter, Piers’s  Obstagoon and Milo’s
  Flapple (Sword) or
  Appletun (Shield). Your opponent is a Grass-type, so it’s a good idea to send out a Fire, Flying, Bug or Poison-type. You could even use
  Eternatus–it has Poison moves and its Dynamax Cannon deals increased damage to Dynamaxed ’mons.
Unlike other raid battles, after defeating Tsareena, you won’t have the opportunity to catch it. But if you want to catch a Tsareena, there’s usually a strong one wandering around the Stony Wilderness in the Wild Area. However, as a reward, you will receive Milo’s Rare League Card. If you have one of these, you can invite the trainer for a battle at Wyndon Stadium.
Once you regain control, step outside the stadium. Sonia will come to let you know that similar Power Spot readings have appeared in Hulbury Stadium and Motostoke Stadium. Hmm, we don’t like the sound of this. From here, you need to head to both of the stadiums. But you’ll have to choose which one to go to first. We’ll be going to Hulbury; if you’re going to Motostoke, skip ahead and then come back.
At Hulbury Stadium, Nessa will ask for your help to defeat the Dynamaxed Pokémon inside.
Max Raid Battle
| Pokémon | Level | Type |
|---|---|---|
 Gyarados Gyarados |
??? | Water/Flying |
For this battle, you’ll team up with Hop’s starter, Piers’s Obstagoon and Nessa’s  Drednaw. When the battle begins, Gyarados’s Intimidate will lower your party’s Attack. For an easy win, send out and Dynamax an Electric-type.
After protecting Hulbury Stadium, you’ll receive Nessa’s Rare League Card. Next, head over to Motostoke Stadium (unless you’ve already been).
When you enter Motostoke Stadium, Kabu will be happy to see you. But there’s no time to chat, because another Dynamaxed Pokémon is on the loose!
Max Raid Battle
| Pokémon | Level | Type |
|---|---|---|
 Torkoal Torkoal |
??? | Fire |
Once again, you’ll team up with Hop’s starter and Piers’s Obstagoon; in addition, Kabu will assist you with his  Centiskorch. At the start of the battle, Torkoal’s Drought will make it sunny. This will boost its Fire-type moves and weaken Water-type moves. To counter it, Dynamax ASAP and use something like Max Geyser or Max Rockfall to deal super-effective damage and change the weather.
When Motostoke Stadium is all safe again, you’ll be given Kabu’s Rare League Card.
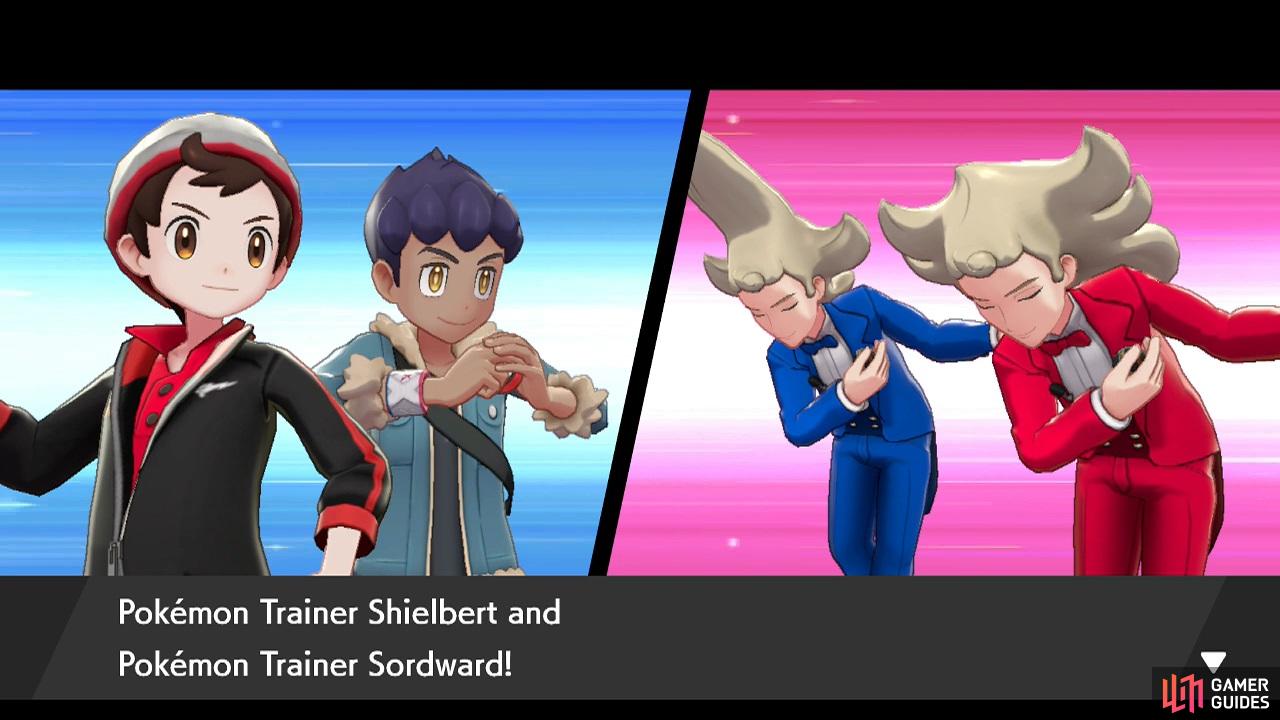
If you’ve defeated the Dynamaxed Pokémon in both Hulbury and Motostoke, Sonia will call you, asking for help. As soon as you can, leave the current stadium and make a beeline for Sonia’s lab back in Wedgehurst. Inside, you’ll meet those insufferable weirdos again. Time to take out the trash!
Pokémon Trainer Sordward and Pokémon Trainer Shielbert
| Pokémon | Level | Type |
|---|---|---|
 Golisopod Golisopod |
62 | Bug/Water |
 Doublade Doublade |
62 | Steel/Ghost |
 Bisharp Bisharp |
62 | Dark/Steel |
 Bronzong Bronzong |
62 | Steel/Psychic |
 Falinks Falinks |
62 | Fighting |
 Klinklang Klinklang |
62 | Steel |
You’ll team up with Hop for a fun lil’ Multi Battle. Sordward and Shielbert use their parties from before, but they’ve taken out their  Sirfetch’d to make space. So Sordward uses Golisopod, Doublade and Bisharp, while Shielbert uses Bronzong, Falinks and Klinklang. To begin with, you’ve got Golisopod and Bronzong to deal with.
Of the two, Golisopod is the main damage dealer; depending on the threat level, you may wish to defeat it first. If so, Flying-types are recommended, to avoid First Impression. But Electric-types are better if you plan to deal with Bronzong as well. If Golisopid drops below 50% (without fainting), it will automatically switch out.
Bronzong plays more of a support role, using Light Screen to protect its party from special moves and Hypnosis to induce sleep. Hop’s  Dubwool will struggle to dent Bronzong, so you could consider fighting Bronzong and hope Dubwool targets Golisopod. Ghost-types are best; Fire and Dark-types are weak to Golisopod’s STAB moves.
After taking down one Pokémon, the rest of the battle becomes a bit more unpredictable.
If Sordward sends out Doublade, the Ghost-type you used (or are still using) against Bronzong should be able to handle it. Although Fire is a safer choice, followed by Dark. Fortunately, you don’t have to worry about Doublade using Swords Dance this time. But be wary of Sacred Sword, which can hurt Normal and Dark-types.
Otherwise, if Sordward decides to send out Bisharp, switch out your Ghost and send in a Fighting-type if you have one. But if Shielbert’s Bronzong is still around, you may want to think twice. Unless your Fighting-type is called  Scrafty; in which case, you’ve nothing to fear. Otherwise, go for Fire or Ground.
As for Shielbert, if he sends out Falinks, a Flying-type would be perfect. Avoid Psychic-types because Falanks can use First Impression on its first turn, like Golisopod, then Megahorn on subsequent turns. Fairy-types are also good, but there are a lot of Steel-types in this battle, so they’ll have limited use.
Finally, if Shielbert sends out Klinklang, consider swapping to a Fire, Ground or Fighting-type. In particular, Fire and Ground also work well against Sordward’s Doublade, while all of the above will hurt Sordward’s Bisharp greatly–especially Fighting. Be cautious of Protect, which is a lot more useful in Double/Multi Battles.
After thwarting the combined efforts of the sword and shield brothers, don’t celebrate just yet. Because it was a trap! Once the villains have left, exit the lab. Sonia will let you know that she’s detected Power Spot readings in the other four stadiums in Galar where Dynamax is possible. You probably know what your next task is…
No Comments