

If you’re reading this, we’re assuming you’ve defeated the Champion and captured the Legendary Pokémon on your game’s cover. By this point, the game’s story is well and truly finished, but “your story” might not be over. For instance, you probably still have Pokémon to catch and Pokémon to train. Maybe there are places in the Wild Area you’ve yet to explore?
Still, we’ve come this far together. So if you need some inspiration or pointers for where to go next, strap on your seat belts because we’re going on a whirlwind tour of Galar, to show you some cool, new stuff that’s easy to overlook!
Present from Leon
At the time of writing, Bulbasaur and Squirtle are MIA, but they should be coming eventually…
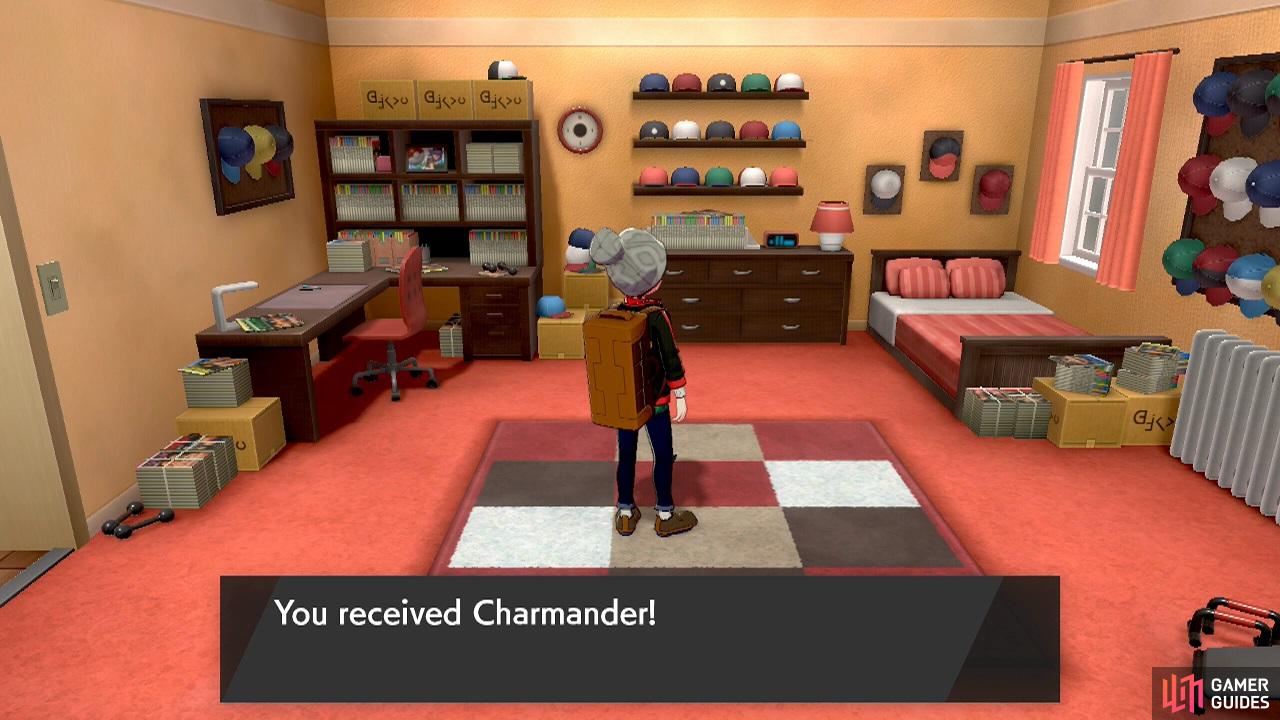
Where’s a better place to start than your home town of Postwick? When you have a moment, go and visit Hop’s house, towards the east. Go upstairs, then check out Leon’s room on the right. On the floor, the former Champion has left you a gift–why he couldn’t give this to you personally, we don’t know. Open it to find a  Charmander! This one can Gigantamax like Leon’s.
The Ultimate Steel-type Move
Next, let’s go and visit Motostoke, where your Gym Challenge started in earnest. Do you remember where you found TM02 Pay Day? Well, it has been ages since you came here. From the  Budew Drop Inn, go left towards the warehouse-like building, then head south. Next, go down the metal staircase to reach the lowest level. Here, there’s a guy who will teach Steel Beam to certain Pokémon.
Marnie’s Special Training
This one’s really short and you don’t get a physical reward from it. But while you’re in Motostoke, enter the Budew Drop Inn. Inside, ride the elevator to the upper floors. Then, knock on the first room on the left. You’ll find Marnie doing some “special training”. Like we said, there’s no reward, but sometimes a smile’s the best kind of reward, dontcha think?
Final Rare League Cards
Your League Card album ought to be full of cards by now, especially after you helped the Gym Leaders prevent the Dynamax threat. But there are three more League Cards that you can get.
First, speak to the Ball Guy outside Motostoke Stadium to get the Ball Guy’s Rare League Card. Secondly, head to Galar Mine (the first one) and look for one of the caverns to the west, about halfway through. You should find Oleana; she’ll give you Rose’s Rare League Card.
For the last one, you’ll need to battle your way through the newly-opened Battle Tower in Wyndon (where the Rose Tower was). After completing enough battles to qualify for Rank 4 (a dozen or so), you’ll fight Leon. Win and you’ll earn Leon’s Rare League Card.
Restaurant Part-Time Job
When you have some spare time, go and visit the seafood restaurant, where you dined with Chairman Rose. Speak to the chef behind the counter and he’ll ask you to help him make some food deliveries. To make things harder, you won’t be given directions, just a really vague clue. For reference, all the deliveries are local, so you won’t need to leave Hulbury.
The first clue is a “clickety-clack” sound. Have you figured it out? It’s supposed to be the sound of trains on a railroad. So head towards the train station in the north-west part of town. Then enter the house to the right of the train station. Speak to the woman by the door to hand over the delivery. You’ll get some Exp. Candy L as a bonus. Go back to the chef to receive 5 Nuggets.
The second clue is a Pokémon cry that sounds like “swiiirl”. This one is a lot easier. Go to the street with houses, in-between the Pokémon Centre and the restaurant. Then enter the 4th house along (the north-most one, just before the stairs). Hey, there’s a  Swirlix inside! Speak to the man to pass on the food. When you return to the chef, you’ll be rewarded with 2 Big Nuggets.
A Pokémon holding this will earn 50% more experience points.
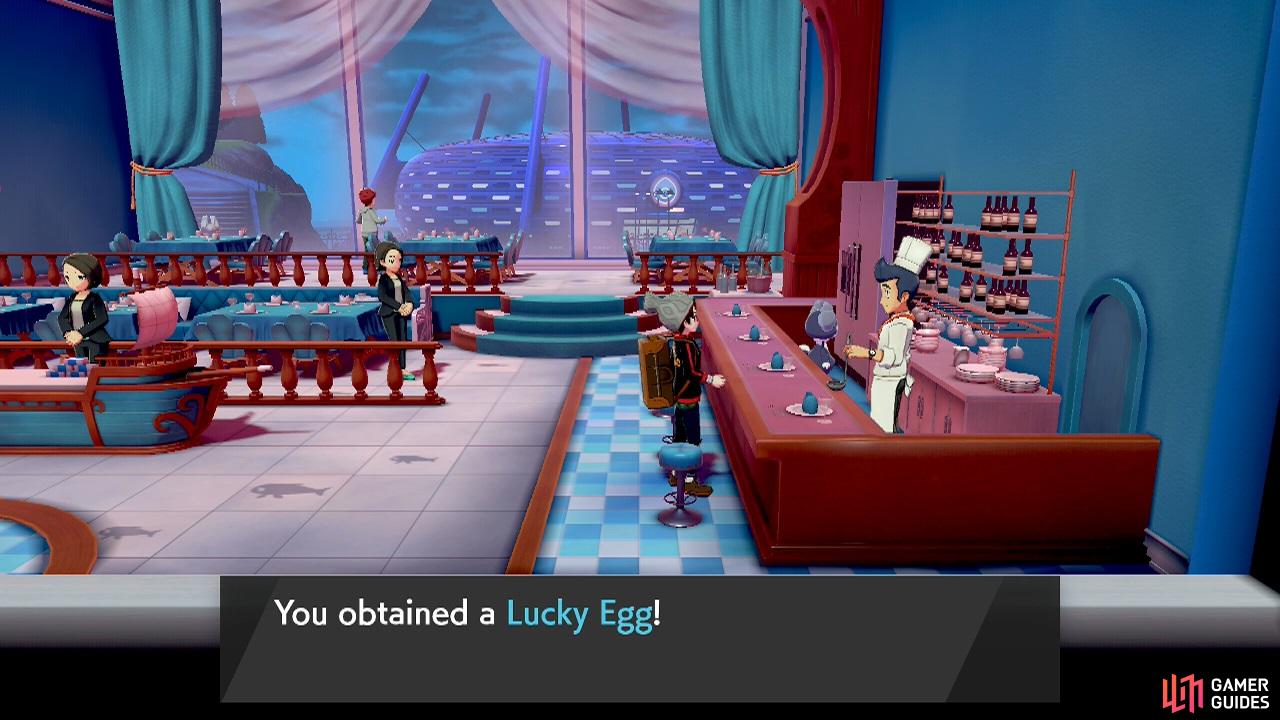
The third and final clue is a green-coloured roof, but it seems no houses in Hulbury have a roof like this. So you have to think outside the box. While you’re thinking, leave the restaurant and take a walk around the market to the south. Looky here! The right-most stall has a green roof. Report back to the chef and you’ll be given a valuable Lucky Egg.
GAME FREAK on Vacation
Whew, we’ve been all over the place haven’t we? If you want to take a break, we know a good place to wind down! Head for the Hotel Ionia in Circhester–specifically the building on the left. Hmm… We wanted to book a room to enjoy the hot baths, but it seems the rooms are full. Bugger. But since we’re here, ride the elevator upstairs.
Knock on the first room on the left. Inside, speak to the policeman near the back. He’ll reveal his true identity: Morimoto, a reoccuring NPC who’s based on a GAME FREAK staff member. Defeat him in a tough Double Battle and you’ll receive an Oval Charm that increases the rate of eggs appearing in the Pokémon Nursery. You can also fight him daily for fun (and some cash).
This might be early days for you, but once you’ve completed your Pokédex by logging in all 400 Pokémon in the Galar region (event Pokémon such as  Mew do not count), head over to the next room on the left. Chat to the Doctor who gave you the Catching Charm to receive a Shiny Charm. This boosts the odds of encountering or breeding Shiny Pokémon! Raid Pokémon are unaffected though.
Rematch with Marnie
Moving on, if you’re interested to know how Marnie’s doing, make your way back to Spikemuth. She’ll be waiting for you outside the Pokémon Centre. Speak to her and you can battle her once per day. Her team is more or less the same as last time, but  Morpeko has finally learned Aura Wheel! Also, there’s no space for either of you to Dynamax. On your first win, you’ll receive Marnie’s Rare League Card.
Wyndon Stadium Tournaments
Speaking of rematches, when you go back to Wyndon Stadium, you can enter tournaments like the Champion Cup finals. There are a few differences though. Firstly, you can invite one trainer, who will be randomly seeded in the tournament. The trainers you can invite increases as you obtain their rare League Cards (but not all NPCs with a rare League Card can be invited).
Next, the other trainers that enter the tournament will be randomly chosen from a pool. They can include the Gym Leaders, Leon, Hop, Piers, but also Gym Challengers like yourself in the past. From there, you’ll participate in three consecutive battles; you’ll get a break in-between each one (and your party will be healed). Win all three and you’ll get a reward from the Ball Guy
The Battle Tower
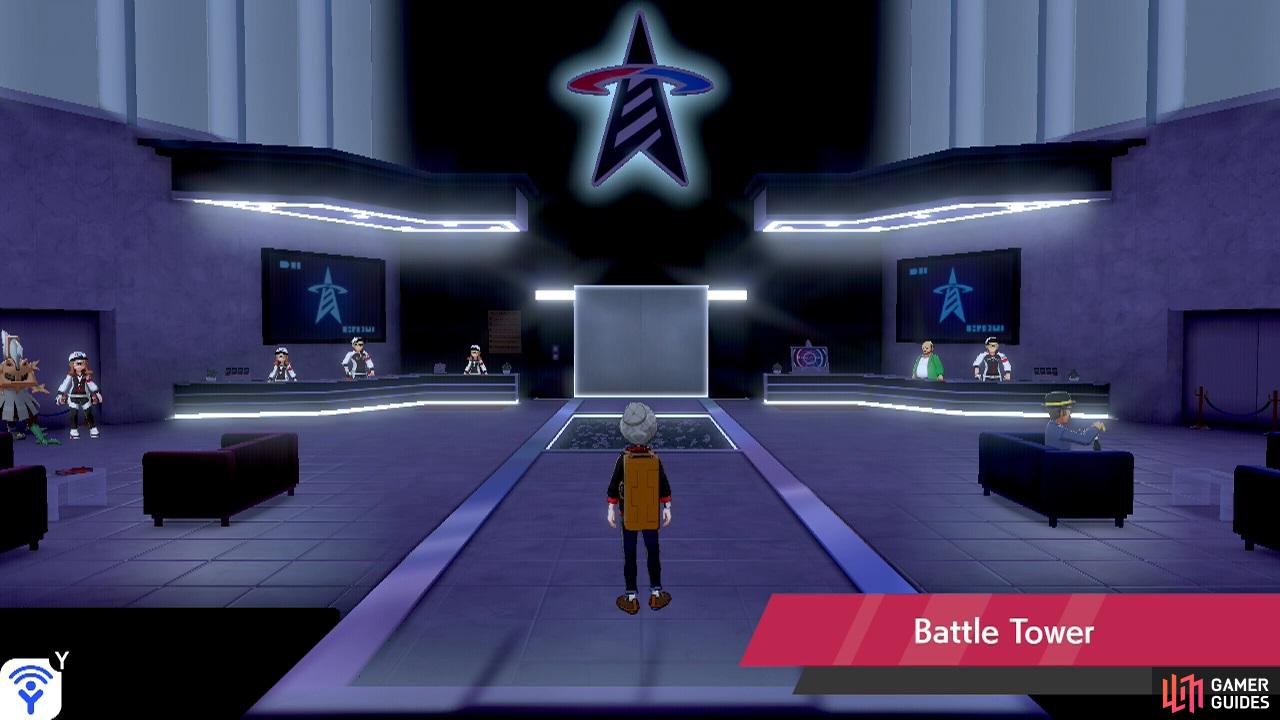
The Battle Tower is the bridge between the relatively easy main story and the harsh world of competitive Pokémon battling.
Last but not least, if you head to where the Rose Tower was (via flying taxi etc.), you’ll find the Battle Tower in its place. Here, you can participate in consecutive battles against randomly selected trainers, where all Pokémon are set to Level 50. It’s tough, especially as you can’t trounce your opponents with higher Level Pokémon, but you can get some cool rewards.
Each time you win in the Battle Tower, you can earn BP to spend in the BP shops here or elsewhere. In addition, as you keep winning, your rank will increase; each time you rank up, you’ll get extra BP and rewards. Furthermore, you’ll also get rewards after reaching certain intervals of wins, starting from 10, 20, 30, 40, 50, 100 and beyond.
If you’re not interested in battling, that’s fine! But you should visit the Battle Tower anyway. Speak to the lady on the left to receive a  Type: Null, an artificial Pokémon from the Alola region. You’ll also receive a stack of 18 Memory Disks that can be given to Type: Null’s evolved form,
  Silvally, to change its type. Much like a certain creator Pokémon…
No Comments