

Snowslide Slope
If you haven’t been to Snowslide Slope before, you can reach it via the Giant’s Bed. Simply continue onwards from the road with the worn out brick walls, where you spoke to the mayor. Or if visited before, you can use the flying taxi to fly to the Watt Trader just past the entrance.
Head up the slope, towards the centre, where there’s a pond, some abandoned buildings and the field where Iceroot Carrots can be grown. From here, go between the buildings, further up the slope. If you go left past the buildings instead, you can reach one of the ruins for the Regi quest.
Assuming you’re climbig the slope, after a while, the slope will level out. There will be several leafless trees and a side branch on the left. Since you’re here, you could check out the branch. There’s a Full Restore at the end and a nice view of the ruins (in good weather).
Past the leafless trees, turn right to reach the top of the slope. If you go left, through the tall grass, there’s another side branch. At the end of this one is an Eject Pack by a tree. That seems kind of ominous… At the top of the slope, you’ll find the entrance to the Tunnel to the Top.
Tunnel to the Top

That’s quite the literal name, huh? What’s next? Burrow to the Bottom?
| Helpful Links |
|---|
| Overview |
| Overworld & Strong Pokémon Data |
This is a rather twisty tunnel. If you have time, you may want to look around every corner. Start by heading further inside. You’ll reach a chamber with a chasm in the centre. Navigate around the chasm. If you go along the right, you can pick up a hidden item by a rock.
Past the chasm, there’s a path on the left leading downwards and a path on the right leading upwards. Go left if you want a short detour. At the end, you can find a Dragon Fang and also see another item ball in the distance. Along the right path, there’s another hidden item by the rocks on the right, near where the arch begins.
Soon, you’ll emerge “outside”, where there’s snow on the ground. Go up and around. Be mindful of a strong Pokémon (possibly a  Froslass) that’s made their territory here. Scoop up the Moon Stone by the far corner. Then continue deeper into the tunnel. You’ll reach a fork in the path.
If you don’t mind a detour, go left first. Turn left and grab the TR15 Fire Blast near the edge. Double back and go right from the fork, up the slope. The path will branch in a few directions. Immediately turn left and pick up the Safety Goggles. Next, go slightly right towards the chasm. There’s a hidden item right by the edge.
Turn right once more. There should be a path straight ahead that goes slightly up. Plus another path on the right, which seems to go downwards. Again, if you’re not in a hurry, go right first. There’s a juicy PP Up waiting for you there. Now go through the remaining path, which takes you up.
Here, there’s a giant pillar near the right. You can go left, which takes you up, or right, which takes you down. You can probably guess the pattern by now. Go right for the last detour of the day. Further down, there will be another branch. Go left to step outside the tunnel for a breather.
Ooh, the scenery is quite nice here. Anyway, turn right and go through the narrow path. Then enter the cave back into the interior. Over here, quickly turn right and go up the slope. You can pick up a visible Rare Candy and to its left, another hidden item. Afterwards, head further into this part of the tunnel.
Whoa, did you see that  Garchomp wandering around? Trying not to be distracted, be sure to grab the Magmarizer along the left. Keep on pressing forward. Keep an eye out for another hidden item by one of the rocks on the left, towards the end of this section. Finally, you’ll arrive outside, in an isolated part of Snowslide Slope.
You can find two hidden items by a rock near the perimeter, directly ahead from the exit. Plus a visible TR83 Ally Switch on the right. Retrace your steps until you’re back at the point before you turned left at the previous branch. Then turn right. Or from your perspective, turn left while facing the slope leading back up.
You’ll reach an otherwise empty room with some Heavy-Duty Boots and a hidden item on its right. Go back up the slope towards the area with the giant pillar. Then take the path leading further up, which should be directly ahead. Along the way, there may be another hidden item on the right.
Finally, turn right and you’ll find the exit to the Path to the Peak.
Path to the Peak
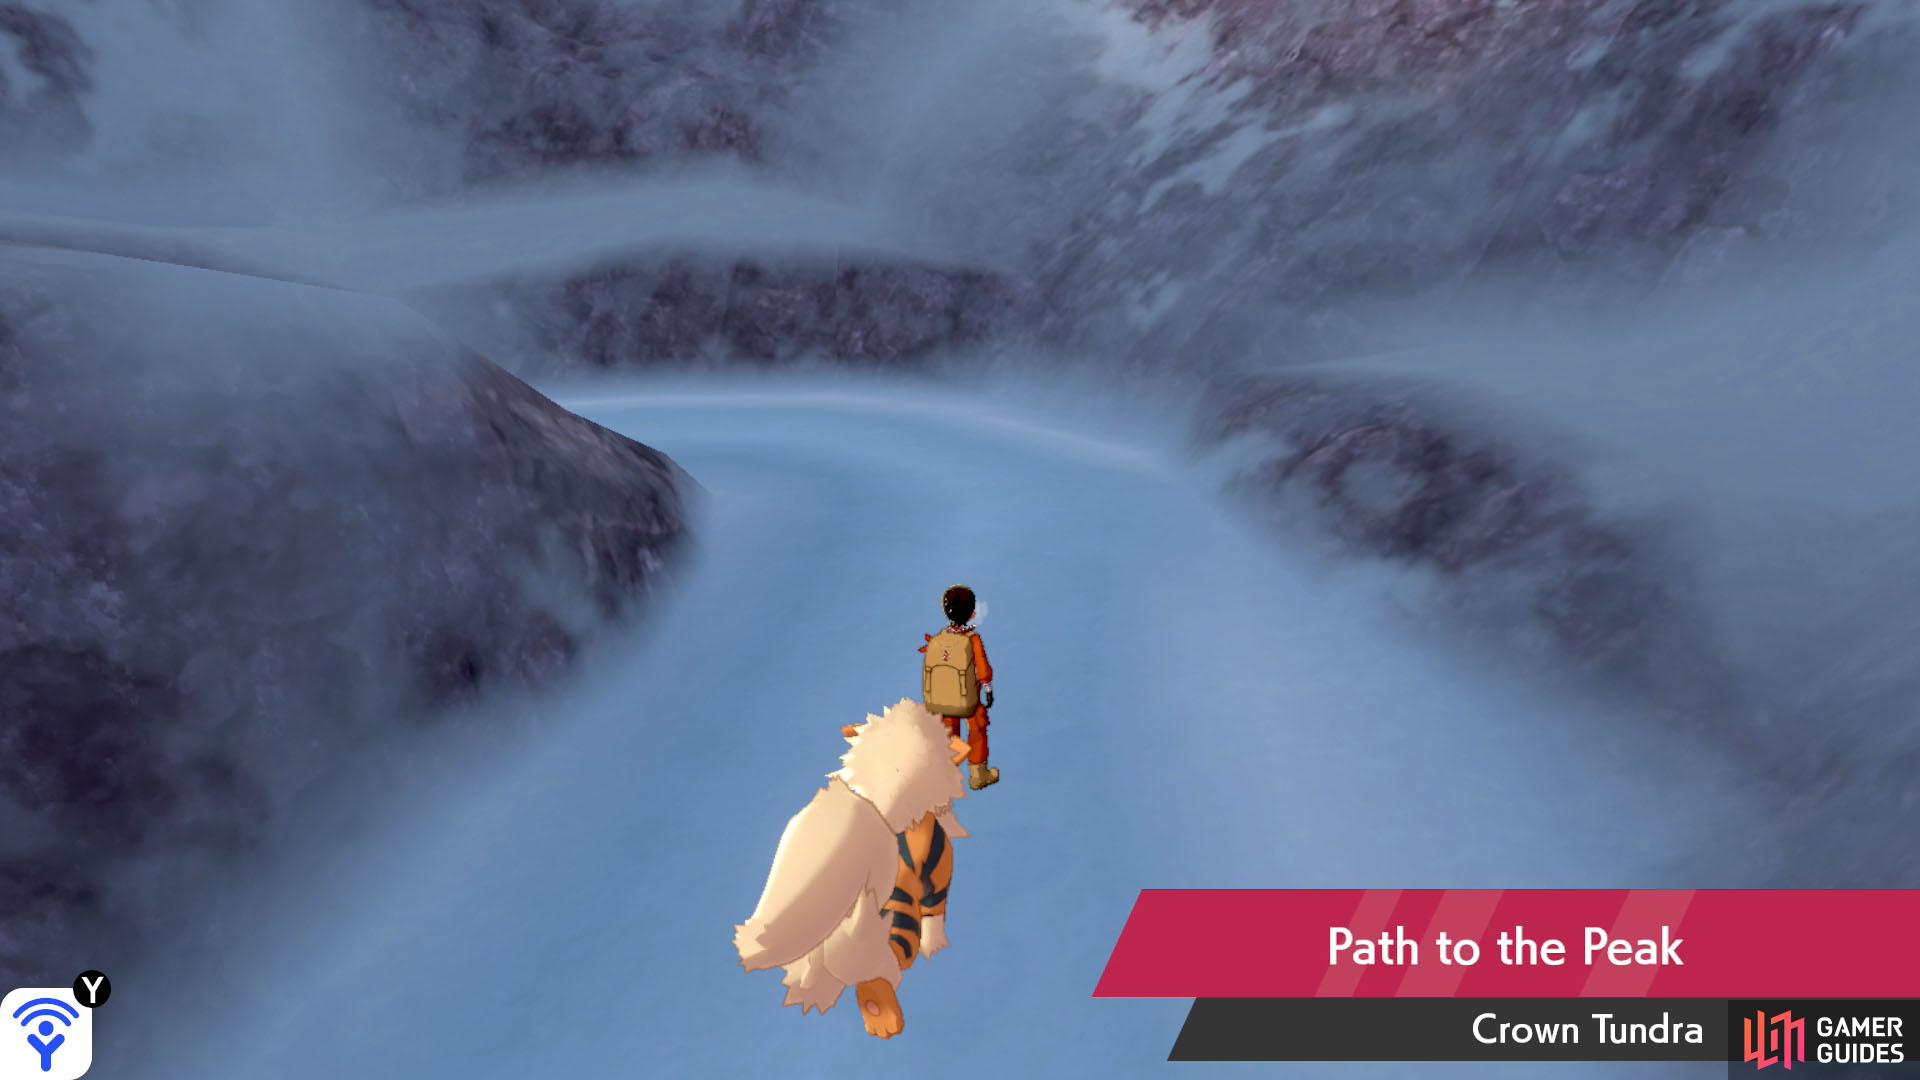
You’re almost there! Another Legendary encounter awaits…
| Helpful Links |
|---|
| Overview |
| Overworld Encounter Data |
| Strong Pokémon Data |
| Max Raids |
This pathway leads straight to the Crown Shrine. Turn left and go up the flights of stairs. You’ll reach a forest of leafless trees, where many  Frosmoth are hovering around. Press on through the forest. There are a bunch of hidden items if you search some of the rocks and trees. Also, grab the Ice Stone on the left.
Past the forest, there’s a nice viewpoint if you turn left. You can also find a hidden item by the edge. Just try not to get too close in case you faaaaaaaaaaaaaaall… Just kidding! Turn right to find the stairs leading upwards. From here, it’s a one-way path to the Crown Shrine.
Crown Shrine

It’s a long way back down. Thankfully, after going inside, the Crown Shrine will become a landmark so you can fly back here in a jiffy.
| Helpful Links |
|---|
| Overview & Max Raids |
When you get close to the shrine, the camera will pan out to show you the shine in its full glory. By the way, if you came here before triggering the story quest,  Calyrex will be watching you from a distance like a stalker. Anyway, go right before the stairs leading to the building itself. You can find TR11 Psychic here.
Now go up the stairs, but don’t enter the building just yet. Go left and retrieve the Max Revive. Once you’re ready, stroll inside the building. Ahhh, the camera will become fixed. Does this feel weird to anyone else or just us? Go left and look for a King’s Rock hiding behind one of the trees. Then approach Calyrex ahead.
When asked, place the carrot in the nearby basket on the left. Afterwards, Calyrex will successfully regain control of  Glastrier or
  Spectrier. As thanks for your efforts, Calyrex will allow you to challenge it to a battle–and catch it. This is one of the harder Legendary Pokémon fights, so be sure to gear up before you accept the challenge.
Legendary Pokémon
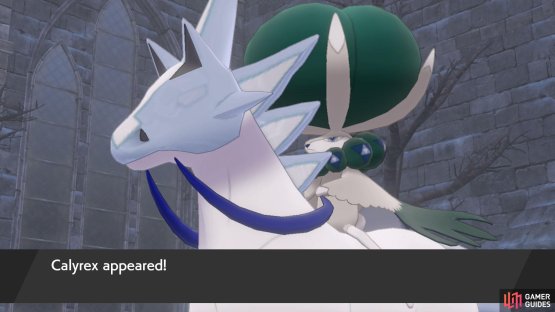
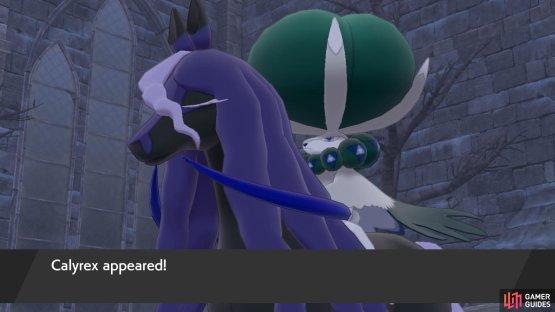
(1 of 2) Ice Rider Calyrex


Ice Rider Calyrex (left), Shadow Rider Calyrex (right)
This is it! Your chance to catch a new Legendary Pokémon–and even better, you get two for the price of one! The Calyrex you face will have fused with Glastrier or Spectrier, depending on your earlier choice. It will gain the secondary Type of the fused horse, as well as powerful new moves.
Cheating Calyrex will also have two Abilities–its natural Unnerve, which prevents you from munching on berries, and the Ability of its horse, which boosts its relevant Attack stat when it scores a KO. Both versions of Calyrex hit like a truck (or a galloping horse), so the second Ability can be a real threat.
Ideally, you want to primarily field a Pokémon that resists Calyrex’s moves. Against Ice Rider Calyrex, you’ll want something that at least resists Ice, like Fire or Water. As for Shadow Rider, a Dark-type can handle both its Psychic and Ghost moves.
Ice Rider Calyrex can use Glacial Lance to poke holes in your Pokémon. It deals a lot of damage, but only has 5 PP. It can also use Iron Defense to rapidly bolster its physical defense. Shadow Rider has Astral Barrage, which deals impressive special-based damage, but again has low HP. It also has Agility to become even faster.
Both Calyrex forms have access to Giga Drain, a Grass-type absorption move, and Psychic, which surely you’re familiar with. Giga Drain shouldn’t do too much damage, but it can be annoying for keeping its HP in check. Psychic isn’t much to worry about if its Ice Rider, but it can be damaging if its Shadow Rider.
As with most Legendary fights, your goal is to whittle down its HP, while inflicting it with a status ailment. For consistency, Paralysis, which you can trigger with Nuzzle or Thunder Wave etc., is ideal. Or if you want a higher catch bonus, you can inflict Sleep, with Spore or Yawn etc., but it disappears after a few turns.
When facing Ice Rider, you can use good ol’ False Swipe to reliably reduce its HP to zero when it gets low. Before that point, unless you’re extremely over-leveled, you can probably whack it with your strongest moves and it’ll still be standing. Then switch over to weaker moves and finally False Swipe.
Shadow Rider is a bit tougher to safely weaken, because its immune to False Swipe. Also because it’s much more fragile. You’ll just have to try different moves and see what works and what doesn’t. Like we said, if you accidentally faint it, you can immediately try again. So don’t worry too much about it!
Once Calyrex has low enough HP, there’s nothing for it but to throw your best Poké Balls. If you don’t care about appearances, Ultra Balls are great. Or Dusk if it’s night time. Alternatively, if you don’t have anything else to use it on, you could use the free Master Ball that Peony gave you. That’ll let you skip the whole fight.
Since Calyrex is a big offensive threat, you could use items like X Defense or X Sp. Def to bulk up your Pokémon, so they take less abuse while you’re chucking Poké Balls like an idiot. Calyrex has a low catch rate, so if you’re not using the Master Ball, you might be here for a while. Don’t give up though and you should eventually catch king and rider!
Triumph and you’ll receive a call from Peony. If you return to the base camp at Freezington, you can report back to Peony, who will consider this quest a success. Onwards to the next one!
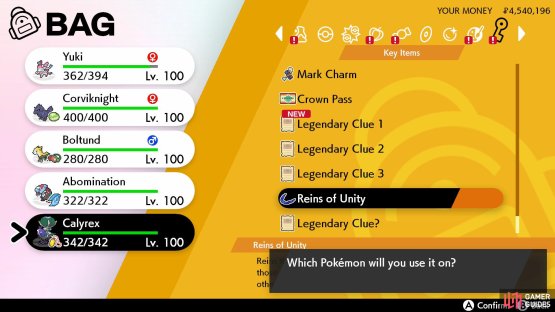
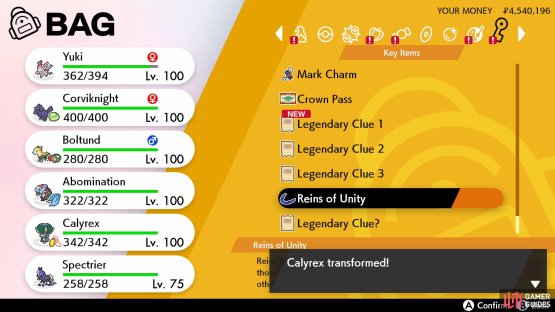
(1 of 2) Fusing/unfusing Calyrex works like Kyurem and Necrozma.
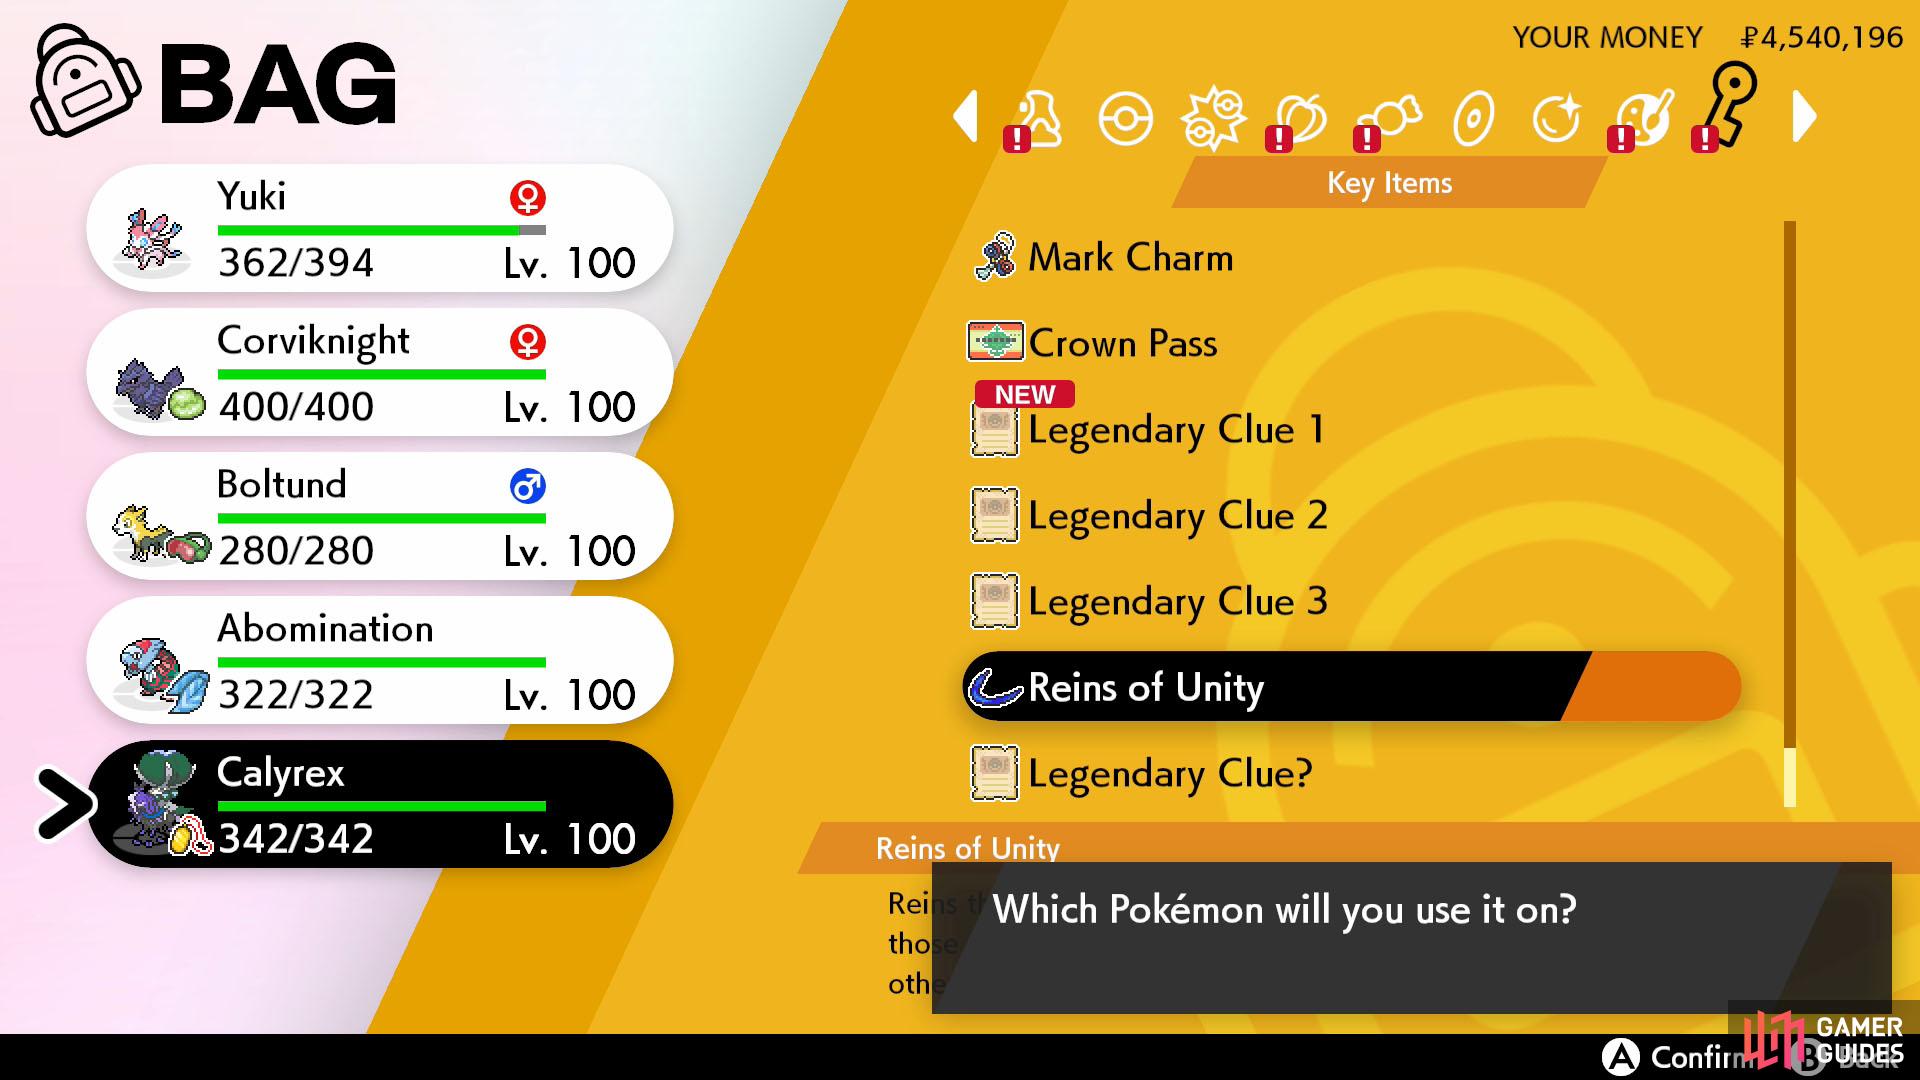

Fusing/unfusing Calyrex works like Kyurem and Necrozma. (left), Ta-da! Now you can trade the horses separately. (right)
No Comments