
The Festering Darkness is one of three new Strongholds added with the Vessel of Hatred expansion. This particular Stronghold is unique as it will have you travel through the darkness, guided by a lantern. Read on to find out where and how you complete The Festering Dark Stronghold in Nahantu.

The Festering Dark is a Stronghold in the Restless Canopy region of Nahantu.
Table of Contents
If you want to jump to a specific section, click on the links below.
The Festering Dark Stronghold Location
You can find the Stronghold in the far south of the Restless Canopy region in Nahantu. Unfortunately, there isn’t a nearby Waypoint, so you’ll have to get there from either Kurast Bazaar or Ichorfall in the Field of Giants region.
The distance is about the same, so pick your poison. If you take the former, keep heading as far south/southeast as you can go, and you’ll find it. If you take the latter, you’ll want to head west into Restless Canopy, and then go southwest.
When you reach the Stronghold, you’ll find several paths leading into it, but your path will be blocked by some Festering Walls. There is only one way into the Stronghold, and that is from the Dark Approach location situated in the far southeast corner of Restless Canopy, south of the Vile Hive dungeon.
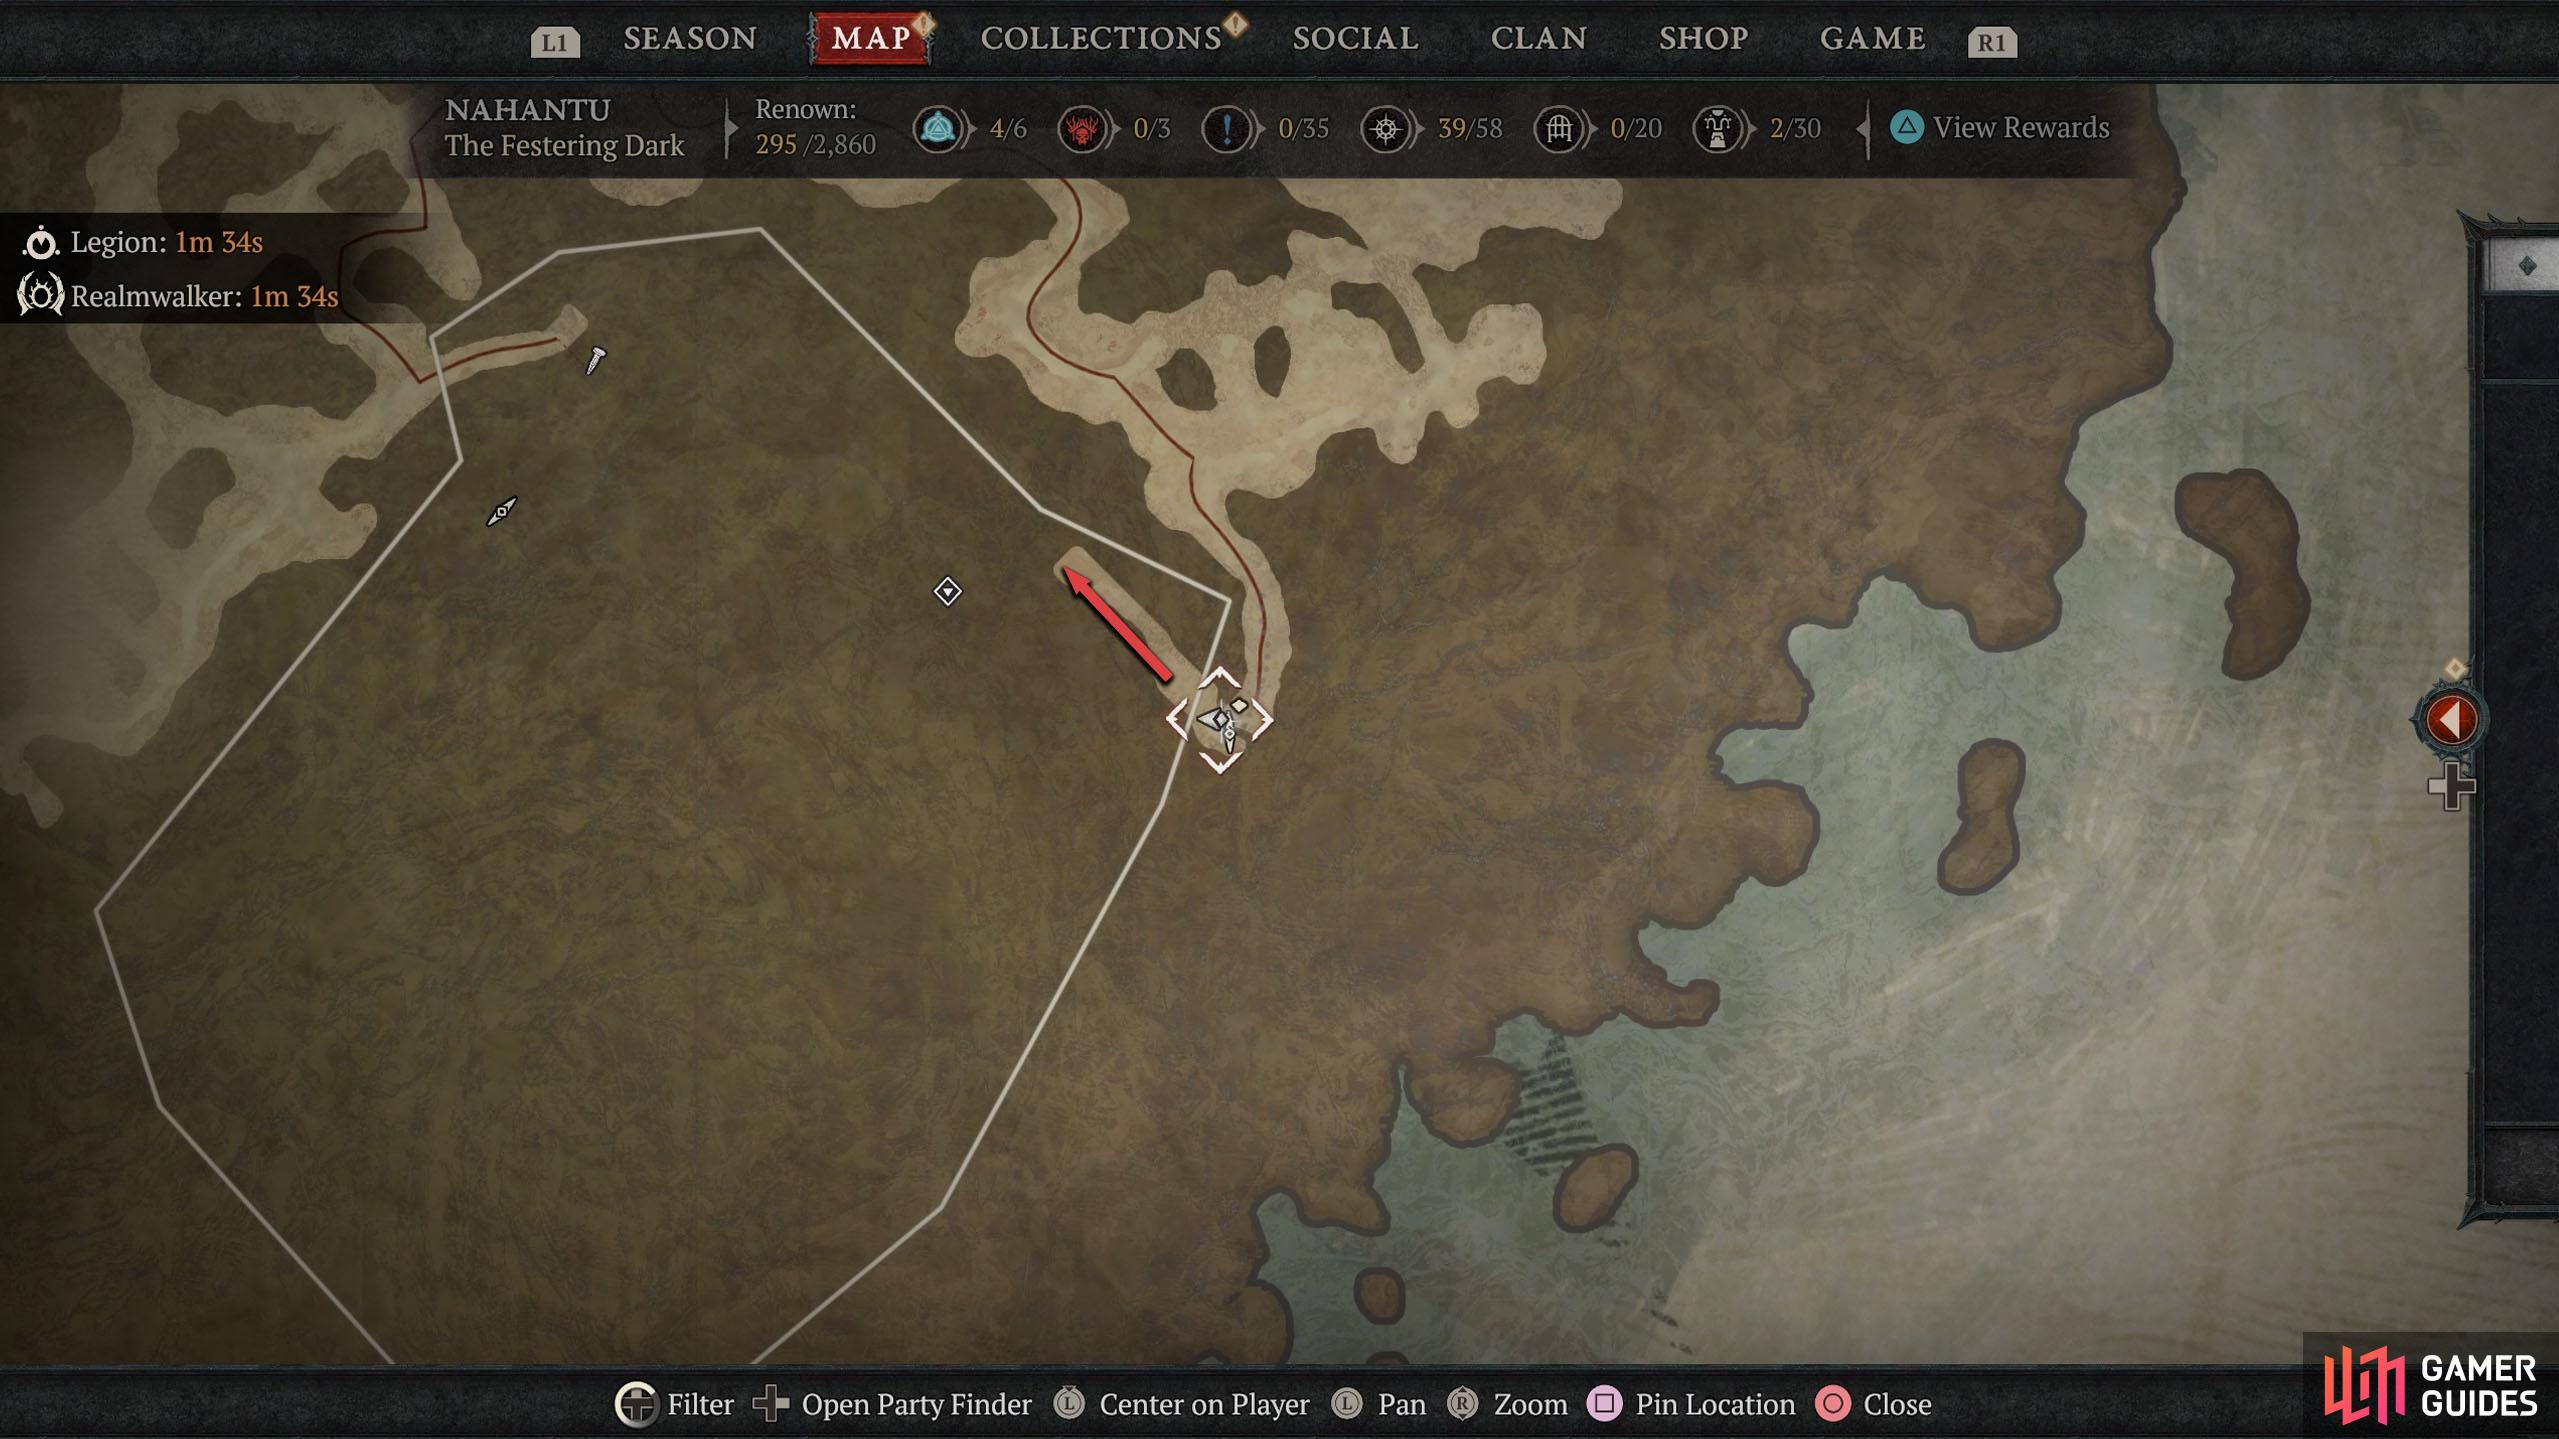


(1 of 2) Make your way to the southeast corner of Restless Canopy to find the Stronghold.
Make your way to the southeast corner of Restless Canopy to find the Stronghold. (left), Climb down to the area below and enter the cave to the northwest. (right)
The Festering Dark Walkthrough
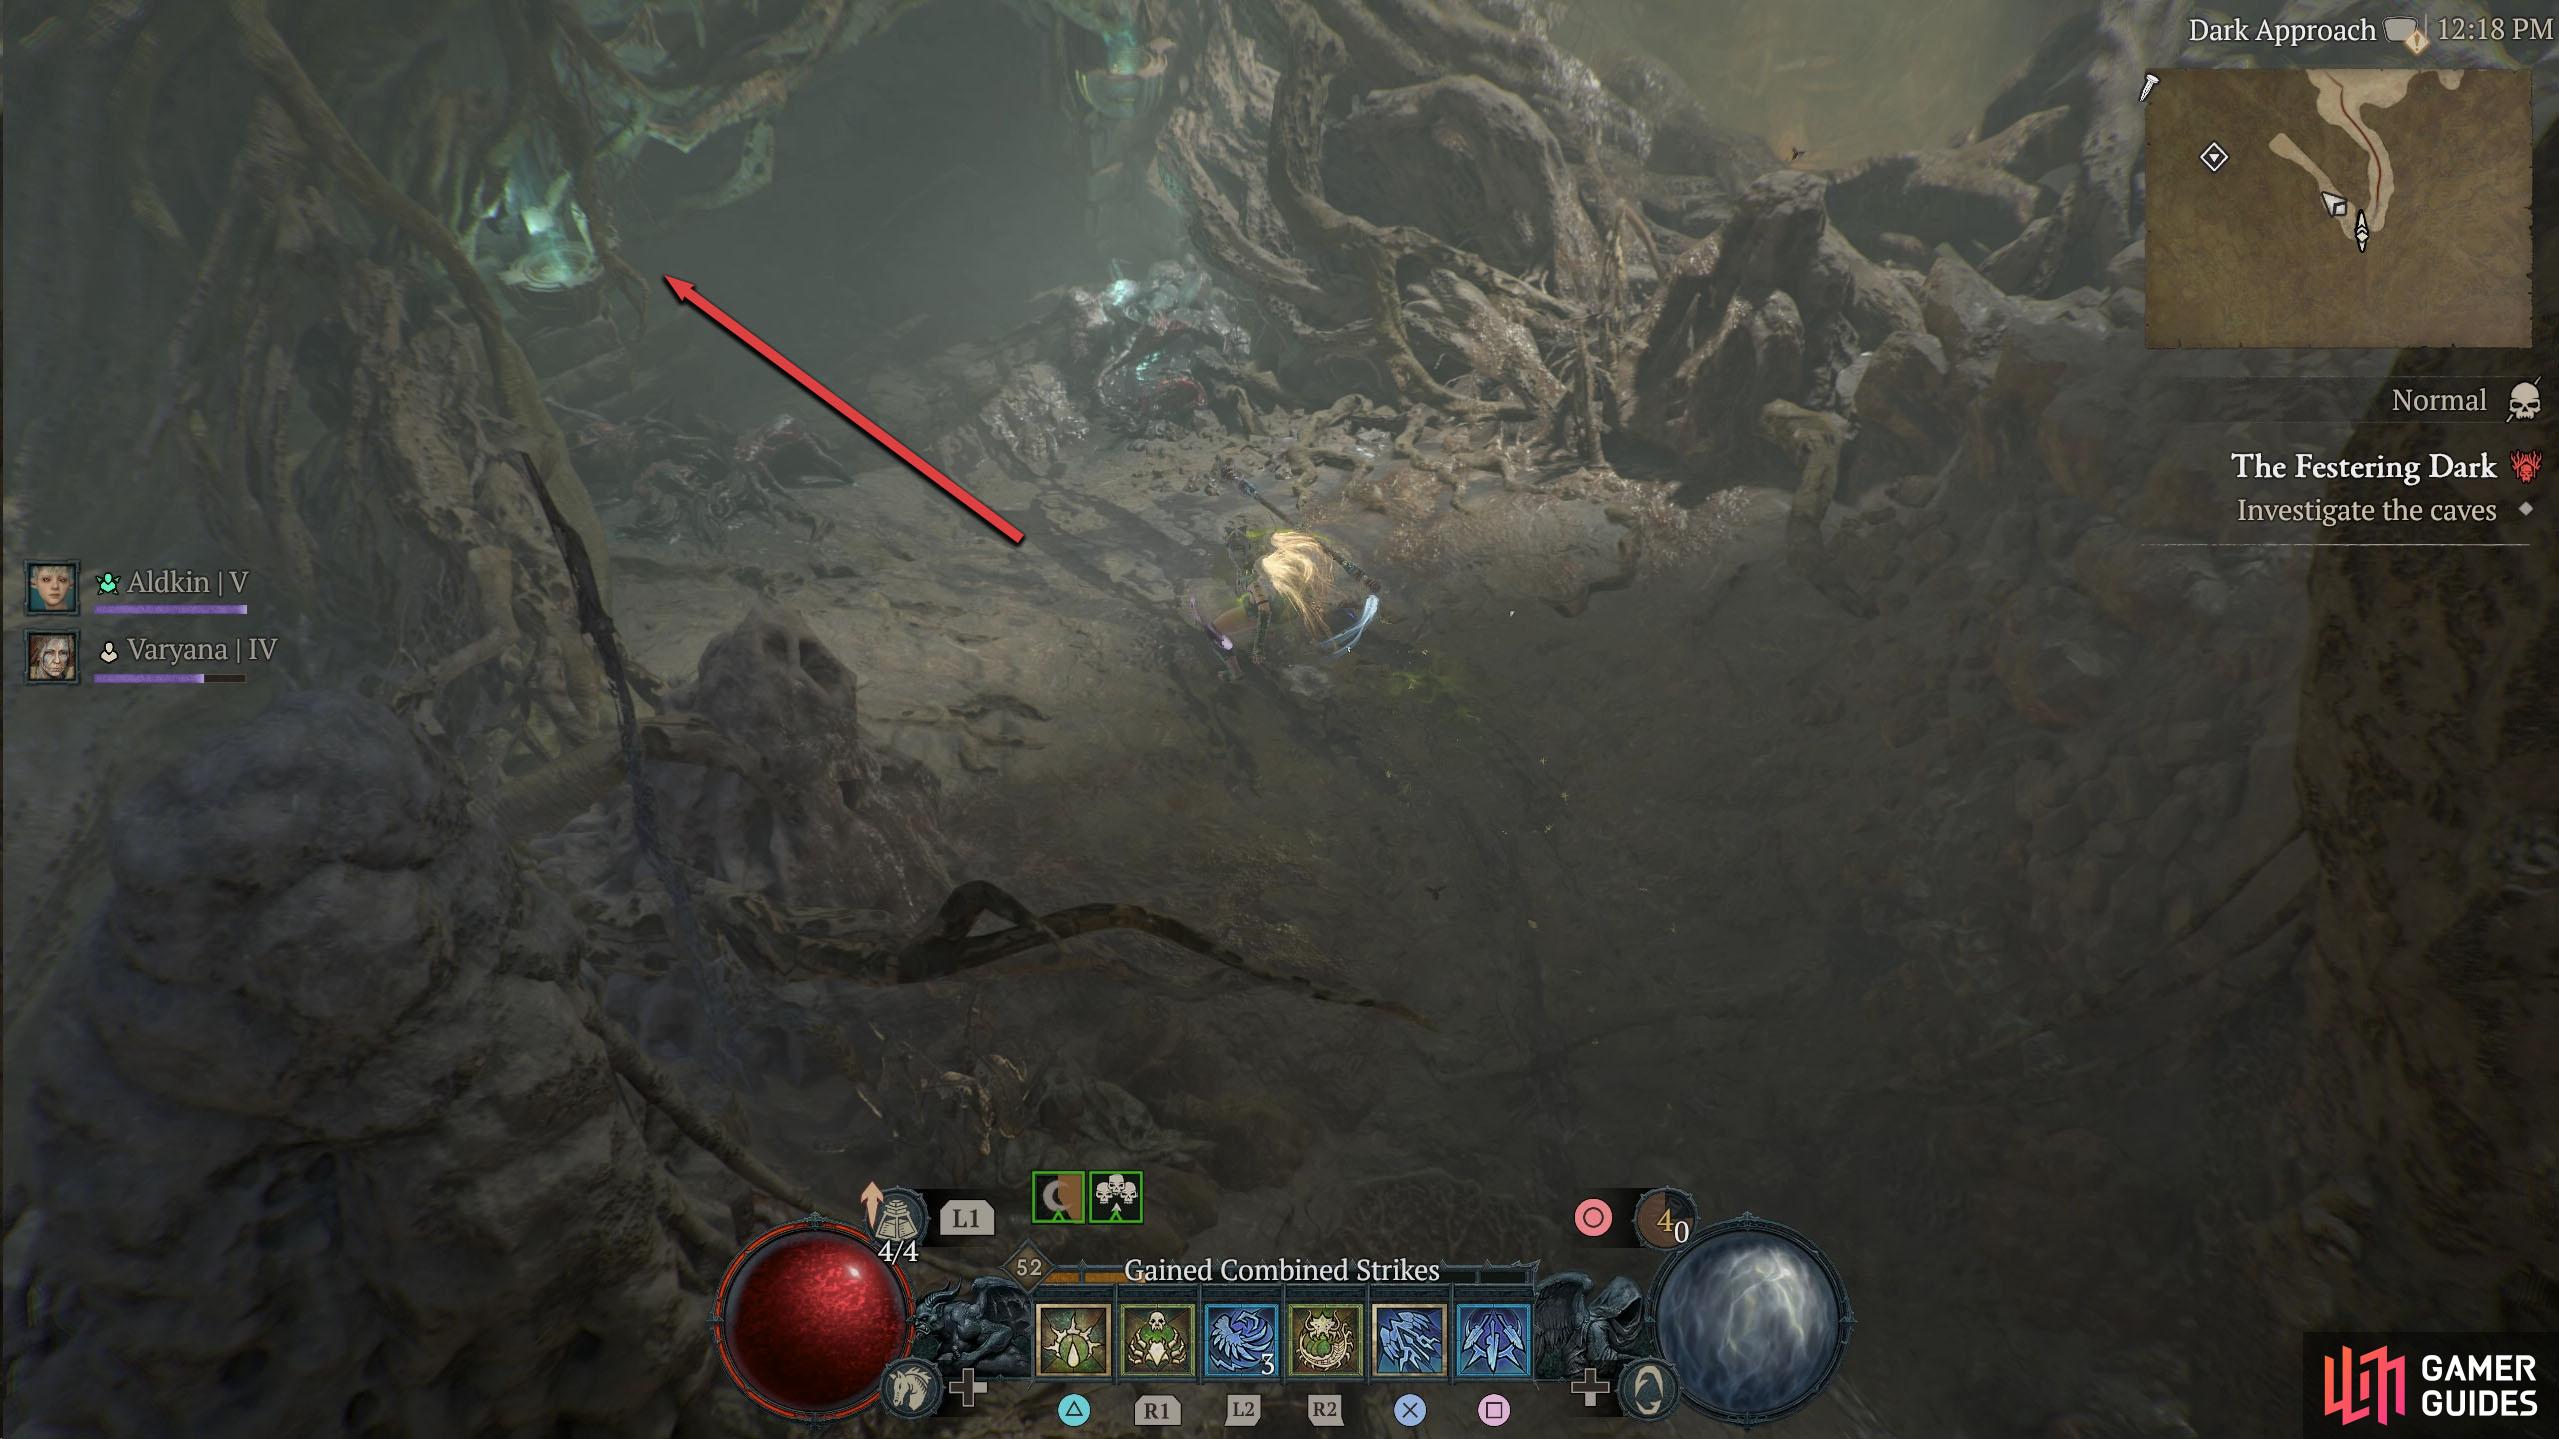
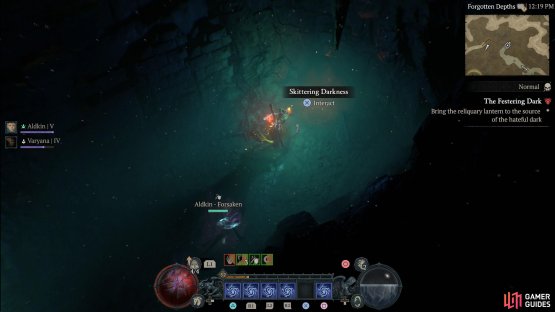
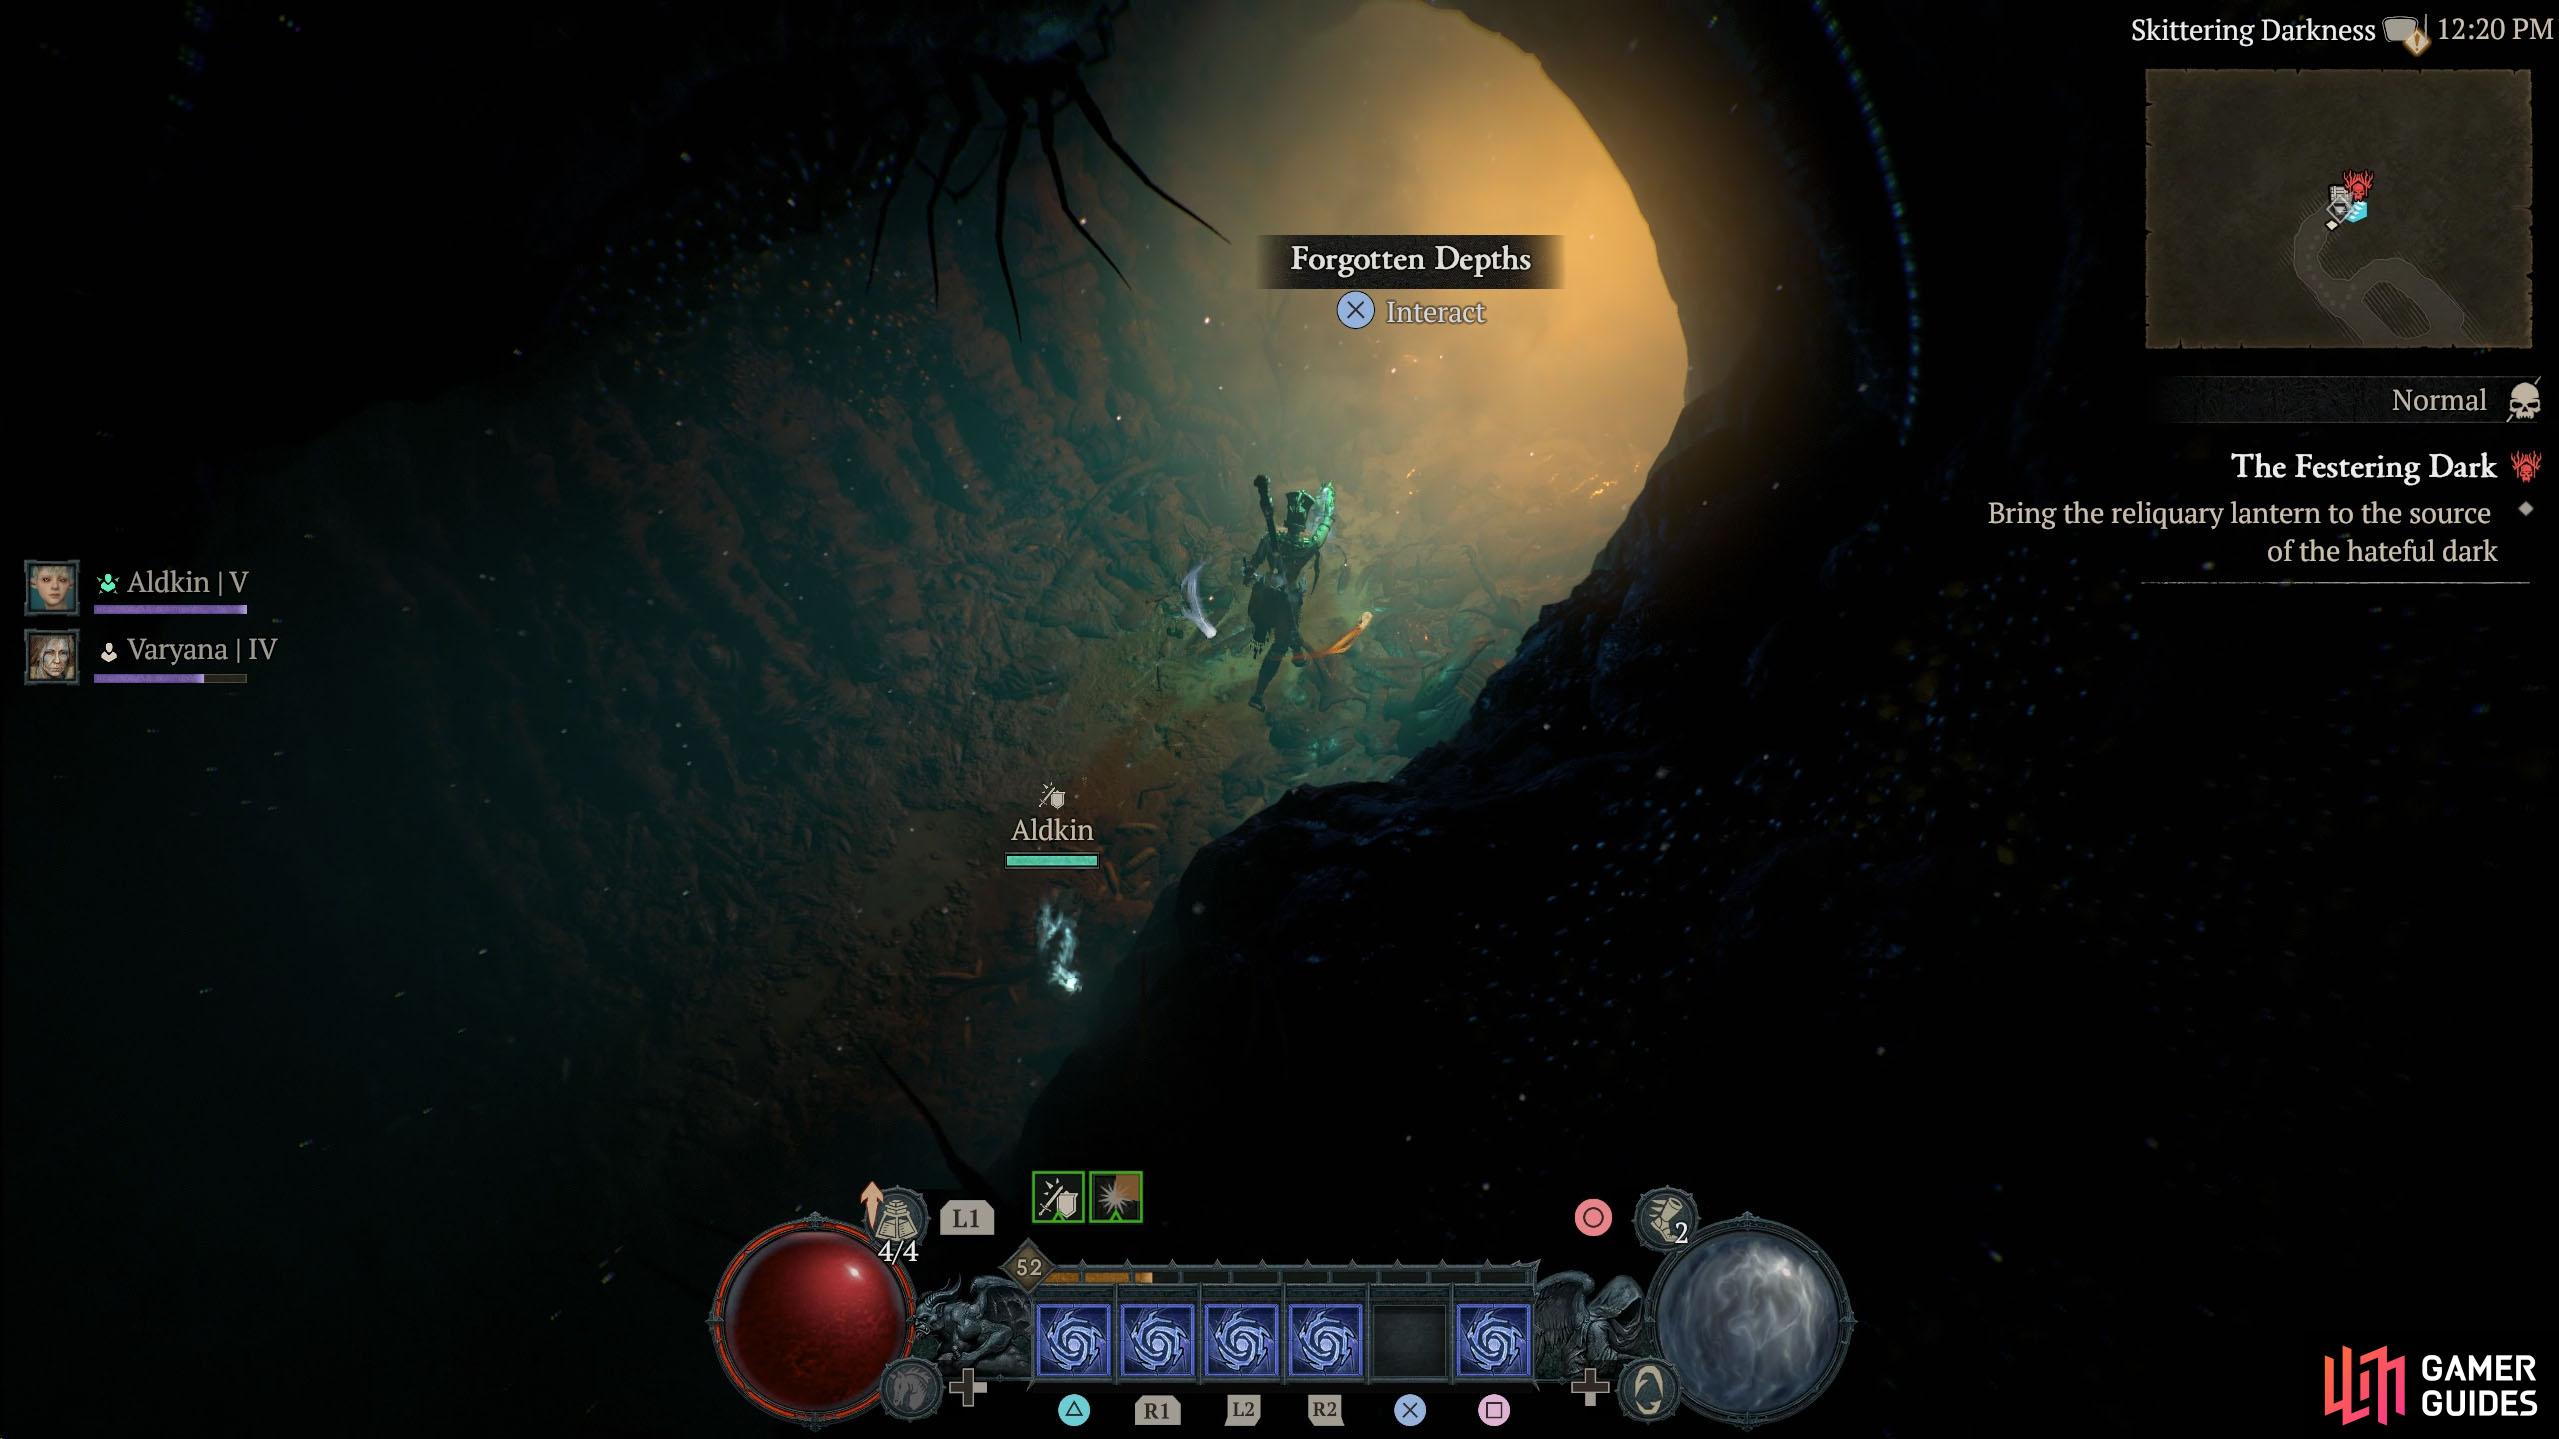
When you enter the Stronghold, you’ll be in the Forgotten Depths and the first thing you’ll notice is how dark it is. Follow the dark winding path west, and you’ll soon come upon a Necromancer’s Corpse, and more importantly, the Reliquary Lantern.
You’ll be using this key item throughout the Stronghold, as you’ll need it to pass through the Festering Walls as you make your way deeper into the Stronghold.
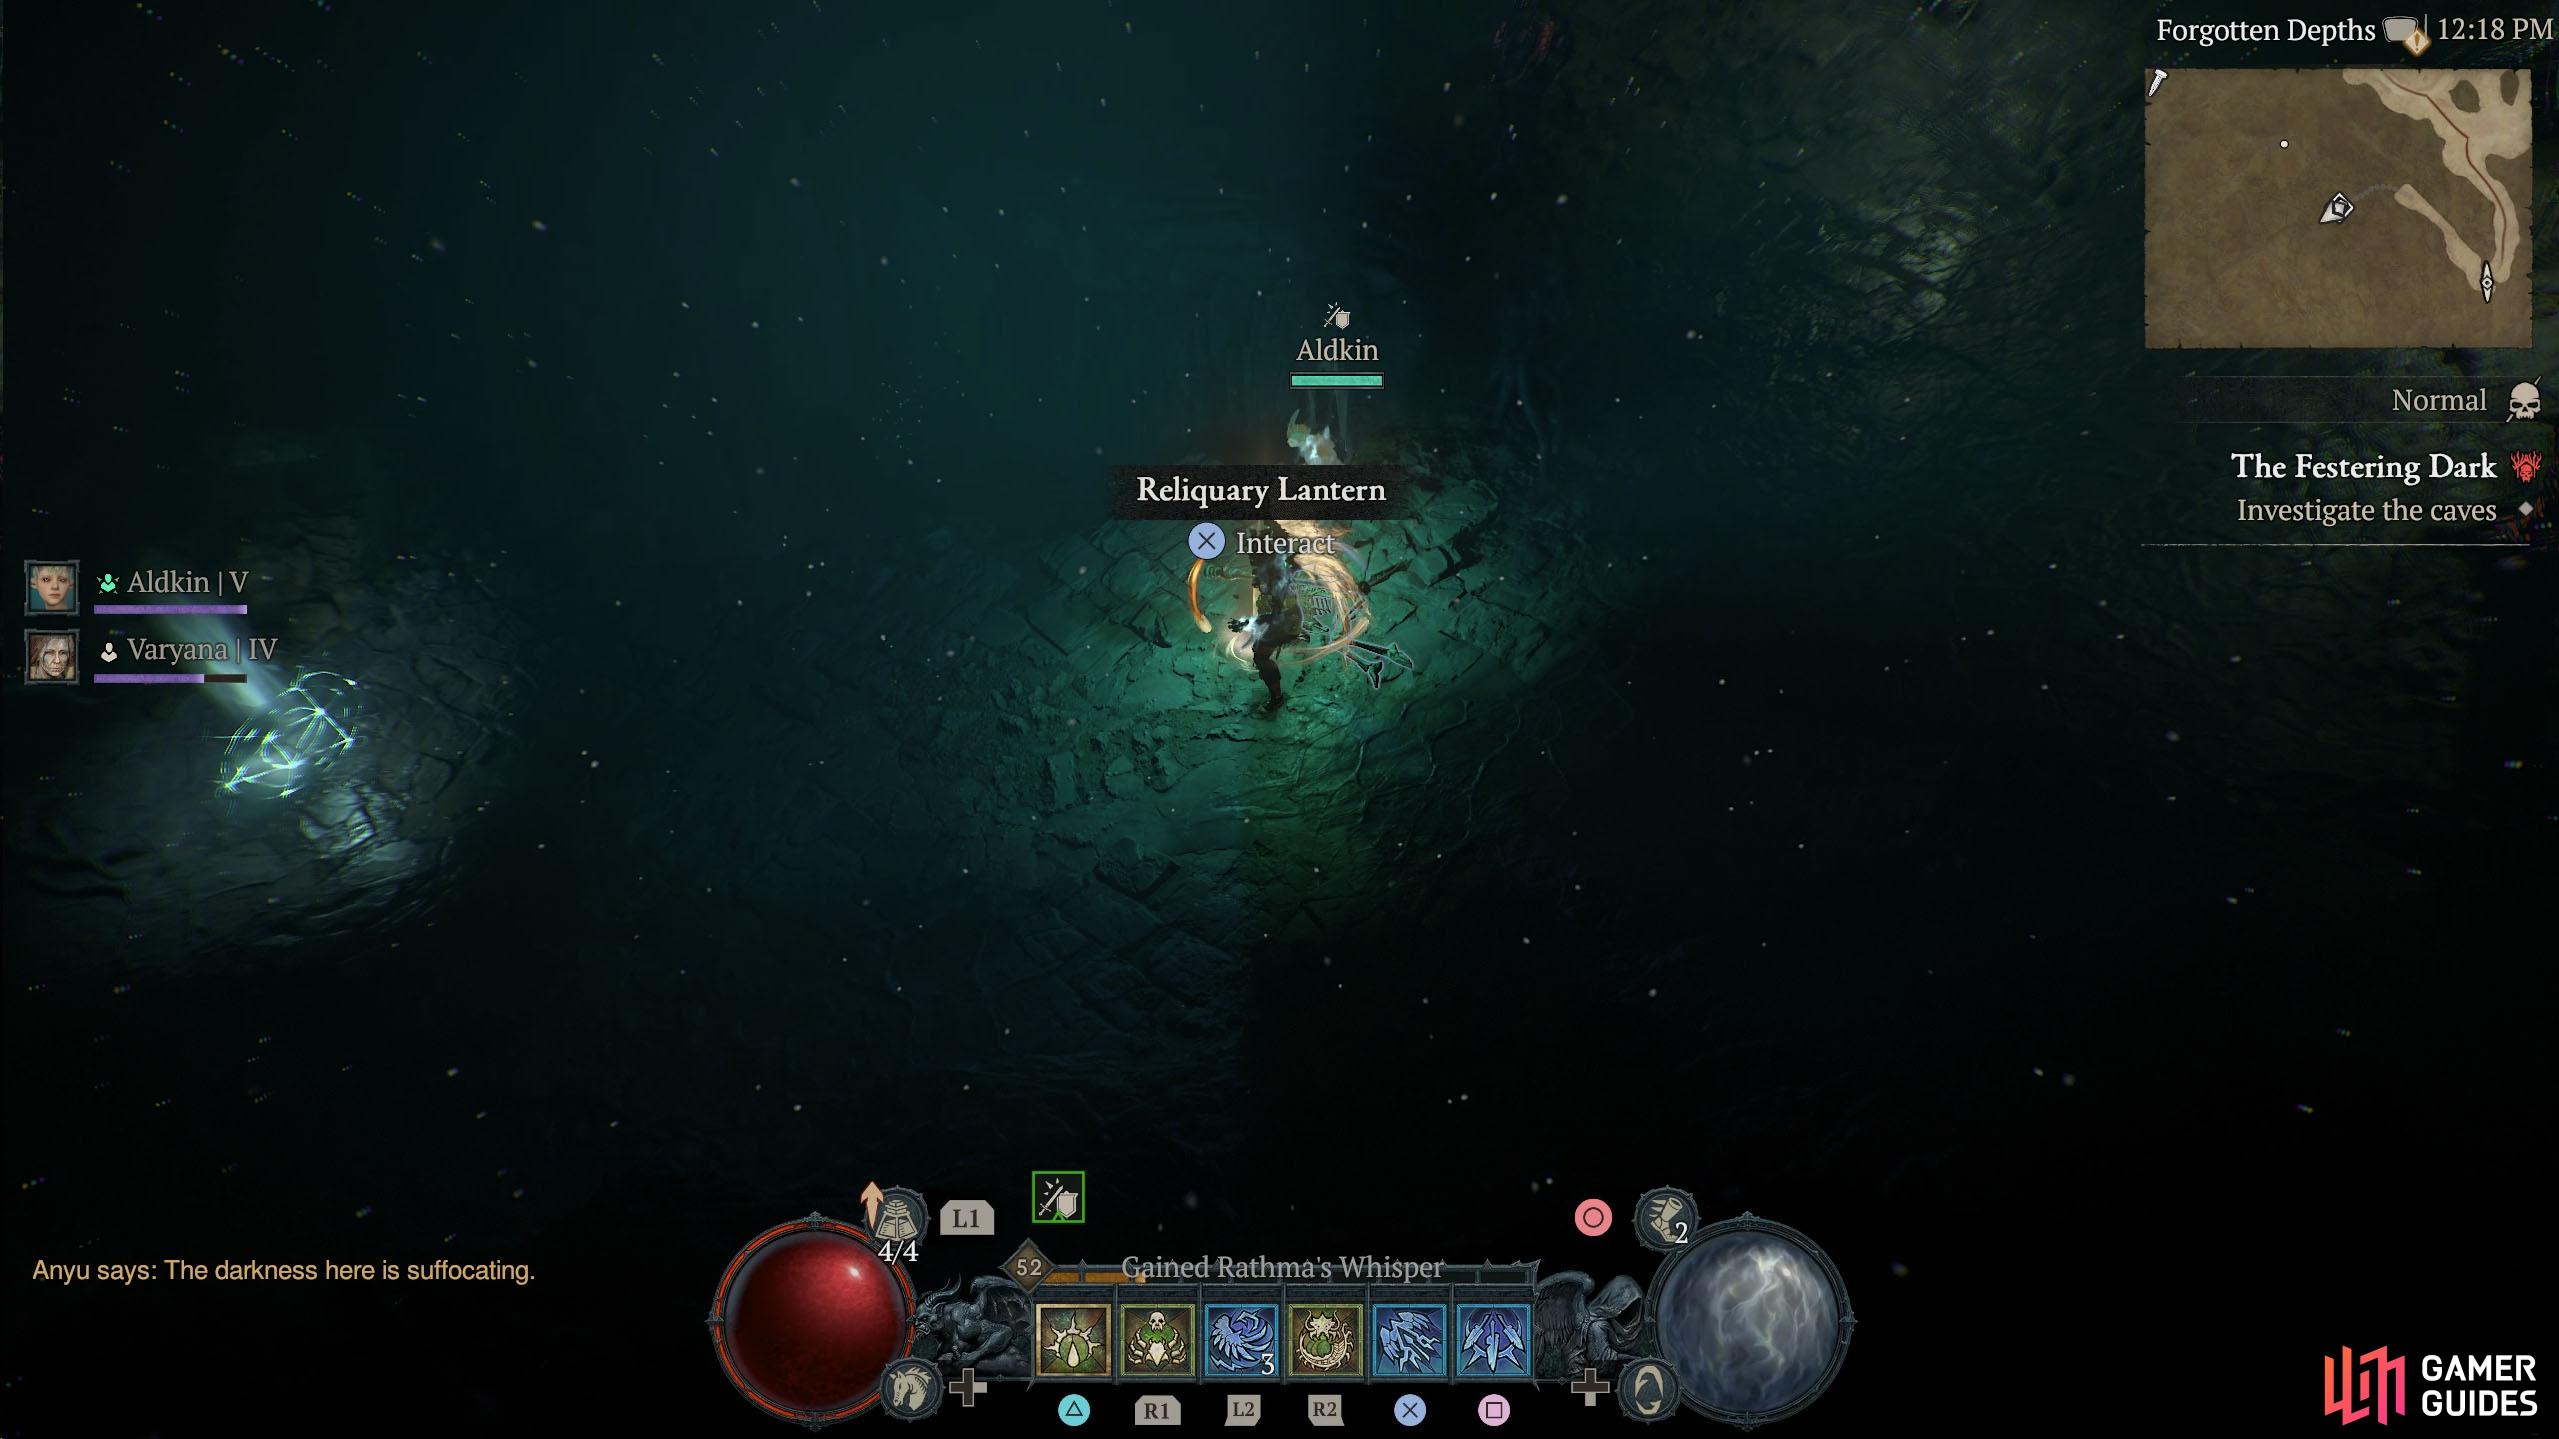


(1 of 2) Take the Reliquary everywhere you go in this Stronghold, otherwise your path will be blocked.
Take the Reliquary everywhere you go in this Stronghold, otherwise your path will be blocked. (left), If you misplace the Lantern, interact with the Sigil to get a new one. (right)
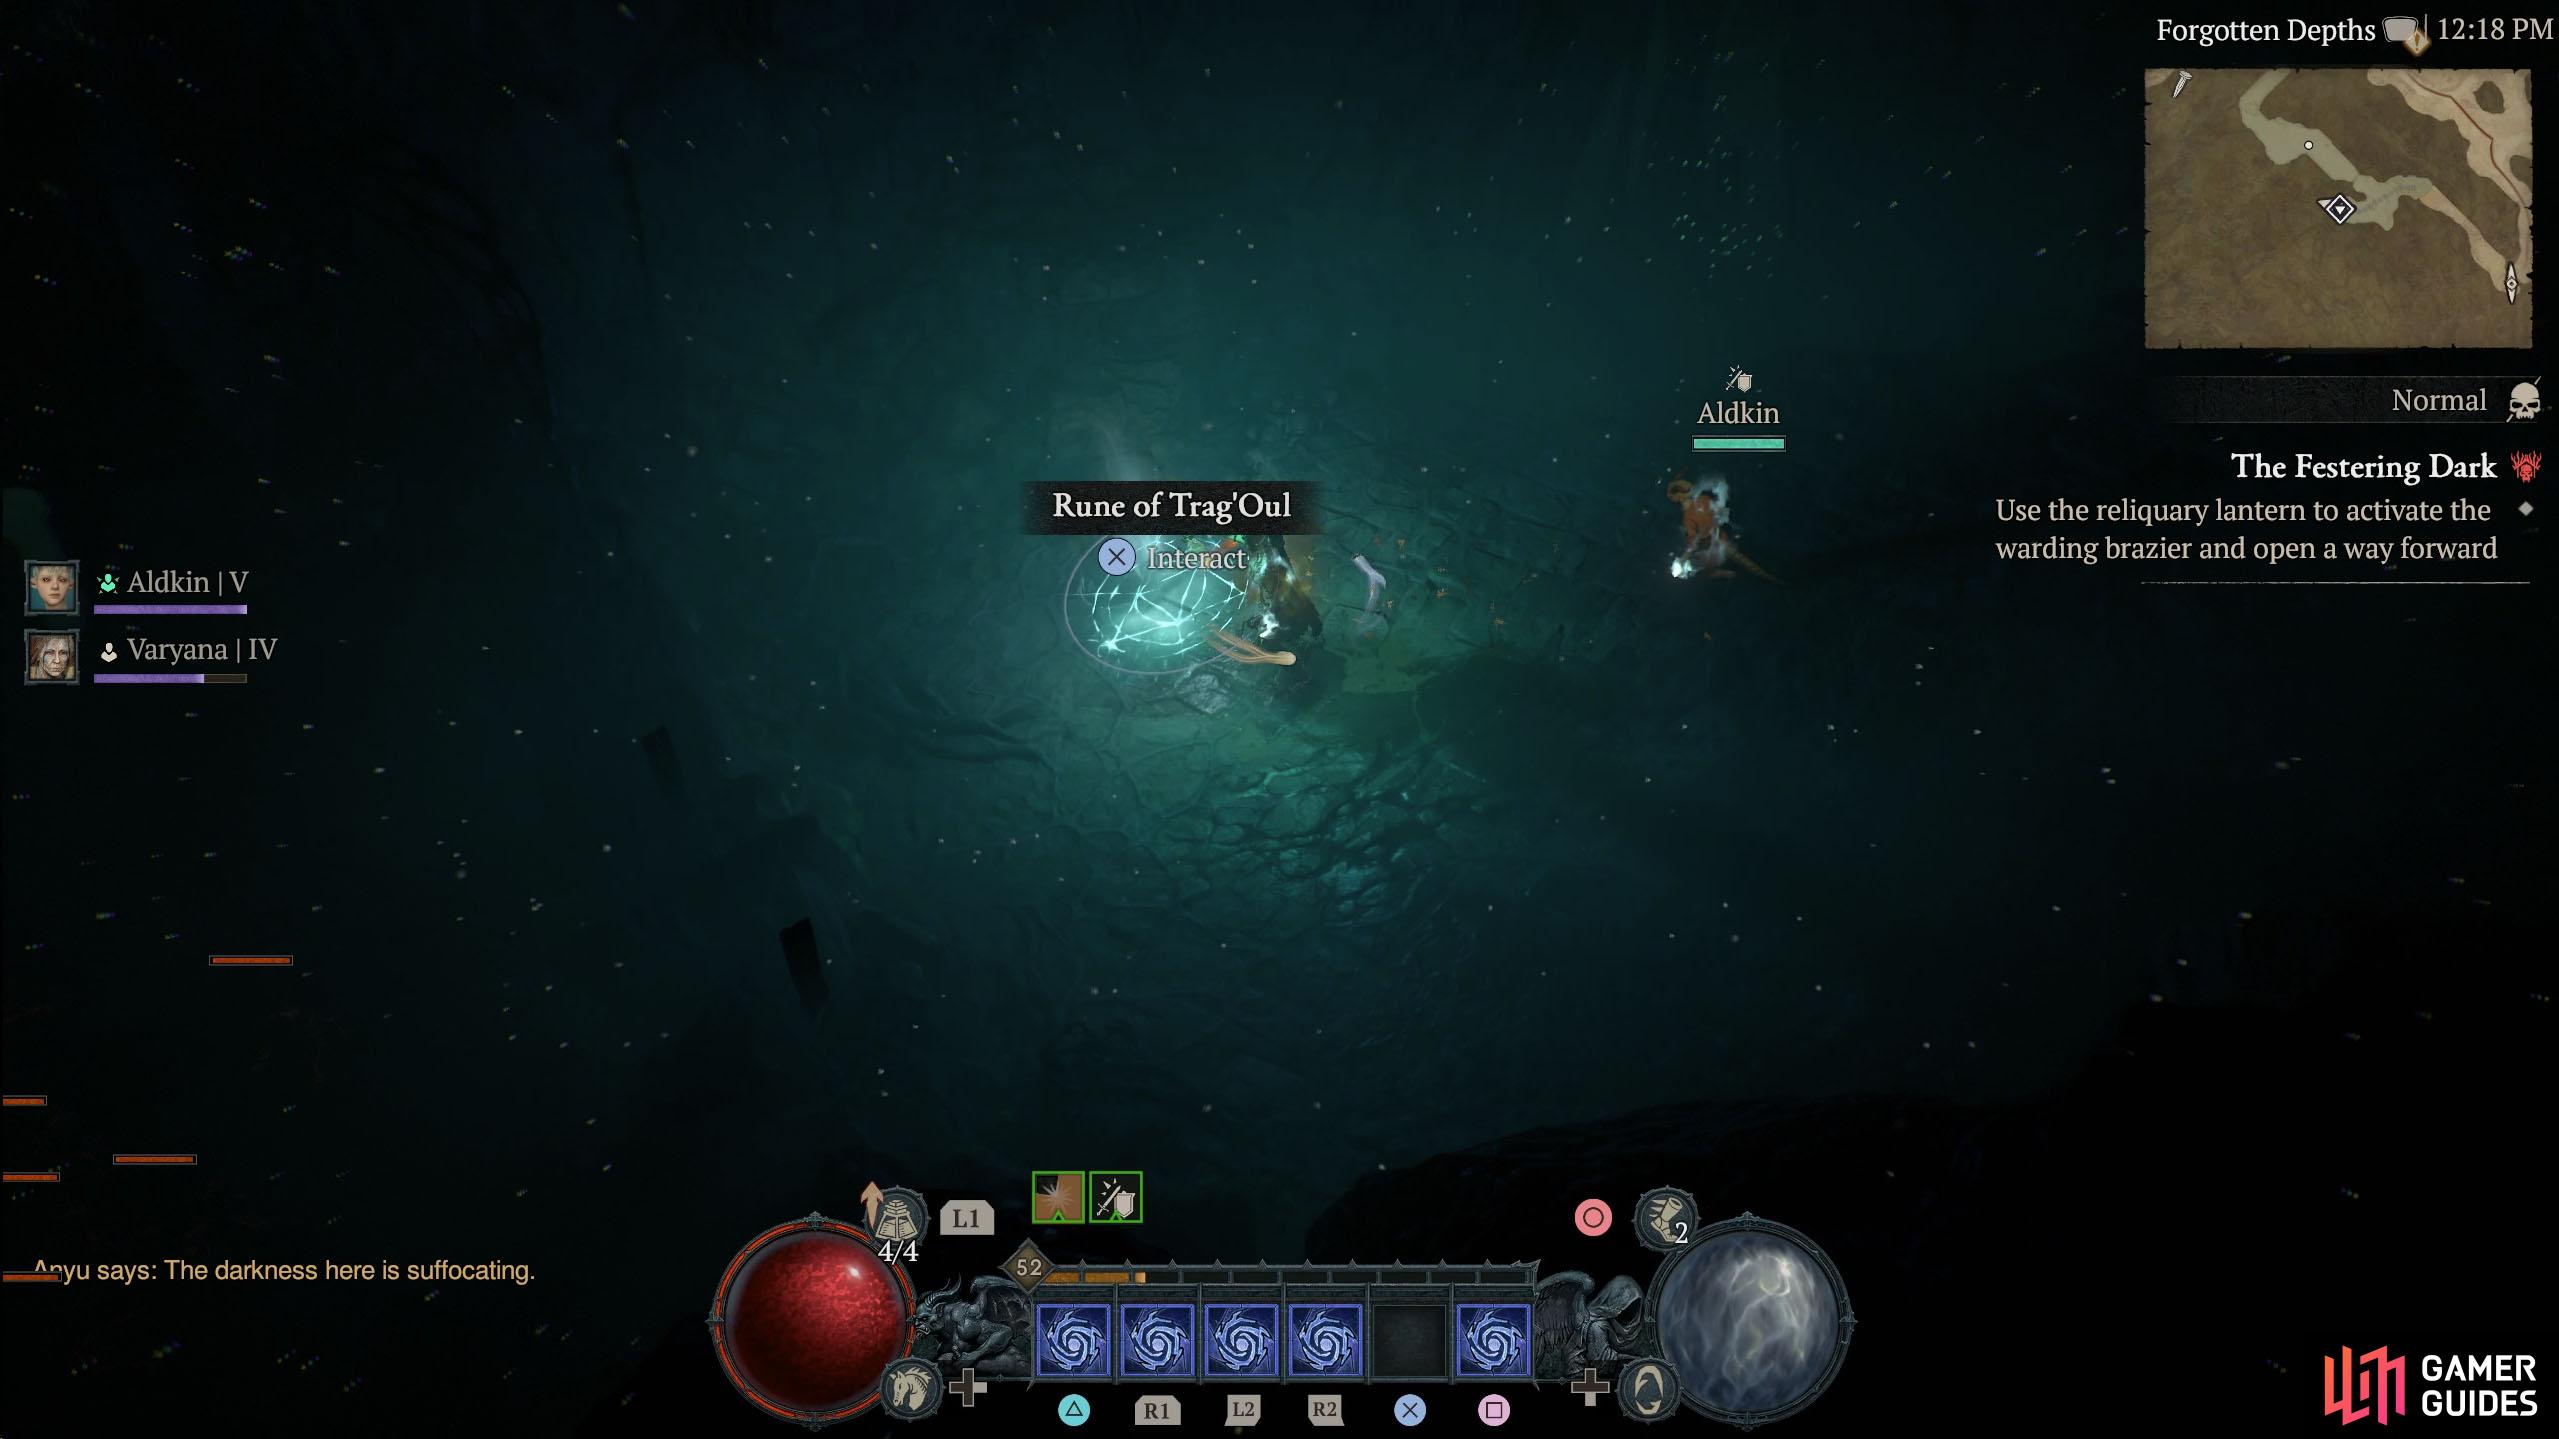
A little west of the Lantern is a Sigil called the Rune of Trag’Oul. These will be scattered throughout the area, and when interacted with, they will summon a Reliquary Lantern, should you misplace it.
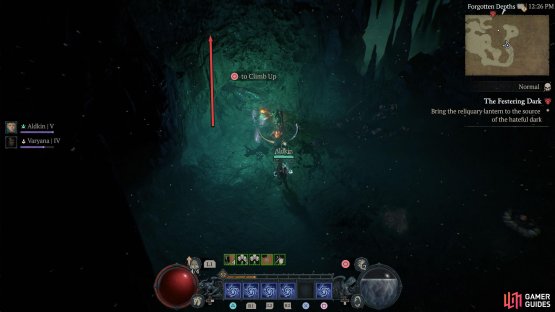
Head back to the Necromancer’s Corpse, and follow the northwestern path, where you’ll destroy your first Festering Wall with the Lantern. Climb up into the next area, continue northwest, and defeat the enemies.
Whenever you attack the enemies with the Lantern out, you’ll emit a pulse of light that will briefly daze them and make them vulnerable, however, you will drop the Lantern on the ground. Here, you’ll find a Warding Brazier.
If you place the Lantern inside it, the Lantern will follow a predetermined path. Follow the Lantern around the corner to the north and enter the Skittering Darkness Cellar.


(1 of 2) Take the path west and then north to find the Skittering Darkness Cellar.
Take the path west and then north to find the Skittering Darkness Cellar. (left), Follow the northwest path to the end to exit it. (right)
Follow the path south and west, defeating the enemies along the way, and you’ll eventually leave the cellar. It doesn’t matter what path you take, as they both lead to the same place. Back in the Forgotten Depths, proceed east to find two Warding Braziers.
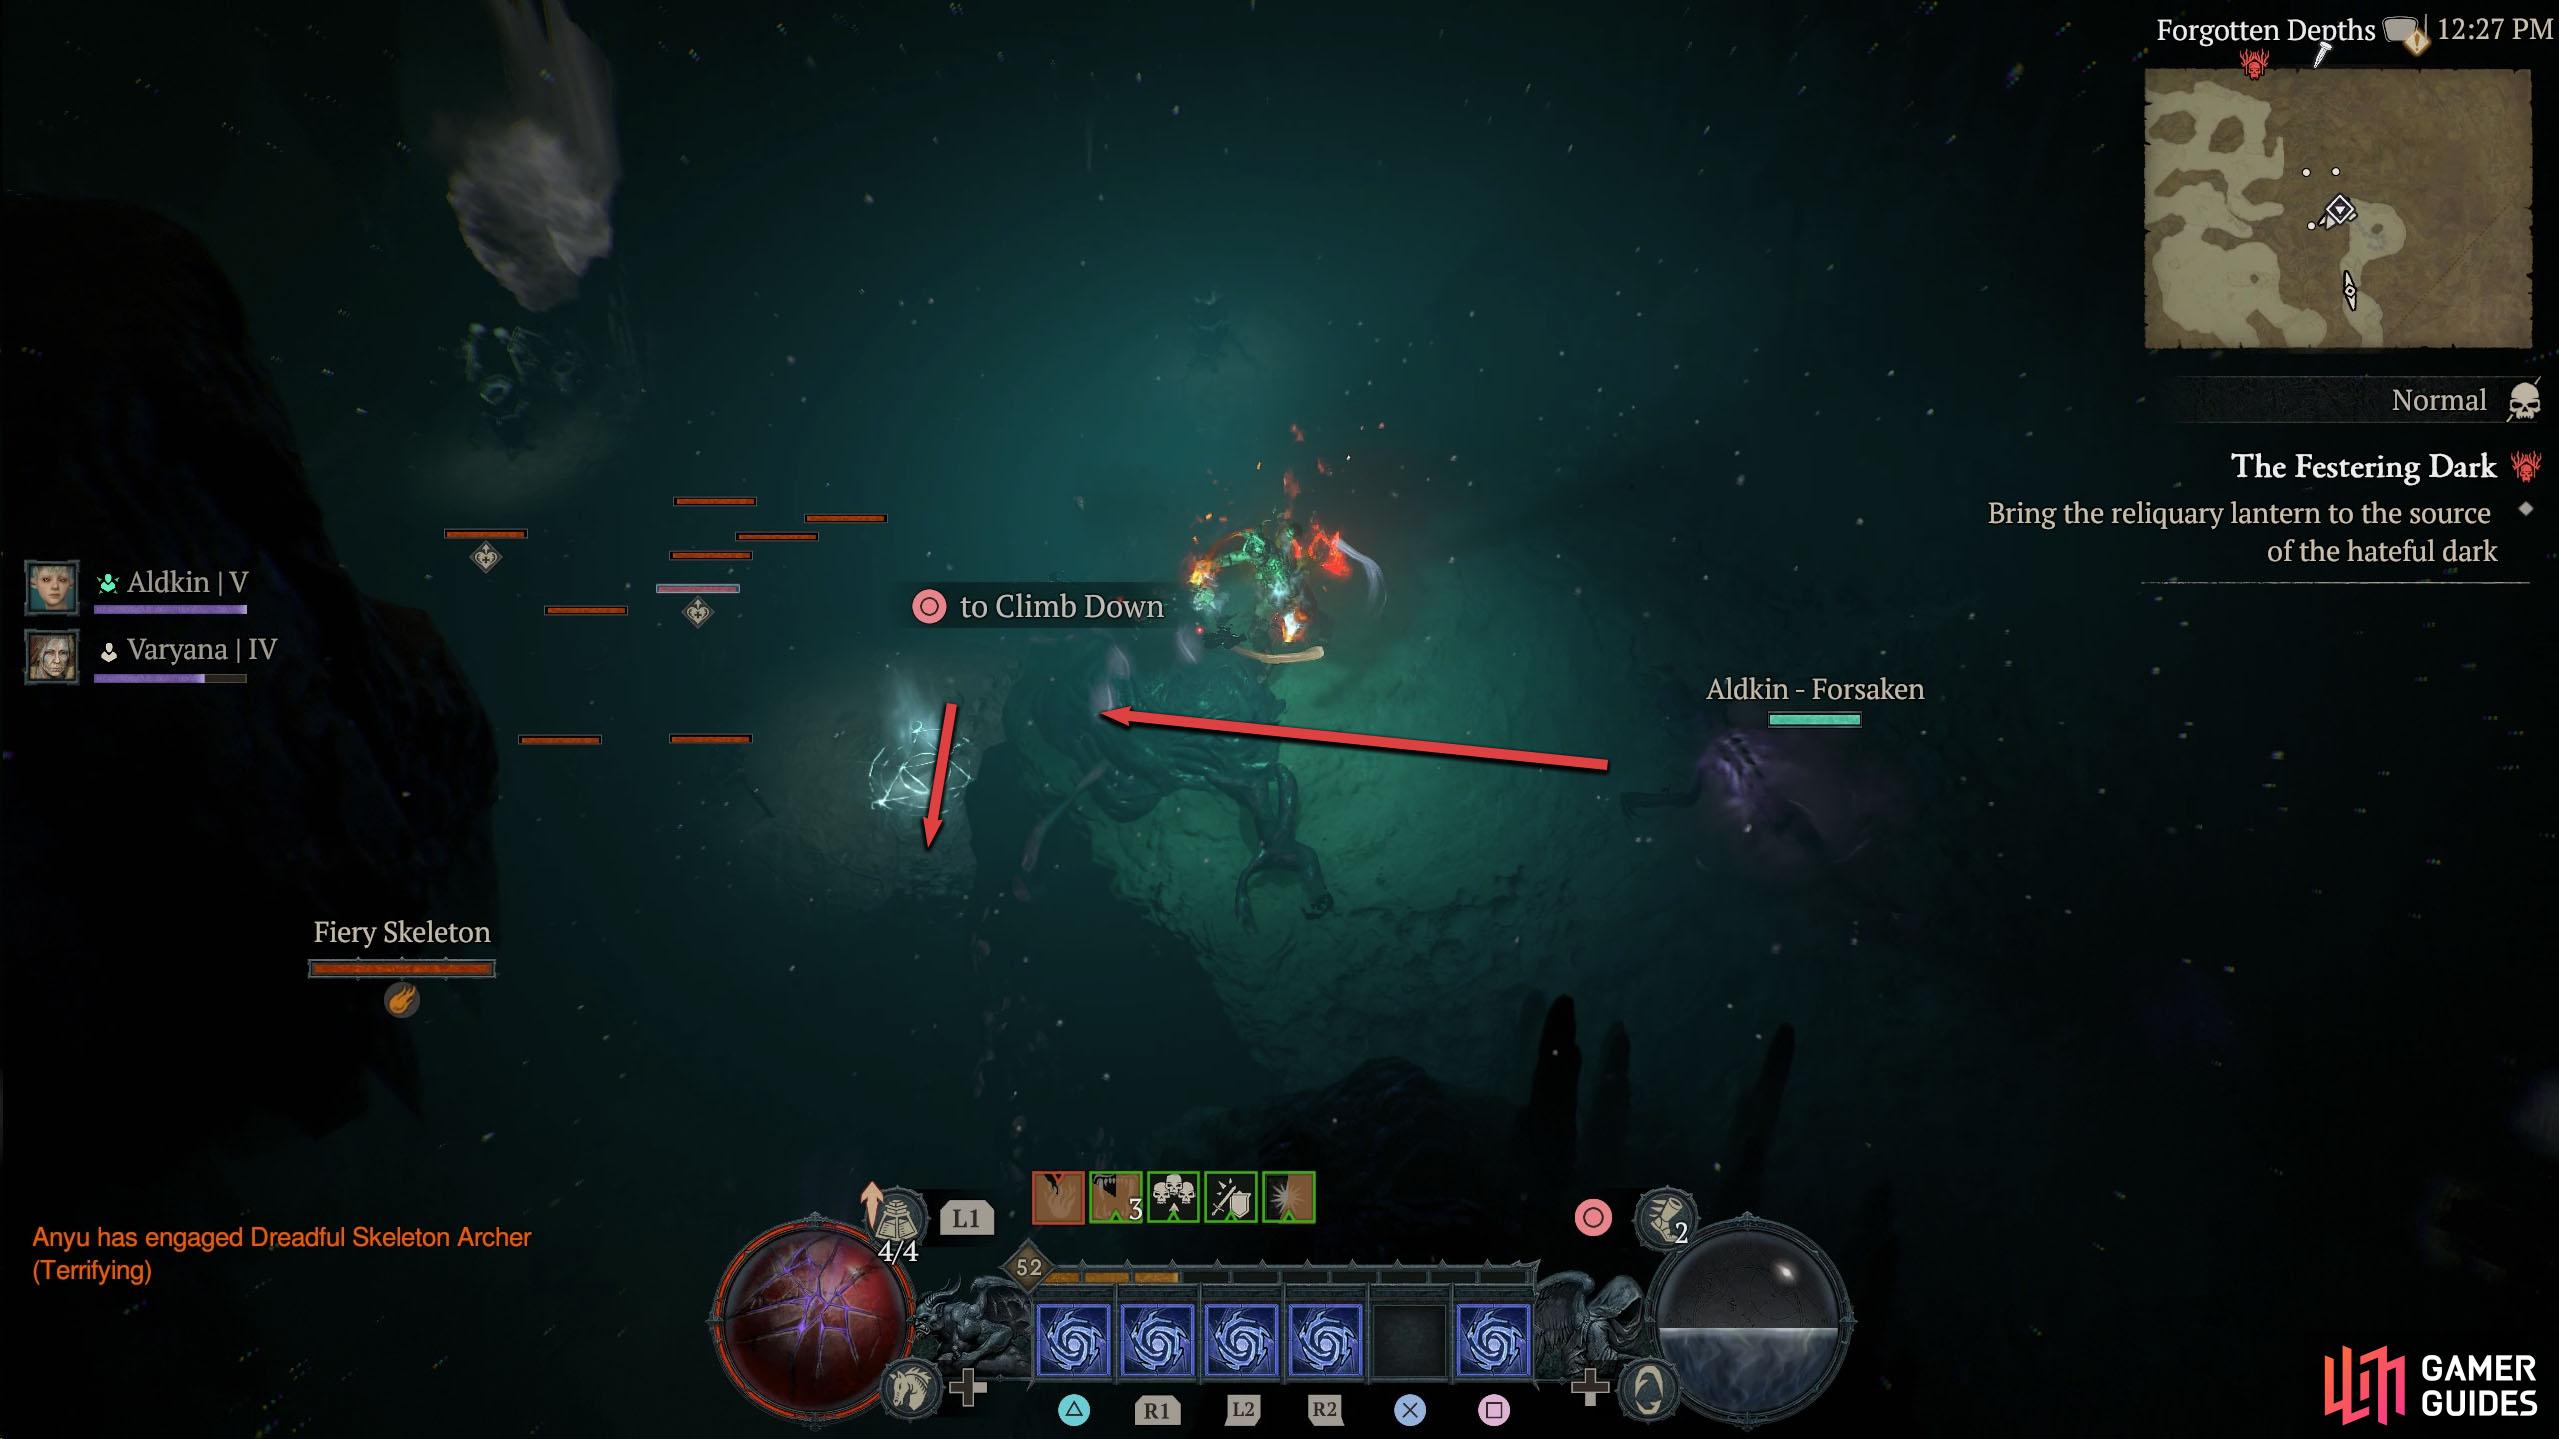
The bottom brazier will travel along the southern path, while the top brazier will travel to the north. Place the Lantern in the southern brazier and follow it east, where you’ll find another brazier. Placing the Lantern here will make it travel south and unveil a new area on the map.
Continue following the brazier and eventually, it’ll head up the eastern path, destroying the Festering Wall and blocking your progress. Past the wall, you’ll encounter a few elite enemies, defeat them, and take the Lantern north.
Just before the Festering Wall, there’s a chest to your right. Continue north and use the climb-up interaction to reach the area above, and defeat the next wave of enemies. After defeating the enemies, head west to disintegrate the Festering Wall, and climb down.


(1 of 2) Use the Lantern to destroy the Festering Wall and climb up.
Use the Lantern to destroy the Festering Wall and climb up. (left), Head west and destroy the next wall and climb down. (right)
To the west is a Warding Brazier which will destroy a Festering Wall, creating a shortcut if you need one, as well as leading to an Elite enemy. If you want to progress, go northeast, place the Lantern in the Warding Brazier there, and follow it east.
When it stops, go south to another Warding Brazier and place the Lantern in it. This will take you southeast and then north.
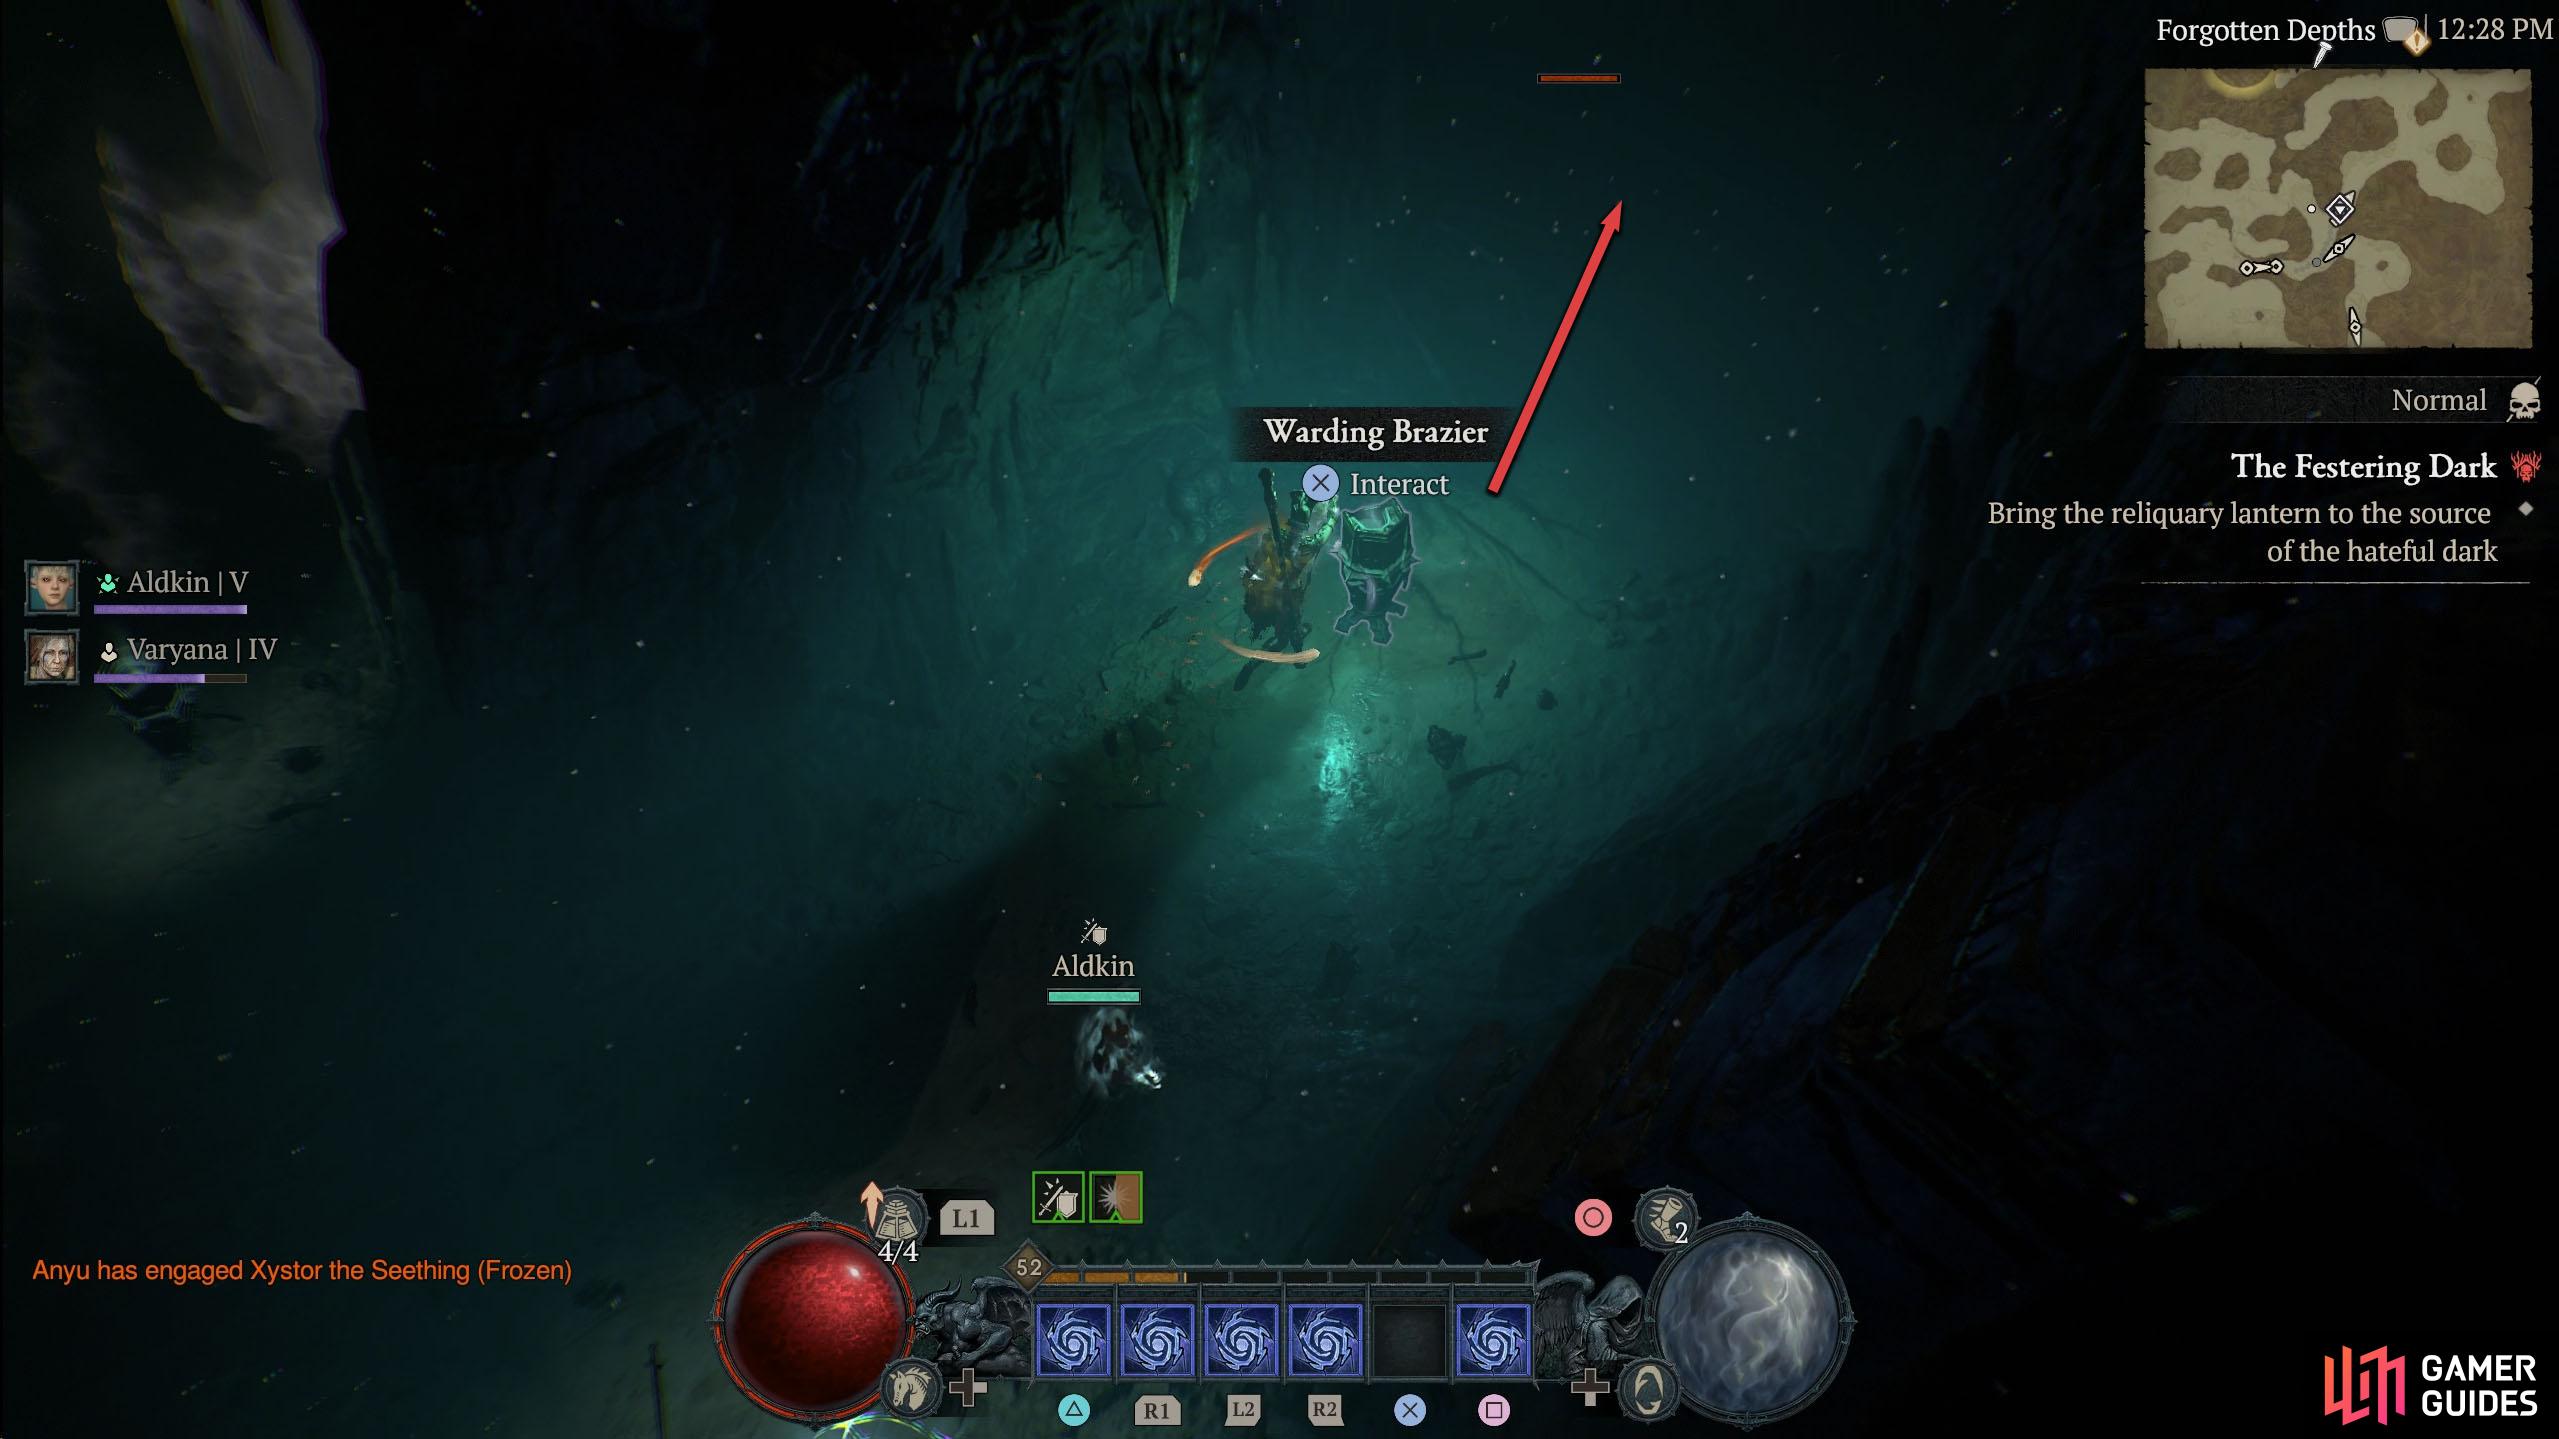
Place the Lantern on the Warding Brazier and follow it northeast.
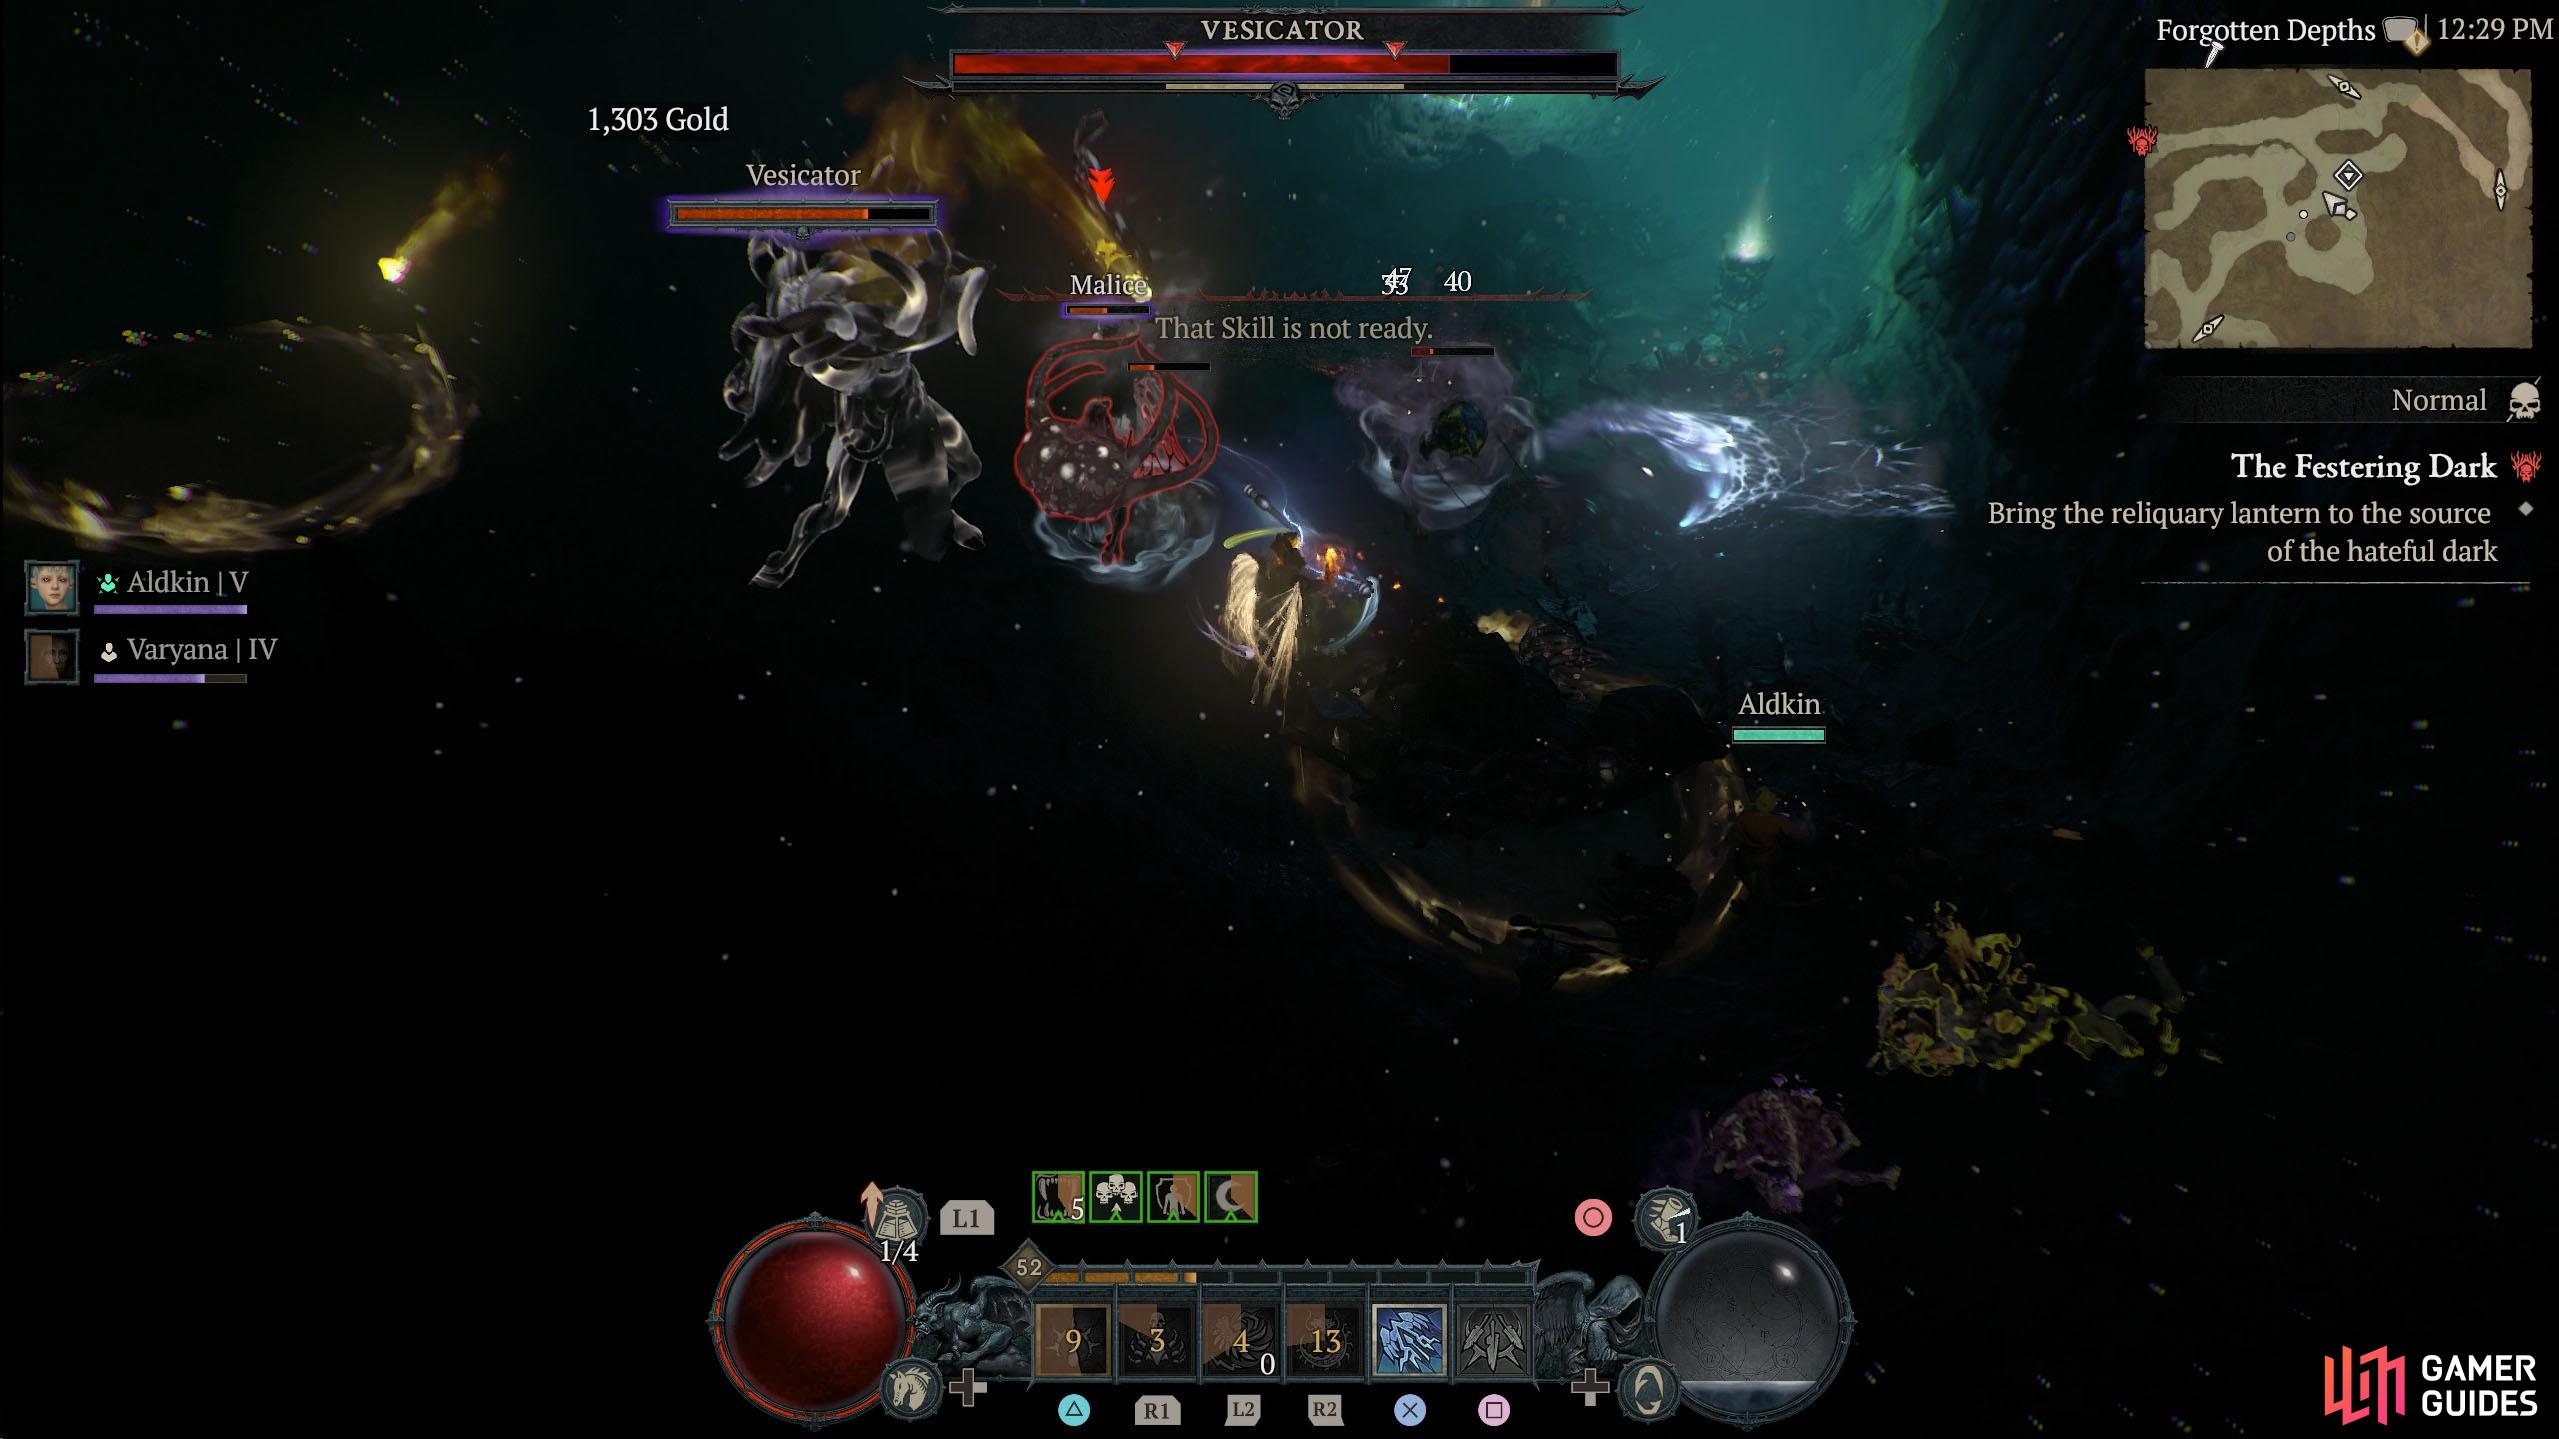
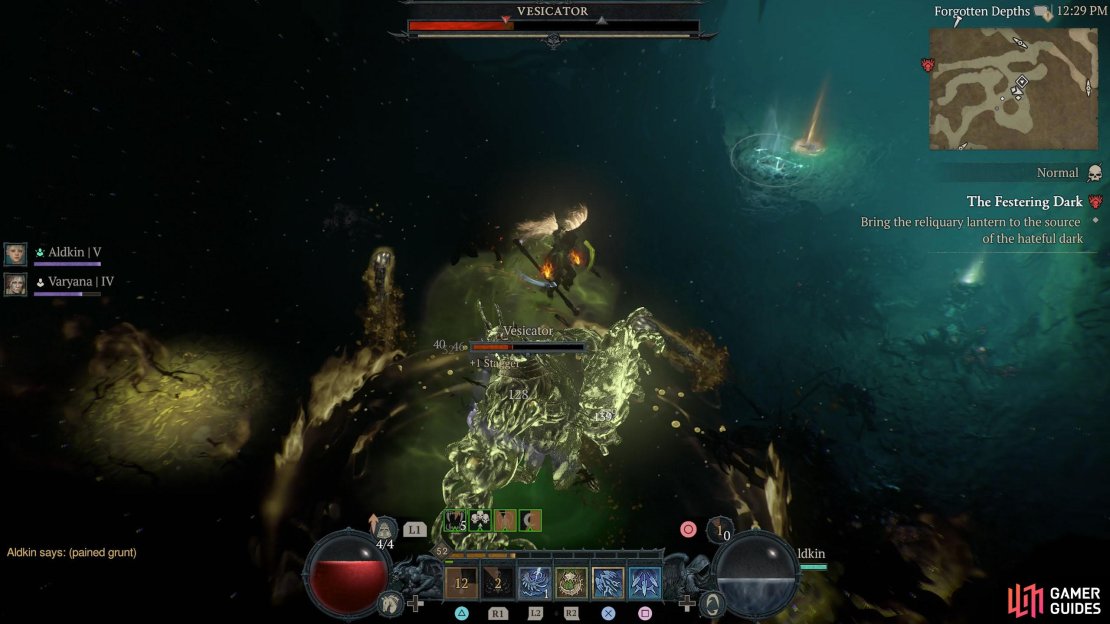
Vesicator Boss
As you begin going north, you’ll get a boss fight against the Vesicator. It isn’t too difficult, but watch out for the trails of poison it leaves behind when it slams its arm into the ground.
If you begin to see your health plummet, you’re most likely standing in it. Simply, reposition and continue attacking the boss. At times, the boss will unleash a Poison Wave attack in a cone area in front of it. Fortunately, you have more than enough time to get out of it.
Finally, the boss will occasionally have a yellow/green circle around it, which will explode Poison, so make sure you’re not in it when it goes off.

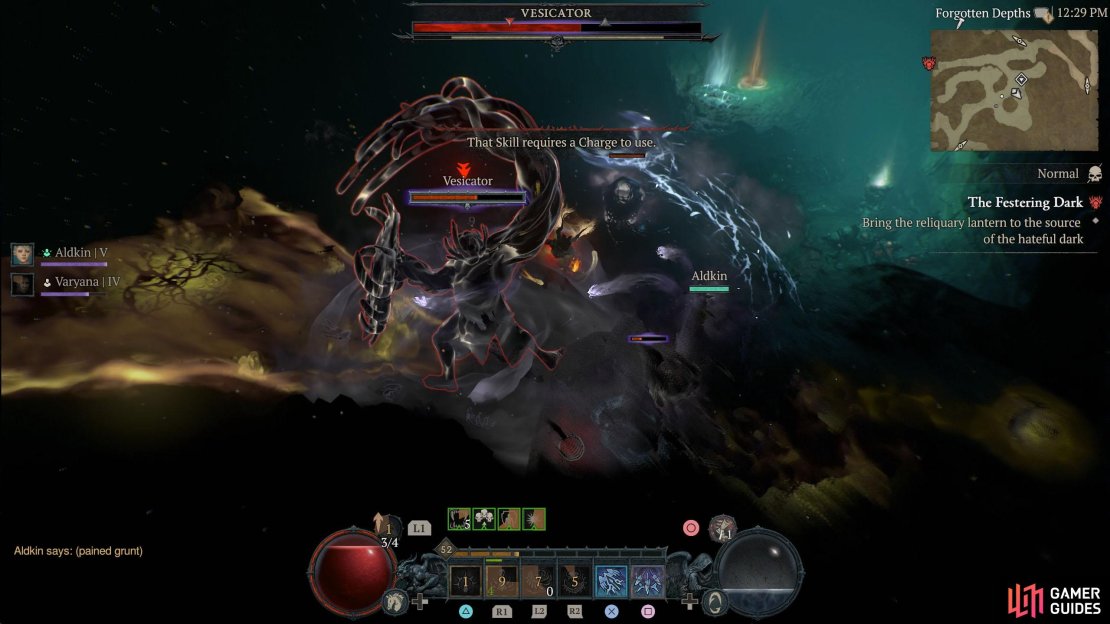
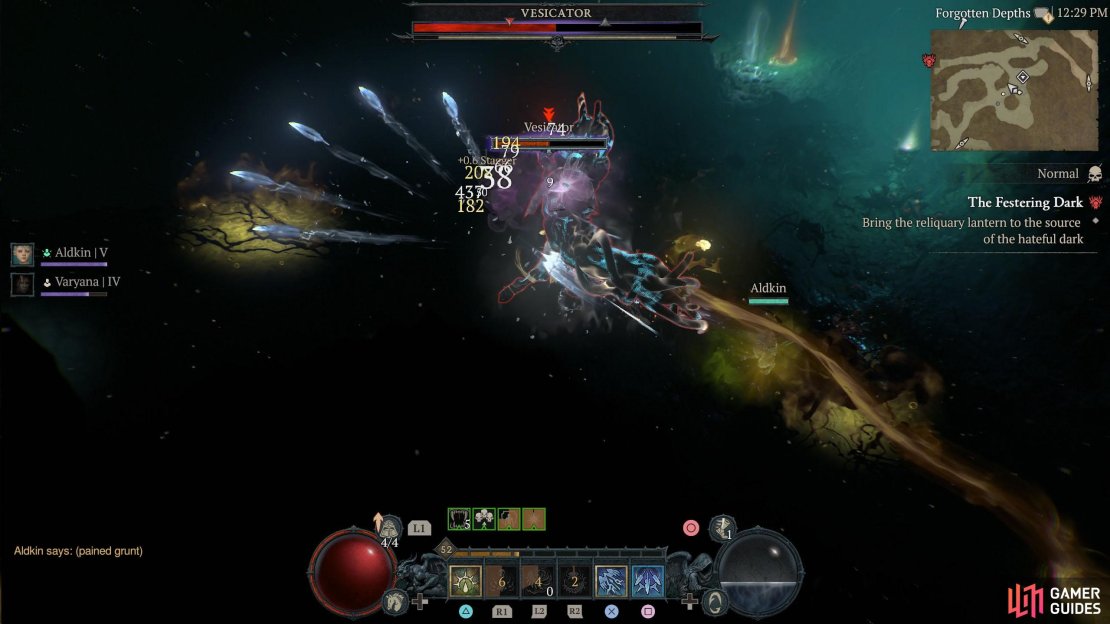
(1 of 4) Vessicator has a few deadly attacks, especially if you don’t move out of them.
Once you’ve defeated Vesicator, proceed north, and take the next path north at the intersection before going west. Eventually, you’ll reach a new area called “Gates of Necropolis”. Head to the center of the room and prepare yourself for a boss fight against Maleficium.
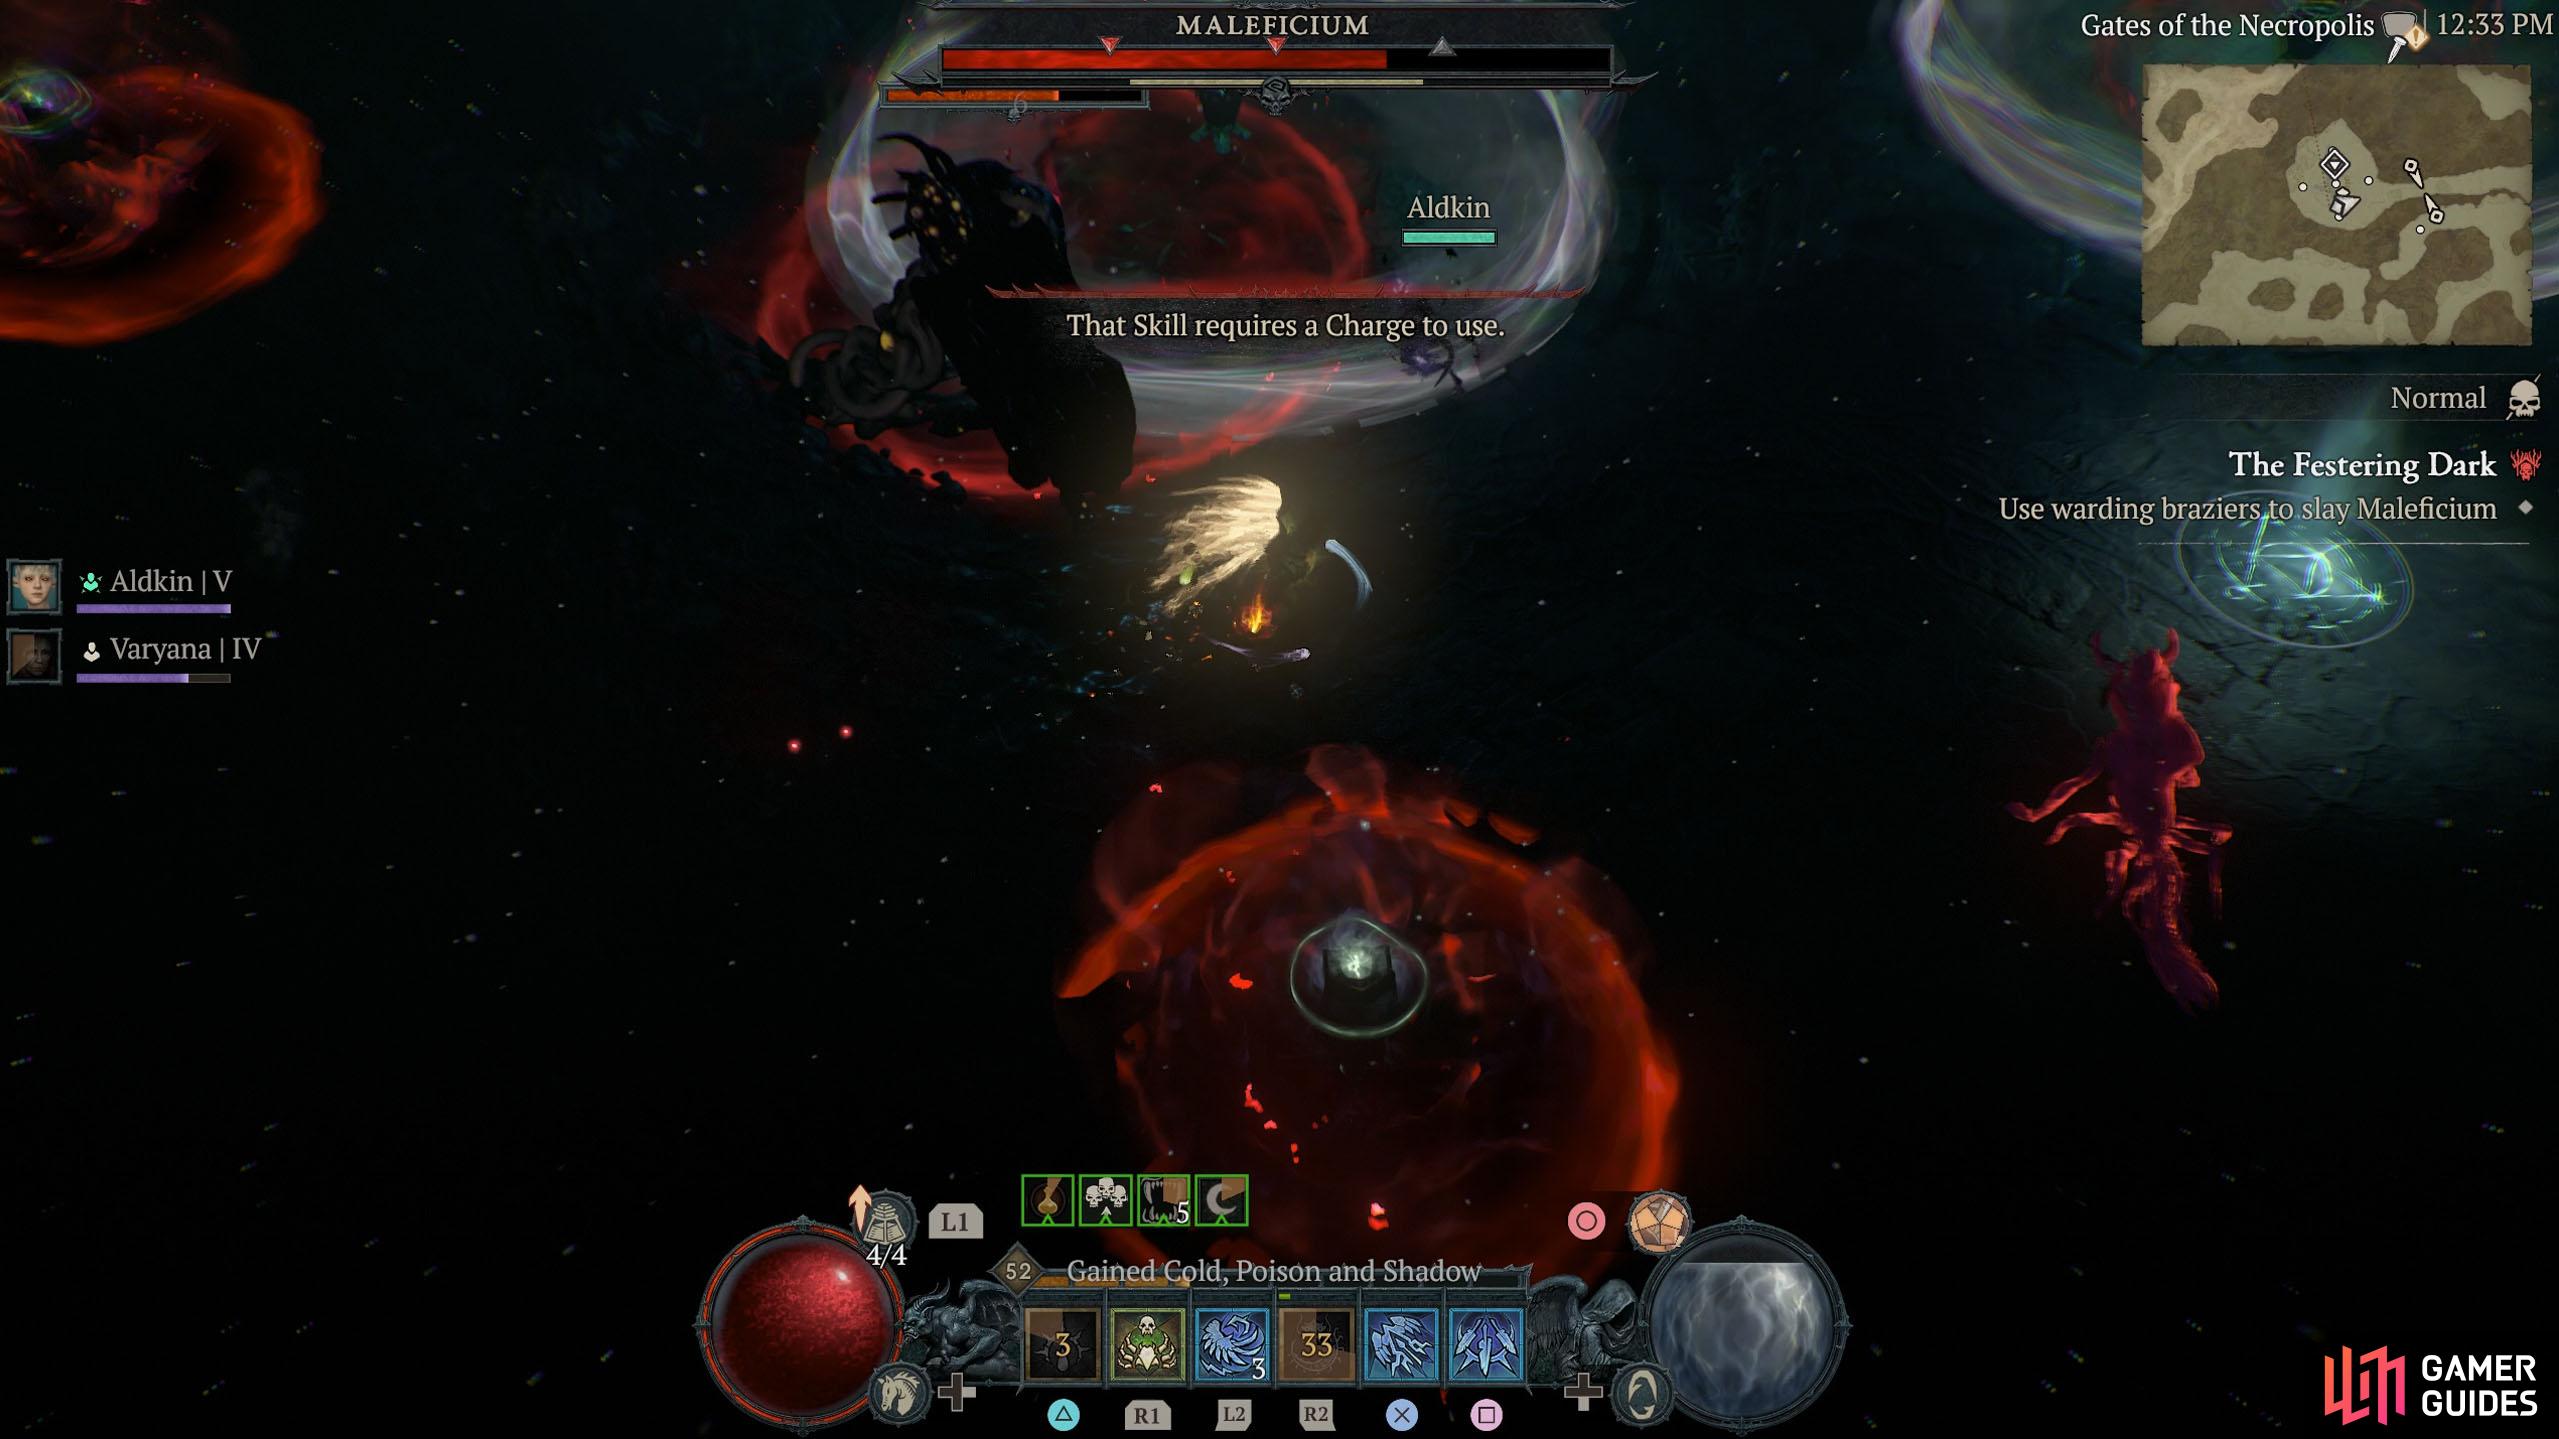
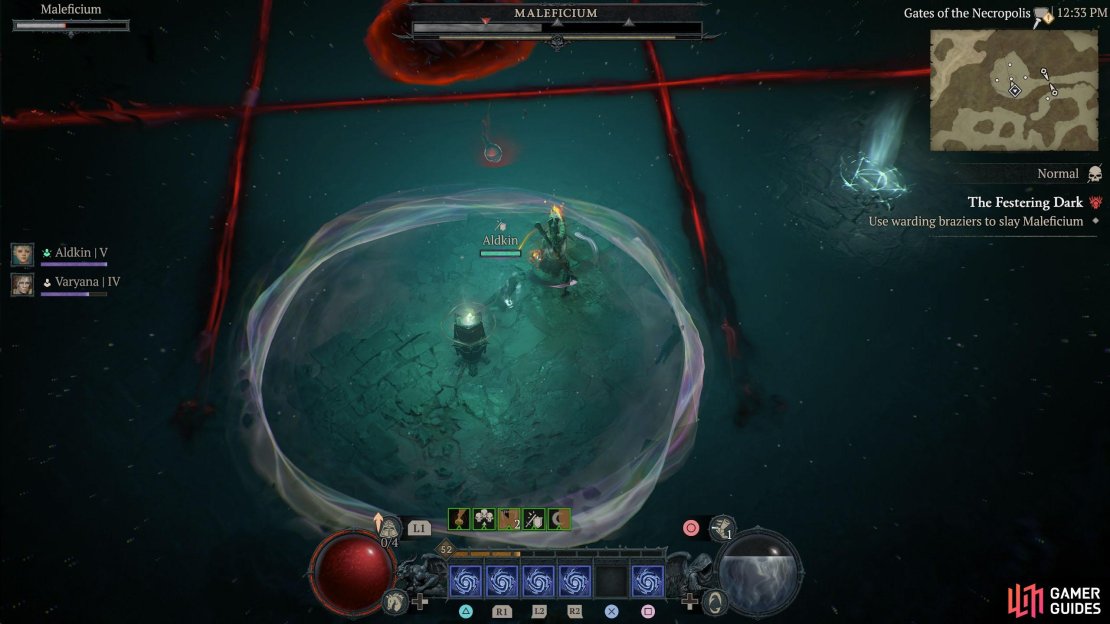
Maleficium Boss Guide
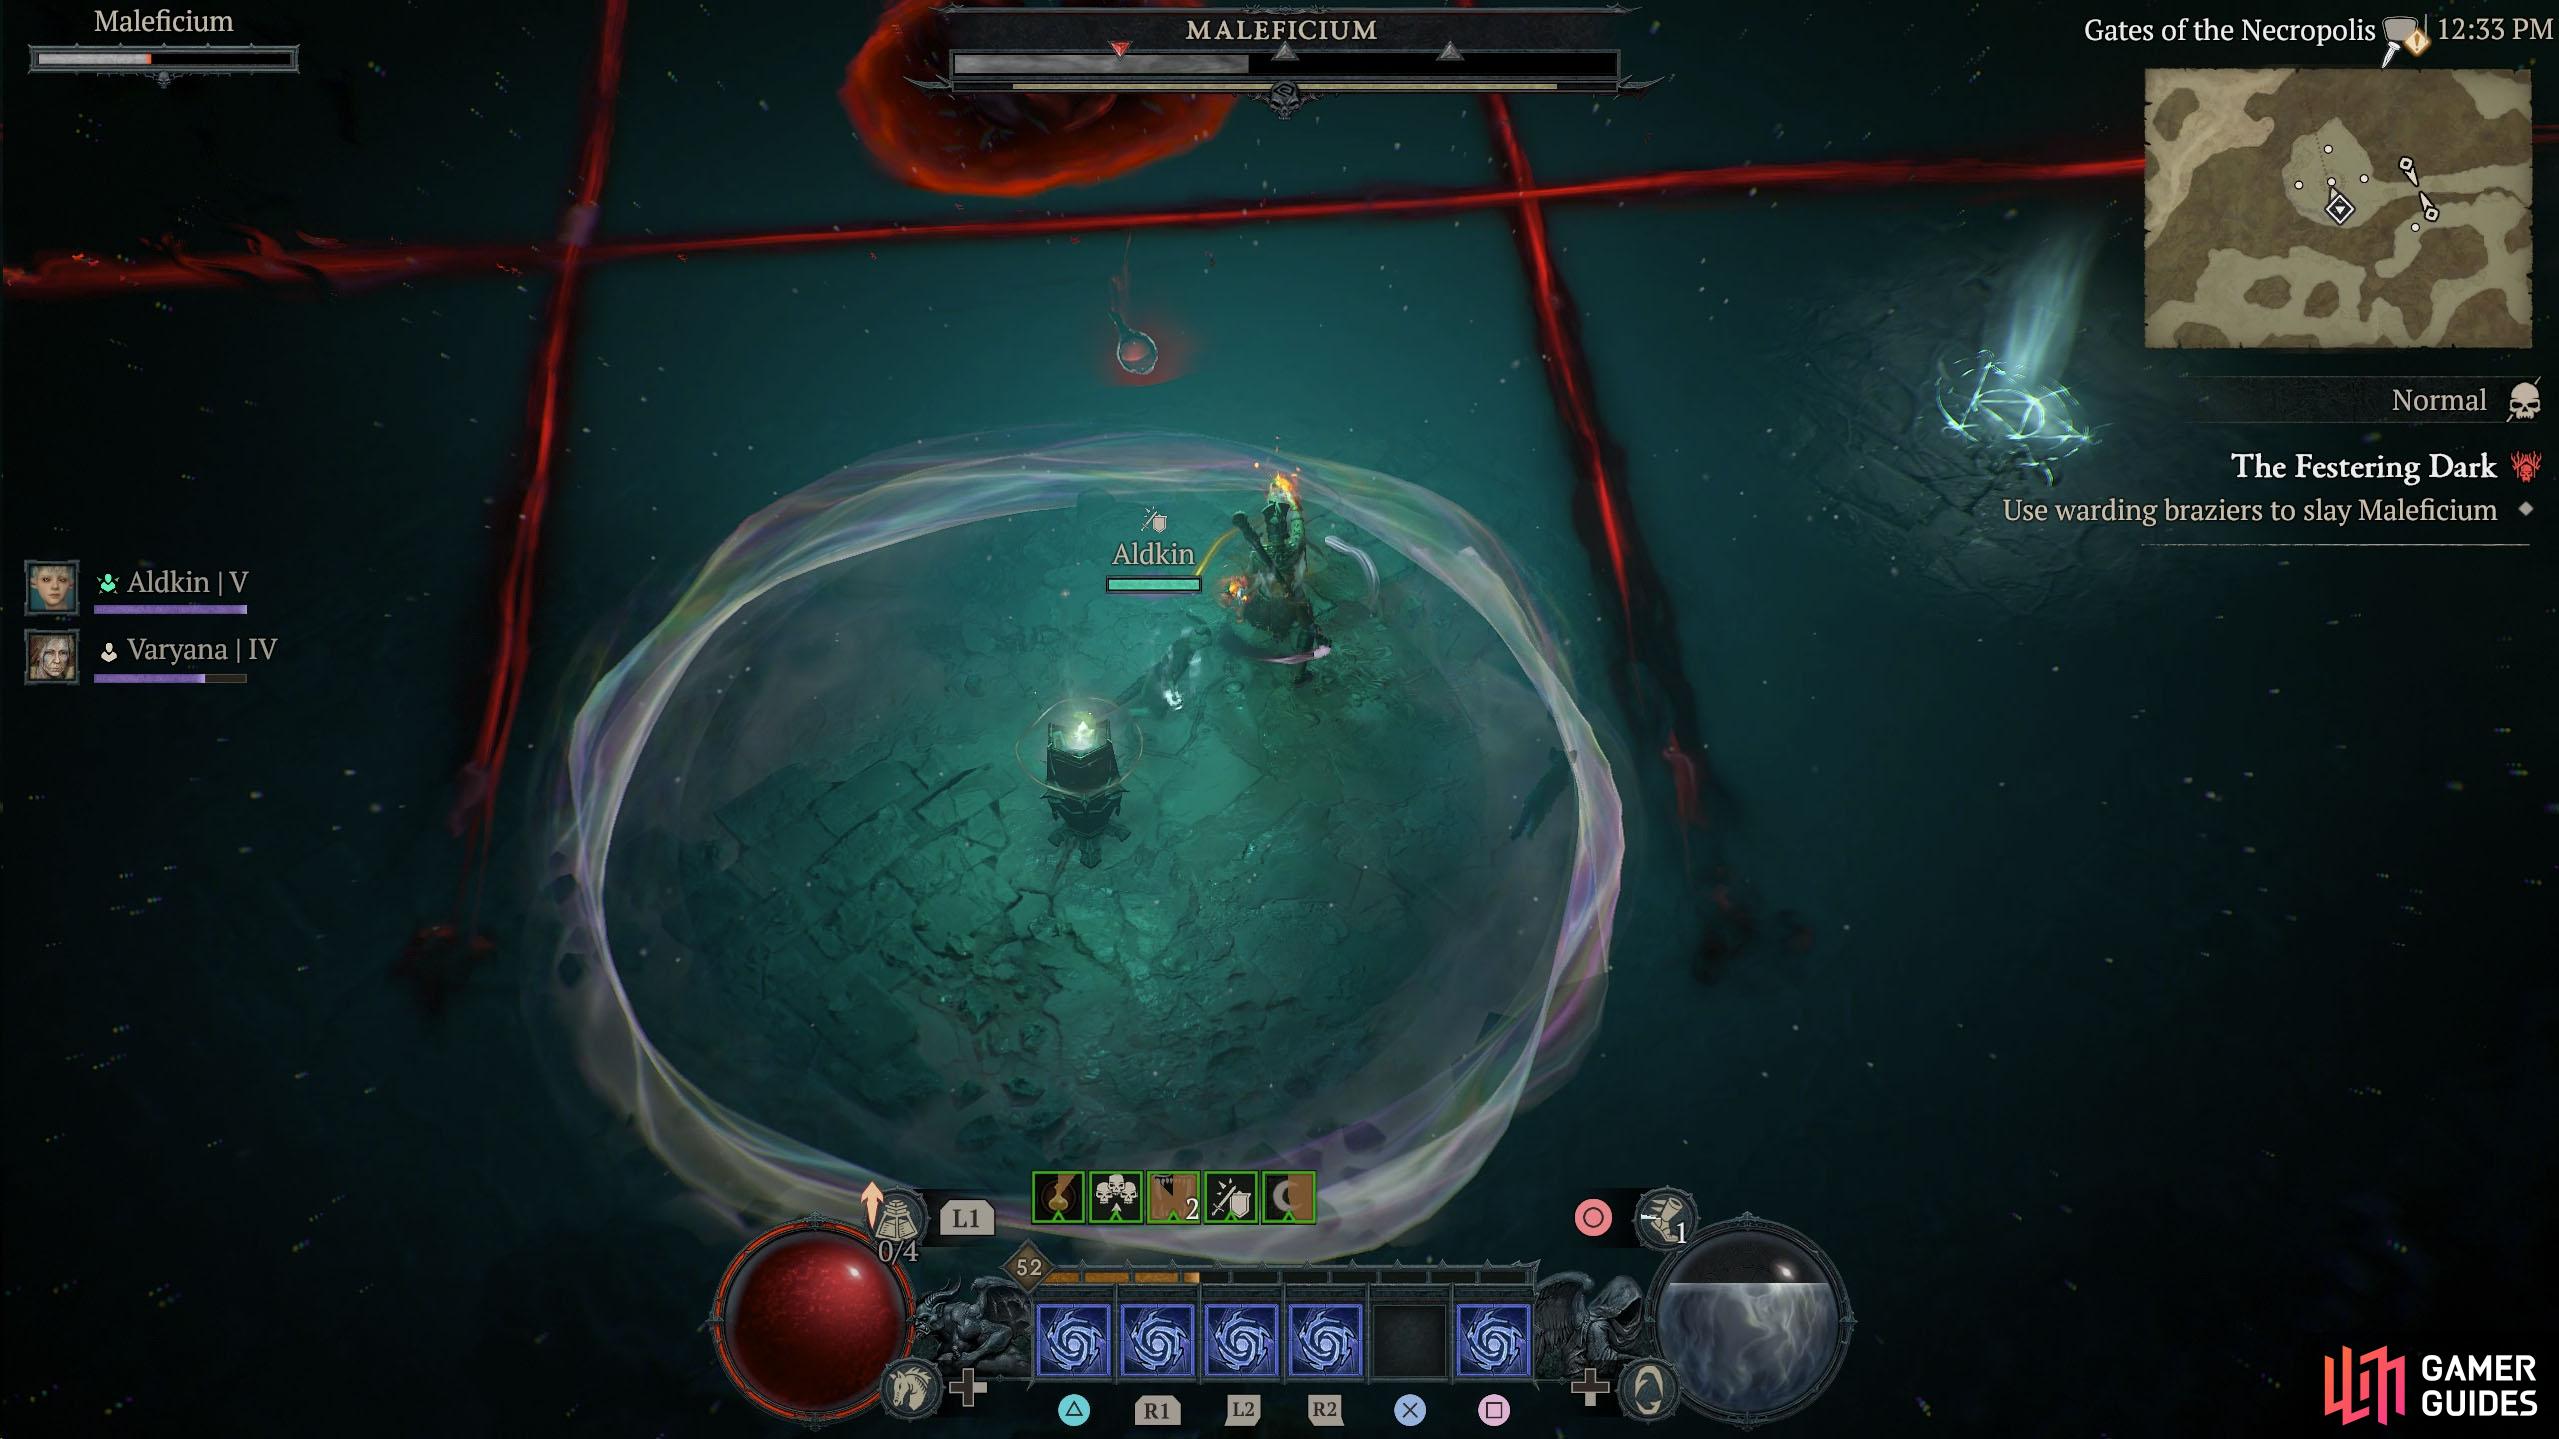
The boss fight begins by placing the Lantern on the Warding Brazier. The main mechanic of this fight is that Maleficium is only damageable in one of the circles emitted from the Warding Braziers.
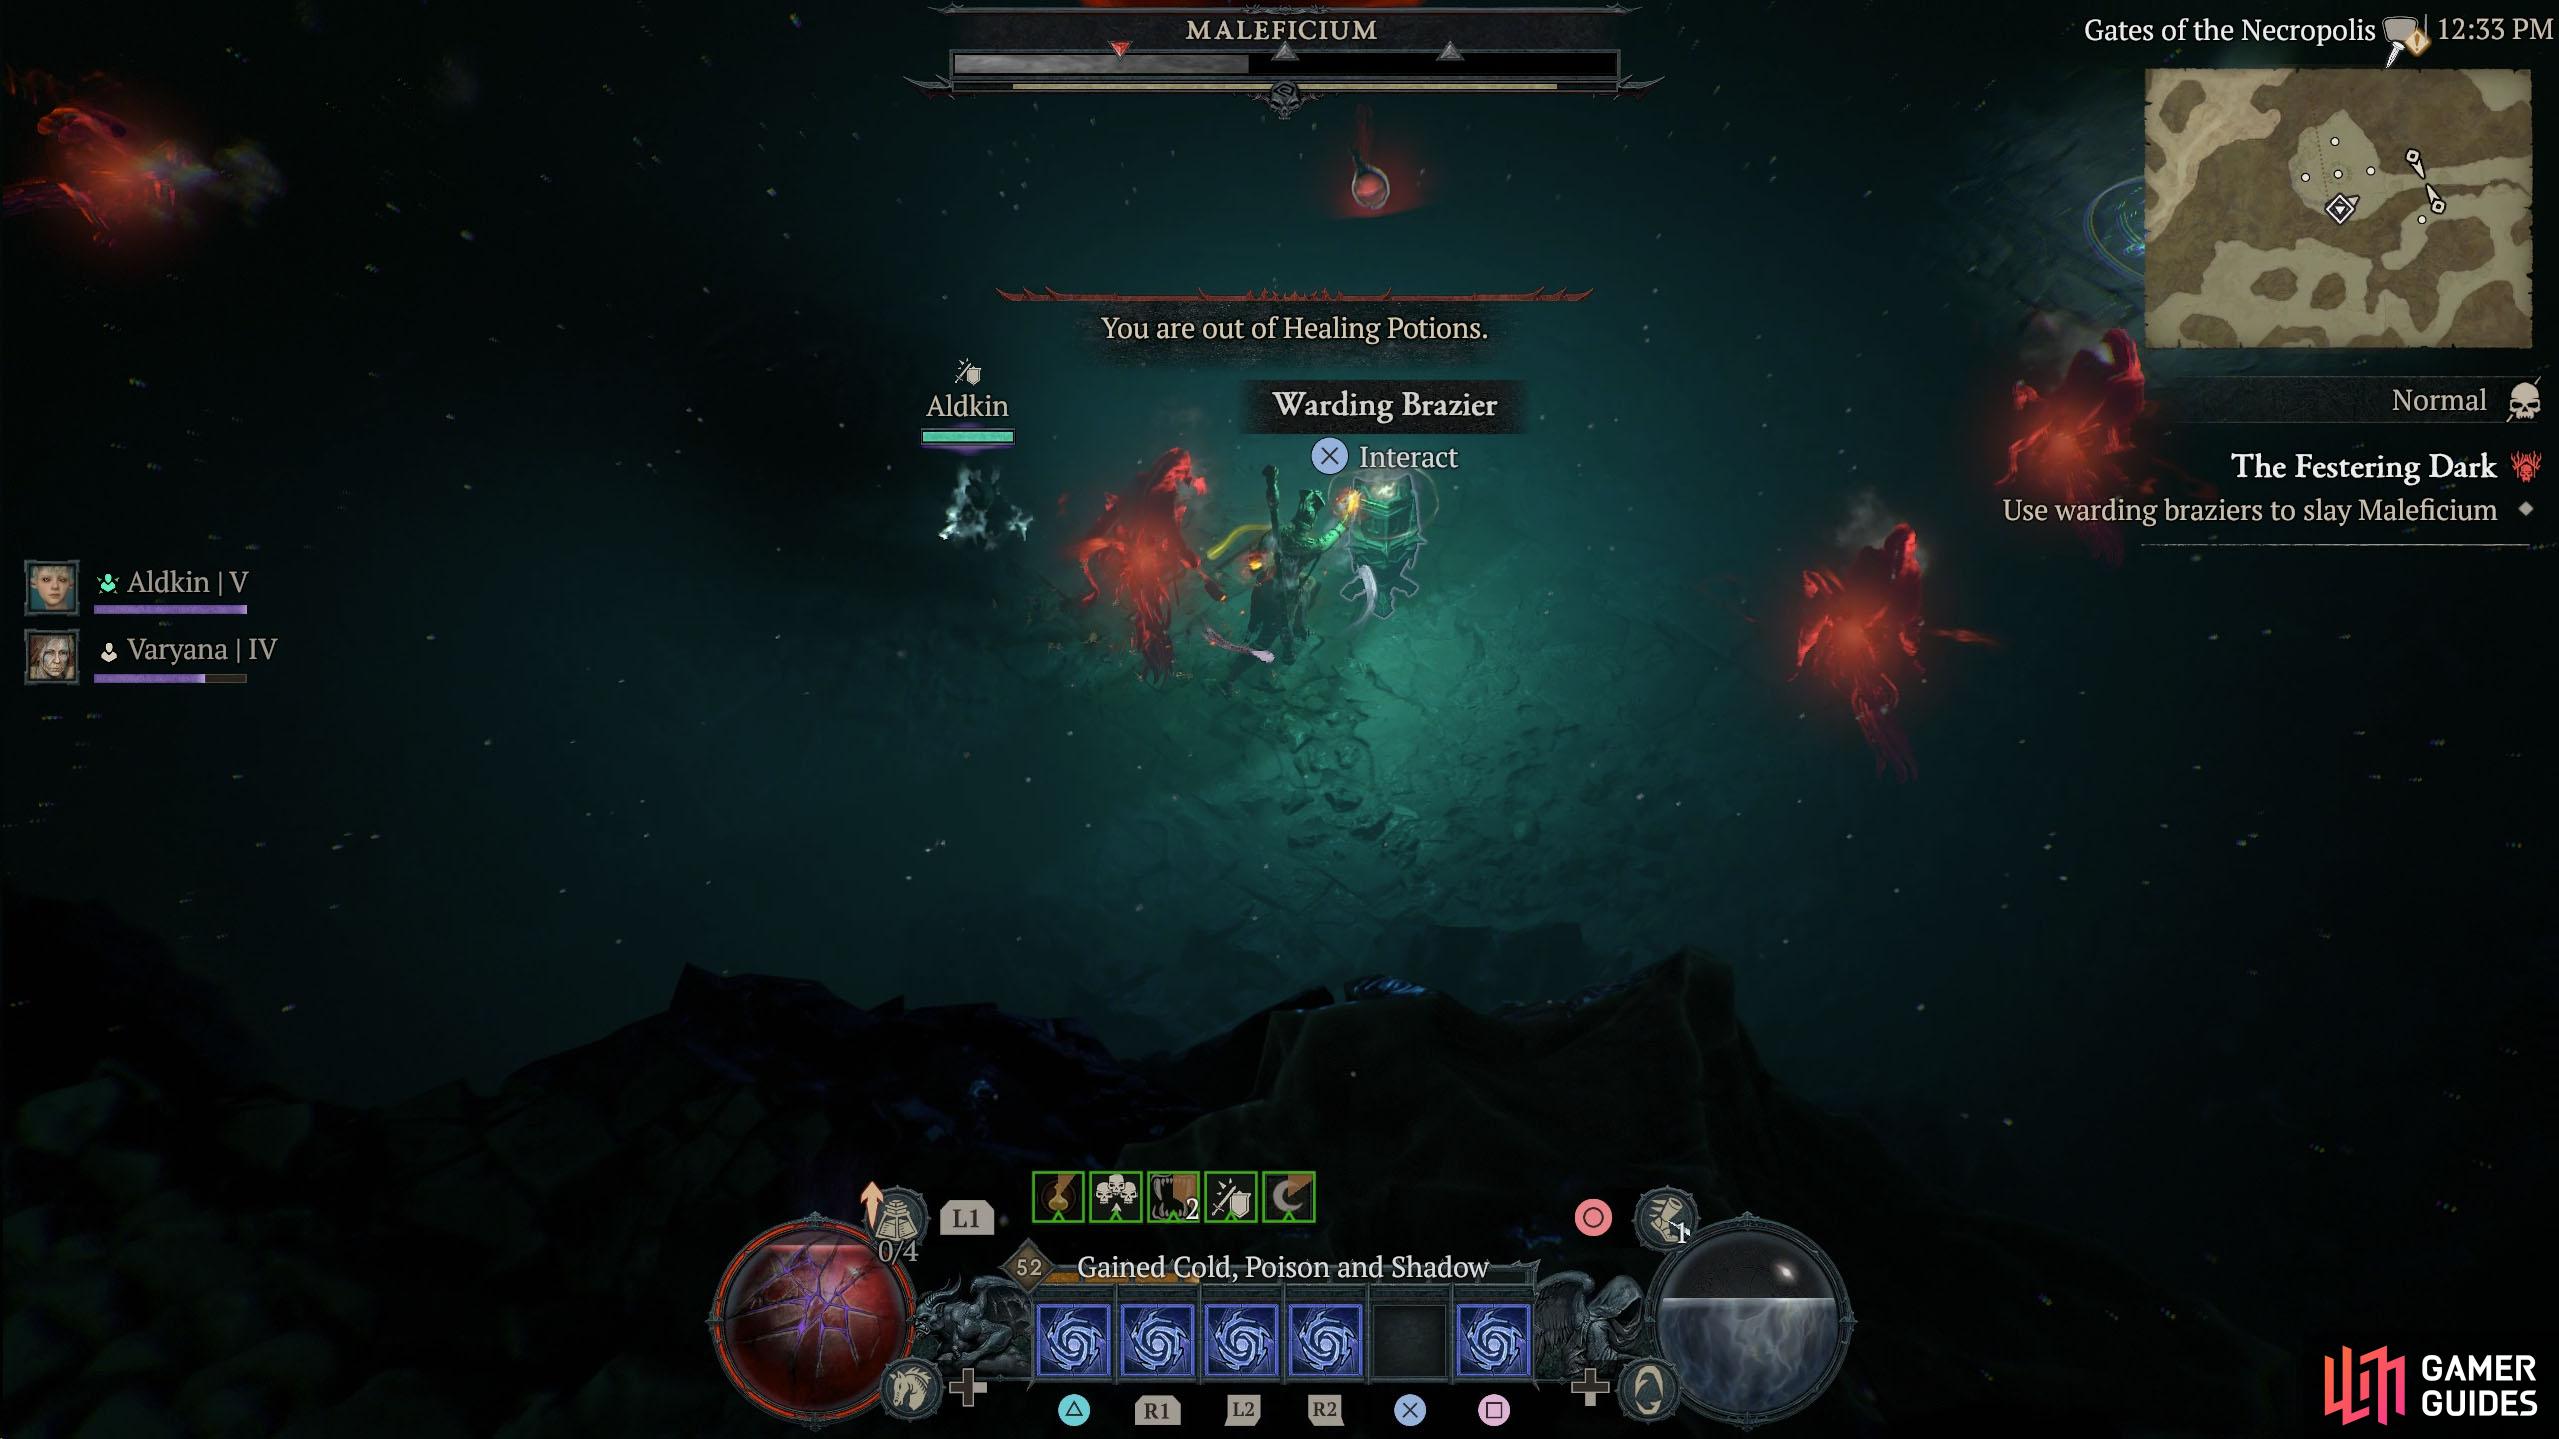
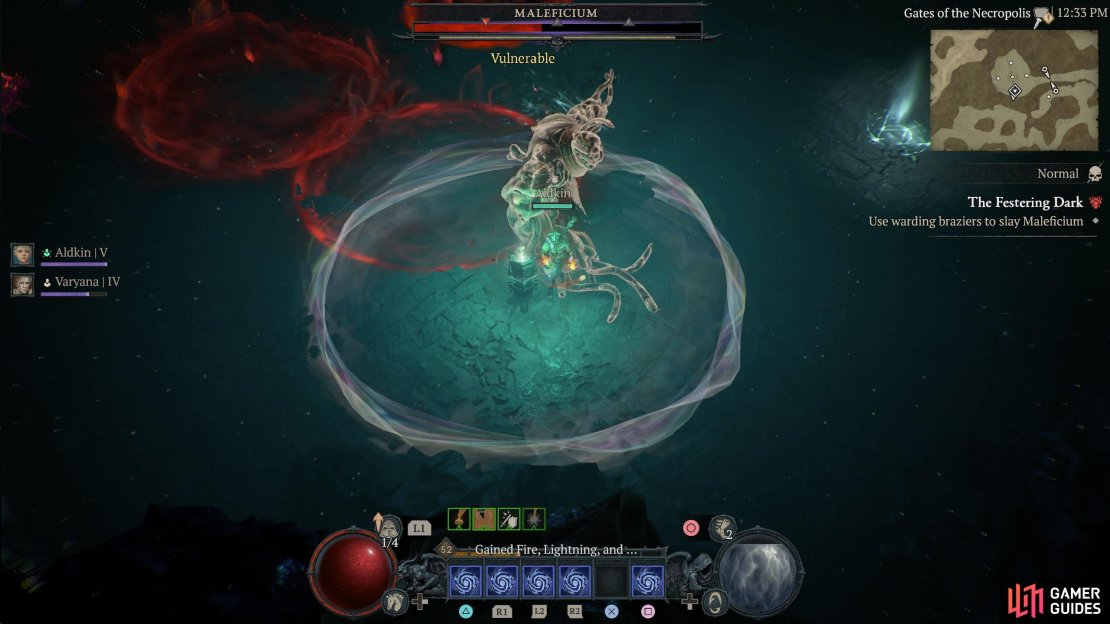
At half health, the boss will distinguish the braziers, and you’ll need to grab the Lantern and light one up again. The braziers will have red circles around them and will damage you while you stand inside them.


(1 of 2) Throughout the battle, Maleficium will distinguish the Warding Braziers.
Throughout the battle, Maleficium will distinguish the Warding Braziers. (left), Avoid its attacks until you can light the brazier up again. (right)
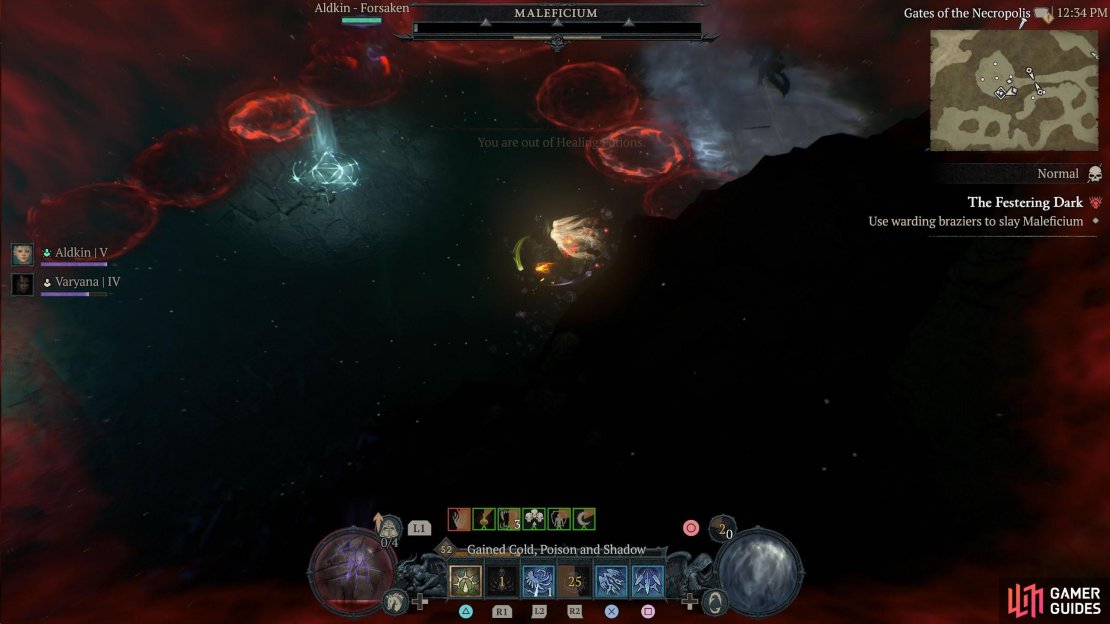
When you’re not in a Warding Circle is when Maleficium becomes difficult. It’ll be invulnerable to damage and also be difficult to see. It does more damage and can summon clones of itself who trigger a room-wide grid-like attack with red lines that’ll deal significant damage if you’re standing on one or charge at you and slam its arm at your location.
Finally, it can summon a large red circle, which sends out shockwaves of smaller red circles in a cross-like shape from the center of the large circle before repeating a second time in the other direction.
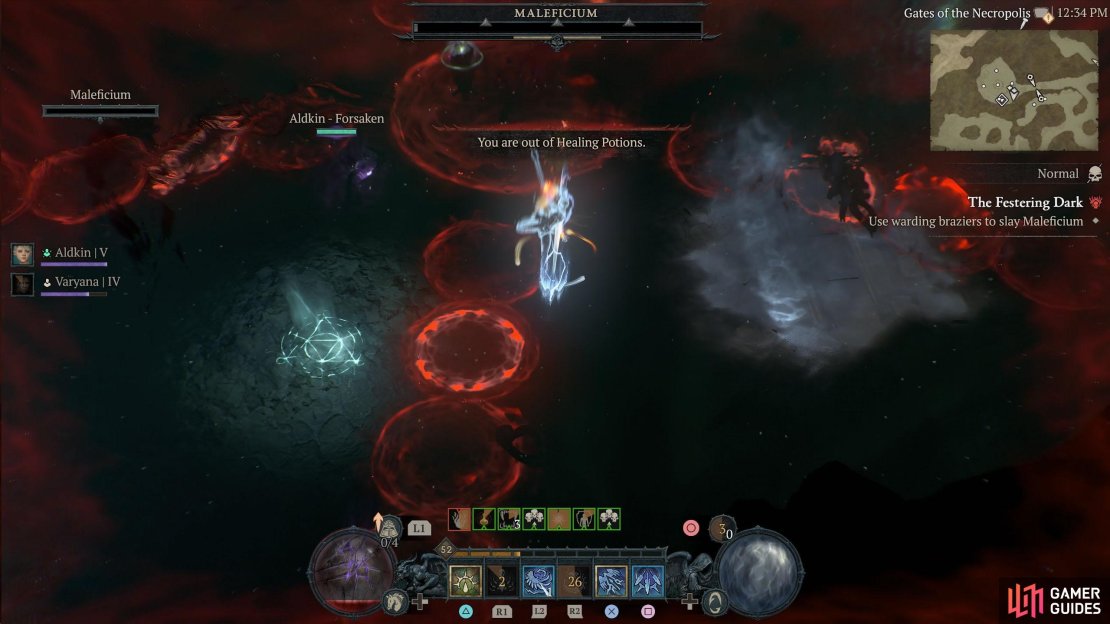
(1 of 4) When Maleficium gets its clones out, they’ll either use the Grid attack.
In short, stay in the light/warding brazier until the boss distinguishes them, grab the Lantern and run around avoiding the mechanics until the braziers don’t have a red barrier around them, and then light the brazier up, and continue to fight the boss within it.
Fortunately, it doesn’t appear that Maleficium has the most health, and you can take it out after it distinguishes the braziers the first time.
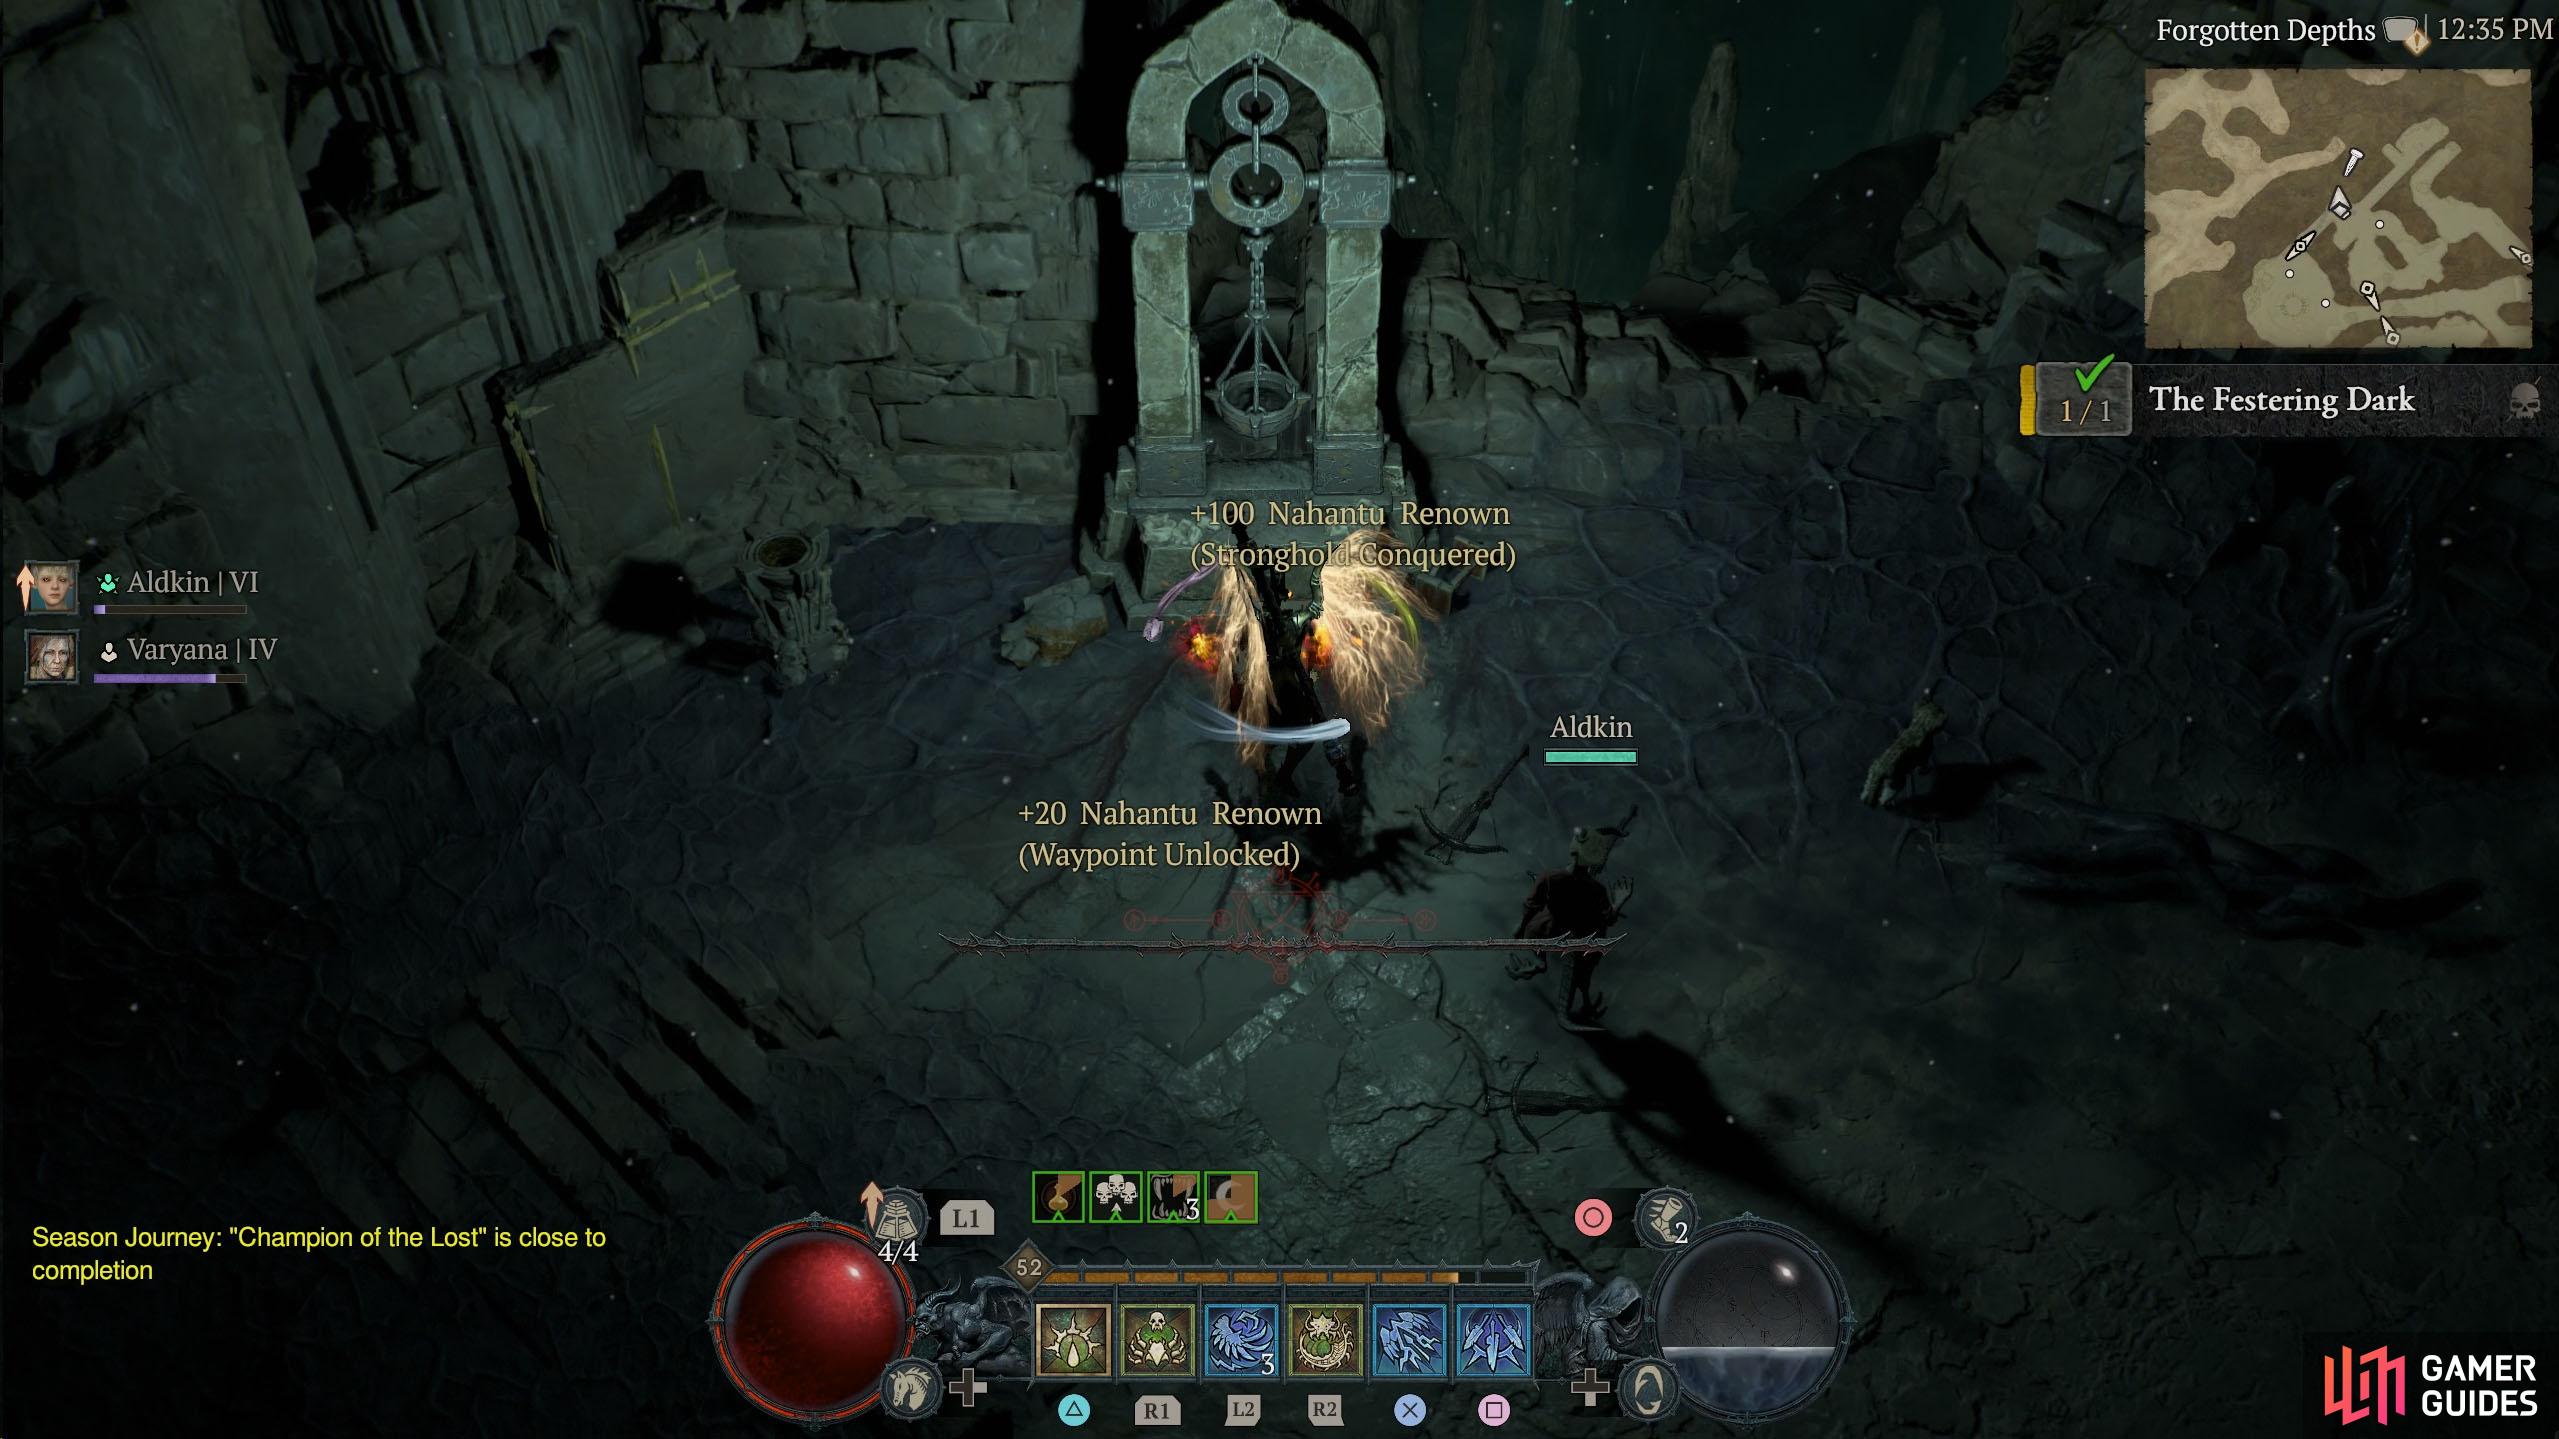
Climb the wall in the northeast and activate the shrine to complete the Stronghold.
Once you’ve defeated Maleficium, pick up the loot, and climb up the wall in the northeast of the room. Now, interact with the Wanderer’s Shrine to cleanse the place and complete the Stronghold.
No Comments