
The first Chapter in Rogue Trader serves as a fairly lengthy tutorial to the game, offering players a mixture of the main story, companion quests, and other rumors and side quest decisions you can use to get a feel for the game. Yet, there’s a few sneaky things about the first Chapter of Rogue Trader that deserve a Walkthrough. So, here’s a guide for completing the first chapter of Rogue Trader, with hints and tips on various aspects of the playthrough.
A Walkthrough of Chapter 1 in Rogue Trader, featuring the order to grab companions and quests, important story triggers, and other missable and interesting things through the 15-hour chapter.
Chapter 1 Rogue Trader Guide
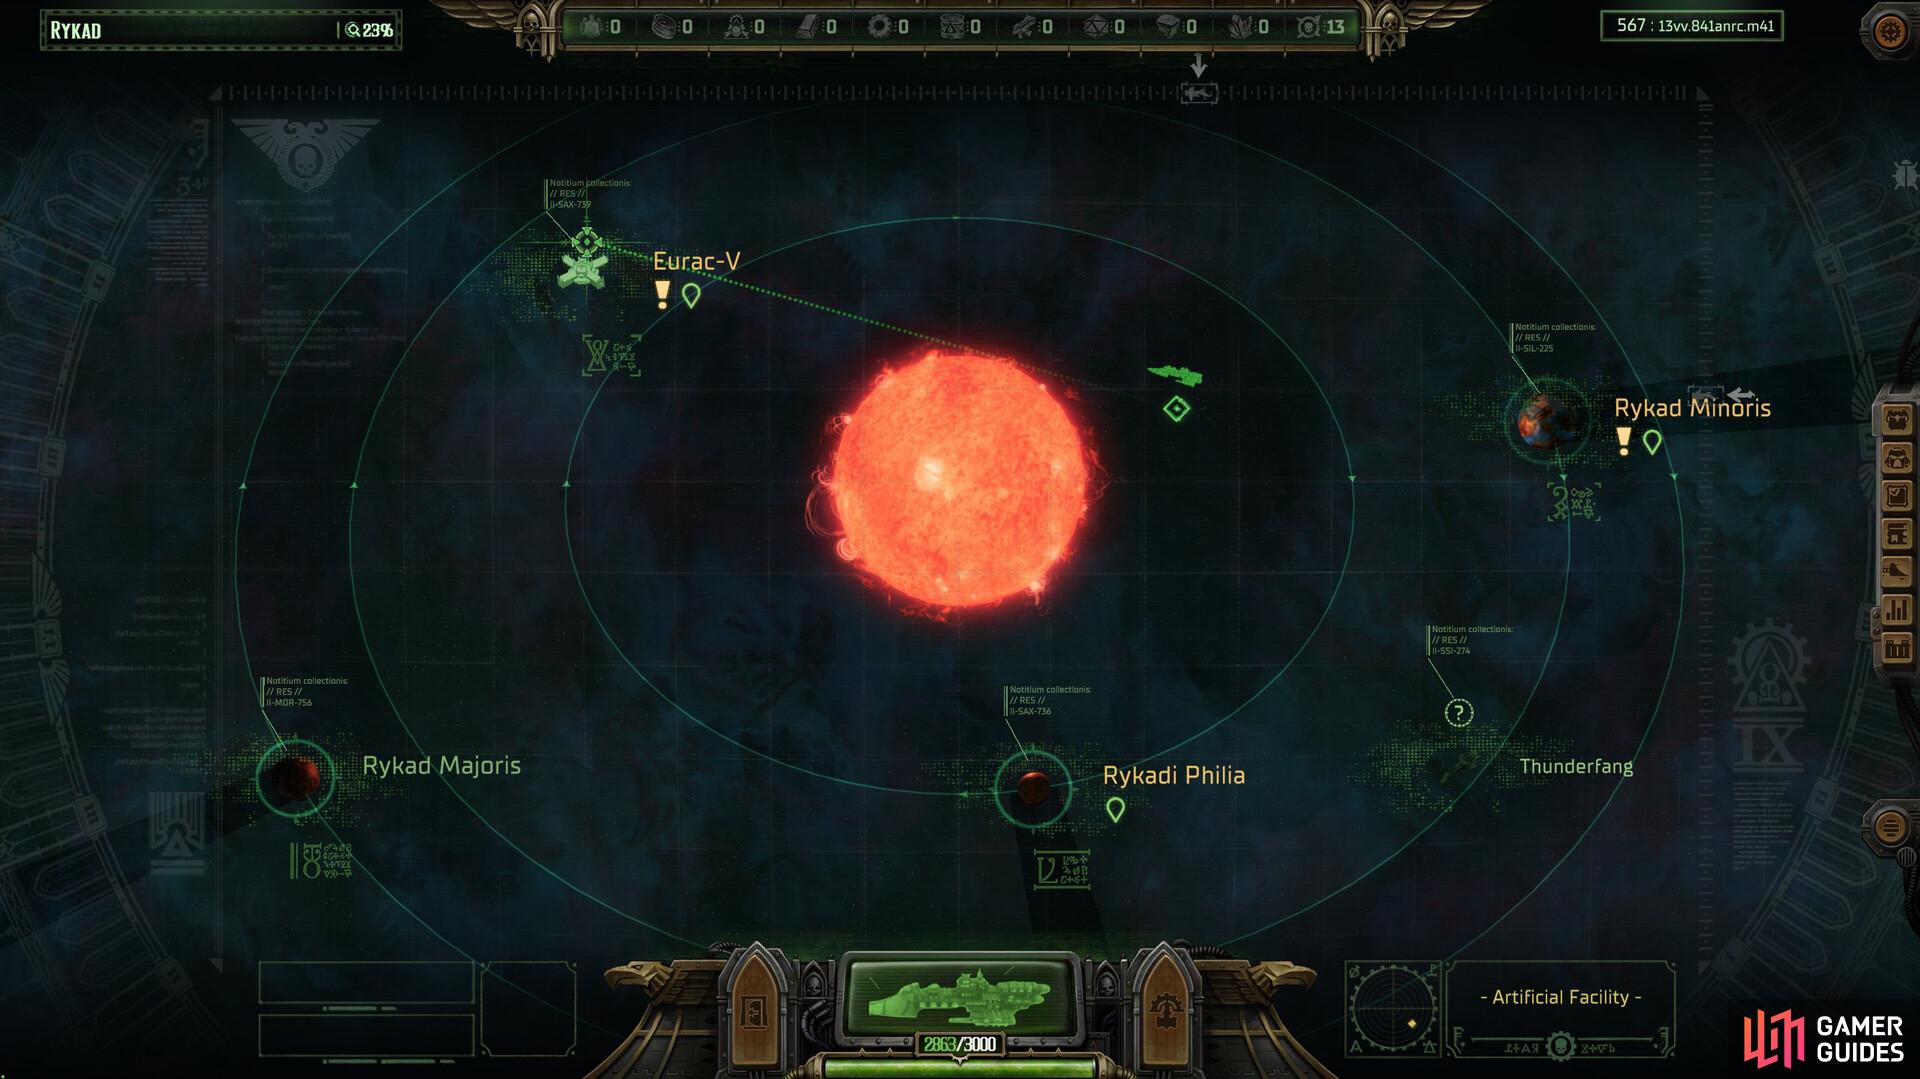
Upon ascending to the throne as Rogue Trader on your ship, you are presented with a few major tasks. You need to repair your ship, refill its crew, and get a new Navigator so you can use Warp Travel. These tasks are scattered throughout the Rykad system. Meanwhile, there are other matters to attend to in the system for additional side quest content and companions you can recruit. We will recommend you do the chapter in a particular order, first of all, thanks to some mission structure and potential side quest into main quest integrations to come.
Unidentified Voidship
The first thing you do before starting any mission is visit the Unidentified Voidship. The Voidship is one of the first types of traders you can interact with. So, follow the dialogue options that don’t result in the trader getting blasted. In addition, one of the first purchases you can make is the earliest two-handed ![]() Flamer weapon, which is good throughout Chapter 1. Slap this in
Flamer weapon, which is good throughout Chapter 1. Slap this in ![]() Argenta’s second weapon slot, and you have an awesome crowd-control tool, which you’ll use a lot against lots of clumped-up and low-wound enemies.
Argenta’s second weapon slot, and you have an awesome crowd-control tool, which you’ll use a lot against lots of clumped-up and low-wound enemies.
The Chosen Ones
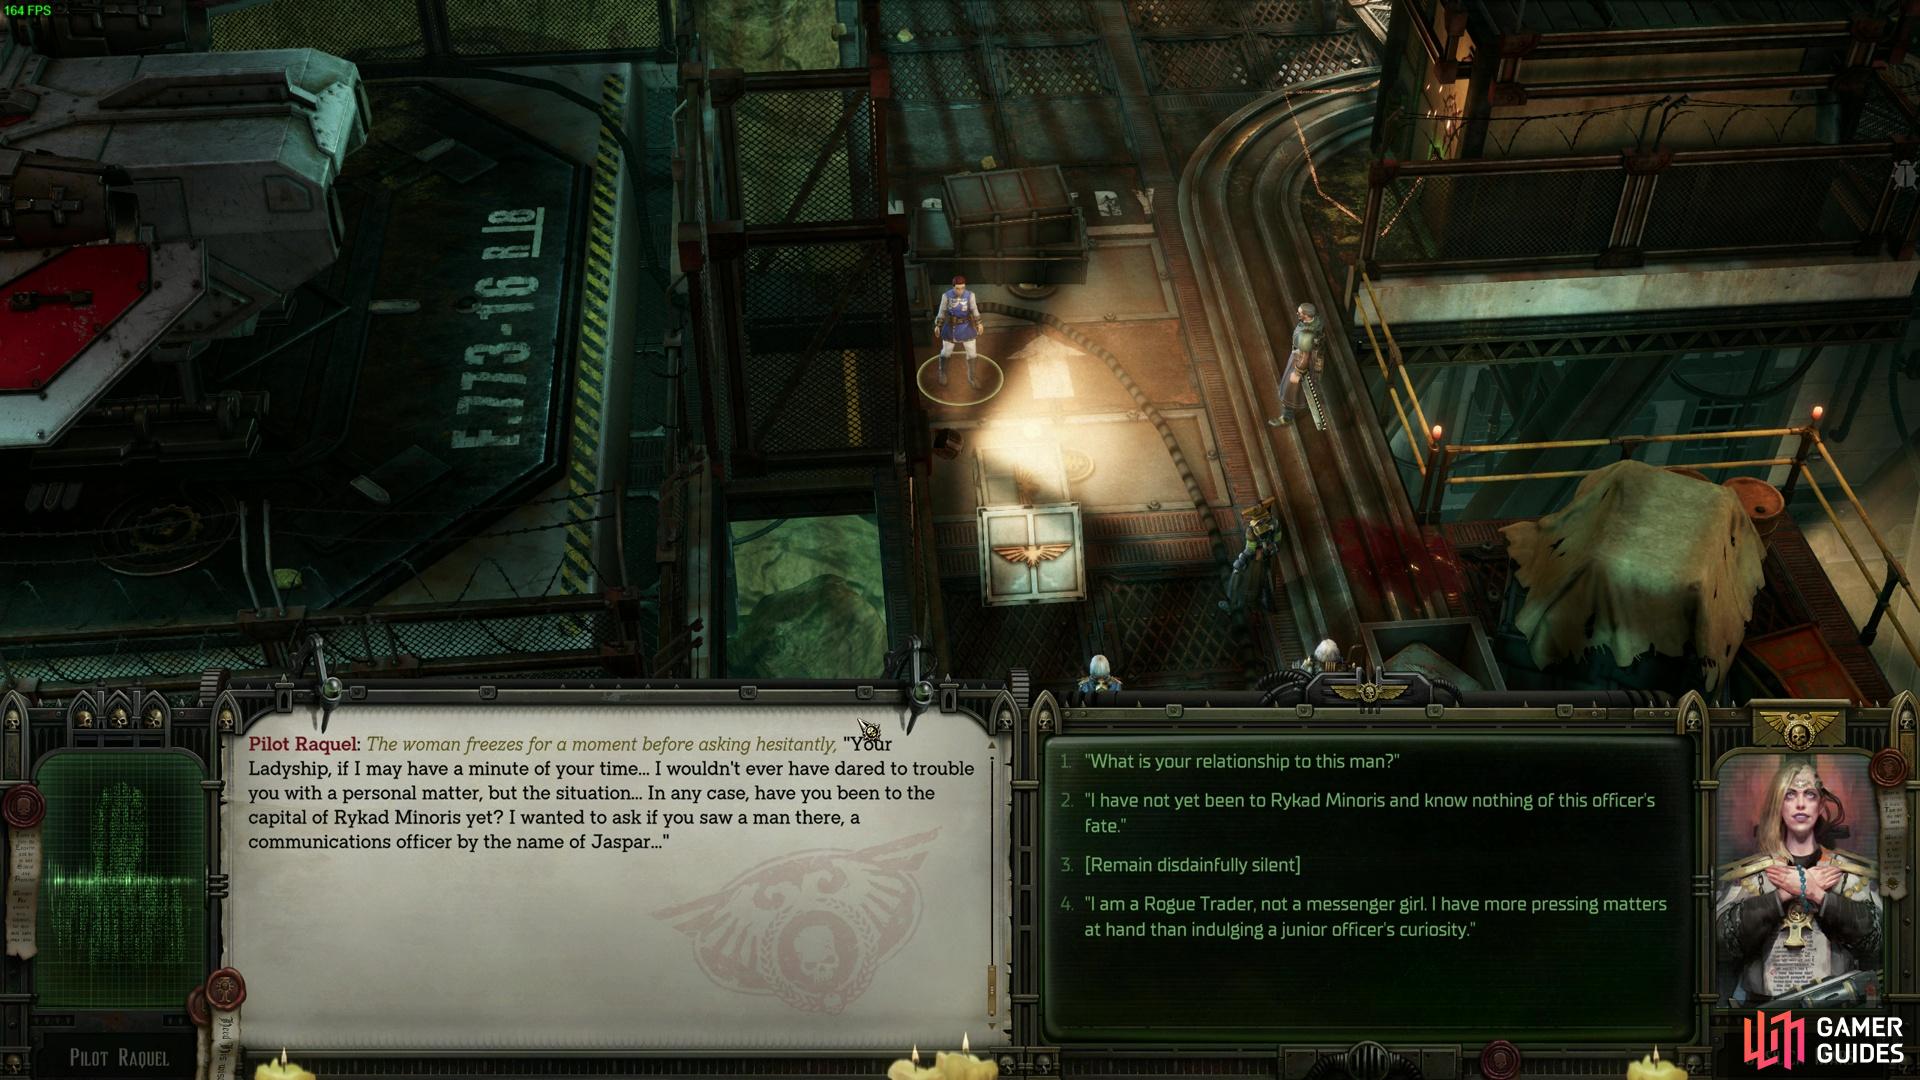
Speak to Raquel near the shuttle and get the lowdown on the situation to kick start the Chosen One’s mission in Rogue Trader.
The Chosen Ones is a side quest on the distress signal on the bottom prison planet in the system’s map. While this is a side quest you don’t need to do, we recommend doing it first. The first is that it is loosely connected to the lore of the main storyline on Rykad Minoris. The second is because there’s a trigger that kills an NPC, which you can help on this planet if you do the main storyline first and miss this quest. So, we’re doing this mission now. It also appears to trigger if you rescue ![]() Cassia first, which our reader kindly pointed out to us. It’s no biggie if you find this quest dead, it’s just nice storytelling for later chapters. But it doesn’t change anything in the grand scheme of things.
Cassia first, which our reader kindly pointed out to us. It’s no biggie if you find this quest dead, it’s just nice storytelling for later chapters. But it doesn’t change anything in the grand scheme of things.
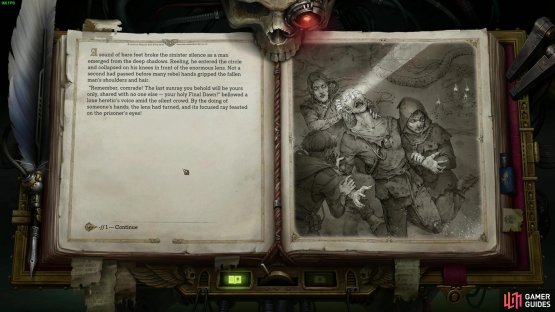
Upon landing at the Prison Planet, you’ll find an NPC, Pilot Raquel, to whom you can speak to. She will let you in on what is transpiring and then walk along the path and enter the barracks. You’ll find lots of poorly armed and low-level enemies here, so they shouldn’t be too menacing to handle. Once it’s done, exit the Barracks via the doorway on the other side, and you’ll come to the fabled NPC in question, Evayne.
Evayne is a good egg, as they say, and the chap just wants to help his friend out, aka the Warden who turned the prison into crazy town. Since you’re here, offer to help him, and you’ll make an ally in the process. Agree to go into the pit with him, and when you go down first, he’ll turn up partway into the conversation you have with the Warden. Try to keep the conversation going until the Warden loses his mind and attacks you and Evayne.
Regarding the boss battle, the main tactic is add management and then destroying the Unholy Lenses. Make sure they are done before even attempting to kill the Warden. Also, do it as fast as possible, as Evayne can die in this battle. Once the battle is over, you can speak to Evayne and ask him to join your ship, which he will oblige. In Chapter 2, he gets off the ship and does his own thing. So, you’ll be able to save a noteworthy noble in the storyline, which can come in handy when his dynasty is mentioned and brought back into the story later in the game’s storyline.
In case you’re wondering, if you come to this planet after the main story missions, you’ll find Evayne dead. Yes, he goes to speak to his friend without your help, and dies with his eyes burned out like the rest of those in the prison. So, responding to his call is a worthy decision.
Navis Nobilite Station
You can get Cassia early on, and complete your Navigator quest, getting a very powerful companion straight away.
With that out of the way, you should now go to the Navis Nobilite station in the top left corner of the map. This is where you can recruit Cassio and get the Navigator part of your journey done. Recruiting Cassio early on is important, as you can start filling your companions and squad size of 6 in a relatively self-secluded space, not to mention Cassia is perhaps one of the strongest Companions for providing the support role to a party thanks to all of her passive Navigator talents you can pick for offensive magic and defensive buffs.
To recruit Cassia, simply head over to Navis Nobilite, board the station, and solve the mystery going on. You’ll have a few choices to make regarding the internal family drama in the station. So, side with whoever, just make sure you get Cassia out of that station alive and part of your recruitment. To do it, you need to do an Athletic check over the rubble and enter the library. Deal with the fight in the middle library, access the PC down the tunnel, open the doors, and reset elevator controls. You also need to get an item from the laboratory. We have an in-depth guide on the Navis Nobilite lab puzzle, and the full Navis Nobilite choices and walkthrough if you’re interested. But this covers the basics of getting Cassia as early as possible.
Moreso, there’s a puzzle in the Navis Nobilite Laboratory that grants special potions to use against Warp or Toxic fights. These will come in handy at the end of the chapter fights and some fights in Chapter 2 and beyond, so certainly keep them around.
Main Storyline on Rykid Minoris
You’ll encounter Pasqal, your new Tech-Priest and companion on your journeys here.
With the pressing stuff done, now it’s time to do the main questline, starting with The Starport quest. One of the reasons why we prepped you to go farm some side quests, get a new companion, and get some gear is for one very big reason. It’s slogging time. The early part of this planet is essentially a never-ending chain of combat, and you have few opportunities to heal the wounds through it. Essentially, there’s a flak gun in the city grounding all flights, so you don’t get to return to your ship and rest until it is done. So, it’s time to equip those med bags on all available characters and prepare for a fight.
Speak to the Sergeant as you land and find out what is going on. Your main task will be to find an escort party to bring a Tech-Priest to the capital. This will be on the middle-right of the map. You’ll need to fight a few cultist groups and rebels along the way, though. Once you get there, you meet and recruit Pasqal, who will join your party for the entire main story and be fully recruitable from then on. This gets you the six companions you need early on. Good job.
Now, your mission is to continue into the capital, fighting more rebels. You’ll get a challenge to figure out what is going on, which you can learn more about through the imposter guard, some flyers in the warehouse, and by investigating the Unholy Lens in the warehouse. Since you did the planetoid before this and dealt with the Warden, you’ll have special role-play notes and have special dialogue options when you find the group of cultists in the warehouse too. So, employ these to figure out what is going on, and then fight the rebels. From here, you have a Warehouse puzzle, if you want to do it. We won’t cover it here since it is not necessary. You can also head into the Sewers for an optional boss that grants a trophy and some decent loot. We’ve spoiler-tagged it, just in case.
Again, a dedicated guide with the rewards can be found under our Herald Of Tzeentch guide.
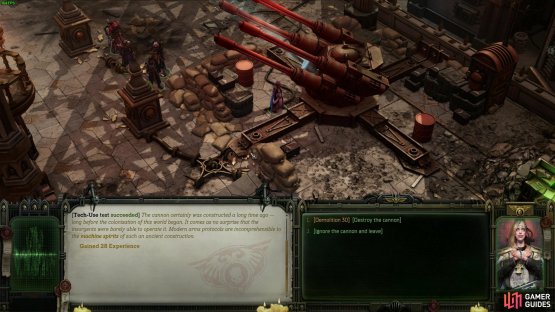
With the Warehouse done, you can now take the top exit. This takes you to a large area filled with enemies. It’s nothing you haven’t faced before, except for the newly introduced sniper unit on the roof of the building to the left of the staircase. Make sure that one dies, as it can solo wipe your party. Other than that, kill the baddies and then blow up the anti-air gun using Melta charges and Demolitions test. Argenta likely has you covered there. Don’t forget to loot the sniper and its special sniper gear rewards from the chest on top of the building.
(1 of 2) Investigate the choices at the Warehouse and find out more information on just how exactly these Unholy Lenses are used to create Blind Heretics.


Investigate the choices at the Warehouse and find out more information on just how exactly these Unholy Lenses are used to create Blind Heretics. (left), You must destroy the Ancient Cannon for the Governor, alongside your sanity, so you can return to your ship and rest your wounded soldiers. (right)
With that done, you now have one more map to go through before making it to the Governor. This map is another long road, with a few hostiles that spawn behind you and some more ahead of you. There are a few snipers at the back, which is the most complex challenge. Get ![]() Abelard to charge up if you can or use your sniper to pop a few when necessary. Everyone else is on cover duty for the up-close and flanking enemies. With those dispatched, you can now make it to the bunker.
Abelard to charge up if you can or use your sniper to pop a few when necessary. Everyone else is on cover duty for the up-close and flanking enemies. With those dispatched, you can now make it to the bunker.
In the Bunker, you can find the general who will give you the next set of main story tasks. You can also speak to a named Tech-Priest, who is a trader, and get some cool new toys. If you wish to dump the relevant cargo, you can sell it to him to increase your reputation with them. You can now go to the ship and let your party heal their wounds. There’s likely some companion stuff waiting for you, too, if you want to hit Argenta’s, Cassia’s, or Abelard’s Lower Deck stuff. If you’ve already done them, it’s no bother. Feel free to use the dialogue options you want for your playthrough on these moments. It’s more immersion with some soft consequences rather than anything serious.
Electrodynamic Cenobium


(1 of 2) Your main journey will require you to explore the Cenobium and look for this Tech-Priest Pasqal needs to find.


Your main journey will require you to explore the Cenobium and look for this Tech-Priest Pasqal needs to find. (left), Be careful of ambushes to the side of the Cenobium as you explore for loot and look for the Priests. (right)
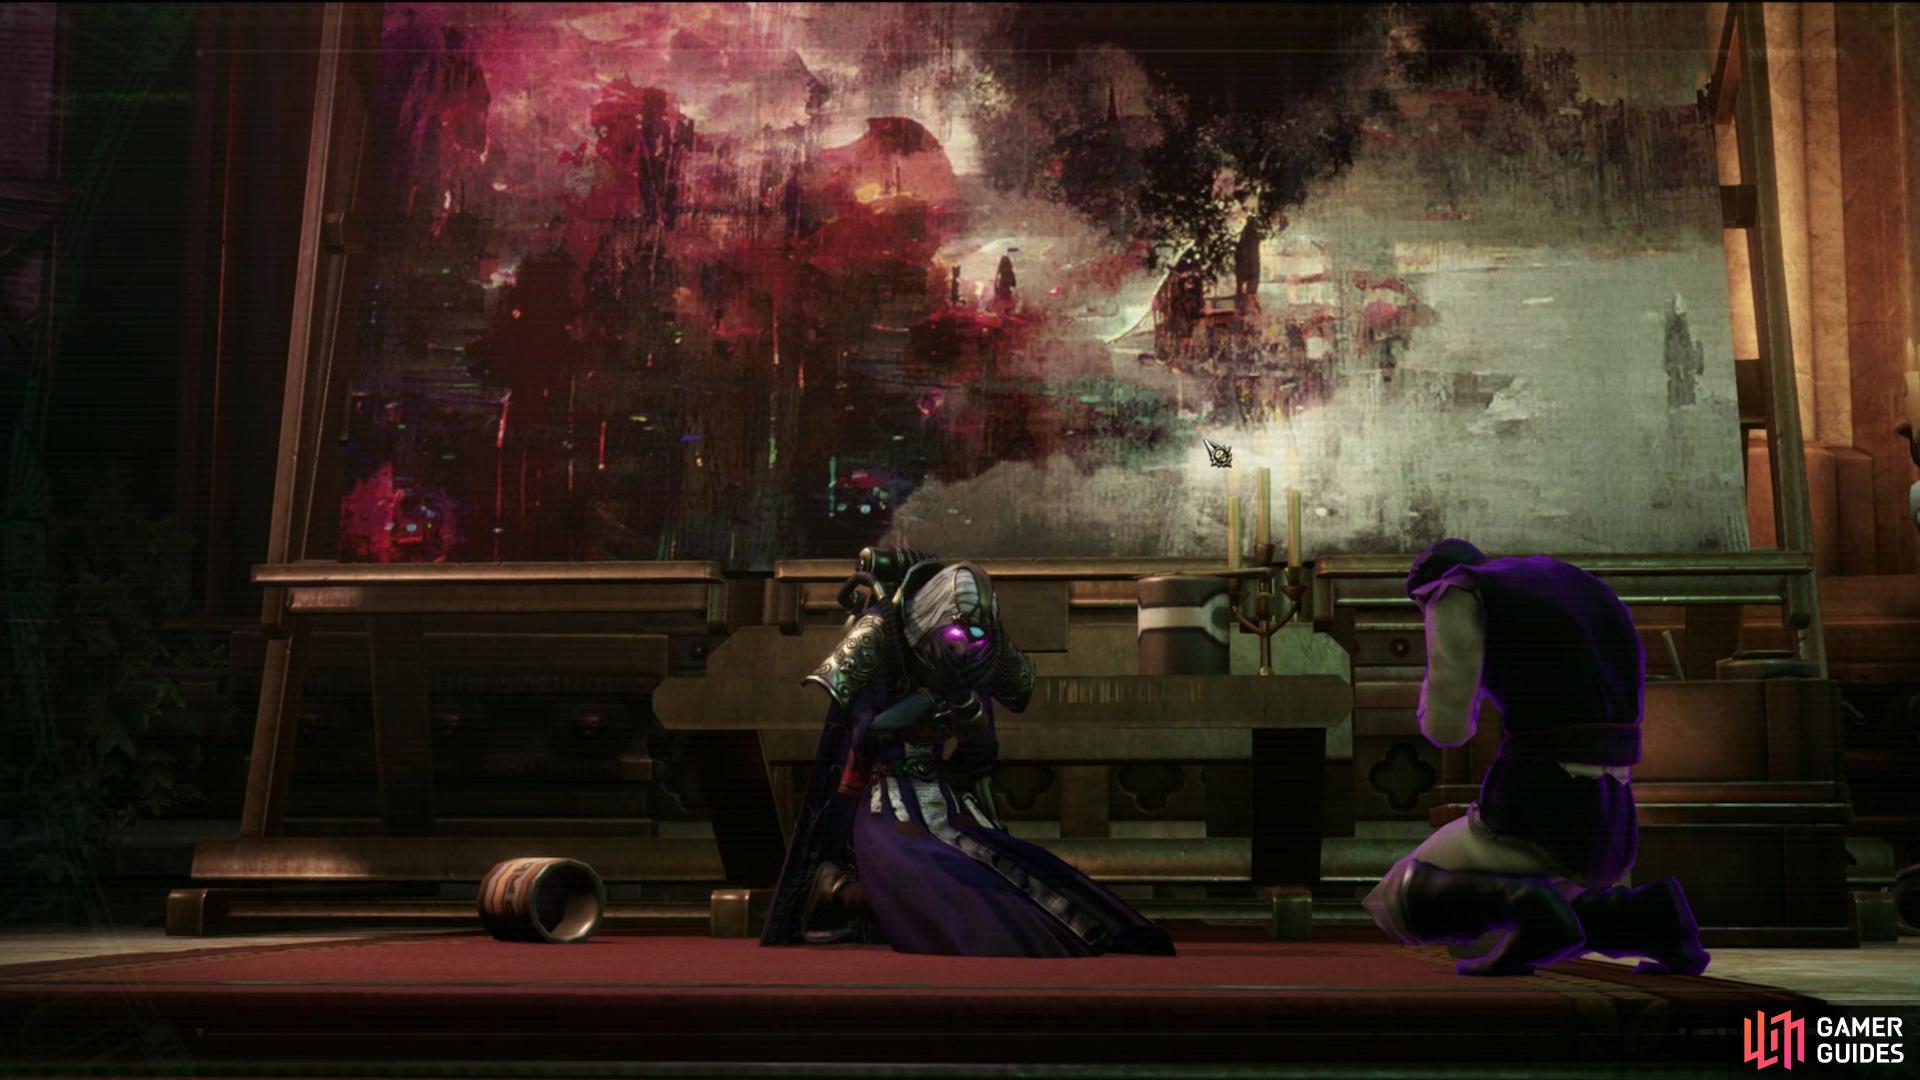
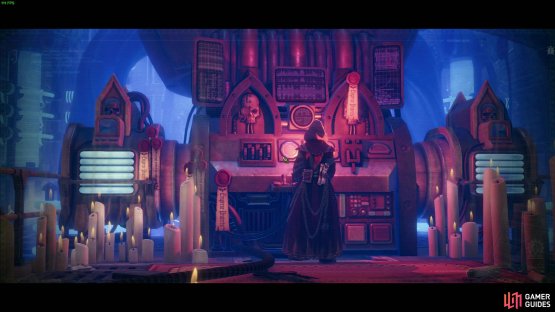
The Gleam of the Final Dawn quest takes you to a place called the Electrodynamic Cenobium and is the next main area you need to visit for the storyline. Here, you must find out what is happening in the Mechanicus Monastery. To do so, head to the center of the map, where all the cultists are gathered around a hung-up Tech-Priest. You’ll have a big fight here and need to survive four-to-five turns before the fight auto-resolves. Speak to the Tech-Priest, go through the dialogue as desired, and learn more about missing monks.
With the missing Monks, you need to go looking for some side rooms near the entrance to the Monastery. There’s also the First Galvanic Hymn Puzzle that awards a new ![]() Arc Rifle if you can solve it. Yes, we have a separate guide on that puzzle, too, if you’re interested. You don’t need to do it, so don’t sweat it.
Arc Rifle if you can solve it. Yes, we have a separate guide on that puzzle, too, if you’re interested. You don’t need to do it, so don’t sweat it.
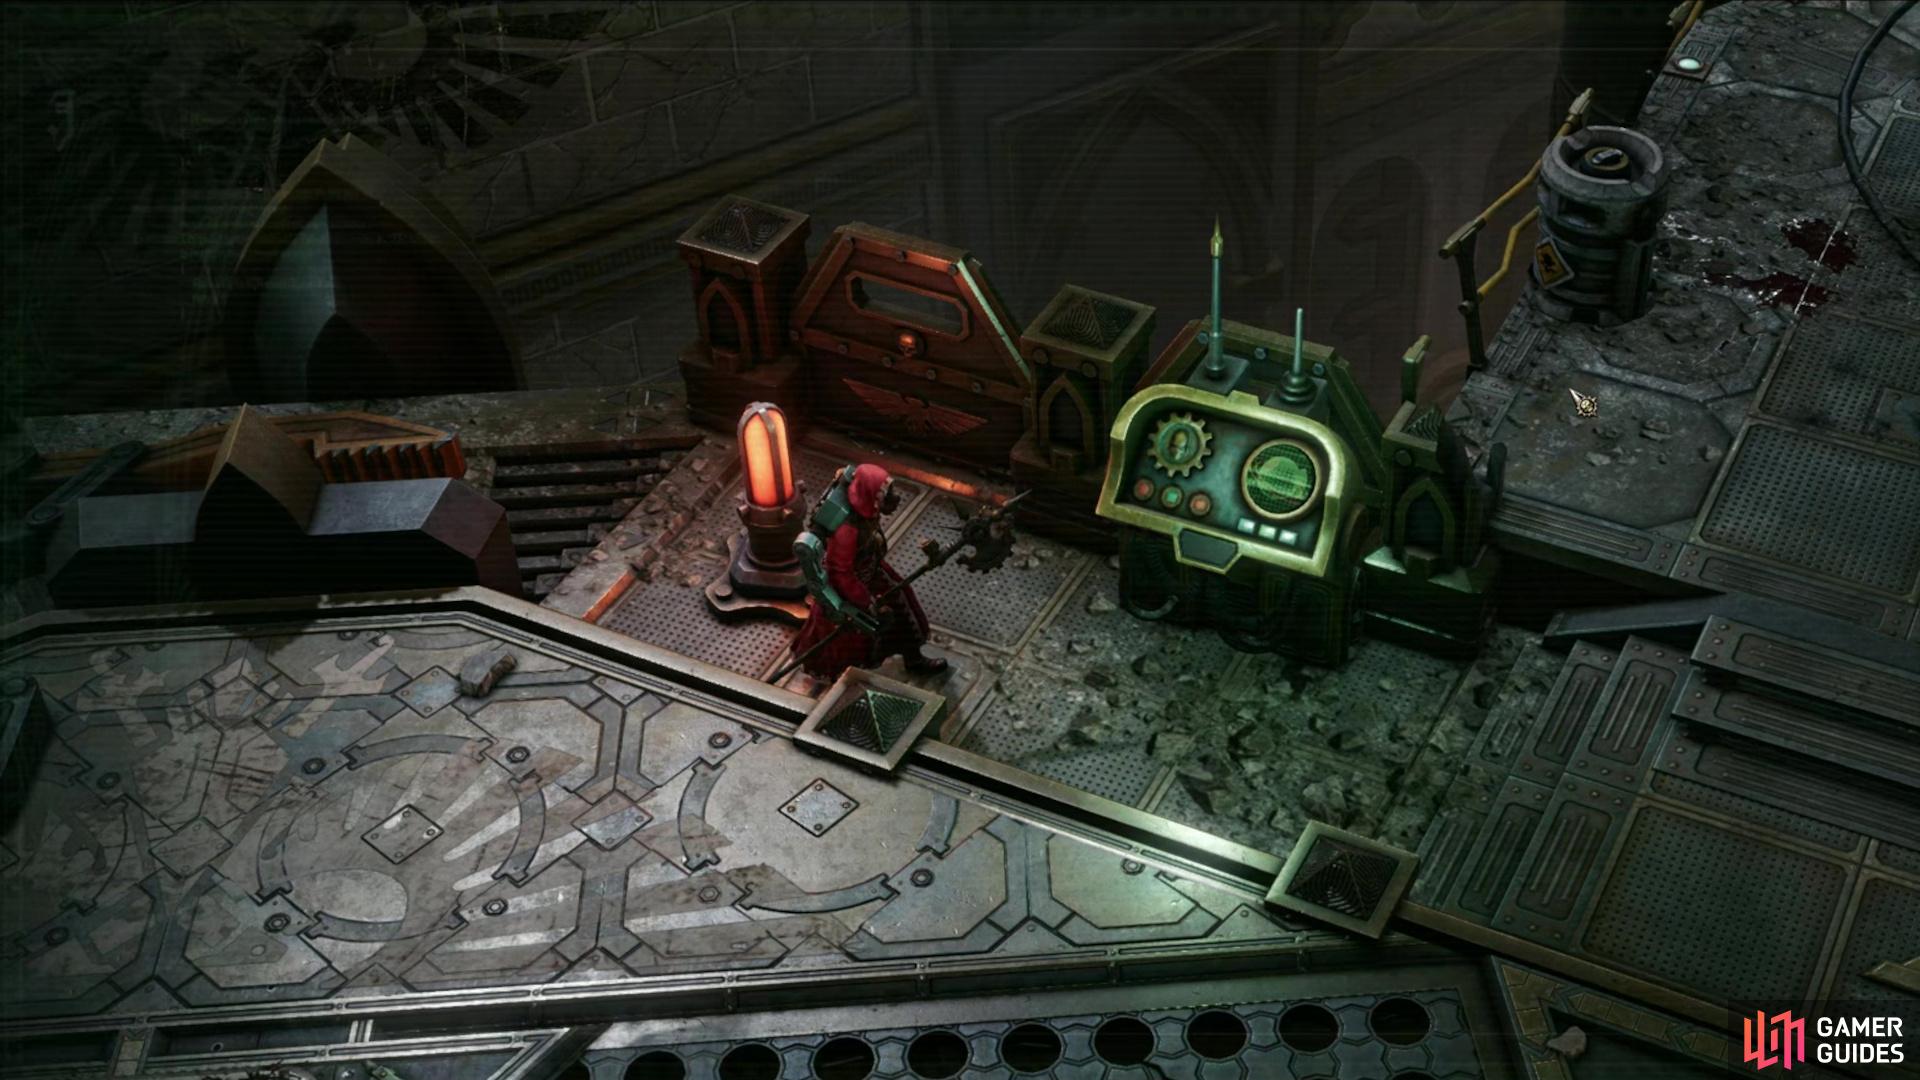
The first room you should visit is the library. There are two secret wall panels at the back corner of the room you can touch. Inside are some Mummified Electro-Priests, who you can talk to. Mention the temple is under attack, and they’ll offer some hints to dealing with it.
Next up is the other room. This room is to the right of the main entrance if you’re facing it. Look for a yellow arrow on the floor; the door is next to it. Inside, you’ll find a new Companion called Heinrix, who is a Sanctioned Biomancer Psyker who works for the inquisitions. Find out more about Aurora, what is going on here, and where to find the missing monks. You’ll now be able to click on the red, circular congitator and find the missing monks. Speak to them, and then enter the bowels of the Monastery and fight the Aurora boss battle.

(1 of 2) Once you find Heinrix, you can activate this terminal and find the surviving monks objective in Gleam of the Dawn.
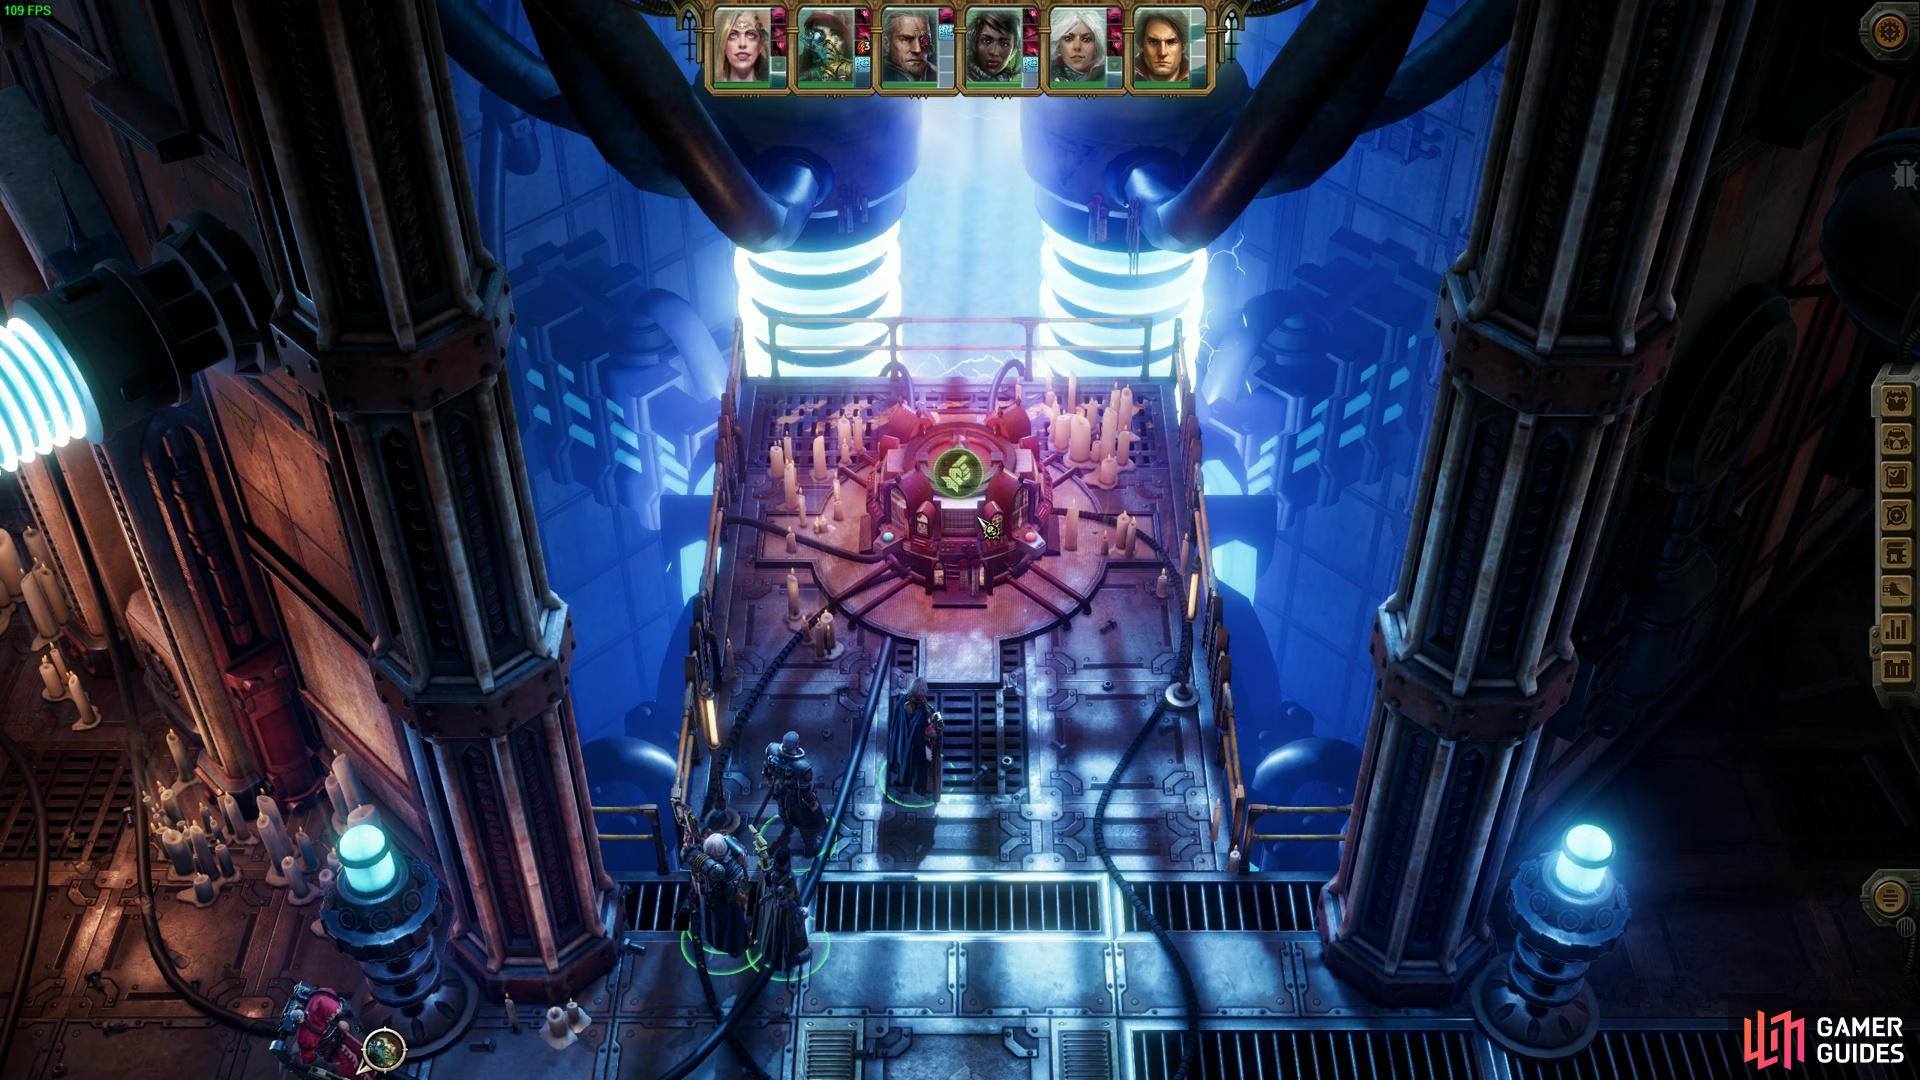

Once you find Heinrix, you can activate this terminal and find the surviving monks objective in Gleam of the Dawn. (left), Once you reach the reactor, you must stop Aurora and its Final Dawn plan. (right)
The main tip here is to split into three groups and kill the Electro-Priests. Don’t use electric-themed weaponry on them, so Iddy and ![]() Pasqal should never shoot them. If you got that Arc Rifle, don’t fire it at the Electro-Priests. These Electro-Priests heal if they are hit with electricity. It wouldn’t be so bad, but you have four turns and counting to beat them all, with you gaining an extra turn for every Electro-Priest that dies. It’s part of the reason you need a full party to make the fight easier, too.
Pasqal should never shoot them. If you got that Arc Rifle, don’t fire it at the Electro-Priests. These Electro-Priests heal if they are hit with electricity. It wouldn’t be so bad, but you have four turns and counting to beat them all, with you gaining an extra turn for every Electro-Priest that dies. It’s part of the reason you need a full party to make the fight easier, too.
With that done, you can return to the governor and celebrate your victory over Heretics. He will call for a Parade, bringing you to the Chapter 1 Epilogue. However, don’t do this yet, as you need to do a few more things.
Things to Do before the Epilogue
Okay, the important thing is that the Epilogue concludes your time in Rykad Minoris. So, make sure to mop up any other side activities with your companions if you still need to do them. Furthermore, speak to the traders and get as much rep or items as needed. You will briefly lose access to these traders in Chapter 2, so grab what you want now in case you have regrets later on. You can fast-track traders using Janis Danrock on the ship’s Upper Deck.
Rykad Majoris Voidship Choices
In addition, there is a mysterious ship in Rykad Majoris. Go and visit the mysterious ship and find out what is going on over there. Get Abelard to send the troops down there and figure out what is happening. You’ll get an Exotic Drukhari weapon with no downsides. This is entirely missable if you don’t do it. While the gun is useless for now, Jae can use those weapons in Chapter 2 if you so wish to recruit her.
Chapter 1 Epilogue Walkthrough

A guide to beating the Chaos Space Marine Boss in Rogue Trader, offering tips on using all companions to their best in the fight.
With the main and side stuff done, you can now visit the Governor and go on the Parade. The Parade, however, could be more successful, and the heretics are back again. It’s another kill everyone angle and will be active while you run back toward the shuttle. It’s essentially the same as the first mission on the planet but in reverse.
When you make it back to the platform, you’ll have some dialogue options. Again, go with the option you prefer, as it’s essentially role-play stuff. Once the conversation reaches its limits, a big bad chapter boss will arrive. You need to defeat a Chaos Space Marine, and depending on the difficulty, can be nice and easy or tougher than expected. In general, the best bet is not to have your units stacked because of the ![]() Heavy Bolter’s blast range. Furthermore, a sniper at the back of the map and some lower-wound melee units run towards you from the right side.
Heavy Bolter’s blast range. Furthermore, a sniper at the back of the map and some lower-wound melee units run towards you from the right side.
Basically, use your party’s composition to its fullest. Have someone deal with the reinforcements, an operator stacking debuffs on the Marine, and your high-damage dealer wrecking through its wounds. Feel free to use Cassia to give your big damage dealer an extra turn to melt through the Chaos Marine. While that’s happening, take out the sniper as fast as possible, as that creature will hurt you a lot and can make the difference between a successful fight and a wipe that requires a restart.
When the creature dies, you can board the Shuttle and get back to your ship. In the final moments of the chapter, you get to choose which people on the planet to save. You can save the Mechanicus and their most praiseworthy artifacts, some of the people, or the nobles. Each one has some more story elements later on, with negatives and positives, so choose whichever you want. Some of the shuttles can blow up in the fight, so be warned that you cannot rescue everyone and even less if one of the ships fails.
Once your rescues are on board, you’ll warp to the next chapter of the act and leave behind everything. Hence, there are not many consequences for the Navis Nobilite side option, and you need to speak to the traders before the parade. With that done, you will have completed the Chapter 1 Walkthrough for Rogue Trader, and be onto more advanced mechanics, more storylines, and a real look at choices and consequences to come.

When you first go to Eurac V, the servent of Cassia will survive!
Hi, i first go to Eurac V and recruit Cassia, after that i go to prison planet and Evayne and his guards ar dead!
Interesting. I do wonder if there's a new trigger about the event being a must-attend first or the quest's storyline is slightly awkward to complete.