
After leaving Footfall in Chapter 2, you’ll be tasked with restoring stability to the von Valancius fiefdom by visiting three troubled planets and resolving the problems there. These quests are all grouped under the super-quest Reclaim What Was Lost, and consists of Flame in the Dark (Kiava Gamma), Spiders in a Jar (Dargonus) and its subsequent quest Blades in the Void and the subject of this page, World Shapers, which tasks you with traveling to the agri-world of Janus. You can travel to these planets and resolve their problems in any order, but Janus - located in the Telikos Epsilon system - is the first of these story planets you’ll stumble across, and is clearly meant to be the first main quest planet you visit. That being the case, this page will provide a full walkthrough for the quest World Shapers on Janus.


(1 of 2) Planet Janus can be found in the Telikos Epsilon system, which will likely be the first story location you discover after Footfall.
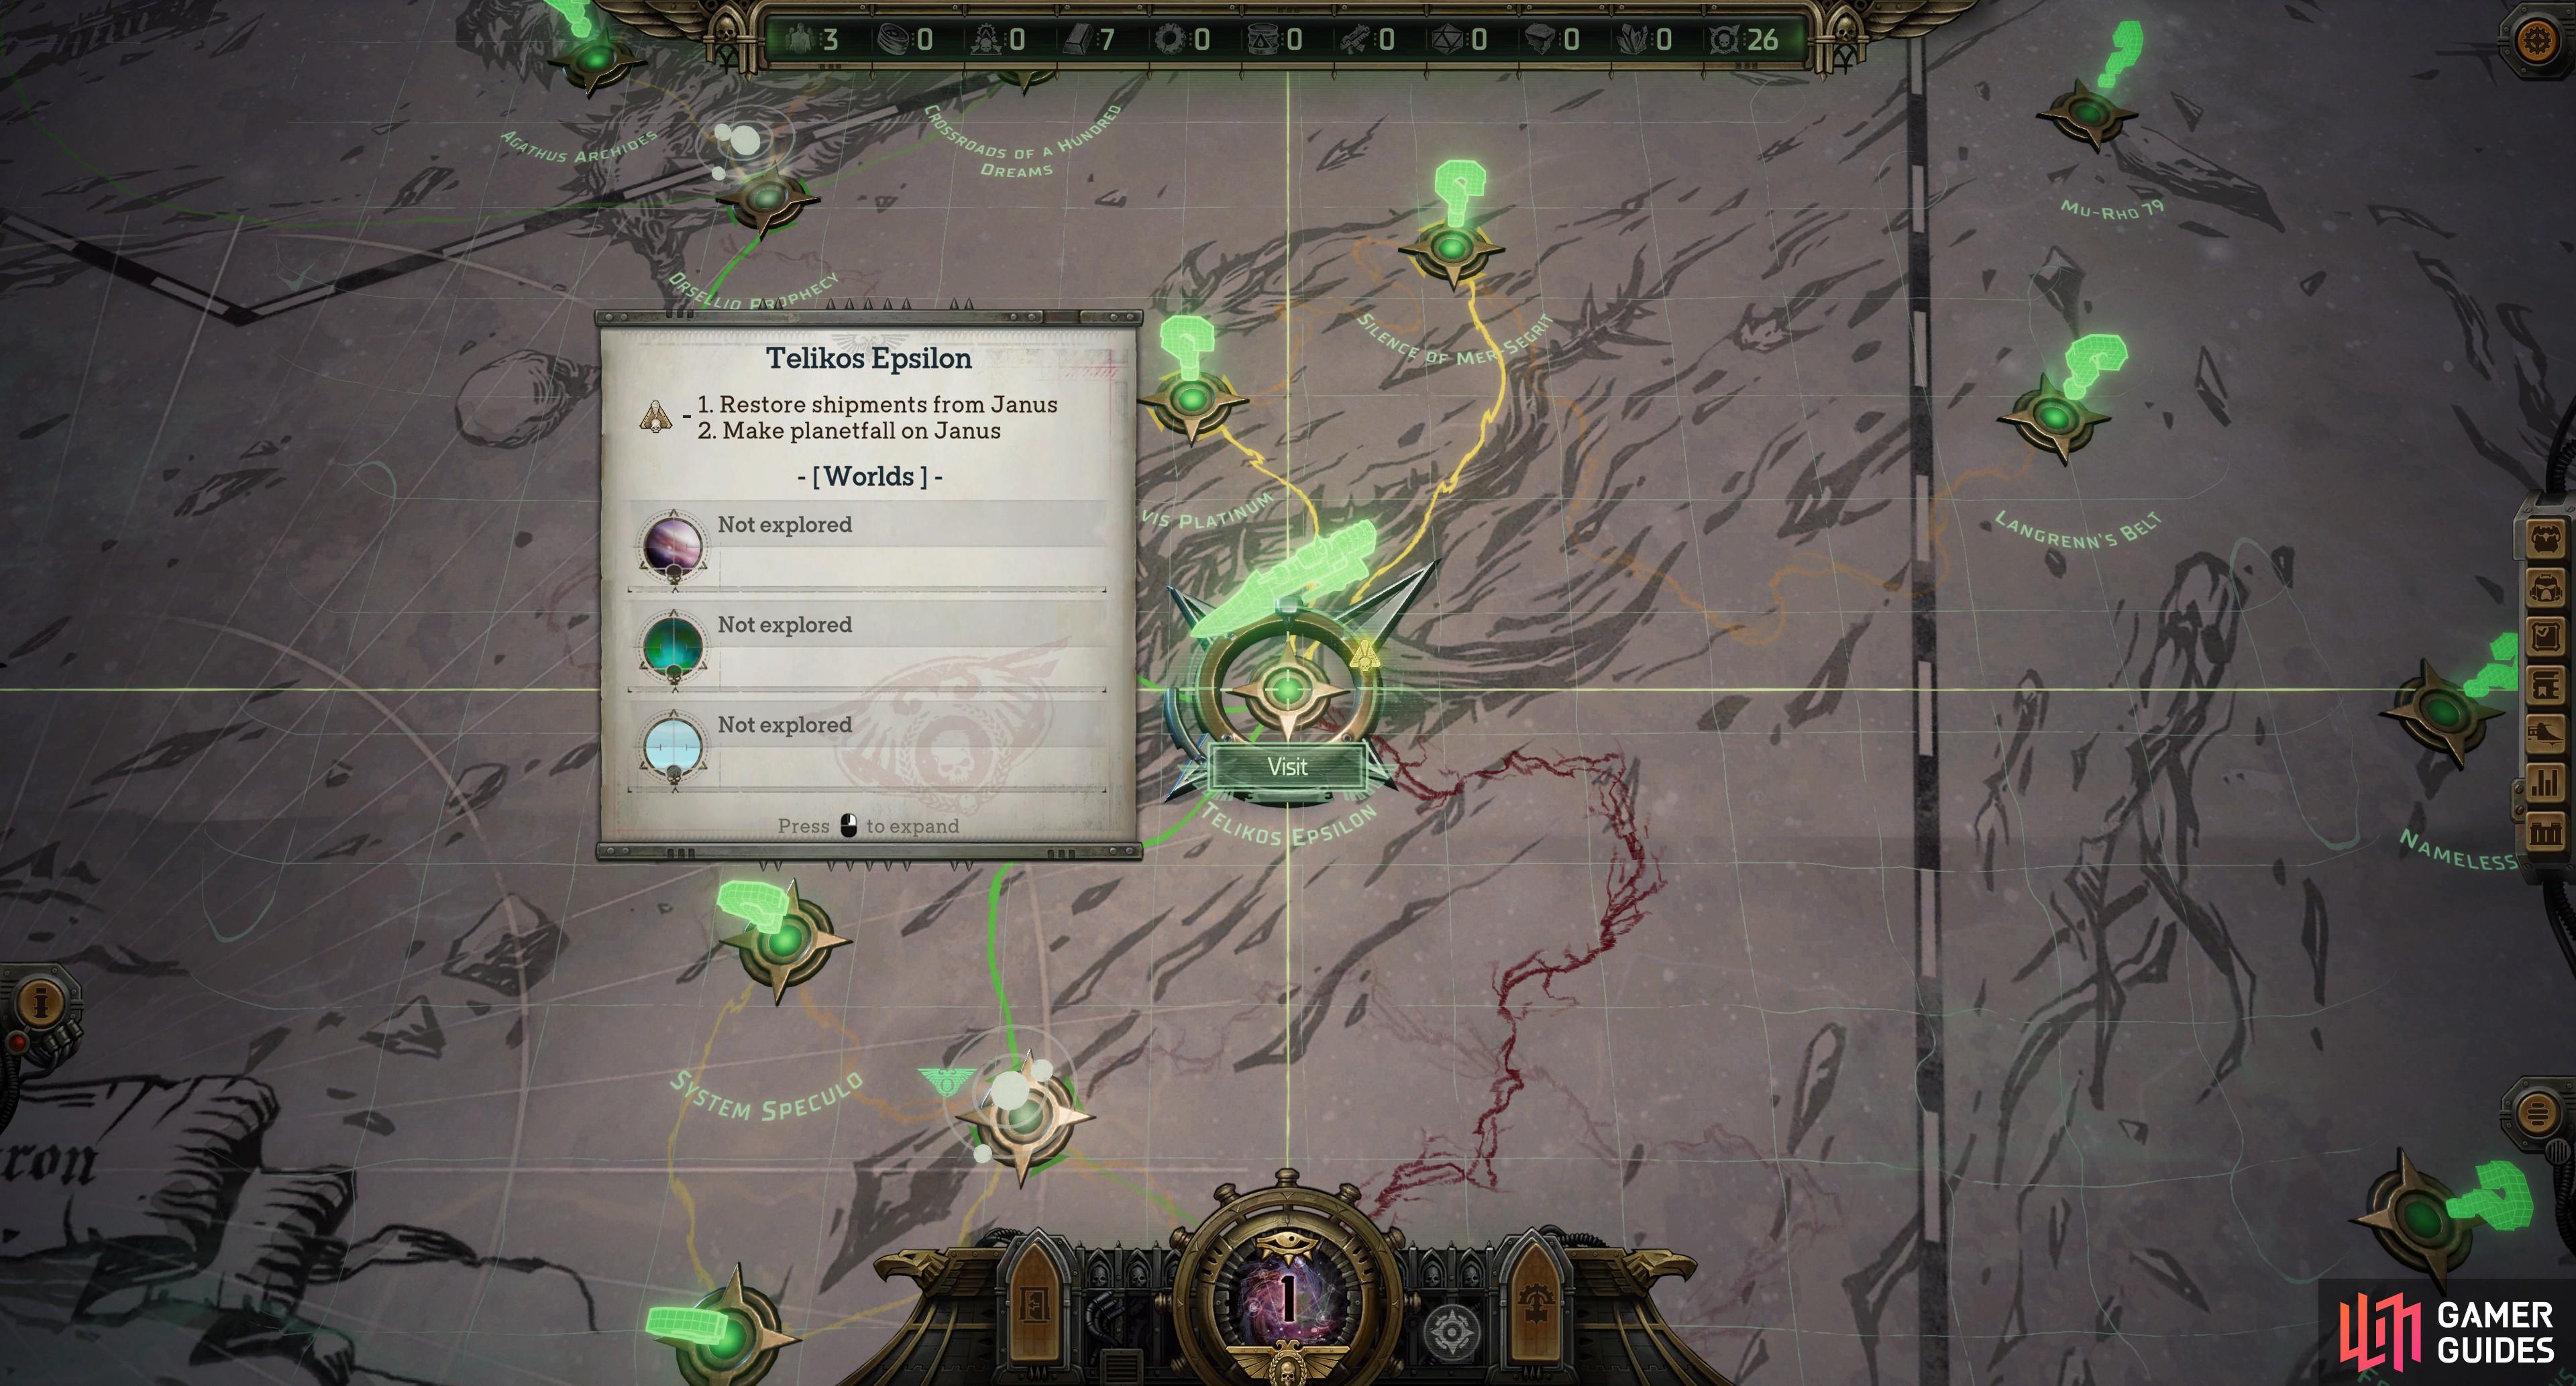

Planet Janus can be found in the Telikos Epsilon system, which will likely be the first story location you discover after Footfall. (left), All you need to do to start World Shapers is fly to Janus and let the governor welcome you… (right)
Governor Vyatt’s Estate - Encounters, Loot and Choices
To reach Telikos Epsilon - the system that houses Janus - you’ll need to travel up from Furibundus (Footfall’s home system) to Trinnitos, then up again to Telikos Epsilon. While only two jumps away from Footfall, unless you chart nearby systems for Navigators Insight, you should expect a perilous journey. When you arrive, you’ll be informed of the system’s significance and told that the governor of Janus awaits your visit. Scan the planet and land at Governor Vyatt’s Estate to be greeted with all the pomp and ceremony your position demands… but it won’t be long before matters devolve into violence.
Fight Off the Forces Attacking the Estate
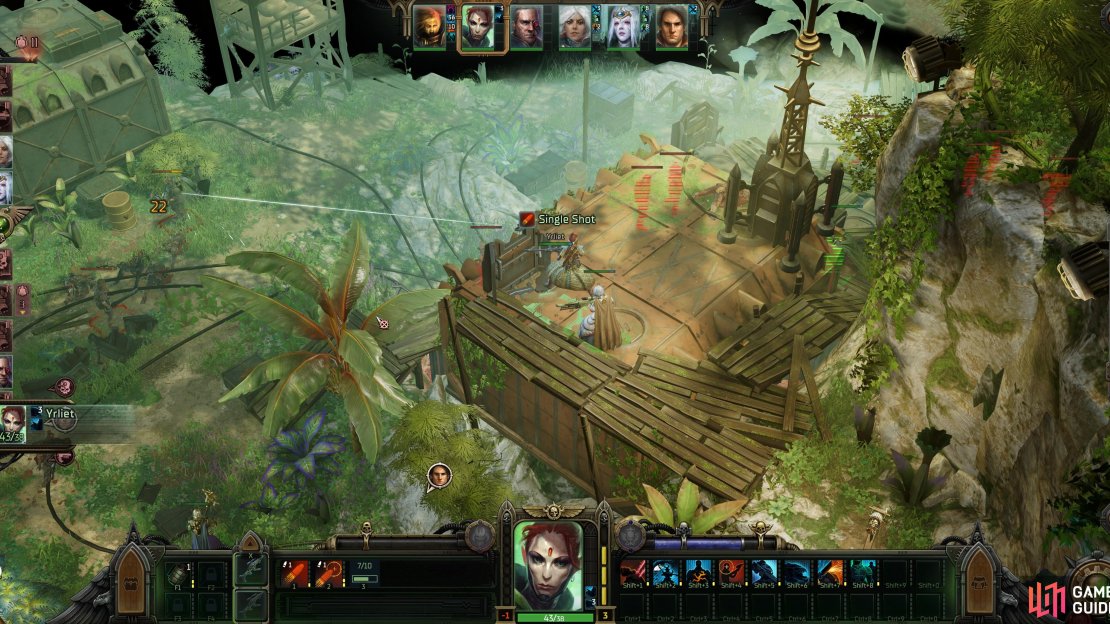
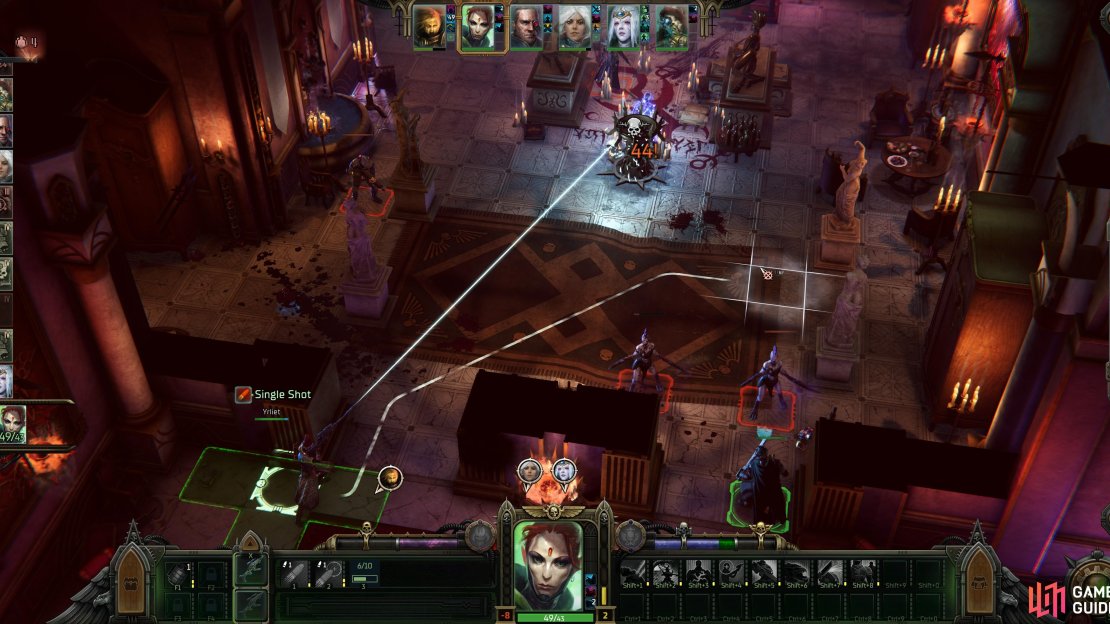
At the start of combat you’ll just be facing off against a handful of “Servants”, weak enemies armed with ![]() Laspistols - it should be trivial to cut them down. Once you do, however, reinforcements will blast their way onto the scene, and these enemies are more powerful than the “Servants” you just dispatched. You’ll be facing off against properly identified rebels this time, some armed with melee weapons (Ripper Rebels), one with a sniper rifle (
Laspistols - it should be trivial to cut them down. Once you do, however, reinforcements will blast their way onto the scene, and these enemies are more powerful than the “Servants” you just dispatched. You’ll be facing off against properly identified rebels this time, some armed with melee weapons (Ripper Rebels), one with a sniper rifle (![]() Sharpshooter Rebel), a Grenadier Rebel and a Diversionist Rebel. While diverse, they aren’t terribly competent offensively, and you should have no trouble putting them down. Even if you do struggle, as long as you make it out in one piece you should be fine, as you can return to your voidship after just about every fight during this mission.
Sharpshooter Rebel), a Grenadier Rebel and a Diversionist Rebel. While diverse, they aren’t terribly competent offensively, and you should have no trouble putting them down. Even if you do struggle, as long as you make it out in one piece you should be fine, as you can return to your voidship after just about every fight during this mission.

(1 of 3) As could be expected, the problems on Janus boil over and you’re forced to defeat some “Servants”,
Visit the Governor
After the rebel ambush you can vent your frustrations on a hapless guard and either go see the governor or make your own way there - the latter option gives you the opportunity to loot, and while the rebels have little of value, you can find a crate to the east with a ![]() Hot Shot Lasgun inside. It might not be the best weapon in the game, but anything with high Dodge Reduction will be invaluable shortly, so you might want to keep it equipped. Other notable loot includes a submerged container by the beach to the west (contains a
Hot Shot Lasgun inside. It might not be the best weapon in the game, but anything with high Dodge Reduction will be invaluable shortly, so you might want to keep it equipped. Other notable loot includes a submerged container by the beach to the west (contains a ![]() Chartist’s Pendant) and a safe along the southwestern edge of the governor’s mansion. Other loot abounds, but it’s mostly cargo and consumables.
Chartist’s Pendant) and a safe along the southwestern edge of the governor’s mansion. Other loot abounds, but it’s mostly cargo and consumables.
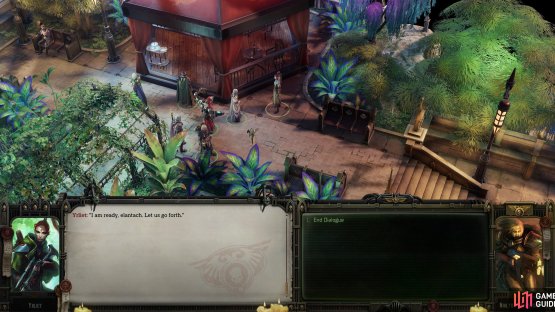
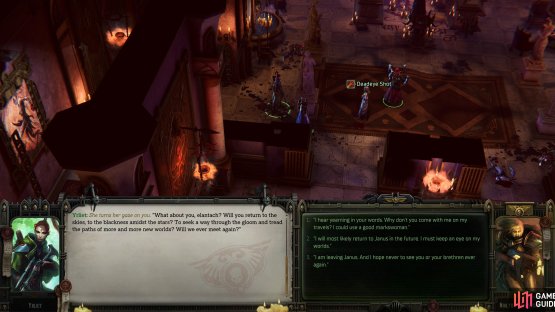
(1 of 2) If you try to attack or arrest Yrliet, she’ll escape via the contrived contraption of a smoke bomb.

If you try to attack or arrest Yrliet, she’ll escape via the contrived contraption of a smoke bomb. (left), Play nice, however, and she’ll join you. (right)
Find Leads to Track Down the Rebel Leaders - Recruiting Yrliet
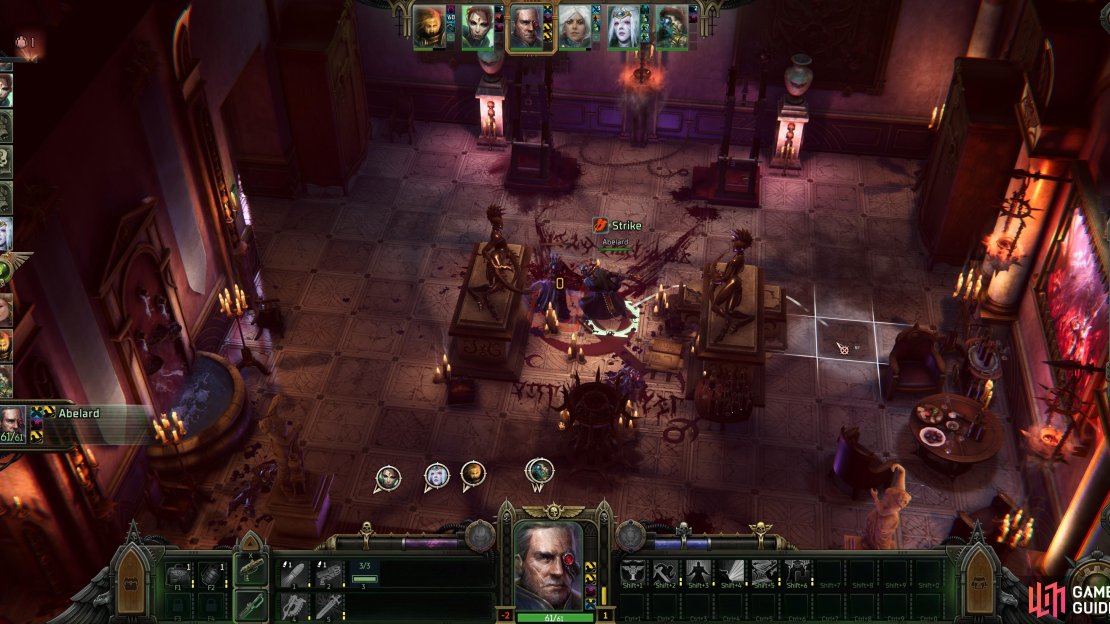
When you’re done scrounging, make your way to the northern edge of the area and enter the mansion. Once inside, head north and approach a door to the west to interact with a Servant, who will let you see the governor alone or with your group - your decision here doesn’t matter, nor do your following choices. Whether you graciously offer to help the governor deal with the rebels or throw her in jail for incompetence, you’re next tasked with finding more info about the rebels and talking to the governor’s mysterious sharpshooter who provided you with in-cutscene support earlier.
The latter is completely optional, but if you can hold your disgust at bay, you can recruit a new companion out of the encounter. You’ll find this sharpshooter - Yrliet - near a pavilion southwest of the mansion, and when you talk to her it’ll quickly become clear she’s not an unfortunate mutant - she’s a filthy xenos! If you pick a fight, she’ll smoke bomb away, but if you put practicality first, she’ll provide what little she knows (and is willing to reveal) about the rebels and their actions, although it’s clear she’s not saying everything she suspects. Whatever the cause of her hesitation, you can convince her to join you, and having a sniper who can mitigate dodgy targets will come in handy before everything is said and done. Plus, she’ll contribute more to this quest story-wise than other companions would. This interaction with Yrliet constitutes the entirety of the errand The Governor’s Aide.
(1 of 3) North of your shuttle you’ll find a Security Officer who informs you they’ve cornered a rebel.
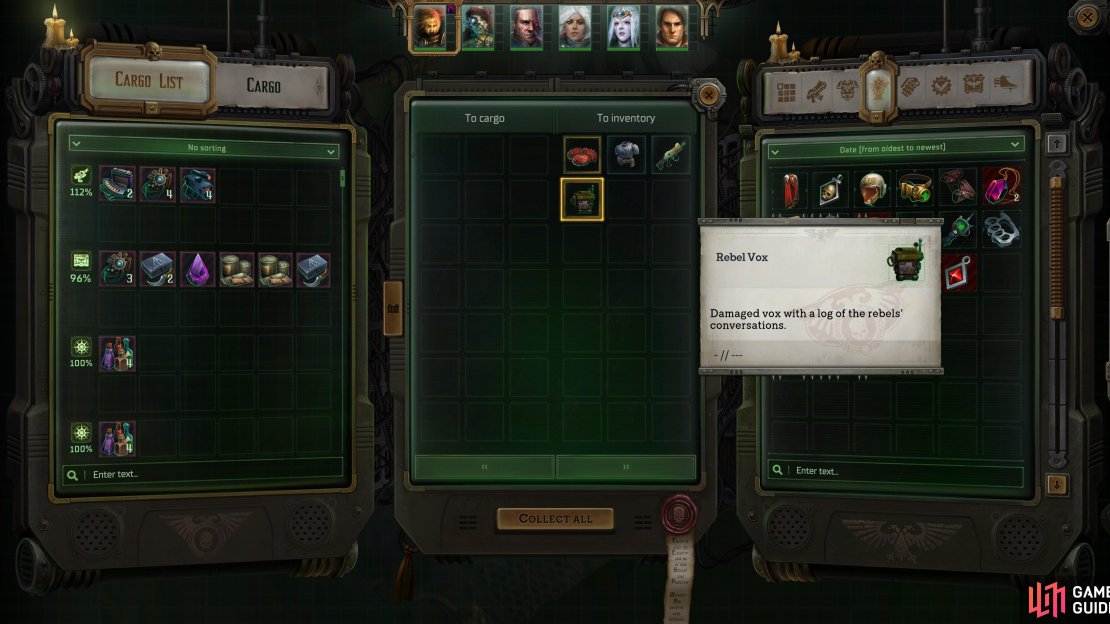
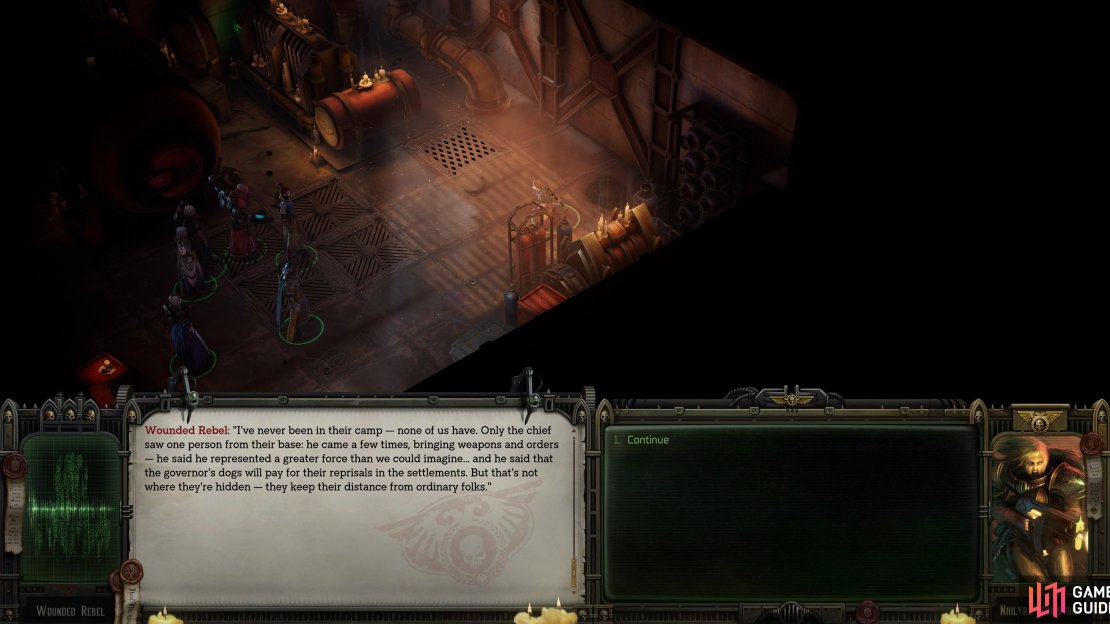
Take Yrliet or leave her, either way it’s time to find information about these rebels. To do this, head to the eastern side of the map to your shuttle, and from there go north, where you’ll be stopped by a Security Officer. A rebel locked himself up in a nearby building, and you can either let the guards do their business and kill the rebel or intervene so you can talk to the rebel. In the latter case you can attempt a [Coercion], [![]() Strength] or [Tech-Use] check to get inside (the [Awareness] check just modifies the [Strength] check a bit). Once inside the rebel will (provided you don’t kill him outright) tell you some sordid rumors about the governor, explaining the rebel’s actions. Keep the conversation going and eventually you’ll come to a [Persuasion] and [Coercion] check you can use to get intel out of him, giving you a Rebel Vox to help you pinpoint the location of the rebels. Or if at any point you kill him (including letting the guards gas him) you can pick the Rebel Vox off his corpse. There’s ultimately more opportunity to roleplay for [Iconoclast] or [Dogmatic] conviction if you talk to the rebel, but you’ll get the intel you need off him one way or another. After dealing with the rebel, loot the room (there’s a locked safe containing a
Strength] or [Tech-Use] check to get inside (the [Awareness] check just modifies the [Strength] check a bit). Once inside the rebel will (provided you don’t kill him outright) tell you some sordid rumors about the governor, explaining the rebel’s actions. Keep the conversation going and eventually you’ll come to a [Persuasion] and [Coercion] check you can use to get intel out of him, giving you a Rebel Vox to help you pinpoint the location of the rebels. Or if at any point you kill him (including letting the guards gas him) you can pick the Rebel Vox off his corpse. There’s ultimately more opportunity to roleplay for [Iconoclast] or [Dogmatic] conviction if you talk to the rebel, but you’ll get the intel you need off him one way or another. After dealing with the rebel, loot the room (there’s a locked safe containing a ![]() Disinfection Device, 2x Multikeys and some cargo in here), then leave.
Disinfection Device, 2x Multikeys and some cargo in here), then leave.
Your next task is to return to your voidship and scan the planet from orbit to locate the rebels. Having a voidship really does give you an advantage that few in your fiefdom can match. Before you leave, however, you can also talk to Atilius Quint (located just west of your shuttle, south of the entrance to the palace) to pick up the rumor Unending War and Vinzelex (along the southwestern edge of the mansion). Talking to both of these characters and depleting their dialog options will also update the main quest World Shapers, but it isn’t essential to actually advancing the quest.

(1 of 2) After talking and looting around the mansion, return to your shuttle and Yrliet will come clean, admitting she knows more about the rebels than she originally let on.
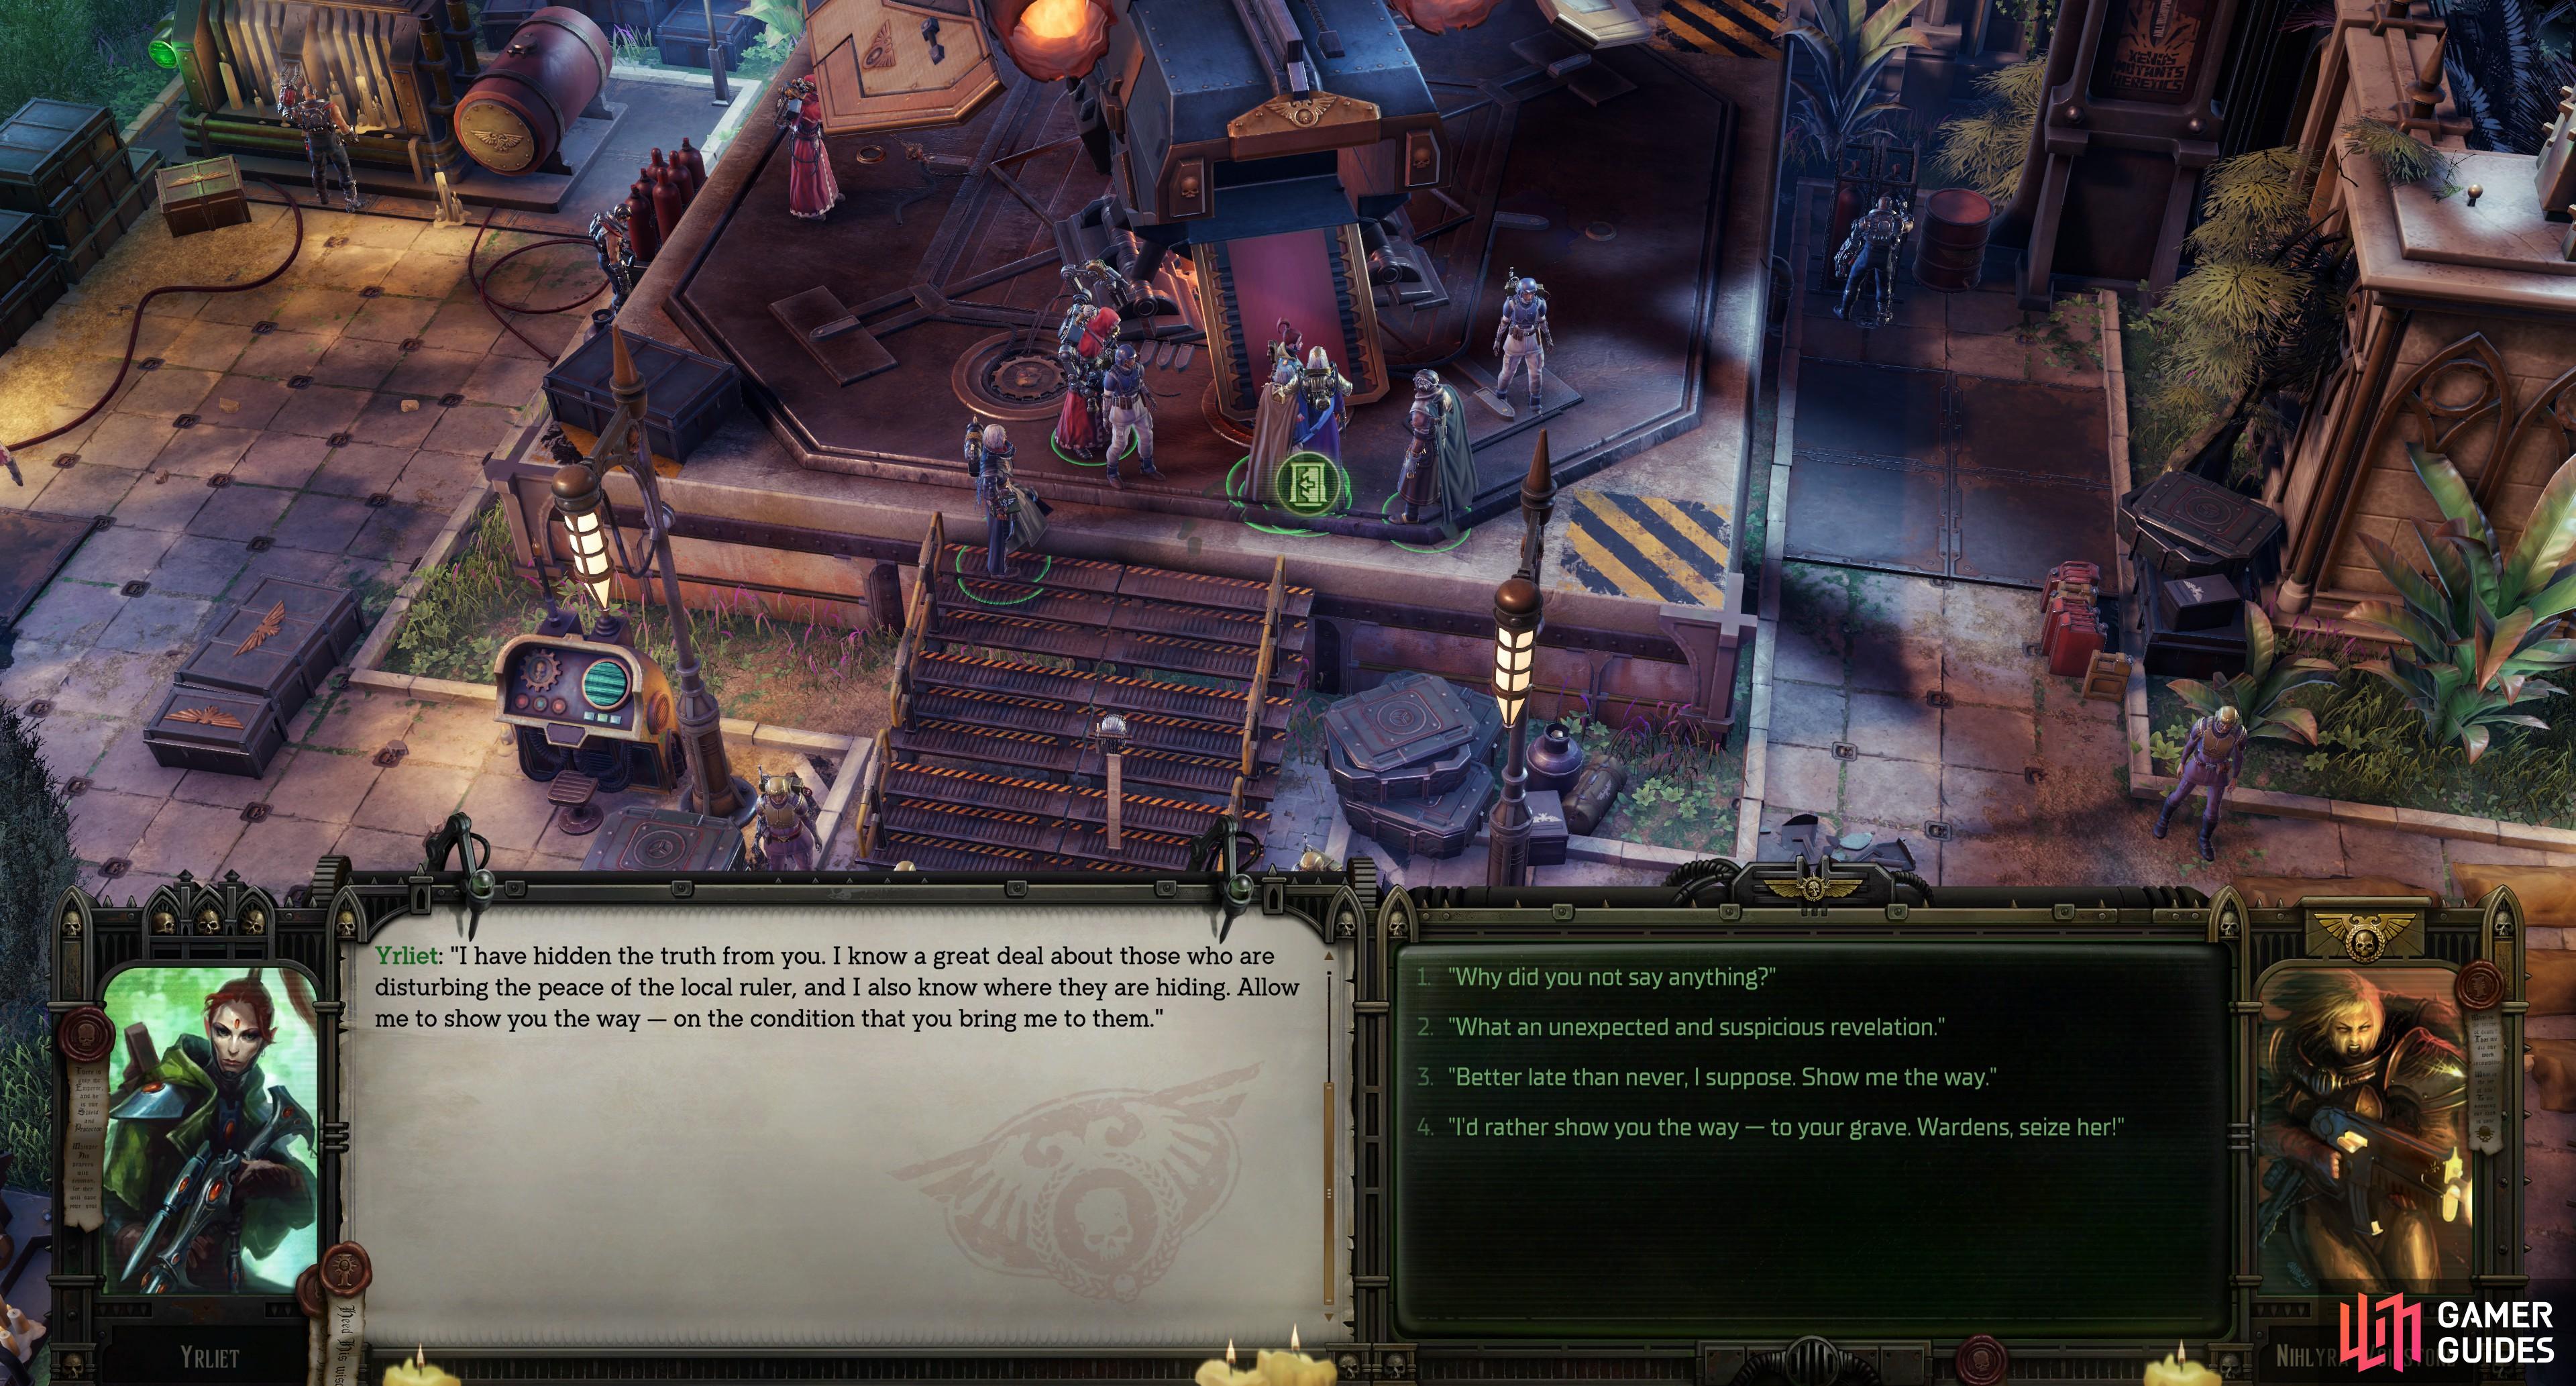

After talking and looting around the mansion, return to your shuttle and Yrliet will come clean, admitting she knows more about the rebels than she originally let on. (left), If you don’t have Yrliet to guide you (for whatever reason), you’ll need to pass some skill checks to find the rebel base. (right)
How to Find the Rebel Base
Anywho, as you enter your shuttle Yrliet will come clean and provided you don’t do anything silly and attack her or try to detain her, she’ll lead you to the Forests of Janus. If you ran Yrliet off or otherwise don’t have her with you, you’ll indeed have to return to your voidship, interact with Janus, select a “Not Explored” icon, then go through an illustrated book episode where you’ll be presented with various choices that mostly just narrates how you go about locating the rebels. Depending on what options you pick, you’ll risk burning cargo and up to -5 Profit Factor searching - we suggest picking the following:
- [Logic] Preventative actions
- [Persuasion]
 Raids by the planetary garrison
 - [Tech-Use] Search using gathered evidence
If you talked to Vinzelex and Atilius Quint earlier, some of these checks may be easier to pass, and provided you pick and pass the checks mentioned above, you should get by with some XP gains and no expenditure on your part. Either way, you should be ready to travel to the Forest of Janus area in pursuit of the rebels.
Forests of Janus
However you get here, you’ll arrive on the southeastern edge of the map. The only way forward is to head north, and after you cross a collapsed tree that serves as a bridge, you’ll reach a fork. If you go west you’ll need to pass an [Athletics] check to climb down a slope, just to the west of which is a large rebel base, while if you continue north up a trail, you’ll find a smaller cluster of rebels. Either way, you’re in for a fight, but if you want to beeline the story and keep yourself in as good of condition as possible for the main quest fights, you’ll want to ignore the northern route for now and make your way down the cliff to the west. For the sake of completionism, the optional northern areas will be listed below, while the western rebel camp will be listed under the heading of the same name later on.
(1 of 2) You can find a small rebel base to the north - dispatch the weaklings here,


You can find a small rebel base to the north - dispatch the weaklings here, (left), and loot this good, low-requirement all-rounder from his corpse. (right)
Northern Rebel Camp
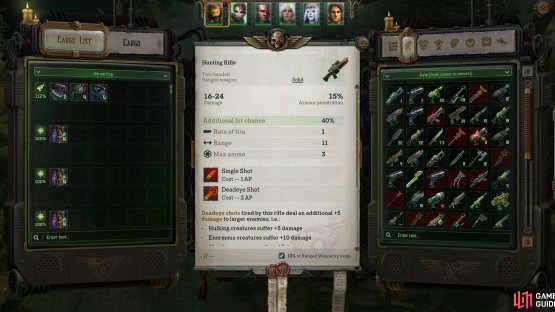
In the smaller rebel base to the north are about a dozen foes, led by a Sharpshooter Rebel, who has the only decent weapon and worthwhile amount of Wounds among the entire lot. Dispatch them and grab the ![]() Hunting Rifle from the aforementioned Sharpshooter, search around for the odd cargo-filled container, then cross a bridge to the north, stopping to gawk at some xenos ruins in the water if you wish.
Hunting Rifle from the aforementioned Sharpshooter, search around for the odd cargo-filled container, then cross a bridge to the north, stopping to gawk at some xenos ruins in the water if you wish.
To the right (east) you’ll find a cliff you can climb with an [Athletics] check, and another tree-bridge to the left (west). Climb the cliff, then pass a [Medicae] check while examining a corpse to ascertain the kill was made by a large predator. Ominous. Climb down the cliff again and cross the previously neglected tree-bridge, disarm a trap [Demolitions] when across, then investigate a plant [Lore: (Warp)] to discover that chaos corruption of the Slaanesh variety has infected Janus. Less than ideal. Press on, disarm another trap [Demolition], then examine a corpse to get some ![]() Recoil Gloves and some cargo, but be wary, as this triggers an ambush.
Recoil Gloves and some cargo, but be wary, as this triggers an ambush.


(1 of 2) Looting a corpse in a clearing will prompt a pack of Lacerax to ambush you,


Looting a corpse in a clearing will prompt a pack of Lacerax to ambush you, (left), They can deal heavy damage, dash through your party, and start out surrounding you - a bad initiative roll can make this fight difficult. (right)
Lacerax Ambush
Four catlike xenobeasts will jump out of the jungle and attack, three Janusian Lacerax and one Alpha Lacerax. They’re all fairly sturdy, but the Alpha Lacerax is a real bruiser, having more than twice as many Wounds as its lesser counterparts, possessing a Guttural Howl that can reduce your ![]() Weapon Skill and
Weapon Skill and ![]() Ballistic Skill and a
Ballistic Skill and a ![]() Dash ability (identical to the Soldier ability) that allows it to move a short distance through enemies while negating Attacks of Opportunity. The Janusian Lacerax gain two attacks per turn due to their Bestial Fury, but don’t hit nearly as hard as the Alpha Lacerax. Both have good Armor and Dodge - enough that any debuffs will help, but their absence isn’t insurmountable. Concentrating fire and picking the beasts off one at a time is your best bet for success, but bad initiative and having several enemies attack one target can just get the fight started in a bad way. Emerge victorious, however, and you can loot two nearby containers for… cargo. Not much more than an EXP stop, to be honest.
Dash ability (identical to the Soldier ability) that allows it to move a short distance through enemies while negating Attacks of Opportunity. The Janusian Lacerax gain two attacks per turn due to their Bestial Fury, but don’t hit nearly as hard as the Alpha Lacerax. Both have good Armor and Dodge - enough that any debuffs will help, but their absence isn’t insurmountable. Concentrating fire and picking the beasts off one at a time is your best bet for success, but bad initiative and having several enemies attack one target can just get the fight started in a bad way. Emerge victorious, however, and you can loot two nearby containers for… cargo. Not much more than an EXP stop, to be honest.


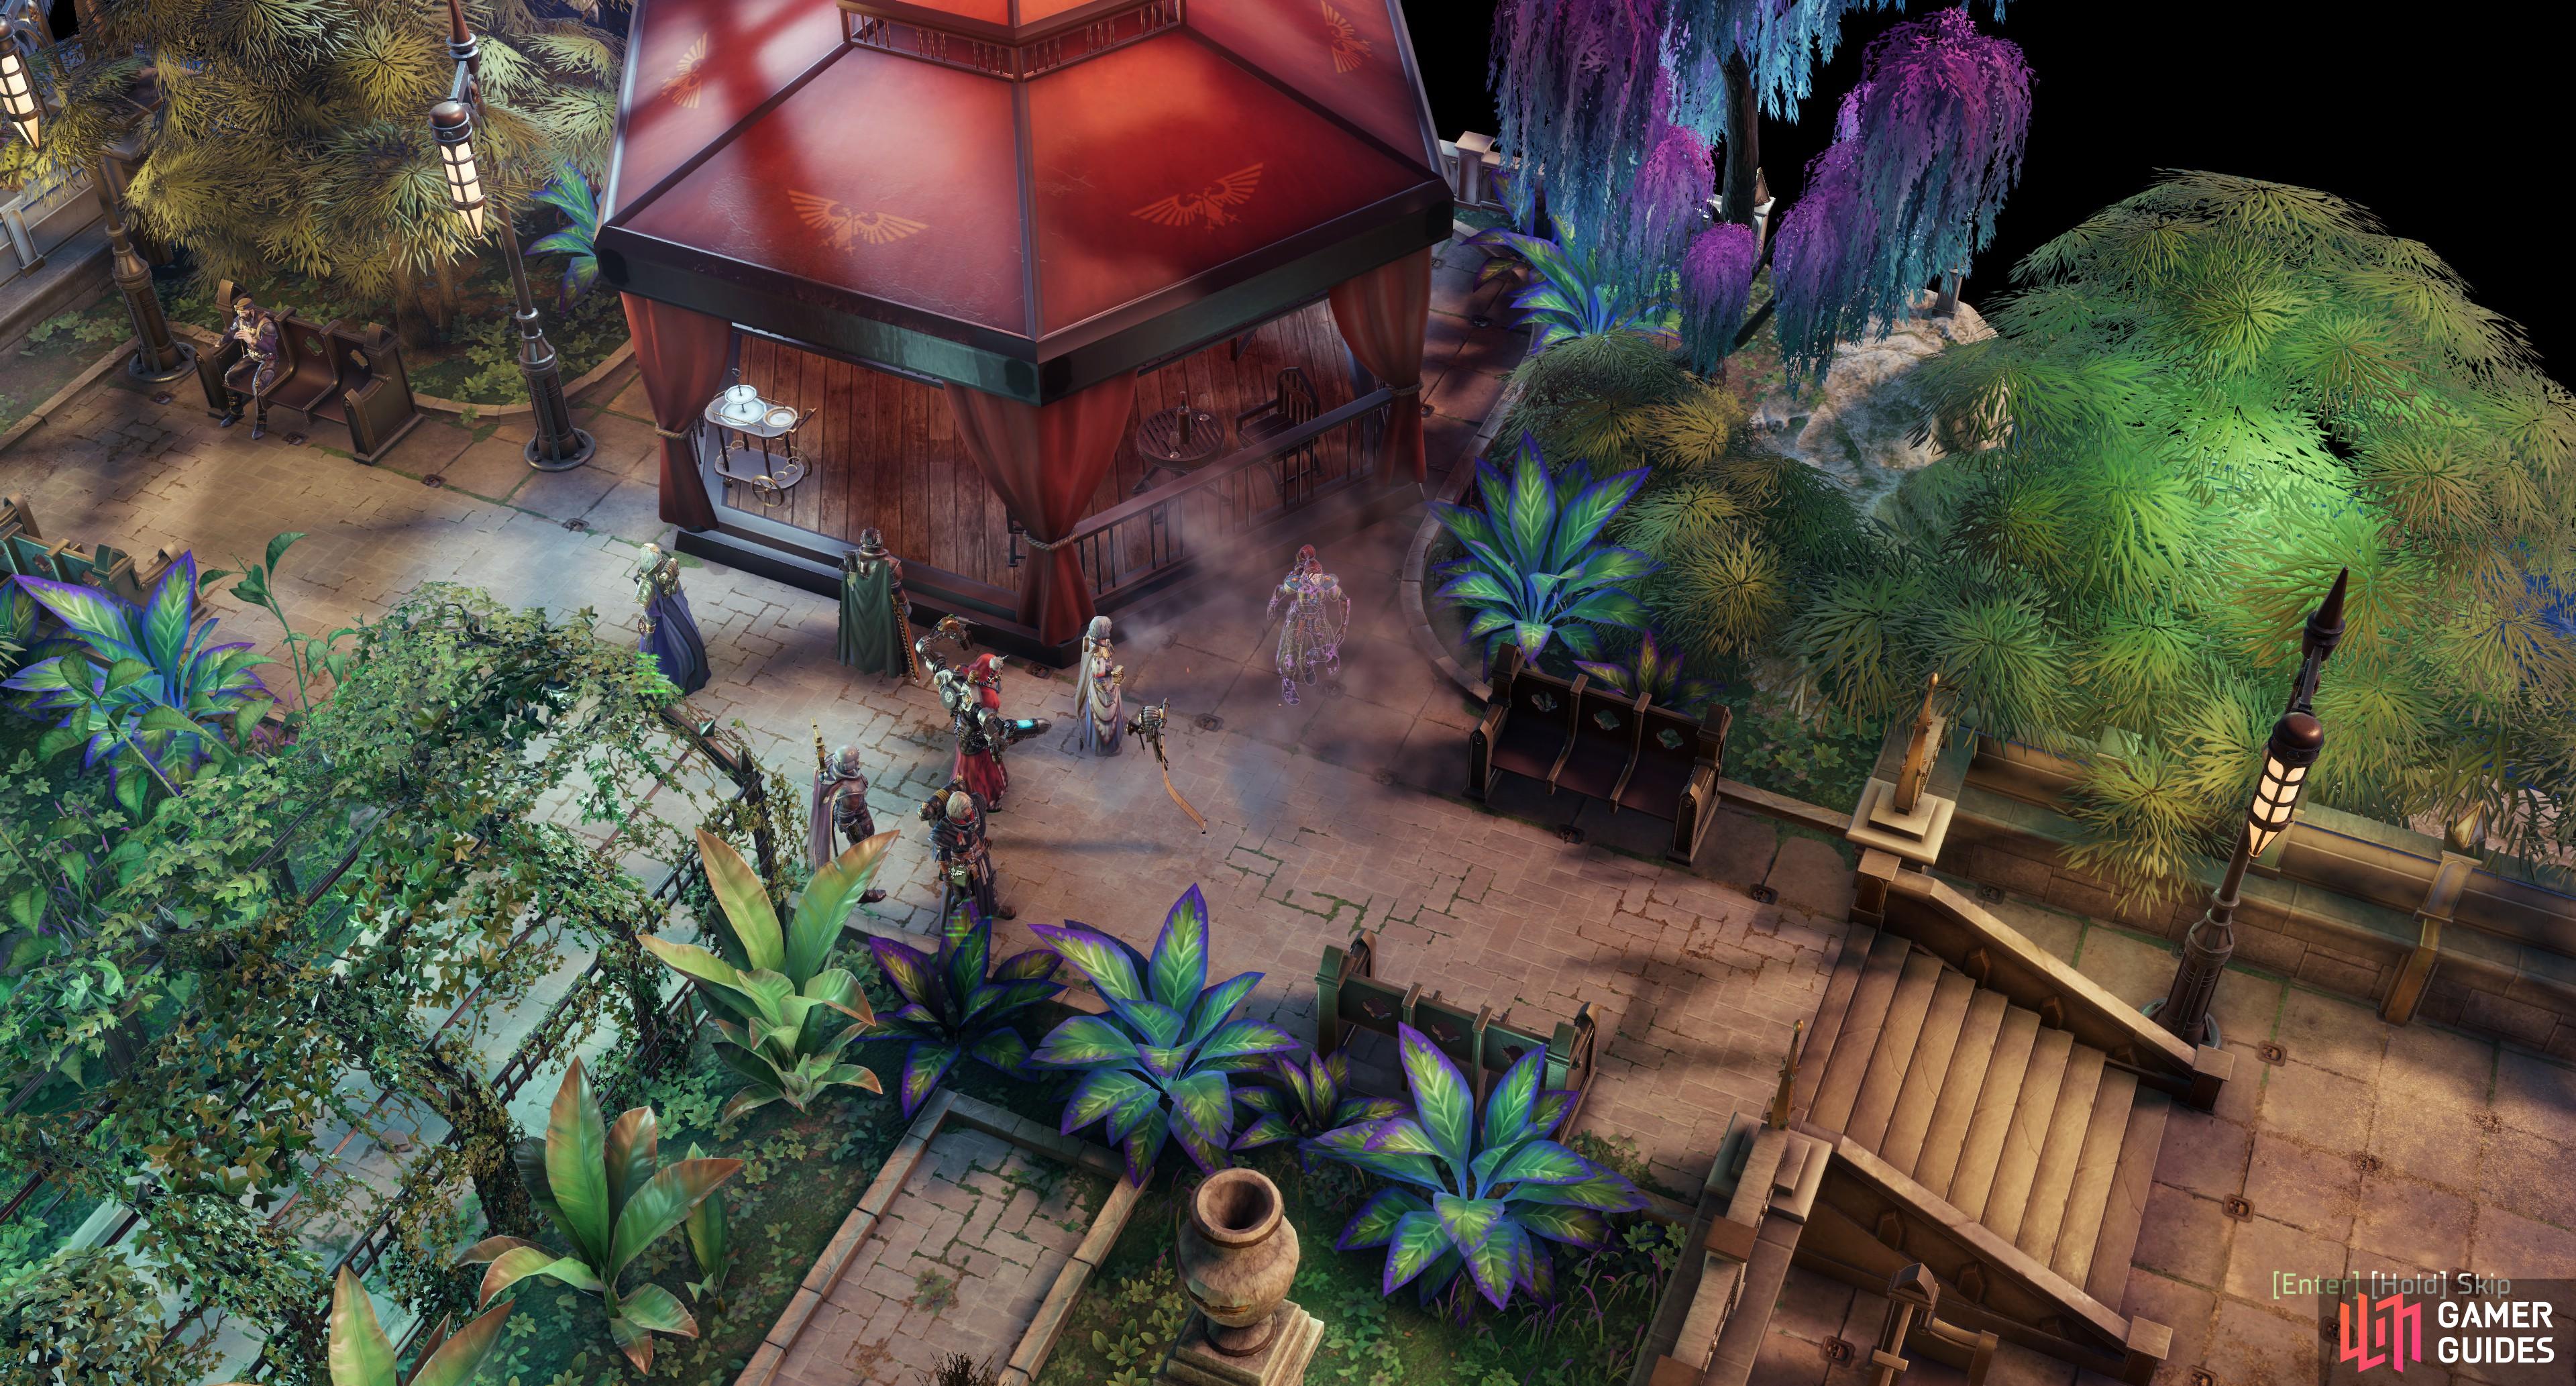
(1 of 6) Yrliet will prove her worth at the western rebel camp, sniping elite rebels,
Western Rebel Camp
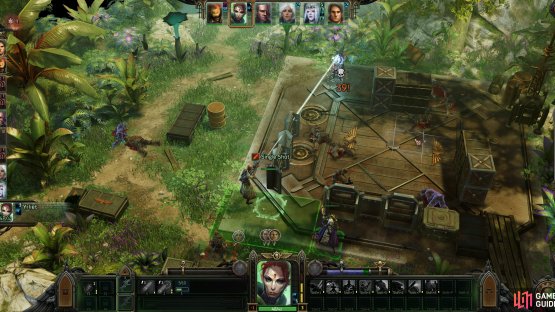
After descending the cliff you’ll be right behind a rebel camp. To the northwest is a vox-tower that makes a fine perch for a sniper or two, especially if you block the ramp up with a melee character, while other characters can split up and defeat the hill to the southwest. Most of the enemies in this fight are disposable Rebels, but there’s the odd Sharpshooter Rebel, Diversionist Rebel, and a handful of Ripper Rebels who are all stronger than usual. The real threats in this fight, however, are the Heavily Armed Rebel and the Combat Servitor, as they come equipped with a Meltagun and a Termal Multi-Melta. Both are very strong against Armor and moderately damaging.
The Heavily Armed Rebel can probably be picked off from afar before he can get up to too much mischief, and while the Combat Servitor is slow, he’s got a lot of Wounds and Armor, making him hard to bring down. In addition, it has an incredibly high Deflection stat, which just negates damage outright regardless of how much you lower its Armor. Attacks that can’t be expected to deal 20+ damage will deal almost nothing, and in a straight slugfest the Combat Servitor has plenty of advantages. We found success by targeting elite rebels with Yrliet, feeding her extra turns with our Officers until the Sharpshooter Rebel and Heavily Armed Rebel were both defeated, after which we focused her attacks on the Combat Servitor, chipping away at its Wounds as it inexorably approached while culling the Rebels that ran ahead of it. After giving as much ground as we could while remaining out of its attack range, we charged and hit it with everything we had before it could get its next turn. Buffed with a Master Tactician’s ![]() Press the Advantage ability Yrliet was finally able to deal solid damage, and
Press the Advantage ability Yrliet was finally able to deal solid damage, and ![]() Cassia’s Navigator powers weren’t as easily deterred by Deflection as
Cassia’s Navigator powers weren’t as easily deterred by Deflection as ![]() Chainswords and
Chainswords and ![]() Lasguns were.
Lasguns were.
After you start to gain the upper hand - or after enough turns pass - the enemy will get reinforcements in the form of two Aeldari Guardians. These Aeldari are moderately formidable with their burst-fire weapons, but their Wounds are only mediocre. They make up for this with an absurdly high Dodge score, and their MP will make your entire party loot laughably slow. For some reason, Yrliet isn’t nearly as fleet of foot as her fellow Aeldari… You’ll want to reduce their Dodge with debuffs and/or make use of Dodge reducing weapons (Las weapons - like that Hot-Shot Lasgun you found earlier). Failing either of those options, psyker powers don’t care about Dodge scores, so Cassia can just glare them into oblivion, if need be. If these two enemies give you trouble, you might want to change your loadouts, because it’s not getting any easier going forward.
Defeat the enemies at the camp and Yrliet will dump some more exposition on you, after which you can loot the camp. There are various containers holding cargo, but the real score here is the Meltagun the Heavily Armed Rebel possessed. You can also grab that sweet Aeldari gear the Aeldari Guardians dropped, but the weapons can only be used with the ![]() Aeldari Weapon Proficiency talent and the armor requires Aeldari Equipment, effectively limiting it to Yrliet.
Aeldari Weapon Proficiency talent and the armor requires Aeldari Equipment, effectively limiting it to Yrliet.
After clearing the base there are two paths you can take: cross a bridge to the north or go downhill to the southwest. Go north first, cross the stream, disarm a series of traps [Demolition], then loot a locked safe [Tech-Use] to get some ![]() Ergo Boots and some cargo. Backtrack to the western rebel camp and go down the aforementioned hill to the southwest, disarming traps [Lore (Xenos)] as you go. Eventually the path will turn northwest at some red, almost certainly warp-influenced flowers. Climb a cliff [Athletics] to the north, disarm a trap [Demolition], then loot some packs to score some cargo, a Data-Slate with Notes, some grenades of various types, 2x Medikits and the
Ergo Boots and some cargo. Backtrack to the western rebel camp and go down the aforementioned hill to the southwest, disarming traps [Lore (Xenos)] as you go. Eventually the path will turn northwest at some red, almost certainly warp-influenced flowers. Climb a cliff [Athletics] to the north, disarm a trap [Demolition], then loot some packs to score some cargo, a Data-Slate with Notes, some grenades of various types, 2x Medikits and the ![]() M40 Autogun. This gun is interesting due to its high Rate of Fire, but its lackluster damage output and mediocre armor Penetration should ensure it’s only used to clear fodder enemies, something
M40 Autogun. This gun is interesting due to its high Rate of Fire, but its lackluster damage output and mediocre armor Penetration should ensure it’s only used to clear fodder enemies, something ![]() Flamers are arguably better at.
Flamers are arguably better at.


(1 of 2) As you approach the main rebel base, you’ll be ambushed by a pair of Lacerax.


As you approach the main rebel base, you’ll be ambushed by a pair of Lacerax. (left), If you fought the other, larger group of Lacerax earlier, you’ll find these ones to be pushovers. (right)
Climb down and follow the trail northwest until you’re ambushed by a pair of Janusian Lacerax, who aren’t any different from the ones you encountered before, save this time there’s only two, there’s no Alpha Lacerax backing them up, and you’re not flanked. So, this should be cake. Defeat the xenobeasts, then press on to reach the main rebel base, situated near some xenos ruins. Disarm a few traps, then cross the bridge to trigger a confrontation with the remaining rebels and their leaders.

(1 of 2) You can coerce the rebels into joining your side, which will make fighting the Aeldari much easier.


You can coerce the rebels into joining your side, which will make fighting the Aeldari much easier. (left), You can also talk your way into an alliance with the Aeldari - either from a position of supplication or strength. (right)
Choice: Ally with the Aeldari, Convince the Rebels to Join You, or Fight?
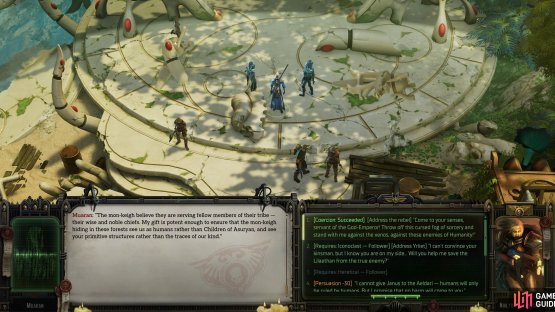
Advance towards the ruins and you’ll be confronted by Muaran, an Aeldari Farseer and mastermind of this rebellion. If you brought Yrliet the two of them will exchange words, and if you refrain from outright attacking, picking [Dogmatic] options or picking any of the obviously inflammatory options (telling a Farseer to pull his head out of his arse isn’t great diplomacy) you have a surprising number of options. First, you can, as mentioned, just pick a fight, which we’ll cover shortly. If you want to flavor your violence a little more favorably, you can - after a few conciliatory dialog responses - pick the option [Nod at the rebels] “What have you done to these people? They believe you are their commander.” followed by [Coercion] [Address the rebel] “Come to your senses, servant of the God-Emperor! Throw off this cursed fog of sorcery and stand with me against the xenos, against these enemies of Humanity!” The [Coercion] check to get this option is hidden and checked automatically, so if you don’t see it pop up after the [Nods at the rebels] choice, you failed the check, and reloading is your only option. This picks a fight, but all the rebels will be on your side, making things far, far easier.
While it’s definitely an edge case when it comes to Warhammer 40,000 lore, you can also practice some honest diplomacy and avoid a fight here, and this comes in several flavors. Pick the “nice” options and eventually you’ll get a variety of choices, many [Iconoclast] ones that make various concessions in order to prevent violence, as well as a [Persuasion] check that’s secretly Dogmatic, securing peace between you and the Aeldari but from a position of strength. Otherwise, any diplomacy that doesn’t end in violence plays out surprisingly similarly - you’ll have to return to Governor Vyatt’s Estate and confront the Chaos-compromised governor on your own, and the Aeldari won’t make another peep.


(1 of 3) All the Aeldari have high Dodge, but they’re ultimately susceptible to pskyer powers.
Muaran Boss Strategy
If you do end up in a fight for whatever reason, you’ll find yourself facing off against Muaran, four Aeldari Guardians (two with burst-fire ![]() Shuriken Catapults near Muaran, two with Aeldari Chanswords further back) and the rebels, who are mostly nondescript save for the fact that Bogul - in addition to being notably sturdier than the rest - is armed with a Shuriken Pistol. The Shuriken Pistol and Shuriken Catapults are both mid-damage weapons with a high Rate of Fire which are capable of withering barrages of burst fire, especially against lightly armored targets. They’ll often catch each other in friendly fire with these weapons, but it’s small consolation given the damage they can do. While the rebels are mostly throwaway and the Aeldari don’t have a lot of Wounds, they do have ridiculously high Dodge stats, and unlike your Dodge numbers, theirs actually seems to translate into them being very slippery in combat. Like with the Aeldari Guardians you fought earlier, try to debilitate them, use weapons with high Dodge Reduction, or psyker powers.
Shuriken Catapults near Muaran, two with Aeldari Chanswords further back) and the rebels, who are mostly nondescript save for the fact that Bogul - in addition to being notably sturdier than the rest - is armed with a Shuriken Pistol. The Shuriken Pistol and Shuriken Catapults are both mid-damage weapons with a high Rate of Fire which are capable of withering barrages of burst fire, especially against lightly armored targets. They’ll often catch each other in friendly fire with these weapons, but it’s small consolation given the damage they can do. While the rebels are mostly throwaway and the Aeldari don’t have a lot of Wounds, they do have ridiculously high Dodge stats, and unlike your Dodge numbers, theirs actually seems to translate into them being very slippery in combat. Like with the Aeldari Guardians you fought earlier, try to debilitate them, use weapons with high Dodge Reduction, or psyker powers.
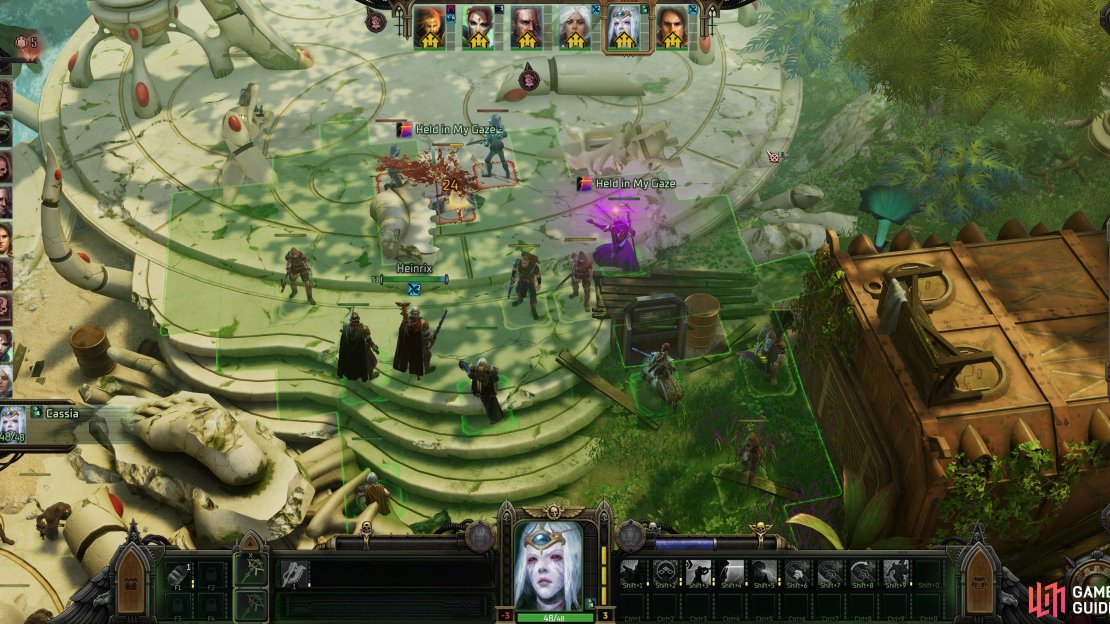
As for Muaran himself, initiative can swing this fight significantly. If Cassia goes first, she can deal some heavy damage with repeated use of ![]() Held in My Gaze that may leave Muaran vulnerable to a clean takedown by another character - Yrliet is likely to have your next best chance of dealing reliable damage. If you can take Muaran out quickly, this fight becomes cake, especially if the rebels are on your side. If Muaran goes early, he can squelch rival psykers with his Mind War ability, debuff with Prophesy of Doom, and inflict wide AoE damage with Eldritch Storm. A nasty foe we’d rather dispatch quickly.
Held in My Gaze that may leave Muaran vulnerable to a clean takedown by another character - Yrliet is likely to have your next best chance of dealing reliable damage. If you can take Muaran out quickly, this fight becomes cake, especially if the rebels are on your side. If Muaran goes early, he can squelch rival psykers with his Mind War ability, debuff with Prophesy of Doom, and inflict wide AoE damage with Eldritch Storm. A nasty foe we’d rather dispatch quickly.
After you strike a deal with the Aeldari or defeat them, Yrliet will ultimately end up asking to stay in your party. Make what decision you will, and if you convinced the rebels to turn on the Aeldari you’ll get to make a decision regarding their fate as well, which is mostly just an opportunity to score more [Iconoclast] or [Dogmatic] conviction. Loot the dead rebels and Aeldari for some generic weapons, then search the area - there’s not a lot of loot here, but you can pull an ![]() Orthlak Mark IV out of a chest on a roof.
Orthlak Mark IV out of a chest on a roof.
With that, it’s time to leave the Forests of Janus behind and return to Governor Vyatt’s Estate. Fortunately, a shuttle has landed nearby, so you don’t have to travel far to return to your voidship.
![Either way, succeed at a [Tech-Use] check to remove the barrier so you can give chase.](/images/markup-img-full/17/328/rogue_trader_vistenza_fight_tech_use_barrier-3fda7d21.jpg.jpeg)
(1 of 3) By picking the right dialog options, you can convince Vistenza to repent…
Choice: Convince Vistenza to Surrender
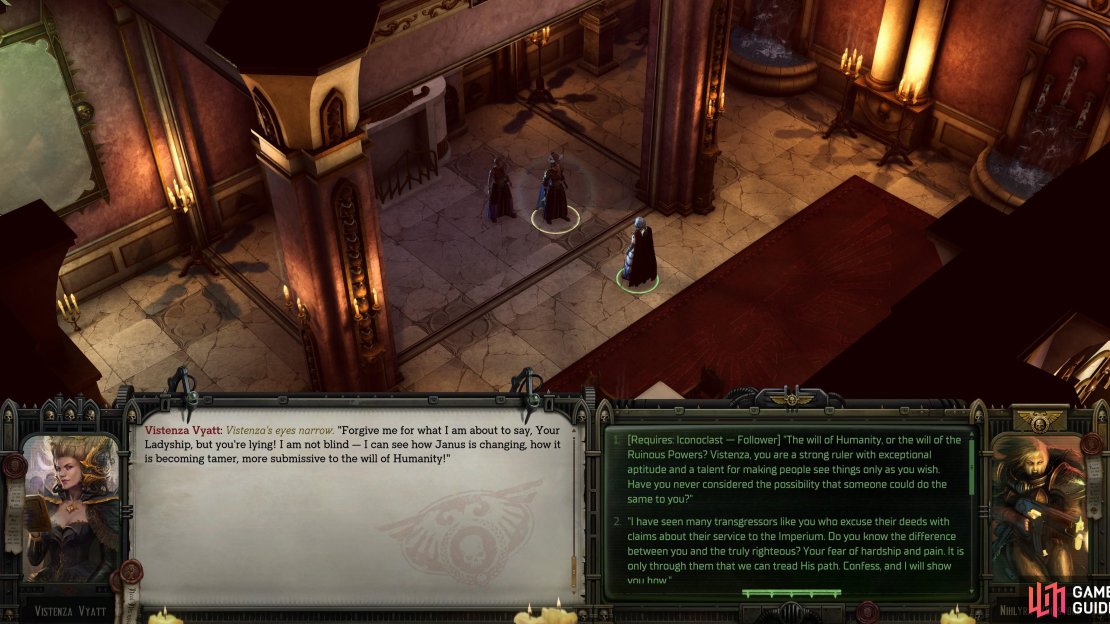
Make your way back to the mansion and confront Vistenza, where you’ll surprisingly get some dialog choices that influence the upcoming encounter. If you refrain from picking the [Attack] option or any [Dogmatic] or [Iconoclast] options you see you should be able to attempt a [Persuasion] or [Coercion] check, after which you can respond with ”You are not saving Janus or improving it, Vistenza. You are destroying this world with your own hands.”. This will open up numerous potential responses, most of which Vistenza ignores, save for the two following ones:
-
[Requires: Iconoclast - Follower] “The will of Humanity, or the will of the Ruinous Powers? Vistenza, you are a strong ruler with exceptional aptitude and a talent for making people see things only as you wish. Have you never considered the possibility that someone could do the same to you?”
-
”I have seen many transgressors like you who excuse their deeds with claims about their service to the Imperium. Do you know the difference between you and the truly righteous? Your fear of hardship and pain. It is only through them that we can tread His path. Confess, and I will show you how.”
Picking either of these options will convince Vistenza to repent… unfortunately the creature behind her isn’t keen on such a course of action and will murder Vistenza. On the plus side, this means you won’t have to fight Vistenza in the upcoming encounter, but you can’t loot her, either. If you allied with the Aeldari earlier, they also won’t send reinforcements if Vistenza is already dead… presumably they already got what they wanted?

(1 of 2) You’d be wise to keep your party spread out, as the Secret Chambers Lieutenant loves to spam Stun Grenades.

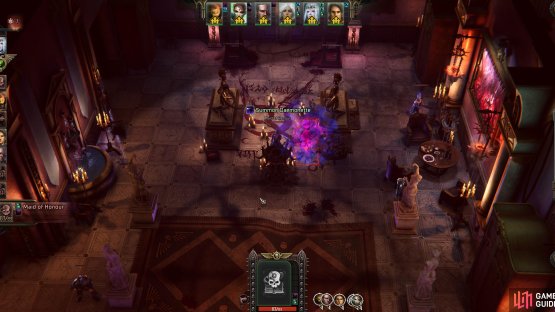
You’d be wise to keep your party spread out, as the Secret Chambers Lieutenant loves to spam Stun Grenades. (left), While you’re struggling with the Secret Chambers Guards, Lieutenant and Daemonettes, the Maid of Honour will keep summoning more demons. (right)
Vistenza Vyatt Boss Strategy
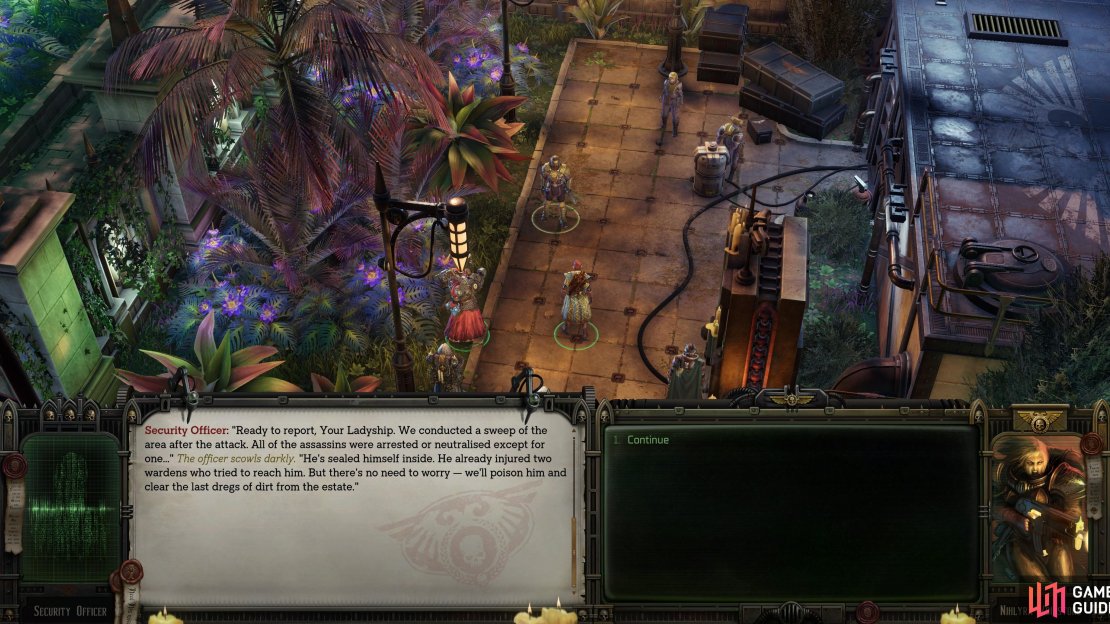
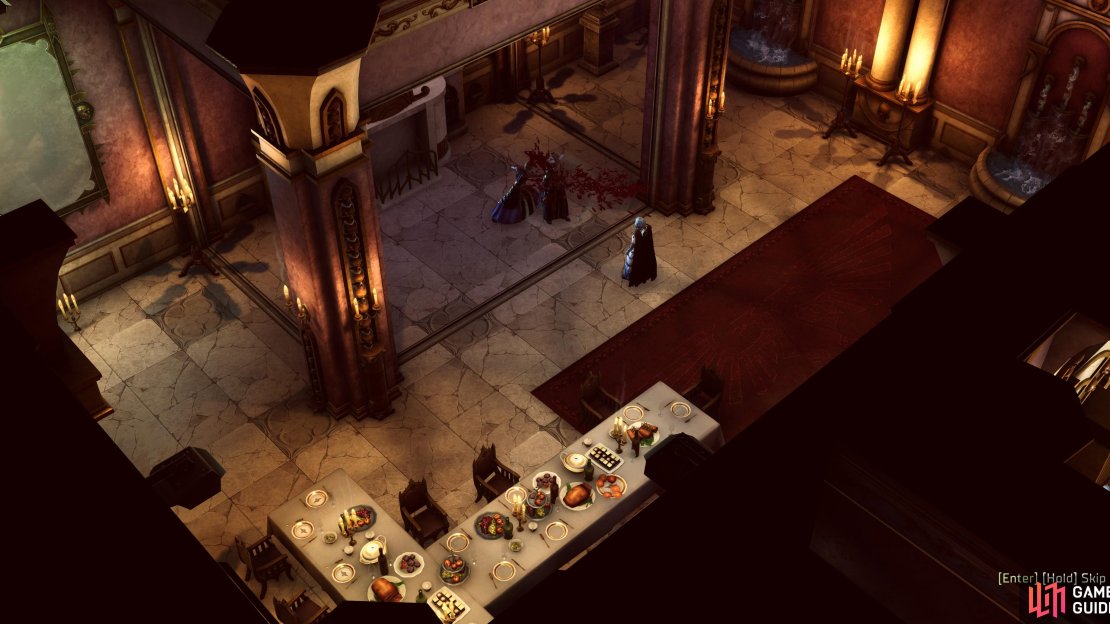
However you deal with Vistenza during your initial confrontation you’ll need to perform a [Tech-Use] check to lower the barrier erected by her Maid of Honour, then chase your foe down a hallway. Don’t get too eager, however, as there are two traps in your way, one [Demolition] trap with a trigger around a corner, in the area of a [Lore (Warp)] trap, which will take some careful maneuvering to avoid. Disarm both traps and loot a container to score a ![]() Bolt Pistol and some cargo, then open a locked door [Tech-Use] and enter the excessive and indulgent room beyond.
Bolt Pistol and some cargo, then open a locked door [Tech-Use] and enter the excessive and indulgent room beyond.
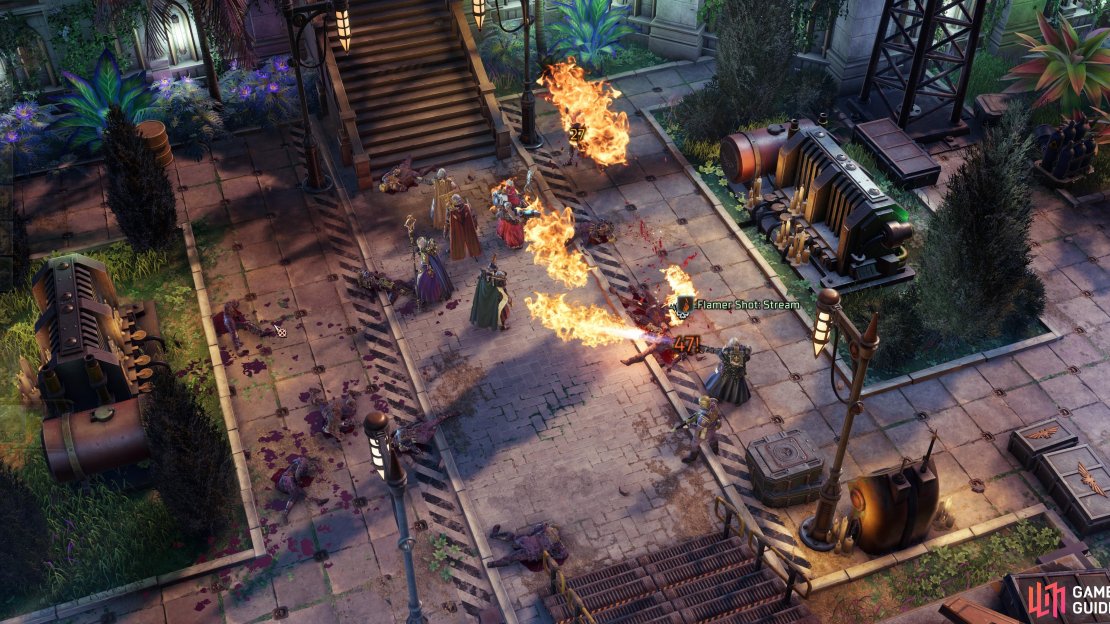
After a scene you’ll be able to enter the room properly, and if you head too far east you’ll provoke a pair of Corrupted Nobles. Even if Vistenza got ganked earlier, this fight can be annoying due to a Secret Chambers Lieutenant who can freely spam Stun Grenades, which affect a large AoE and cause characters to lose their next turn, which is a significant debuff. Needless to say, you don’t want your party grouped up. So instead of rushing on in, split your party in half and send one group around the depressed sofa-lined area in the center of the room, then advance to start the fight.
The Corrupted Nobles are mere fodder, but in the room to the east greater threats congregate, including a pair of Secret Chambers Guards, the aforementioned Secret Chambers Lieutenant, two Daemonettes, the Maid of Honour and, if she’s still alive, Vistenza Vyatt. Most of these foes are annoying in their own way, not least because they all have a fair number of Wounds. The Secret Chambers Guards can lay into you with their M40 ![]() Autoguns, which are capable of withering burst fire, and unlike half the enemies you’ve been encountering lately you likely don’t have the Armor, Dodge or Wounds to shrug such attacks off. The Secret Chambers Lieutenant, as mentioned earlier, is a nuisance due to his Stun Grenades, but he’s no slouch with his
Autoguns, which are capable of withering burst fire, and unlike half the enemies you’ve been encountering lately you likely don’t have the Armor, Dodge or Wounds to shrug such attacks off. The Secret Chambers Lieutenant, as mentioned earlier, is a nuisance due to his Stun Grenades, but he’s no slouch with his ![]() Bolter, either.
Bolter, either.

(1 of 3) Play conservatively and let the Secret Chambers Guards and Lieutenant come to you, and try to eradicate them before they can get close enough to land solid burst fire volleys.
All of these foes are much easier to deal with if you can reach them in melee or keep them at a distance, but while you try to play the range game with them you’ll have to deal with Daemonettes, who seem to defy numerical probability when it comes to overcoming your Dodge rolls, and while they don’t hit terribly hard, they can also debuff you via the mere proximity with Manifestation and Aura of Elation. While not terribly durable, the Maid of Honour will summon another Daemonette every turn, but if you kill her all the summoned Daemonettes (save the initial two) will vanish. This should make the Maid of Honour your top priority… if you can spare the time to attack her with the other aforementioned nuisances.
Splitting up the party, sticking to cover and playing conservatively at first will give you your best shot at long term success, but you need to take down those Secret Chamber Guards and the Secret Chambers Lieutenant quickly, likely by playing safe enough to accumulate enough Momentum to pull off a Heroic Act or two. Once they’re down you can more boldly advance against the Maid of Honour - Yrliet bolstered by an Officer’s Finest Hour! Heroic Act might be able to shoot down the Maid of Honour in a single turn, or at least grievously wound her to the point where somebody else can finish her off.
As for Vistenza Vyatt, if she even lives long enough to participate in this fight, she’s something of an odd combatant. Not much of a threat on her own, she can at best pick away at characters with her ![]() Needle Pistol, which deals decent damage, but on her own she’s the least dangerous opponent here, save for the Corrupted Nobles you brushed aside at the start of the fight. She can, however, heal her allies due to her Daemonic
Needle Pistol, which deals decent damage, but on her own she’s the least dangerous opponent here, save for the Corrupted Nobles you brushed aside at the start of the fight. She can, however, heal her allies due to her Daemonic ![]() Regeneration ability, and her lame, overly gamey Force Field passive gives her a flat 50% chance to negate any incoming damage. This makes her durable, not dangerous, and her ability to heal can be a real nuisance if she’s close enough to pull it off and you don’t defeat a priority target like the Maid of Honour in a single turn.
Regeneration ability, and her lame, overly gamey Force Field passive gives her a flat 50% chance to negate any incoming damage. This makes her durable, not dangerous, and her ability to heal can be a real nuisance if she’s close enough to pull it off and you don’t defeat a priority target like the Maid of Honour in a single turn.
If Vistenza Vyatt survived to bother you during this fight, at the end of the first turn the Aeldari will appear as reinforcements… assuming you allied with them instead of killing them. This aid appears in the form of three Aeldari Guardians, and on harder difficulties it may be worth playing even more conservatively so they have a chance to actually catch up with you and help distract enemies enough for you to pick off the Secret Chambers Guards/Lieutenant.
(1 of 2) After defeating Vistenza and/or the Chaos Daemons she consorted with, you can ask Yrliet to join your party long term.


After defeating Vistenza and/or the Chaos Daemons she consorted with, you can ask Yrliet to join your party long term. (left), Be sure to loot Vistenzia’s office for some nice accessories. (right)
Once the Secret Chambers Lieutenant and Maid of Honour are defeated you should be in good shape, and after emerging victorious you’ll be able to ask Yrliet to remain with you as a companion. More importantly, you can loot the vanquished. The Maid of Honour will yield a ![]() Sinister Diary that gives its holder a +20 bonus to [Lore (Warp)] checks, but a -10 penalty to
Sinister Diary that gives its holder a +20 bonus to [Lore (Warp)] checks, but a -10 penalty to ![]() Willpower resistance saves, while Vistenza will drop her Needle Pistol and a
Willpower resistance saves, while Vistenza will drop her Needle Pistol and a ![]() Signet Ring which gives a +10 bonus to [Persuasion]. If she was slain by the Maid of Honour before the fight, you won’t be able to loot her.
Signet Ring which gives a +10 bonus to [Persuasion]. If she was slain by the Maid of Honour before the fight, you won’t be able to loot her.
Most of the other enemies have mundane loot, and there’s a good bit of nondescript cargo you can pick up by searching around. Be sure to search Vistenza’s office to find a chest holding ![]() Power Grips (+10 to [Strength]) and a
Power Grips (+10 to [Strength]) and a ![]() Noble Born Mantle (+15 to [
Noble Born Mantle (+15 to [![]() Fellowship] when there are no enemies within a 4-cell radius). As you leave search the wrap-around sofa in the first room to find a Tome of Excess, (+10 to [Lore (Warp)], but wielder takes +(Lore (Warp) / 3)% more damage from psychic and Navigator powers).
Fellowship] when there are no enemies within a 4-cell radius). As you leave search the wrap-around sofa in the first room to find a Tome of Excess, (+10 to [Lore (Warp)], but wielder takes +(Lore (Warp) / 3)% more damage from psychic and Navigator powers).

After you leave Janus you’ll be able to choose what to do with the planet’s bounty - relieve Footfall, or let Incendia Chorda have her way?
Choice: Send Provisions to Footfall or Not?
With all that plundered, leave the mansion. If you were too chummy with the Aeldari and/or tried to talk sense into Vistenza, Heinrix may complain, and Atilius Quint will question you, but for all intents and purposes you’re done with the main quest World Shapers. Once you return to your Voidship you’ll get one final choice to make now that you’ve recovered Janus and can start reaping the benefits of this stolen Maiden World: Do you send provisions to Footfall, or let Footfall suffer, forcing them to submit to whatever deal Incendia Chorda offered? You’ll get three choices, one for each conviction, and whichever conviction you choose will get a whopping +15 bonus. The [Iconoclast] option also gives you Profit Factor +5.
Now that your business on Janus is concluded, check out the following pages to continue building your fiefdom in Rogue Trader:
No Comments