
Sealed Grounds
Once you arrive back at the Sealed Grounds, Groose will tell that, already, the Imprisoned is soon going to break from the depths of the planet below again. Go to the bottom of the pit and let’s take him down for good this time!!
Boss: The Imprisoned
(1 of 2) This is the last time you’ll have to fend off The Imprisoned.
This is the last time you’ll have to fend off The Imprisoned. (left), Remember to use Groose’s bombs to stun the beast. (right)
Battling the Imprisoned is similar to the last time around. As before, you want to kill it by repeatedly shoving the stone spike into its head three times (nine hits) before it reaches the temple. How do you shove the spike in?
Well, let’s go in order. For the first third of the battle, you’ll have to do one of two things. One: cut off all of its toes. This is quite the feat, seeing as it is moving very fast and releasing shockwaves with each step.
If you’re going to do this, I recommend hitting it with one of Groose’s Bombs to stun it. Take off the toes on the stunned boss, one foot at a time, then shove in the spike with down-up vertical slices.
The easier way is to use the above ledges or the central whirlwind to land on the boss’s head, atop which you can use up-down vertical slices. Note that The Imprisoned will throw you off, so you should stun it with one of Groose’s bomb before jumping on its head.
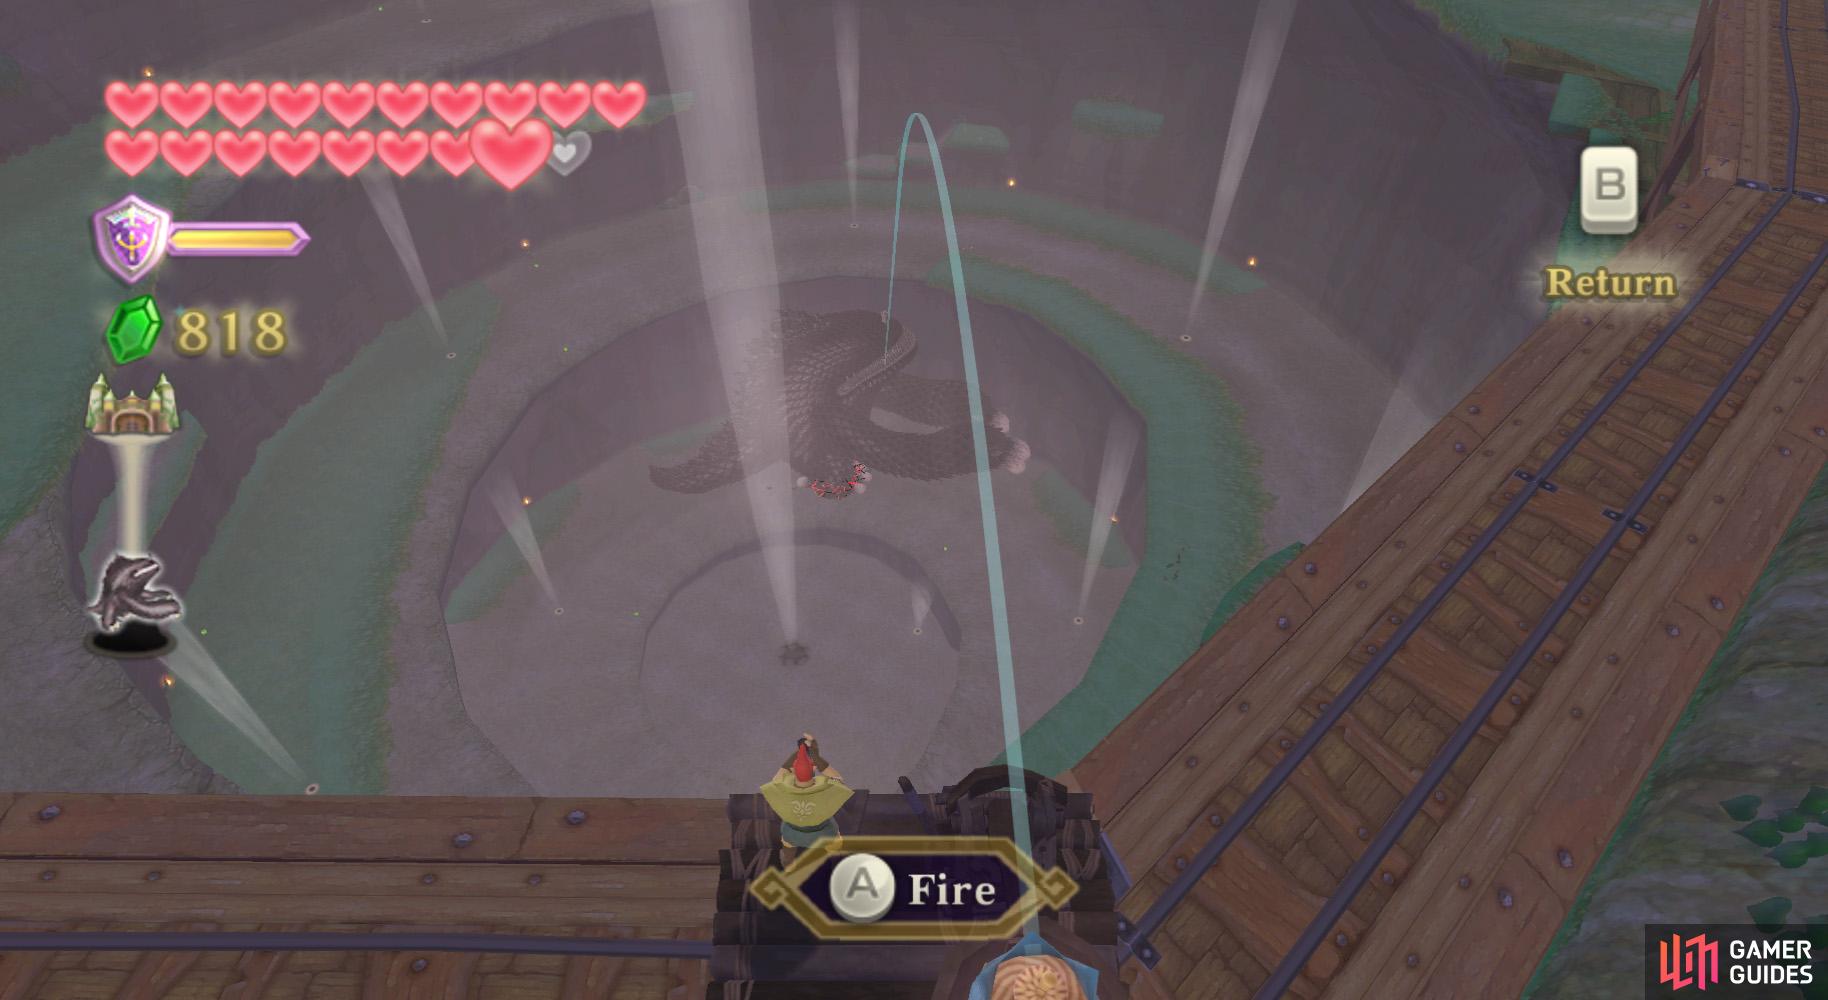
(1 of 2) When The Imprisoned starts flying, call on Groose’s help to send it plummeting back to the ground.
When The Imprisoned starts flying, call on Groose’s help to send it plummeting back to the ground. (left), For the third phase, you’ll need to head over to Groose’s catapult yourself. (right)
The boss will then get up – way up – for round two. It will now be flying. You cannot get to it whatsoever until Groose hits it with a Bomb. Once he does, you need to go to the center of pit and do some more down-up vertical slices.
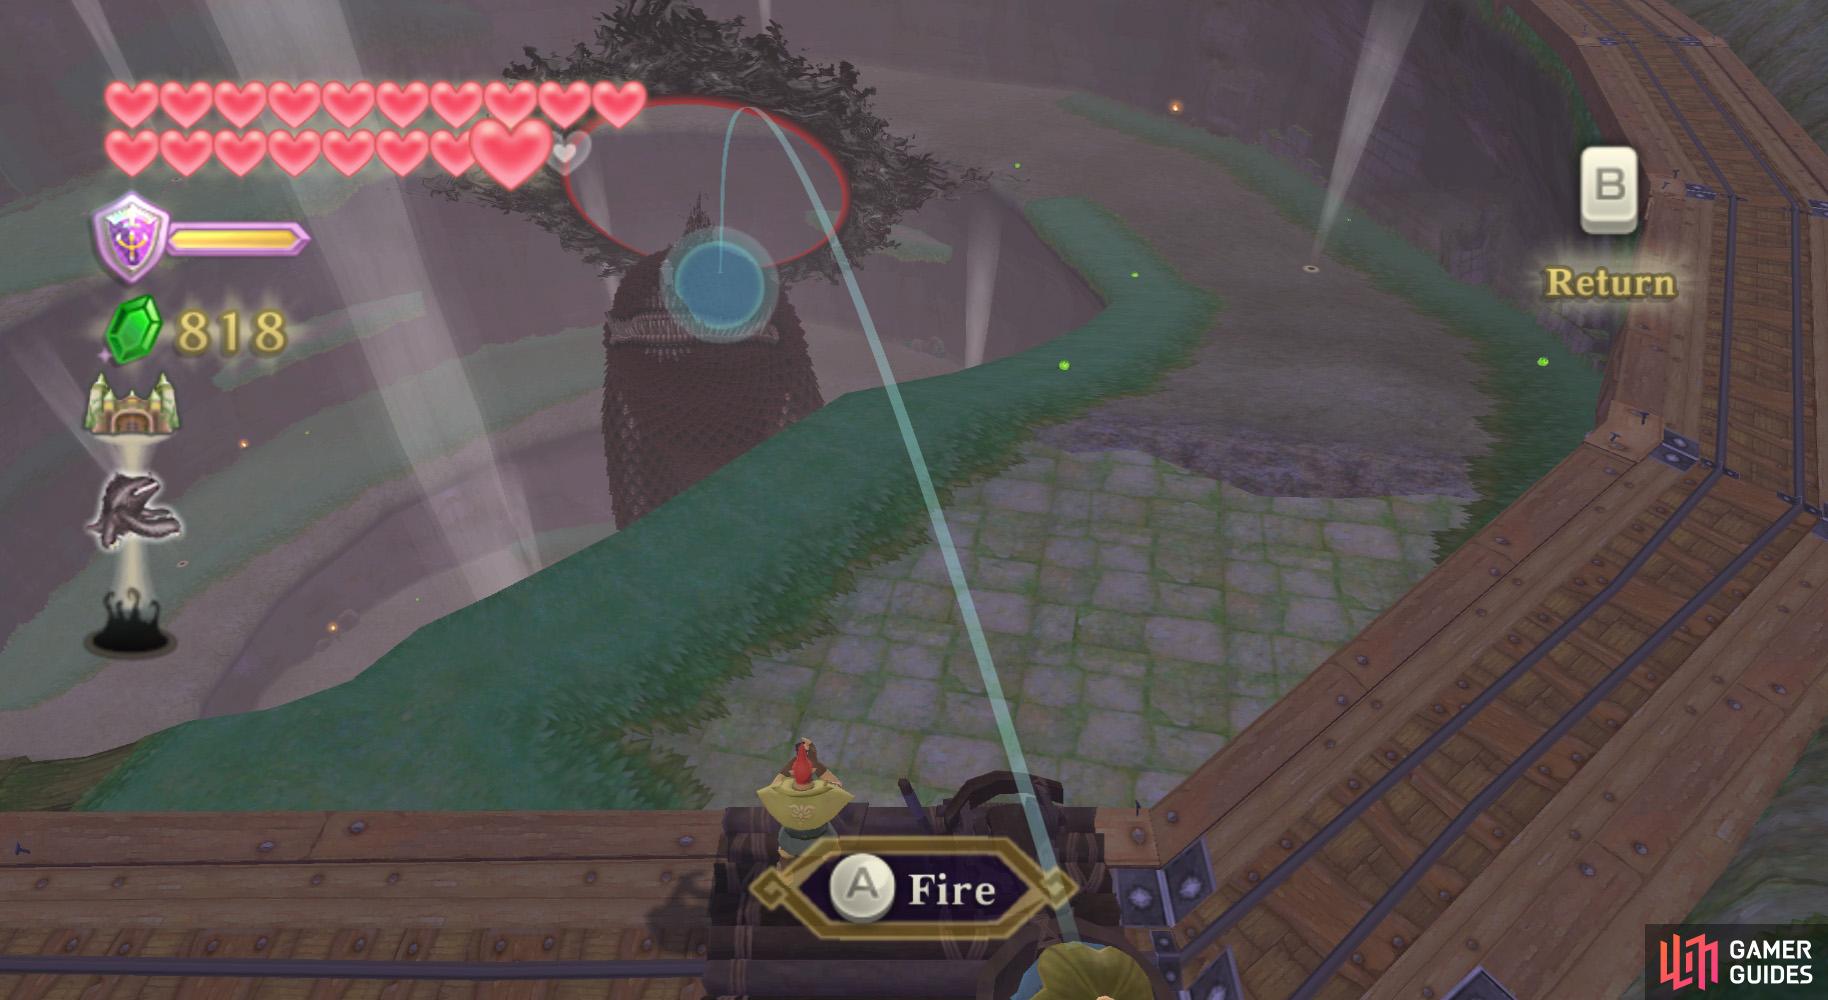
The Imprisoned will then start flying again. Groose has also lost his Bomb supply, so you need to get up there. Use the whirlwinds around the pit to get up there. Speak with Groose, then get into the catapult.
Aim for the boss’s head (slowly adjust your aim at the head to go further back, then, when the big blue circle suddenly goes away, fire). Atop its head, do three up-down vertical slices to finish off the boss.
After finishing the boss (yet again), head to the bottom of the pit and hit the sealing spike with a Skyward Strike. Then swing the Wii Remote in correspondence with the appearing design. Afterwards, use the whirlwinds to go up to and into the Sealed Temple.
Sealed Temple
Inside, you’ll meet up the old woman and Groose. The former will mention that the majority of the Faron Woods has been flooded by an unknown cause – the reason why you couldn’t really choose your landing location from earlier.
An idea soon dawns on Groose – using his catapult, you’ll be launched far up and over to the Great Tree. Save at the nearby Bird Statue, then exit the Temple through the front door.
Sealed Grounds (Again)
Back outside, speak with Groose to get flung.

 Sign up
No Comments