
![]() Adam the Firstborn is the penultimate boss in V Rising. Added with the Gloomrot update, Adam is arguably the most difficult boss in the game due to his hard-hitting attacks, an arena that has to be continuously disabled to move freely, and his ability to close the distance almost immediately. Add to the fact that you need to disable the electronic fields blocking the entrance to fight him with EMPs makes this battle frustrating. You can find Adam at the back of
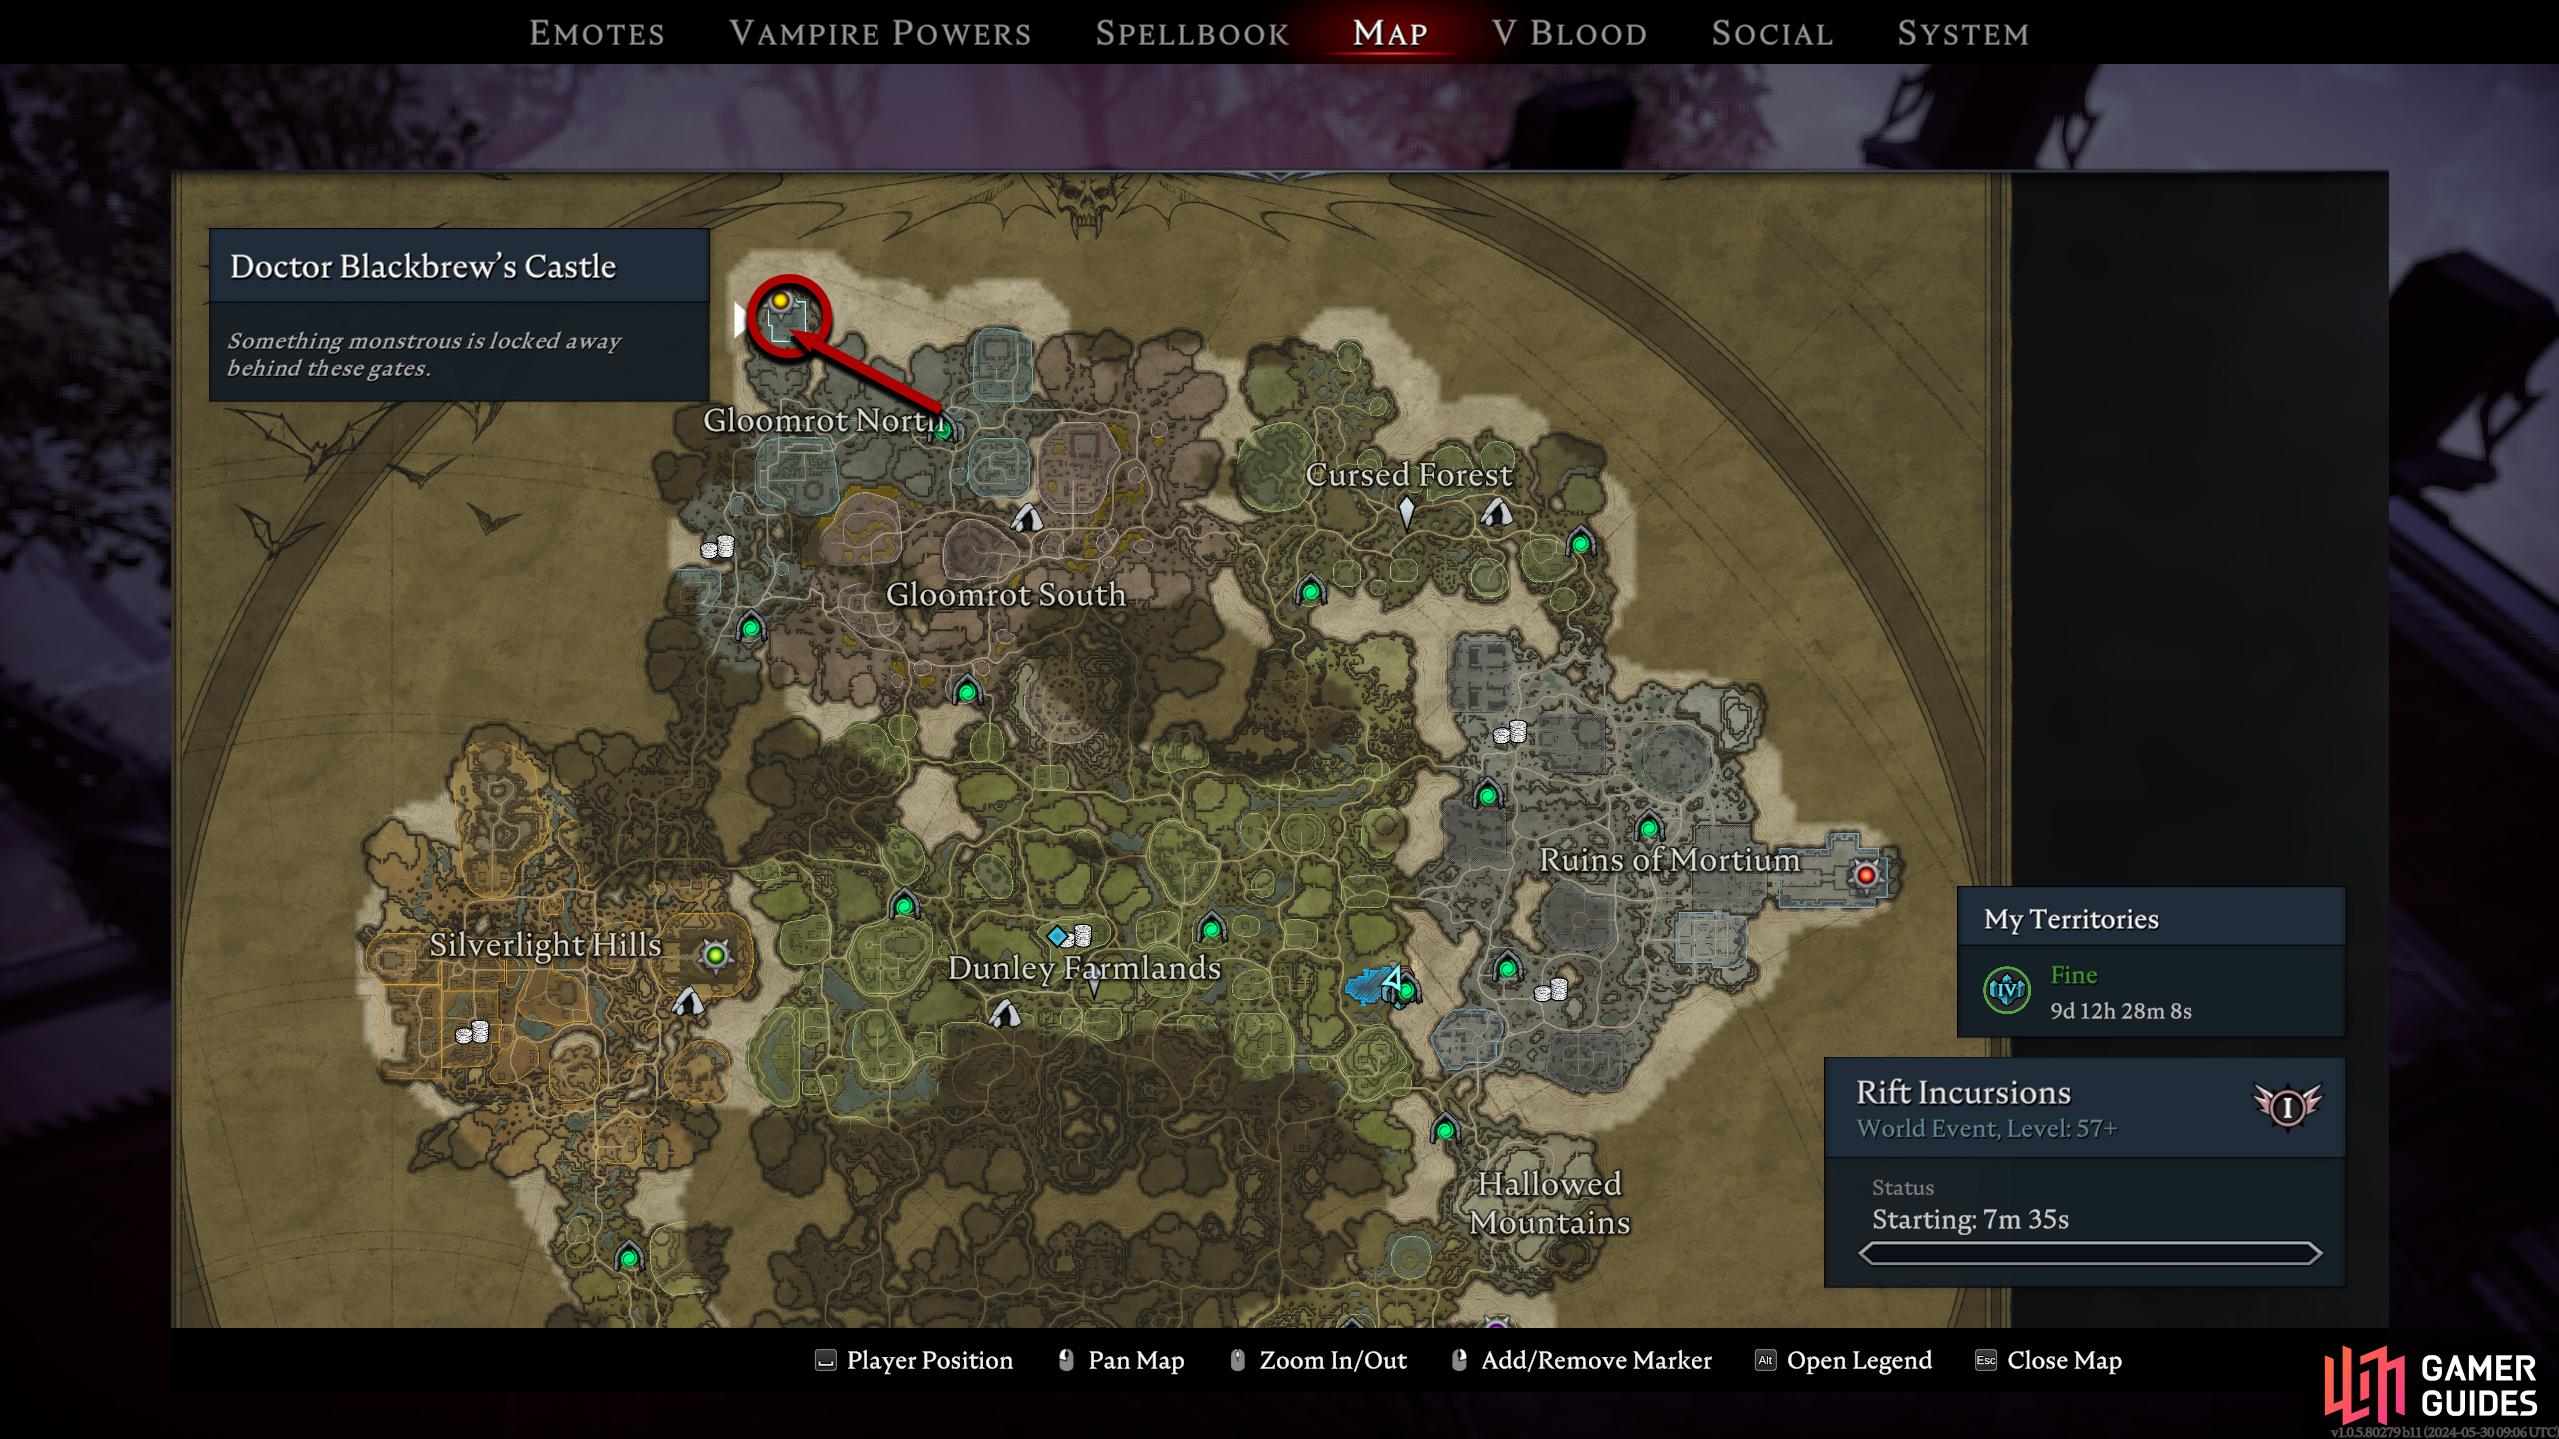
Adam the Firstborn is the penultimate boss in V Rising. Added with the Gloomrot update, Adam is arguably the most difficult boss in the game due to his hard-hitting attacks, an arena that has to be continuously disabled to move freely, and his ability to close the distance almost immediately. Add to the fact that you need to disable the electronic fields blocking the entrance to fight him with EMPs makes this battle frustrating. You can find Adam at the back of ![]() Doctor Blackbrew’s Castle in Gloomrot North, where you’ll need to pull a lever to start the fight. As Adam is level 88, it’s recommended that you have the best equipment you can get up to this point, as well as Spell Jewels to enhance your spells. Read on to find out how to start the Adam fight, and how to defeat him.
Doctor Blackbrew’s Castle in Gloomrot North, where you’ll need to pull a lever to start the fight. As Adam is level 88, it’s recommended that you have the best equipment you can get up to this point, as well as Spell Jewels to enhance your spells. Read on to find out how to start the Adam fight, and how to defeat him.
Adam the Firstborn is the penultimate boss of V Rising.
Table of Contents
If you want to jump straight to our strategy, or perhaps see what rewards you get from beating Adam the Firstborn, check out the following table:
Adam the Firstborn Location
As briefly mentioned above, Adam can be found in Doctor Blackbrew’s Castle (Map Marker) situated in the northwest of Gloomrot North. The easiest way to get to him is to teleport to the Gloomrot North Vampiric Waygate (Map Marker), switch to Bat Form and fly over to Doctor Blackbrew’s Castle in the northwest. Before you do this though, you will want to make some EMPs to access the inner sanctum of the Castle.


(1 of 3) You’ll find Adam in Doctor Blackbrew’s Castle in the northwest.
Crafting EMPs
Firstly, you’ll need the recipe, which is obtained by defeating ![]() Voltatia the Power Master. Read our Voltatia Boss Guide to find out how to defeat him. Once you have the recipe, you’ll need to make
Voltatia the Power Master. Read our Voltatia Boss Guide to find out how to defeat him. Once you have the recipe, you’ll need to make ![]() Power Cores. This requires the use of the Fabricator, which you should have as it was a reward for defeating
Power Cores. This requires the use of the Fabricator, which you should have as it was a reward for defeating ![]() Ziva the Engineer. To craft Power Cores, you’ll need 6x
Ziva the Engineer. To craft Power Cores, you’ll need 6x ![]() Radium Alloy and 3x
Radium Alloy and 3x ![]() Charged Battery. Although you can find Radium Alloys all over Gloomrot North, your best bet is to head to the
Charged Battery. Although you can find Radium Alloys all over Gloomrot North, your best bet is to head to the ![]() Trancendum Power Plant (Map Marker) for them so you can acquire Depleted Batteries.
Trancendum Power Plant (Map Marker) for them so you can acquire Depleted Batteries.
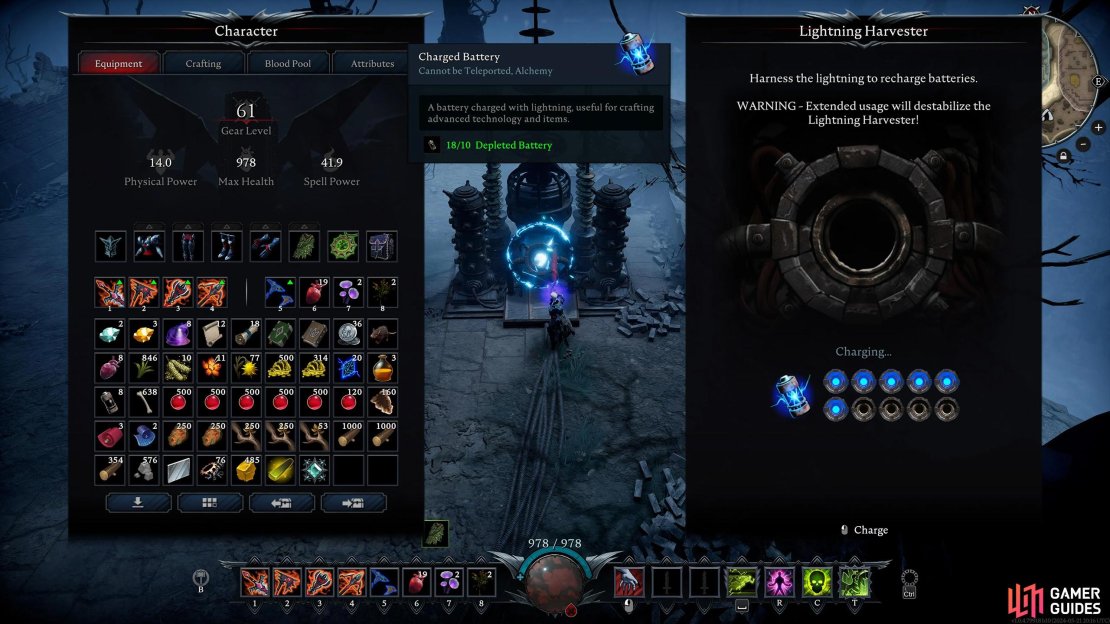
Once you have the Depleted Batteries, you’ll need to charge them up to create the Charged Battery, and to do this, you’ll need to find a ![]() Lightning Harvester. The best place to find one is in
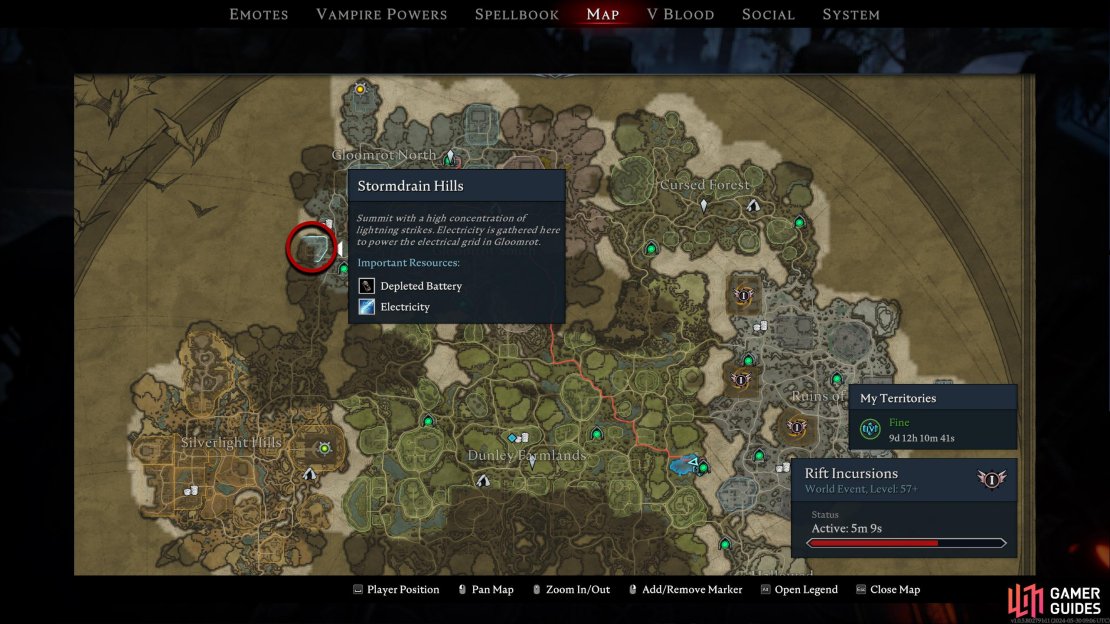
Lightning Harvester. The best place to find one is in ![]() Stormdrain Hills (Map Marker) which can be found in the southwest of Gloomrot North. Although you only require three batteries for five EMPs, you can only use the Lightning Harvester in sets of ten Depleted Batteries. This will give you 10x Charged Battery, but that means you’ll need 10x Depleted Batteries first. For a full guide on how to craft EMPs, read our EMP Crafting Guide.
Stormdrain Hills (Map Marker) which can be found in the southwest of Gloomrot North. Although you only require three batteries for five EMPs, you can only use the Lightning Harvester in sets of ten Depleted Batteries. This will give you 10x Charged Battery, but that means you’ll need 10x Depleted Batteries first. For a full guide on how to craft EMPs, read our EMP Crafting Guide.

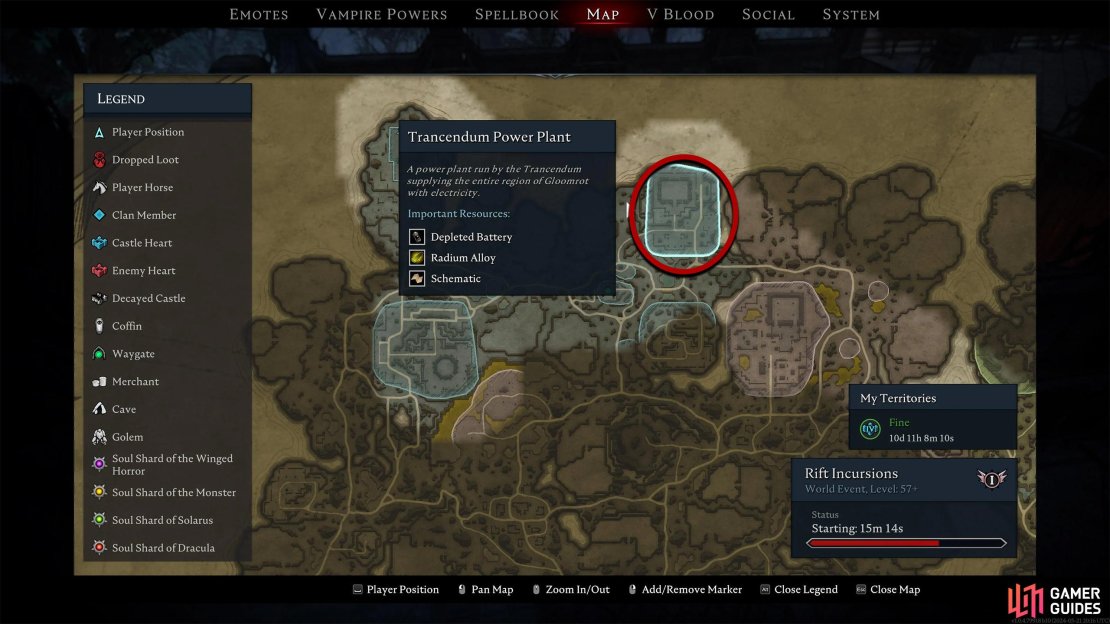
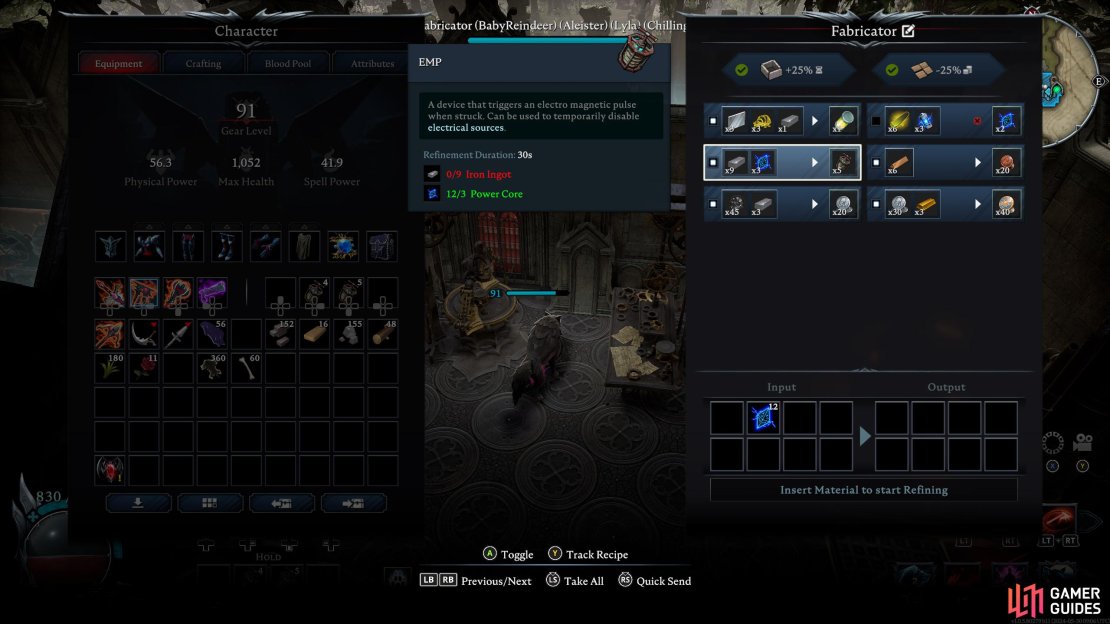
(1 of 4) To craft EMPs, you’ll need 10 Depleted Batteries. The Trancendum Power Plant is the best place to find them.
Using EMPs
When you have crafted some EMPs, put them on your hotbar/shortcut, select them, and place them in front of the door to Doctor Blackbrew’s Castle. Attack the EMP, and a red ring will show you the radius the EMP will affect. This will open the door, albeit temporarily, and you can head further in. There are no enemies in the castle aside from Adam, and you’ll need to activate a lever first before you can start the fight, so you’re safe in here…for now.
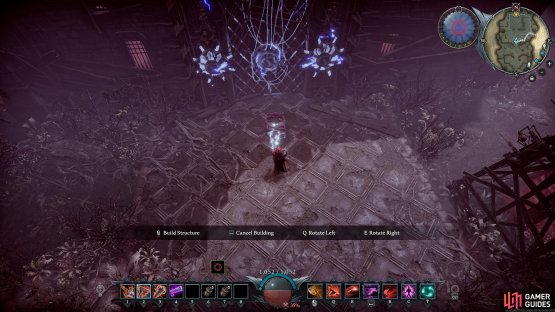

(1 of 2) Place the EMP into your hotbar/shortcut and select it, and then place it near the entrance.
Place the EMP into your hotbar/shortcut and select it, and then place it near the entrance. (left), Attack the EMP to set it off, and get out of the blast radius. (right)
Starting the Adam Boss Fight
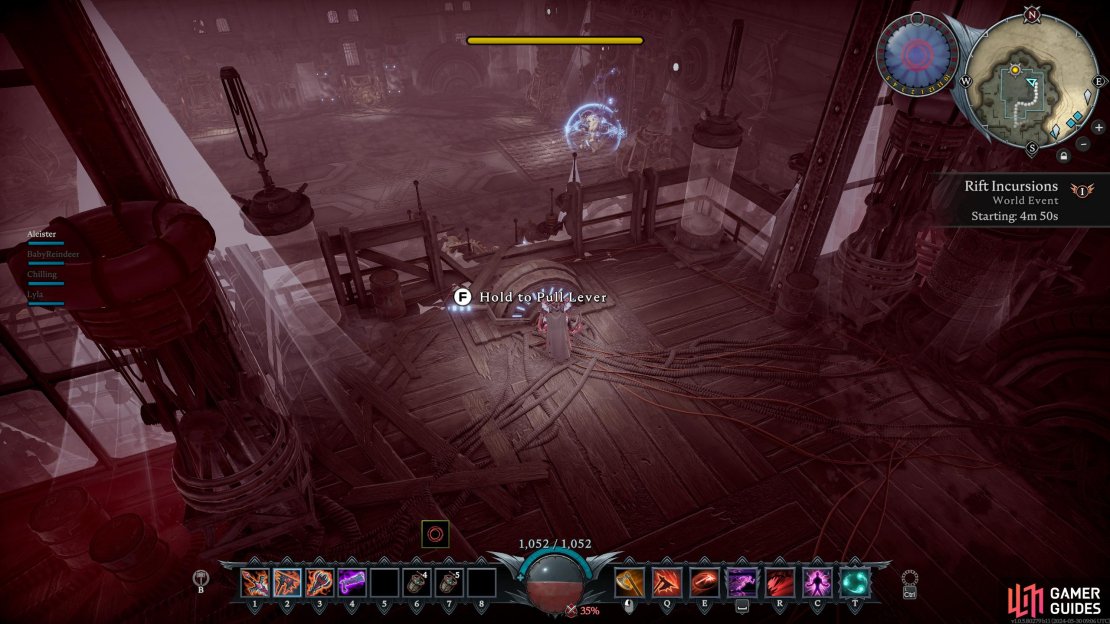
All you need to do now is activate the lever which is keeping Adam subdued. Next to the room where Adam is, you’ll find some stairs to the north. Follow these up and around, where you’ll find the lever. Interact with the lever to start the boss fight. You can jump over the railing behind the lever to land in the boss room.
Recommended Spells, Equipment, and Blood Type
Although you can beat most bosses in the game with most spells, equipment, and blood setup, some of them are just better for specific fights. For the Adam fight, we recommend you use the following:
Blood Type
Ideally, you’ll want as close as 100% Brute blood, which you can often find roaming the roads of Dunley, near the villages, although you can find them elsewhere. Other great alternatives are Scholar or Rogue. For the former, fight the Lightweavers near the Holy Monastery in Dunley while the latter can be found almost anywhere. Brute is so good because it offers you life leech, movement speed, attack speed, and attack power. The best part about the Scholar blood type is the 15% chance to reset cooldowns, and finally, Rogue gives you increased critical hits and movement speed.
Equipment
| Type | Name | Stats |
|---|---|---|
| Weapon | The Red Twins (Axes) | +33.7 Physical Power, +25% Physical Damage to |
| Body | +224 Max Health, +4% Weapon Attack Speed, +2% Weapon Skill Life Leech | |
| Gloves | +123 Max Health, +54% Weapon Attack Speed, +2% Weapon Skill Life Leech | |
| Legs | +187 Max Health, +4% Weapon Attack Speed, +2% Weapon Skill Life Leech | |
| Feet | +160 Max Health, +4% Weapon Attack Speed, +2% Weapon Skill Life Leech | |
| Amulet | +31.9 Spell Power, +15% Reduced Blood Drain Rate, +10% Spell Cooldown Recovery Rate, +random bonus |
For your weapon, it’s more of a preference, but we like the Axes. The reason for this is that ![]() Frenzy enhances your attack speed, and when combined with both
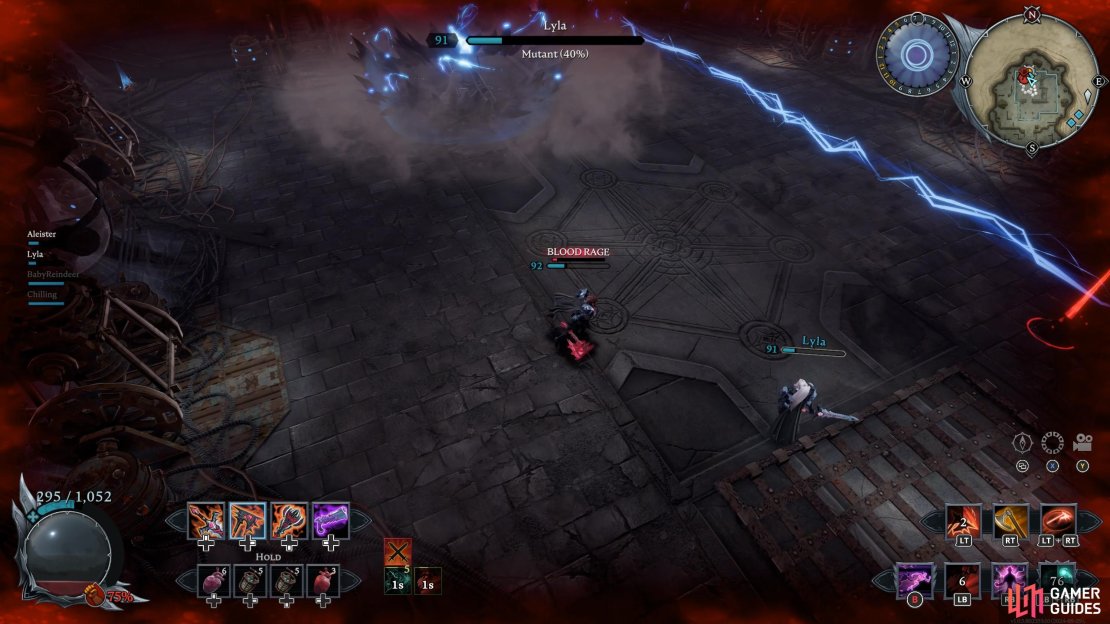
Frenzy enhances your attack speed, and when combined with both ![]() Blood Rage and
Blood Rage and ![]() Power Surge, you’ll be attacking fairly quickly while also leeching health, which helps negate some damage you’ll receive from Adam. If you have The Red Twins Axe,
Power Surge, you’ll be attacking fairly quickly while also leeching health, which helps negate some damage you’ll receive from Adam. If you have The Red Twins Axe, ![]() X-Strike can also leech health, which makes the weapon quite potent. Other great alternatives are the Pistols for an extra dodge, and the Greatsword, which will increase your movement speed while also giving you an i-frame. Note that the stats for the weapon above can change when you craft the weapon but try to get some passives with Life Leech and Max Health if possible.
X-Strike can also leech health, which makes the weapon quite potent. Other great alternatives are the Pistols for an extra dodge, and the Greatsword, which will increase your movement speed while also giving you an i-frame. Note that the stats for the weapon above can change when you craft the weapon but try to get some passives with Life Leech and Max Health if possible.
Your armor choice is between the Grim, Shadowmoon, Dread, and Maleficer sets. Out of these sets, we prefer the Grim set, although the Shadowmoon set is close. It all depends on whether you want Weapon Attack Speed and Weapon Life Leech or Movement Speed and Critical Hits (Shadow). Finally, for your Amulet, take either the ![]() Amulet of the Master Spellweaver for the Spell Cooldown Recovery Rate, the Amulet of Unyielding Charger for the Movement Speed, or the Amulet of Crimson Commander for the Weapon Skill Life Leech. All are good, and all will help against Adam.
Amulet of the Master Spellweaver for the Spell Cooldown Recovery Rate, the Amulet of Unyielding Charger for the Movement Speed, or the Amulet of Crimson Commander for the Weapon Skill Life Leech. All are good, and all will help against Adam.
Spells
| Type | Spell | Magic School | Ideal Jewel Passives |
|---|---|---|---|
| Dodge/Veil | Veil of Chaos | Chaos | Increase damage by 25%, Next primary attack on an enemy affected by Ignite applies Agonizing Flames |
| Buffs/Attacks | Blood | Cast removes all negative effects, Increases effect duration by 30%, Cast grants a 60% shield to caster and allies | |
| Buffs/Attacks | Chaos | Increase attack speed 10%, Remove all negative effects, Increase effect duration 30% | |
| Ultimate | Illusion/Frost | N/A |
As most “builds” go, this one is relatively simple, attacks go brr. In short, we’re increasing your attack speed as high as it can go. Blood Rage will give you 25% attack speed as well as movement speed and leech. Power Surge will give you 20% attack speed while also giving you movement speed and making your attack Ignite (burning). Use both at the same time, and you’ll be attacking very quickly while also leeching health and setting Adam on fire. This will also give you a much-needed boost to your movement, which can help you avoid some attacks. For your dodge (Veil), take the Veil of Chaos for the second dodge.
This means you can dodge into Adam, attack him a couple of times, and dodge again to avoid the inevitable grapple attack he’ll use. Veil of Storm and Veil of Illusion are also great alternatives as the former will further increase your attack speed by another 20% while the latter can inflict weaken, lowering Adam’s damage output momentarily while also lowering your spell cooldowns. Finally, for your Ultimate, we like ![]() Wisp Dancer or
Wisp Dancer or ![]() Ice Block. Both will give you some health back, with the former dealing damage and the latter allowing you to absorb some attacks. Alternatively, both of the Storm Ultimates are good shouts, especially for damage.
Ice Block. Both will give you some health back, with the former dealing damage and the latter allowing you to absorb some attacks. Alternatively, both of the Storm Ultimates are good shouts, especially for damage.
Adam the Firstborn Strategy
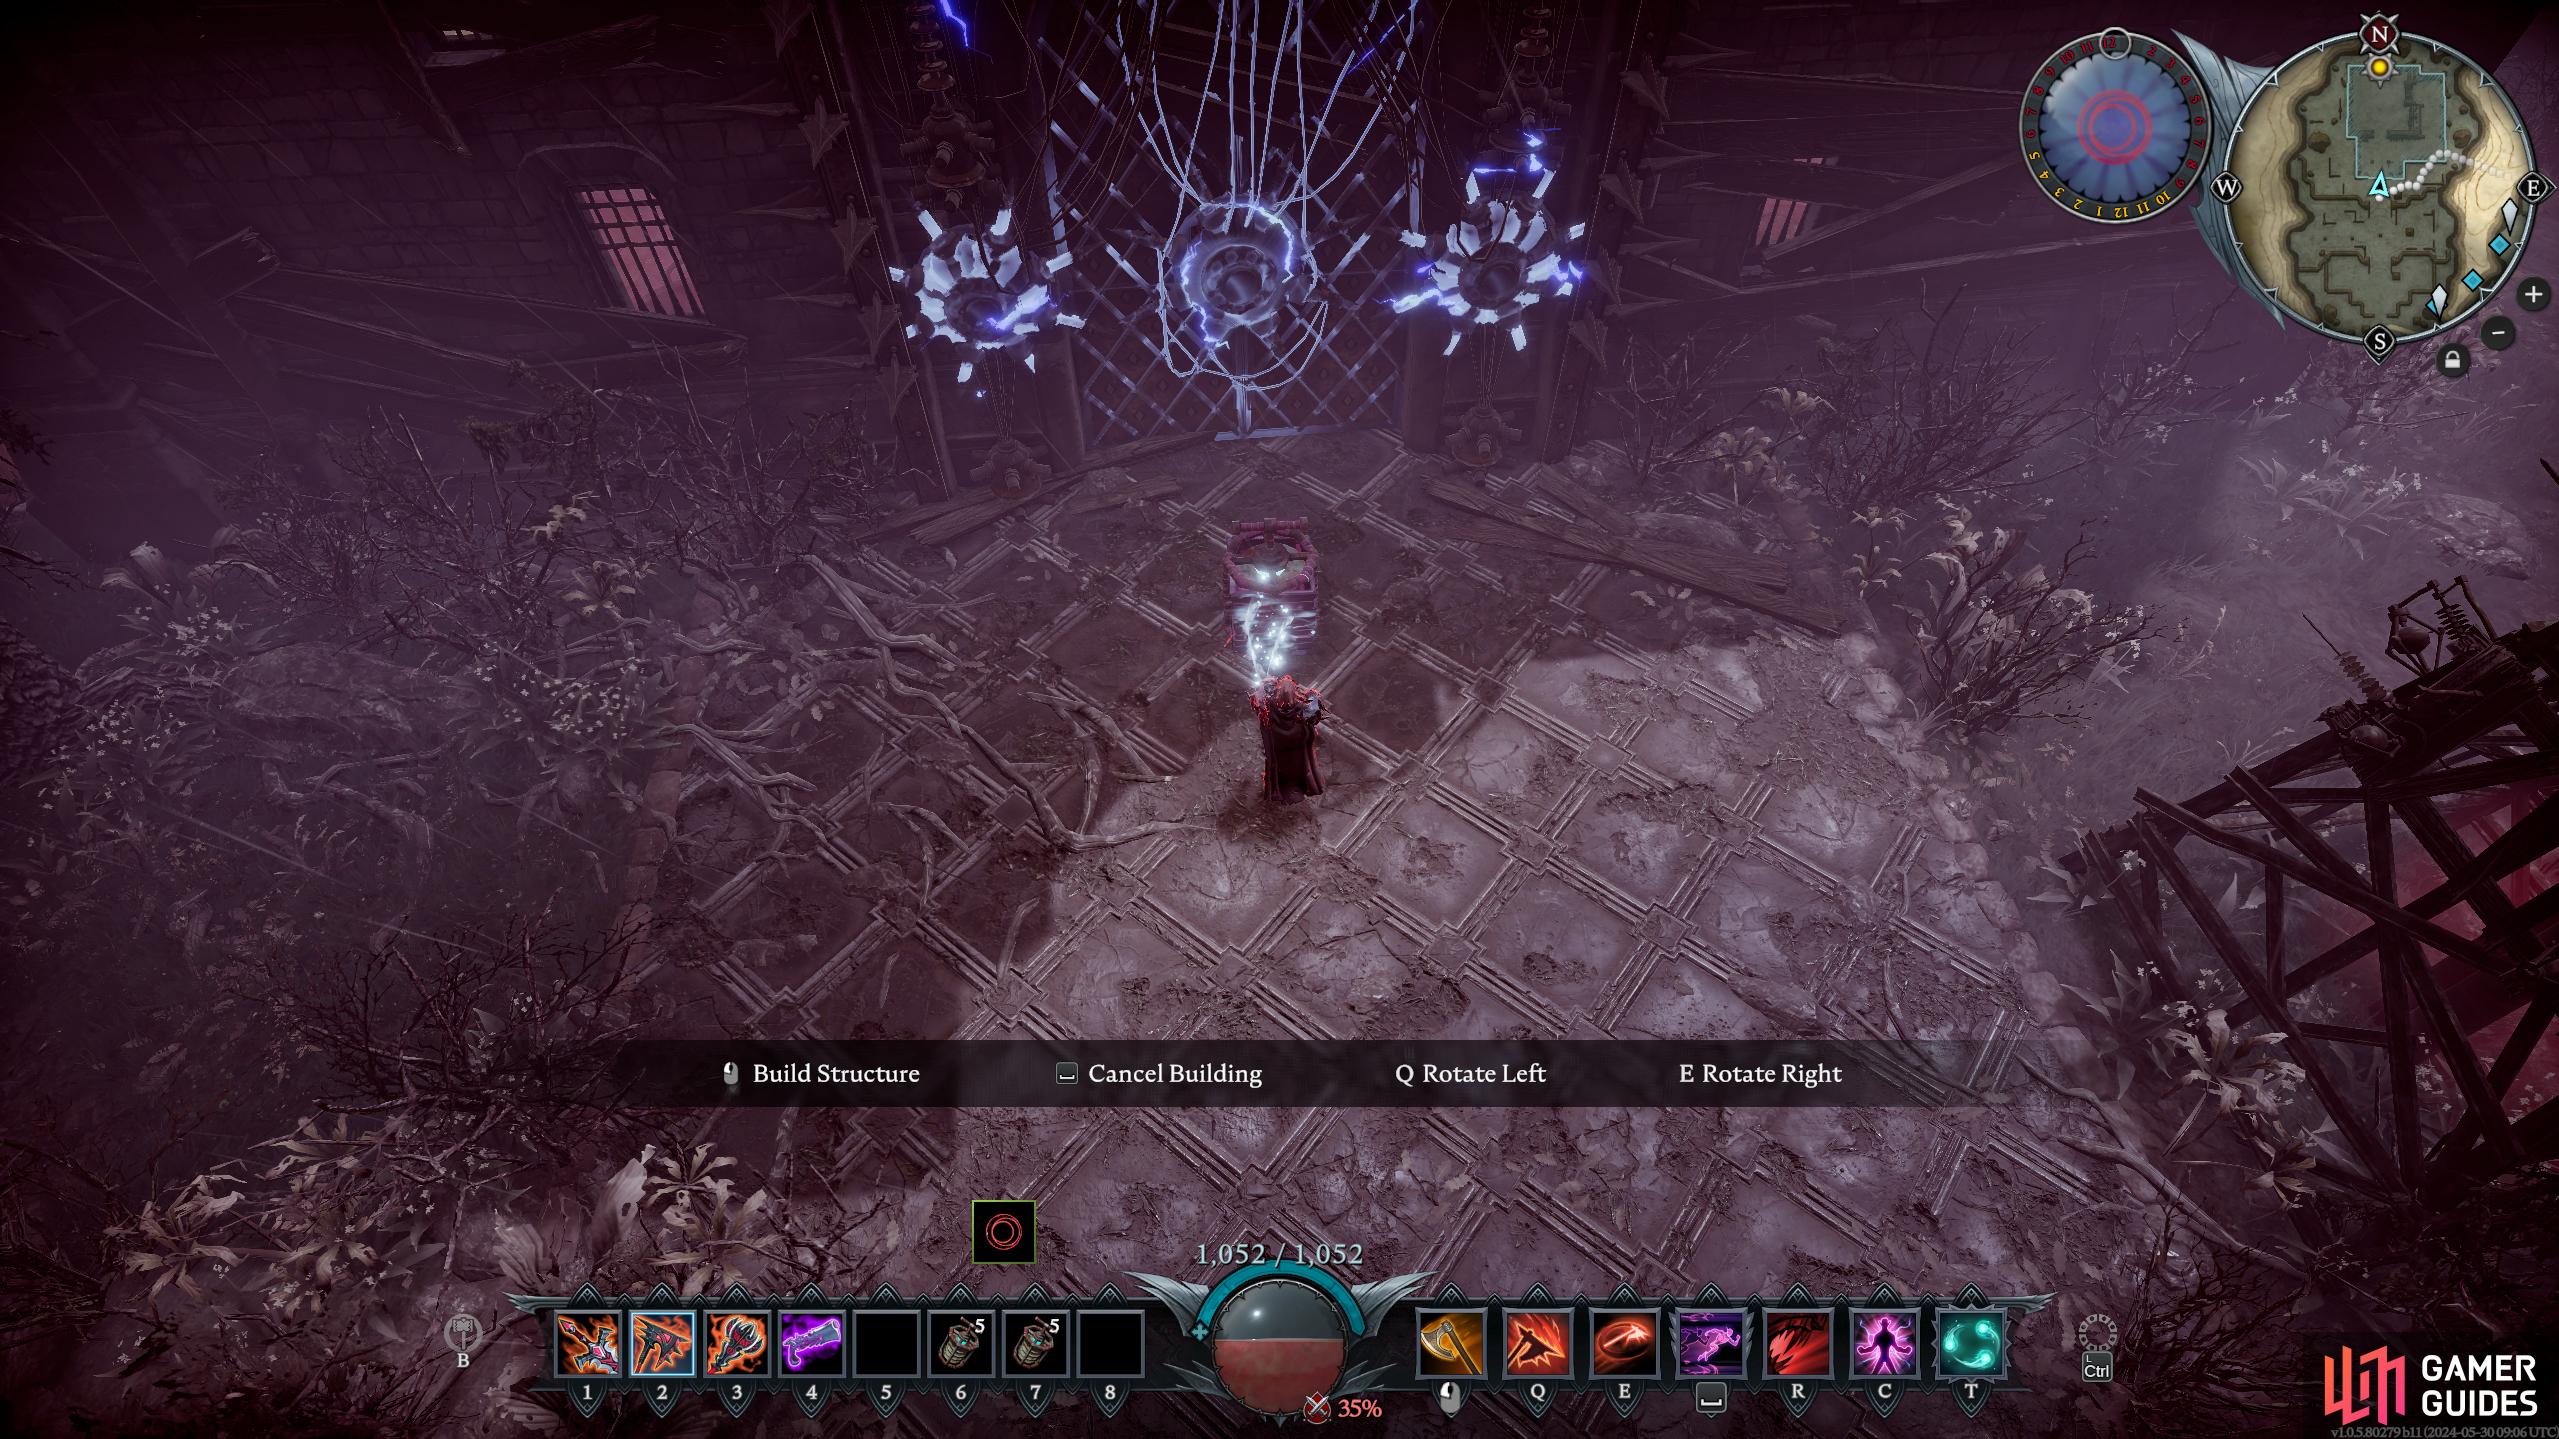
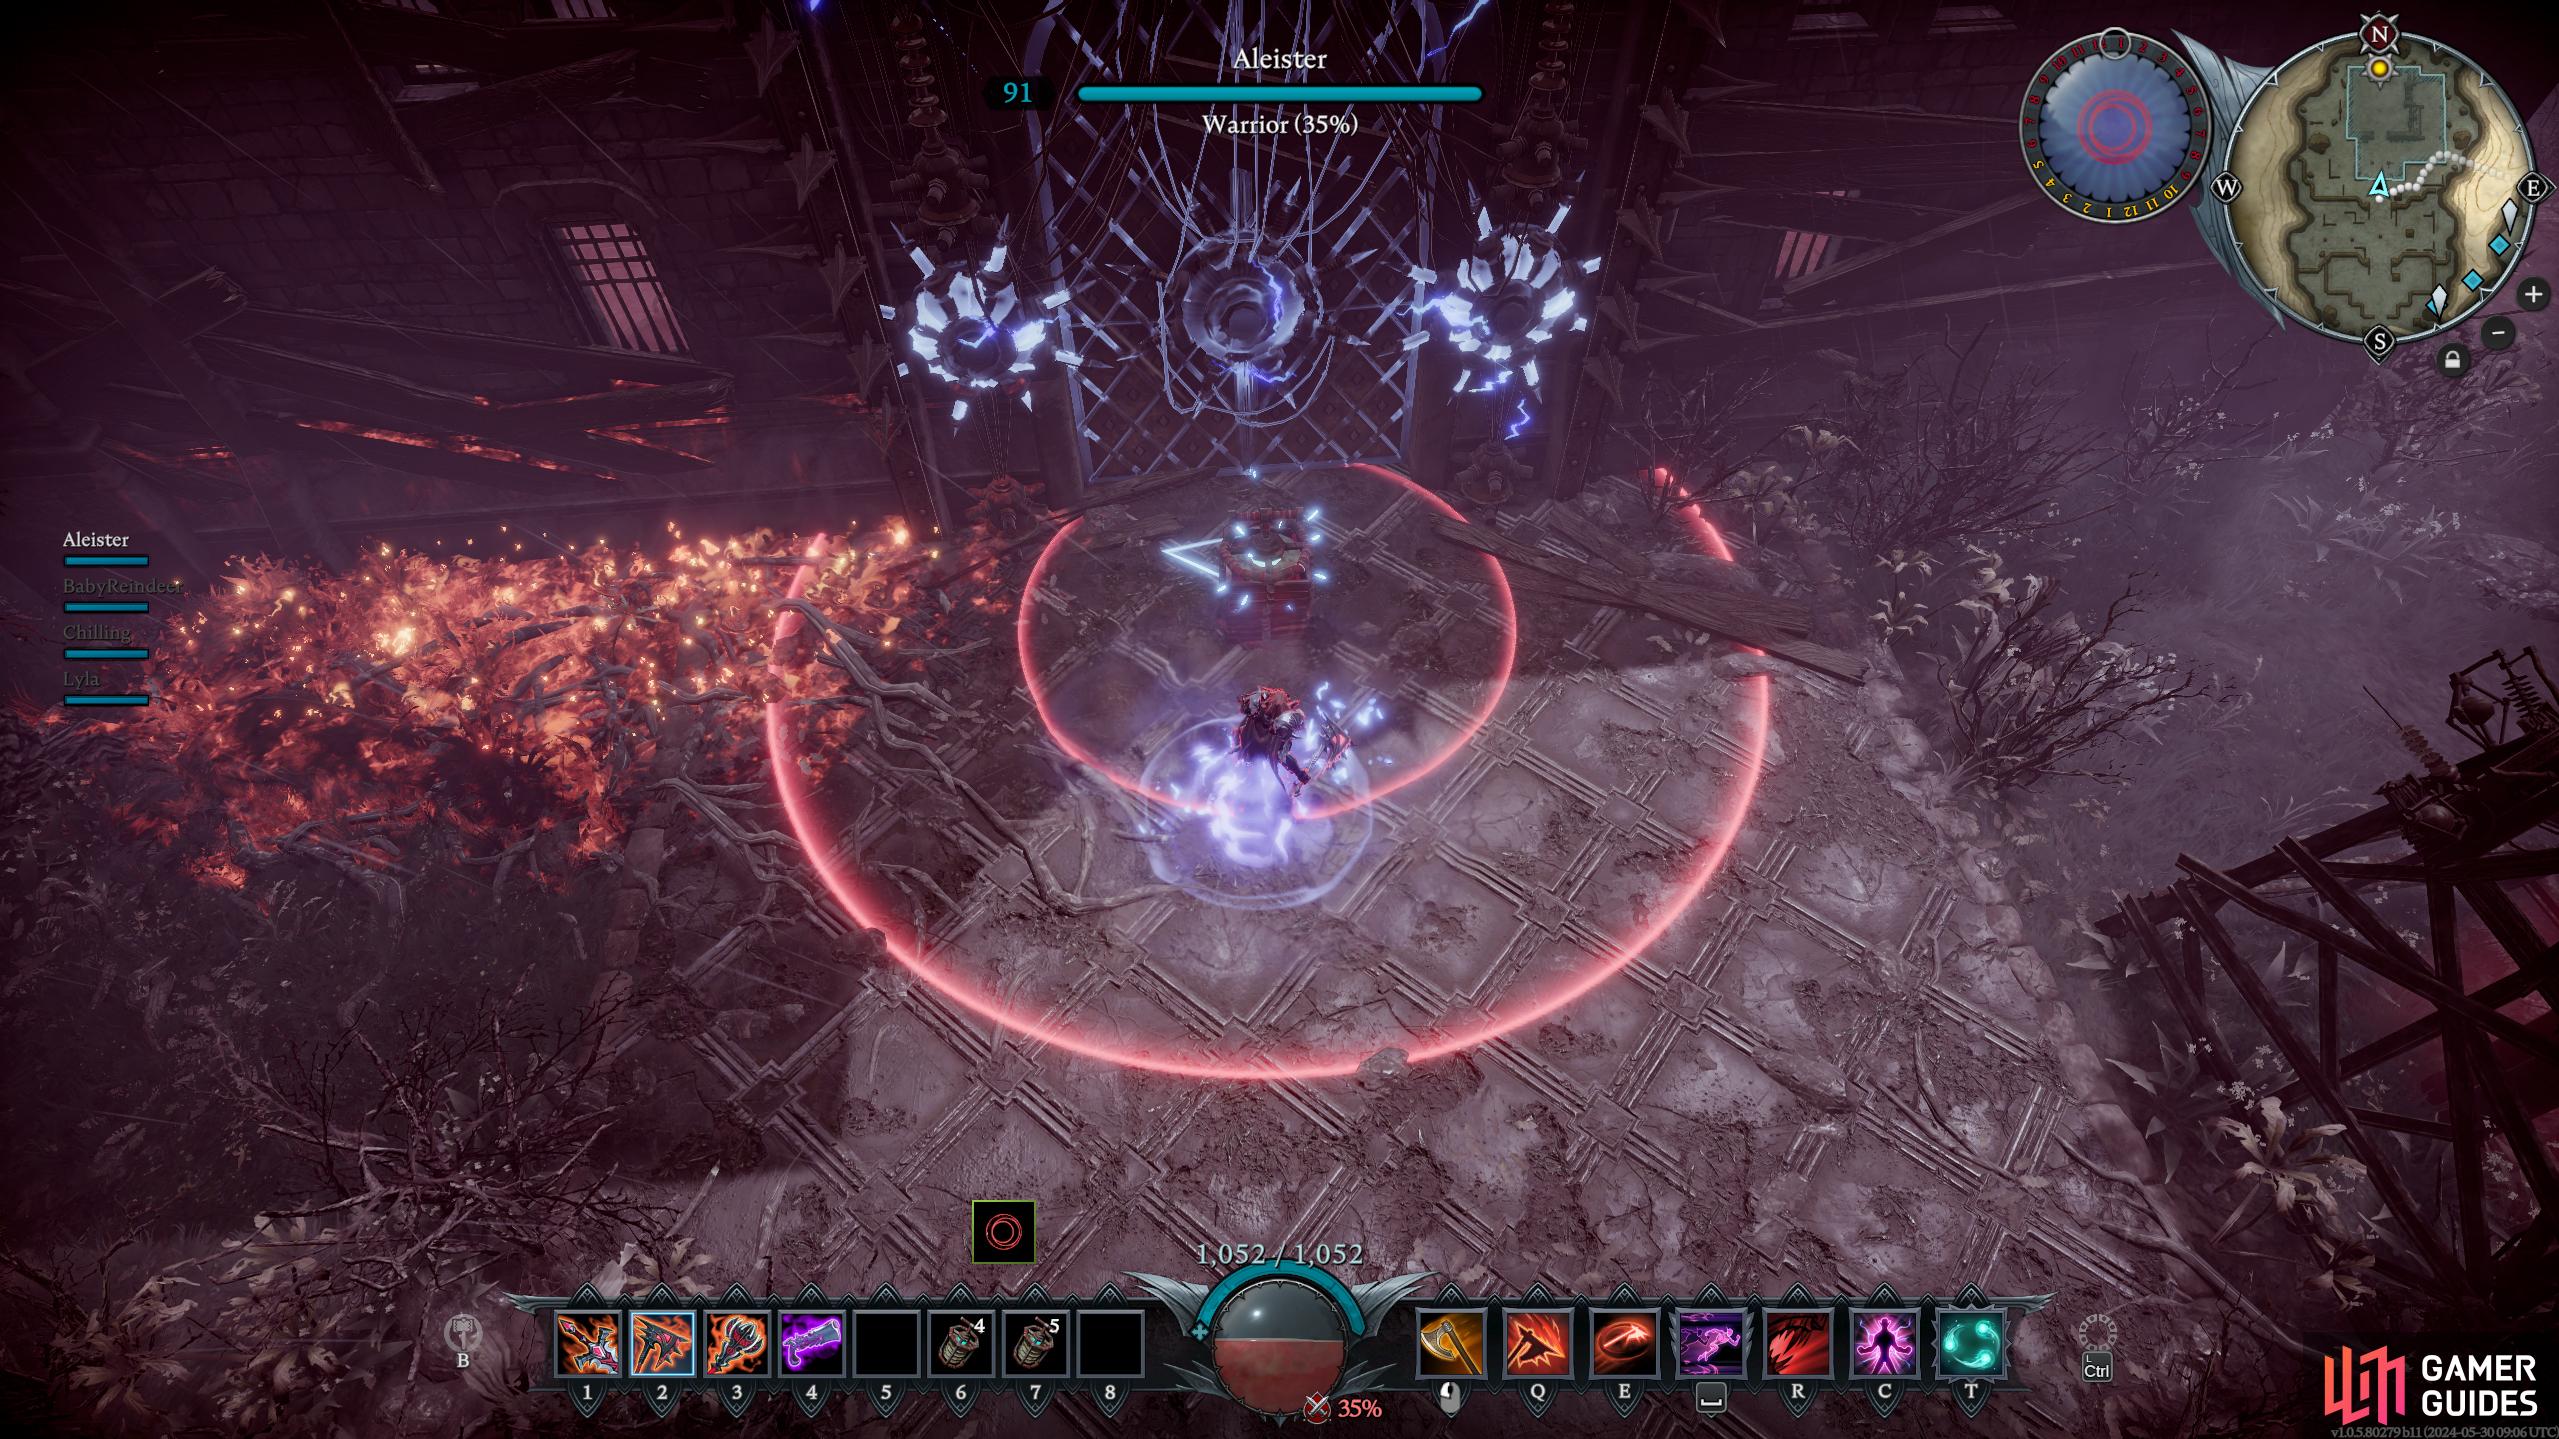
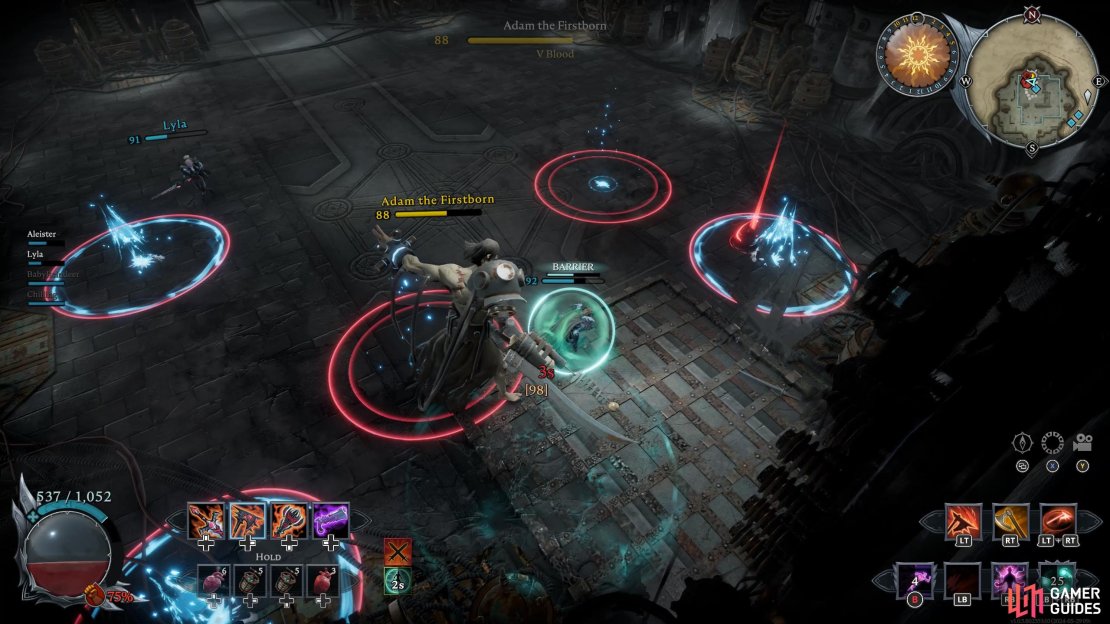
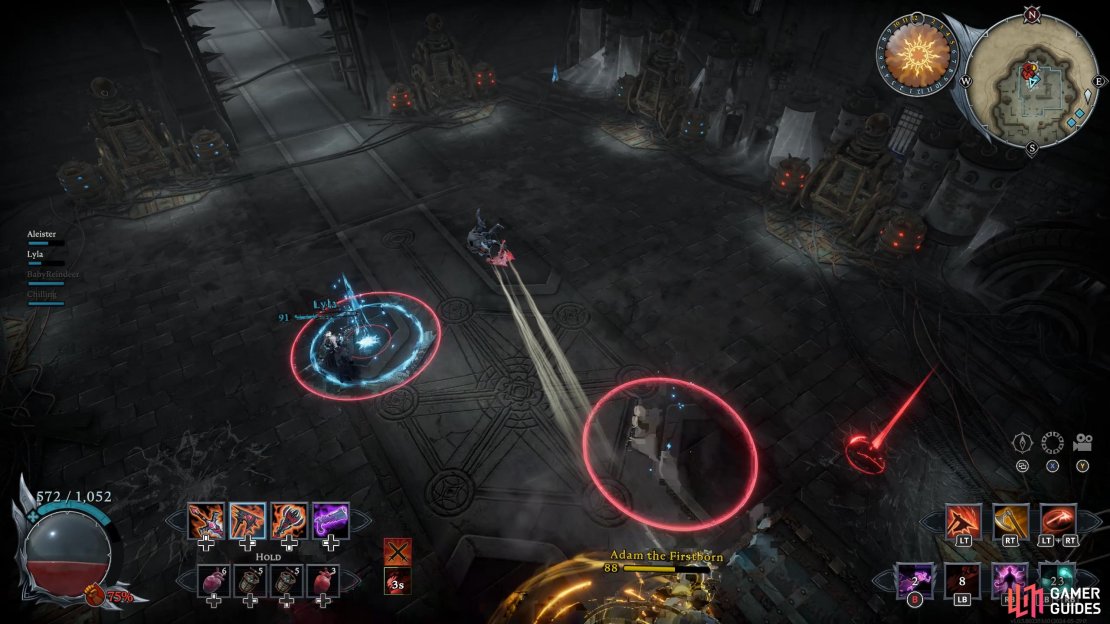
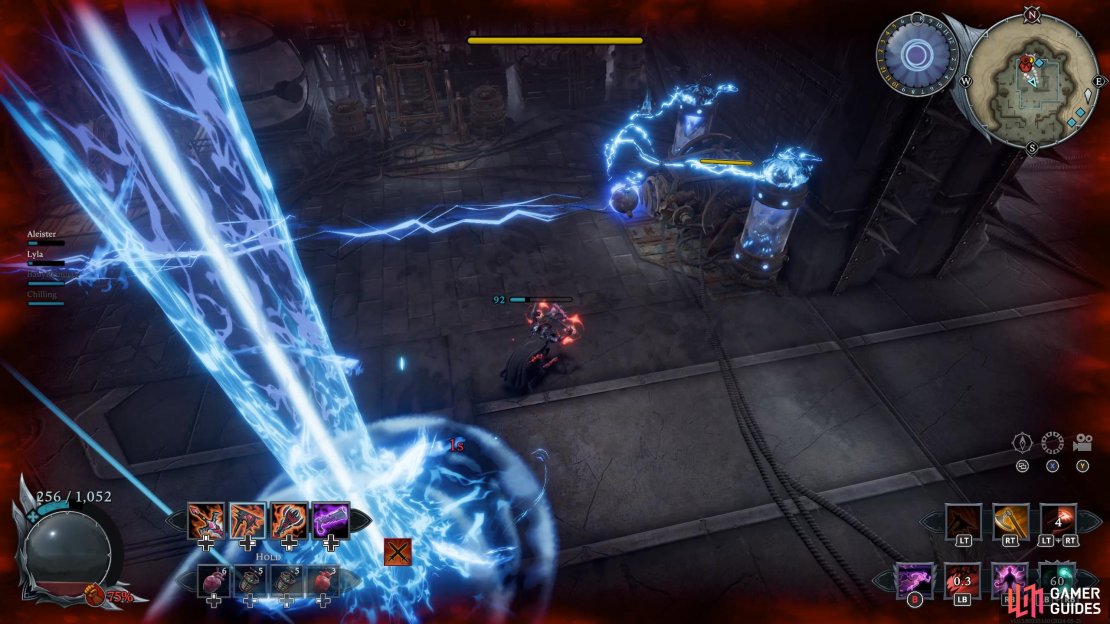
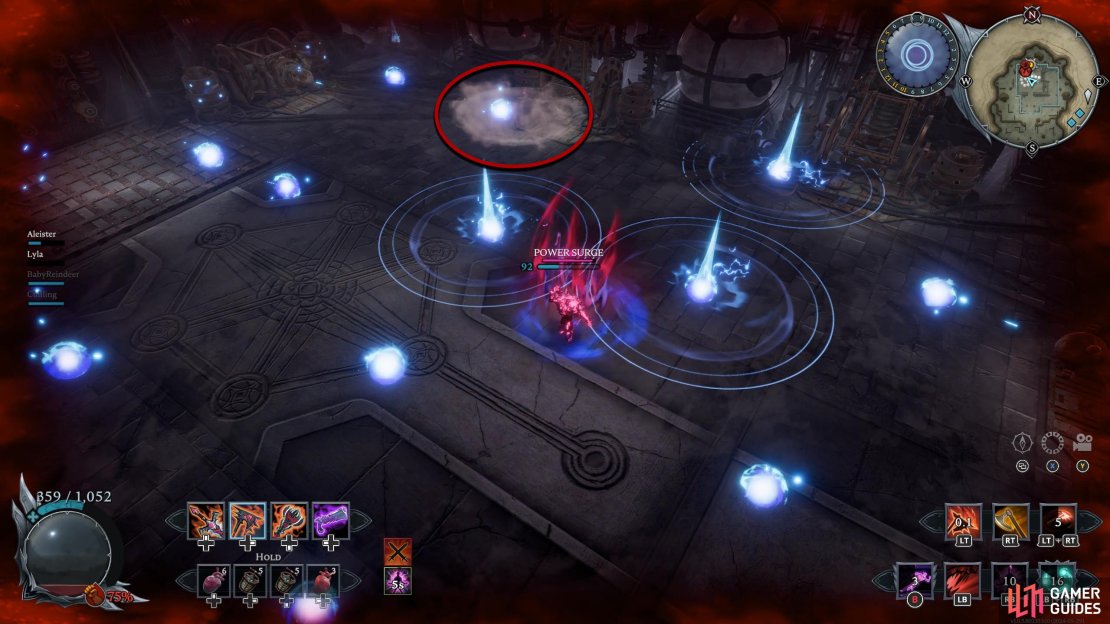
Arguably the most difficult boss fight in the game, Adam will keep you on your toes, and it’s easy to get overwhelmed due to so much going on. When you begin the battle, your first objective is to take down the lasers that cover the entire arena. This can be done by attacking and destroying the machines they’re attached to. You only need to destroy one of the machines for each laser, so make sure you focus your damage on one of them. Once you’ve cleared the arena of lasers, you can begin to fight Adam properly, but be aware that the lasers will reappear one at a time throughout the fight, when this happens, destroy it as soon as you can, and keep on top of it throughout the fight.

(1 of 2) From the beginning to the end of the fight. The room will continuously send out laser from the machines.
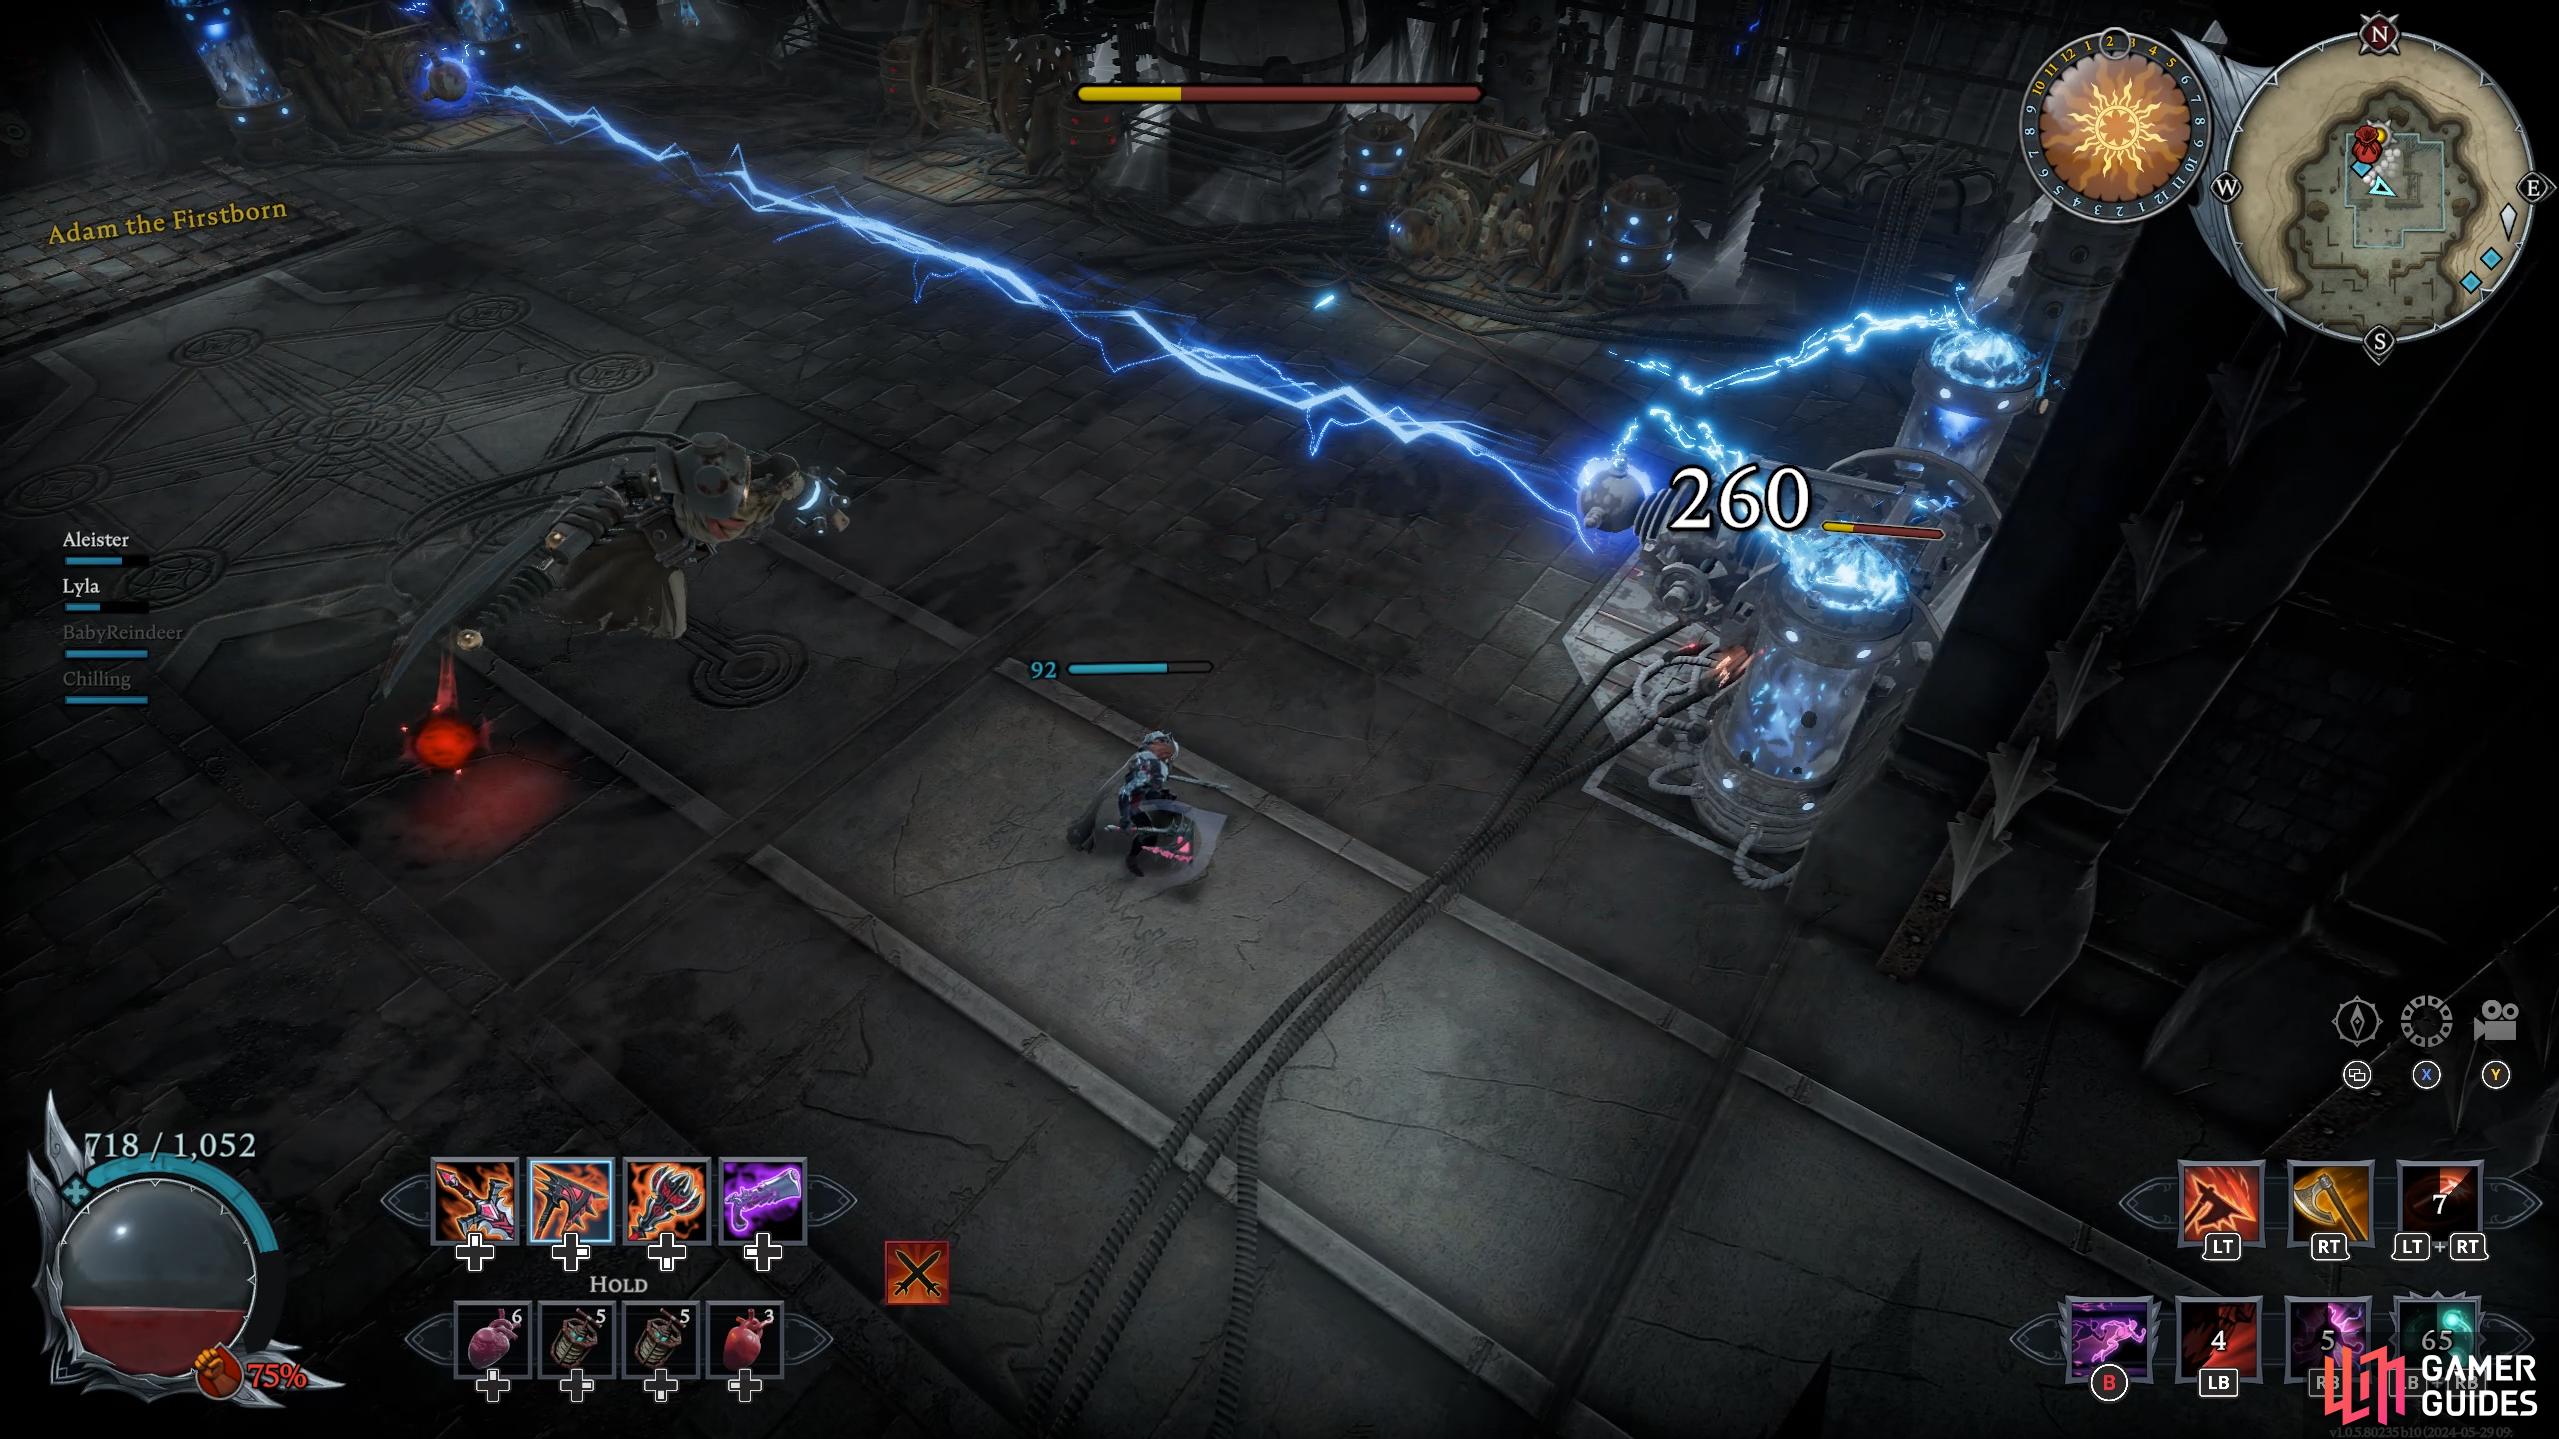
From the beginning to the end of the fight. The room will continuously send out laser from the machines. (left), Make sure you destroy the machines immediately to allow you more maneuverability. (right)
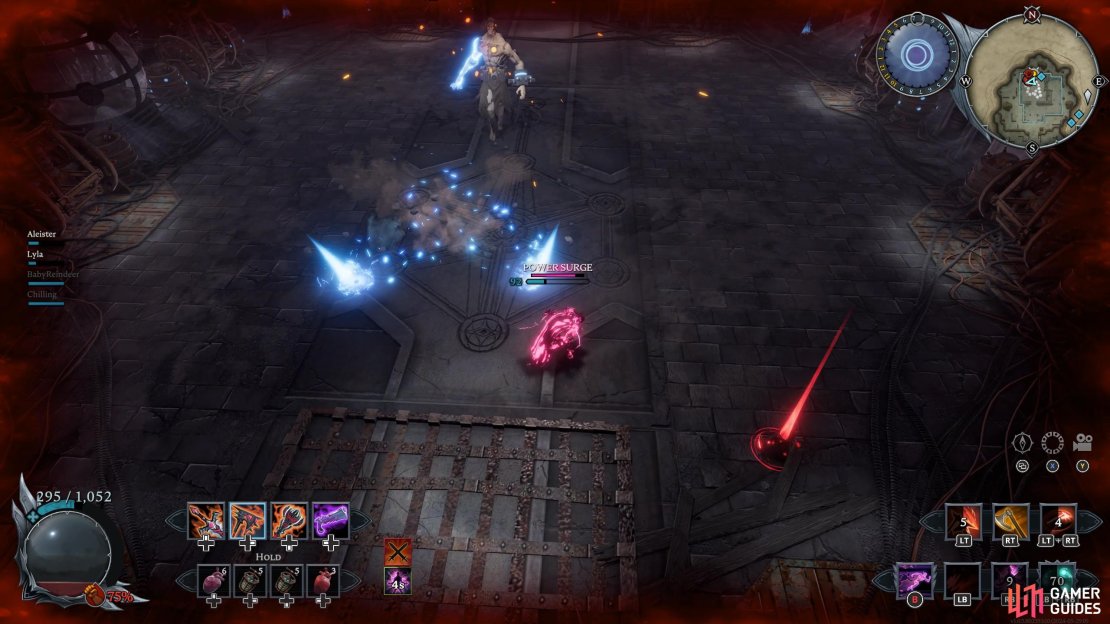
The longer you leave them up, the more you will have to destroy them. Note that while you’re destroying the machines, Adam can and will close the distance and attack you, normally with a grapple and throw. If this does happen to you, dodge the grapple and lure him away from the machine you’re attacking, and then go back to finish it off. The easiest way to destroy the machines is to use one of your weapon abilities, ![]() Whirlwind (Sword), X-Strike (Axes), and
Whirlwind (Sword), X-Strike (Axes), and ![]() Fan the Hammer (Pistols). Before we get onto the strategy of the battle, let’s take a look at Adam’s attacks:
Fan the Hammer (Pistols). Before we get onto the strategy of the battle, let’s take a look at Adam’s attacks:
-
Stomping
 Shockwave: Adam will lift his leg before stomping on the floor, unleashing small shockwaves in every direction. The easiest way to avoid this attack is to get a bit of distance to avoid the stomp and dodge toward him to avoid the shockwaves.
 -
Sword Slam: Similar to the Stomping Shockwave attack, however, Adam will use his blade, slamming it forward onto the ground unleashing three shockwaves in a cone in front of him. He can use this attack multiple times in quick succession. The shockwaves in general are difficult to avoid, but in general, each shock wave will travel from him toward you in a line. They will spread out the further they travel, and each shockwave will have a general location with one being on the left, one in the center, and one to the right. The easiest way to avoid the attack is to dodge toward Adam when they get close to you. Alternatively, get back and stand in between them, although they will come at you fast, which makes this difficult.
-
Triple Shockwave: Same as the Sword Slam attack, but Adam will perform three hits. The first attack will send out one shockwave, the second will do the same, and the third will unleash three shockwaves in a similar pattern to Sword Slam. Move side to side to bait out the first two attacks and dodge the final attack by dodging through them.
-
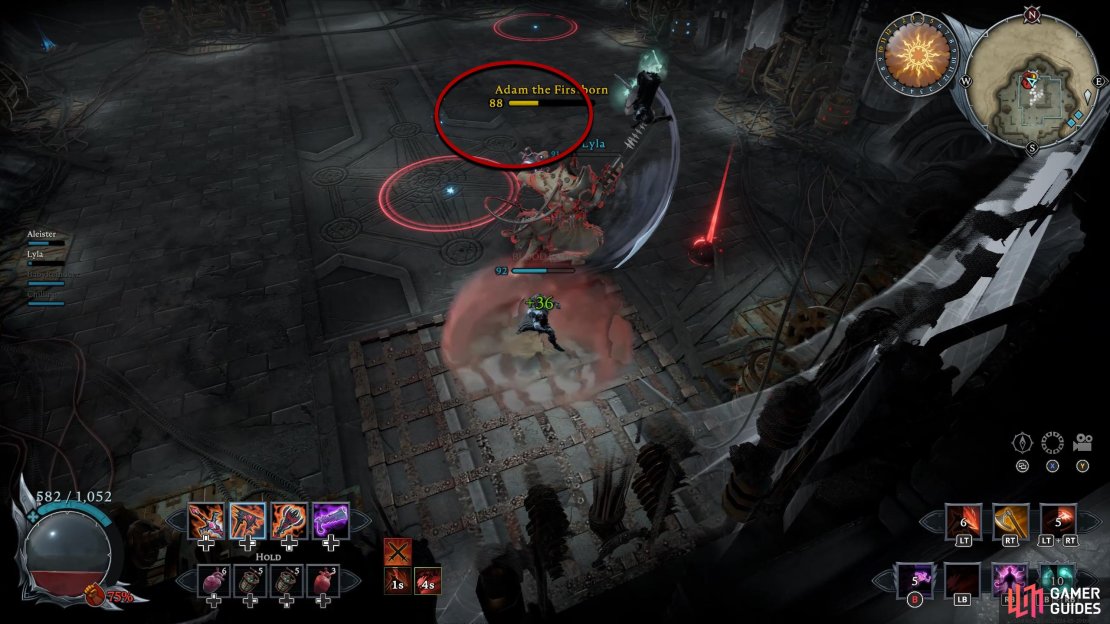
Grapple Throw: Adam will reach out and grapple you before throwing you across the arena, stunning you briefly. This attack will hit you a lot. He’ll only use it in melee range, but you want to be close to him to avoid some of his tricky long-range attacks. When fighting him in melee, always expect and be ready to run or dodge away from his hand. If you run, make sure you use Blood Rage or Power Surge to increase your speed, otherwise Adam will still grab you.

(1 of 5) Stomping Shockwave: Adam will lift his leg and stomp onto the ground, unleashing shockwaves in every direction.
-
Electric Palm: He will rarely use this attack, but he can raise his fist, unleashing a small pulse of electricity from his palm. As long as you’re not right next to him or in front of the attack, you won’t take any damage. You can ignore this attack for the most part.
-
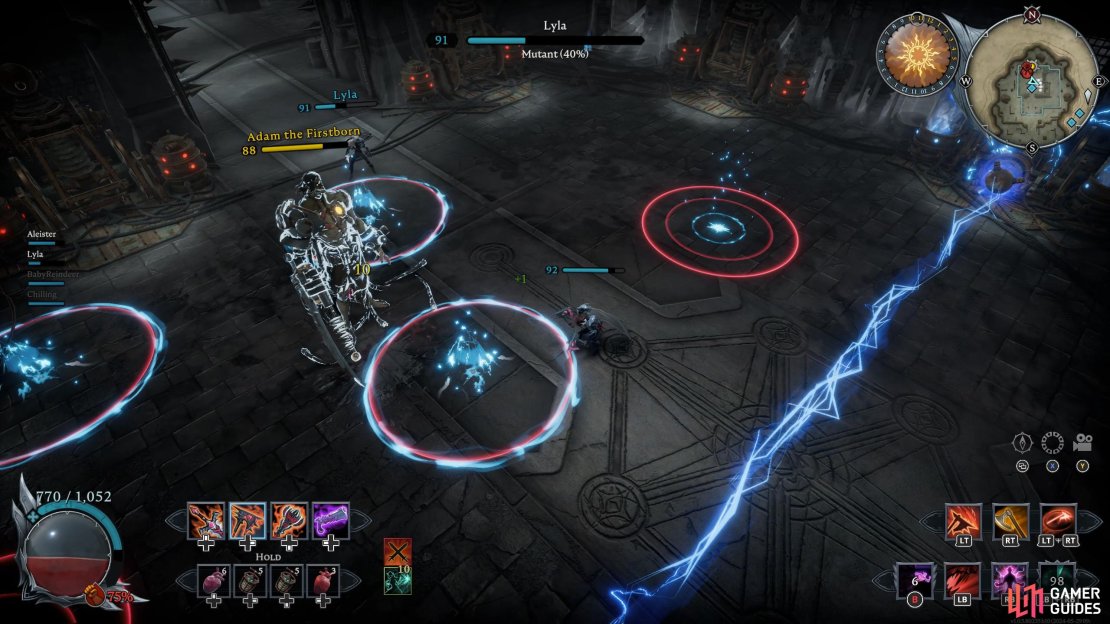
Lightning Storm: In phase 2 (50%), Adam will raise his blade arm and cast a storm of lightning bolts that place numerous red markers across the arena, which will regularly be used for the majority of the fight. There’s not much you can do about this other than not standing in the red marker. If you happen to be in one, dodge out of it as soon as you can.
-
Lunging Slash: Adam will dash toward you and perform an upward slash. When he closes the distance, run/dodge away from him.
-
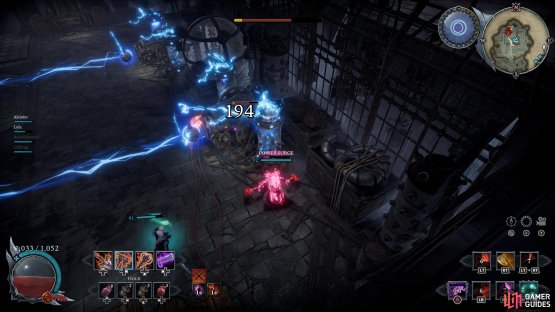
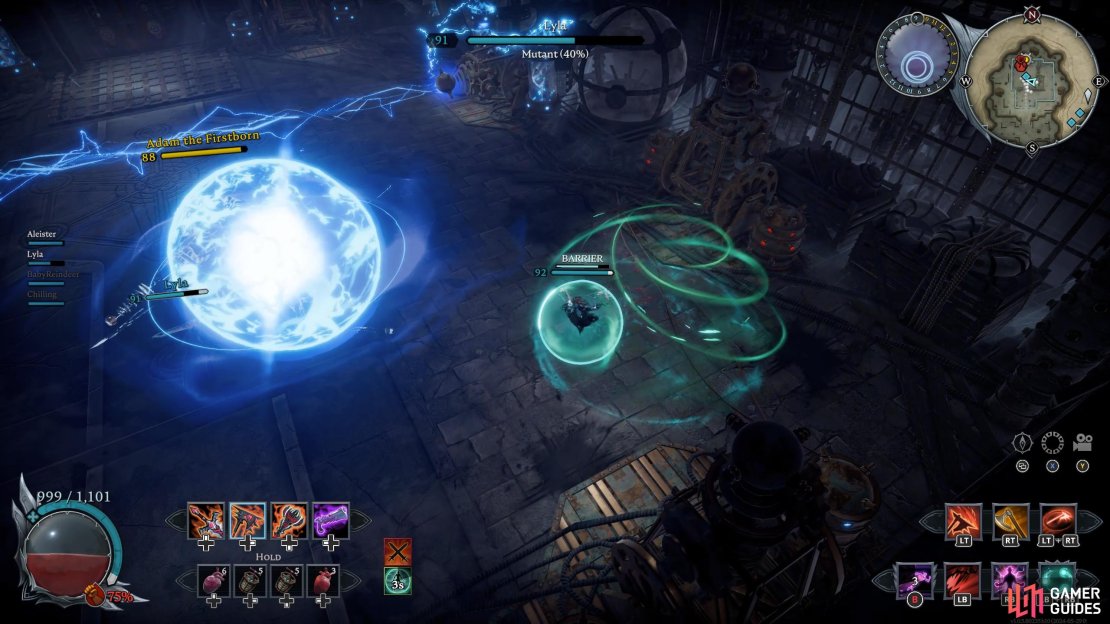
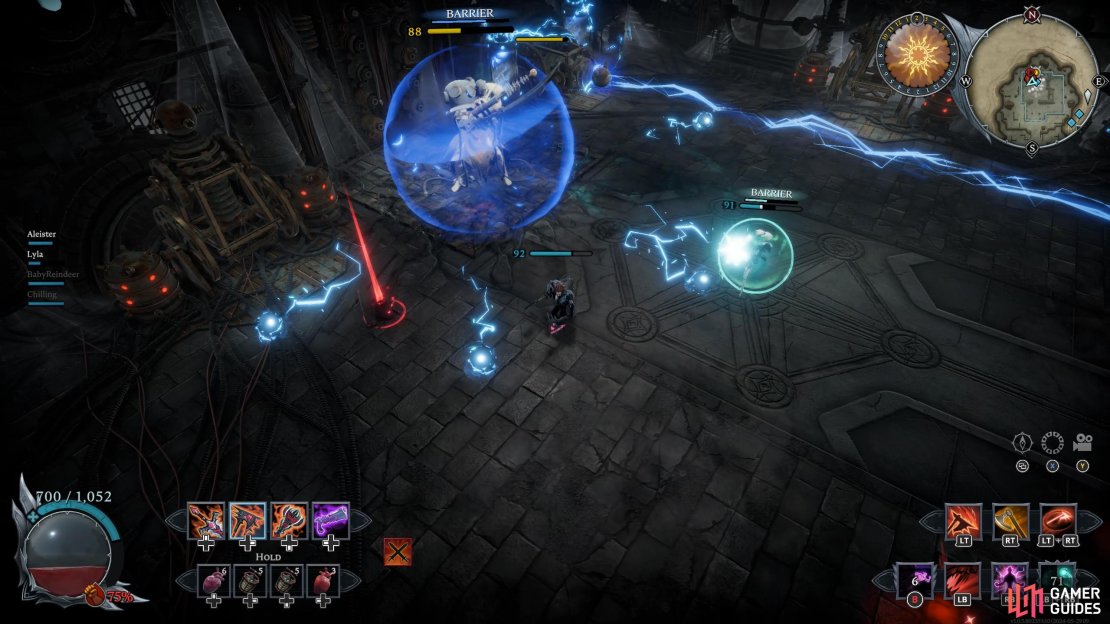
Barrier: Adam will place an impenetrable blue barrier around himself that negates all damage. Wait for the Barrier to disappear while taking out the lasers/avoiding the other attacks. If you attack him while he’s in the Barrier, he’ll unleash electric orbs in every direction across the room.

(1 of 4) Electric Palm: A small explosion of electricity from Adam’s palm when close to him.
-
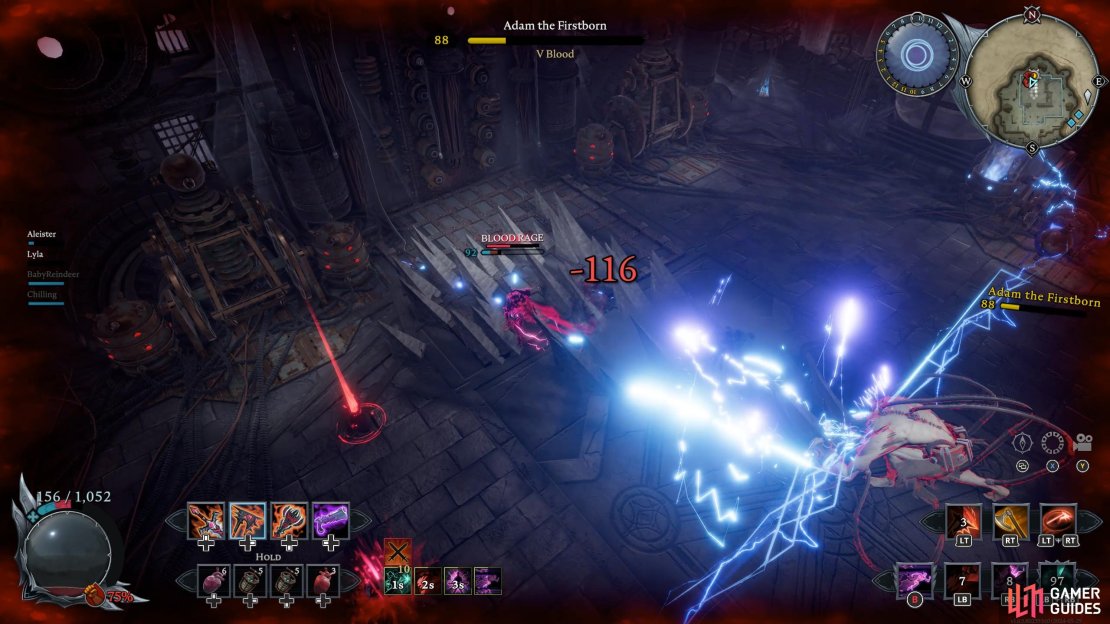
Thunder Grapple: Adam will grapple you like before, but this time he will lift you in the air and cast electricity on you, dealing multiple hits before throwing you to the ground. The same rules apply for this attack as they did for the Grapple Throw attack. Run/dodge away from him when he shifts toward you.
-
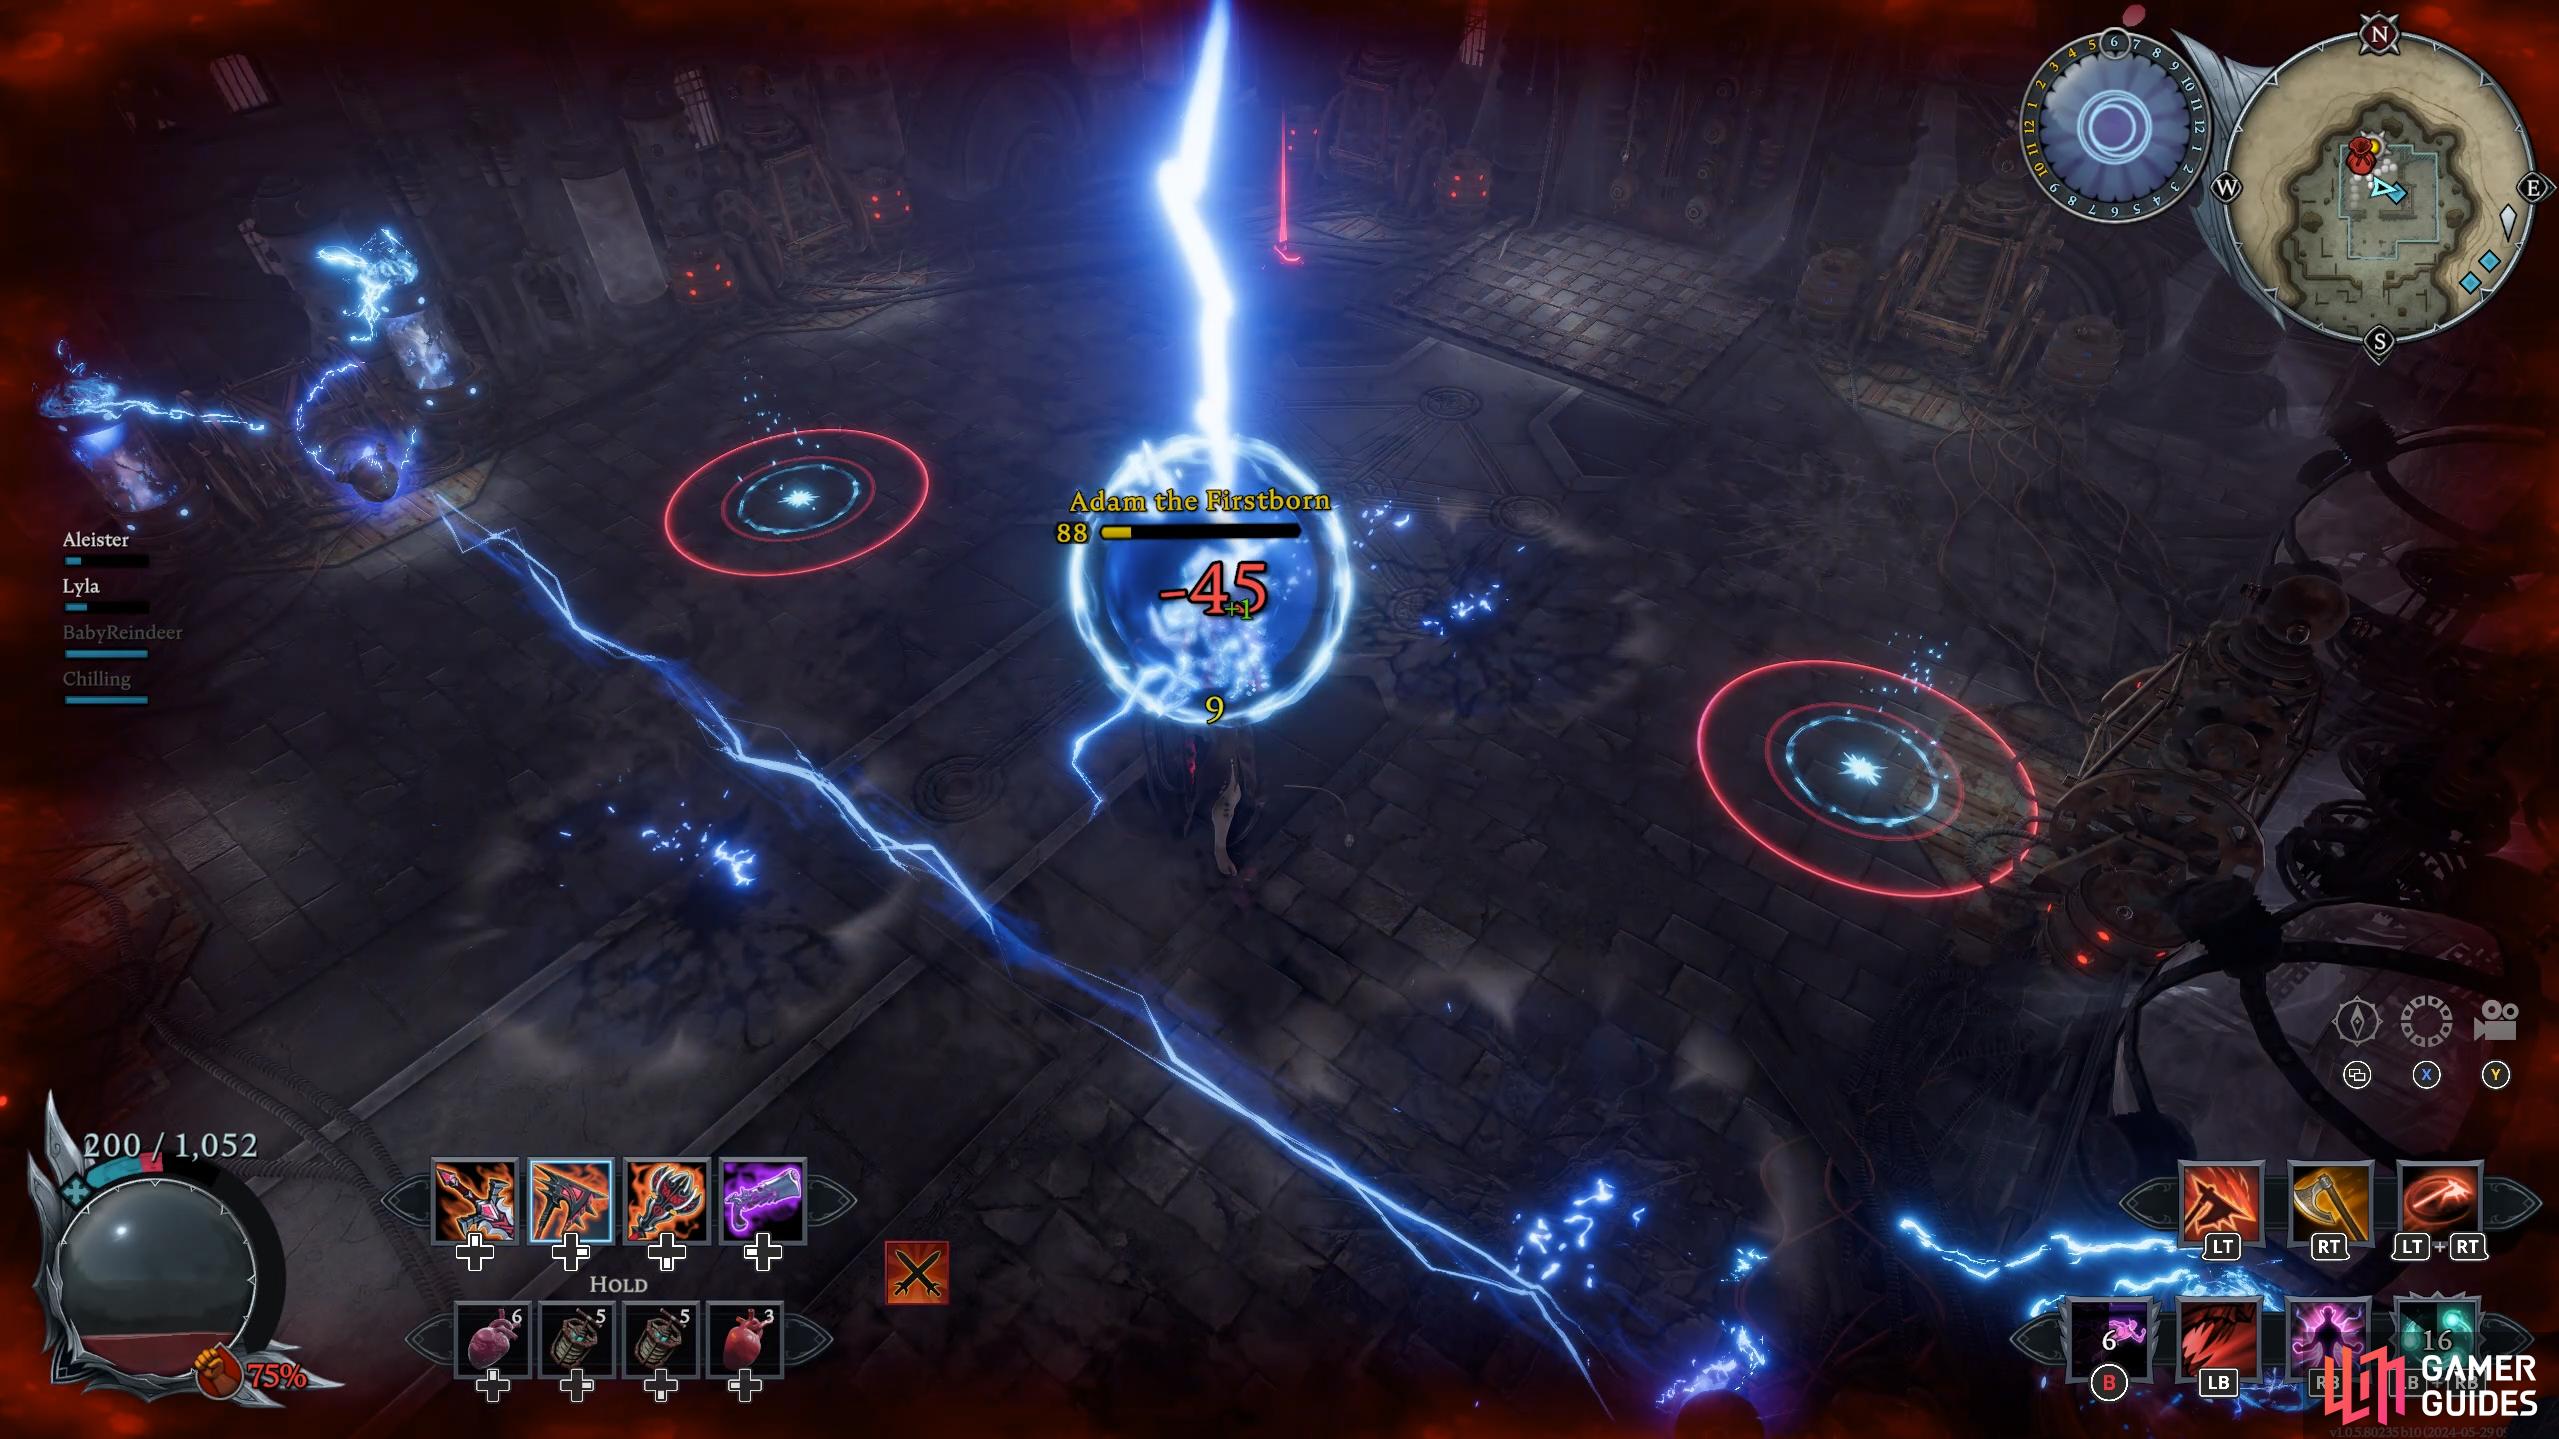
Thunder Mines: Adam will place numerous electric mines across the arena that pulse with electric energy. Every time the blue marker expands out, it’ll deal moderate damage to you. Similar to Lightning Storm, make sure you’re not near a mine when it’s about to explode.
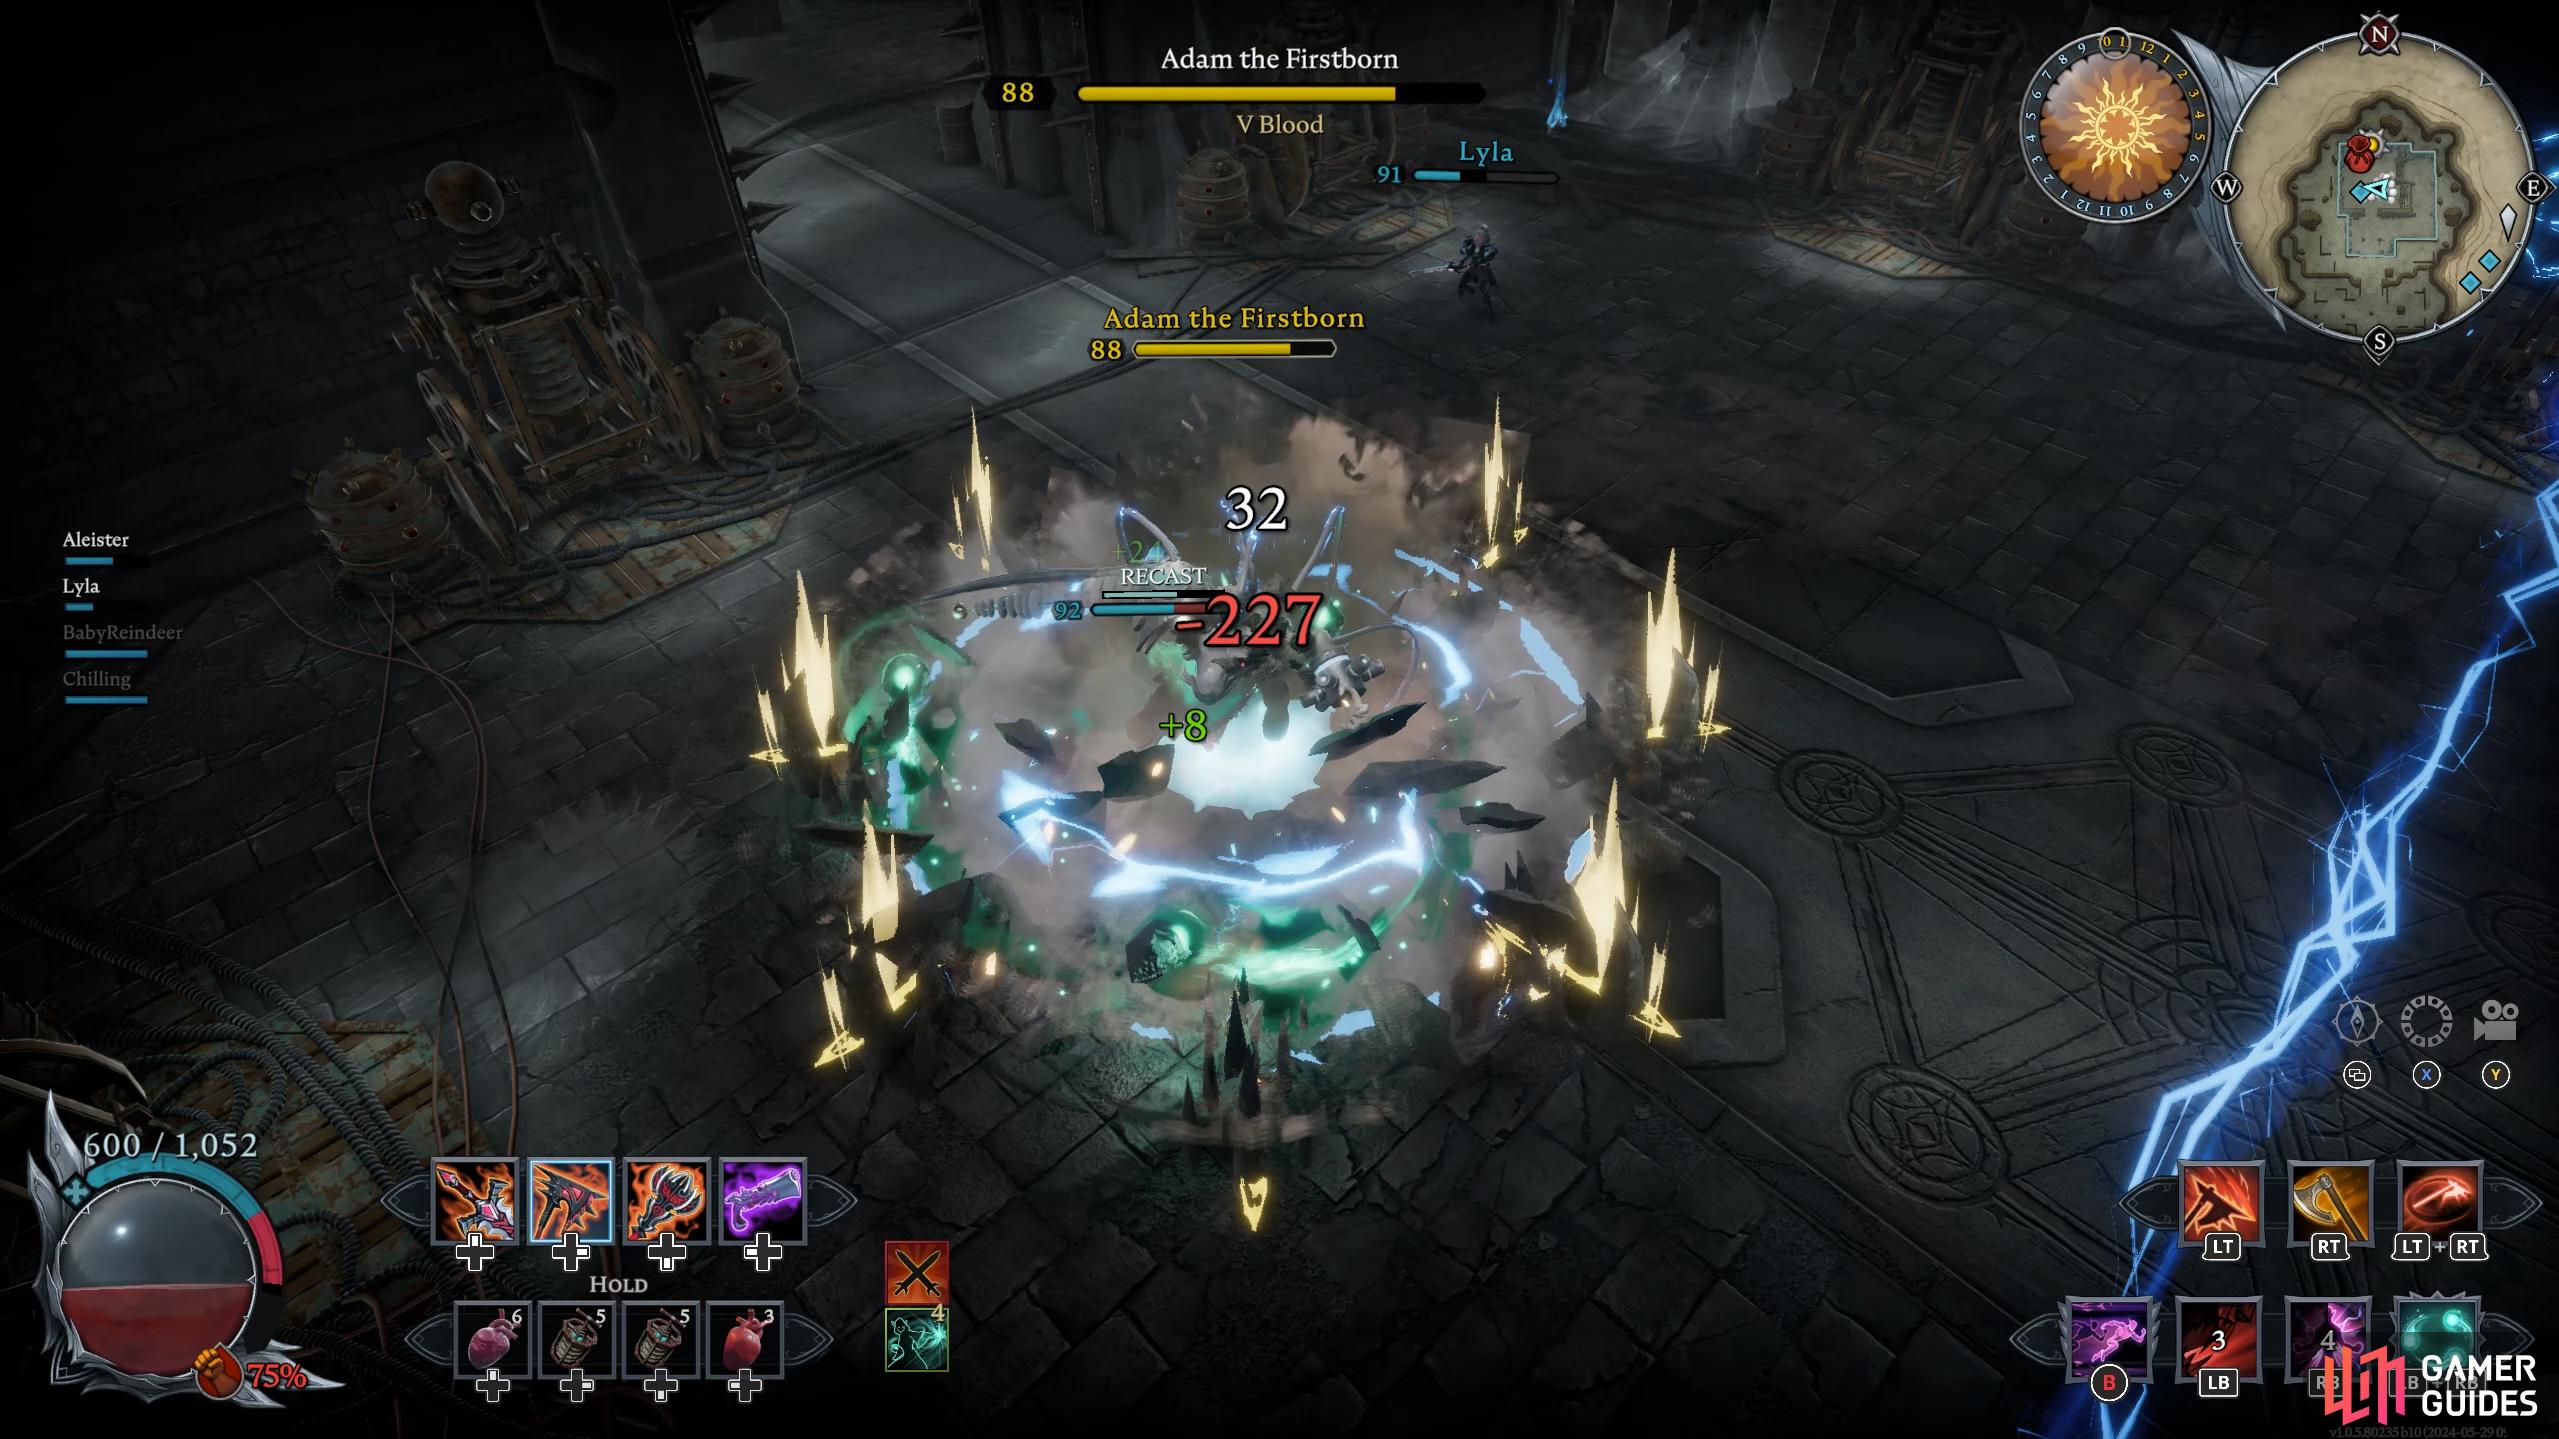
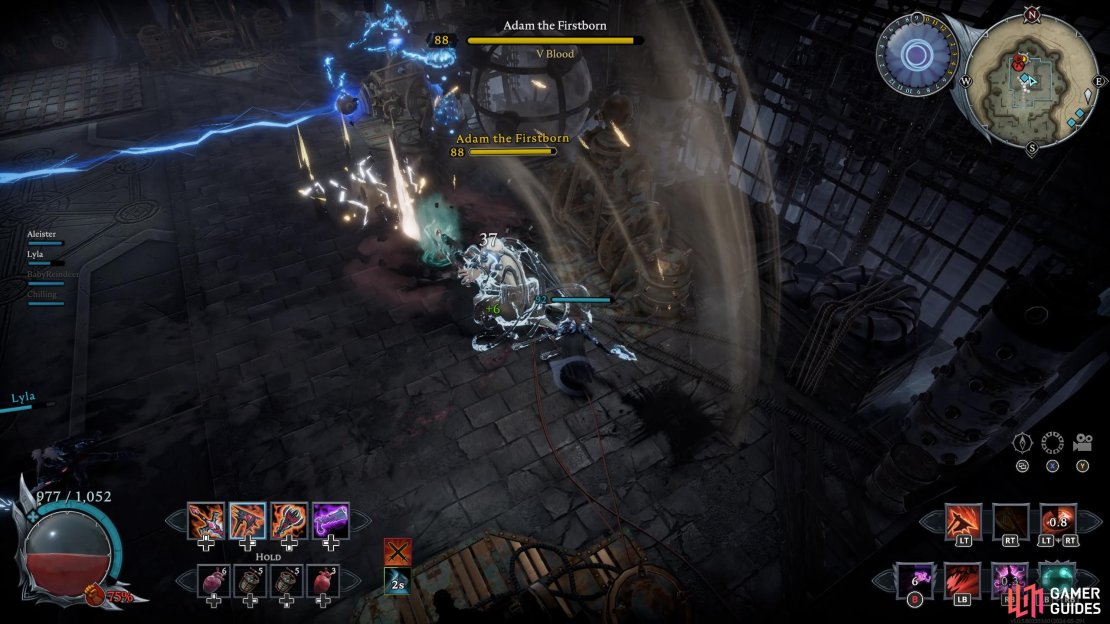
-
Resurrection: When you deplete Adam’s health to zero, he will resurrect into his final form with half his health. Make sure you get away from him as this happens because he’ll send out a shockwave around himself as he comes back to life.
-
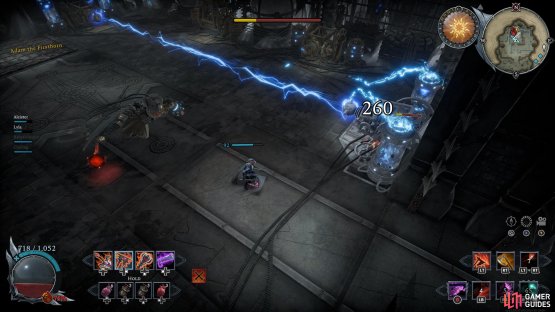
Electric Pillars: Adam will thrust his arm into the air and summon a moving pillar of electricity that will move throughout the arena. If you get caught in this, you’ll take significant damage. The pillar will continually deal damage to you while you’re in it. He can use multiple pillars in quick succession. Use your movement speed buffs or dodges to get some distance from it.

(1 of 4) Thunder Grapple: A grapple attack that shoots jolts of electricity through your body. This will hit multiple times.
-
Leaping Slam: Adam will leap into the air and disappear for a short while before crashing down to the ground unleashing electricity around him. A red marker will appear when he’s ready to crash down. Make sure you get out of the large circle as quickly as possible. You will want to use your dodge or movement speed buffs to escape this.
-
Electric X-Strike: Adam will bend over while conjuring electrical “waves” from his hands that move side to side as they travel toward you, similar to the Axe’s X-Strike attack. Wait for the waves to close in on you and dodge through them.
-
Electric Attack Combo: Adam will dash toward you and perform three melee attacks. This is almost the same as the Triple Shockwave attack but instead of shockwaves, it’ll be electrical bolts instead. The same rules apply to avoid the attack.
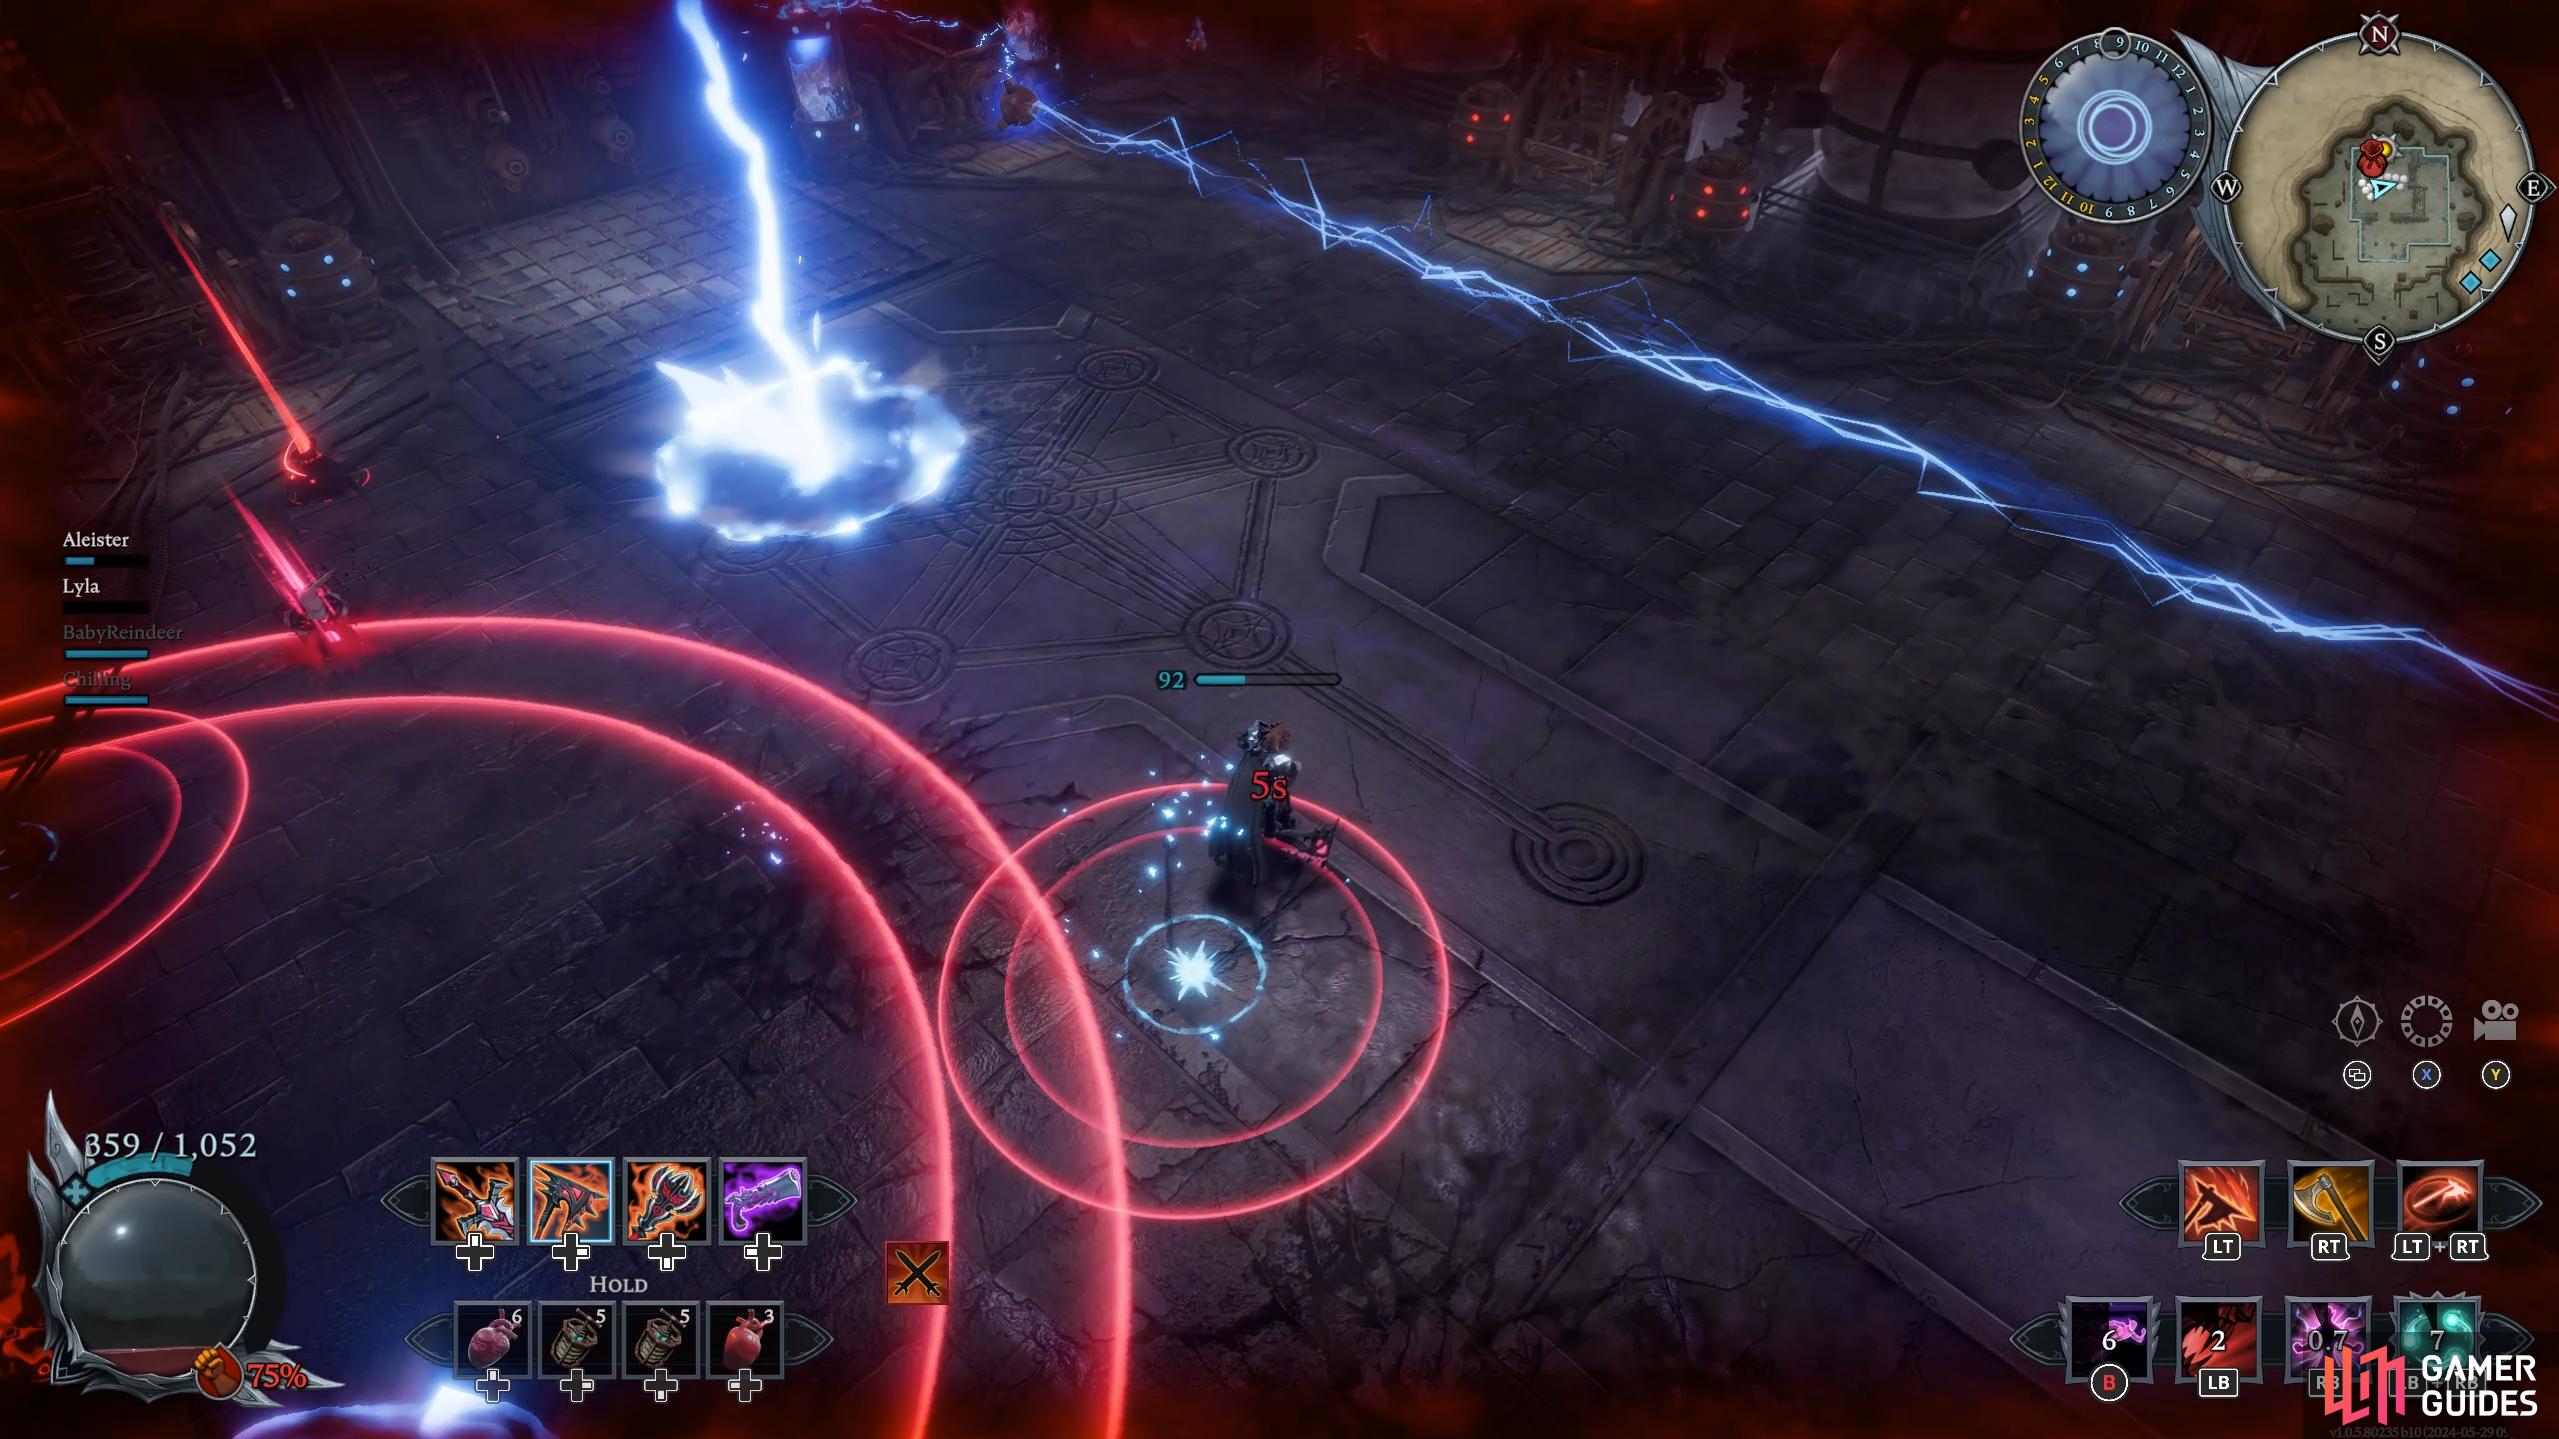
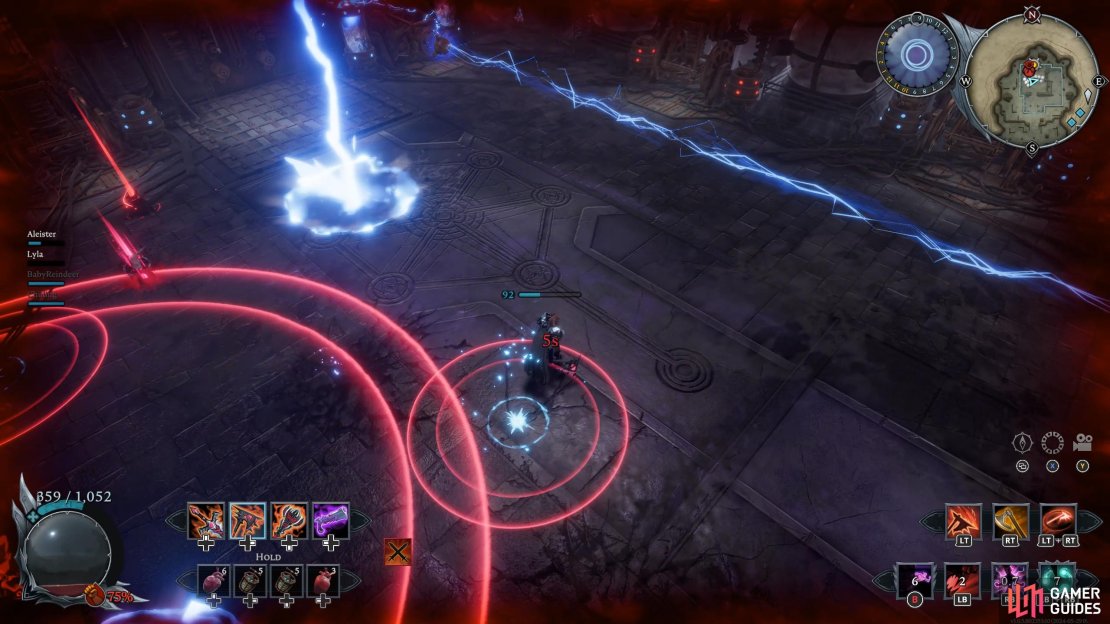
(1 of 4) Leaping Slam: He will then crash down to the floor in an explosion of electricity.
As you can see, Adam has a lot of attacks in his arsenal, and most of them are difficult to avoid. Take your time to deal with the mechanics because getting greedy with your attacks will be your downfall. Whenever a laser is up, destroy it and keep this up for the entire battle. If Adam dashes towards you, use your dodge, as a grapple is most likely following it up. If he uses any of the shockwave attacks, dodge through them toward Adam. When he begins to cast any/all of Lightning Storm, Thunder Mines, or Electric Pillars, keep on the move, and stay out of the blue and red markers.
Don’t attack him when his barrier is up, otherwise electric orbs will come in your direction. Only attack Adam a couple of times before dodging away from his attacks. X-Strike (Axes) is particularly good here, as it will hit him multiple times for a lot of damage. Don’t underestimate his speed. Although he is large, he can dash across the arena surprisingly quickly, leaving you almost no time to deal with the other mechanics, so always expect him to attack you without a moment’s notice.
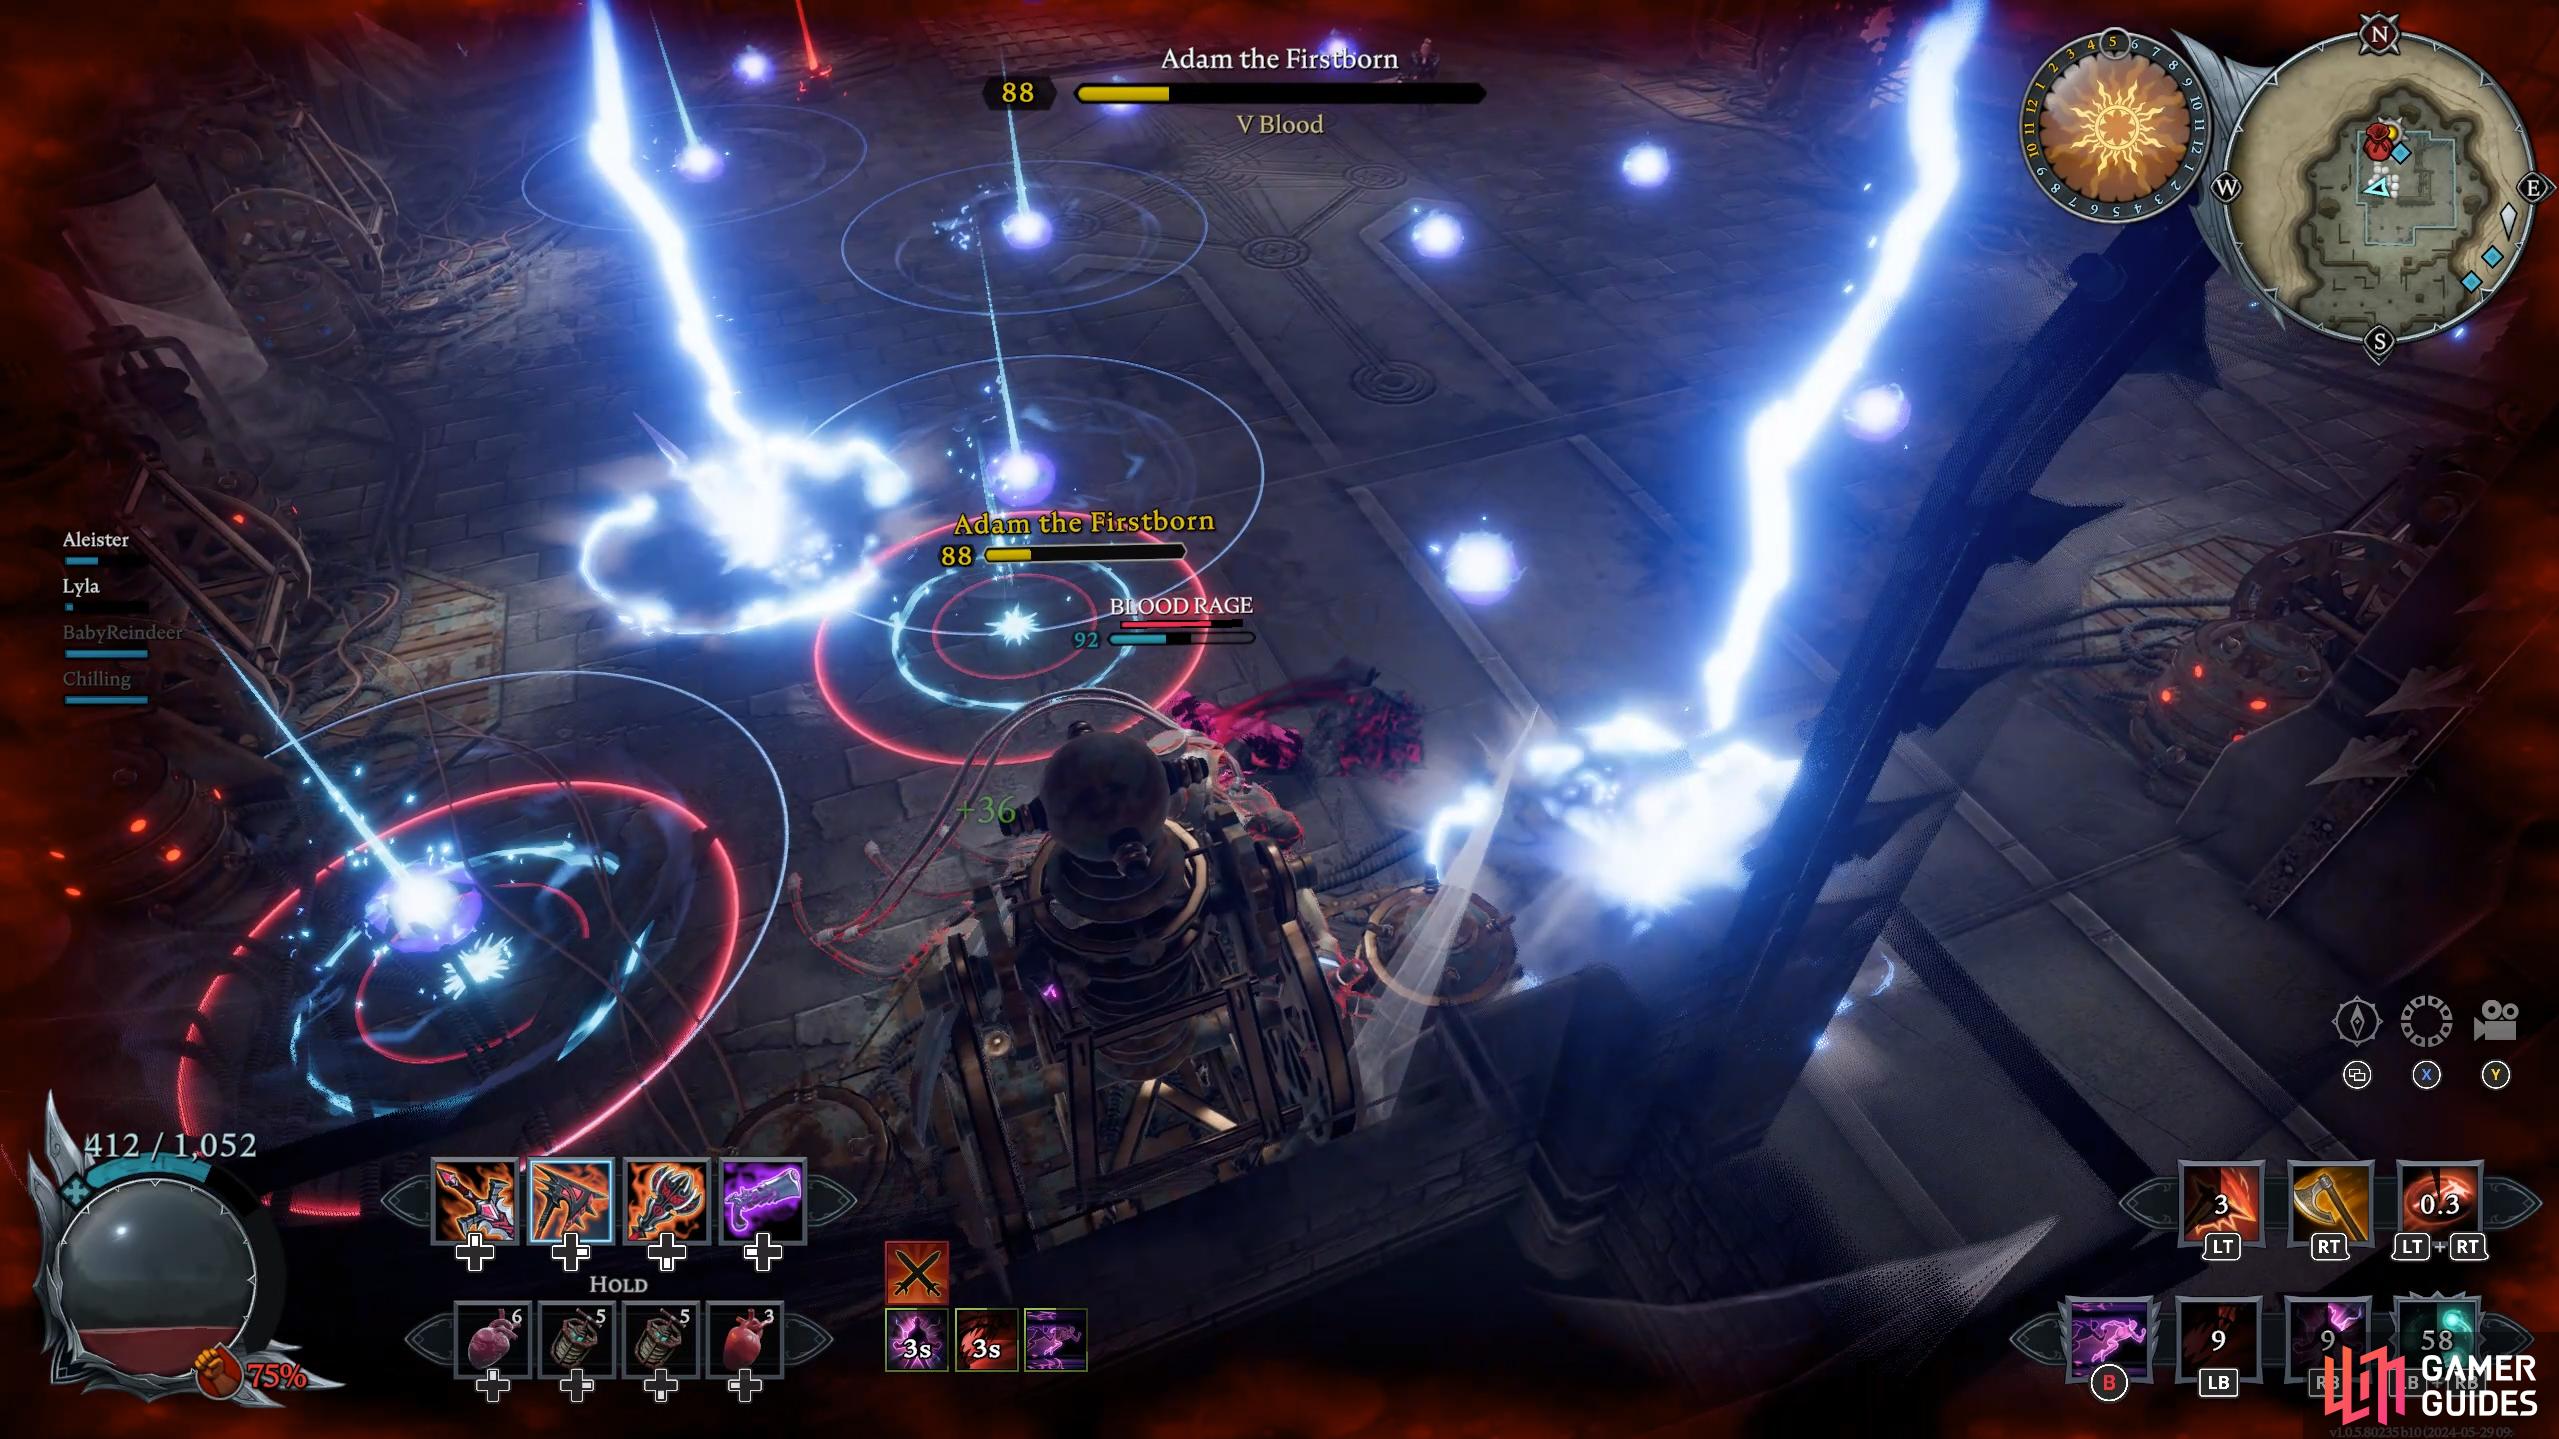
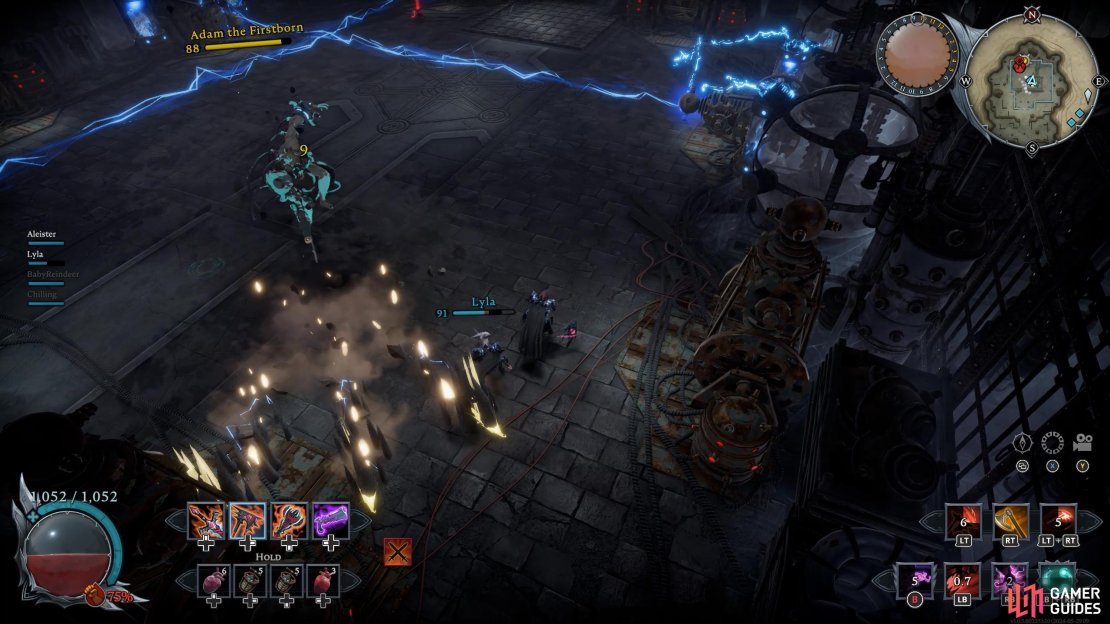
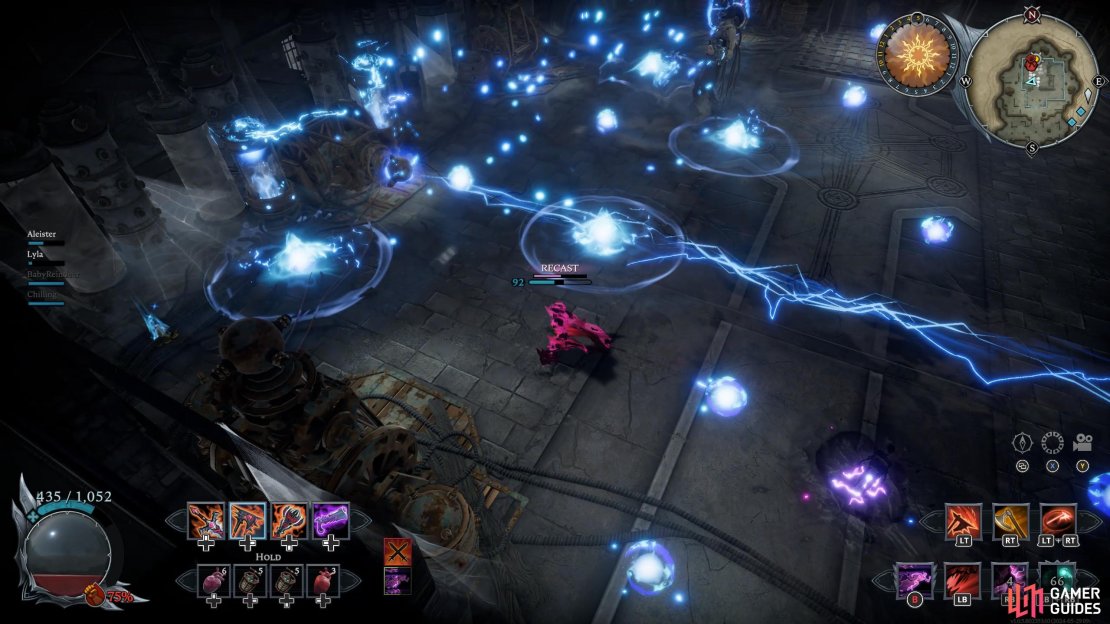
As the fight goes on, you’ll have to deal with Thunder Mines, Lighting Bolts, Lasers on top of Adam’s regular attacks.
Finally, as the battle goes on longer and longer and his health depletes, the battle will get more difficult. When he’s down to 25% health and especially after he’s resurrected, expect to deal with multiple mechanics at once, which include but are not limited to shockwaves, Lightning Storms, Thunder Mines, and Electric Pillars. This is happening while the laser mechanic is still happening in the background. We recommend that you only take out a couple of the lasers during the last part of the fight, as you’ll have no time to attack him. Just make sure you give yourself enough room to maneuver. During this portion of the battle, focus on avoiding the mechanics first while you slowly chip away at his health.
If you try to finish him quickly, you’ll most likely die, although it’s not impossible. Once you defeat Adam, you’ll unlock the following rewards: Pedestal of the Monster (Soul Shard holder), ![]() Soul Shard of the Monster, and Dracula’s Leggings recipe.
Soul Shard of the Monster, and Dracula’s Leggings recipe.
No Comments