
As you progress through Bowser’s Keep in Super Mario RPG, you’ll end up going through a room covered in darkness before you reach a save point with Croco nearby. In the next room, you’ll encounter six red doors you can go through. Going through these doors will lead to the best weapons in the game outside the post-game for some of the party, but to get to them, you’ll have to complete some sort of challenge from action courses (platforming), puzzle courses, or battle courses. Unfortunately, each door is random for every playthrough so we can’t tell you what each door has, but we can tell you what you can get in them. When you complete four doors/rooms, you’ll progress further into the keep regardless of what you get. Here is what you can find in the doors:
- Sonic Cymbals: Mallow’s best weapon outside post-game.
- Super Slap: Peach’s best weapon outside post-game.
- Star Gun: Geno’s best weapon outside the post-game.
- Drill Claw: Bowser’s best weapon outside post-game.
- Rock Candy
- Rock Candy
Ideally, you’ll want to get the four weapons, but due to the randomness of the doors, you’ll have to get lucky. You can “give up” in some courses, which allows you to check out the other rooms first. Now you know what’s behind the doors, read on to find out how to complete the challenges associated with them.
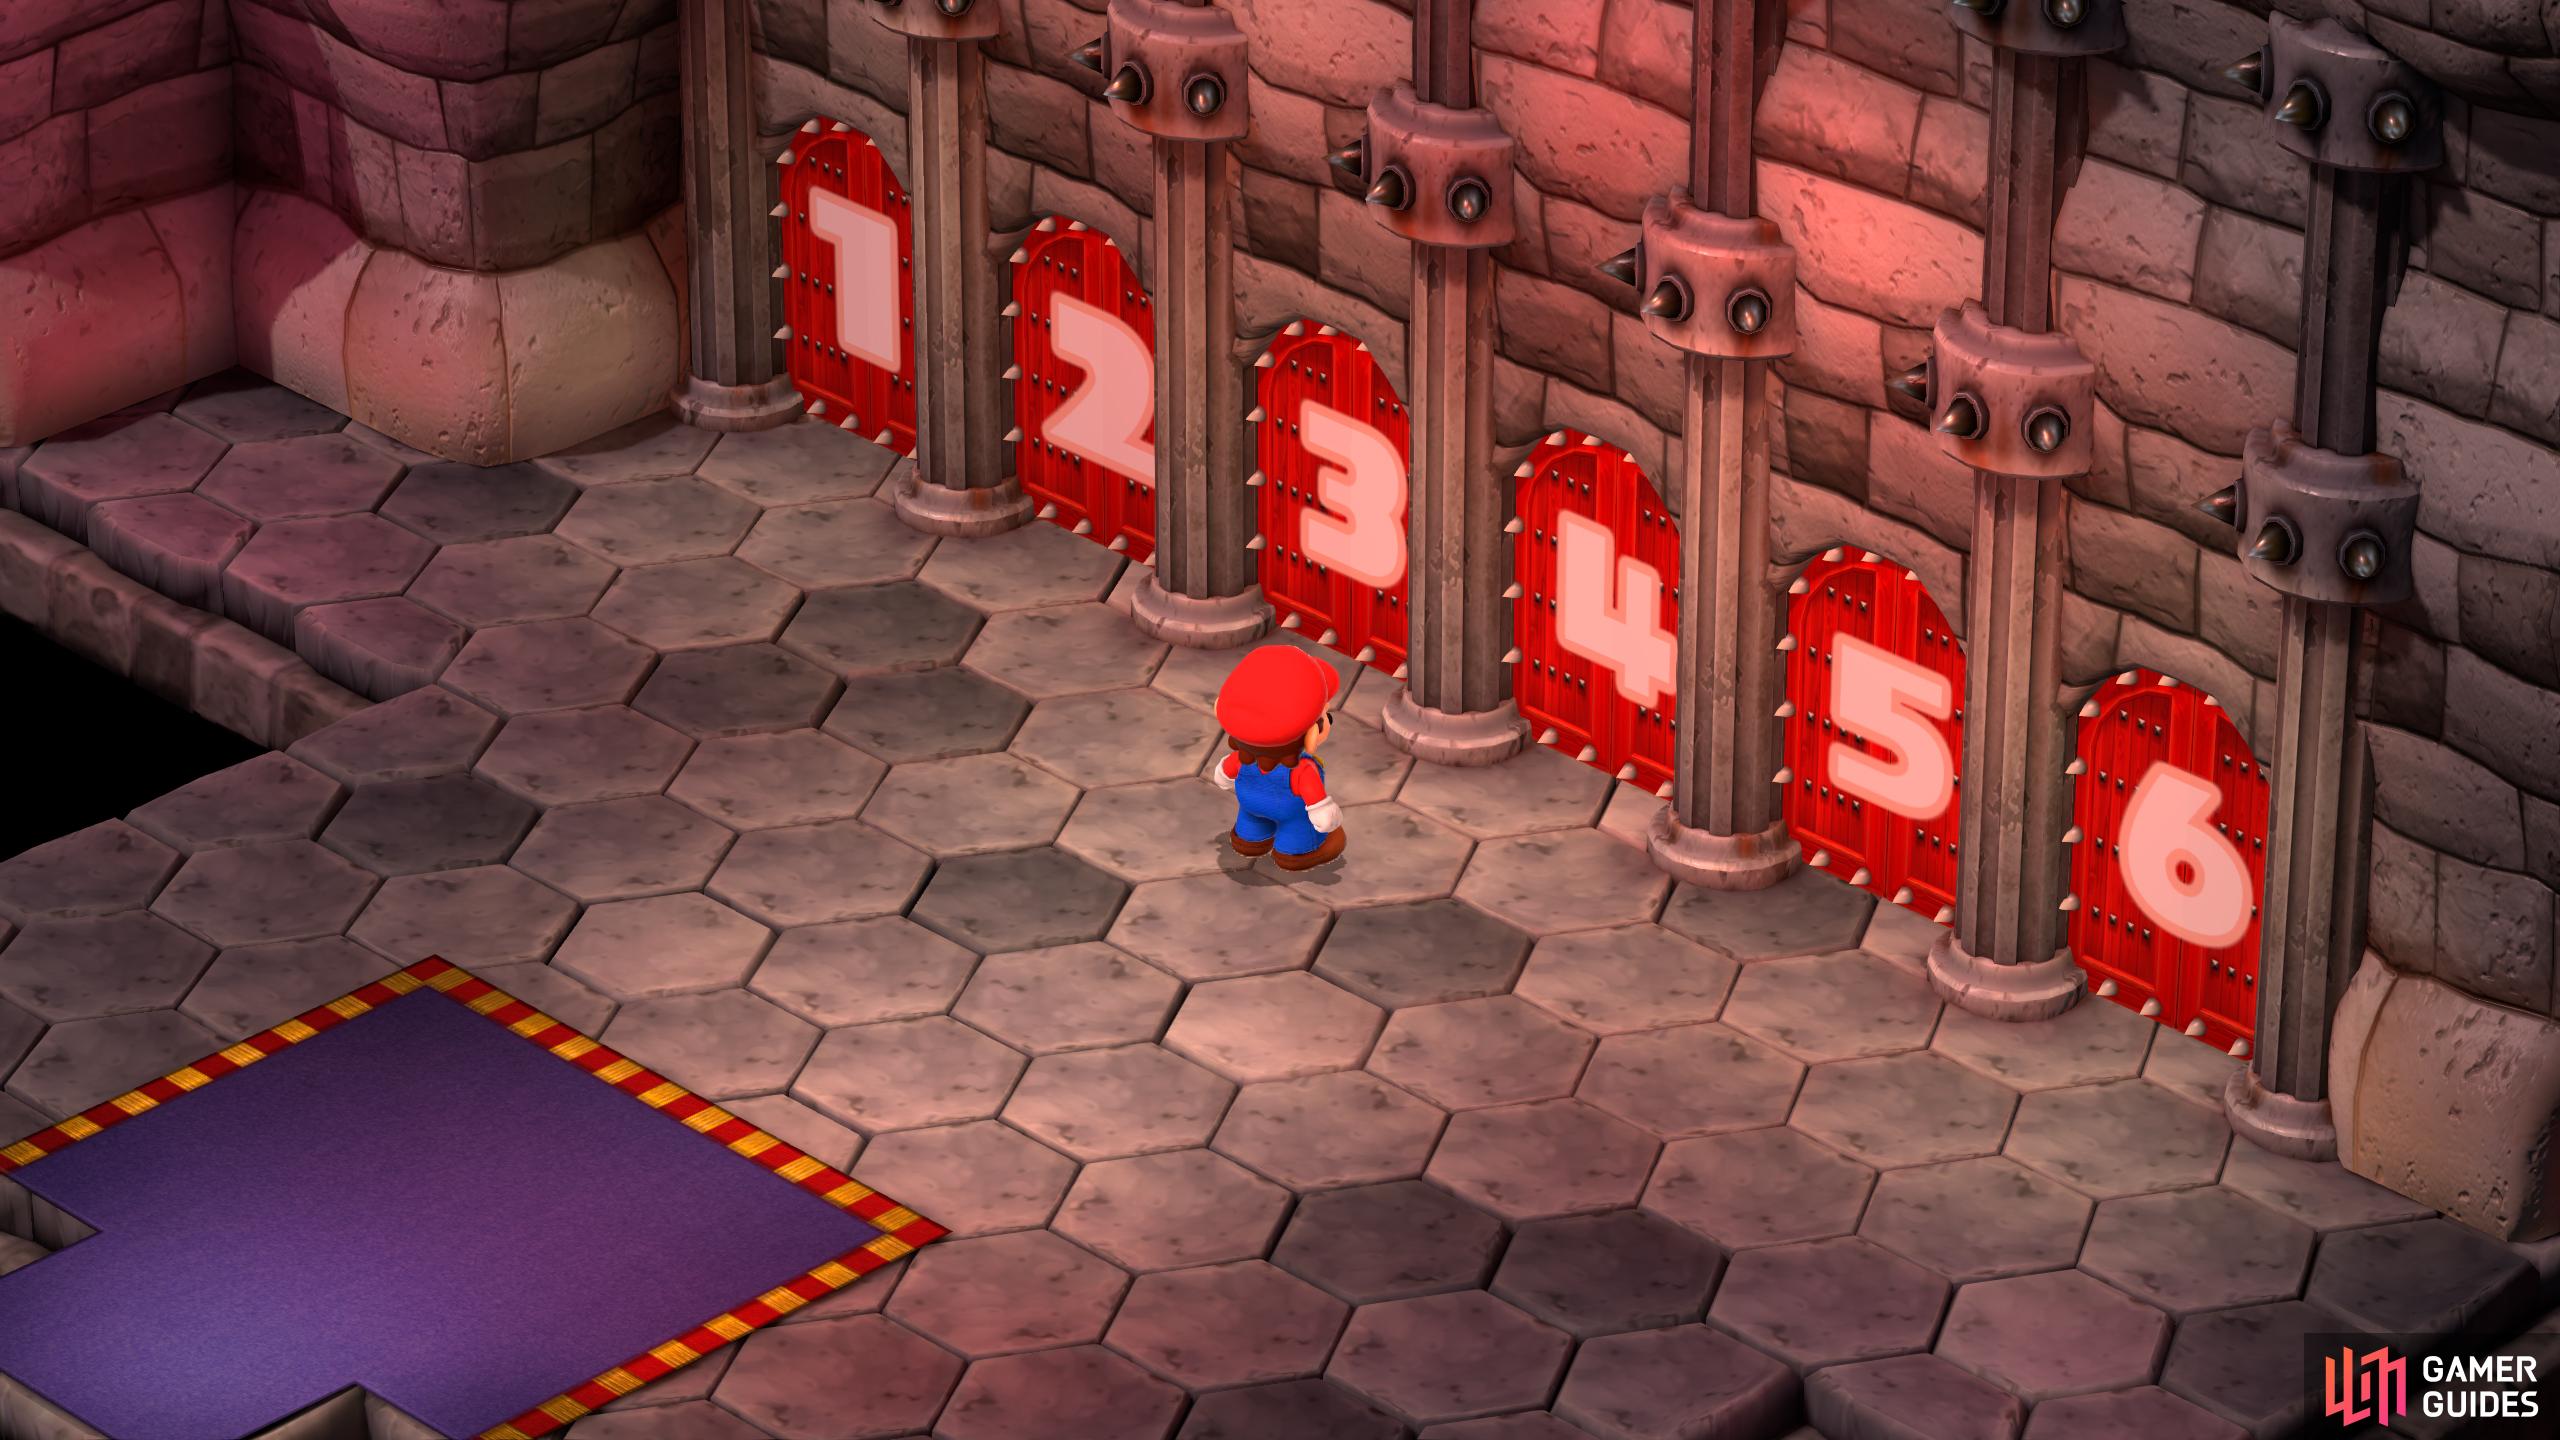
In Bowser’s Keep, there are six doors, all with puzzles, battles, or platforming. Four of these doors reward you with a weapon.
Door Puzzles
There are two action courses (platforming), two battle courses, and two puzzle courses behind these doors. This list won’t be in any specific order due to the randomness of the doors, so when you enter a room, check your surroundings to find out what guide correlates with the room you entered.
| Quick Jump | – |
|---|---|
| Action Course 1 | Action Course 2 |
| Battle Course 1 | Battle Course 2 |
| Puzzle Course 1 | Puzzle Course 2 |
Action Course 1
Action courses are platforming tests where you’ll need to jump over bridges, blocks, and yellow platforms. Like the other courses, there will be three rooms for you to get through, and you’ll have ten attempts to complete the whole course before you get kicked out and have to start again. You’ll lose an attempt every time you fail to make the jump, so slow and steady will win the race here.
Room 1 - Lava Platform Room
In this room, the goal is to make it across the lava by using the moving platforms, but this looks easier than it actually is. Jump on the first moving platform, and wait for it to get as near as possible to the second platform before jumping over to it. On the second platform, wait until the block you’re on is higher than the next platform, and then jump onto it. Repeat this until you reach the last platform, and wait until it drops quickly to jump on it. The timing is different from the previous platforms.
Room 2 - Rob-omb Cannonball Room
For this room, the first thing you’ll see is a cannonball, and a bomb. The goal here is to ride the cannonball to the raised platform with the door at the back while avoiding all the bombs. Sounds easy, right? Well, the controls will be inverted when you ride the cannonball, and the bombs will lock on and chase you. Now, factor in there are four chests you can open here which contain, two Flowers, a Max Mushroom, a Pick Me Up, and a Rock Candy which can be found near the other raised platforms, and you’ll see why it’s not as easy as it looks. However, if you ignore the chests, it will make this room significantly easier. The best way to do this is to roll near the bomb to get its attention, and then roll into a corner to move it away from the middle. This will give you some time to make it through unharmed.
Room 3 - Rotating Platforms
The final room of the course is easy in principle, but difficult in practice mainly due to the isometric viewpoint. What you need to do here is jump on the small platform, and the platform next to it will rotate around your platform. Use this to get across the lava to the exit. If you’re having trouble landing your jumps, use the shadow of the platforms in the lava to help you pinpoint exactly where you need to jump. There are several chests in here if you want to get them which contain the following: a Fire Bomb, two Flowers, a Royal Syrup, and a Pick Me Up. When you reach the exit, follow the platform to get your reward which will be Mallow’s Sonic Cymbals weapon.
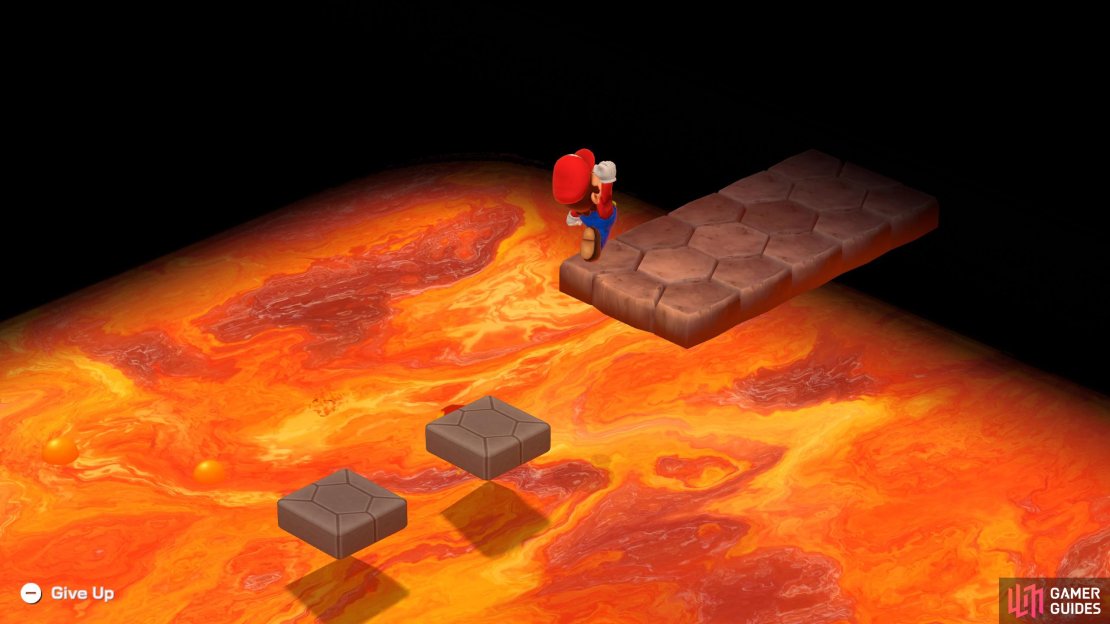


(1 of 3) Action Course 1 - Room 1: Wait for the blocks to rise over the next block before committing.
Action Course 2
Room 1 - Hidden Lava Path
This room won’t have a path, at least one that you can see. However, if you jump, you’ll briefly see the path you need to take. Make your way across the lava while jumping to reveal the path. There are numerous chests in here that contain the following: a Royal Syrup, a Fright Bomb, an Ice Bomb, and a Rock Candy, and you can get them by following the different paths you unveil when you jump.
Room 2 - Moving Blocks Room
As soon as you enter the room, you’ll see numerous floating blocks going back and forth across the lava-filled room. The goal here is to use the blocks to reach the other moving blocks to get across. To make things more difficult, they added a few treasures to obtain which are a Fire Bomb, a Max Mushroom, a Flower, and a Red Essence. If you want these treasures, jump from a central block when it gets near to the block next to the treasure. If you want to just reach the end of the room, jump onto the middle block, wait for it until you reach the next block, and then walk onto it. Once again, wait until it joins up with the block on your left, and walk onto that block. Finally, stay on the block, and it will take you to the red door; jump off and go through the door into the next room.
Room 3 - Donkey Kong Barrel Throw
This feels familiar. In this room, you’ll need to make it to the top while dodging the incoming barrels in the same manner that you may have done in the original Donkey Kong game on the NES. You can rush up the first two platforms, and when you get to the third, jump over the incoming barrels. If you’re doing this quickly, and you should, you’ll have to jump over three of them. On the next platform, rush up to the top while jumping over any barrel coming your way, and then jump over the last couple of barrels to reach “Chained-Kong” who will stop throwing the barrels, and retreat. Go through the door, and open the chest in the next room which contains Mallow’s Sonic Cymbals weapon.
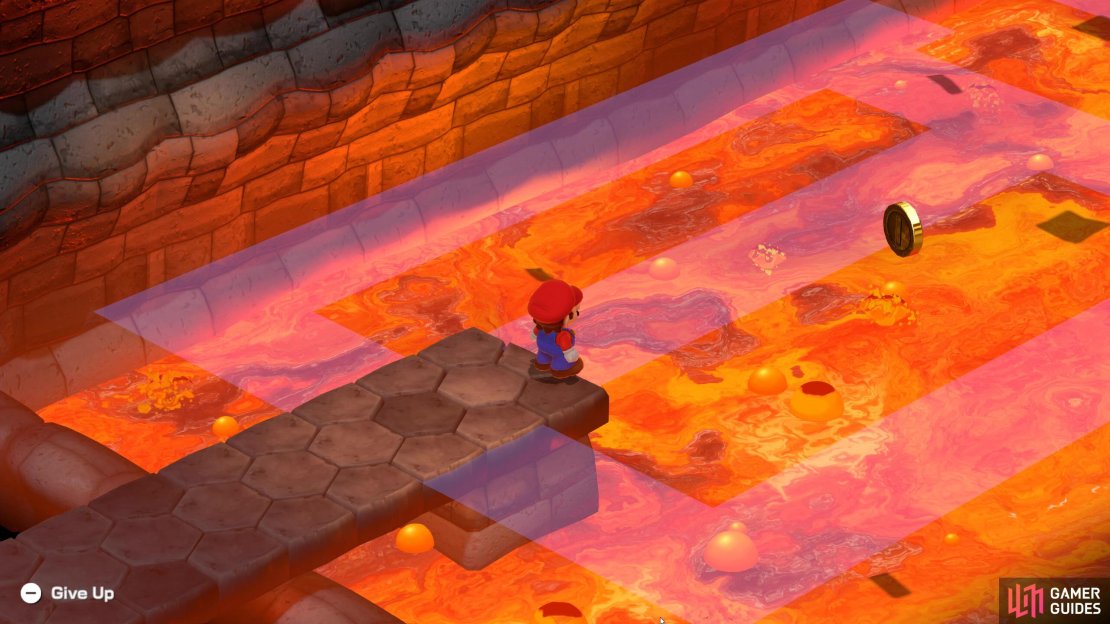


(1 of 6) Action Course 2 - Room 1: Every time you jump, the path through will reveal itself.
Battle Course 1
| Room | Battle | Enemies |
|---|---|---|
| 1 | 1 | Pro |
| 1 | 2 | Malakoopa x2, Grand Troopa x1 |
| 1 | 3 | |
| 1 | 4 | Sling Shy x 5 |
| 2 | 1 | |
| 2 | 2 | Muckle x2, |
| 2 | 3 | |
| 2 | 4 | |
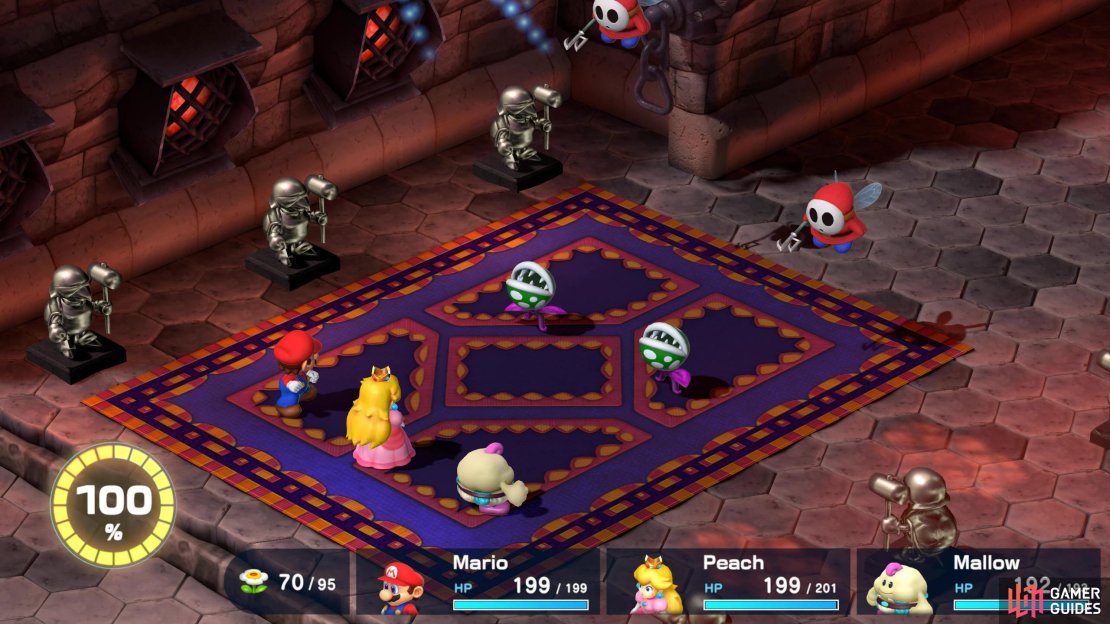
| 3 | 1 | Lava Babble x3 |
| 3 | 2 | |
| 3 | 3 | |
| 3 | 4 | Shaman x6 |
Battle courses are gauntlets of twelve battles scattered throughout three rooms, and defeating them all will reward you with ![]() Bowser’s Drill Claw weapon.
Bowser’s Drill Claw weapon.
Room 1
Each room will throw a battle at you every time you reach a set of statues along the corridor as you progress through the room.
-
Battle 1: The first battle will be against five Pro
 Goombas. These are weak enemies which shouldn’t cause you any problems, although you could use Peach’s Psych Bomb, or another area-of-effect attack to finish them off quicker.
 -
Battle 2: As you walk to the next set of statues, you’ll face two Malakoopas and one Grand Trooper. Again, this is nothing that should trouble you, but using Mallow’s Shocker ability on them will quicken the pace due to their weakness to lightning.
-
Battle 3: Continue along to the next battle which will pit you against two
 Boos, and two Orbisons. As with the previous two battles, this will be an easy battle, although the Orbisons can pump out a decent amount of damage. Take these out with regular timed attacks, and focus on the Boos first. With luck, the area-of-effect damage from the timed attacks should take out the Orbisons too, if not, you’ll finish them off in the next turn.
 -
Battle 4: The last battle of the room consists of five Sling Shies. Use a Psych Bomb with Peach, and use regular attacks with the other party members to finish them off.


(1 of 4) Battle Course 1 - Room 1 - Battle 1: Here, you’ll fight five Pro Goombas.
Room 2
-
Battle 1: The first battle in room two will be against two
 Beezos, and two
  Chewy’s. The Chewys will use Fire Saber, which is a single-target spell, or Hot Shot; a single-target fireball. Beezos will either mute you with Elegy or use Will-O-Wisp, which is a single-target spell. The Beezos are weak to ice, but the Chewys don’t have a weakness, so cast Snowy with Mallow to take them out in one turn. If any survive, follow it up with regular attacks.
 -
Battle 2: This battle gets a bit more challenging, but nothing that will make you shake in your boots. You’ll be facing two Muckles and one
 Mr. Kipper. All of these are weak to Fire, so an Ultra Fireball from Mario should be enough to take them all down, if not, finish them off with regular attacks. Muckles do have 320 HP, so they may survive the fireballs, but your regular attacks will finish them off.
 -
Battle 3: For the third battle, you’ll face two
 Amanitas and one Orbison. The Amanitas like to cast Sporocyst which will turn you into mushrooms, and waste your turns, and the Orbison can heal. Amanitas are weak to Fire, while the Orbison are weak to Jump, but as none of them have a lot of health, you can take them all out with another Ultra Fireball, and finish any that survive Mario’s onslaught with regular attacks.
 -
Battle 4: Room two’s last battle will pit you against two
 Greapers, and one Glum Reaper. This is arguably the first semi-difficult battle you’ll face. They are quick, so their turns will most likely come before you, and they cast a lot of area-of-effect magic such as Blizzard while also being able to inflict Fear with the aptly named attack, Fear Sickle. When they’re not nuking you to kingdom come, they will use single-target spells such as Lightning Orb, and Will-O-Wisp. Cast Thunderbolt with Mallow to inflict lightning damage to the group as the Greapers are weak to it, heal with Peach if needed, and use regular attacks with Mario. This should still be a relatively easy battle, but this battle will at least make you have to try. Note, if you’re struggling with the area magic attacks, the enemies can be put asleep, which will let you take your time with them.


(1 of 4) Battle Course 1 - Room 2 - Battle 1: The first battle in room two will be against two Beezos, and two Chewys.
Room 3
-
Battle 1: The first battle in room three will be against three Lava Babbles. There’s nothing special about these enemies other than they will predominantly use fire attacks (surprise!), and are weak to ice (shocked, I say!). Simply cast Snowy with Mallow, and if any survive, finish them off with some regular attacks.
-
Battle 2: In the second battle, you’ll be against three
 Lakitus. These will predominantly pelt you with lighting-based spells such as Bolt, and Static Electricity, with the odd Monster Toss thrown in for good measure. You can just use regular attacks on these enemies until they’re defeated, but if you’re taking too much damage from their area-of-effect attacks, mute them as they are susceptible to it, and then they will be even less of a threat.
 -
Battle 3: This battle is a bit more challenging, but not by much. You’ll be facing two
 Zeostars, weak to Lightning and Fire, and two Shamans who are weak to Sleep and Mute. The Zeostars can heal, but the Shamans will deal more damage, so pick your poison on what to defeat first. Our rule of thumb in turn-based games is if they can heal, they gotta go first. Alternatively, you could use area-of-effect spells such as Psych Bomb, and Ultra Fireball, but it will be costly, well, costly and time efficient.
 -
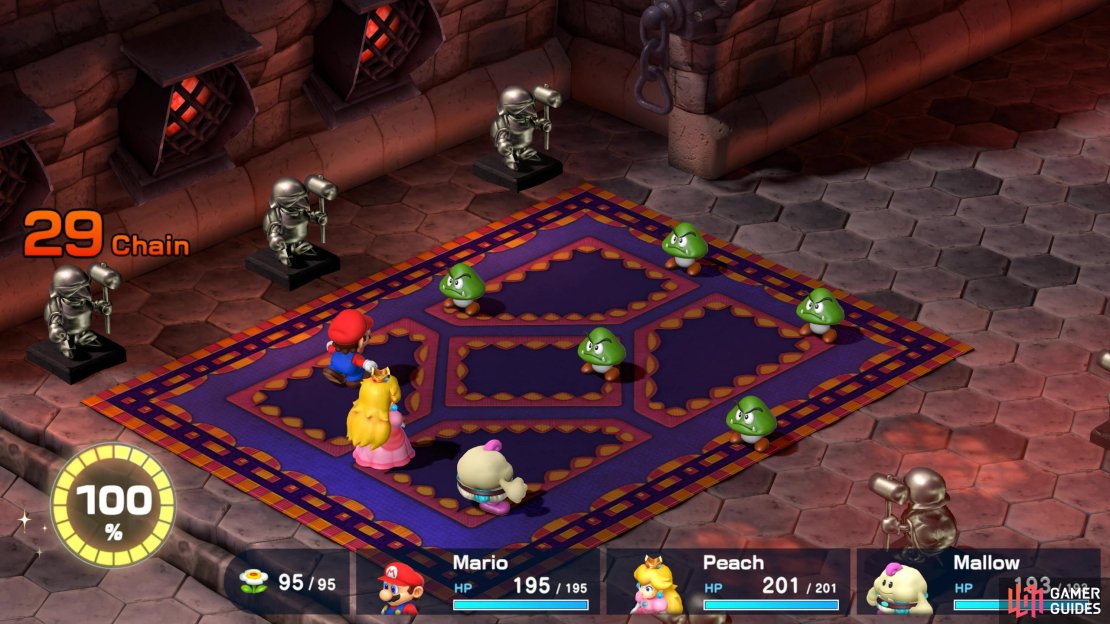
Battle 4: The last battle in Battle Course one will pit you against Shamans. Not one or two, but six, six Shamans! If you let these get going, they can deal a lot of damage per turn. Either sleep, or Mute the group to stop this in its tracks, and launch some nukes of your own with Peach’s Psych Bomb, Mallow’s Snowy, Mario’s Ultra Fireball, etc. Once you’ve defeated the Shamans, head through the door, and open the chest floating in the air to obtain Bowser’s Drill Claw as a reward.
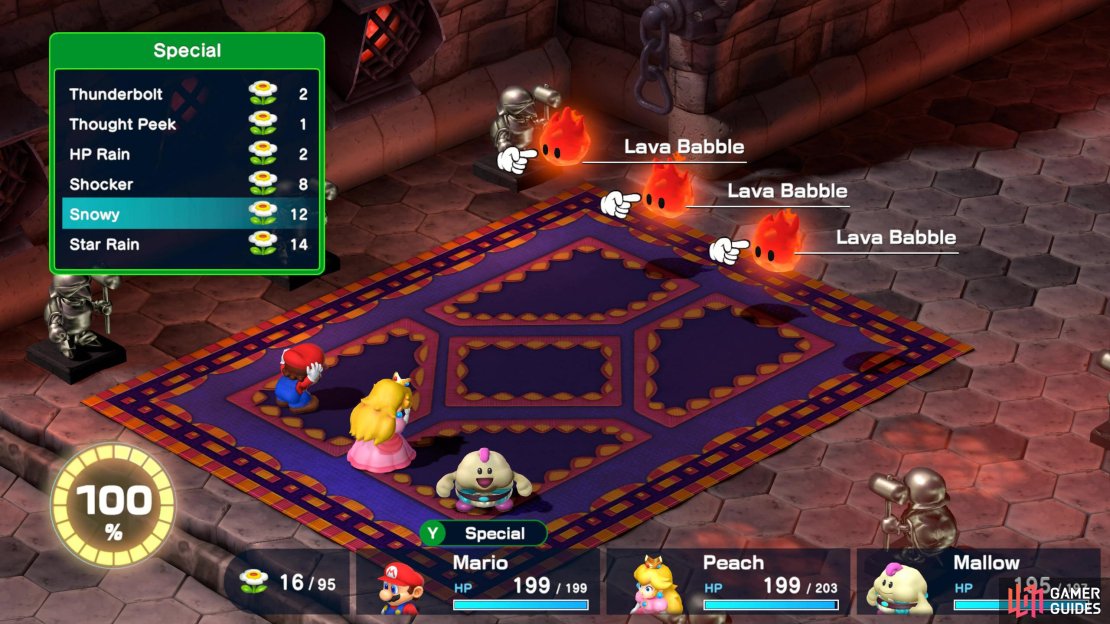


(1 of 4) Battle Course 1 - Room 3 - Battle 1: The first fight in Room 3 is against three Lava Babbles.
Battle Course 2
| Room | Battle | Enemies |
|---|---|---|
| 1 | 1 | Terra Cotta x4 |
| 1 | 2 | Urspike x2, Star Cruster x1 |
| 1 | 3 | |
| 1 | 4 | |
| 2 | 1 | Armored Ant x2, |
| 2 | 2 | |
| 2 | 3 | |
| 2 | 4 | |
| 3 | 1 | Big |
| 3 | 2 | Vomer x4 |
| 3 | 3 | Magmus x2, |
| 3 | 4 | Comeon (Mimic) x1, Bahaumutt x1 |
Battle courses are gauntlets of twelve battles scattered throughout three rooms, and defeating them all will reward you with Geno’s Star Gun weapon.
Room 1
Each room will throw a battle at you every time you reach a set of statues along the corridor as you progress through the room.
-
Battle 1: The first battle will be against four Terra Cottas. Another group of weak enemies that you can defeat by using regular attacks. Use Peach’s Psych Bomb to speed up the process.
-
Battle 2: Another easy battle, but this time against two Urspikes, and one Star Cruster. Defeat them with regular attacks, and use Mallow’s Snowy skill to defeat the Star Cruster.
-
Battle 3: This battle can be difficult. You will be facing one
 Sackit, and two Big
  Blasters, with the latter able to cause instant death with their Blazer attack. Make sure you at least have Peach equipped with a Safety Ring.
 -
Battle 4: The last battle of the room consists of two
 Chows and one Forkie. This is a relatively easy battle providing you have resistance accessories for fear. The Chows will either attack or cast a Howl which causes Fear while the Forkie will attack you with regular attacks and its Storm skill for moderate damage.
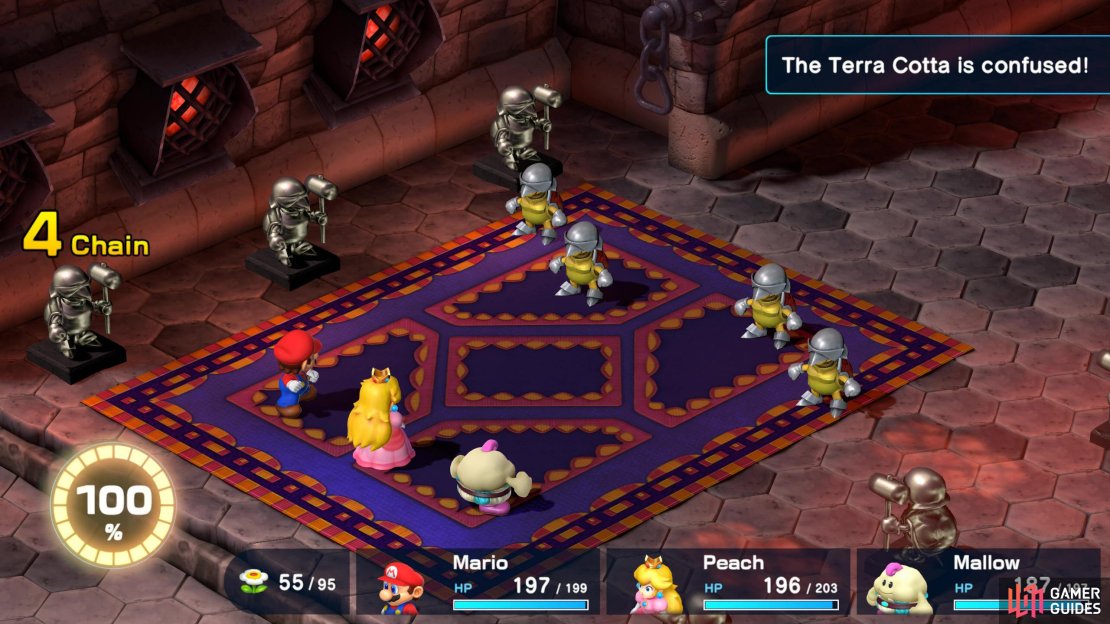


(1 of 4) Battle Course 2 - Room 1 - Battle 1: The first fight in Room 1 is against four Terra Cottas.
Room 2
Each room will throw a battle at you every time you reach a set of statues along the corridor as you progress through the room.
-
Battle 1: The first battle will be against two Armored Ants, and an
 Alley Rat. The latter won’t cause you any problems it will most likely run away. However, the Armored Ants will cast Endobubble on you when they’re not attacking, which will cause fear to a single target. Like most fights, a Psych Bomb from Peach will quicken the process, otherwise, use regular attacks.
 -
Battle 2: Here, you’ll face three
 Bloopers and one Star Cruster. Another easy fight where the only real damage you may take is from the Star Cruster who has a bit more health than its allies, but nothing a Snowy from Mallow can’t handle.
 -
Battle 3: This battle is relatively easy as you’ll only be facing four
 Stingers, but they can inflict mushroom, and poison on you. Either take them out quickly with an area of effect or two. Otherwise, equip resistance guarding accessories, and then defeat them with regular attacks.
 -
Battle 4: The last battle of the room consists of two
 Geckits and one Chained Kong. Your only threat here is the Chained Kong, and that’s not much of one anyway. For the most part, the Geckits will either attack themselves or attack the Chained Kong. If you want to take them out as soon as possible, cast a Snowy with Mallow.
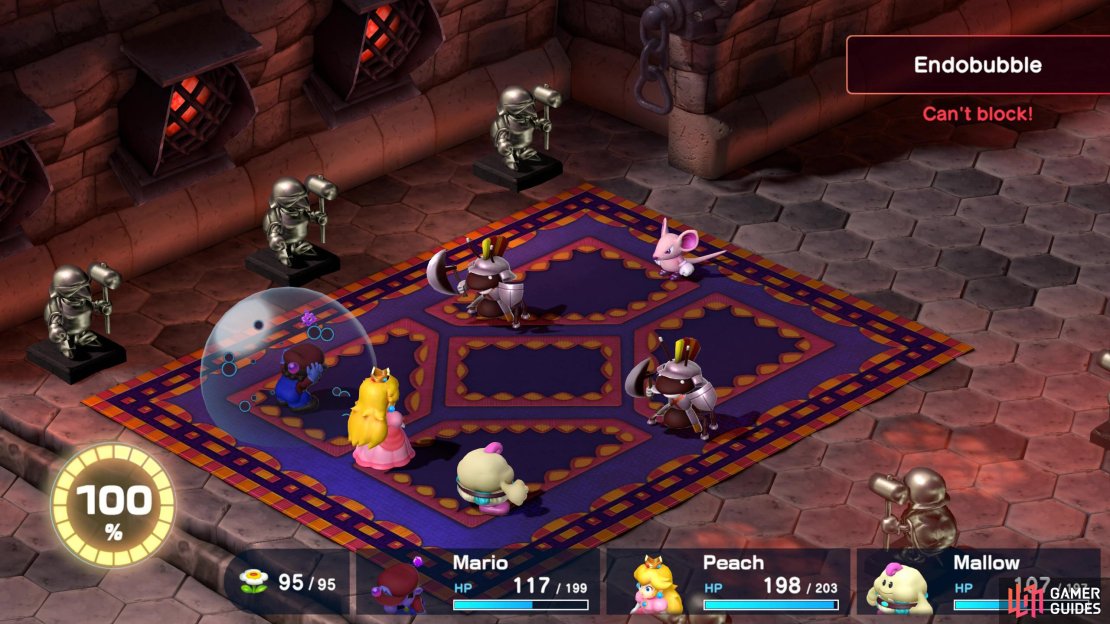


(1 of 4) Battle Course 2 - Room 2 - Battle 1: The first battle of Room 2 pits you against two Armored Ants, and one Alley Rat.
Room 3
Each room will throw a battle at you every time you reach a set of statues along the corridor as you progress through the room.
-
Battle 1: Once again, this can be somewhat of a difficult battle due to the Big Blasters Blazer attack which can cause instant death. There are two of them in this battle while having a
 Rob-omb alongside them, but it’ll blow itself up in the first turn. Like the previous fight against the Big Blasters, wear accessories that protect from instant death (mortal blow).
 -
Battle 2: This battle will pit you against four Vomers. The battle itself is easy, but you’ll need to use special moves to defeat them. They are particularly weak to Mario’s Jump attacks.
-
Battle 3: Battle three will be against two Magmus and two
 Pulsars. Nothing special about this group of enemies, but the Pulsars will counter-attack you when you hit them, so keep that in mind if your health gets low. The Magmus only has a small amount of health, so take them out first.
 -
Battle 4: The final battle consists of one Comeon which is a mimic chest. During the first turn, it will summon Bahamutt. No, that’s not a typo, nor is it as strong as the Final Fantasy summons. Instead, it’s a stupid red “dragon” with an equally stupid face. You would think with what’s involved, you would get a tough battle, but no, no you don’t. Comeon does have a fair bit of health and can cure both itself and Bahamutt, so make sure you focus your attacks on the chest first. Also, it has access to a few area-of-effect attacks, so make sure you keep your health up with Peach’s Group Hug skill. Bahamutt on the other hand will spew out a few fire attacks such as Hotshot, and Iron Maiden which causes Fear, but it shouldn’t cause you any problems. Finally, Bahamutt is weak to ice, while Comeon is weak to Jump. When they’re defeated, head through the door to collect your reward, which will be Geno’s Star Gun.


(1 of 4) Battle Course 2 - Room 3 - Battle 1: Another tricky battle. Two Big Blasters and one Rob-omb will be your opponents.
Puzzle Course 1
This puzzle course will have three rooms where you must complete a puzzle in each room.
Room 1 - Coin Collecting
Stand on the yellow platform to reach Dr. Topper. You will take turns attacking the chest in between you to receive coins. There are 21 coins in total, and the person who takes the last coin loses. Keep attacking the chest while counting the coins both you and Dr. Topper take. You can take a minimum of one coin, and a maximum of four. If you want to stop on less than four coins, simply press  to switch turns. When you get to 15 coins, begin to take only one coin at a time, before that, you can take as many as you want. The reason for this is Dr. Topper can also take four coins, and if you end up at 16, he can get to 20, leaving you to pick up the last coin and lose. You will want to end your last turn on the twentieth coin to make him have no choice but to pick the last one. Sometimes, Dr. Topper will take four coins on purpose even if it makes him lose, no idea why, but we’ll take it. When you beat Dr. Topper, you’ll be sent to the next room.
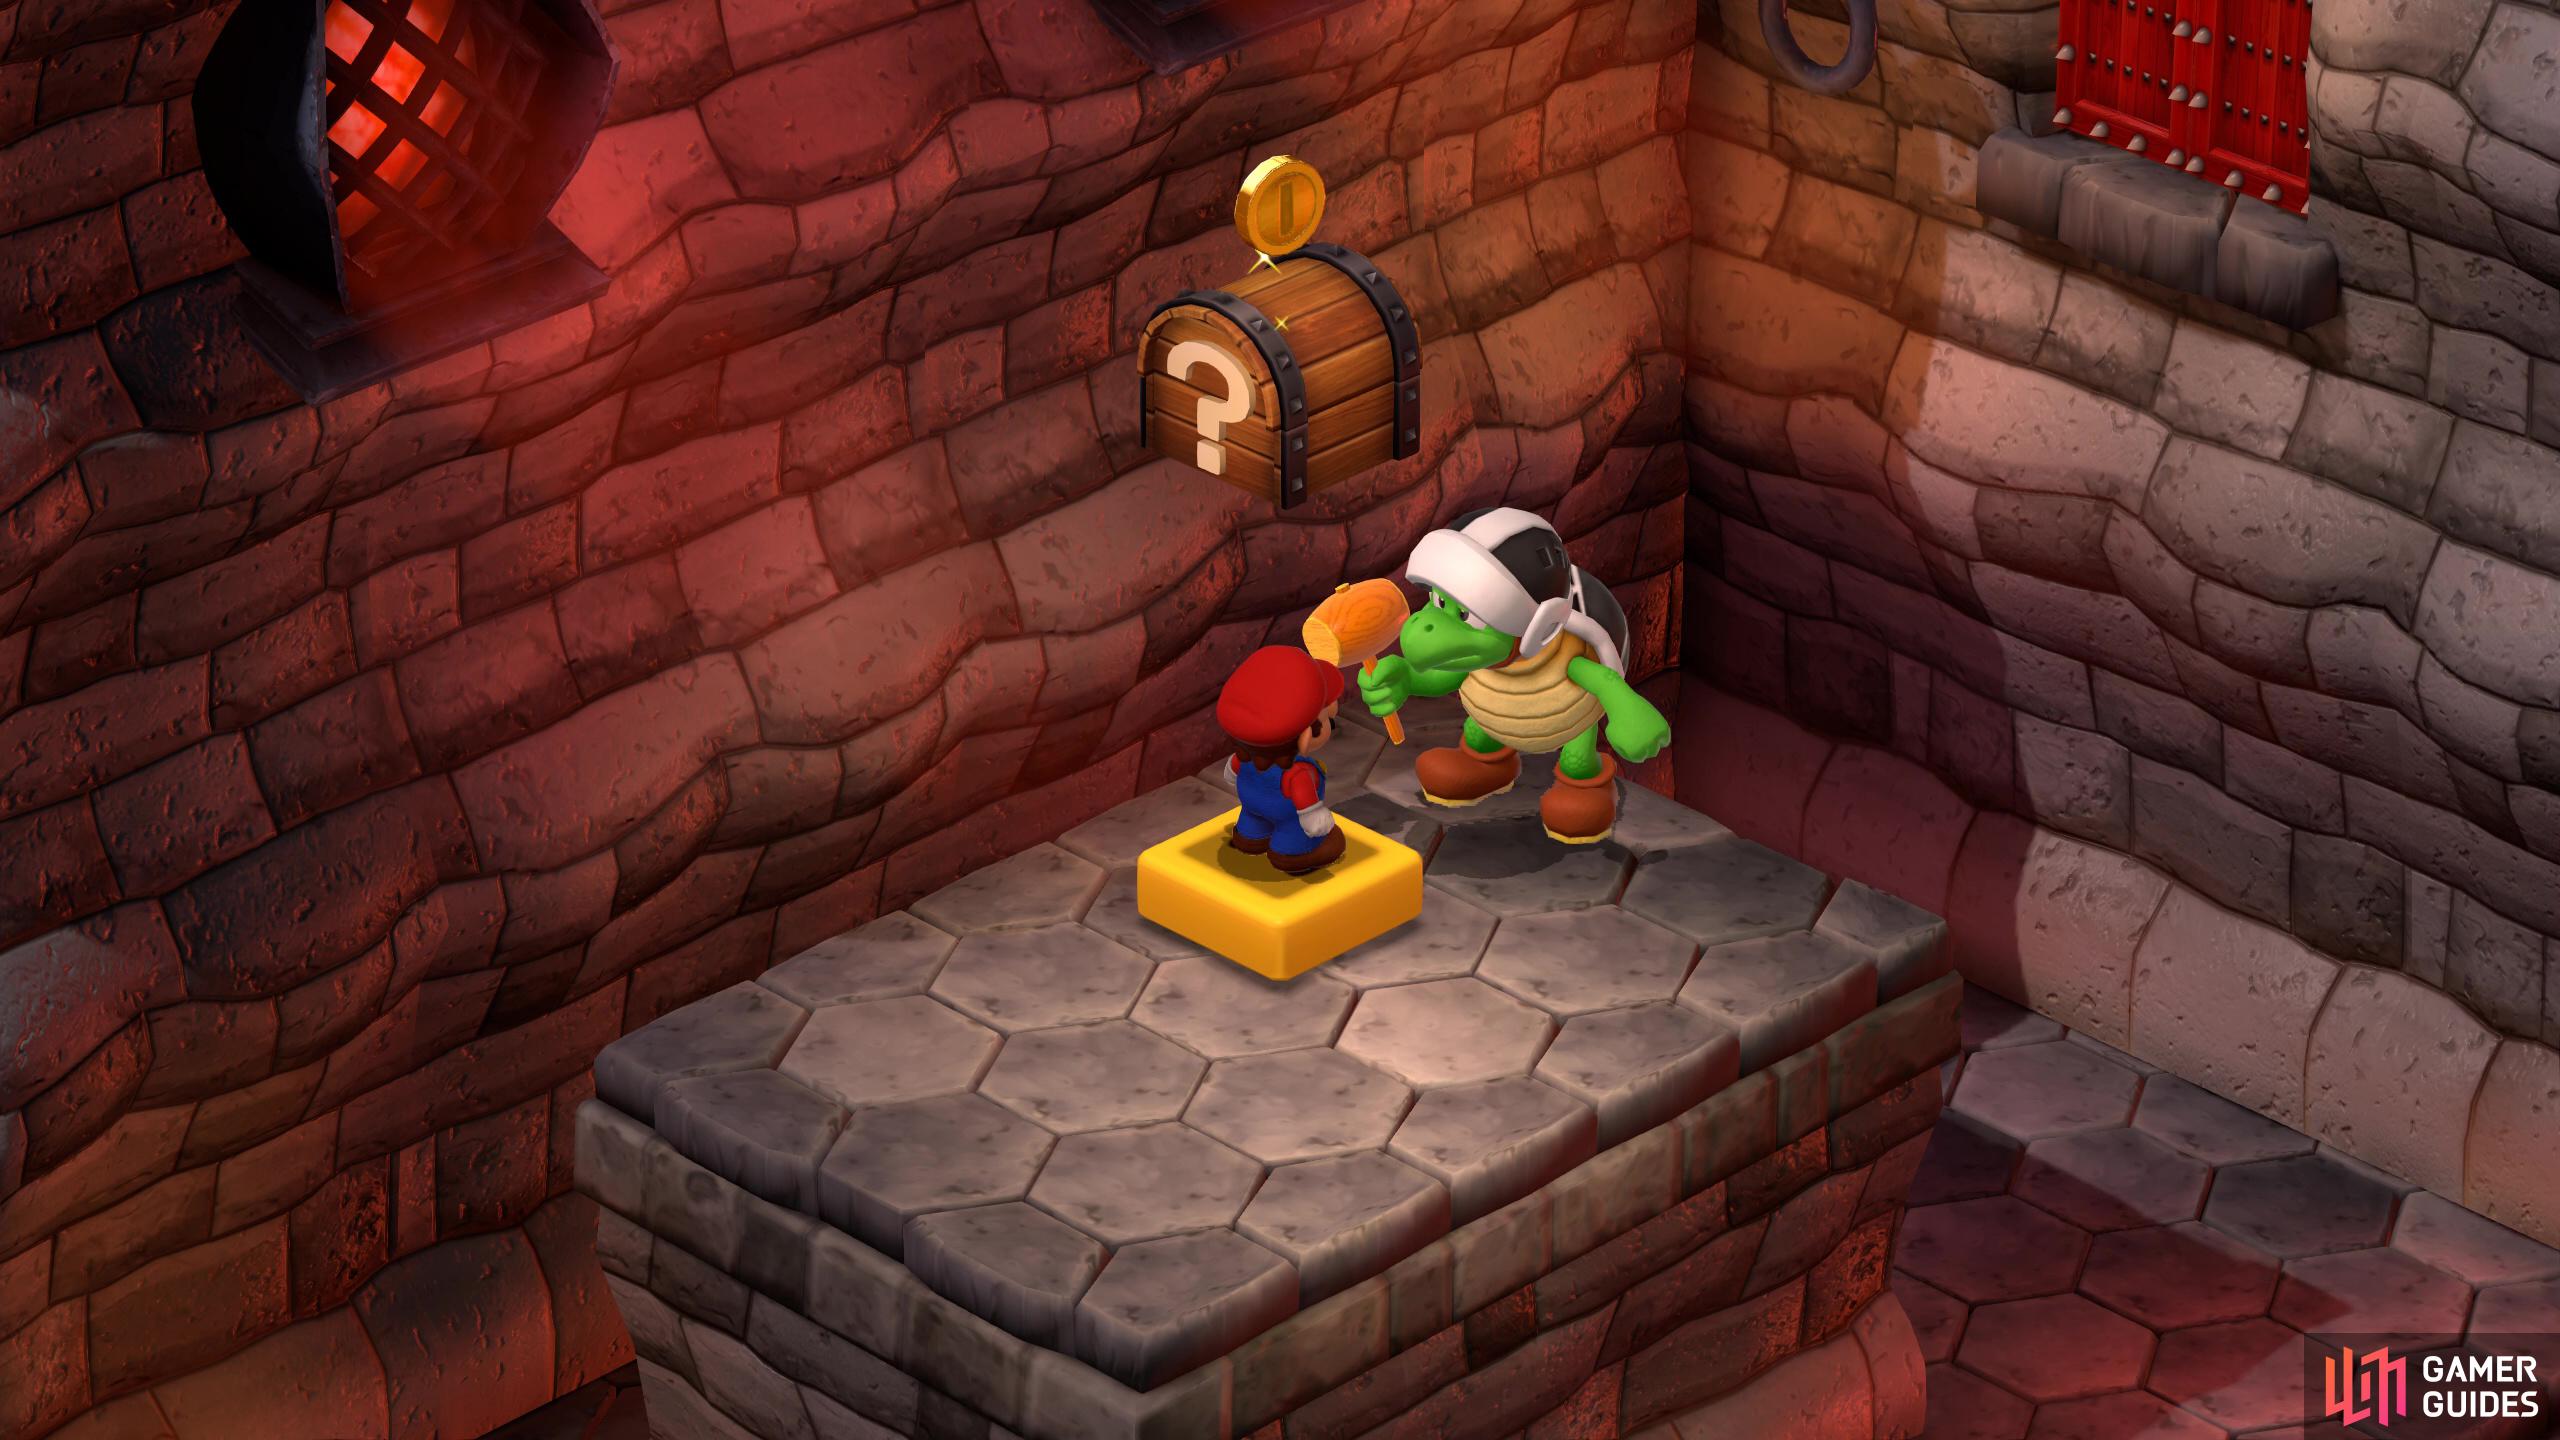
Puzzle Course 1 - Room 1: Keep collecting four coins (while counting Toppers) until you reach 15. Then, keep taking one coin at a time. You want Dr. Topper to take coin 21 to win.
Room 2 - Magic Buttons
In the second room, Dr. Topper will set you up with a rather complex puzzle. You’ve most likely done this puzzle in many games in the past, but it can still be tricky. The goal for this puzzle is to press all the green ! buttons down, but when you push one down, others around it will either go down or pop back up. Here is how you can complete it with ease.
| – | Column 1 | Column 2 | Column 3 | Column 4 |
|---|---|---|---|---|
| Row 1 | 1 | 2 | 3 | 4 |
| Row 2 | 5 | 6 | 7 | 8 |
| Row 3 | 9 | 10 | 11 | 12 |
| Row 4 | 13 | 14 | 15 | 16 |
The top row is the row of green buttons nearest to the red door. Walk over, and step on the following buttons in order to complete the puzzle. Jump on switches: 2, 8, 15, and 9. This will push all the buttons down, and allow you into the next room. For a more visual representation of the puzzle, look at the image below.
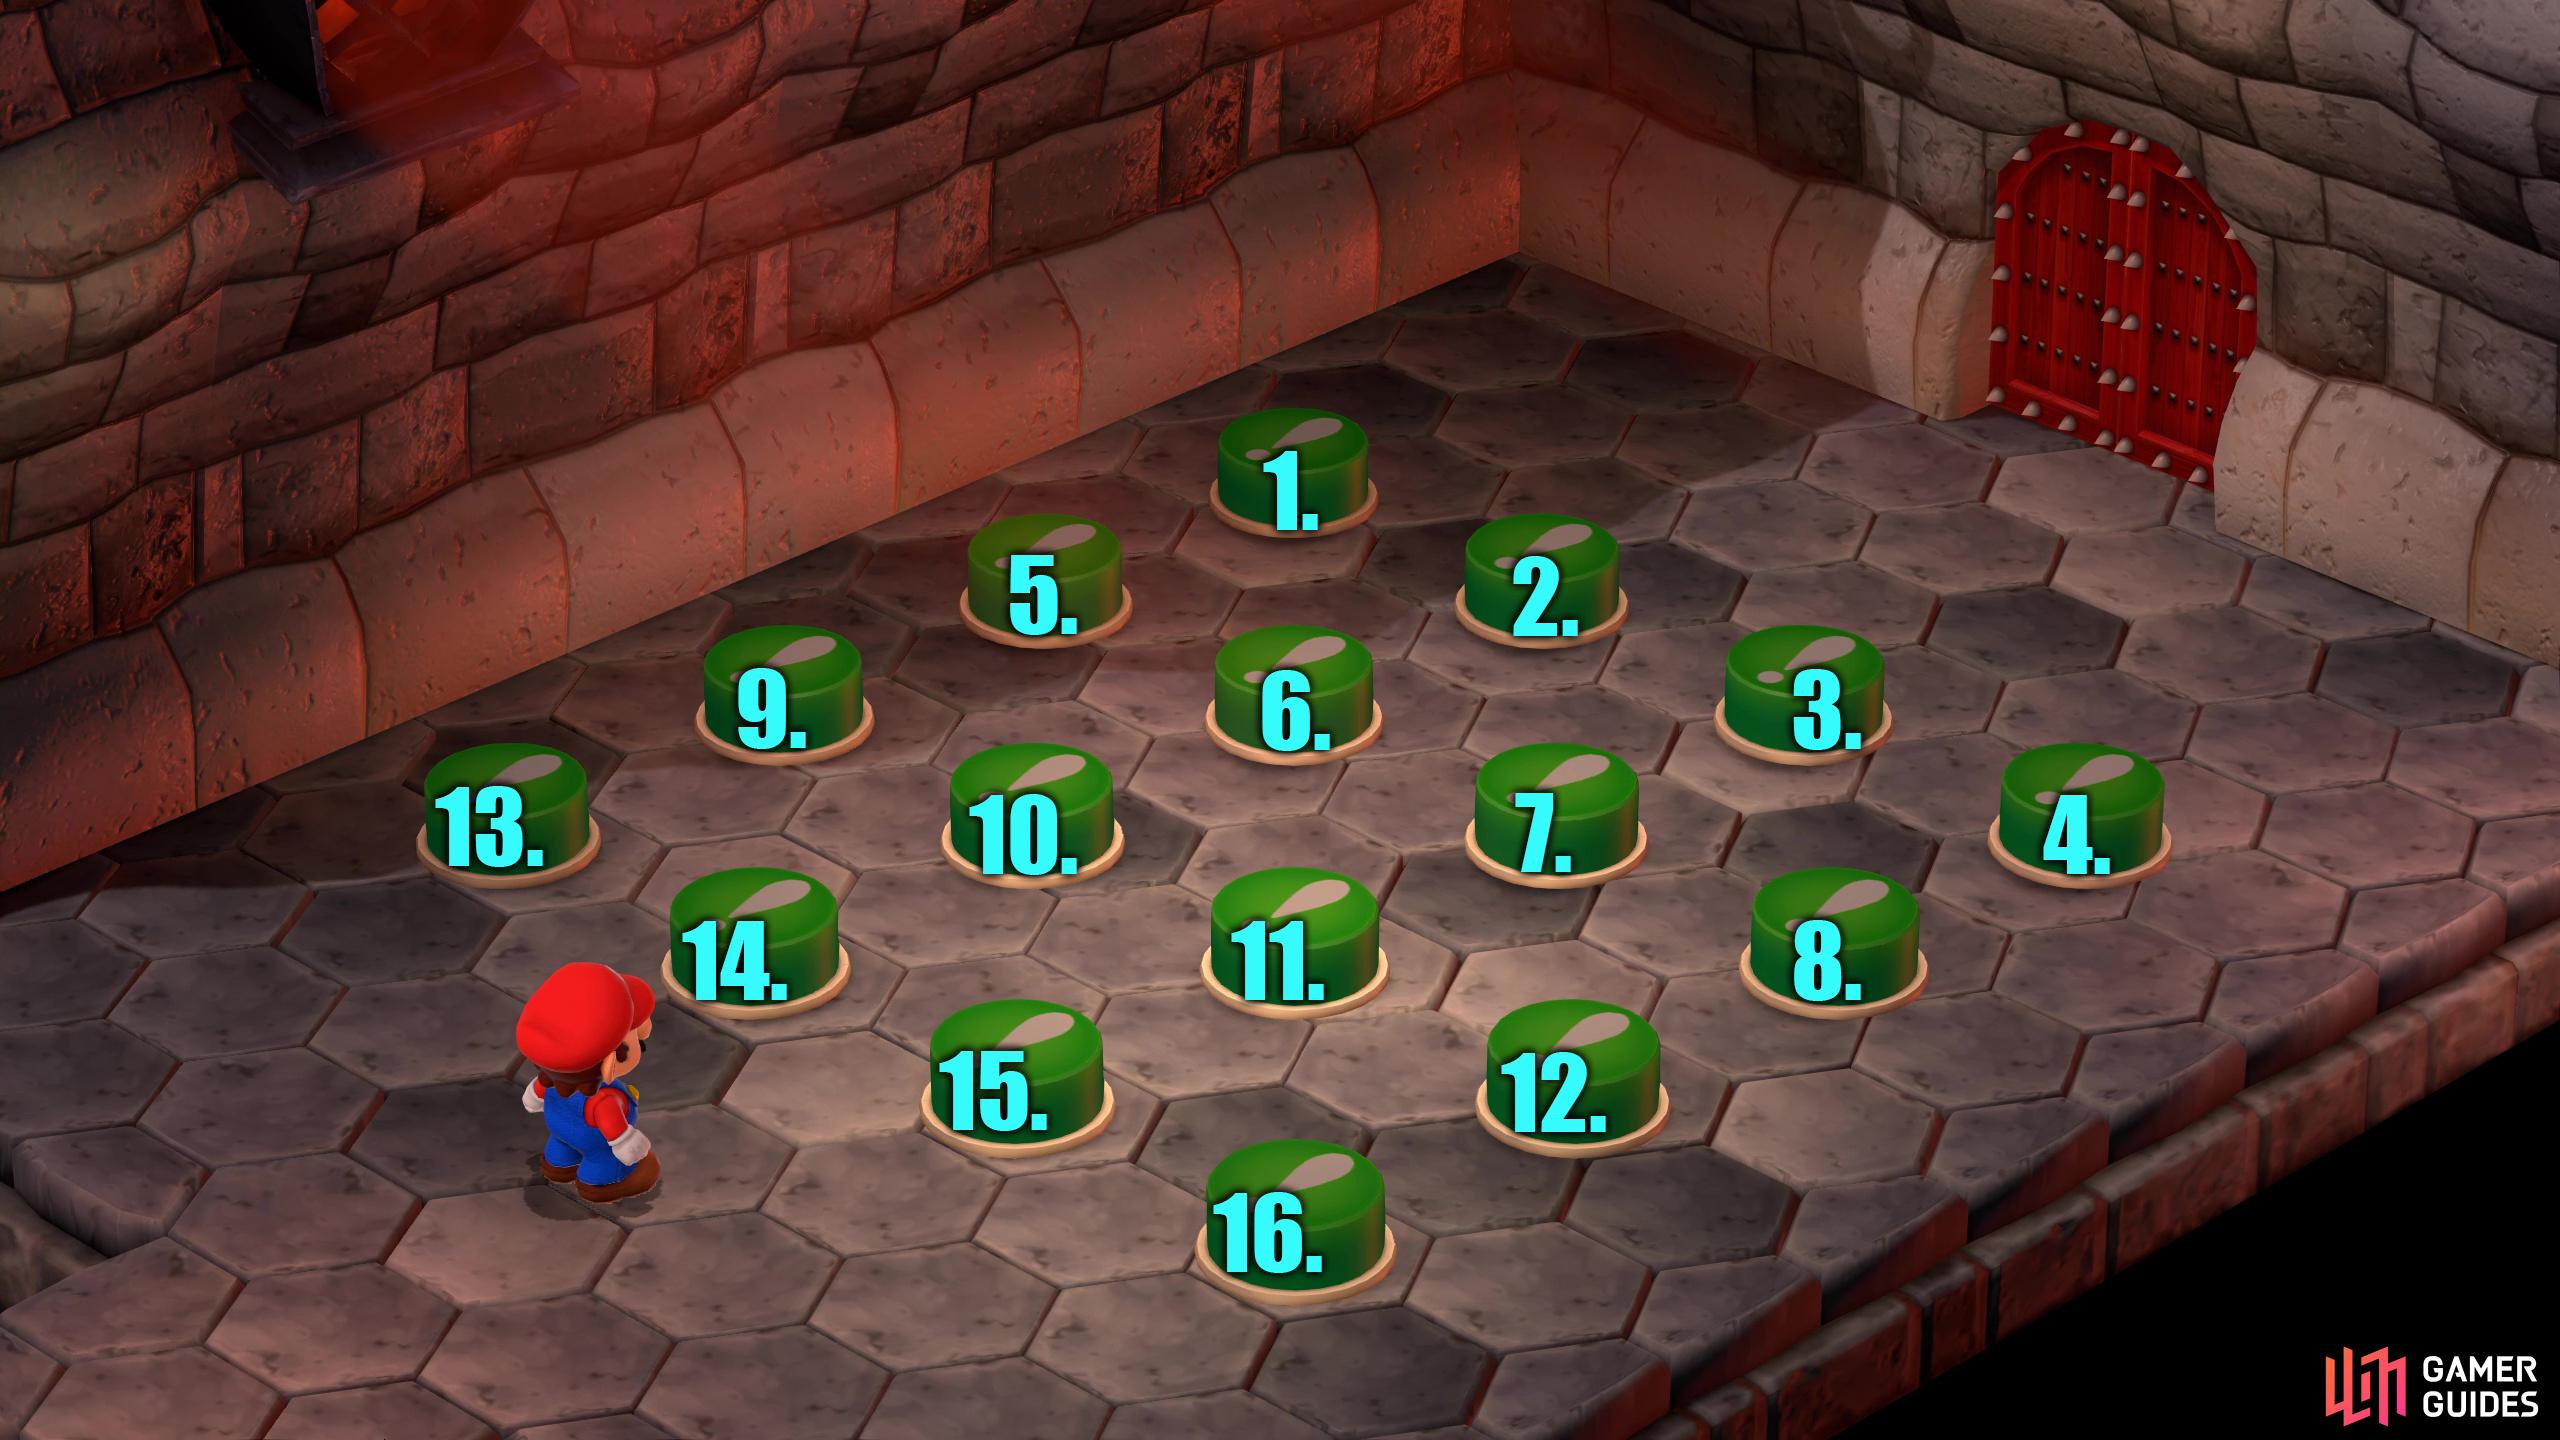
Puzzle Course 1- Room 2: Jump on the following buttons: 2, 8, 15, and 9 to complete the puzzle.
Room 3 - Ball Solitaire
This puzzle is set out in the same order as the previous puzzle, so we’ll use the same table again, but this time, you want to kick the cannonball (ouch!) over another cannonball to remove it from the room, similar to Drafts/Checkers. Once you have cleared the room of cannonballs except one, the puzzle will be completed. The process here is more complex than the previous puzzle, thus requiring more steps. For example, when we say kick cannonball 1 to number 3, we mean kick the cannonball to the right, over the cannonball in the number 2 space, and it will land in the empty space 3. The goal is to remove all but one cannonball from the room to win the game. Once you’ve completed the game, head through the door into the following room to receive your prize, a Rock Candy.
| – | Column 1 | Column 2 | Column 3 | Column 4 |
|---|---|---|---|---|
| Row 1 | 1 | 2 | 3 | 4 |
| Row 2 | 5 | 6 | 7 | 8 |
| Row 3 | 9 | 10 | 11 | 12 |
| Row 4 | 13 | 14 | 15 | 16 |
- Step 1: Kick the Cannonball from space 1 to space 3.
- Step 2: Kick the Cannonball from space 4 to space 2.
- Step 3: Kick the Cannonball from space 11 to space 3.
- Step 4: Kick the Cannonball from space 5 to space 7.
- Step 5: Kick the Cannonball from space 8 to space 6.
- Step 6: Kick the Cannonball from space 9 to space 11.
- Step 7: Kick the Cannonball from space 15 to space 7.
- Step 8: Kick the Cannonball from space 3 to space 11.
- Step 9: Kick the Cannonball from space 2 to space 10.
- Step 10: Kick the Cannonball from space 16 to space 8.
- Step 11: Kick the Cannonball from space 10 to space 12.
- Step 12: Kick the Cannonball from space 8 to space 16.
- Step 13: Kick the Cannonball from space 13 to space 15.
- Step 14: Kick the Cannonball from space 16 to space 14.
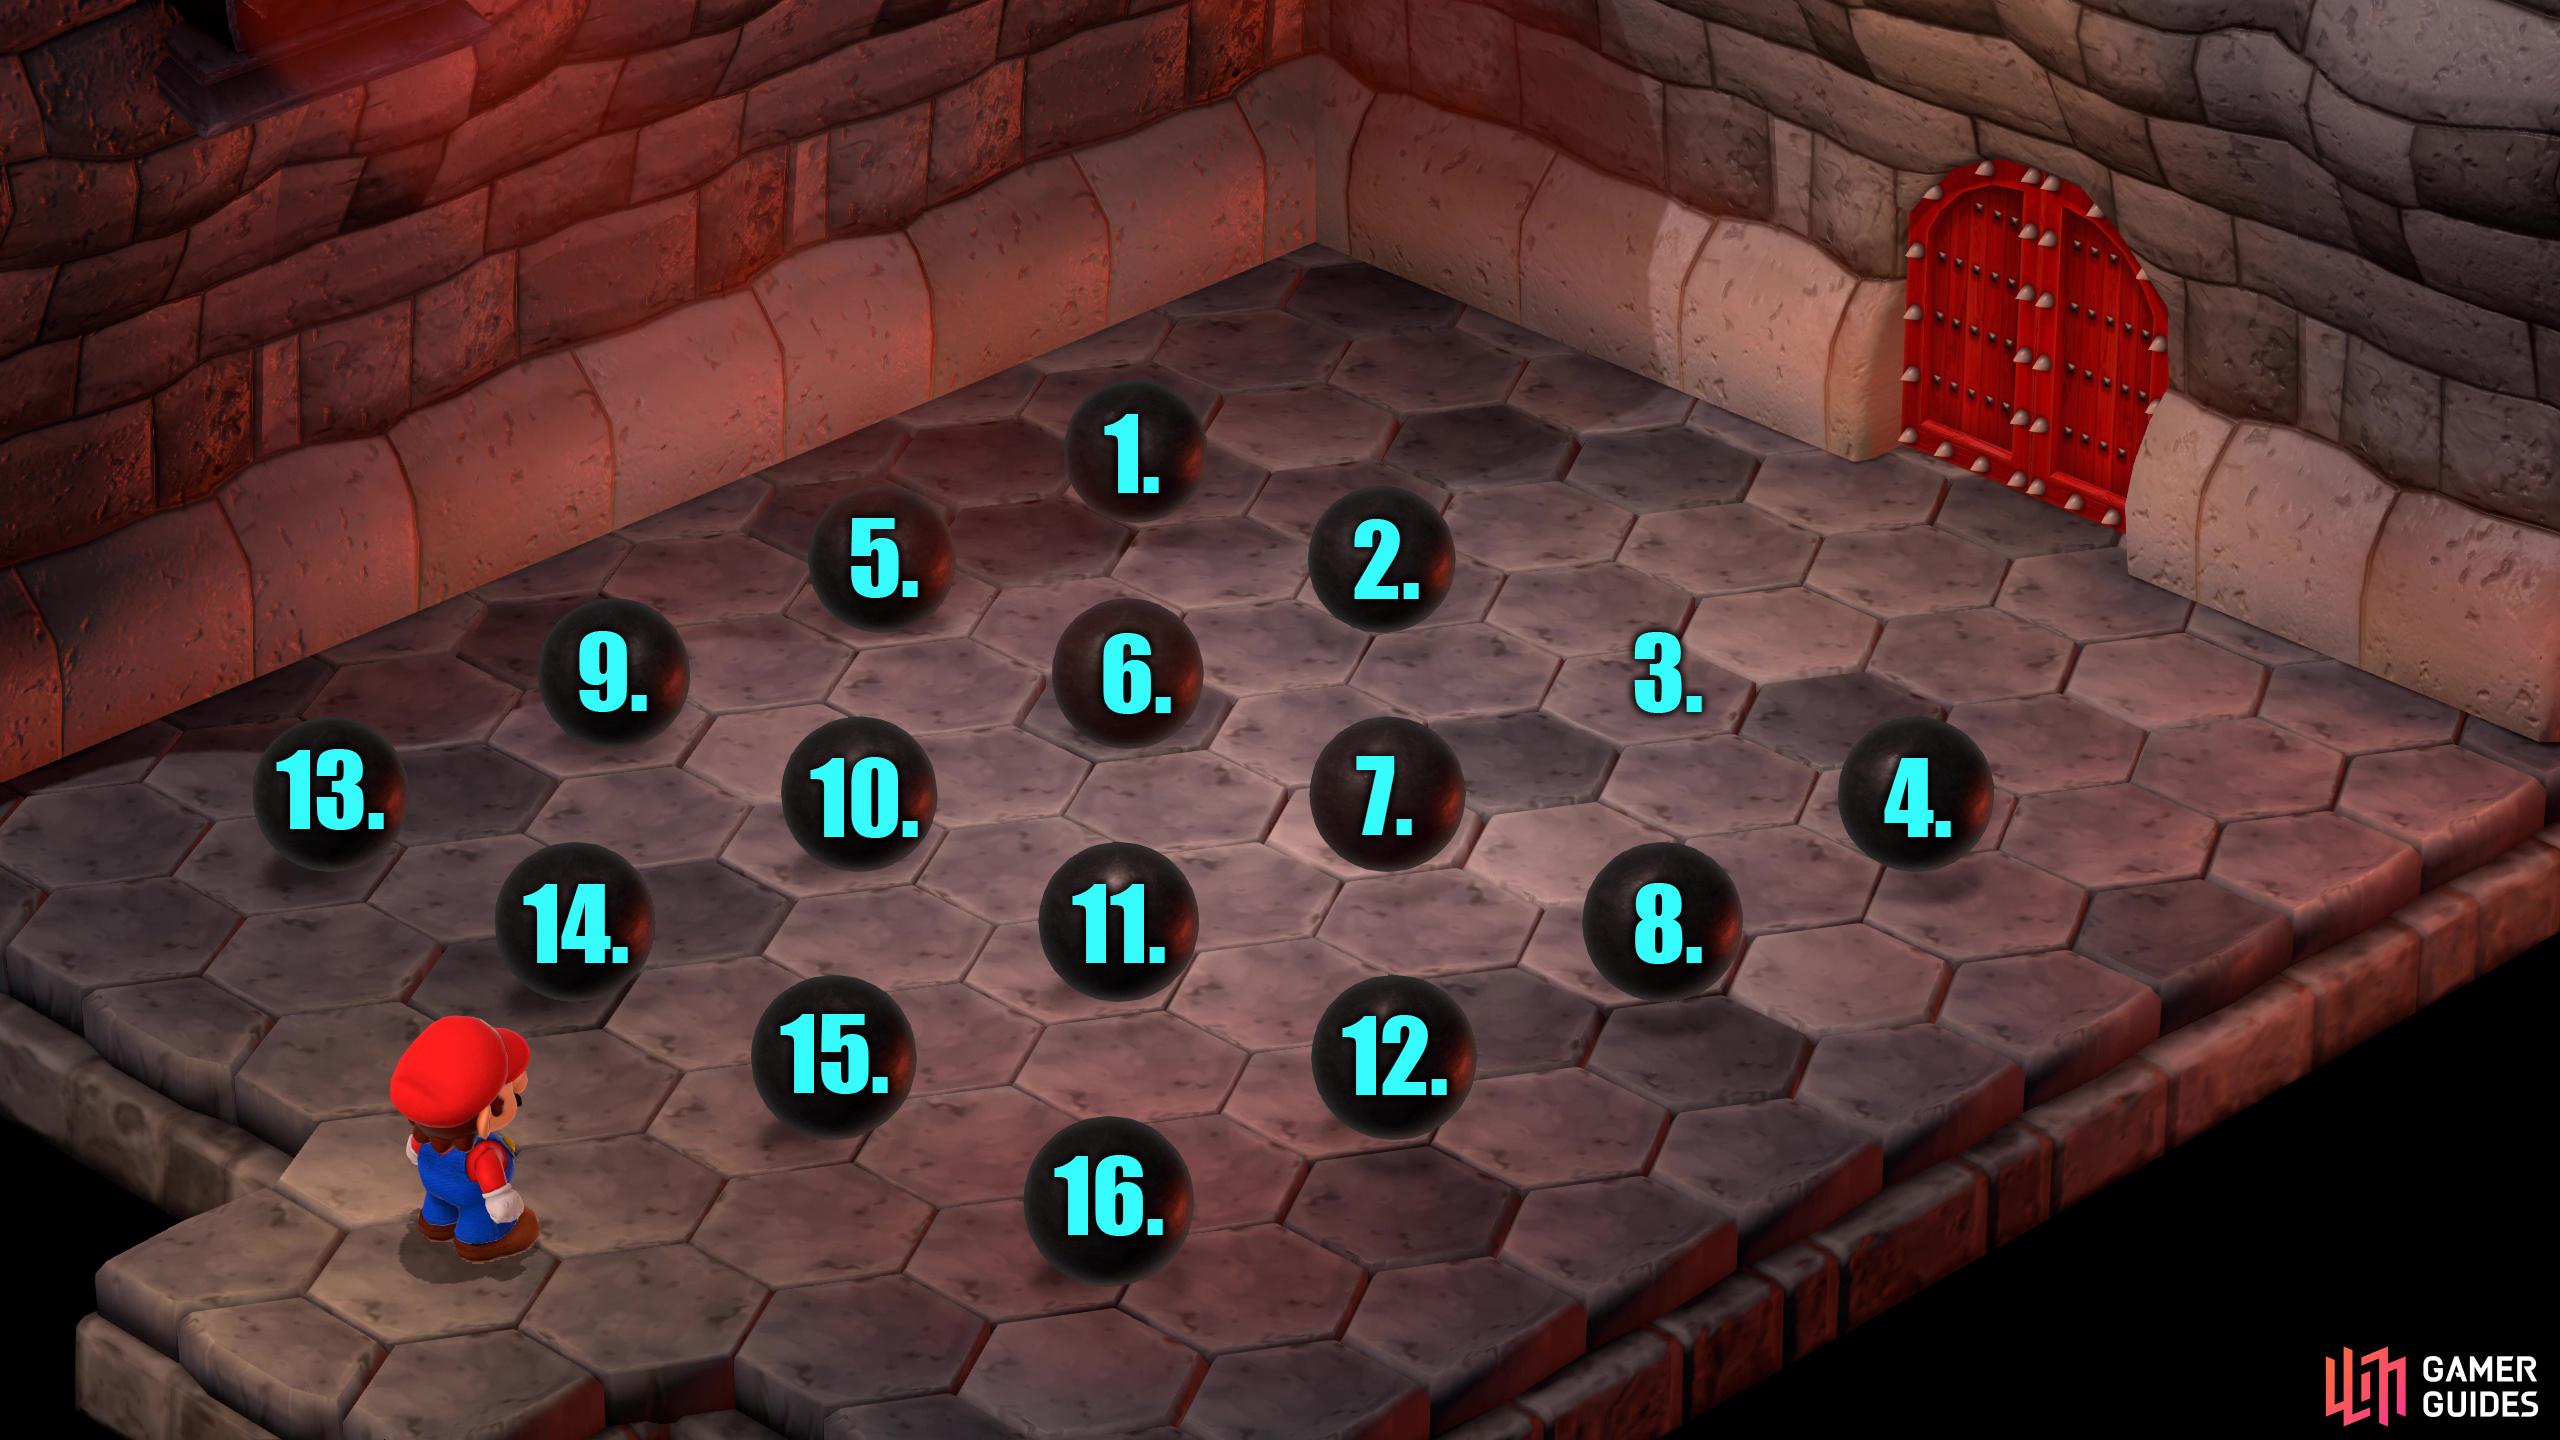
Puzzle Course 1 - Room_3: Kick the cannonballs into the empty spaces. You will win when there is only one ball on the screen.
Puzzle Course 2
This puzzle room will also have three rooms each with its own unique puzzle. All of these puzzles will have some degree of randomness to them.
Room 1 - Quiz Time Answers
In the first room, Dr. Topper will ask you twelve questions, if you’re right, the yellow platform will move up one, but if you answer incorrectly, it’ll move down two spaces. However, if you don’t answer a question within five seconds, you’ll automatically drop one place. The goal here is to reach the eighth step within the twelve questions.
| Question | Answer | Question | Answer |
|---|---|---|---|
| What do Culex, |
They live in Monstro Town | Booster is what generation? | 7th |
| What color is the end of Dodo’s beak? | Red | Who is the famous composer at Tadpole Pond? | Toadofsky |
| How much…does a female beetle cost? | 1 Coin | What’s the name of |
Jinx |
| Mite is Dyna’s…WHAT? | Little brother | A boss | |
| How many underlings does |
Three | What’s the chef’s name at |
|
| Where was the third Star Piece found? | Moleville | What words do |
La dee dah~ |
| Who is the famous sculptor in Nimbus Land? | Garro | Where was the first Star Piece found? | The Mushroom Kingdom |
| What’s the first monster you see in the Pipe Vault? | Lava Bubble | What’s the full name of the boss at the Sunken Ship? | Jonathan Jones |
| Currant juice | What’s the password in the Sunken Ship? | Pearls | |
| How many legs does |
Six | What was Toadstool doing when she was kidnapped by |
She was looking at flowers |
| The man getting his picture taken at |
Getting his picture taken | Who is the ultimate enemy in this adventure? | Smithy |
| What did |
A carrot | What is the fourth selection on the Menu screen? | Items |
| Who helped you up the cliff at |
What technique does |
Crusher | |
| The boy getting his picture taken at |
Skiing | What is the name of the boss at the Sunken Ship? | |
| What does the Red Essence do? | Gives you strength | What does |
Scarecrows |
| Which monster does not appear in Booster Tower? | What color are the curtains in Mario’s house? | Blue | |
| In the Moleville blues, it’s said that moles are covered in what? | Soil | How long have the couple inside the chapel been waiting for their wedding? | 30 minutes |
| What does Birdo come out of? | An eggshell | What was Mallow asked to get for Frogfucius? | Cricket Pie |
| What is Cinder Toad in charge of at the middle counter? | The inn | What is Raini’s husband’s name? | Raz |
| Which enemy is only found in the Sunken Ship | Mario, Mallow, and Peach’s triple move is called what? | Healing Rainbow |
Room 2 - Counting Barrels
There isn’t a definitive answer for this puzzle as it is random every time. Dr. Topper will give you ten seconds to count the barrels in the room before he asks for an answer. Unfortunately, the only way to do this is to count them yourself. The first set of barrels is relatively easy, and you’ll get ten seconds to count them. However, the next set of barrels is more challenging, and Dr. Topper will give you twenty seconds to count them. Try to count the bulk of the barrels first, and then add or subtract the barrels that are missing, or on their own.
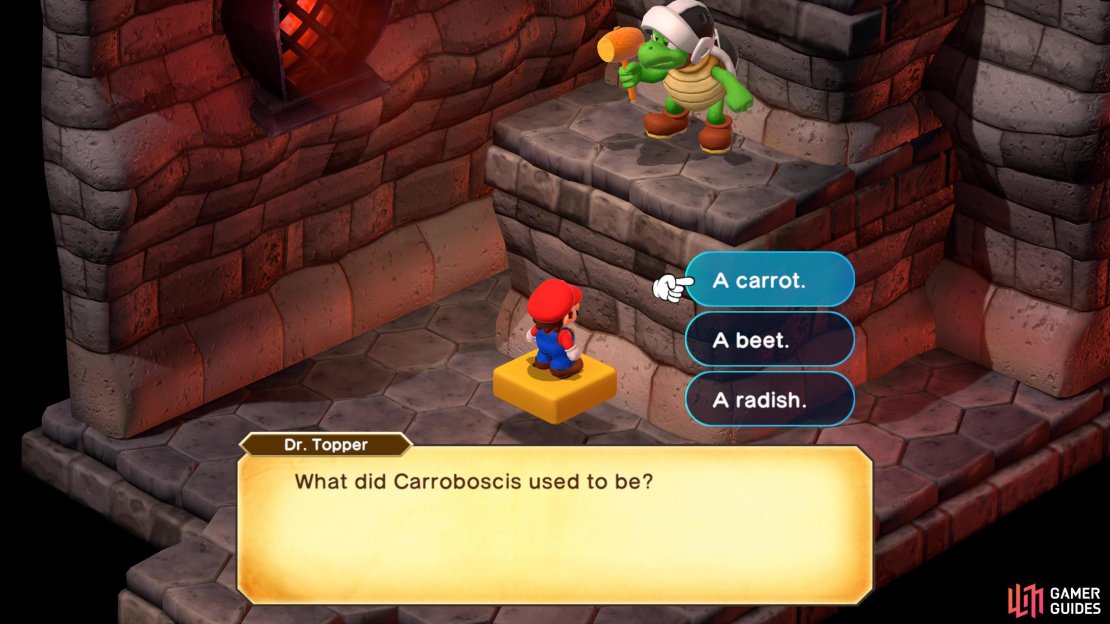


(1 of 3) Puzzle Course 2 Room - 1: The first puzzle will ask you twelve questions. Get one right, move up space, get one wrong, drop two spaces.
Room 3 - Triathlon
Room three has an unusual puzzle. Dr. Topper wants to know what order each of the four monsters finished in the Triathlon. The Triathlon consisted of swimming, cycling, and a marathon. You will need to talk to each monster and deduce where each one finished based on what they say. Once you’ve done that, talk to Dr. Topper to choose the order, which you’ll do by talking to each monster in the order from first to last. Although the monster’s answers are in a random order, the answers themselves will be the same. Talk to the monsters, and remember which monster says the following things:
1st Place: I outdid [monster name] both on my bike and in the final rankings!
2nd Place: I fell into fourth place during the bike race, but finally ended up in the same place as I did in the swimming event.
3rd Place: I placed the same in the swimming and cycling events, but two others beat me in the marathon.
4th Place: I came in third for swimming, and never did better in the events after that.
When you select the rankings for each monster, you’ll start with who finished first, and end with who finished fourth. Use the answers above to deduce who finished what position. Once you’ve guessed correctly, go through the door, and open the chest for your reward which will be a Rock Candy.
No Comments