
SAMicide
You could have started this quest quite early in the game, but since you have to wait quite a while to finish it, it’s been neglected until it could be finished all in one go… albeit with a bit of running around. Now that you have access to Kadara, it’s time to pick up this quest. Return to the Nexus at your leisure (there’s no shortage of Nexus-Kadara quests out there that’ll give you an excuse) and make your way to the Docking Bay area. Travel there, climb to the second level, then find Doctor Aridana in the Tech Lab. She’s apparently been studying the Scourge, and has some equations she’d like to run… she’s basically asking if she can use SAM, the Pathfinder’s greatest tool, salvation of the Initiative, as a calculator. Well, what’s the worst that can happen? Agree to help her and she’ll give you a disc.
Travel to the SAM Node on the Habitation Deck, then plug the disc in to SAM. What’s the worse that could happen? Well, the most obvious problem that everybody should have seen coming the second you were given a physical storage disc to plug into your super high-end AI machine. After SAM struggles with the malicious code for a bit, you’ll be directed - via hologram - to fiddle with some Reset Panels. Two to the south, one to the north. Turn south and interact with the Reset Panel to the left, first, then turn around and interact with the northern Reset Panel. Finally, turn back south and interact with the Reset Panel to the right, then use the central SAM Node console to chat with SAM again, who will explain what, exactly, happened.
Confront Doctor Aridana back in the Tech Lab and she’ll deny involvement before one of her associates mentions some anti-AI faction at work in the Nexus. Seems like the Andromeda Initiative brought all of the worst aspects of the Milky Way with them. Leave the Tech Lab, head down a ramp, then turn northeast to find a read Avina spouting anti-AI propaganda. Talk to the VI and a hacker will communicate to you through the VI… and they’re operating under the assumption that not only did their virus succeed, but that you’re happy to be free of SAM. Play the role SAM suggests and the hacker will mention somebody named “Knight”, the leader of their anti-AI crusade. With that, the seed is planted, but you’ll have to wait until it bears fruit in the form of future correspondence.
Searching Sanctuary
This future correspondence just to happens to come after you visit Kadara Port for the first time, likely when you leave after acquiring Vehn Terev’s Datapad. Check your Email Terminal for the message “[Error 982: Carrier signal interrupted!] - Invitation”, which is the promised message from this “Knight” person. More importantly, this message includes the navpoint to their “sanctuary” on Kadara. Time to get to the bottom of this business.
To get to this sanctuary, travel to the Haarfel Forward Station on Kadara. The sanctuary itself is due south, but this mountainous terrain makes any direct journeys difficult, at best. Instead drive southeast from the Forward Station to return to the isolated structure in the elevated mountain clearing (the site of the quest “Task: Broken Family”). From this structure turn west, southwest and drive uphill into a mountain pass. At an abandoned vehicle turn south and continue uphill, then, when the terrain obliges you, turn southwest and head downhill. When the navpoint is just under 100m away from you, apparently over a short - but sheer - cliff face, turn northwest and drive over those cliffs to find the sanctuary in the valley below you.
As you approach, Ryder will actually give some good advice. These fanatical anti-AI zealots think SAM has been disabled, and that you are grateful for it. That means you should probably play that up and avoid doing things that might blow the ruse… like scanning things. Enter the structure and you’ll be met by Knight, who will reveal the reasons behind her anti-AI conviction. It might seem like some dialogue choices are better than others, but you can’t mess this part up, so say what you will and ask her whatever questions you wish before she leaves. As the conversation ends she’ll hint at some big plans she has, and mention an “AI detector”, which prompts SAM to flat-out tell you not to use your scanner… just in case.
So, time to look for clues sans SAM for a change. Read the Datapad “Citadel Economics Board: Case Report A-5” on some crates just east of the entrance, then make your way to the southern end of the room and talk to a Turian named Laveria, who will refer you to her son, Alain. Go through the nearby door, where you’ll find the Alain, who seems… unwell. Exhaust his dialogue options to learn more about this Project Overlord, his condition, and his mother’s big plan. Seems like you may be able to earn his trust by helping him out… and talking to him will get you some Cybernetic Device blueprints.
Leave the room and head upstairs, where you’ll find the Datapad “Re: AI Detector?” on a desk, and another Datapad ““Intelligence and Introspection” - Dr. K Nigh” on a crate to the west. You’ll also find Knight’s Console up here but, as SAM will point out, tampering with it is risky business.
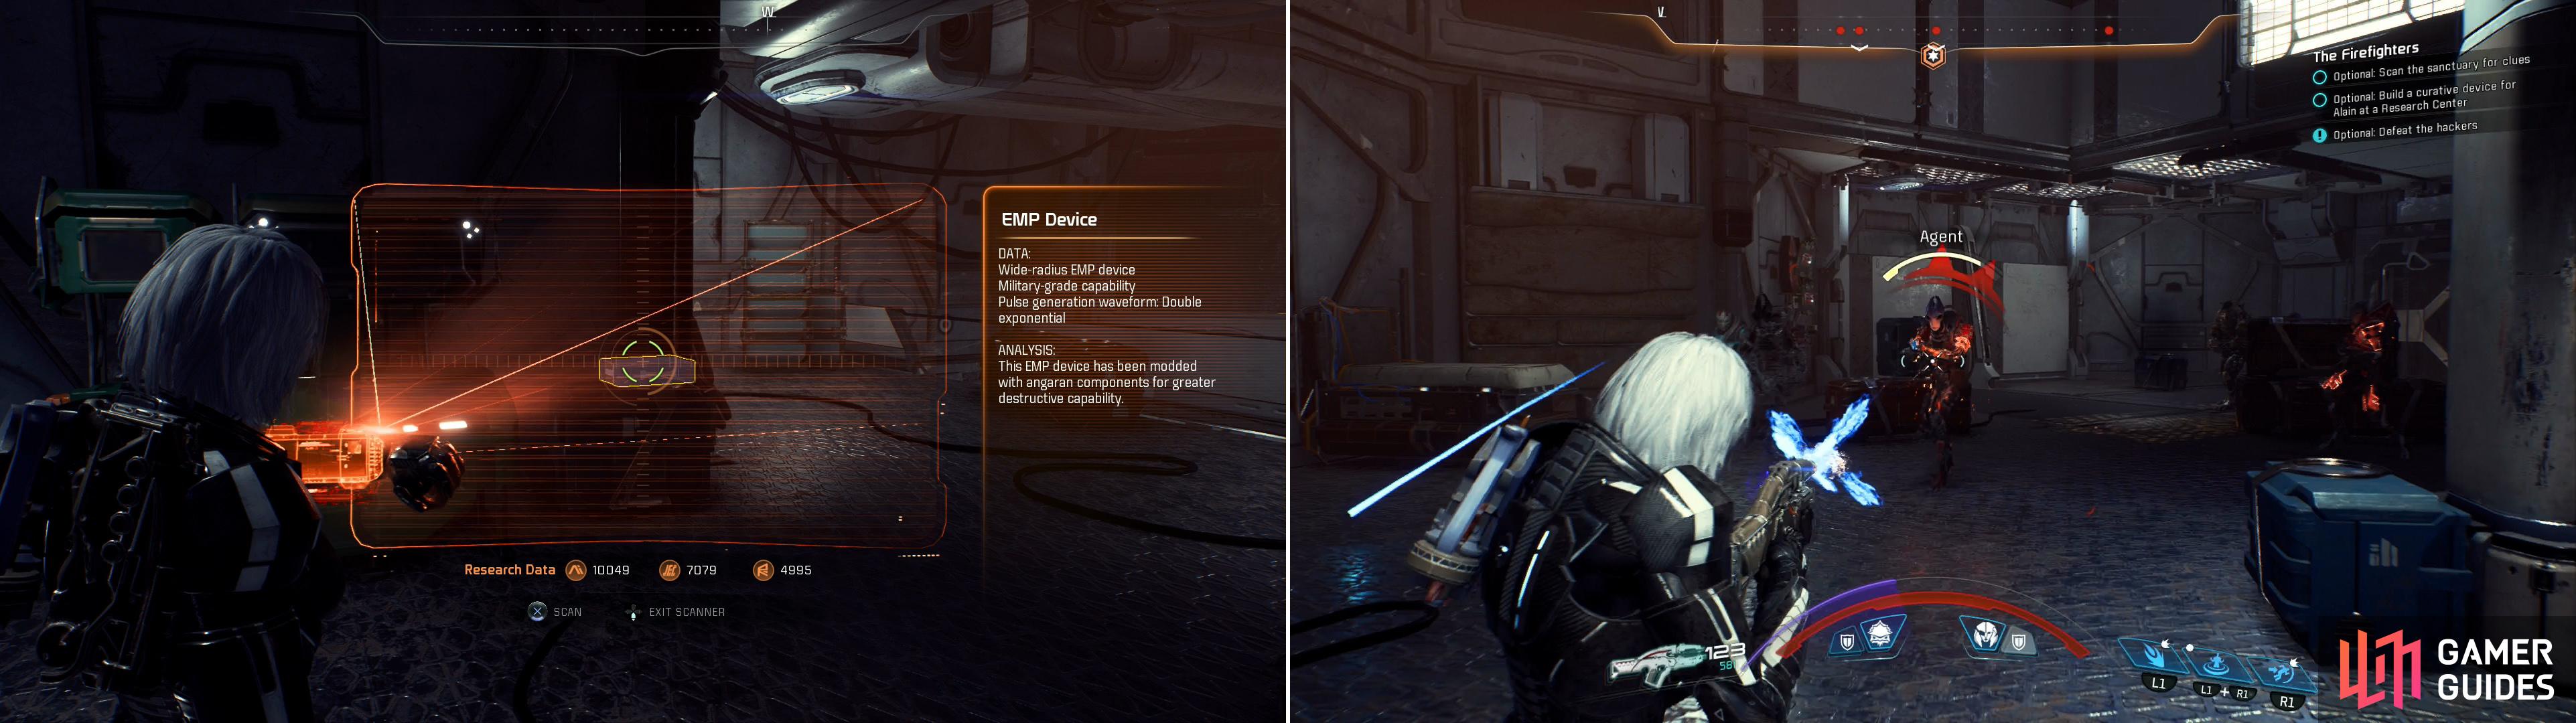
If you scan too many objects in the sanctuary (left) you’ll expose yourself and provoke the anti-AI fanatics (right).
Disarming Knight
You now have to make a choice about how you want to go about things. You can use your scanner, but every time you scan something, it’ll raise suspicions. Just like with baseball, it’s three strikes and you’re out - at which point the zealots downstairs (including Laveria) will turn hostile. They’re child’s play, combat-wise, but spraying bullets about does impact how this quest plays out. What you need to scan are as follows:
- Upstairs, on a crate west of the Datapad “Re: AI Detector?” you’ll find an “EMP Device”.
- At the foot of the stairs, on the wall to the northeast is a cluster of computers labeled “Schematics”, which holds the schematics for a “blue box” quantum computer.
- Also downstairs, on the opposite, western wall, just north of where Laveria stands, you’ll find the wall-mounted computer cluster “Nexus Network Map”.
If you make your way to any old Research Station and develop a Cybernetic Device (doing so will cost you six Aluminum and two Iridium - a paltry amount of resources) you can then return to sanctuary and present the device to Alain. In return, he’ll mention something called “Mercury”, a keyword that’ll allow you to bypass all that messy scanning and hack Knight’s computer without causing a bloodbath.
With the tool and the targets identified - or with the keyword “Mercury” - you can then fiddle around with Knight’s Console to figure out exactly what’s she’s planning to do - take out the Nexus’s supercomputers before they can be used to create an AI. Of course, there’s no guarantee those computers will ever be used in such a way, nor are they being put to such a purpose right now, so it’s rather akin to cutting off a farmer’s hands to ensure they never get put to any more sinister purpose. It’s not the sort of setback the Nexus needs right now.
After gleaning this information - however you went about getting it - leave the sanctuary and return to the Tempest, then set a course for the Nexus. When you land on the Docking Bay level you’ll be contacted by Kandros, who continues the long-running habit of Andromeda NPCs being useless. While they track down Knight, you need to disable the EMPs. Don’t worry, it’s not like you have implanted cybernetics which could kill you if forcefully disconnected.
Let’s get to it, then. Make your way to the western end of the level and turn south and venture past the Vortex, where you’ll find your first EMP Device behind a planter. Scan it, deactivate it, after which Knight will contact you and complain. Poor sport. Travel to the Operations deck next and make your way to the northeastern room and search the northwestern corner of this room to find a second EMP Device under a desk near the wall. To find the final EMP Device, make your way to the Colonial Affairs section of this level - the western-most bit of the Operations deck, just below Addison’s office. You’ll find the third EMP Device in front of the consoles and the railing, near where William Spender stands (if you haven’t completed the quest “Nakmor Drack: Krogan Betrayal” yet, anyways). Scan and disarm it, then Kandros will tell you he’s done his part and cornered Knight, but she seems to want a final confrontation with you.
Return to the Docking Bay deck and head upstairs to the balcony outside of the Tech Lab, where you’ll find Knight. If you got all shooty back in her sanctuary, things will get messy, but the Nexus will be saved. You’ll get 530 XP for your trouble and a nasty email “[Error 982: Carrier signal interrupted!]” from her bereaved son, Alain, who now calls himself “Paladin”. The kid’s got a bit of bark in him, especially for somebody who can’t even shit properly without tuning his cybernetics several hours a day. On the other hand, if you learned about her little “Mercury” project by providing Alain some cybernetics, however, you’ll get different dialogue options. End the conversation by saying “Alain is cured” and this confrontation will end with no bloodshed, although the only tangible difference is the lack of a post-quest email from Alain (you’ll get 530 XP either way).
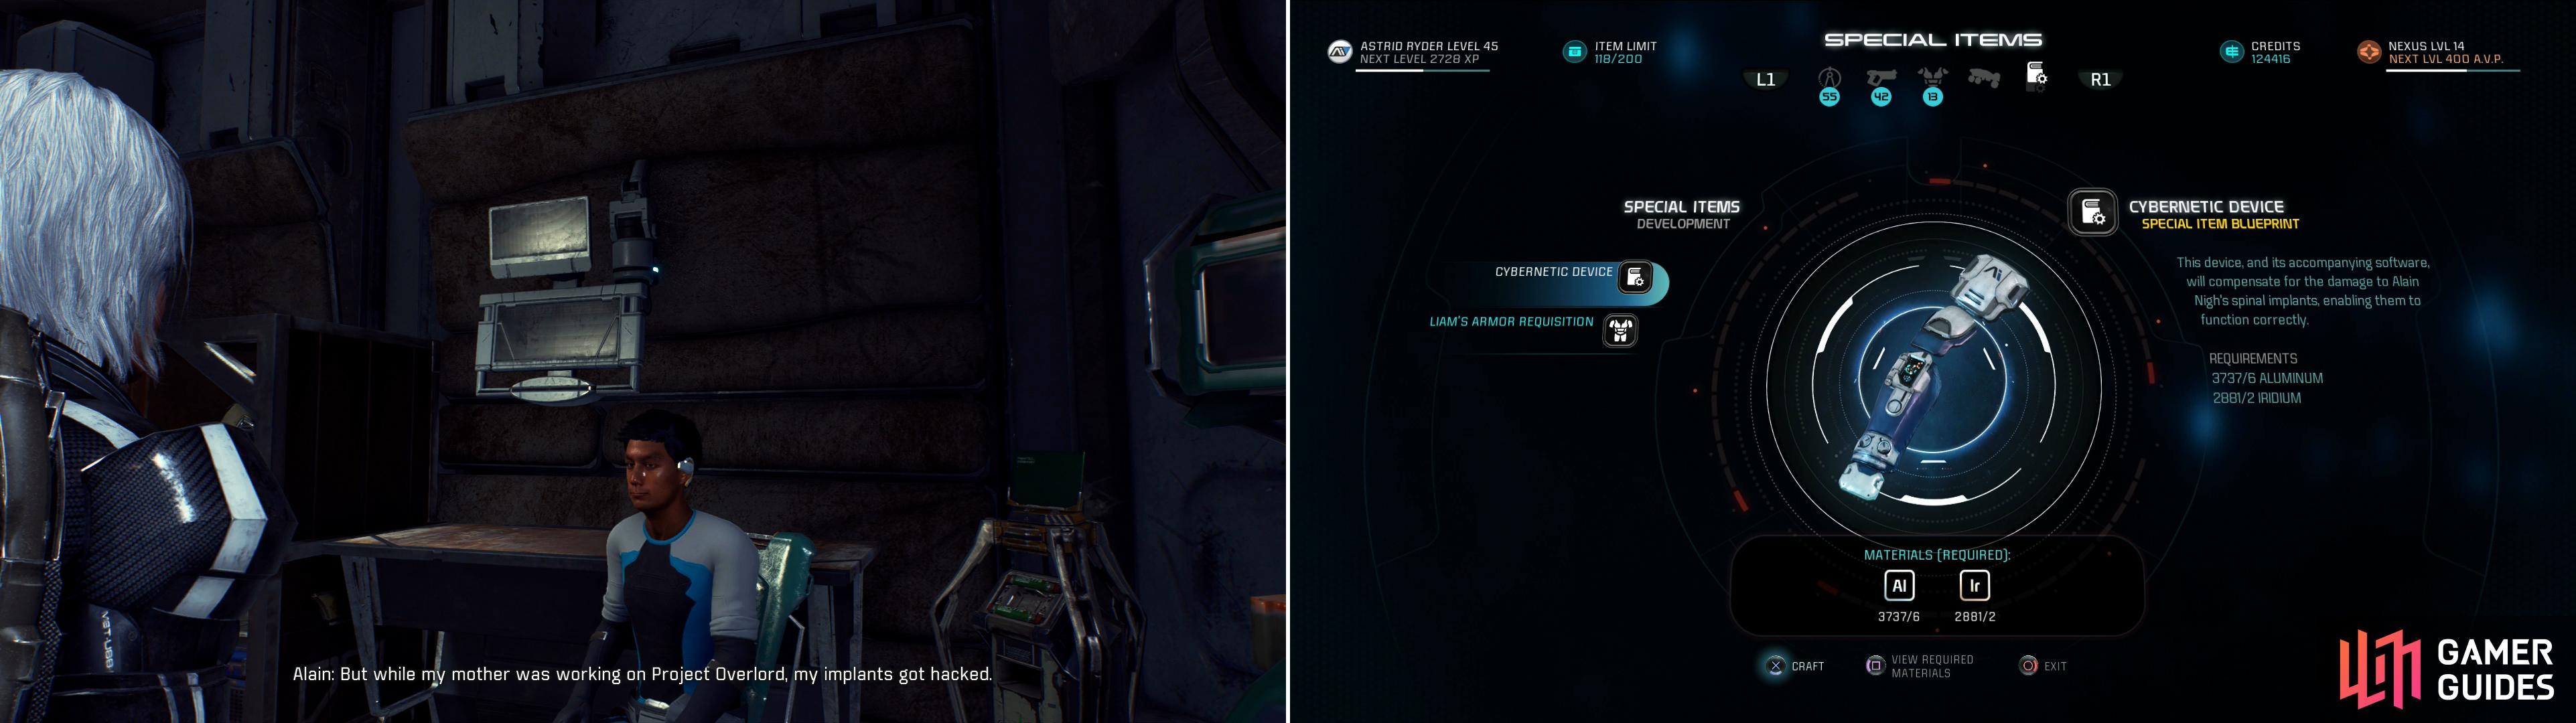
Talk to Alain to learn about his cybernetics (left), then craft a Cybernetic Device to make his life better and earn his trust
If you make your way to any old Research Station and develop a Cybernetic Device (doing so will cost you six Aluminum and two Iridium - a paltry amount of resources) you can then return to sanctuary and present the device to Alain. In return, he’ll mention something called “Mercury”, a keyword that’ll allow you to bypass all that messy scanning and hack Knight’s computer without causing a bloodbath.
With the tool and the targets identified - or with the keyword “Mercury” - you can then fiddle around with Knight’s Console to figure out exactly what’s she’s planning to do - take out the Nexus’s supercomputers before they can be used to create an AI. Of course, there’s no guarantee those computers will ever be used in such a way, nor are they being put to such a purpose right now, so it’s rather akin to cutting off a farmer’s hands to ensure they never get put to any more sinister purpose. It’s not the sort of setback the Nexus needs right now.
After gleaning this information - however you went about getting it - leave the sanctuary and return to the Tempest, then set a course for the Nexus. When you land on the Docking Bay level you’ll be contacted by Kandros, who continues the long-running habit of Andromeda NPCs being useless. While they track down Knight, you need to disable the EMPs. Don’t worry, it’s not like you have implanted cybernetics which could kill you if you get forcefully disconnected.
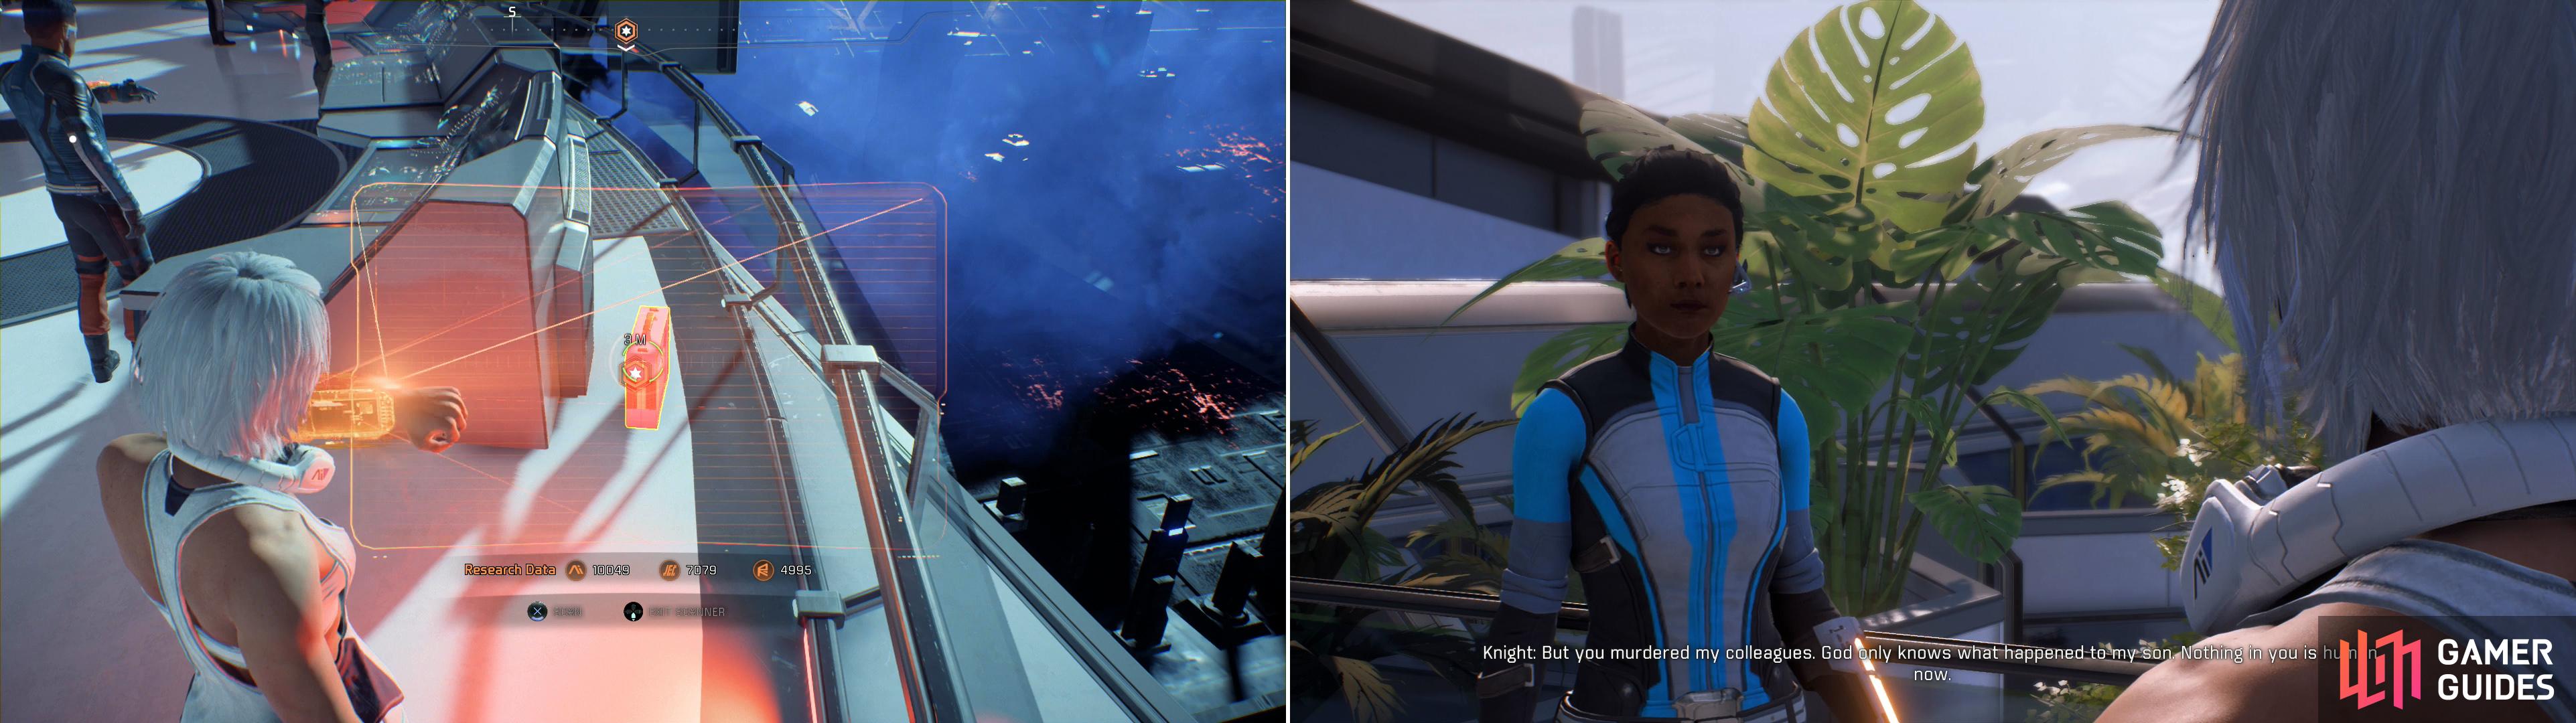
Search the Nexus for three EMP Devices (left) then confront Knight, who will respond poorly if you killed her supporters (right).
Let’s get to it, then. Make your way to the western end of the level and turn south and venture past the Vortex, where you’ll find your first EMP Device behind a planter. Scan it, deactivate it, after which Knight will contact you and complain. Poor sport. Travel to the Operations deck next and make your way to the northeastern room and search the northwestern corner of this room to find a second EMP Device under a desk near the wall. To find the final EMP Device, make your way to the Colonial Affairs section of this level - the western-most bit of the Operations deck, just below Addison’s office. You’ll find the third EMP Device in front of the consoles and the railing, near where William Spender stands (if you haven’t completed the quest “Nakmor Drack: Krogan Betrayal” yet, anyways). Scan and disarm it, then Kandros will tell you he’s done his part and cornered Knight, but she seems to want a final confrontation with you.
Return to the Docking Bay deck and head upstairs to the balcony outside of the Tech Lab, where you’ll find Knight. If you got all shooty back in her sanctuary, things will get messy, but the Nexus will be saved. You’ll get 530 XP for your trouble and a nasty email “[Error 982: Carrier signal interrupted!]” from her bereaved son, Alain, who now calls himself “Paladin”. The kid’s got a bit of bark in him, especially for somebody who can’t even shit properly without tuning his cybernetics several hours a day. On the other hand, if you learned about her little “Mercury” project by providing Alain some cybernetics, however, you’ll get different dialogue options. End the conversation by saying “Alain is cured” and this confrontation will end with no bloodshed, although the only tangible difference is the lack of a post-quest email from Alain (you’ll get 530 XP either way).
No Comments