
Site 1 - Promise
Travel to the Pytheas System’s planet Eos, then search for “Landing Zone Eos” on the planet’s surface. Confirm your loadout, then, finally, you’ll land on your first planet in the Andromeda system. What about Habitat 7, you ask? Crashing doesn’t count as landing, plus you weren’t in charge then. Liam will chat at you for a bit, after which your job as Pathfinder finally, truly begins.
The Tempest will land near Site 1, one of the Nexus’s few attempts at colonization without a Pathfinder. Obviously the vital importance of the Pathfinder’s role on colonization outcomes can’t be over-stated, but then again, nobody expect conditions in the Heleus Cluster to be so harsh.
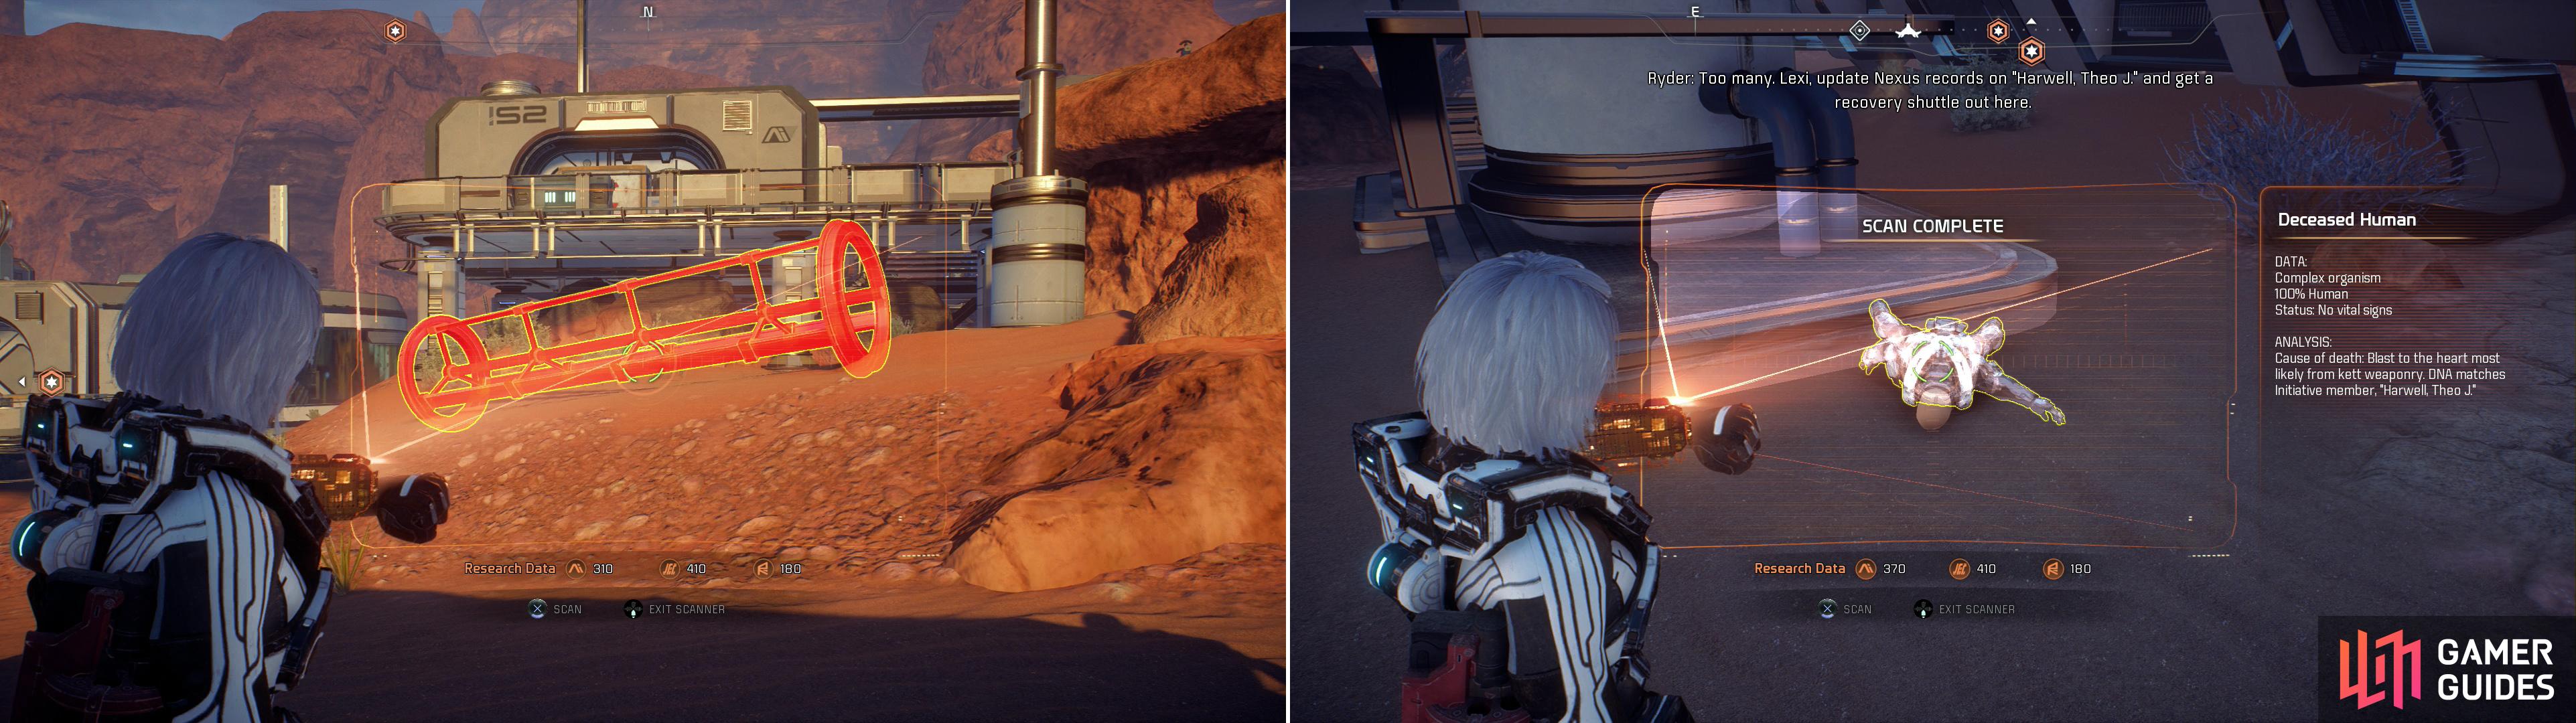
There’s plenty of discarded Initiative equipment you can scan to earn Milky Way Research Data points (left). Sadly, the Initiative left behind more than equipment - scan colonist bodies to start the quest “Task: Naming the Dead” (right).
From where you disembark head northwest, past some discarded gear (including an Ammo Box and a container). There’s also some Initiative Supply Crates near a structure you can scan… in fact, there’s a great deal of discarded equipment, cargo and technology you can scan, often obtaining Milk Way Research Data points as a result. The minutia of tracking down each container full of loot and object to scan will be left up to you - the more you look around, the more you’re going to find.
Continue down the road to the northwest, scanning along the way, until you reach the shelter (the “outpost central control” building) indicated by the quest marker. SAM will chat with you, at length telling you that you’ll need a code to get inside. Fair enough, more incentive to explore. Behind (north of) this building you’ll find two Operational Energy Storage towers and an Initiative Shuttle you can scan, the latter of which reveals a bit of skulduggery on the part of some Nexus explorer. Near the tower you’ll also find the corpse of a settler (Harwell, Theo J., to be precise). Scan the body to not only get the codes to the door you need, but to also start the task “Naming the Dead”, which will largely run parallel with “A Better Beginning”. Ignore the fact that you have the door codes for a moment and, from the back of the structure head east to find an Infusion Station you can scan, then turn southeast to find a deposit of Fluorite , which you can scan, then mine.
Return to the front of the outpost central control structure you’re locked out of, and show that door who is boss by opening it! Jerk door. Sadly, your victory against doors will be short-lived, as the door to the north is unpowered. Loot a container and go through the door to the west. Read a terminal, then continue west, then south into another room to find a Power Interface to scan, a console and a terminal to interact with, and two containers to loot.
Getting the Power
Looks like you need to go investigate a power relay tower. Leave the structure and return southeast to the Tempest’s landing ramp, from which you’ll find a trail leading east. Follow it east, then uphill to the south, stopping only to loot deposits of Cadmium and Fluorite . Head up some stairs to reach the door on the eastern side of the building and interact with a console.
Seems you’re not the only human picking about the bones of this failed settlement, and the man inside the power relay tower - Clancy Arquist - doesn’t come off too friendly. After you role as Pathfinder is established, he’ll tell you why the power is out, and subsequently allow you to provoke the Kett by turning it back on.
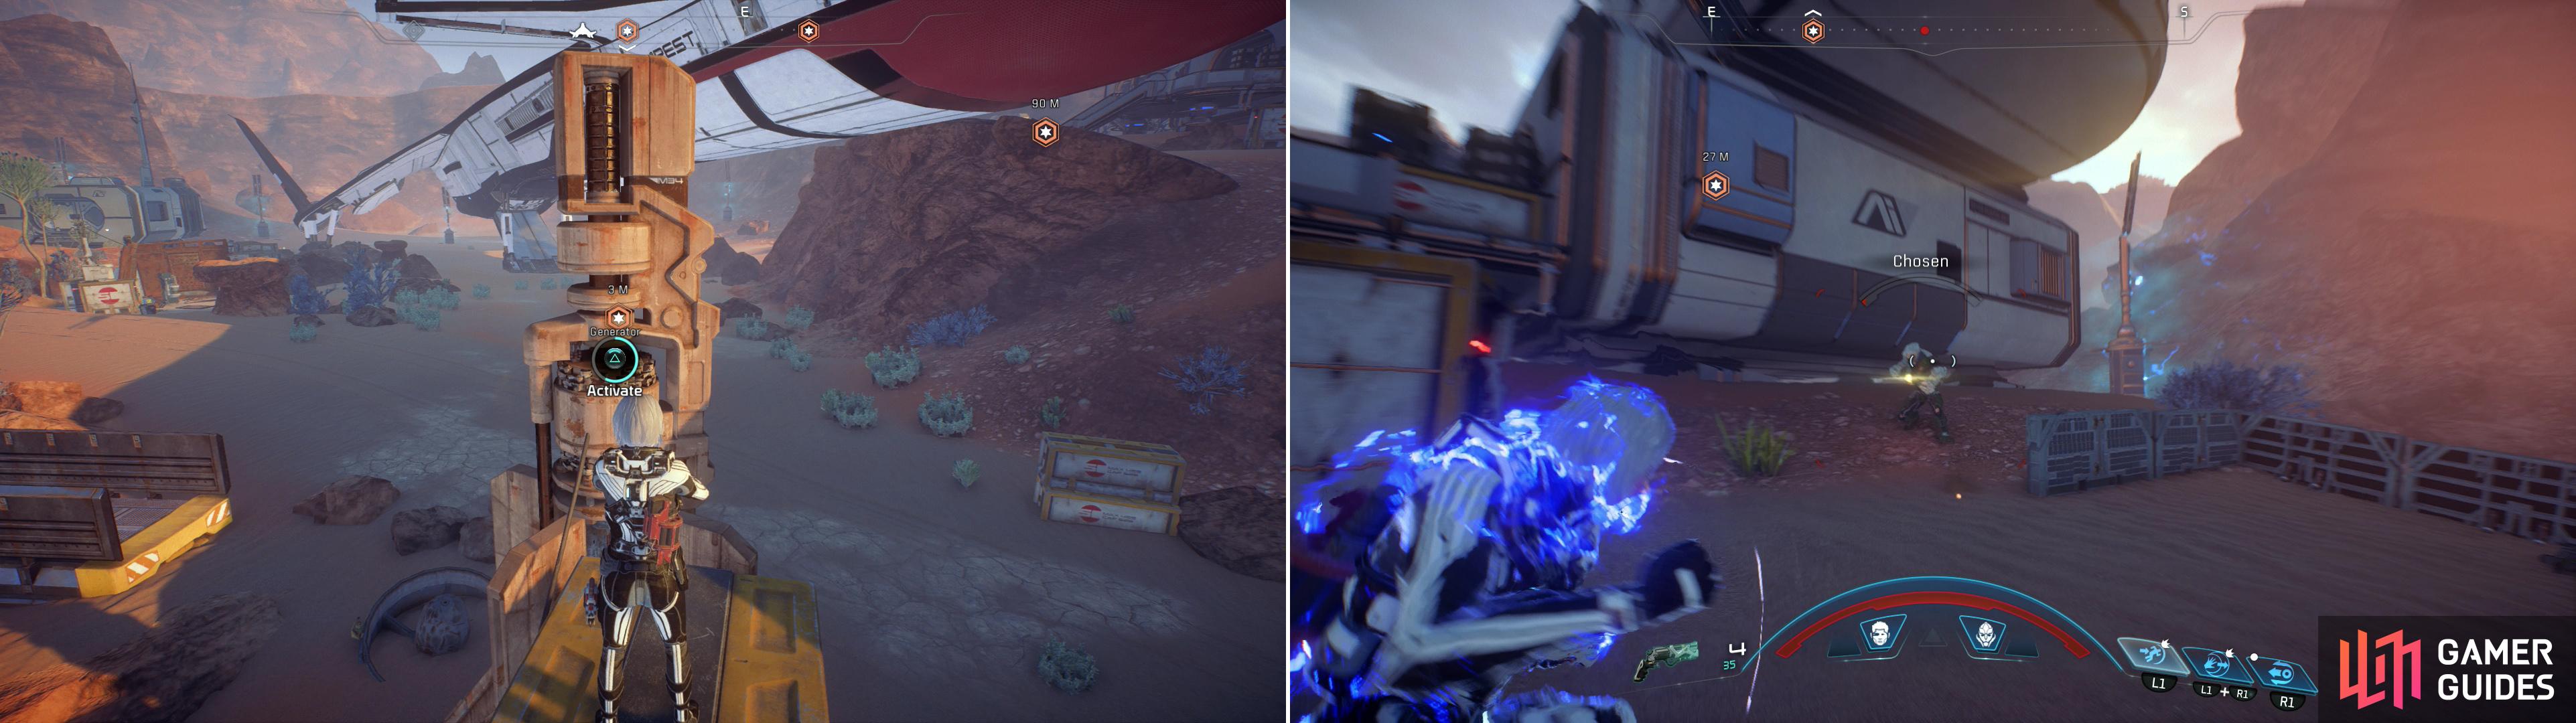
Activate Generators to restore the power (left) then fend off the Kett lured by the activity (right).
There are two generators you’ll need to fiddle around with - one to the west, southwest of the Tempest, and another east of the power relay tower. When you interact with both, the generator will act up, forcing you to interact with an Initiative Power Pylon nearby (both of which can be scanned). Save the eastern generator for last, as the Kett will show up between the power relay station and the Tempest, and if you’re near the eastern generator, you’ll be able to use the power relay station as high ground from which to engage the Kett… otherwise, you’ll yield the high ground to them. They’re not any stronger or more diverse than the Kett you fought on Habitat 7, so take them out, then return to the power relay station, which you can now enter.
Clancy will, after surmising that you smote the Kett, be somewhat less adversarial to you, even suggesting that you commandeer a vehicle he failed to salvage. How generous. You can also buy some of the items he’s salvaged, should you be in need of a store. Loot two containers, then fiddle with the “Outpost Power Controls” to get the power back on. This will earn you 73 AVP and +5% Eos Viablity, and allow you to access the previously-sealed door in the outpost central control… in fact, every door in Promise is now open to you.
Exploring Promise
Your immediate goal now is to get a vehicle, so you can survive long enough outside Site 1’s protective barriers to keep exploring the signal you detected from space - a similar signal to the one that led dad to the device that cleaned up Habitat 7. There’s no rush, however, and you can get a bit of loot and backstory by exploring Promise.
First stop, head to the northern side of the power relay tower to find a door. While previously sealed, it’ll now open for you, and inside (to the east) you’ll be able to scan some figures - representing SAM’s ability to magically cobble together data in the form of a hologram for you to listen to. It’s worth a chunk of XP, so enjoy this prime example of Clarke’s third law, then search the rest of the building for a terminal with an audio log on it, a Datapad, and a container to plunder. Reading the Datapad will start the Eos quest “The Secret Project”, which can be put on hold for a good while.
Return to the Tempest and from there head west, southwest to where one of the generators stands, near which is a structure. Right now you’re across a pond from the outpost central control structure, near which you’ll find the vehicle you need. Might as well explore around the pond to reach that goal, while making sure nothing goes unsalvaged in Promise. Mine some Fluorite outside, then head into the structure and read two Datapads (one contains a copy of the code you needed for the outpost central control structure), loot two containers, then leave.
In the building to the south you’ll find another hologram of the past SAM can reconstruct with its magical AI powers. Enjoy the tasty XP, loot two containers, then leave. If you head south from this structure you’ll find a Destroyed Forward Station you can scan and two mine-able nodes - one Fluorite and one Cadmium . Certainly worth a trip out into the sand to collect.
Backtrack to the front of the second hologram structure and from there continue northwest to find another structure, in front of which is a container to loot. Inside the structure you’ll find another Datapad with a code to the outpost central control structure’s front door and another terminal with an audio log on it.
Leave the building and continue north, where your attention will be called to the massive rings to the west, now warped - a testament to the viciousness of Eos’s storms. Return to the outpost central control structure and go through the stubborn door to the north, which now can be explored. Your great reward for getting in here? A container to loot and a terminal to read. Yaaay…
Exit the building and follow the road uphill to the east, ignoring a search zone begging you to scan a massive shipping crate to the north. Instead, enter the building next to the crate (marked on your map as a “Research Center”. More importantly, it’s a fully functional research center, saving you the trivial effort it takes to return to the Tempest to craft things. Simple use a terminal to activate the power relay and you’re good to go - SAM’ll even give you the task “Research Center Development” to encourage you to research and craft any ol’ weapon. Read a Datapad, loot two containers, then leave.
Forward Stations and the Nomad
Now that you’re done exploring Promise, it’s time to get ahold of that vehicle. Exit the Research Center and scan the “Large Cargo Container” outside to identify its contents as an “All-terrian scout rover, model name ‘Nomad’”. Sounds like what you need, and Gil is sure excited about it. Fortunately for you, you need to call down a Forward Station to get the vehicle - probably the only thing that kept Clancy from stealing it.
Head down the road to the west towards the quest marker, where a hologram of the Forward Station awaits. Once you’re close enough, the Forward Station will be called down automatically. When it lands, note the circle denoting its area of effect - while in this circle your health, ammo and power cells will be fully restored, as will your hardsuit’s (and the Nomad’s) life support systems… you know, when the Forward Stations are deployed in safe zones, anyways. You can also use Forward Stations to change your loadout and switch party members. You’ll learn to love these things.
Return east to the cargo container the Nomad is in and activate a keypad on the side of the crate to unleash the Nomad. Huzzah! Transportation is yours! Approach the vehicle and hold [Triangle]/[Y] to board it. [R2]/[RT] will move the vehicle forward, [L2]/[LT] will send it in reverse, while [Left Analog] steers the vehicle.

Drive the Nomad west, past the Forward Station and through a metal structure, then follow the tracks south beyond the protective barriers. The Nomad, like your Hardsuit, has life support systems that’ll keep you safe from Eos’s ever-present radiation, and while the Nomad has far greater shielding than your hardsuit, its life support capacity is finite, too. If the Nomad’s life support is running low, don’t be shy about fast traveling back to the Tempest, a Forward Station, or an outpost (yellow arrows denote applicable fast travel locations). If your hardsuit’s life support systems dwindle, spending time in the Nomad will restore them, somewhat.
Follow the trail when it turns southwest and head uphill… which happens to be too steep for the Nomad. Fortunately, the Nomad is a six-wheel ATV, so simply press [L1]/[LB] to shift into six-wheel drive mode to conquer such obstacles. Holding [Square]/[X] will provide boosts of speed, when necessary and pressing [X]/[A] will allow you to use the jets on the Nomad to jump - all useful for terrain traversal.
When you crest the hill, you’ll probably note a number of bugs crawling about. You’ll encounter two types of these critters here - Kaerkyns and Shemrys, which are at best minor threats. In the Nomad, you can safely ignore them or run them over, but they can also be scanned for a good amount of Heleus Cluster Research Data, not to mention progress towards the task “Comparatively Alien”. They’ll also drop Shell Filaments and Soft Chitin, respectively, and while not individually all that valuable, the fact that you can get 20 - 50 per drop can make for a fair chunk of change… especially considering that Shell Filaments can sell for around 20 Credits each. Yes, that’s 400 - 1,000 Credits for killing a bug, when you’re fortunate enough for said bug to drop you its Shell Filaments.
No Comments