
Searching for Sages
After completing the quest “Helping Havarl’s Scientists”, talk to Kiiran Dals, who now trusts you enough to task you with more important errands. Simply put, Havarl’s ecosystem is spiraling out of control, becoming more virulent as it approaches collapse. An obvious sign of the problem - and the cure - are Havarl’s monoliths, of which there are only two instead of the usual three. Probably going to make triangulating the vault more difficult, but fortunately, there’s a solution… or at least some leads. Apparently some introverted Angaran sages might be able to help you, and why not? Messing around with superficially understood Remnant technology has been basically space-magic this whole time. Might as well take the full plunge into alien superstitions.
Your goal is a good distance to the southeast, southeast of the Turian encampment (part of the quest “Turian Ark: Not Dead Yet”), which itself is southeast of the Forward Station east of the Pelaav Research Station. Like the first Remnant monolith, however, you’re better served making your way east from this Forward Station, then south, as the geography impedes a more direct approach. Continue east until you reach the massive trench that separates the operational zone of Havarl into two halves.
To proceed you must make your way to the watery bottom of this trench, and while jumping down won’t kill you, the fall may well be too far of a drop to make without sustaining damage… and worse, being placed back on the ledge you leaped from. That being the case, follow the edge of the trench south until you find a series of staggered Remnant ledges that allow you to make multiple smaller jumps down into the trench. When you reach the watery bottom of the trench, destroy any Remnant bots (Assemblers and Observers are numerous down here) you see, then continue down the trench to the south.
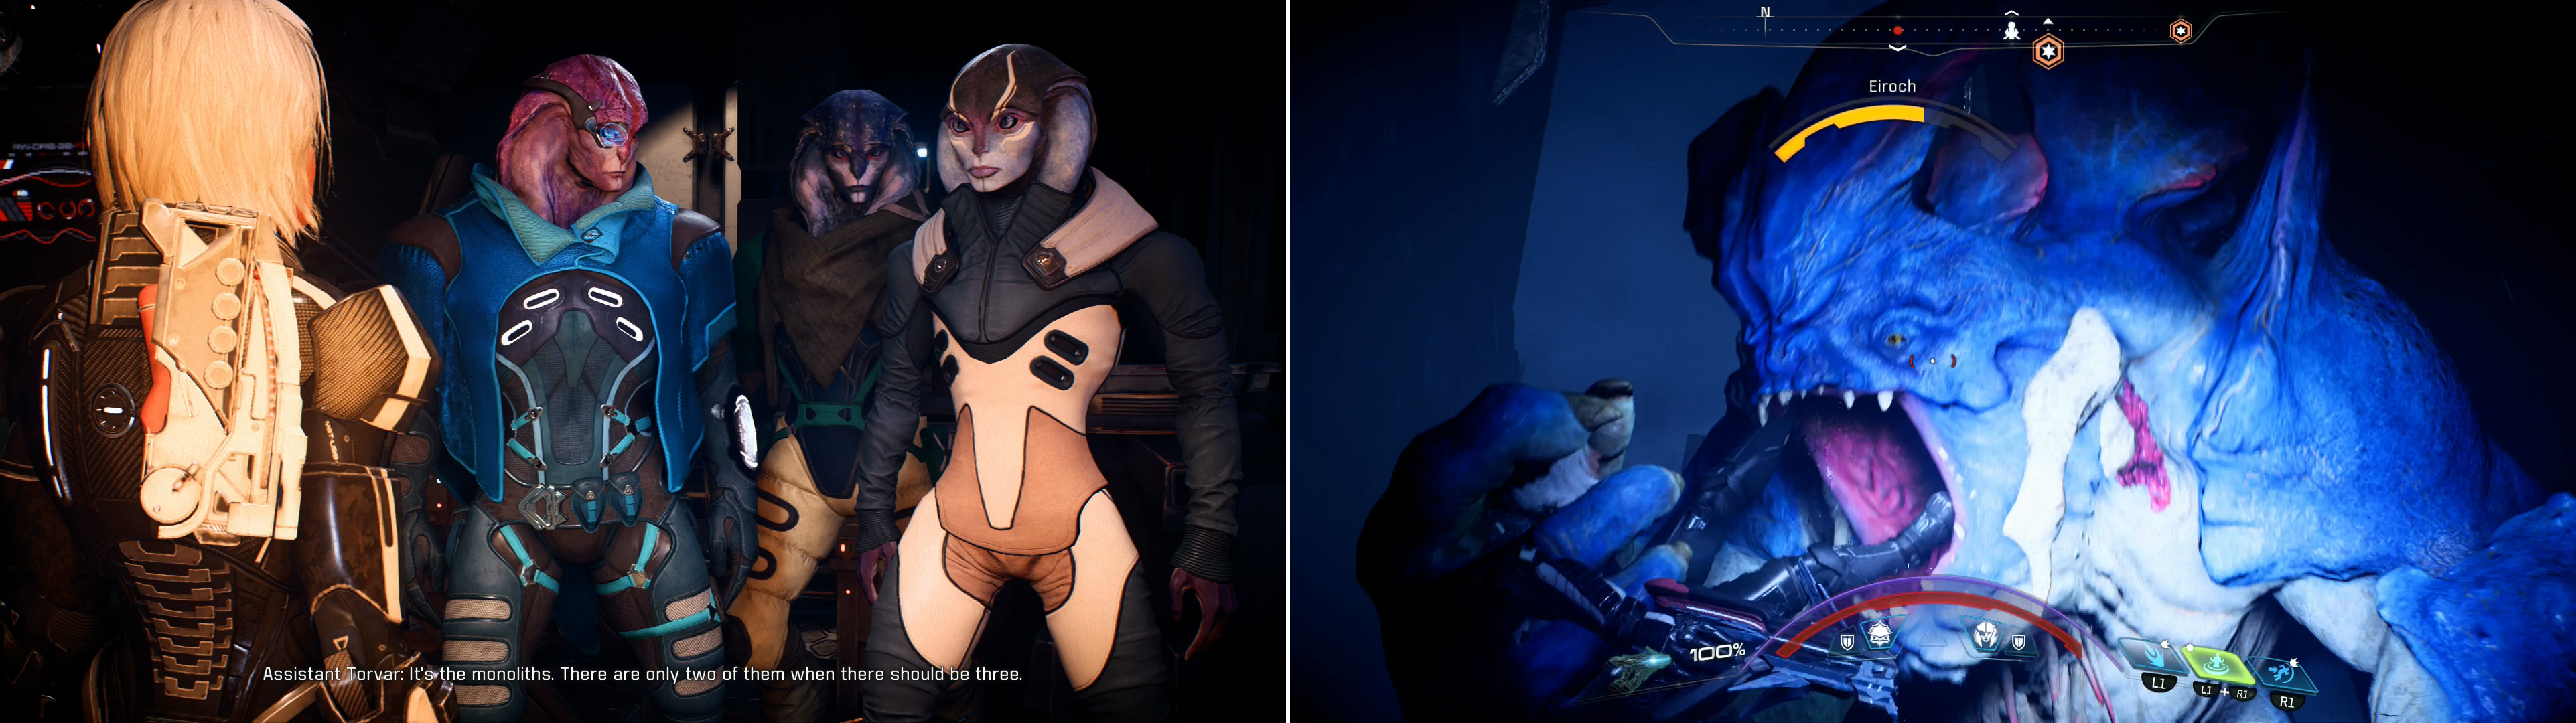
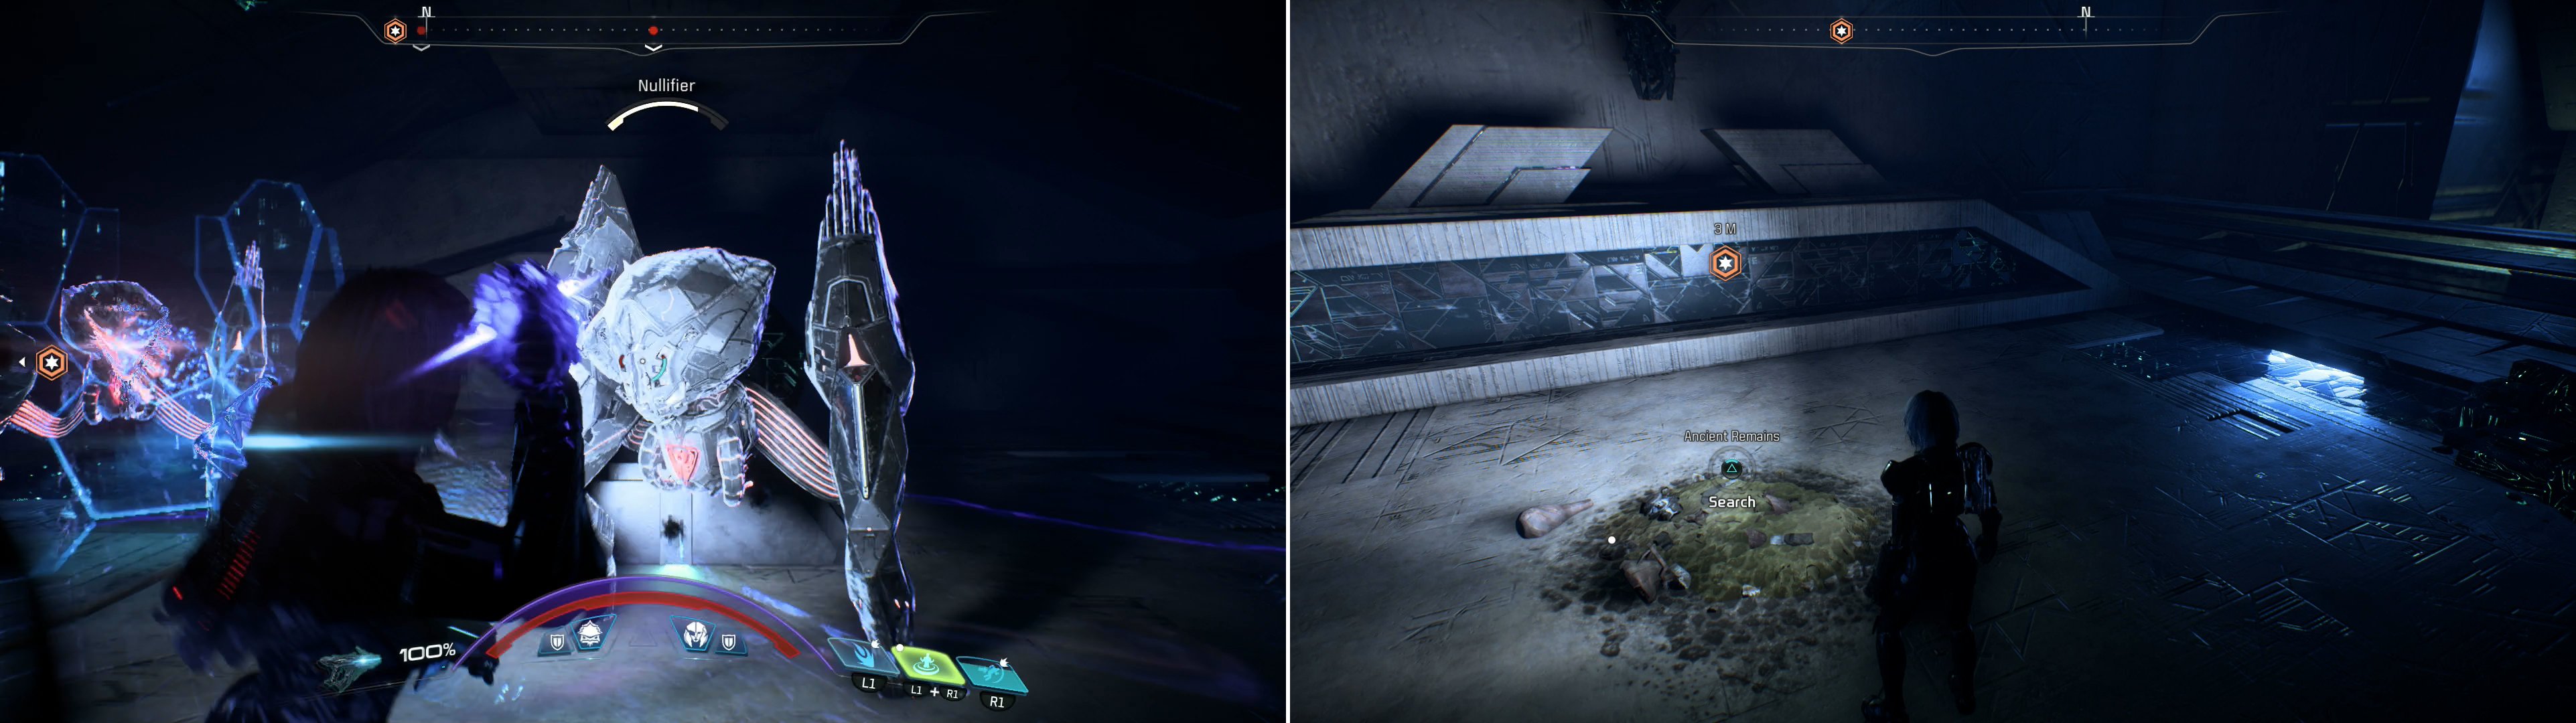
After saving Havarl’s scientists you’ll be trusted with a major task - restoring Havarl’s vault, which has some unique complication (left). Be wary of a sneaky Eiroch lurking in Havarl’s trench (right).
A short distance to the south you’ll find a wall, which is likely occupied by some Roekaar Raiders and their pet Adhi. Dispatch them, leap up onto the wall, then kill whatever foes you find to the south - likely more Remnant, Roekaar and wildlife, most of which will happily drop their differences and turn their attention to you given the opportunity. When the coast is clear - or clear enough, anyways - drop off the wall to the south and search a lower ledge to the east to find an Adaptive Remnant Core Device near a health container.
Scan, loot, then continue south into the water. There’s plenty of wildlife and Remnant for you to fight as you continue south, but be particularly wary of an Eiroch who may be hiding behind some rocks. The only purpose this beast serves is to remain hidden until you’re blissfully engaged with other, lesser foes, while the Eiroch sneaks up behind you and makes you sad-pants with a one-hit-kill.
Climbing to Mithrava
At the southern end of the trench you’ll find a Remnant door, beyond which is a large chamber that hasn’t been spared from Havarl’s aggressive flora. Continue south through the chamber and note the search area under your compass - the object of this search area is along the southern end of the room, behind some rocks, where you’ll find a Remnant Console. Activate it, then go through a newly-opened passage to the west until a Remnant pillar protrudes from the floor. Time for some good, old-fashioned platforming.
Your goal is to leap up several levels through some hexagonal openings. Simple enough, save for the fact that the holes are all the same size, and Ryder is picky about what ledges they’ll climb. Instead of leaping out over the hole and using your air-dash ability - you know, the sensible way to reach the opposing ledge - jump up and out a bit and rotate to a nearby ledge mid-leap. Because physics.
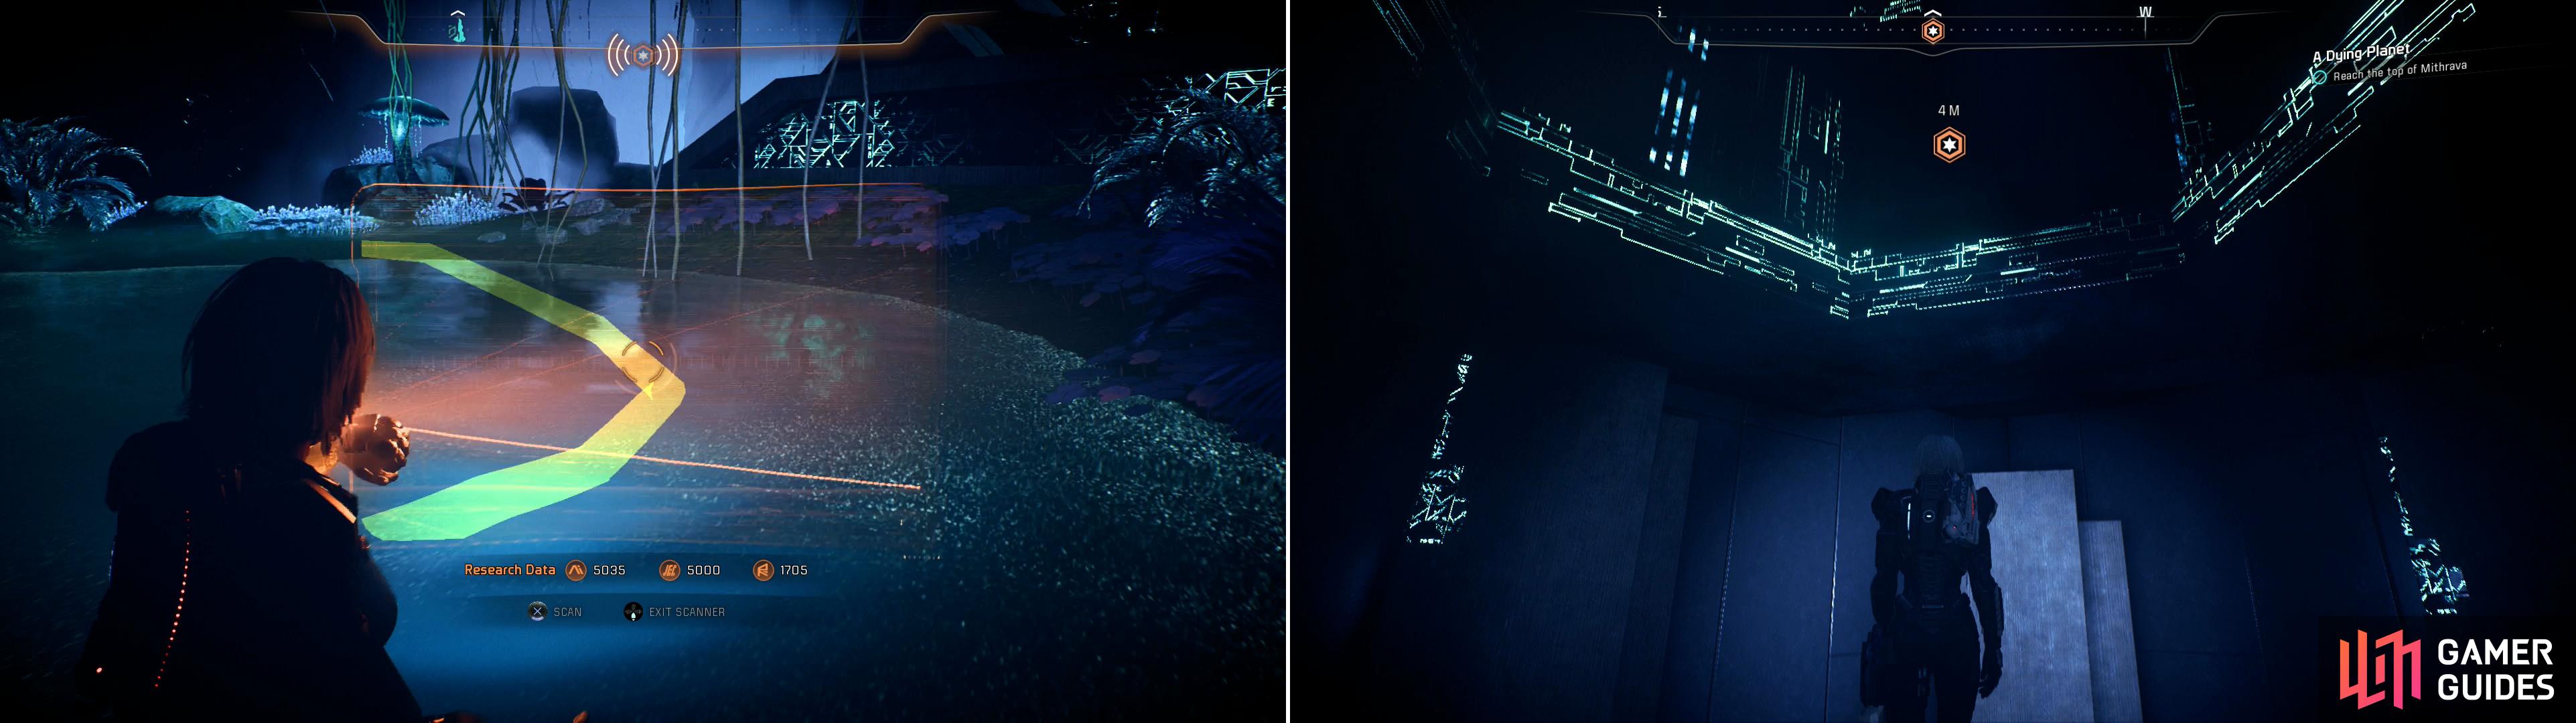
Scan and follow a conduit to find a Remnant Console (left) then leap up several hexagonal openings (right).
After you’ve succeeded at leaping your way up, make your way east and use a Gravity Well to propel you horizontally across a gap. Yeah, it’s one of those weird sideways gravity wells. Continue east and, when prompted, press [R3] to look up at your destination. Seems like you’re not done platforming just yet. Continue east to find another Gravity Well - this time a proper up-and-down one, not one of those sideways freaks. After your ride, continue south through a doorway to reach the exterior ledges of Mithrava.
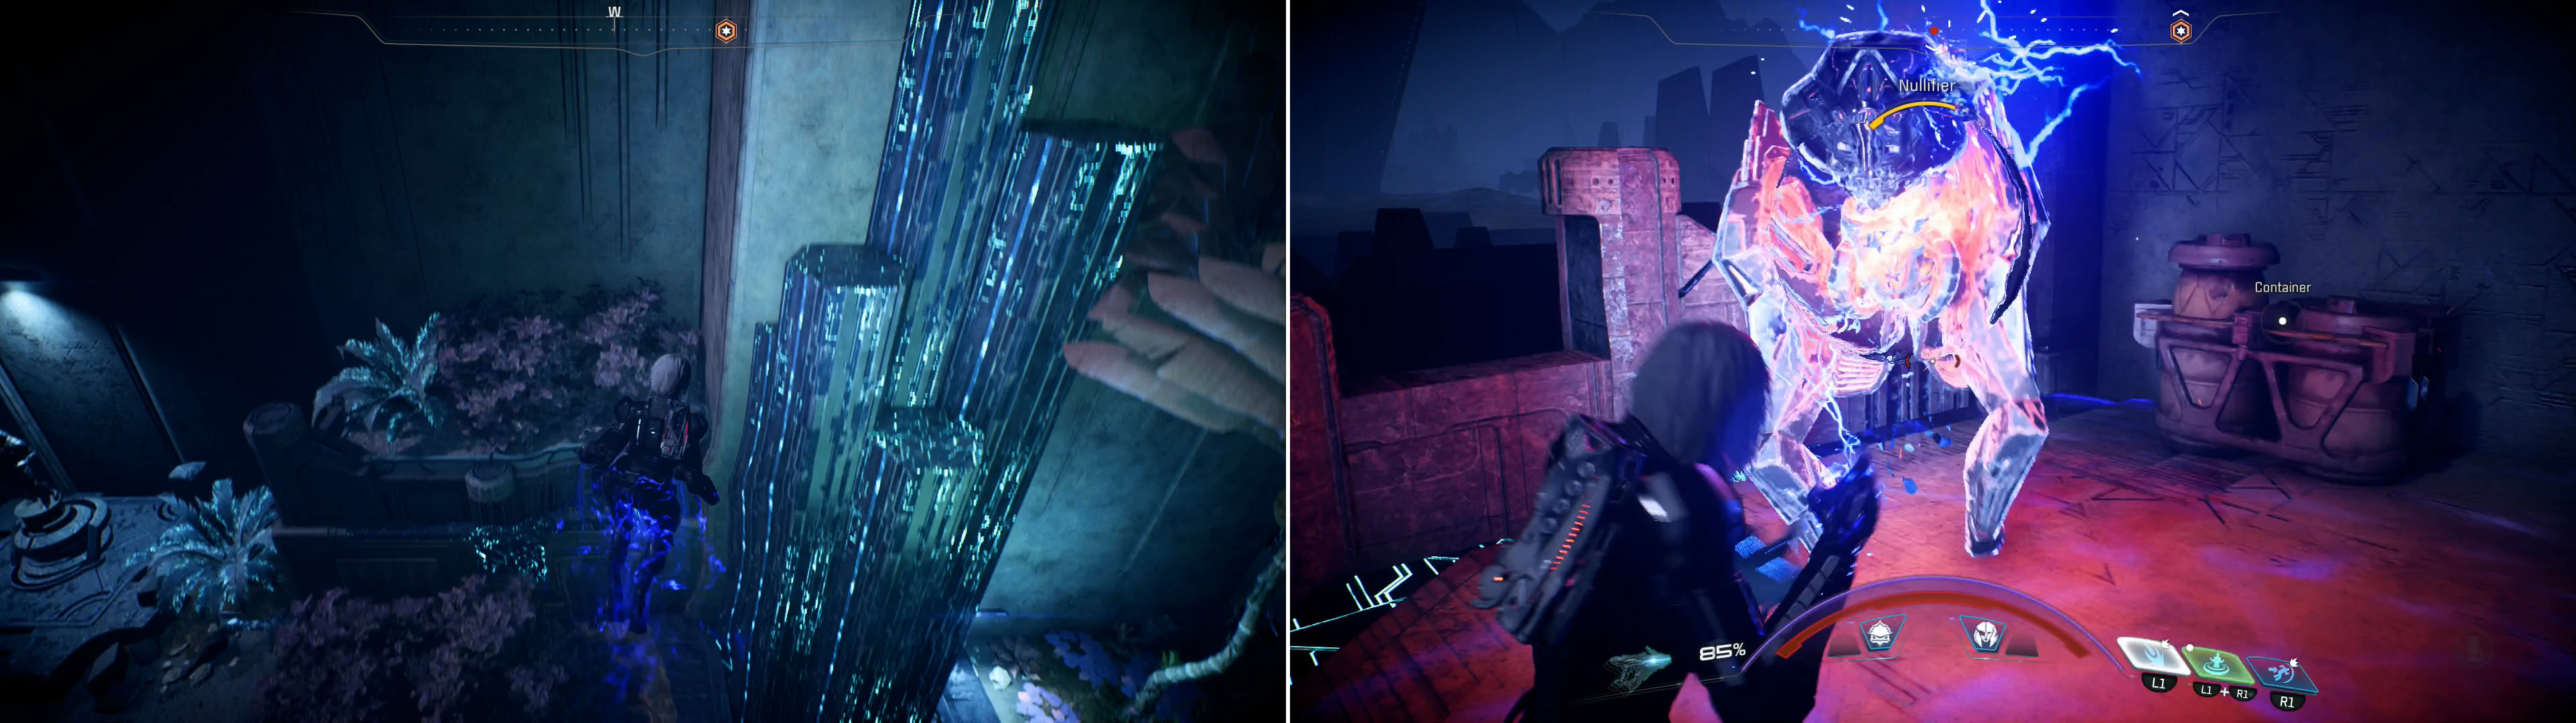
Ledges, ledges everywhere! Drop down a few to the south, then turn west and drop down a larger ledge and follow the walkway west, then northwest to find a dormant Nullifier guarding a container. Kill the isolated bot, then plunder it’s loot and return back whence you came. From the ledges leading to the door the leads to the Gravity Well (whew!) make your way east, drop down a larger ledge, turn northeast, then north. Kill some Remnant (an Observer and some Breachers) then scan the ground as you continue north to find a conduit, which runs to a Remnant Console to the east. Interface with it and some pillars will realign behind you, and a platform will lower above you.
Once on the exterior of the Remnant structure you’ll have to continue platforming to reach the top (left) stopping only to dispatch the odd bit of Remnant resistance (right).
Jump on some Remnant pillars near the console you activated and use them to reach the platform you lowered, then loot west, southwest to the pillars behind you that realigned. Leap across to them and use them to leap up to a higher ledge. Follow the walkway you find yourself on to the northwest, then west, then drop down a ledge to the north and activate another Remnant Console, which deploys a rather poorly-designed bridge. Or maybe it serves another function, but you’re using it as a bridge.
Either way, cross it, disable some more Observers and Breachers, then follow the walkway west, southwest, then south until it terminates at a dead-end. Leap up several ledges, then follow this higher walkway to the east until it ends, at which point turn south and leap up some glowy Remnant structures to reach an even higher ledge. Turn east and activate another Remnant Console to deploy another bridge, cross it, leap up some ledges to the east, then south, then turn west to find a door. Open the door to find a Gravity Well which will mercifully take you to the top of Mithrava.
When you arrive, First Sage Esmus will express surprise at your exploits, but all things considered, probably not enough surprise, honestly. Chat with him and he’ll express his pessimistic, defeatist fatalism concerning Havarl before veering straight out of sci-fi and into the supernatural. Souls, reincarnation, past-life experiences… they’re all apparently a thing now, and if your incredulity hasn’t been stretched to the breaking point already, good news! The reincarnation of an old soul you need happens to be on Havarl right now! Bad news? They’re a member of the Roekaar, which complicates things a bit.
After the conversation ends, head west to deploy a Forward Station, which will make traveling around easier, then search the area to find containers, a mineral cache, a node of Platinum and an Angaran Integrated Tech Node device you can scan. There are also Angara you can talk to up here, including Sage Amurd and Sage Fleera, who will give you the quests “A Lost Sister” and “Task: Unearthed”, respectively. Both of these quests are worth picking up and perhaps advancing as you continue on with “A Dying Planet”. Finally, search the eastern end of this area to find a Memory Trigger, which you may as well collect while you’re up here.
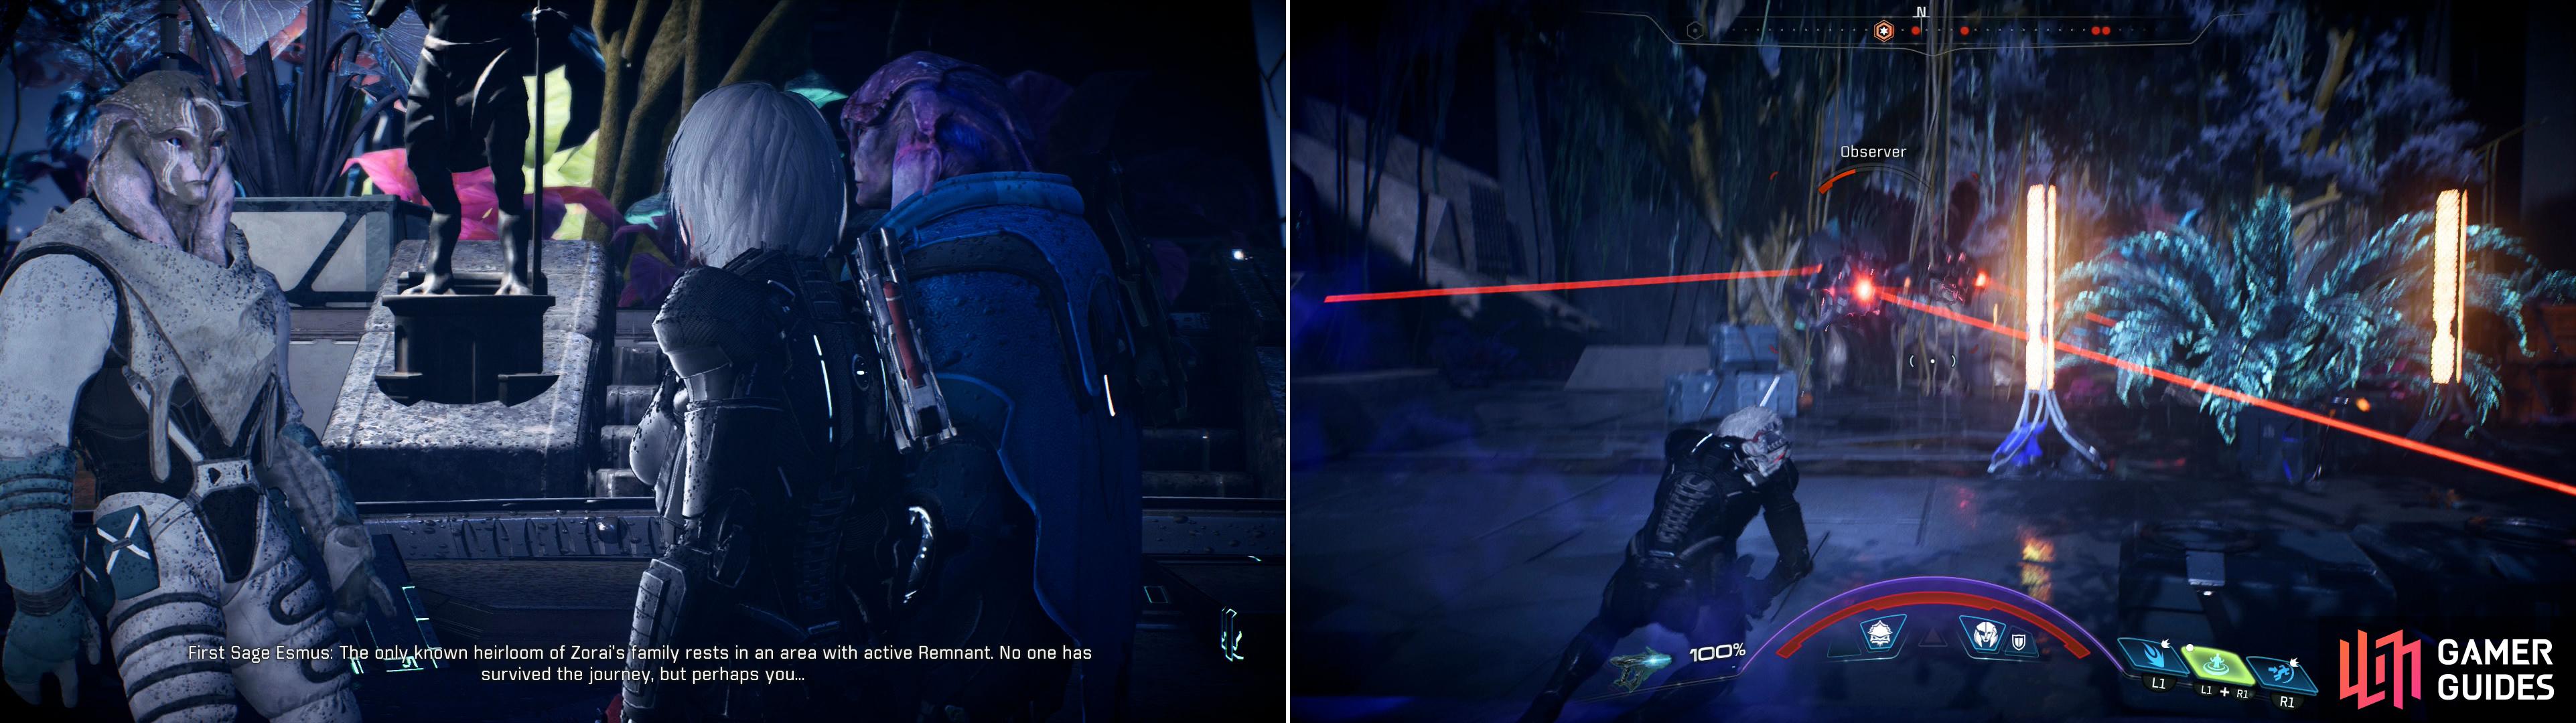
When you reach Mithrava, talk to First Sage Esmus to learn how you might locate the third monolith (left). Fight through both wildlife and Roekaar as you make your way north across Havarl (right).
Hunting for Heirlooms
The next destination - where you must look for Zorai’s heirloom - is across the operational area of Havarl, on the northern end of the map. Fortunately, you don’t have to run all the way there, simple fast traveling to the Forward Station east of the Pelaav Research Station will spare you the effort of descending the Mithrava again. From this Forward Station, simply head north on foot and fight through a group of Roekaar fighting some Remnant near an exposed Remnant structure.
After fighting through this first group of Roekaar and Remnant, continue north to find some ramps leading up to another Remnant structure, where you’ll find more Roekaar. Kill them, then search under a low ramp running west to find an Adaptive Remnant Core Device . Ascend the ramps until you find what appears suspiciously like the entrance to a vault, around which you’re bound to encounter more Remnant. Before you head into the depths of this Remnant structure, head southwest from it to find a cave, near which you’ll find an Unearthed Remnant Device , an Element Zero Sample (for the quest “Task: Hitting Rocks for Science”) and another Adaptive Remnant Core Device .
Plunder as you will, then head into the Remnant structure and use a Gravity Well to descend into the bowels of Havarl. When you land, turn northeast to find an Adaptive Remnant Core Device . Once scanned, head southeast and go through a door to reach a room in the center of which you’ll find a Remnant Console. Activate it and the walls to the northeast and southwest will lower, revealing tunnels beyond… and providing a path for Remnant Observers and Assemblers to enter from the northeast. Put down the Remnant and note the two paths available to you. The northeast, as evidenced by the Remnant opposition, is where you want to end up, but if you take the long route by going southwest and looping around you’ll earn more treasure and XP.

Defeat the Destroyer (left) then deploy a bridge and loot a small treasure room (right).
That being the case, head down the hallway to the southwest, go through a doorway and descend a ramp before turning southeast down another tunnel. Disable some Remnant blocking your way, then turn down a tunnel to the northeast, head down a ramp and pass through another doorway to reach a larger chamber. The center of this chamber houses a dormant Destroyer, but don’t expect on it remaining inert for long. There’s a bit of cover to the northeast, but it’s destructible and won’t protect you for long against the Remnant, so instead seek more sturdy cover near the pillars in the chamber. Also be wary of the fact that the Destroyer doesn’t come alone - it’ll be joined by lesser Remnant as well, including plenty of Assemblers. Focus on the lesser Remnant first, then target the Destroyer’s turrets to force it to use its slower main gun.
After the Remnant are destroyed, make your way to the southeastern end of the room, where you’ll find a Remnant Console. Activate it to deploy a bridge, then cross the bridge to the southeast and open a door to find a container and an Adaptive Remnant Core Device . Plunder the room, then return across the bridge to the larger chamber and head through a door to the northeast.
Continue up a ramp, head down a tunnel to the northeast, turn northwest and head up another ramp to reach a small room. Before you get around to searching, kill the Remnant lurking in this chamber - there are bound to be several Assemblers and two Nullifiers lurking about. When they’ve been dismantled, note that there’s a door to the northwest and a small side-chamber to the northeast. Go northeast first to find a Remnant Console and interface with it, then turn around and note that it deployed some Remnant platforms in the previous room. These platforms surround a square pillar in the center of the room, and using them allows you to reach the top of said pillar. Just make your way to the eastern side of the pillar, jump onto the first platform on the pillar, then turn east and jump onto another, larger platform along the wall. From this platform you can turn back west and leap onto another, higher platform on the pillar, from which you can leap to the top, whereupon you’ll find two containers.
Defeat more Remnant deeper in the ruins (left) then search some debris to find Zorai’s Heirloom (right).
When you’re done looting, drop off the pillar and go through the previously-ignored doorway to the northwest, beyond which you’ll find a small room. Inside, in the center of the room you’ll find a rather out-of-place pile of “Remains”, which, when scanned reveals itself to be heavily decomposed Angaran remains. Eww… Gingerly search through the Angaran crud to find Zorai’s Heirloom, then examine an Ancient Data Drive on the ground nearby. Now that you have what you’ve come for, loot two containers in the same room, scan another Adaptive Remnant Core Device (they’re being awfully generous with these, no?) and leave the ruins.
Tracking Down Taavos
Now that you have the required heirloom, you’ll need to track down Zorai’s ancestor… because that’s how triggering past-life memories works, apparently. Make your way back to the large trench on Havarl and search for a bridge, which - wonder of wonders - is now deployed. Funny how those things seem to happen when, and only when, you need to advance a quest. Anywho, kill the small, but varied, group of Roekaar guarding the bridge and cross the bridge to reach the eastern side of the map.
When you reach the far side of the bridge, kill some Roekaar that occupy some stairs, then search said stairs to find a Mineral Cache on the first landing. There’s quite a bit more to loot and scan in the area, however. Continue up the stairs to find various containers lying about, and up the third (and final) flight of stairs you’ll find the Roekaar Datapad “Fire” . Reading it will start the quest “Task: Roekaar Manifestos”, another fetch quest that’ll have you scouring Havarl for unmarked Roekaar Datapads. Fortunately, most are nearby, and will be pointed out as you come across them, but the full quest is, of course, covered in its own page.
There’s plenty more to be found area here, however, so head back down the stairs and note that you can venture both north and south along the edge of the trench to the north. Much treasure lurks along the trench here, usually in alcoves to the east. If you head north you’ll find an Unearthed Remnant Device i n the first alcove, while another can be found to the south of the stairs, behind a tree. These, of course, will advance the quest “Task: Unearthed” when recovered. If you continue south you can also score an Angaran Integrated Tech Node , also behind a tree. This doesn’t include the numerous mineral nodes and containers also lying about.
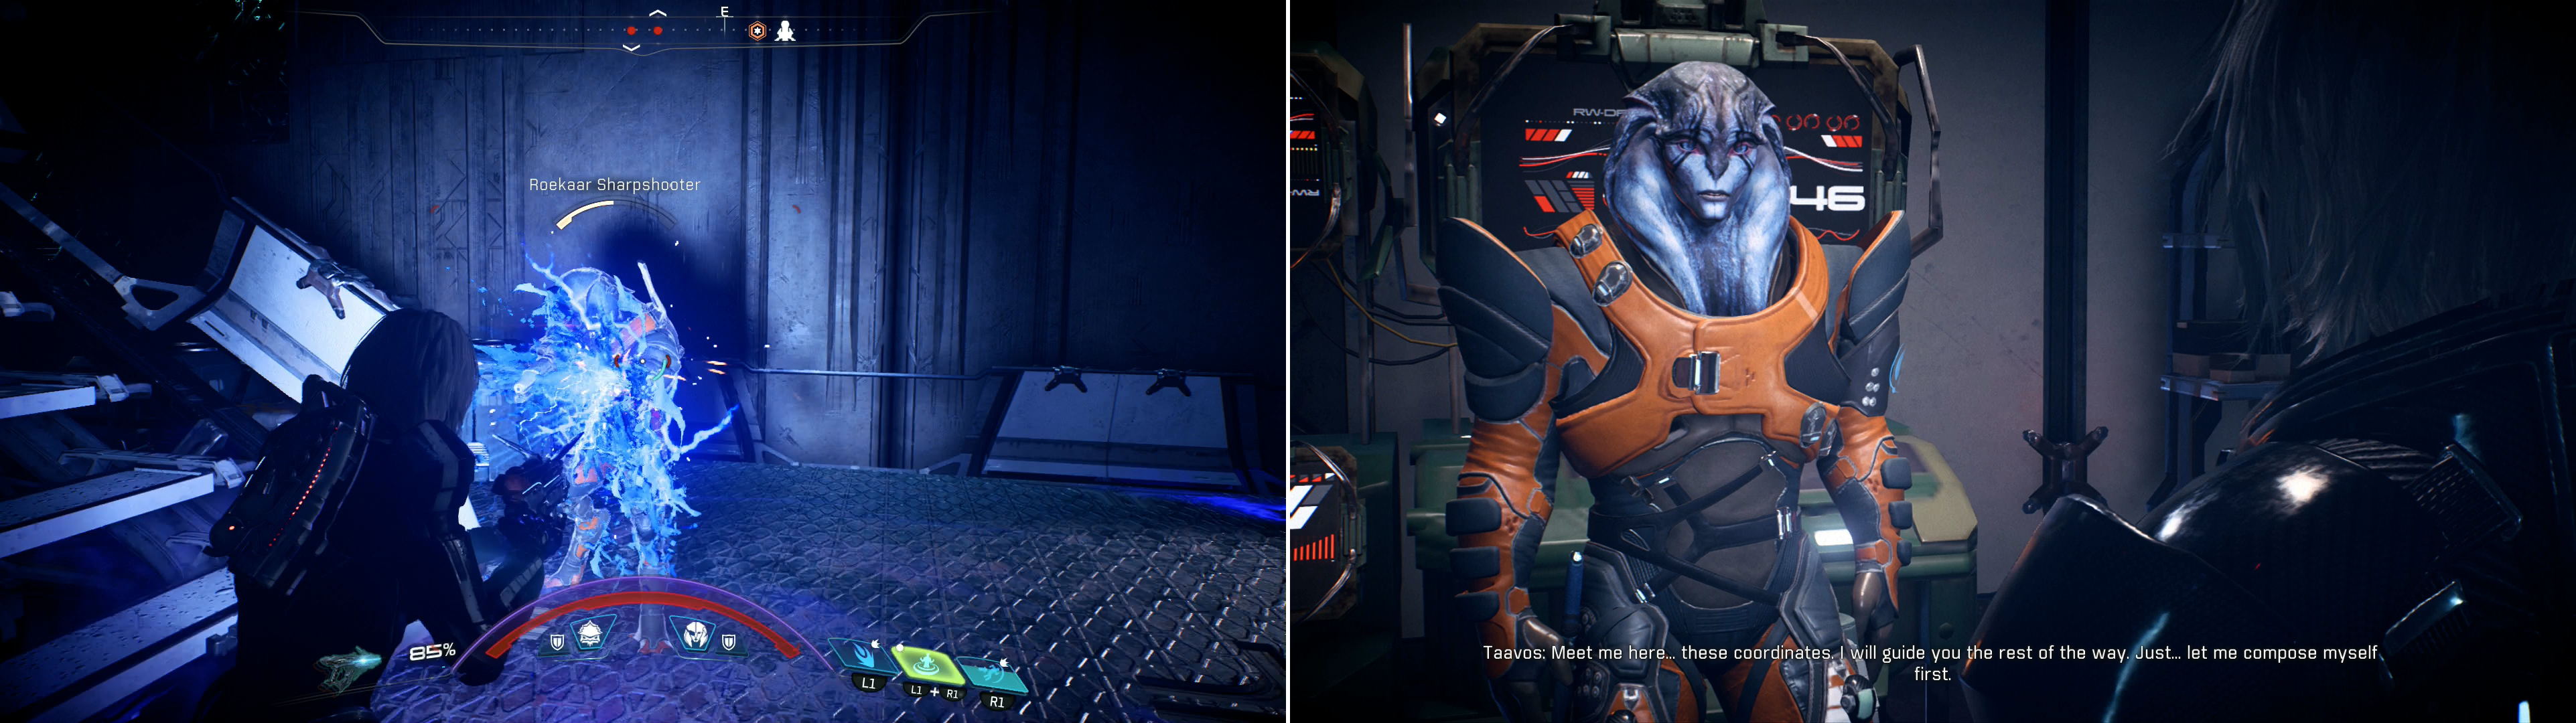
Return to and ascend the stairs, continue east through a Remnant hallway and pass through a door, beyond which you’ll find the final Forward Station on Havarl. From this Forward Station trek through the swamp to the east until you find some stairs leading to a rather large Roekaar camp, complete with a watch tower (with attendant Roekaar Sharpshooter), Challyrions, Raiders and Saboteurs. Fight your way up the multiple flights of stairs to reach a higher ledge on which the majority of the camp (and minority of the enemies) are located, including numerous Adhi and whatever stragglers you didn’t kill near or on the stairs below.
Right your way through numerous Roekaar strongpoints (left) then enlist Taavos’ help (right).
When the Roekaar have been dealt with, note that there are three structures you can search. The navpoint makes this a no-brainer, really, just enter the central building to confront Taavos, who whines about your wanton murder of his friends. What a whiner. He gets over it pretty quickly before messing with the heirloom you present him, and after some past-life recollection drama he’ll give you a new navpoint at which you’re to rendezvous. Apparently this Angaran past-life stuff isn’t just reliable, it’s accurate and fast, too.
Before you run off anywhere, be sure to loot around the camp, as there’s numerous containers about, some mineral nodes and two Mineral Caches. You can also find two Roekaar Datapads (part of the quest “Task: Roekaar Manifestos”) in the northern structure ( Roekaar Datapad “Invasion” ) and the southern structure ( Roekaar Datapad “Conquerors” ), not to mention an “Archive System” you’ll need to mess with to advance the quest “A Lost Sister”.
Taavos will use memories gained from the heirloom to open up a new passage (left). Lead him to Zorai’s remains, along the way activing the missing monolith (right).
The Missing Monolith
When you’re done looting around the Roekaar camp, it’s time to rendezvous with Taavos, whose spirit visions have drawn him to the location of the missing monolith, which is apparently located at the northern end of the trench. Fast travel to the Forward Station in the trench, if you have it. If not, just make your way into the trench by whatever means are most convenient, and when you reach the northern end of the trench turn west to find Taavos.
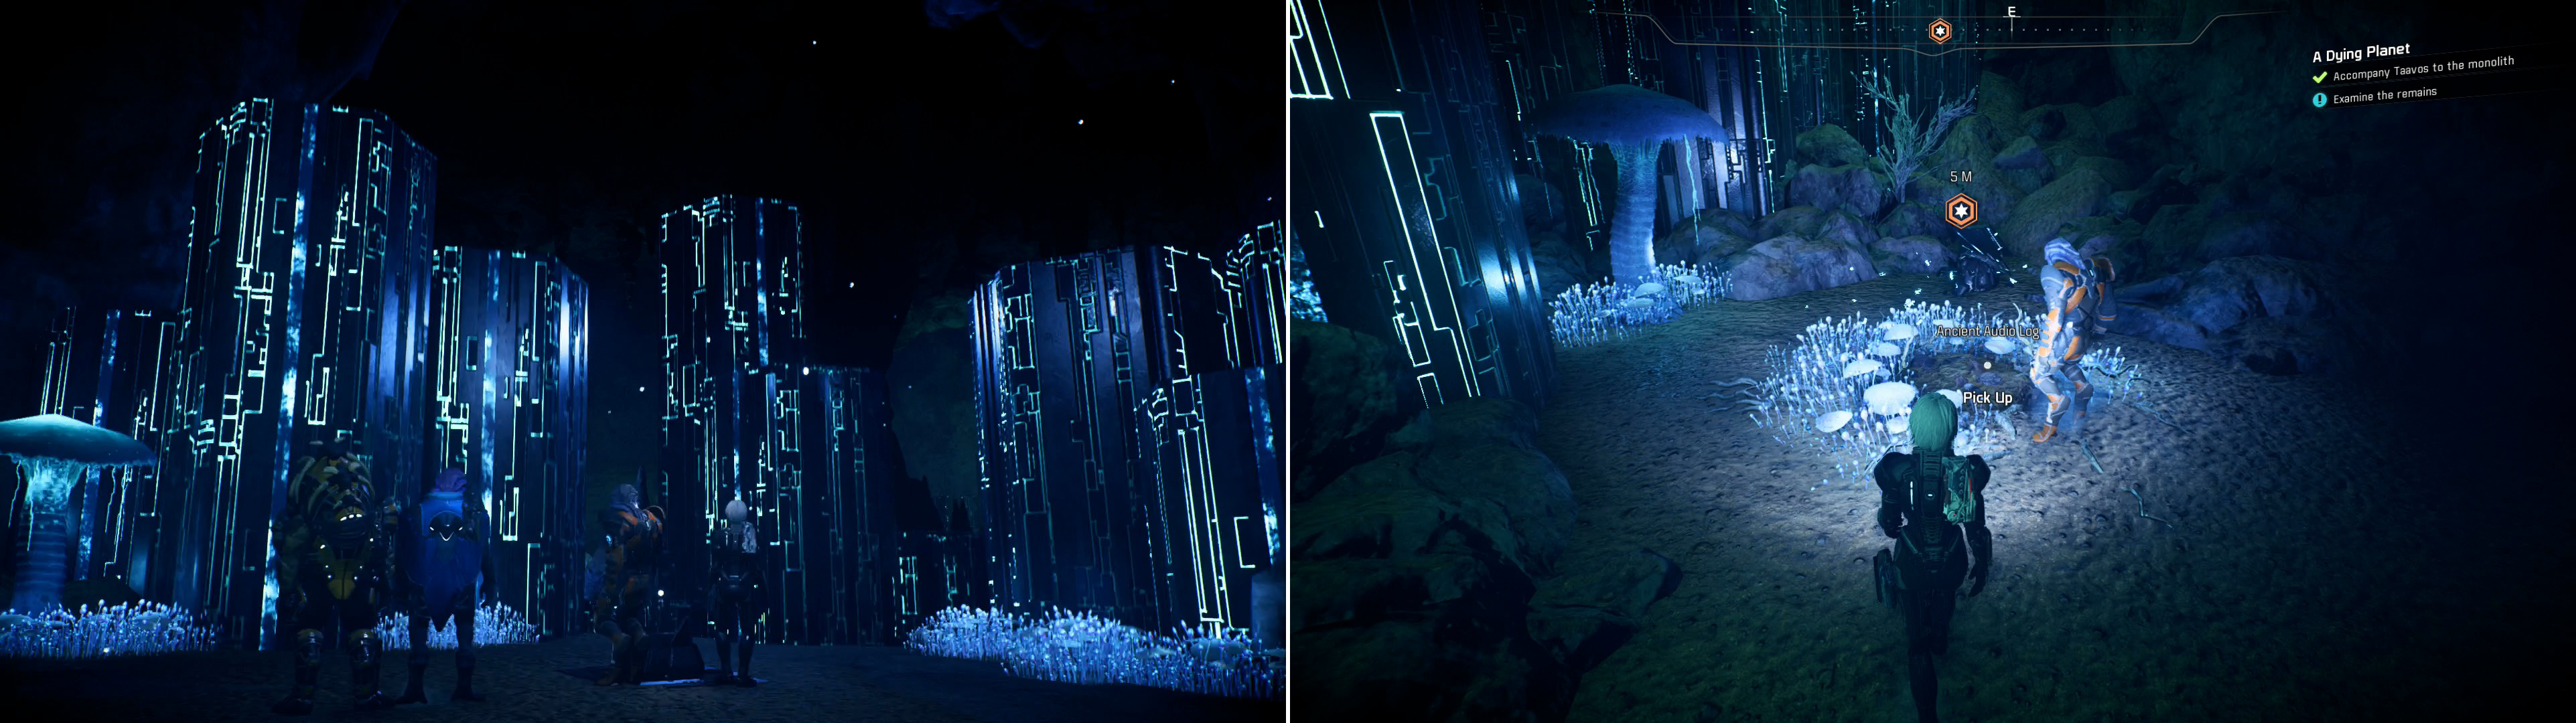
Talk to Taavos and he’ll use the magic of past-life memories to interface with some Remnant tech and reveal a passage ahead. Continue northwest into the Buried Cave beyond and follow Taavos as he leads you through the cave. At the end of the cave you’ll find an Ancient Audio Log, which just so happens to belong to Zorai. Listen to it, then after Taavos is done gushing about his past-life gender-bender, scan Zorai’s Remains on the ground, which prompts Taavos into more chatter. Fortunately, he decides to see to your business before he breaks out the candles and gets all sentimental at the grave site. As you backtrack through the cave, be sure to search around for the odd container and mineral node, if such fare interests you.
Follow Taavos and he’ll lead you through a previously-sealed door, which leads to a cavern with a still-functional Gravity Well in it. Ride the Gravity Well down to a lower chamber and make your way north, northwest to find a Remnant Console, which will activate the monolith when you interface with it. After some more chatter with Taavos, you’ll be free to make your way to Havarl’s long lost vault… but first, this cavern bears some exploration.
In addition to the typical loot you’ll find hidden around (containers, mineral nodes), make your way north from the Remnant Console to find a Memory Trigger, which will, of course, advance the quest “Ryder Family Secrets”. But wait, there’s more! Continue north and leap up some rocks to the northeast and you’ll find a lucrative Remnant container just waiting to be plundered. From this container turn south and you’ll find an Adaptive Remnant Core Device waiting to be scanned.
The Hidden Vault on Havarl
Collect all the loot you care to, ride the Gravity Well back up, exit the cave and return to the trench. You now need to make your way back to the land east of the trench and from there Forward Station there head southeast to find the bunker leading to Havarl’s vault. Along the way you’ll doubtlessly have to fight through Havarl’s wildlife and some Remnant near the bunker, and when you arrive, if you still have the quest “Task: Unearthed” active, search south, southwest of the vault entrance to find an Unearthed Remnant Device .
When you’re ready, open the door to the vault and ride down a Gravity Well into the bowels of the Remnant structure. Considering all the work you did to merely find this place, you may be relieved to find out that this vault is considerably less complicated than the previous two you (presumably) activated on Eos and Voeld. You all are following this guide chronologically, right? Wonderful! When you land turn north and leap up onto a higher ledge to find two Adaptive Remnant Core Devices and a dormant turret. Save yourself some trouble and destroy it now - you might not get any positive feedback, but you can destroy it - then scan the aforementioned pylons for some delicious Research Data points.
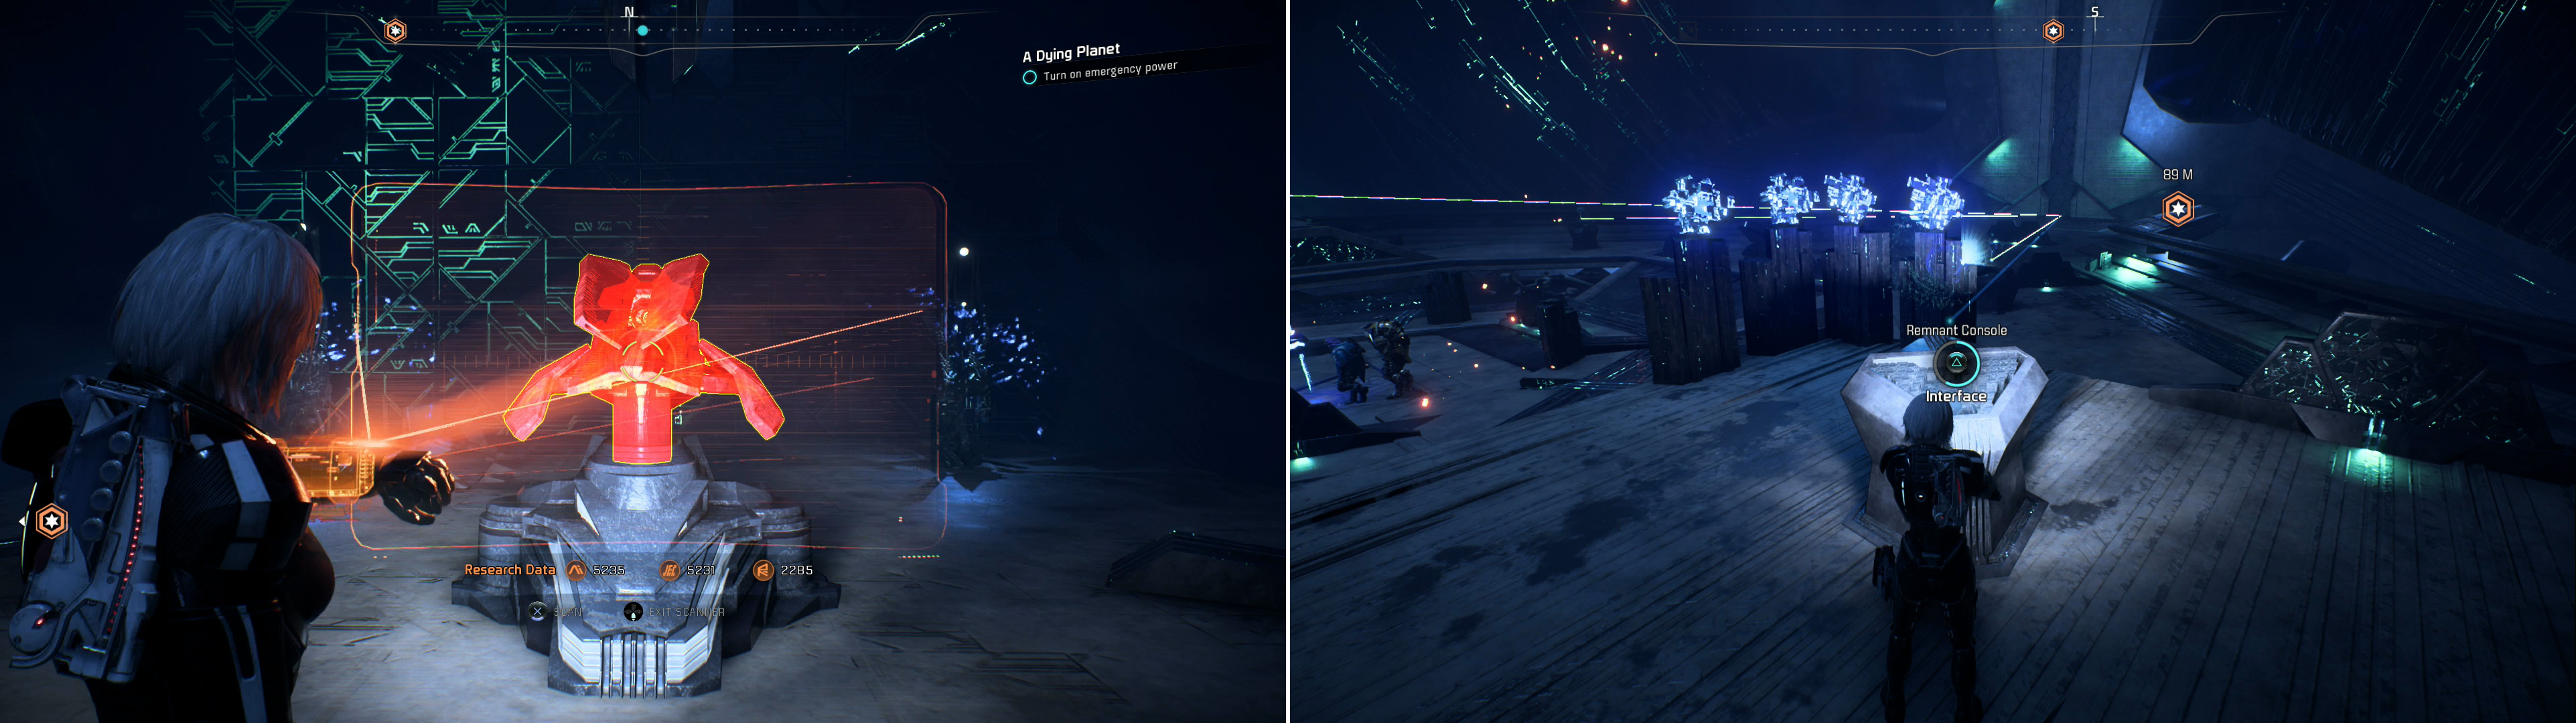
Consider destroying a dormant Remnant Turret before it can cause you trouble (left). Activate several Remnant Consoles in order of the numer of lights near them (right).
Return to the Gravity Well and head south to find a Remnant Console, which, when activated will activate four more consoles nearby. Destroy several Observers that pop up and challenge your meddling, after which turn your attention to the new Remnant Consoles. There are two on each side of the first console, one immediately adjacent, and another on a higher ledge. Your goal here is to activate the consoles in the correct order, and you can attempt this blindly… or you can note the Remnant Lights near each new console. There are a varying numbers of lights near each console, and the number of lights indicate the order in which they are to be activated. Activate the console to the east, first, then activate the elevated eastern console. The third console you must activate is west of the central console, and the fourth and final console is the elevated one to the west.
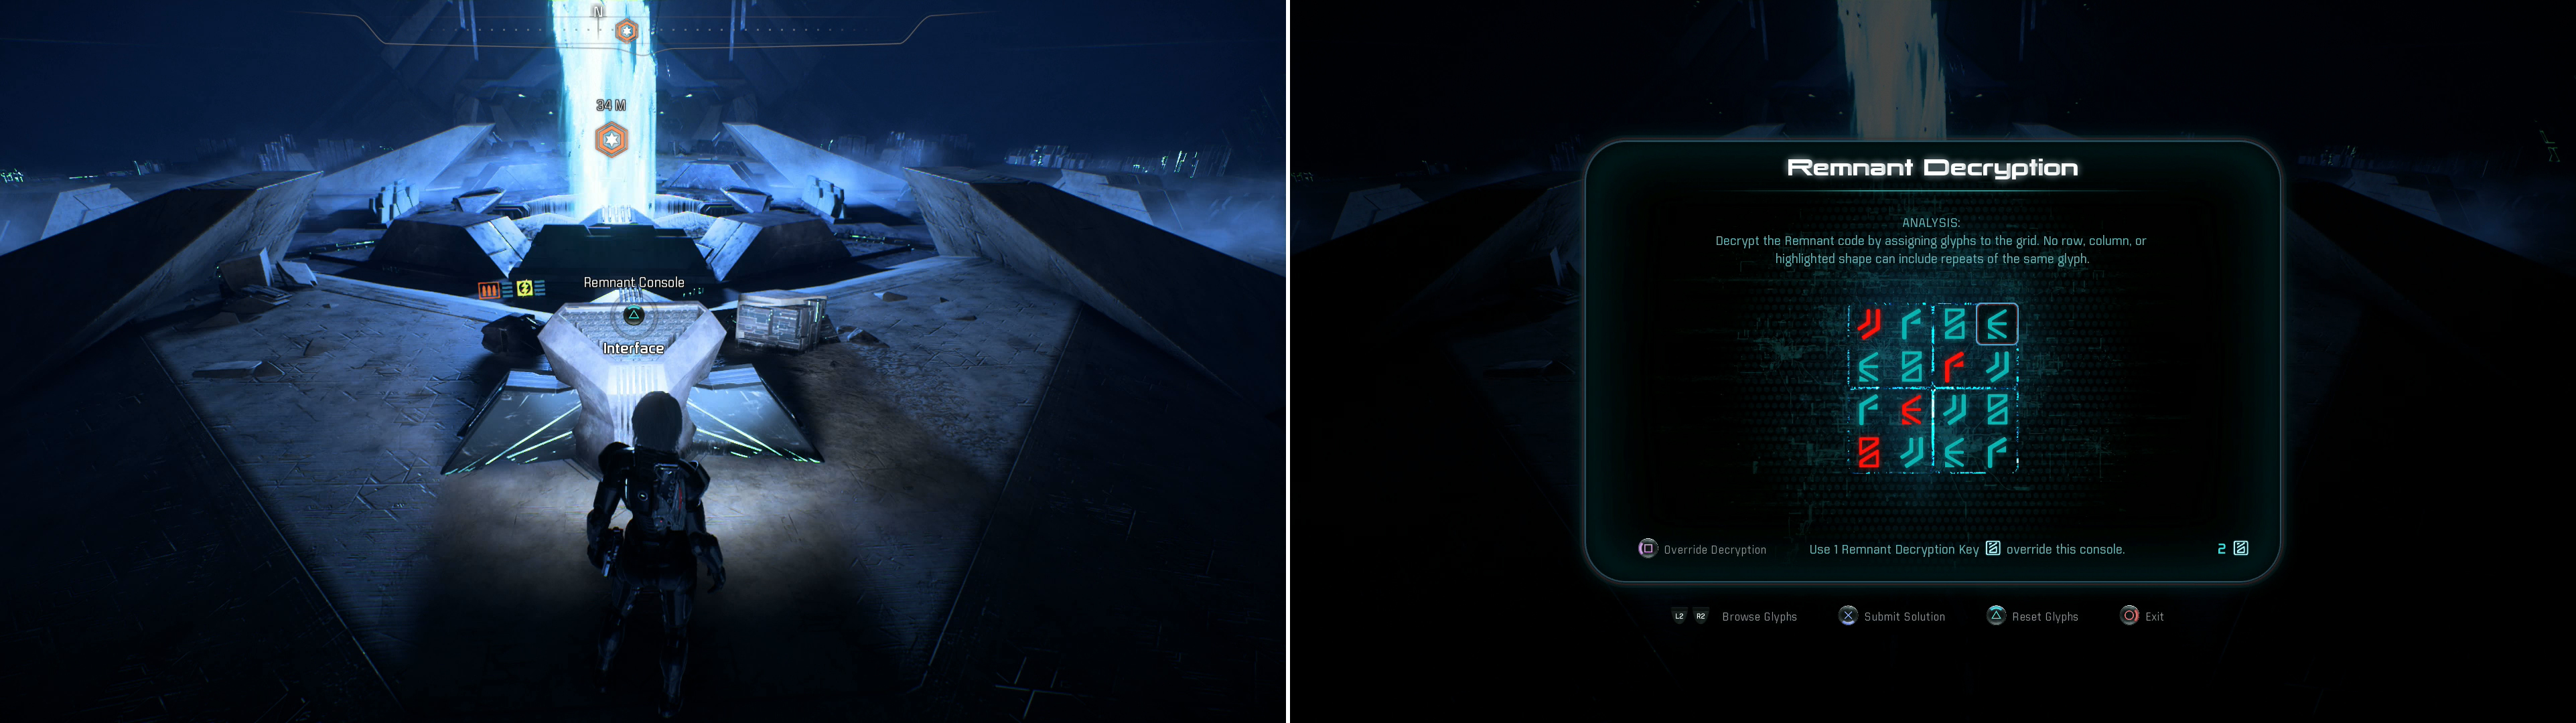
Activate a Remnant Console near the Purification Console (left) and solve the Remnant puzzle (left) to gain some skill points.
Once all four are activated, a large door to the south will lower, granting you access to the heart of the vault. Don’t head straight to the main Purification Console, however, and instead head to another Remnant Console south, which is encrypted with a Remnant puzzle. Use the provided solution to solve it, a feat for which you’ll be rewarded with two bonus skill points. When you’re done with that console - and ready to run and fight - make your way to the Purification Console and interact with it.
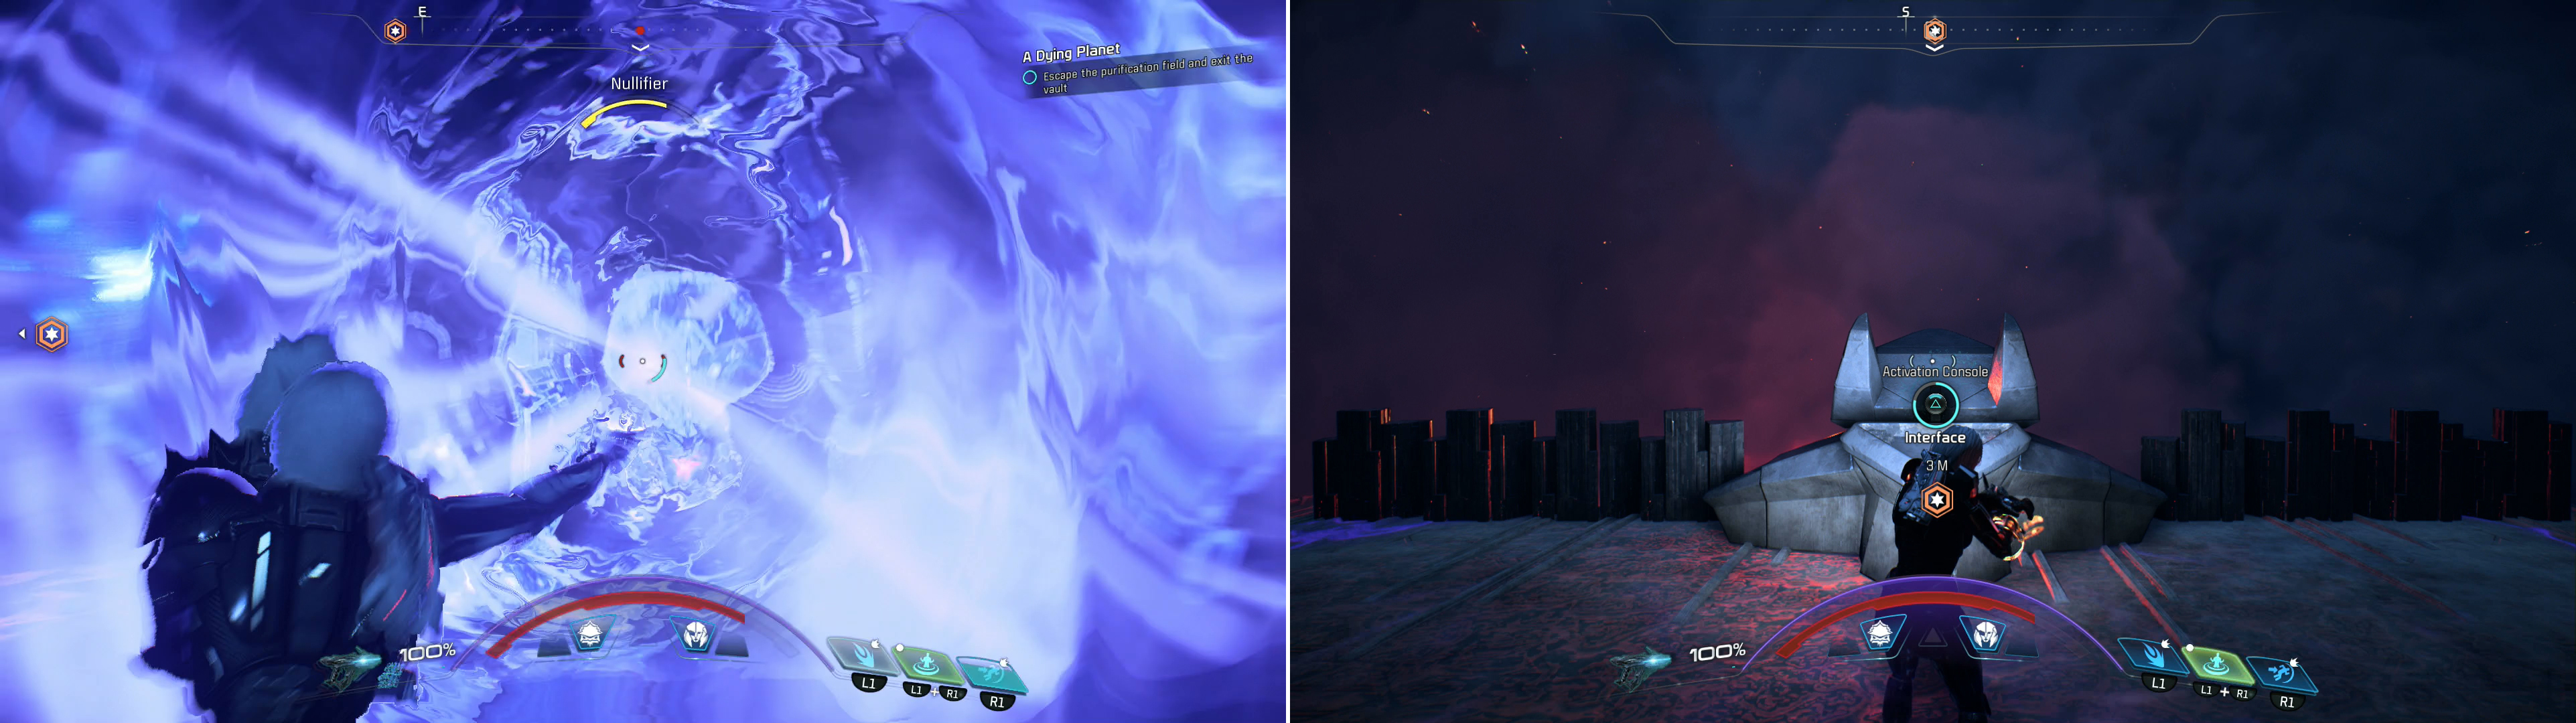
Fight your way through the Remnant that appear when the purification field activates (left) then close the doors to escape the field (right).
After activating the Purification Console, the expected purification field will arise, forcing you to flee, with some Remnant popping up to complicate the process. Don’t worry about running just yet, however, as the door behind you is closed and will only open after some time has passed, so instead focus your efforts on putting down the Remnant, then, when the door opens (you’ll be prompted to look when it does) rush through the door and into the Gravity Well chamber. In here you’ll have to fight three Observers as the purification cloud closes in on you. They’ll be joined by the now-active turret if you didn’t destroy it earlier, but if you did, dispatching the Observers shouldn’t be too difficult. Scrap the Remnant near the console quickly so you can interact with it and close the large door to the south. Once done, you’ll be safe, Havarl’s vault will be active, and you’ll be generously rewarded with 900 AVP, +55% Havarl viability and 1,330 XP.
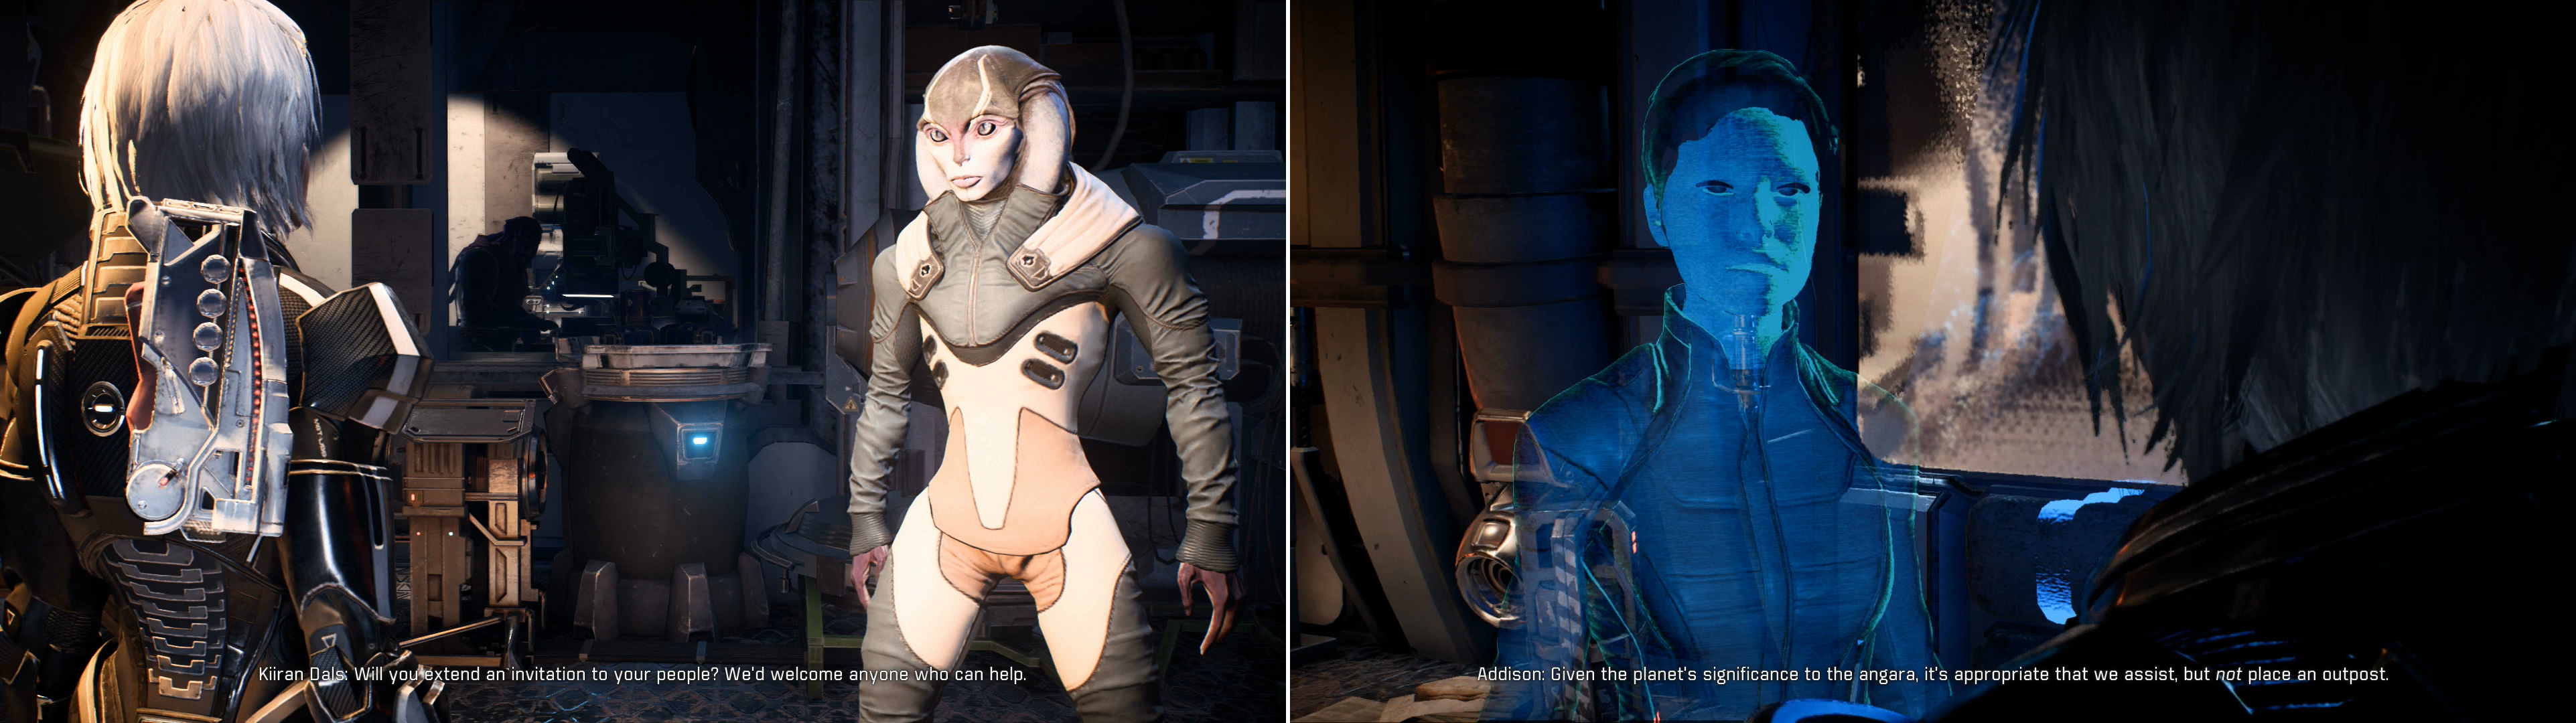
Back at the Pelaav Research Station you’ll be formally invited to send a research team down to Havarl (left). Get in contact with Addison to confirm the deal and earn more rewards (right).
Your heroics are over, you now need merely return to the Pelaav Research Station and chat with Kiiran Dals, who will hail you as the savior of Havarl. As an added bonus you’ll get to see old bonds mended between the Angara, and, best of all, you’ll be invited to deploy a team to Havarl to take up residence at the Pelaav Research Station. It’s not as good as an outpost, but it’s a sign of growing goodwill and cooperation between the Milky Way races and the Angara, and progress is always a good thing. Better yet, you’ll be rewarded with another 73 AVP, +5% Havarl viability and 1,330 XP.
Finishing this quest will earn you a majority of Havarl’s viability, but there’s still some cleanup to do. To get some new quests to pop up, you’ll need to return to Tempest and check your Email Terminal to find the message “Havarl: Science Team Deployment” which will start the quest “Cross Cultural Alliances”.
No Comments