
This quest will begin any time you approach a monolith… most likely the western-most monument, which you’ll pass by during the drive to Vehn Terev’s buried Datapad during the quest “Hunting the Archon”. Simply put, when you go about the business of locating Kadara’s vault, this quest will start up in response. Despite that, however, there’s no rush to deal with these - only one quest will really be impeded by the toxicity of Kadara’s water, so this task can wait until you have dealt with most of Kadara’s side quests and resolved the political dispute between the Collective and the Outcasts. Then again, there’s no harm in doing it early, so… as you will.
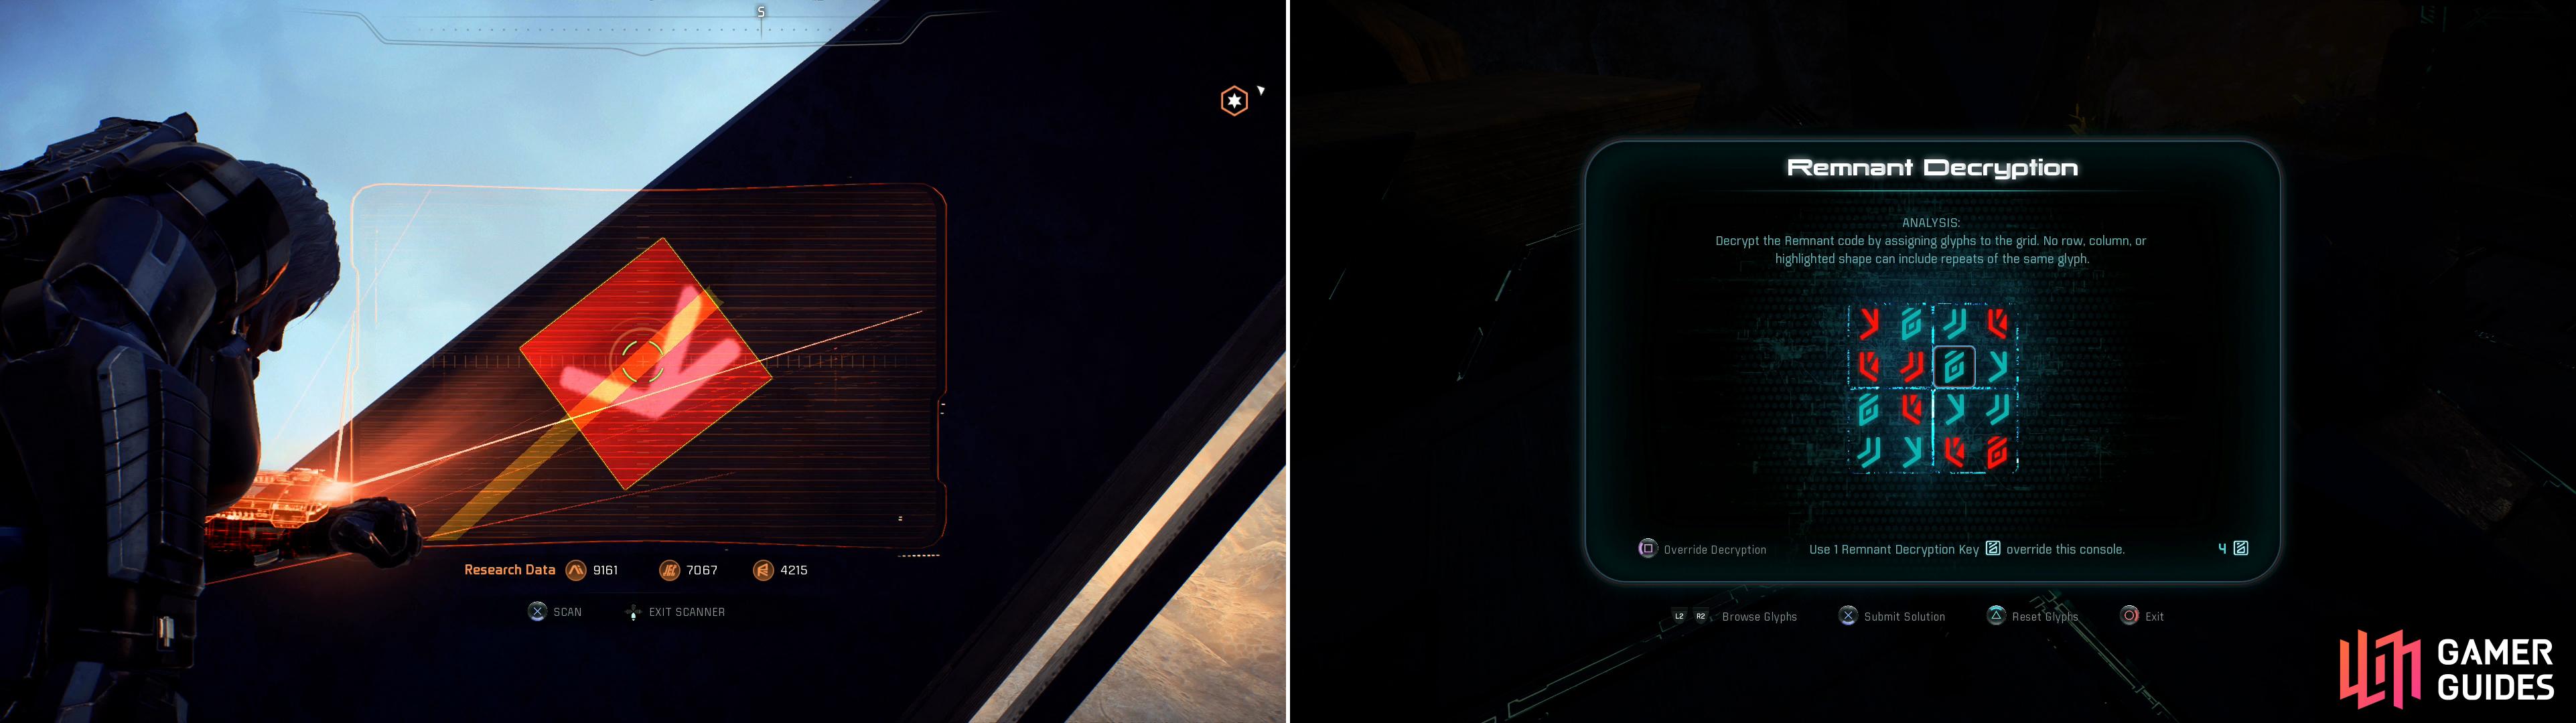
Scan the glyphs near the eastern monolith (left) then solve the Remnant puzzle (right).
The Eastern Monolith
The eastern-most monolith on Kadara (north, northeast of the Forward Station outside of the Kadara Slums) is fairly simple, just follow the road up to it to find an unguarded - but encrypted - Remnant Console. Sadly, this means you’ll need to bother with a bit of a scavenger hunt to find the three glyphs. The first one is just south of the Remnant Console, on one of the massive monolith’s arms. To the northeast you’ll find a Lithium node, and on some rock ledges nearby is an Adaptive Remnant Core Device . From this device leap onto one of the monolith’s arms to the south and walk down its length to scan the second glyph. Drop down to the platform the Remnant Console is on and from there turn east, southeast to find the third glyph on yet another monolith arm, near which is a container full of goodies. With all three glyphs, solve the Remnant puzzle and activate the first monolith.
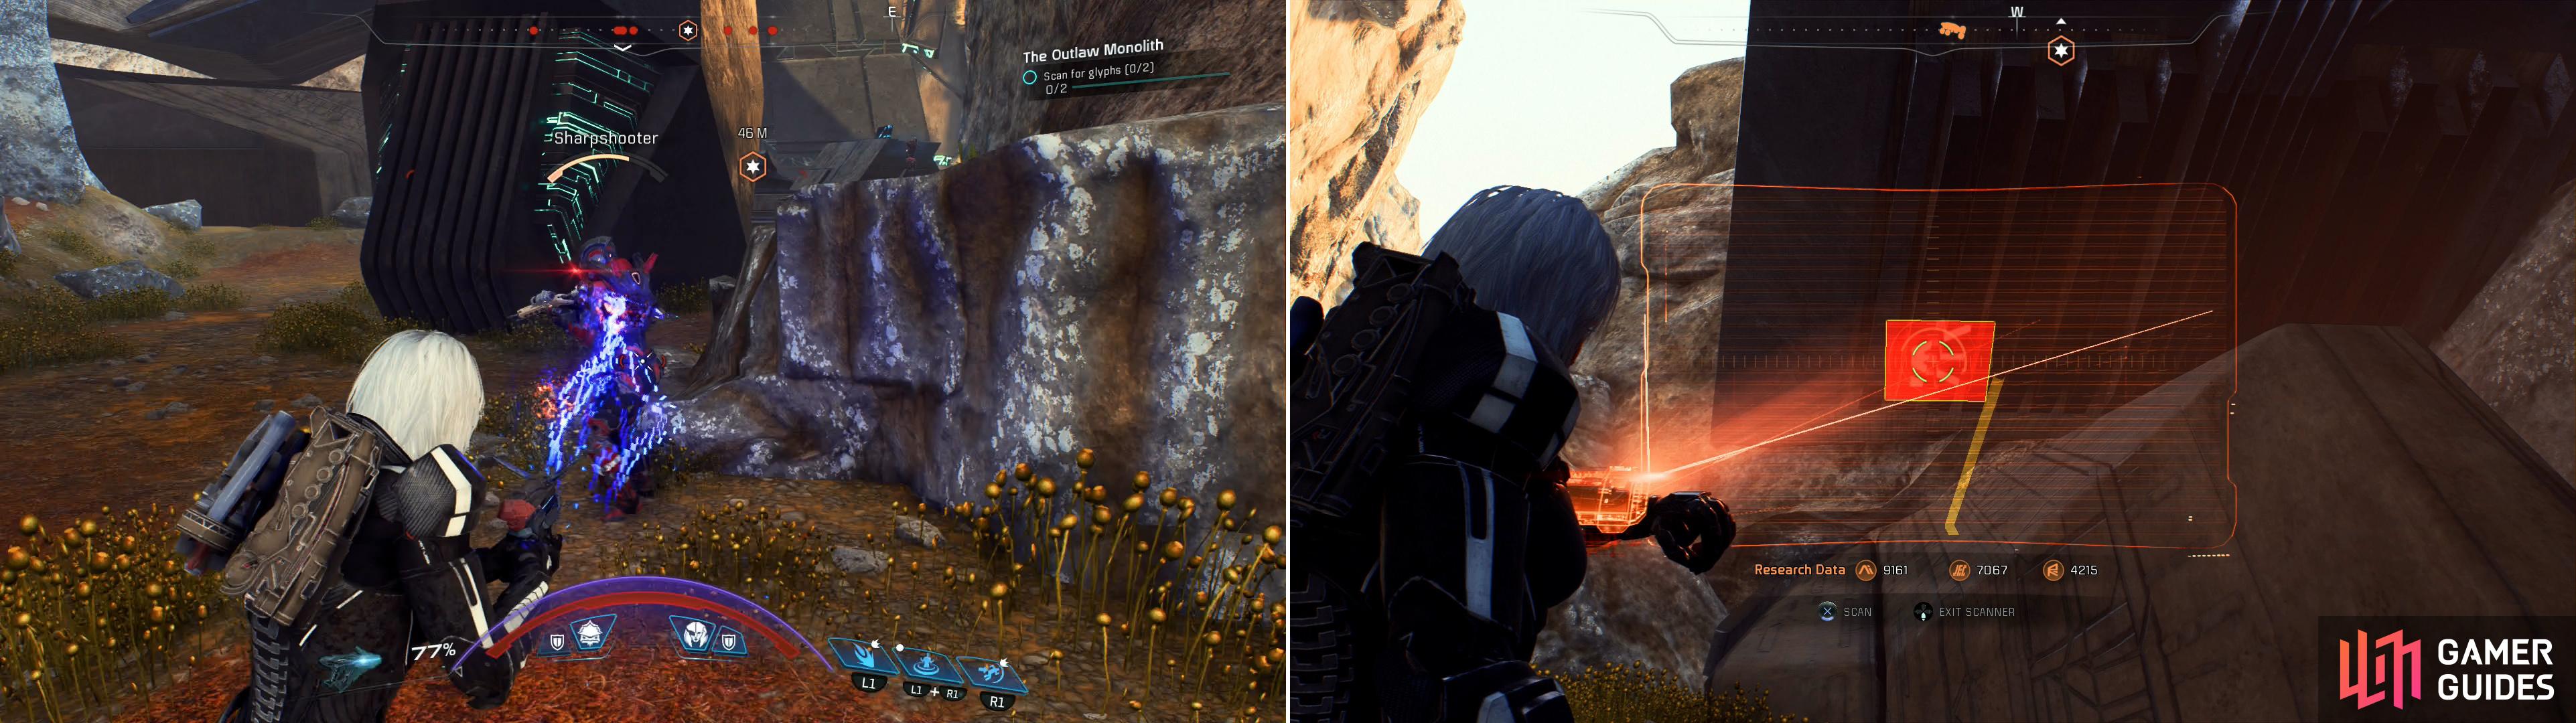
Kill the outlaws near the western monolith (left) then scan the glyphs to activate the monolith (right).
The Western Monolith
This monolith is northwest of the Sulfur Springs Forward Station, just southwest from the Kadara settlement site. Finding it is somewhat complicated that the obligatory Remnant Console which activates it is located below ground. Simply follow the road northwest from the Forward Station and at the fork turn southwest and drive past an outlaw camp until you reach the edges of a toxic lake. Dismount the Nomad and search the mountains south of the lake until you find a pass leading to the monolith platform.
When you arrive you’ll find some Angara fighting off some Outlaw Raiders and Sharpshooters. Put the outlaws down and talk to the leader of the Angara - creatively named “Local Angara” - who will relent to your tampering. First, go searching for the two glyphs you’ll need to decrypt the Remnant Console; there’s one on a stone-encased monolith arm to the north, and another glyph on an arm to the west. Neither of these require any jumping around, just follow the conduits and scan them, then return and interface with the console - no puzzle involved.
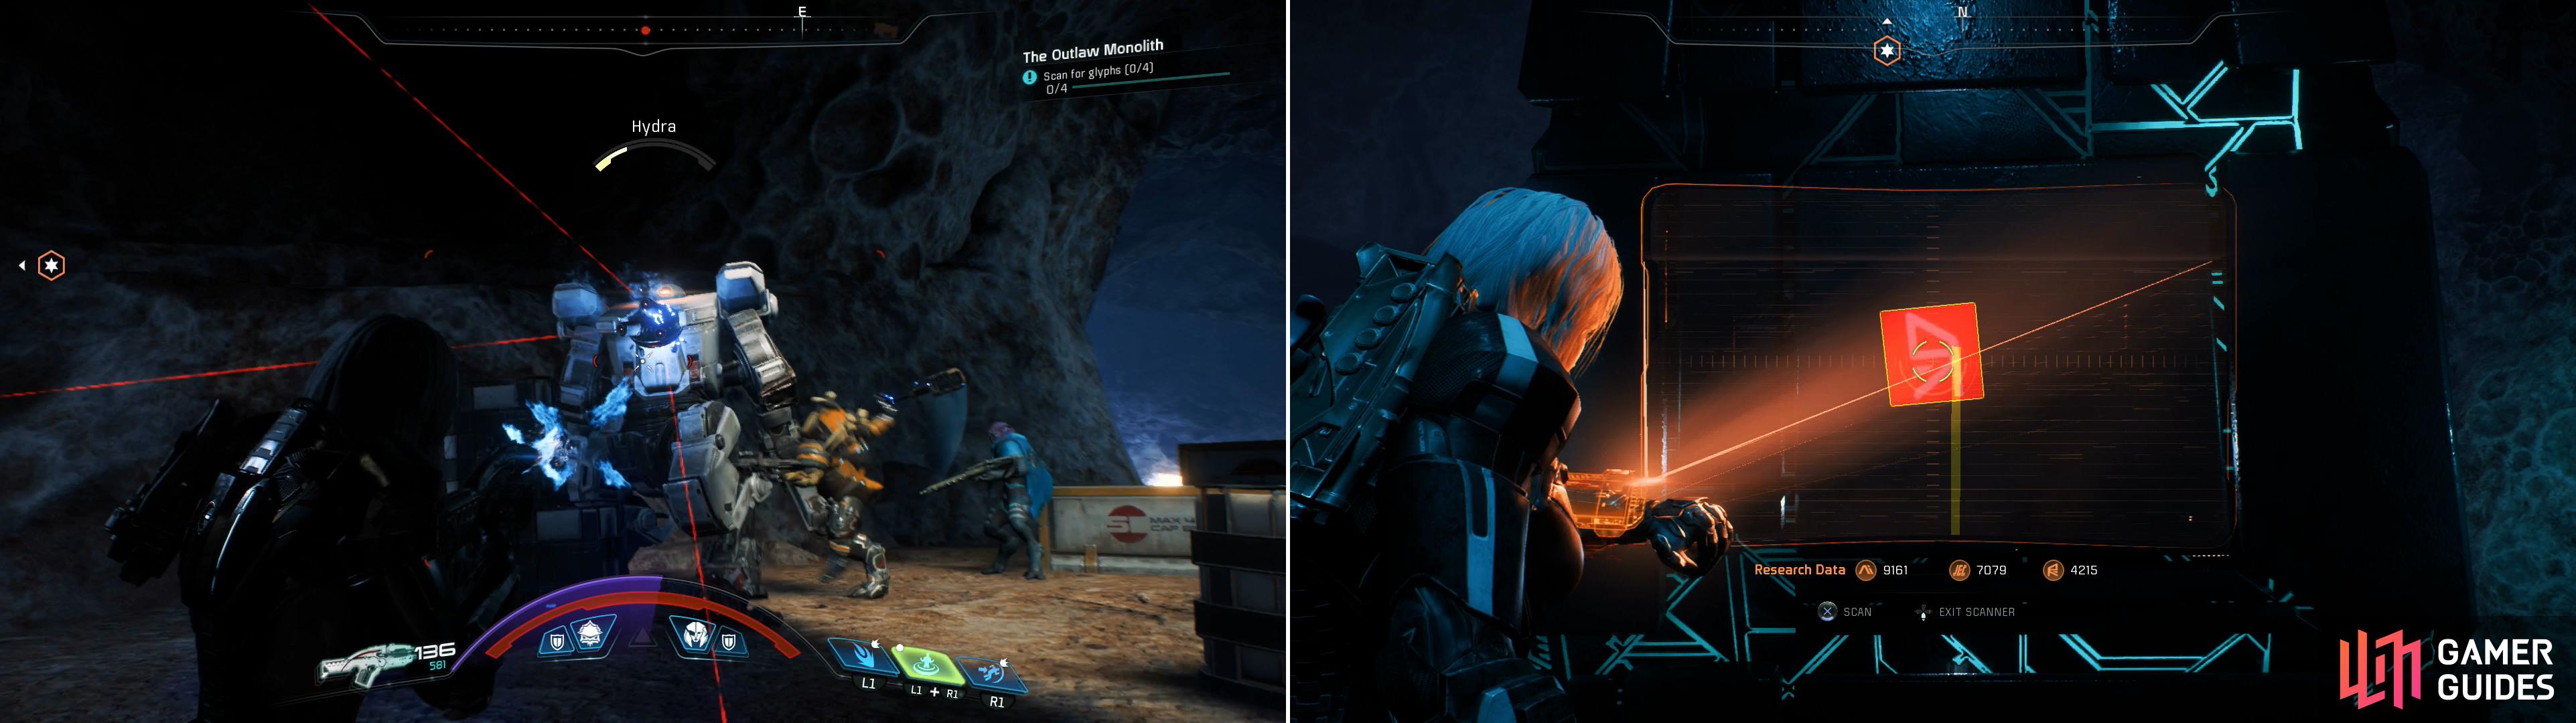
Defeat the Raiders in the cave, including their Hydra mech (left) then scan the glyphs to activate the southern monolith (right).
The Southern Monolith
Fast travel to the Draullir Caves Forward Station and from there follow the road east. The road will turn north, then east again, and just before it turns north a second time dismount the Nomad. There’s an outlaw camp to the east, but they should be too far away to really pester you. Instead, make your way west to find a cave, inside of which you’ll find a number of destroyed Remnant Observers, which have apparently caught the interest of some outlaws. Continue deeper into the cave and you’ll find some Raiders, who are supported by a Hydra mech. Gun them down, then continue north to reach some ledges, then turn northwest to reach the monolith platform.
You know the drill, turn southwest and follow a conduit to find a glyph on a monolith arm. You don’t need to even move, just aim the scanner at it and… well, scan it. Another one can be found on a monolith arm to the north. The next two require a bit more walking, head east, southeast to find the third glyph on the base of a monolith arm, while the fourth can be found further south, on a Remnant structure above a Uranium node. Once all four are scanned, simply interface with the Remnant Console to activate the monolith - no puzzle-solving required.
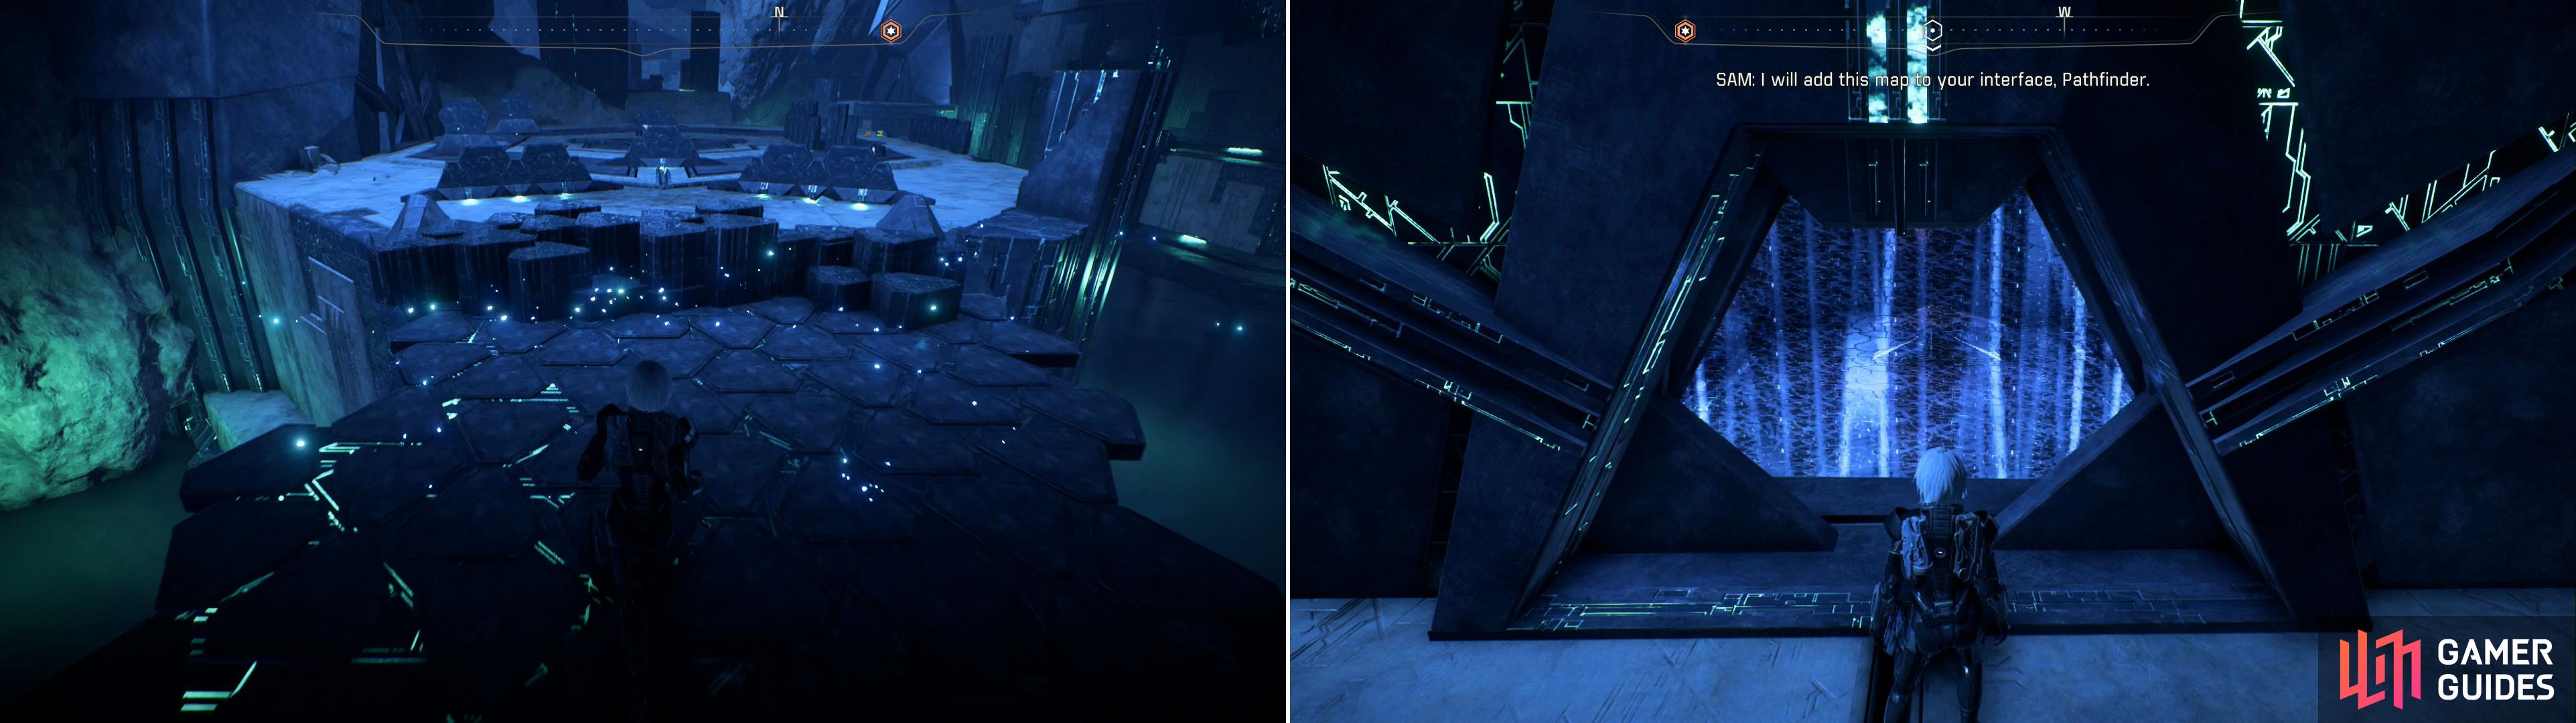
Entering Kadara Vault
Now that Kadara’s vault is revealed, it’s time to head on over there. The vault is on the edge of the Haarfel area, southwest of the Forward Station there. However you go about reaching the vault, note that the area is surrounded by toxic water and hostile Kadaran wildlife, so tread carefully. When the coast is clear, open the vault door and use a Gravity Well to descend into the vault.
When you land, take stock of the area. These vaults should be seeming awfully familiar by now, and the vault on Kadara is much like the Voeld vault, except now the hazards are inverted, and it’s much less complicated. So… okay, not really that much like it at all. Still, there are some parallels that can be drawn. There will be a number of Remnant Consoles in this vault surrounded by energy barriers. Unlike the ones in the Voeld vault, however, these will not recharge your life support systems - they’ll actively damage your shields. It’s at such a slow rate that one has to wonder why they even bothered, but… yeah, inverted Voeld going on here.
In addition, expect to manipulate consoles that activate far off objects, raising and lowering platforms, opening doors, all that good stuff. It’s not nearly as complicated as the mess of sequenced console in the Voeld vault, but there’s still some fidgeting around you’ll have to do if you want the best loot.
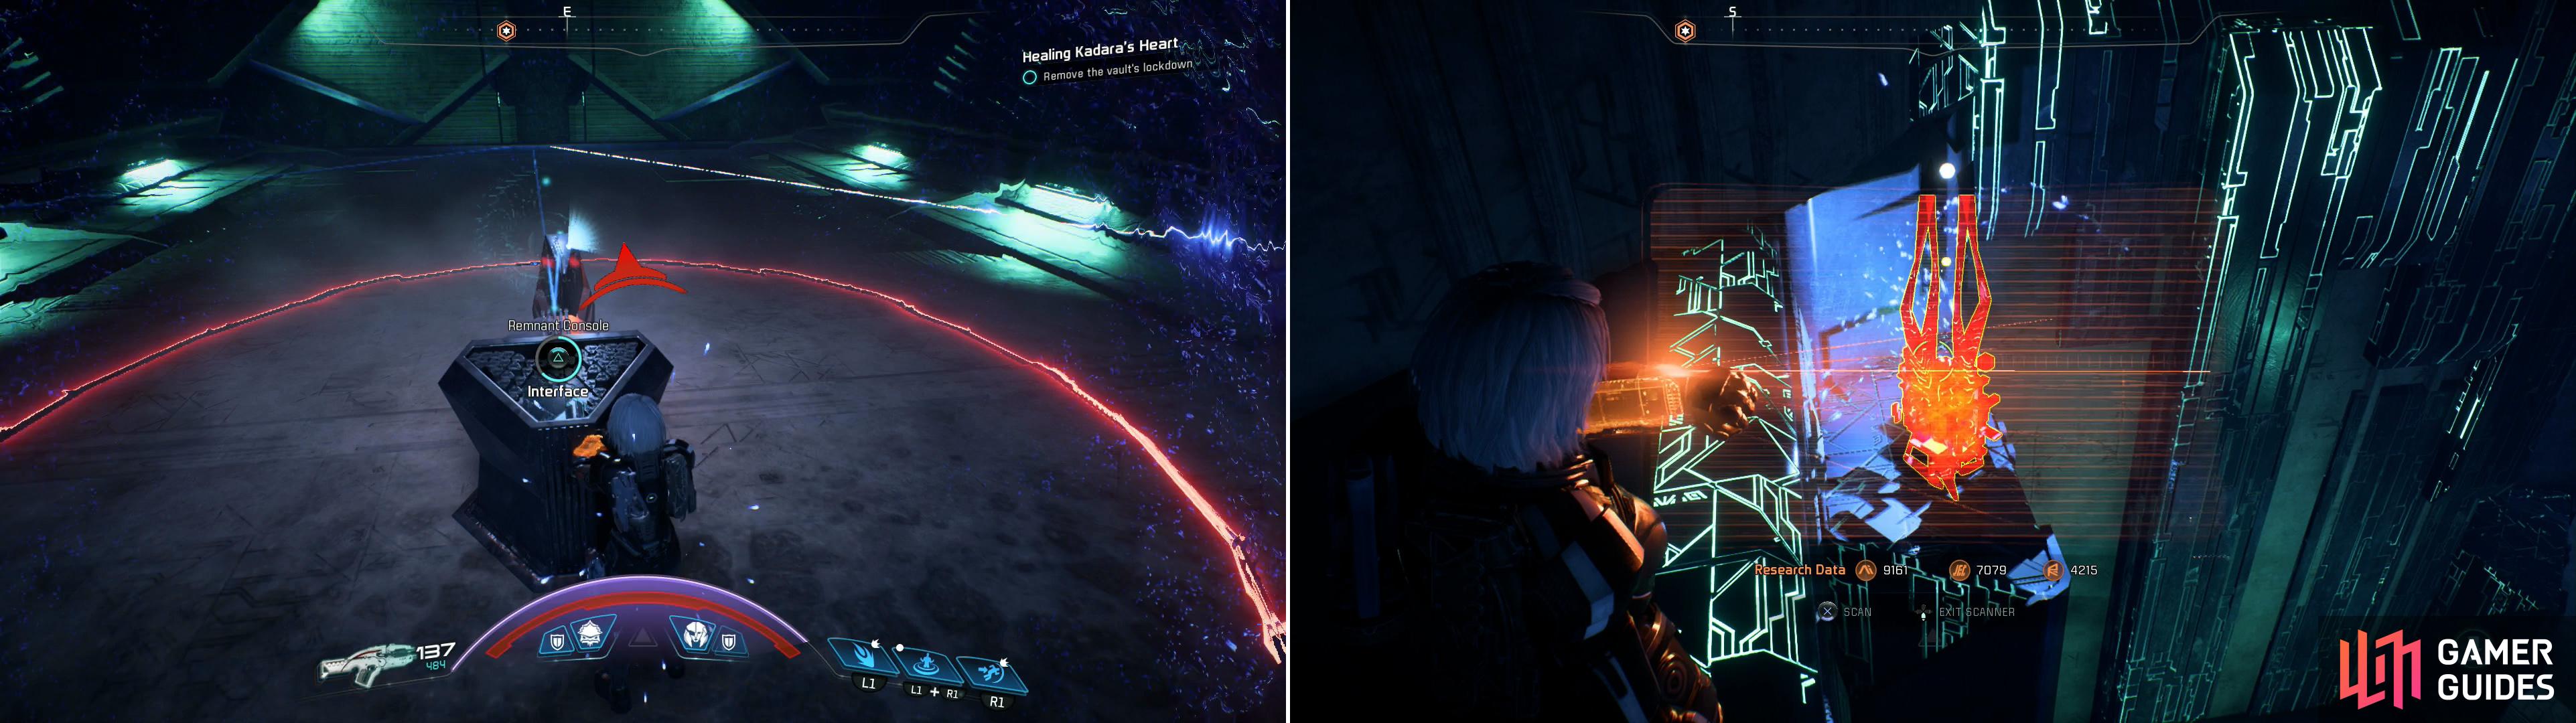
The energy barriers around some console will damage you, but you’ll need to bear with it to activate them (left). Search the ledges to the east to find an Adaptive Remnant Core Device (right).
Kadara Vault - Consoles and Consequences
With that out of the way, then, it’s time to get to work. From where you landed turn west and make your way up to an elevated ledge overlooking the room, where you’ll find a Power Console. Activate it to raise three Remnant Consoles, complete with damaging energy barriers. Simply walk up to them one by one and activate them, taking whatever marginal damage they dish out. Once all three have been powered up, the door to the east will open, granting you access to the vault proper.
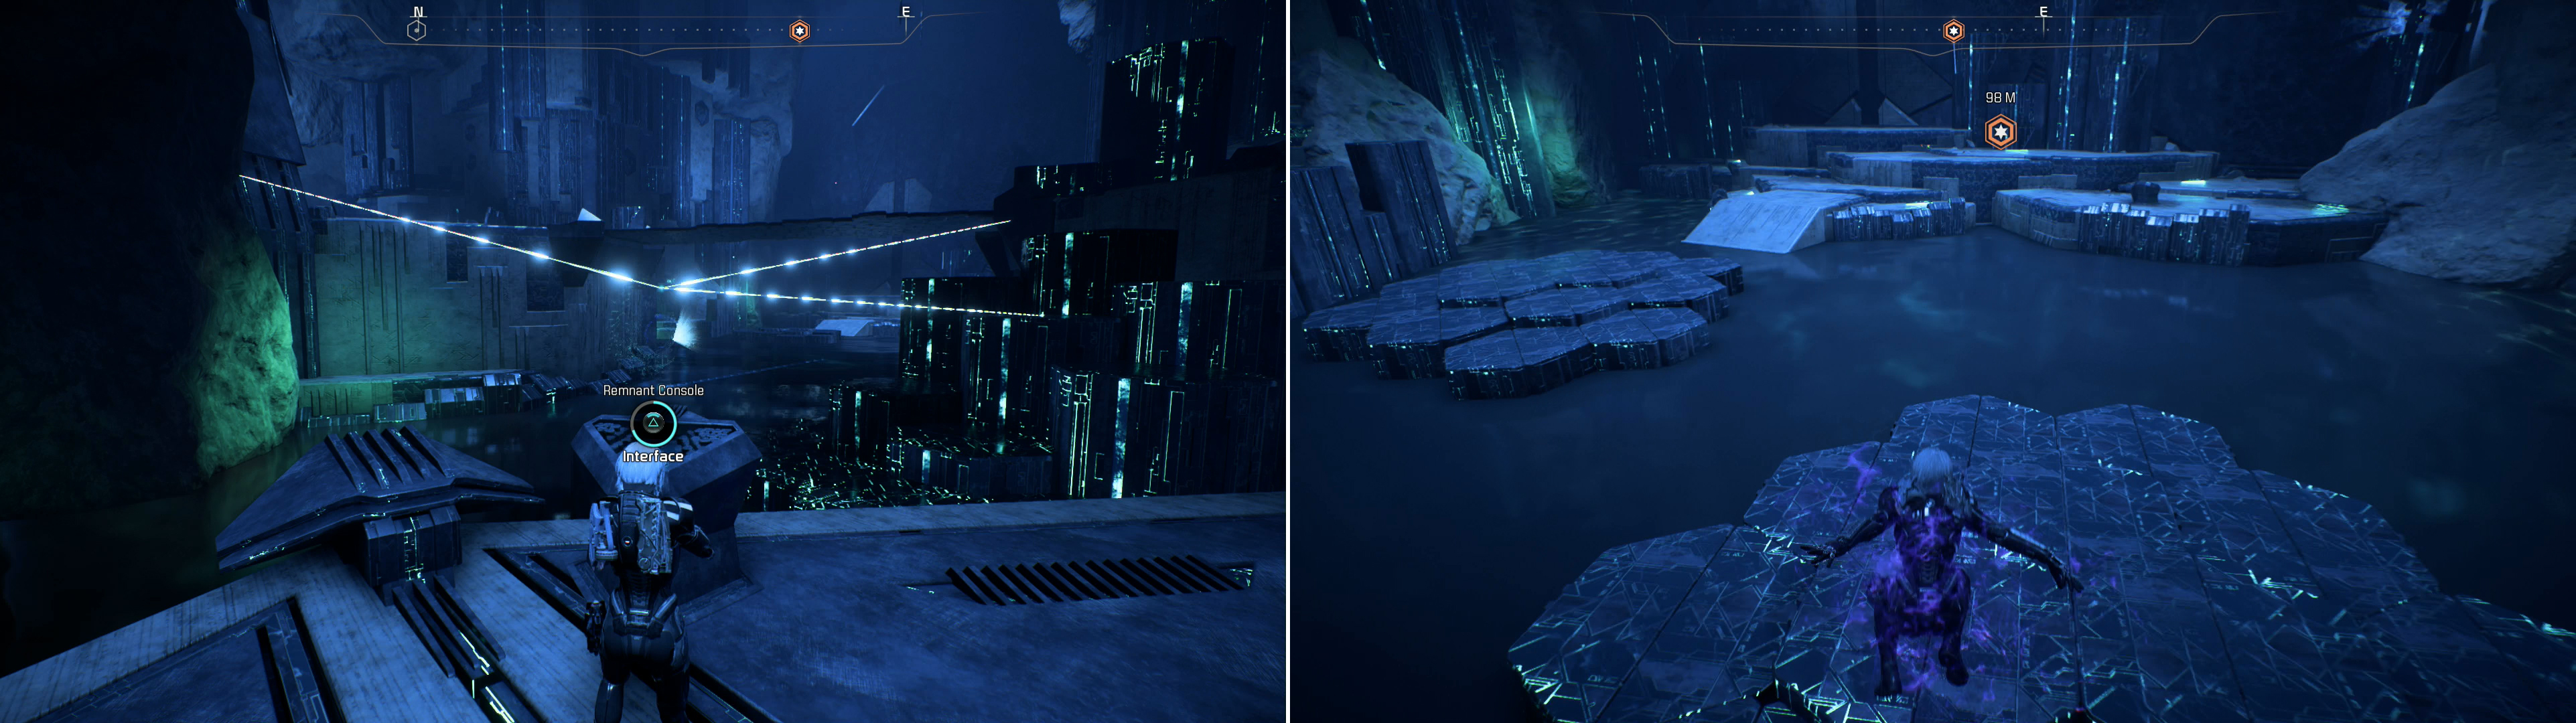
Make your way through the door you opened, down a slope and over a ferro-fluid-filled chasm with three pillars sticking out of it. Beyond this chasm are some Remnant Breachers and an Observer. Strike them down, then continue east and leap onto a large ferro-fluid surrounded platform. On this platform you’ll find a Remnant Console. Go up to it and look at the pretty lights, which indicate what it affects, namely a door to the north (you can’t actually see it from this angle) and some platforms and a bridge to the east.
Don’t activate the Remnant Console at the entrance to the vault proper, which will allow you to cross a Remnant bridge (left). Note the chamber behind the energy barrier, which is worth planning to return to as you flee the vault (right).
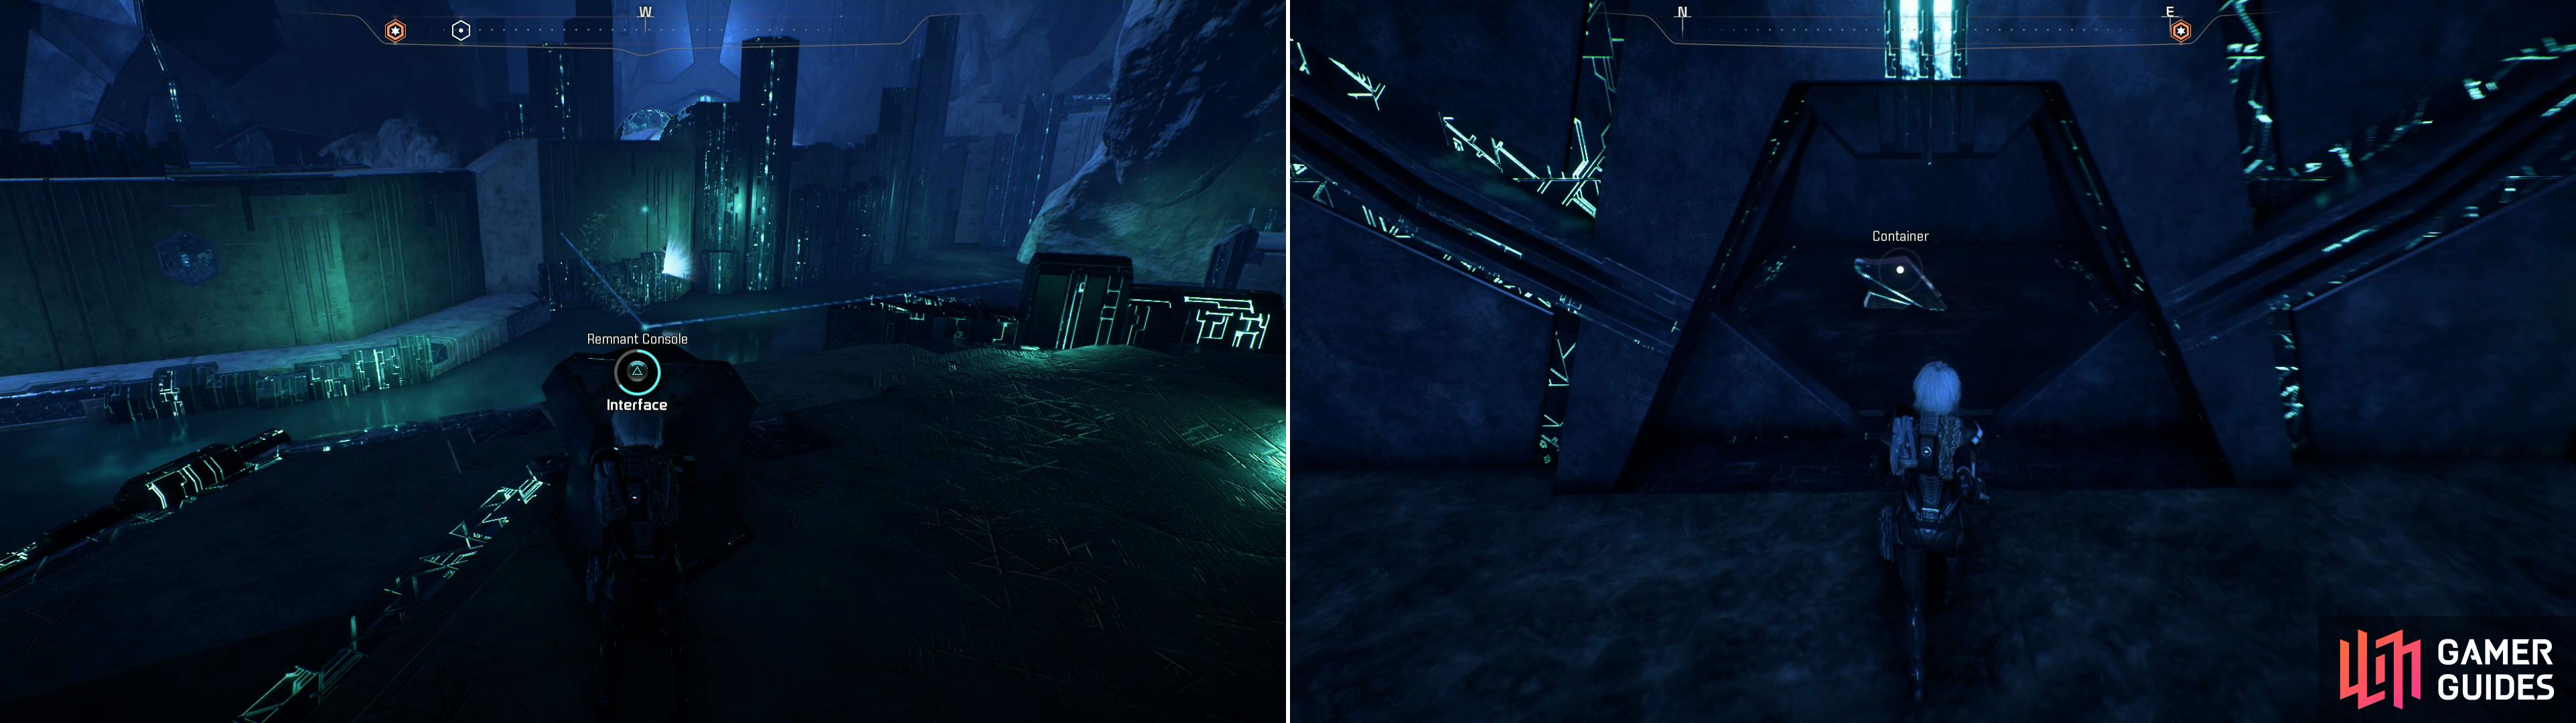
You’ll need to mess with this Remnant Console eventually… but you might as well leave it alone for now. Instead, leap onto the aforementioned platforms to the east, then jump onto a more sturdy platform to the east. Kill two Assemblers and turn south, southwest to find an Adaptive Remnant Core Device on a ledge. Scan it, then turn around and leap up some ledges to find a container hidden away. Once your done scanning and looting around here, make your way north, northwest to a bridge, which will extend before you and allow you to make your way to another platform. On this second sturdy platform turn west, southwest to find a doorway blocked by an energy barrier. You know how this works - you can’t get to it until you activate the purification field, and as an added complication, if you activate the Remnant Console back on the earlier platform it’ll close the door. You’re going to have to choose between an easier escape, and loot.
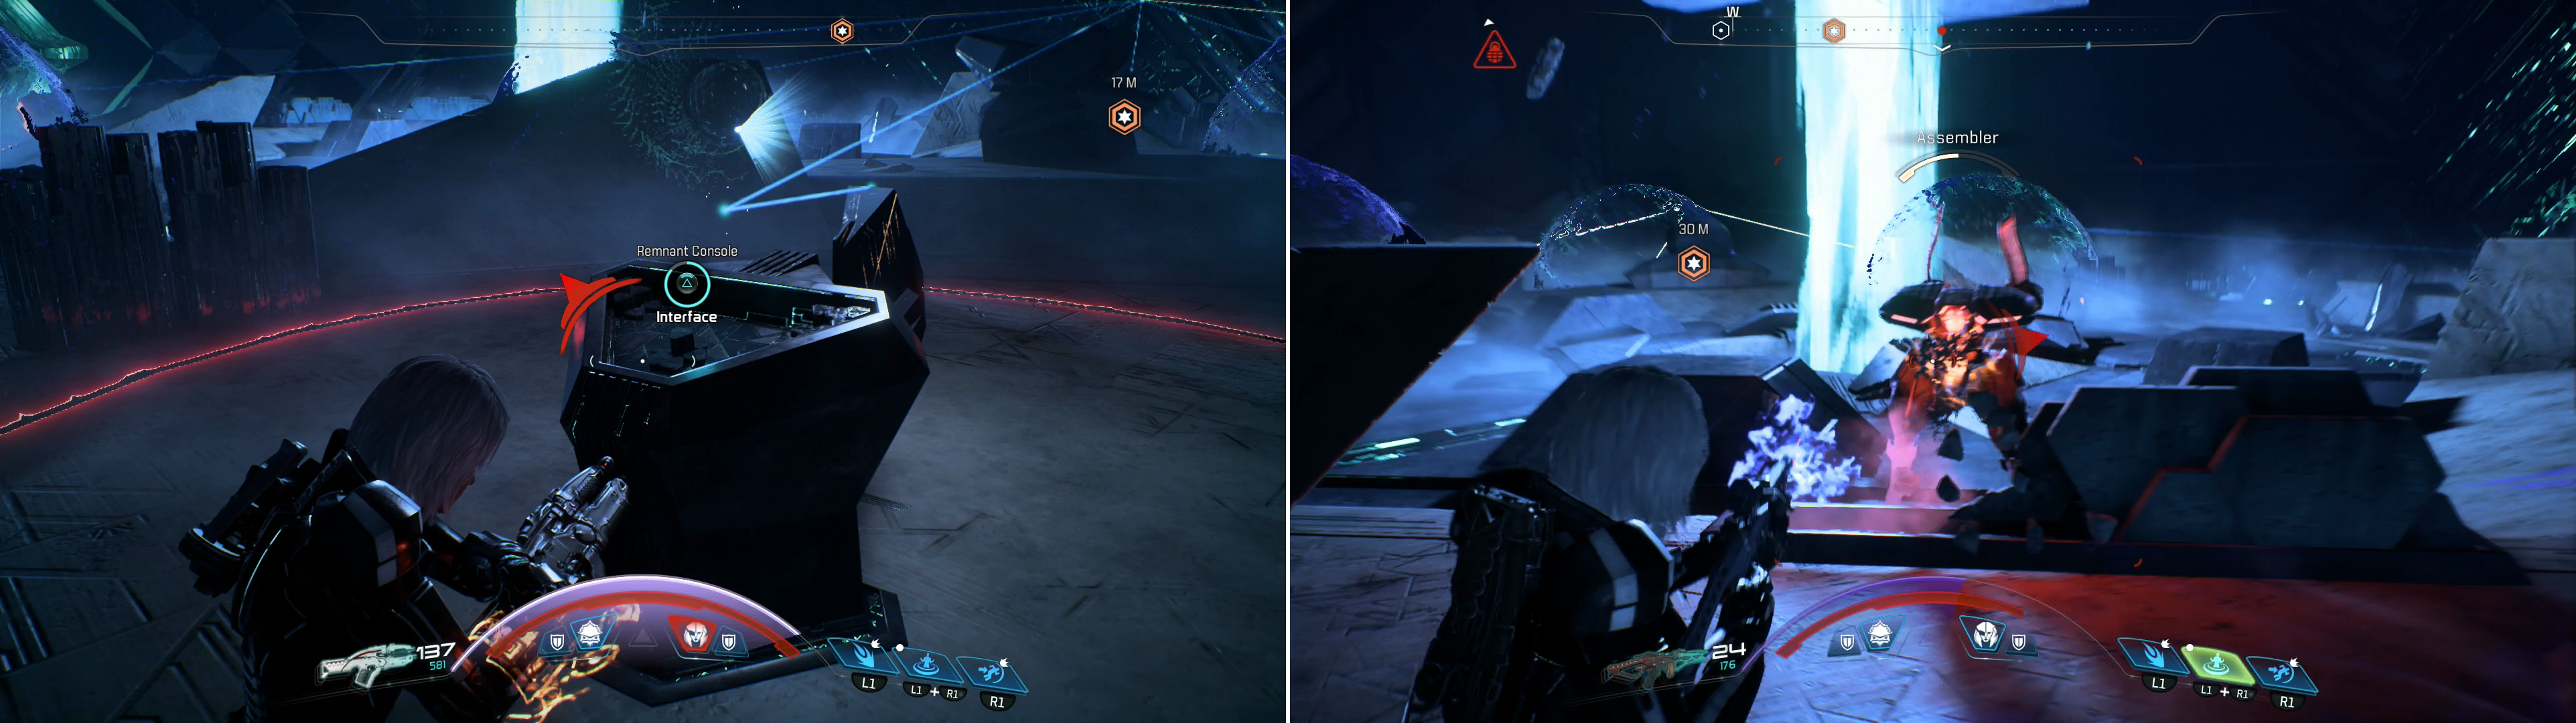
That choice comes later, however. For now, continue northwest up a ramp and turn west to find an open area crawling with Remnant - mostly Assemblers, but they’re reinforced by a Nullifier. There’s also a Remnant Console nearby, but it’s usefulness is debatable. In its current setting, it has some cover deployed, but further west it also powers a Turret. If you disable it you’ll disengage the cover, but you’ll also deactivate the Turret. As a special bonus, it’ll light up some harmless energy bubbles if you toggle its base setting. Do what you will, but dismantle the Remnant ahead and loot a container tucked away in a recess in the center of the area (between the energy spheres, if you activated them).
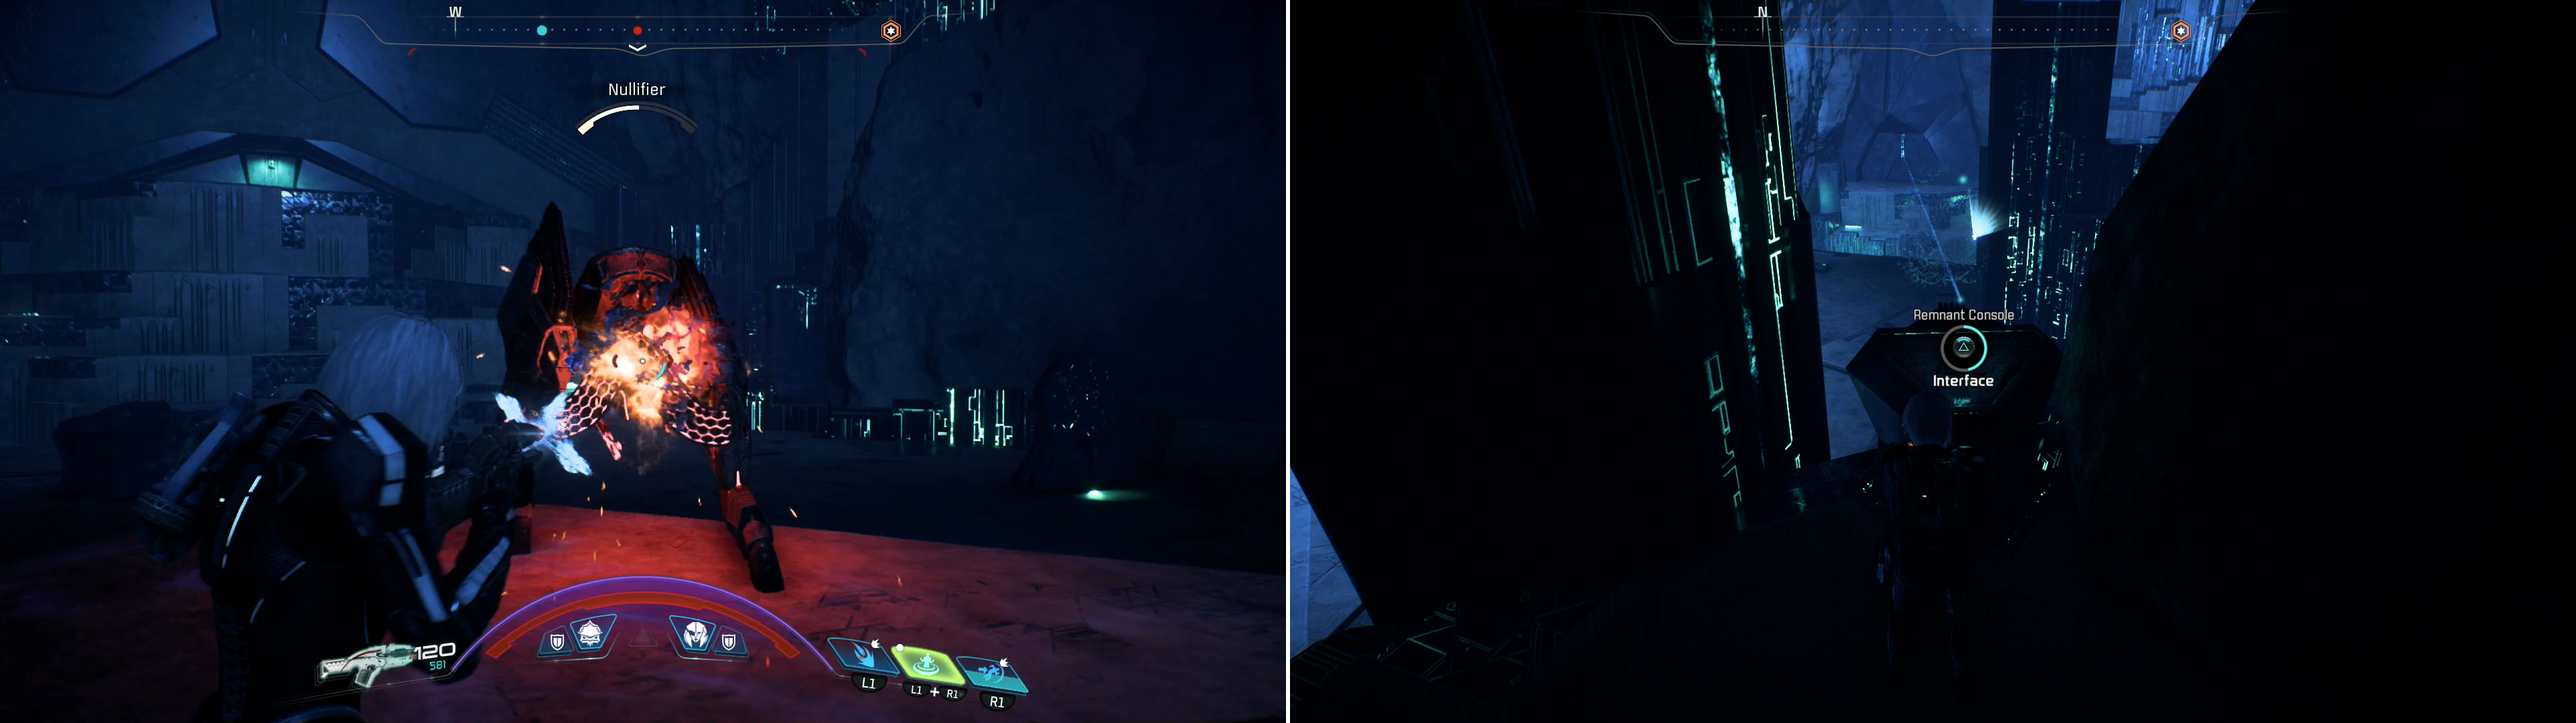
Defeat the Remnant guarding the northwestern section of the vault (left), then scale some ledges to find a Remnant Console, which will open a door across the ferrofluid moat (right).
Kadara Vault - Remnant Data Core
Now that the Remnant are gone, there’s much to see and do around here. First, from the center of the area (where the container can be found) turn north and west to note two doors, both of which are worth exploring. First, however, turn southeast and leap up onto an elevated ledge to find a Remnant Console. Follow the line from the front of the console to note that it goes across the level to the north, northeast, where it’ll open a door. There’s treasure behind that door, and activating this sneaky console is the only way to get to it, so you might as well ensure the way is open now before you eventually make your way over there.
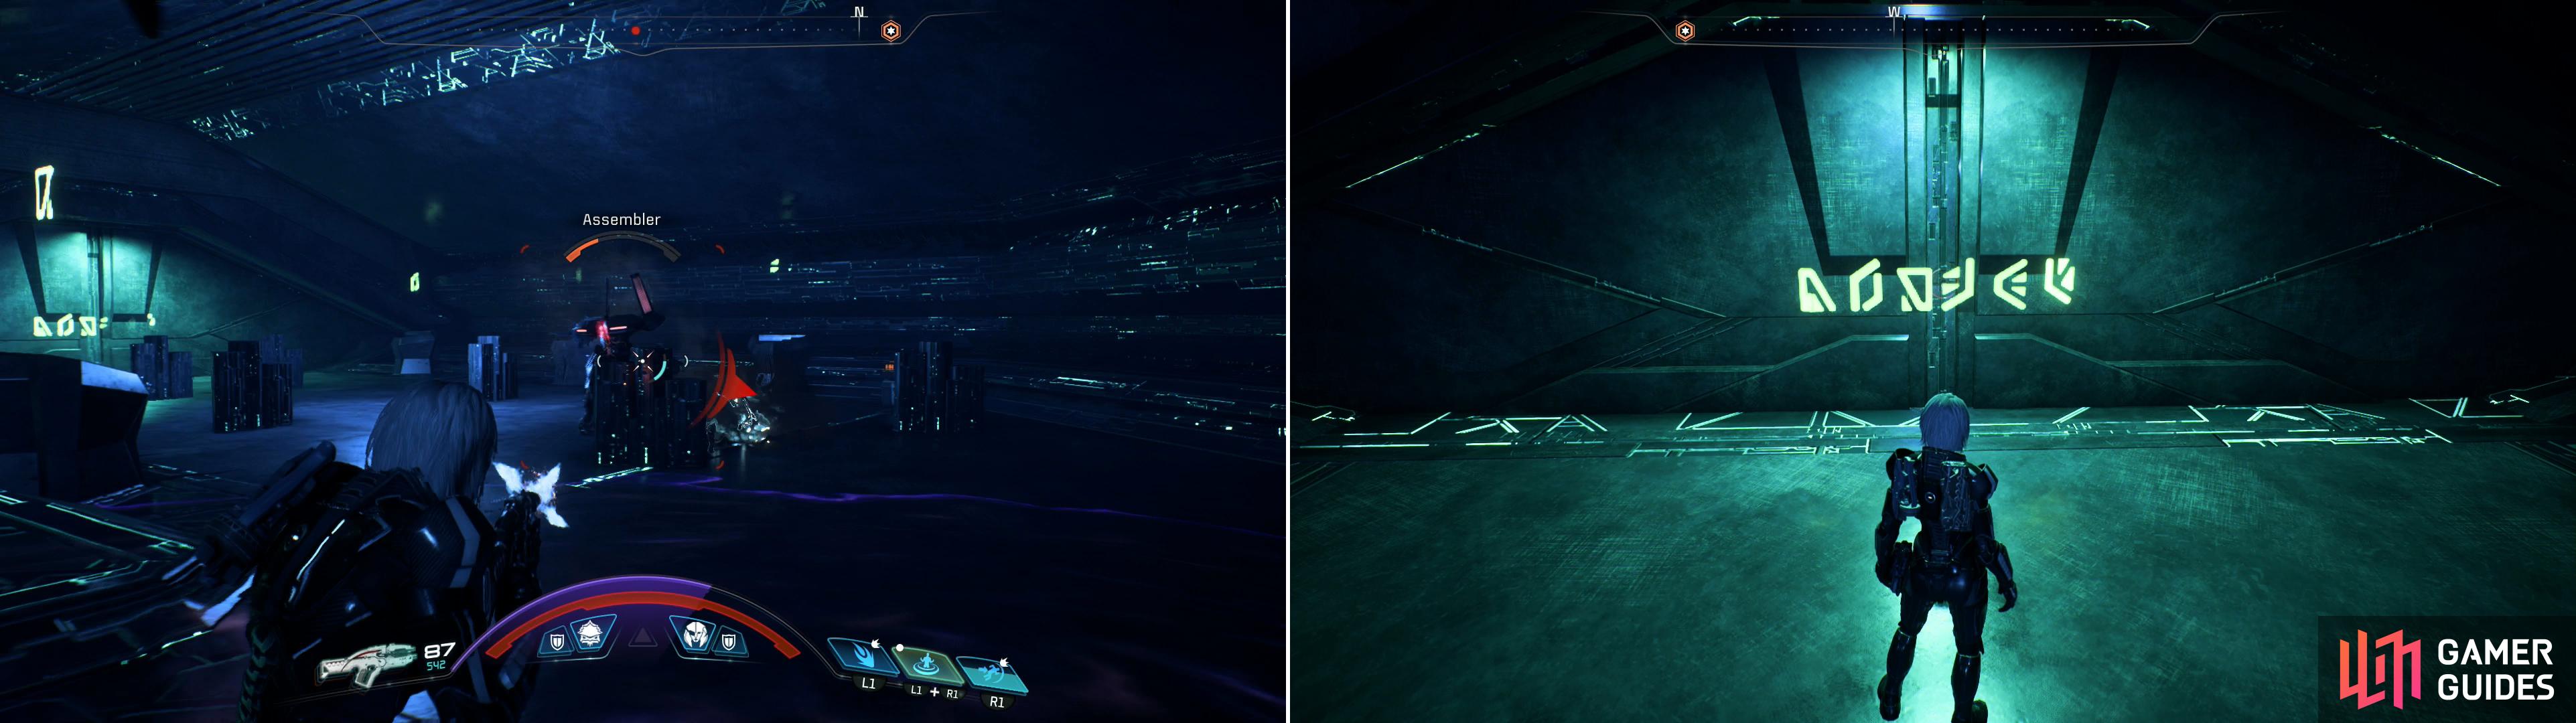
Kill the Remnant beyond the northern door (left) then note the symbols on a locked door (right).
Once that door is open, return to the container in the center of the area and turn north. Head up a ramp and go through a door, beyond which you’ll find two Assemblers. Put them down and turn west to find a door, which has a series of six glyphs glowing on it. Coincidentally, there are six consoles nearby (three to the north and three to the south) which have the same symbols on them! What luck! Simply activate the consoles in the same order that the symbols are displayed, from left to right, starting with the D-shaped symbol and ending with the backwards y-shaped symbol. The first console is south-center, the second is north-left, the third is south-left, fourth is north-right, fifth is north-center, and the sixth and final glyph is south-right..
Activate some nearby consoles with symbols corresponding to the symbols on the door in order of left to right (left), then open the door to find a lucrative treasure chamber beyond (right).
Go through the door after activating all six consoles in the correct order and you’ll find your prize, three Adaptive Remnant Core Devices and a Remnant Data Core. Scan the Adaptive Remnant Core Devices for a massive influx of Research Data points, then grab the Remnant Data Core to move one step closer to appeasing Peebee. What a generous little room.

Kill the Destroyer (left) then solve a Remnant puzzle to gain a permanent bonus to your skill points (right).
Kadara Vault - Remnant Puzzle
Collect your booty, leave these norther rooms and return to the center of the large open area outside. From here turn west, hop over a gap, leap up several ledges, activate a Remnant Console then go through another door. Ahead of you you’ll spot a dormant Destroyer, which won’t materialize until you approach. This massive murder machine isn’t alone, either - there are two Nullifiers and several lesser Remnant further west, and they won’t wait long to join the fray. There’s a bit of cover here, but most of it is fragile, and hence, sub-optimal. Even worse, the Nullifiers can shoot through the cover, anyways.
There are a few ways you can attempt to go about this battle, and it’ll largely depend on your build. If you’re sturdy, you could just rush past the Destroyer and attempt to get behind a large square pillar. Sure, the Destroyer will chase you, and this won’t do much to deter the Nullifiers and lesser Remnant, but the Destroyer is slow enough that it’ll give you time to deal with its support, while you can constantly just keep circling around the pillar to keep out of its sights. For a build that can constantly replenish its shields (like a Vanguard with max Charge) this isn’t too much trouble on normal difficulty. The only thing to really watch out for along the western edge of the chamber is a Turret, which you’ll want to dispatch as quickly as possible. To this end there’s a good bit of cover you can use while you destroy it, or, you can just wait until it fires, then quickly deactivate it by activating the Remnant Console nearby.
With a character less capable of crash-offense, you may just want to hide behind the supports on the side of the entrance hallway, which are sturdy enough to withstand anything the Destroyer throws at you. Still won’t block the Nullifiers, though, so you’ll have to be ready to dodge their attacks, and/or take them out quickly.
When all the Remnant are scrapped, leap on top of the square pillar in the center of the chamber to the west to find a Remnant Console. Interface with it and solve the puzzle - there are no glyphs to scan and the starting glyphs are relatively scarce, but if you solve it (solution provided) you’ll earn yourself a permanent +2 Skill Points. Not to mention, it’s another missable Remnant puzzle out of the way.
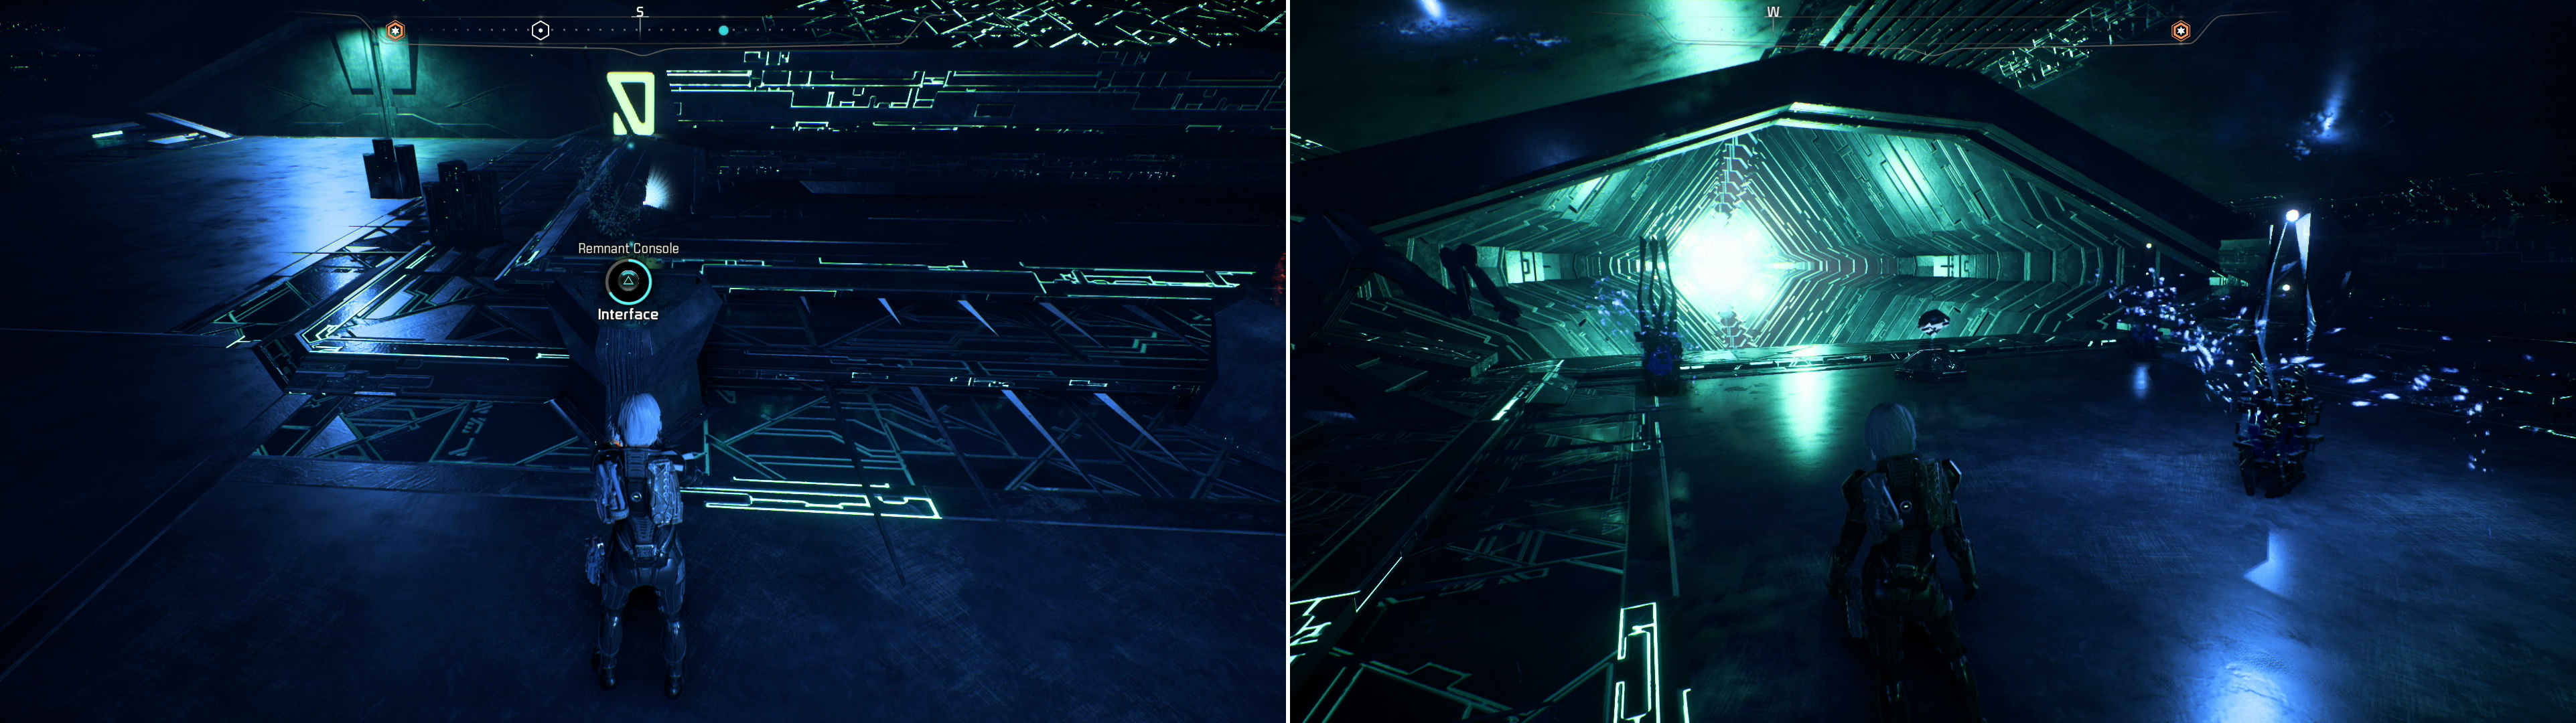
Return to the beginning of the vault and activate the previously ignored Remnant Console (left) then leap across the “lily pad” platforms deployed by aforementioned console (right).
Kadara Vault - Hidden Treasure
Make your way back east, go through the door, jump down the ledges and hop back over the gap to reach the open hub area. Return to the beginning of the vault, or rather, to the platform near the door opened by the three Remnant Consoles and interface with the Remnant Console you ignored earlier. This will lower the platforms to the east, northeast and raise others, forming four “lily pads” of more or less evenly elevated platform clusters you can leap across to reach the eastern edge of the vault. Do so, and when you reach the fourth lily pad turn east and note the large door that leads to the core.
Activate another Remnant Console to provide you a way back across the ferrofluid moat (left) then loot the treasure chamber you opened earlier (right).
Ignore it for now and leap up some ledges to the northwest, dispatch some Remnant, including a Nullifier, then search for a Remnant Console, which will elevate a platform to the west and another to the northwest. The former is important, as it’s the way you’ll have to escape if you want to get the sweet, sweet loot behind the barrier across the level. Speaking of sweet, sweet loot, make your way northwest and leap onto another platform that rose out of the ferro-fluid when you activated the Remnant Console. When you’re on this platform turn east, northeast to find an Adaptive Remnant Core Device on a ledge above you.
Scan it, then turn north, northwest and leap across a gap onto a ledge, then climb up to a higher ledge to find a door. If the door is closed, it’s because you didn’t activate the Remnant Console across the level to the southwest. If not, enter the small room and grab a container.
Endure the punishment and activate the Remnant Consoles in the vault core (left) and dispatch Remnant every time you activate a console (right).
Kadara Vault - Purification
Make your way back southeast to the door to the purification chamber, which you neglected earlier. Leap onto the ledges adjacent to it and turn south to find a Remnant Console. This console will open the door to the chamber, but lower the platform you need to reach the ledges to the northwest. While the door to the core is open, you can’t make your way back northwest, and if you leap northwest across the lily pad platforms to the entrance of the vault, you won’t be able to get the treasure behind the barrier.
So, if you want to be greedy and get the best of both worlds you’ll need to follow a specific route through the vault. What you’ll need to do is - when the core is activated and the purification field is bearing down on you - rush back to this console, activate it to raise the platforms to the northwest, leap onto them, then from there onto the ledges nearby. Continue west, northwest to the Remnant Console that deployed the platform to the west and leap on it, and from there turn southwest and jump to the structure that houses the barrier-protected chamber. From there you’ll be able to run across the bridge to the south, southeast, then turn west and leap onto the first platform. From here the exit back to the Gravity Well room is just west, northwest.
You should give this route a run-through before trying it out… and for more than just practice. Speaking of the first platform near the door leading to the Gravity Well, you need to return there anyways, so get that practice in (or just jump back across the lily pads, if you’re too lazy) and activate the Remnant Console there again to toggle things back to their original configuration. This removes the lily pads, but reactivates the bridge. You now can’t use the lily pads to get back across, so instead cross the bridge and leap across using the platform northeast of the barrier-blocked room to reach the other side.
Now that the door (but not the barrier!) is out of the way and you know the route you’ll have to take to escape the vault and get the treasure, return to the Remnant Console near door to the core. Before you activate it, turn southeast to find an Adaptive Remnant Core Device on an elevated platform. Scan it, interface with the Remnant Console, then head through the door into the vault core.
In the vault core you’ll find that the Purification Console is currently unpowered. To get it working again you’ll have to activate five Remnant Consoles around the core chamber. Each of these secondary consoles is surrounded by a damaging energy bubble, and, as expected, activating each console will spawn waves of progressively stronger Remnant. At first you’ll fight an Observer, then Observers and Assemblers, and finally a Nullifier. Activate the five consoles, then, before you activate the Purification Console head east from the core (the dangerous beam of light in the center of the room) to find a ring of barriers, in the middle of which is a container.
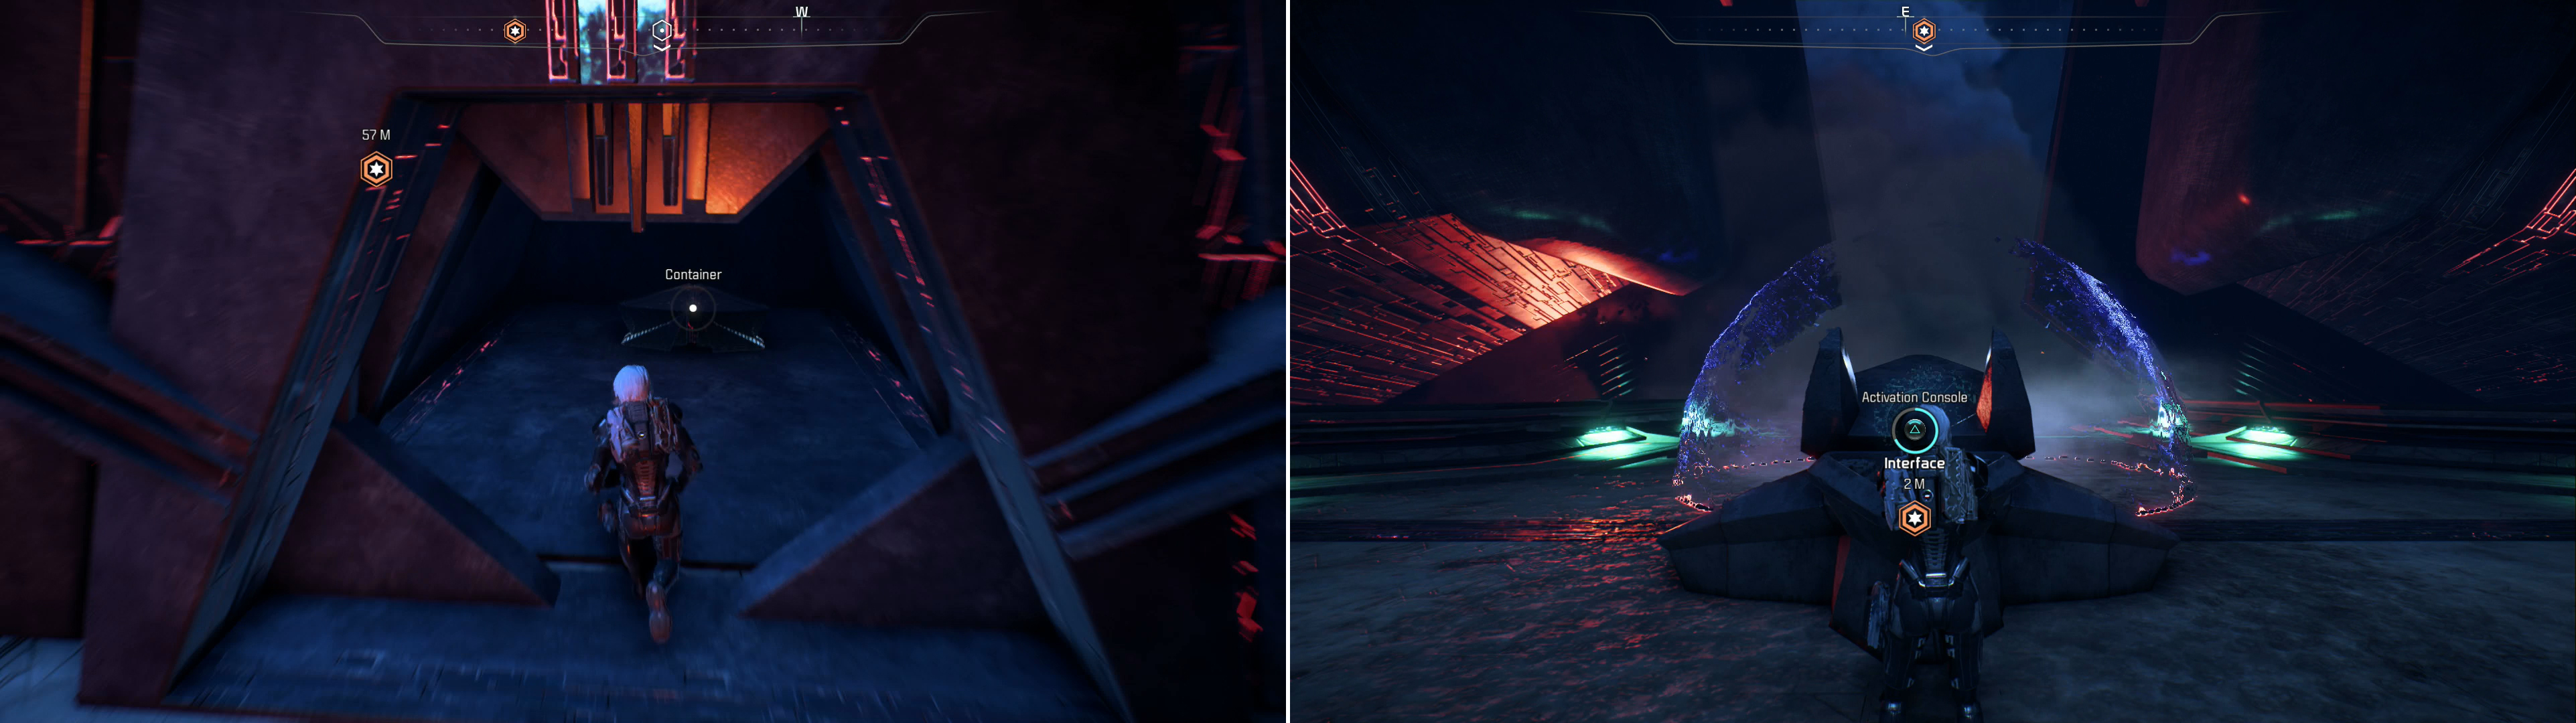
Loot the container behind the barrier-sealed room (left) then activate the console in the Gravity Well chamber to escape the purification field (right).
Grab this loot, then activate the Purification Console. You know the drill, a cloud of death spawns and progresses through the vault. You should also know the route, but to recap briefly; run out of the core room, activate the Remnant Console, jump across the ferro-fluid moat, grab the treasure in the (now barrier-less) chamber, jump down to the first platform just outside the Gravity Well room, then flee back to the Gravity Well room and activate the Activation Console there to close the door and escape this vault unscathed. For reactivating the vault on Kadara you’ll earn 900 AVP, +40% Kadara viability and 1,330 XP, not to mention the Fusion Mod of Rapid Deployment I .
No Comments