
Walkthrough for the Main Quest Cradle of Echoes in Horizon Forbidden West, including information about how to defeat the [Specters].

This quest will begin immediately after you restore one of the subordinate functions to GAIA.
This quest will begin immediately after returning the first of the subordinate functions (AETHER, DEMETER or POSEIDON) to GAIA. This will occur after you complete the main quests The Kulrut, [Seeds of the Past] or The Sea of Sands, respectively.
| Starting Location | Prerequisite | Level | Rewards |
|---|---|---|---|
| The Base | Complete either The Kulrut, [Seeds of the Past] or The Sea of Sands* | 18 |
After you restore one of the subordinate functions to GAIA, she’ll discuss a complication… and a potential opportunity. It’s too important to ignore, and too risky for Aloy to go alone, despite her protestations, so Erend and Varl will be accompanying you on this mission.
Examine the Zenith ambush site.,
Investigate the Zenith Ambush Site
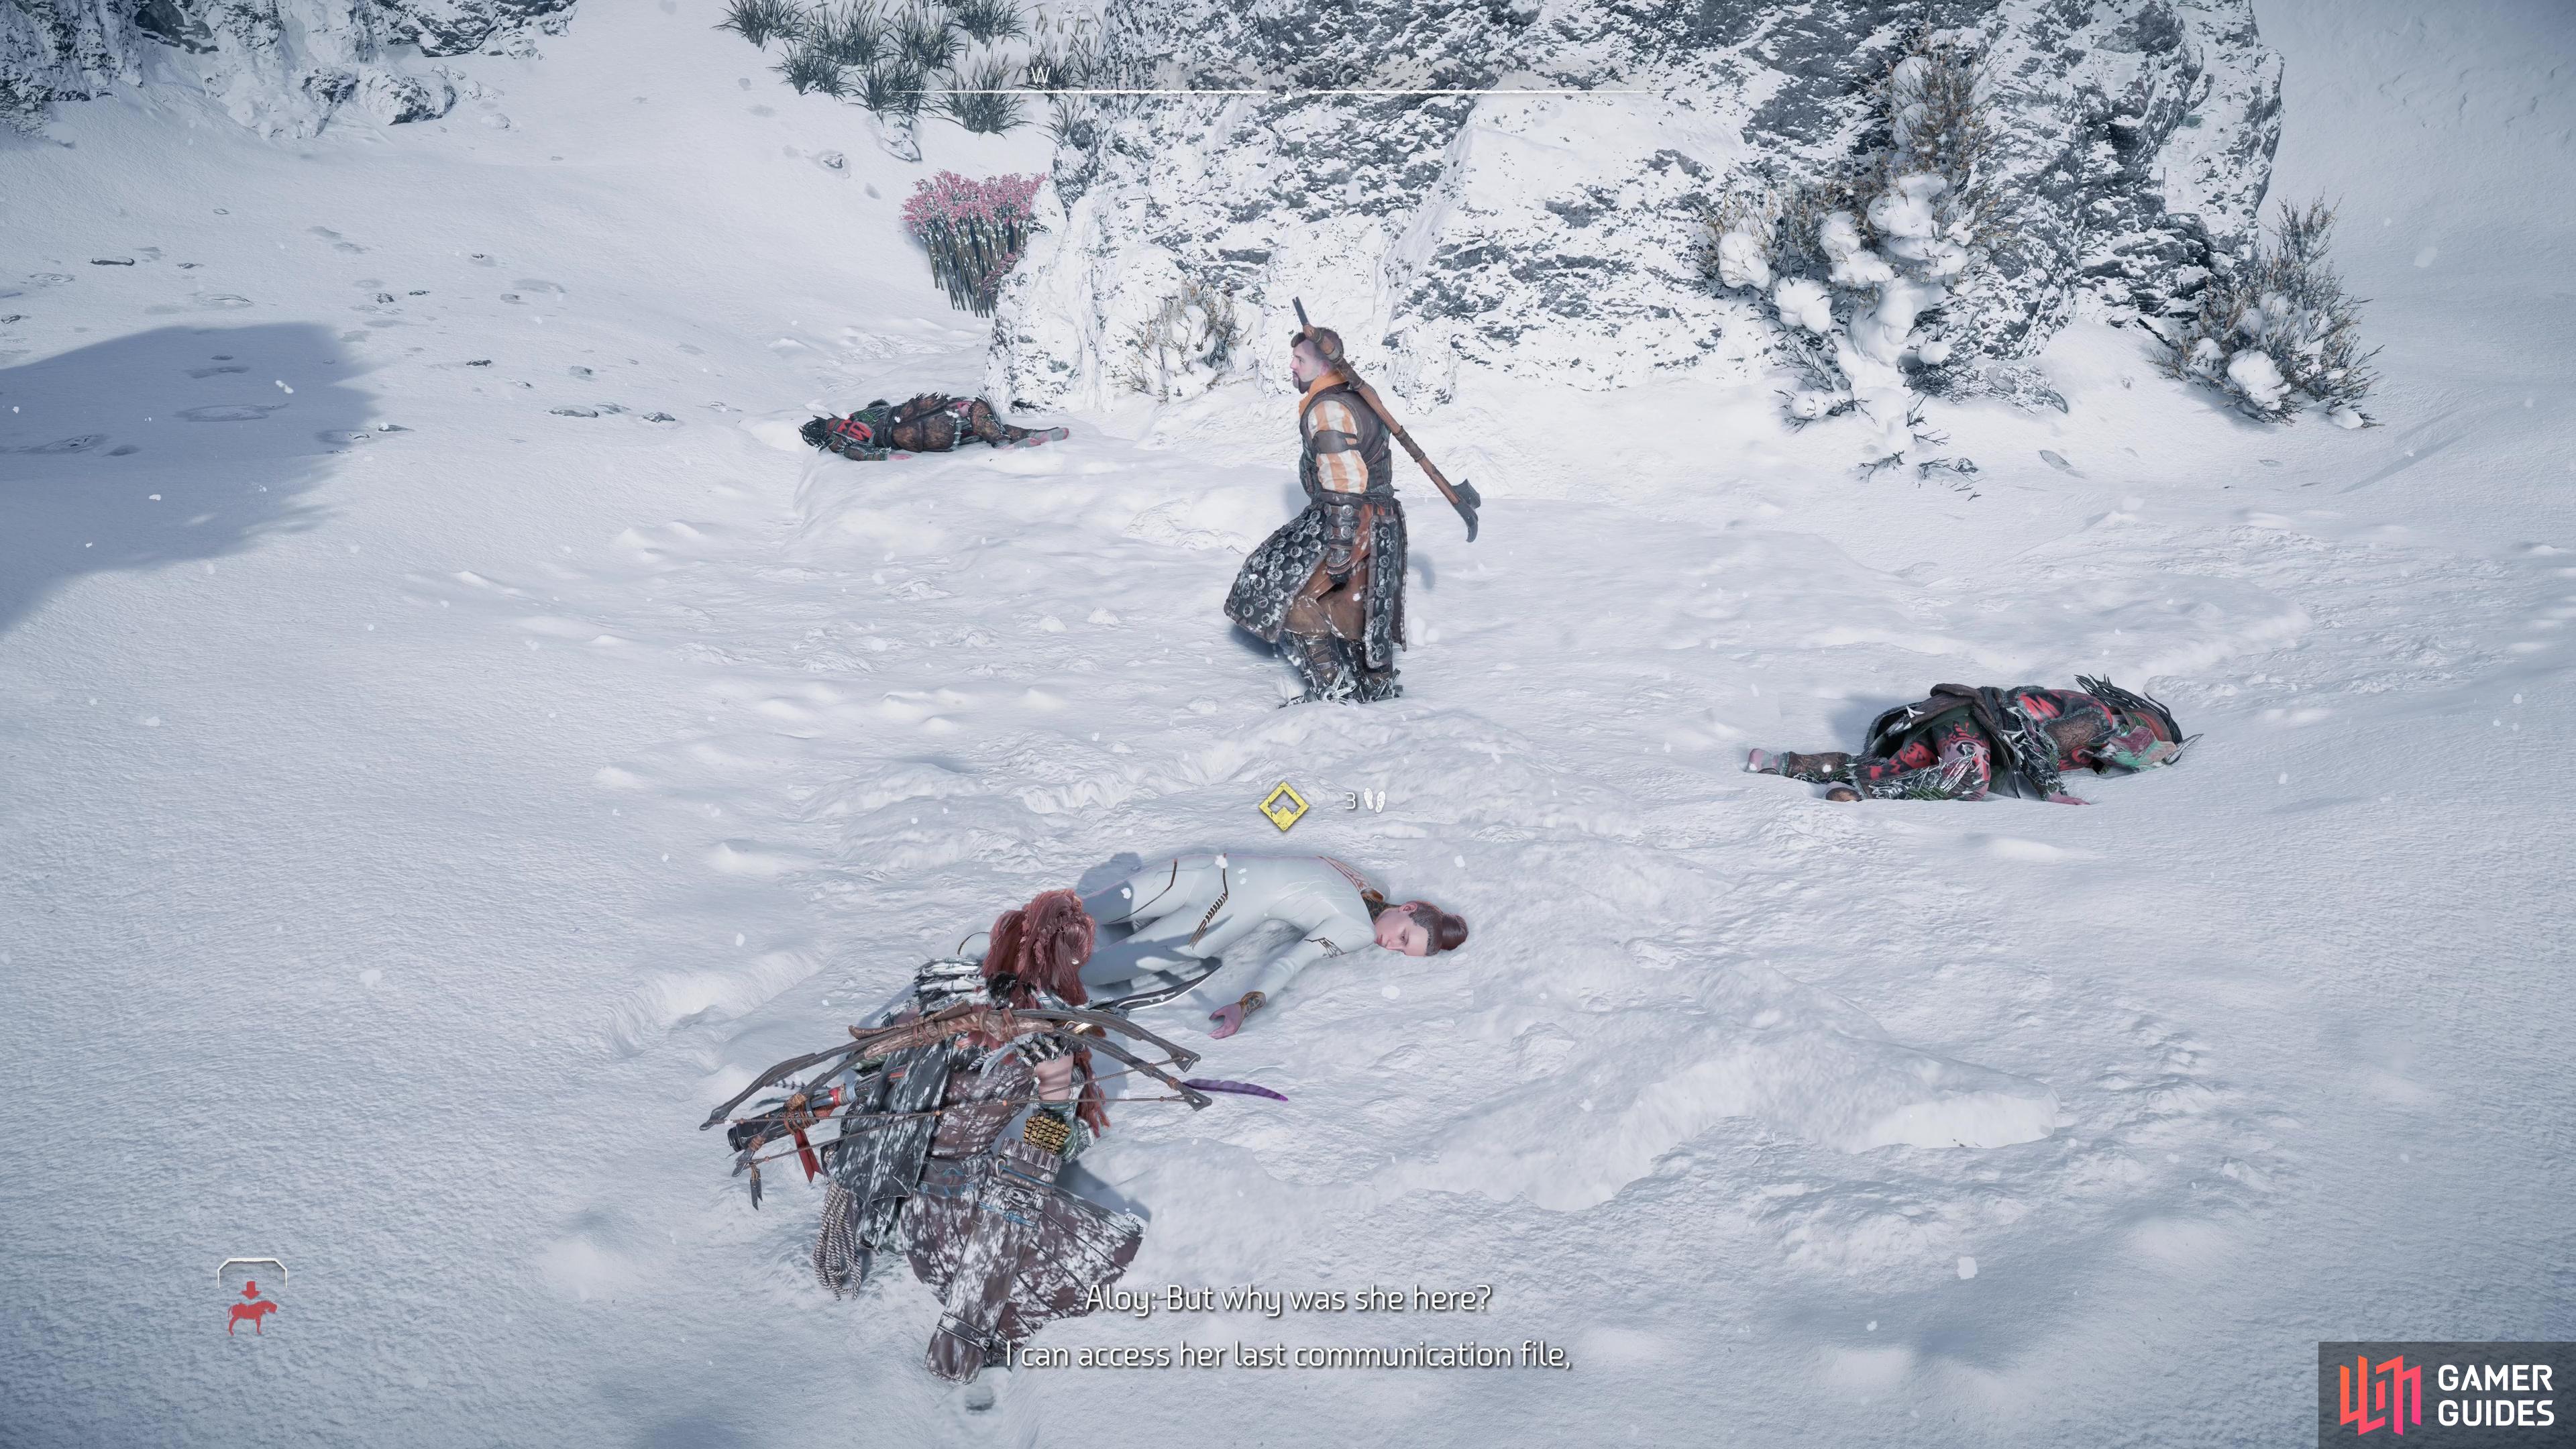
Prepare however you wish, or rather, however you can within the confines of The Base, then go meet up with Erend and Varl along the southwestern end of the living area.
Confirm you’re ready to get started and after a scene examine the Zenith corpse. You’ll automatically obtain the Verbena to Base datapoint, after which examine the [Specter] to the north, northeast to get another datapoint, Specter Instructions. Next head up the ledge to the west, southwest and examine a corpse and the remains of their weapon. Finally, head behind a rock to the south to find a camp site, return to Erend and tell him what you found, then find and talk to Varl. Before you head down the shaft, look around the area to find some caches you can loot.

Go through the ruins below, entering the code “237” into the console.
How to Find the Asset
Head down the shaft to reach some ancient ruins, and when you reach a fork, turn right to loot a cache, then continue forward (northeast) through a doorway. Head downstairs and scan the datapoint Command Log, interact with the console in the center of the room, then go through a door to the north.
Once through you’ll find that the path splits, with some stairs to the north and a passage to the west. Both will get you to your destination, but if you go down the western passage you’ll find a room to the right where you can scan the Priority Shift and Progress Report datapoints, along with some caches you can loot.
Eventually you’ll make your way to a large storage chamber, which you’ll need to search. This isn’t much of a search, really, as if you head up some ramps to the northern end of the chamber you’ll find a console to examine - this will be called to your attention as you approach. Busy yourself with looting the many containers strewn about, then interact with this console. You’ll be prompted to enter a code, which can be found in the Distress Signal datapoint you automatically obtained earlier - just enter in 237 and you’re golden.
How to Defeat the Specters
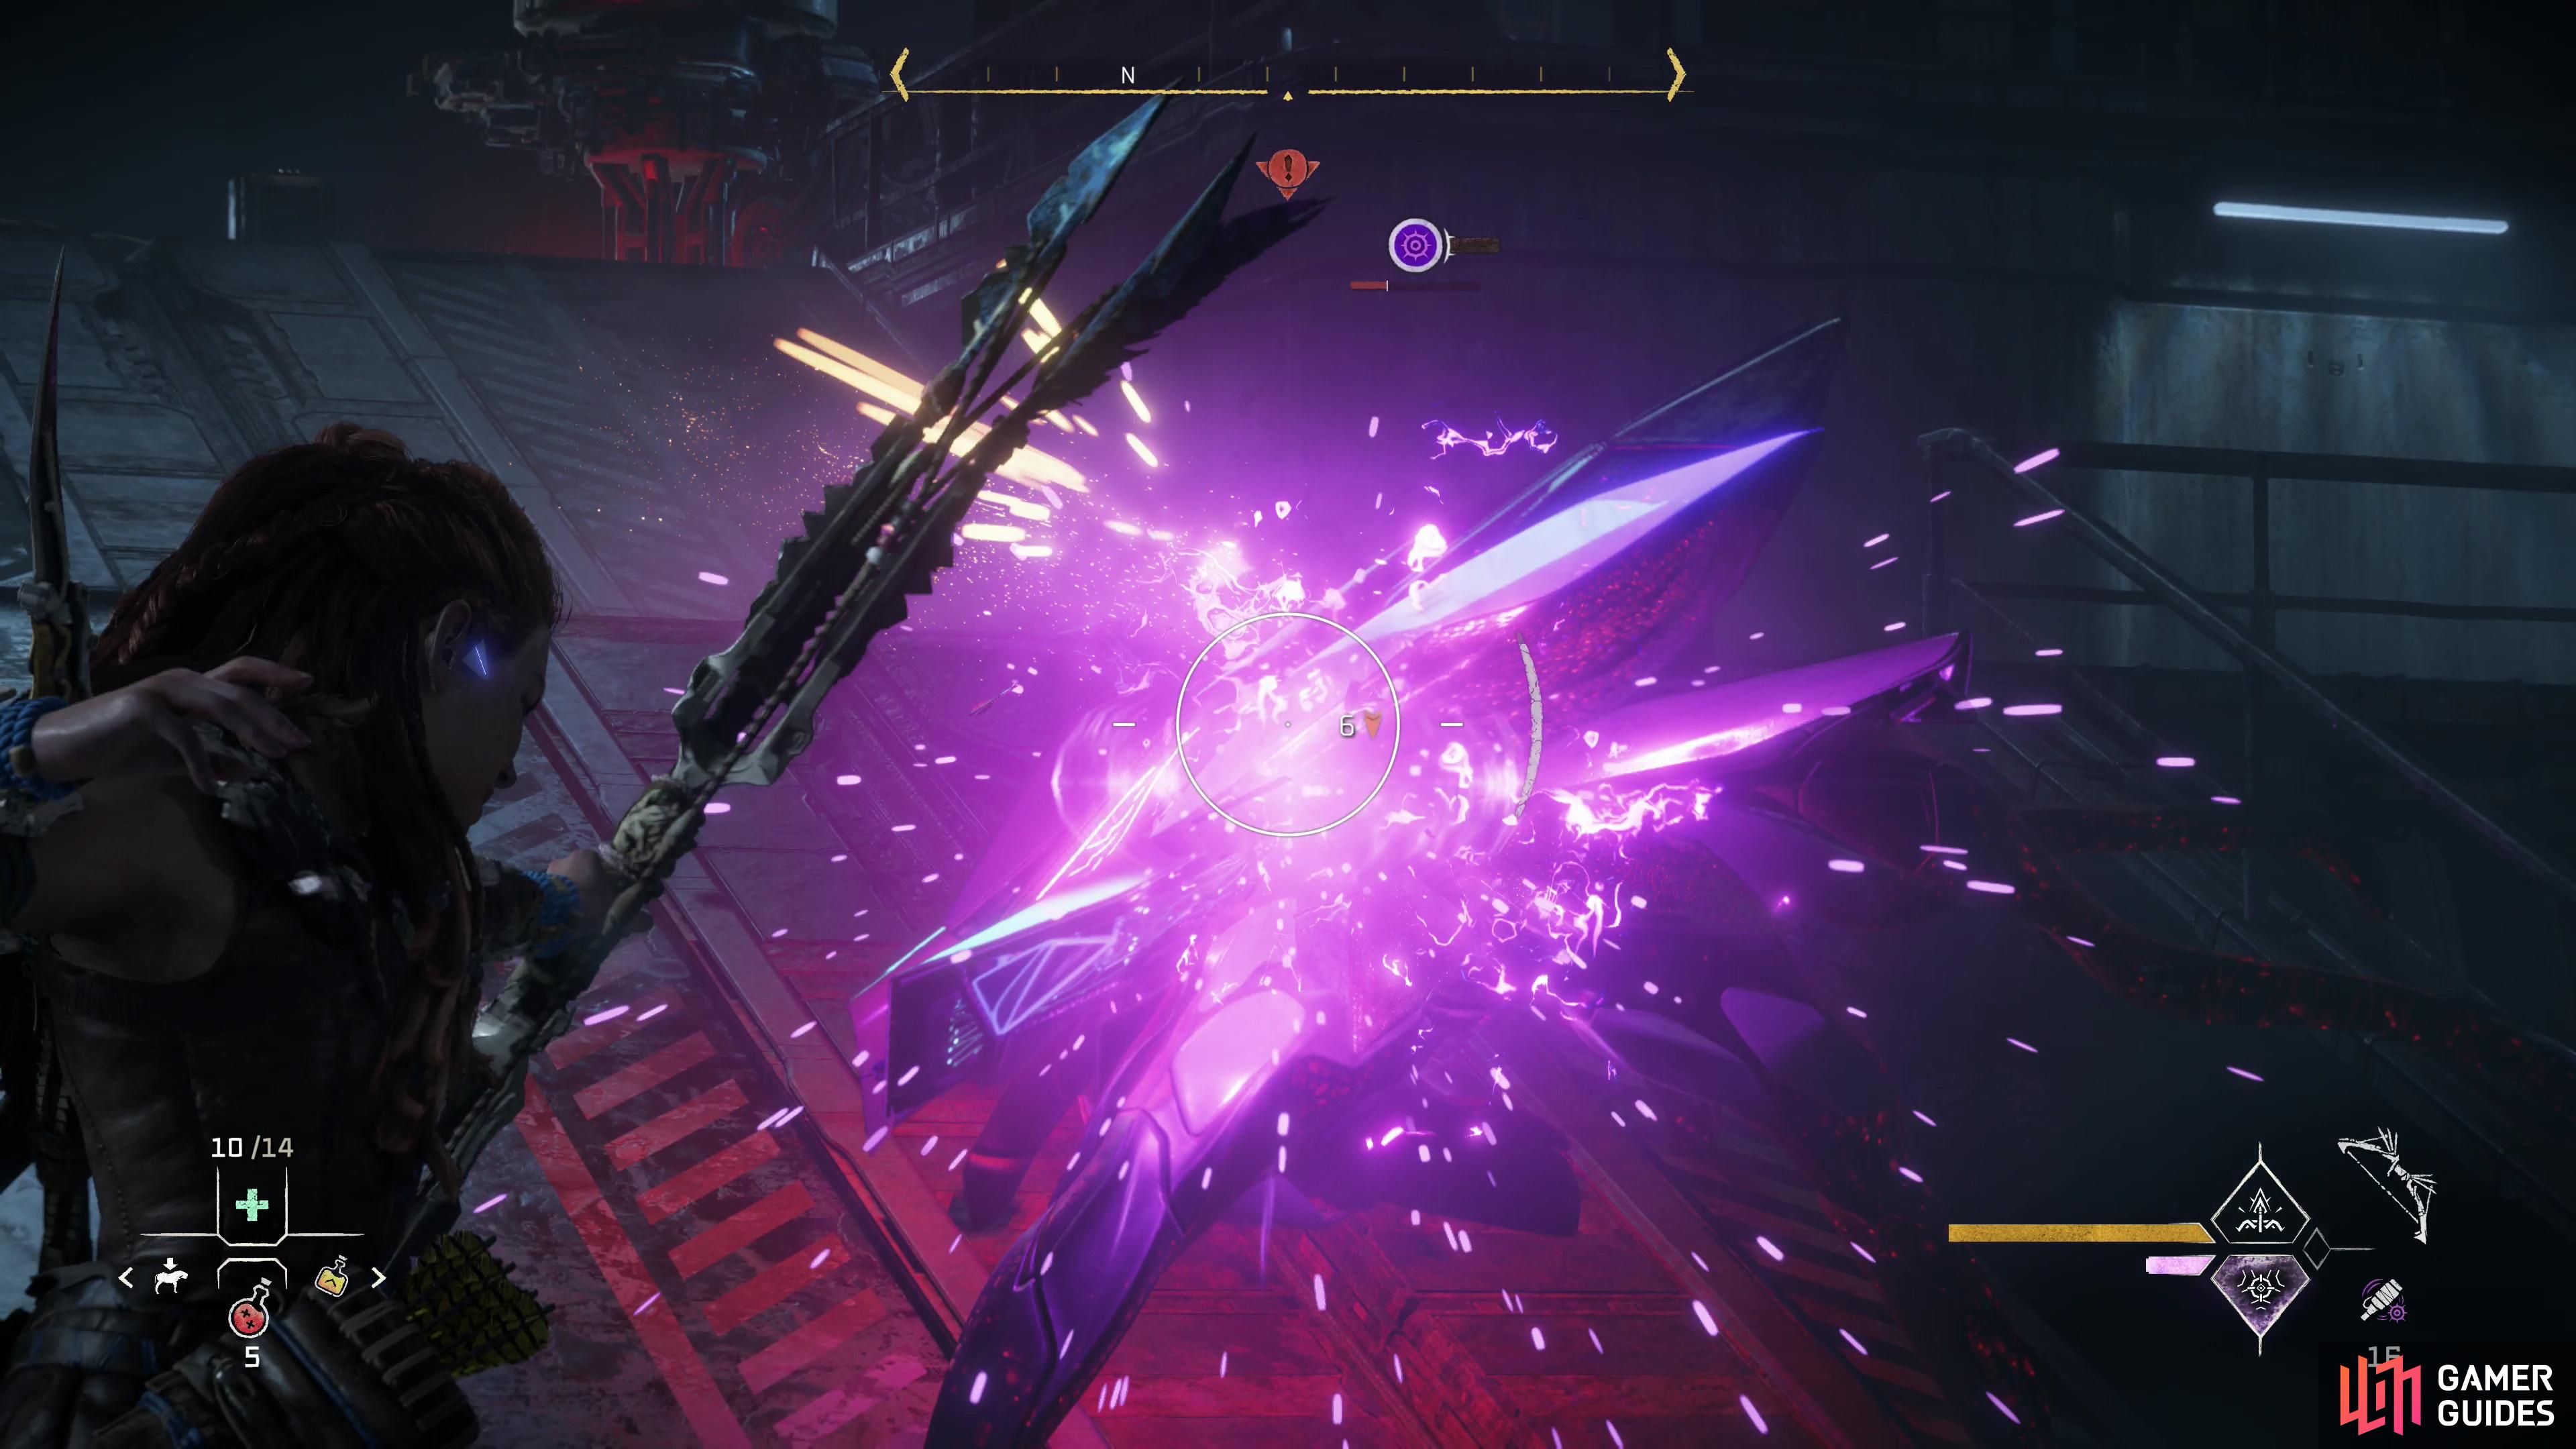
After some scenes you’ll need to prepare to fight a [Specter], but this time you’re not swimming for your life after wearing yourself out fighting an invulnerable Zenith. Better yet, you have some time before the Zenith arrives which you can use to prepare the battlefield. If you lay traps, favor Plasma and Acid damage, wherever possible, and avoid Fire, Shock and Purgewater. Arm yourself appropriately, as well, and if you feel you need an edge, down a potion to overheal.
It’ll arrive from the southern end of the chamber, so keep your eyes open and when you see it, lay into it. Plasma damage is fine if you’re ready to followup and build up a Plasma Blast, but if you’ve got a decent Acid weapon, you may find it even more to your liking.
Unlike the whimsical machines HEPHAESTUS has concocted, the Specter is sleek, modular and compartmentalized. It has numerous weakpoints, but few of them are regularly exposed until they’re deployed, whereupon they’ll rise from their angular, armored compartments. This is the reason why Acid damage works well against Specters, as if you can inflict Corrode, you’ll inflict more damage through the machine’s armor, which can significantly improve the speed at which you take Specters down.
Offensively, Specters are highly mobile and keen to attack both at close range with pounces, slams and nano-tentacle swipes, but at a distance with its top-mounted Pulse Cannons. The latter are typically only targetable when firing, and any plates knocked off can be retracted and restored thanks to the machine’s Regeneration Unit. This is located under its “head”, and can be targeted when it’s being used.
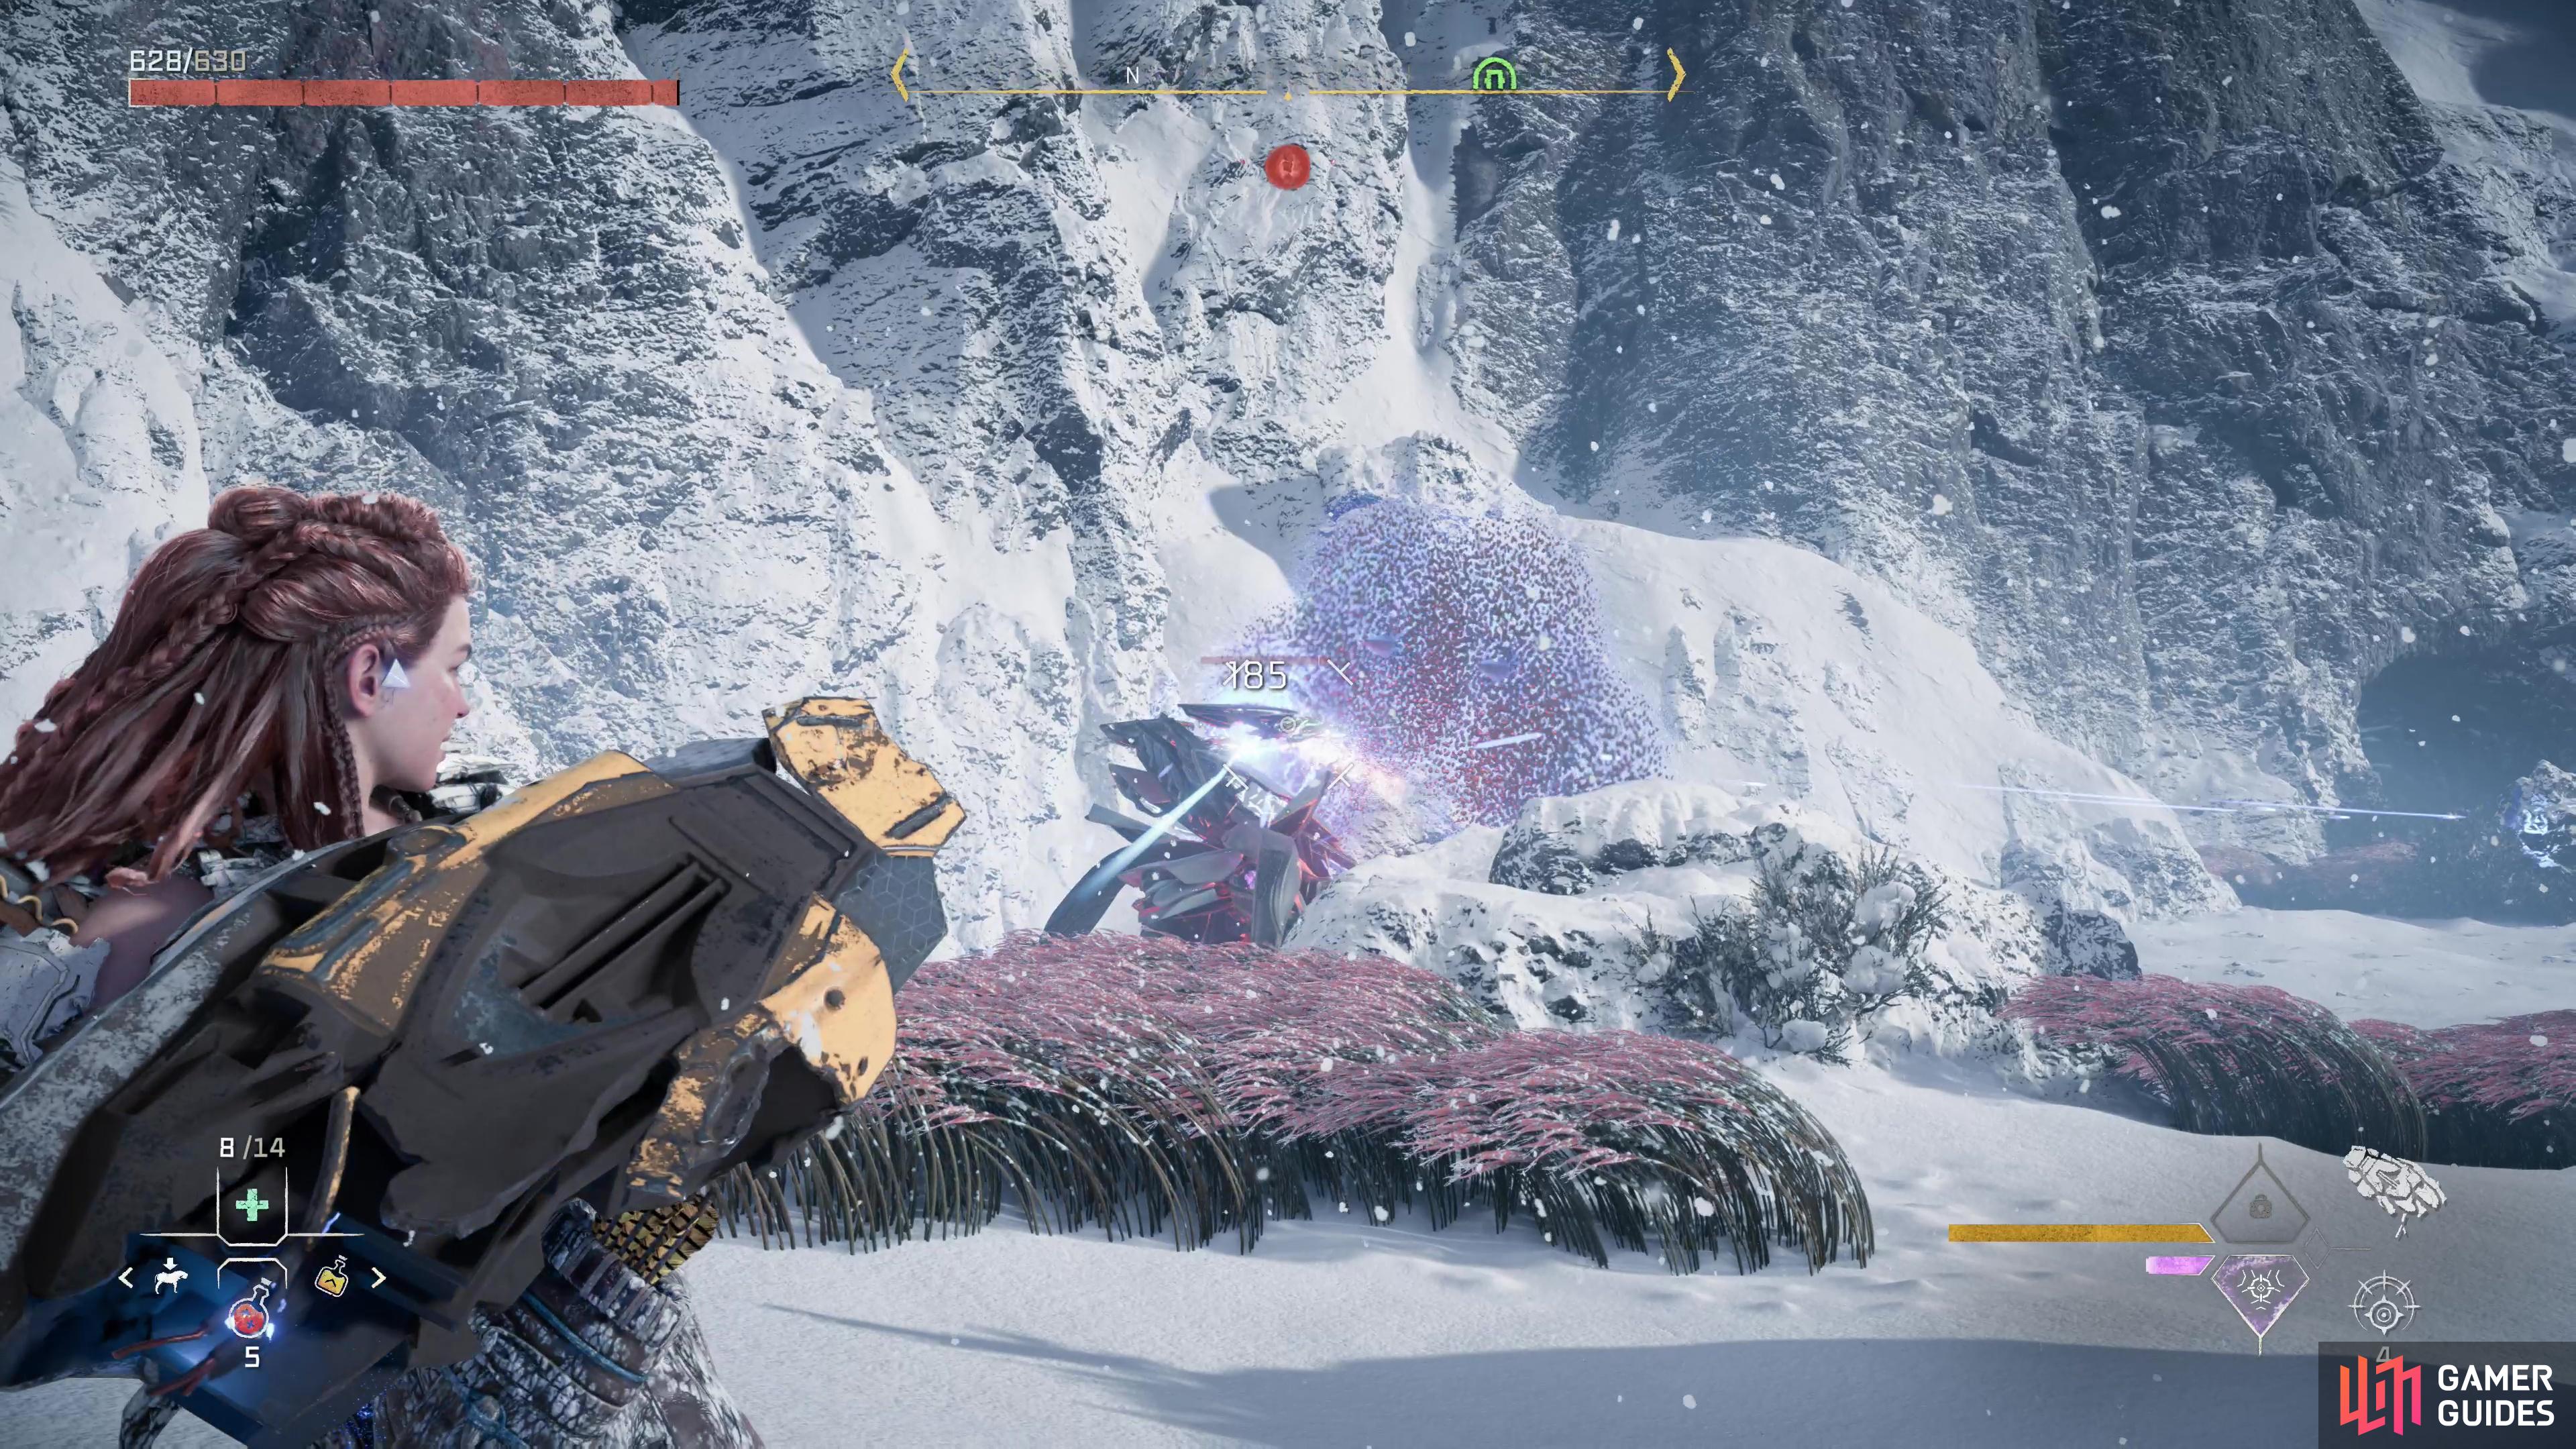
Defeat the Specter in the ruins, then head up to the surface to find Erend pinned down by the second one. This Specter has deployed an energy shield which it can unfairly shoot through. Fortunately, it’s distracted by Erend, so let the machine take potshots at your Oseram pal while you seek out a heavy weapon (there should be a Dart Gun lying around the ambush site, or you can shoot a Ravager Cannon off a deactivated [Ravager] and use that, instead) and thus armed, flank the Specter. Aim at the exposed Plasma Cannon to start the fight off right, then put this second Specter down. You don’t get to prepare this time, but you have Erend helping you, and you can find healing herbs strewn about.
After the fight, head back up to the ridge to the west and examine the weapon that took down the Zenith’s shield. You’ll be back in The Base after that, where you’ll need to talk to Beta (the Elisabet clone) and GAIA. Once you sit through this lengthy bit of chatter, the quest will end and you’ll be free to seek out other subordinate functions.


No Comments