
Hunting Grounds are challenges that will test your mettle with various weapons in the game. This page will detail the Shock Trial at the Hunting Ground in The Daunt.

Shock Trial at the Hunting Ground in The Daunt
Where To Find The Hunting Ground In The Daunt
As you progress through the main story and rescue the Oseram Trapper during the main mission, To the Brink, you will be told about this Hunting Grounds and the location will be pinpointed on your map. If you leave Barren Light via the northern exit, you will come to a bridge on your eastern side. Directly east of the bridge will be the location of the Hunting Ground.
Stripes
| Stripes | Time Needed | Rewards |
|---|---|---|
| Quarter Stripes | 10:00 | 4 Hunting Medals, 20 Metal Shards, Small Machine Core |
| Half Stripes | 04:30 | 5 Hunting Medals, 35 Metal Shards, 5 Sparkers, Small Machine Core |
| Full Stripes | 03:00 | 6 Hunting Medals, 50 Metal Shards, 5 Sparkers, Scrounger Spark Coil, Medium Machine Core |
Grounds Keeper’s Tips
- Hitting a Power Cell with Shock ammo will cause a delayed explosion that will shock any machines in range.
- Use the Shock Warrior Bow to hit a Scrounger’s Power Cell and overload it near other machines.
- Use Shock ammo on a machine to build up to the Shocked state and immobilize it.
How to Complete the Shock Trial
The second trial will be a little trickier to complete, as it requires you to overload the Scroungers’ Power Cell to make it explode, in order to inflict the Shocked status on other machines (you need three enemies to be done like this for the Trial). There are two big problems with this, as the only other machine in the area for this trial is the Charger, which tends to stay away from you and the Scroungers if they are alerted to your presence. The other problem stems from the fact that other machines will need to be near the Scrounger you overload its Power Cell, so you might need a little luck in positioning here. Whenever you first spoke to the Grounds Keeper, he should have given you a Shock Warrior Bow, which is probably the only Shock weapon you have (other than the Tripcaster).


(1 of 2) Aim your Shock Warrior Bow at the Power Cell on the back of the Scrounger
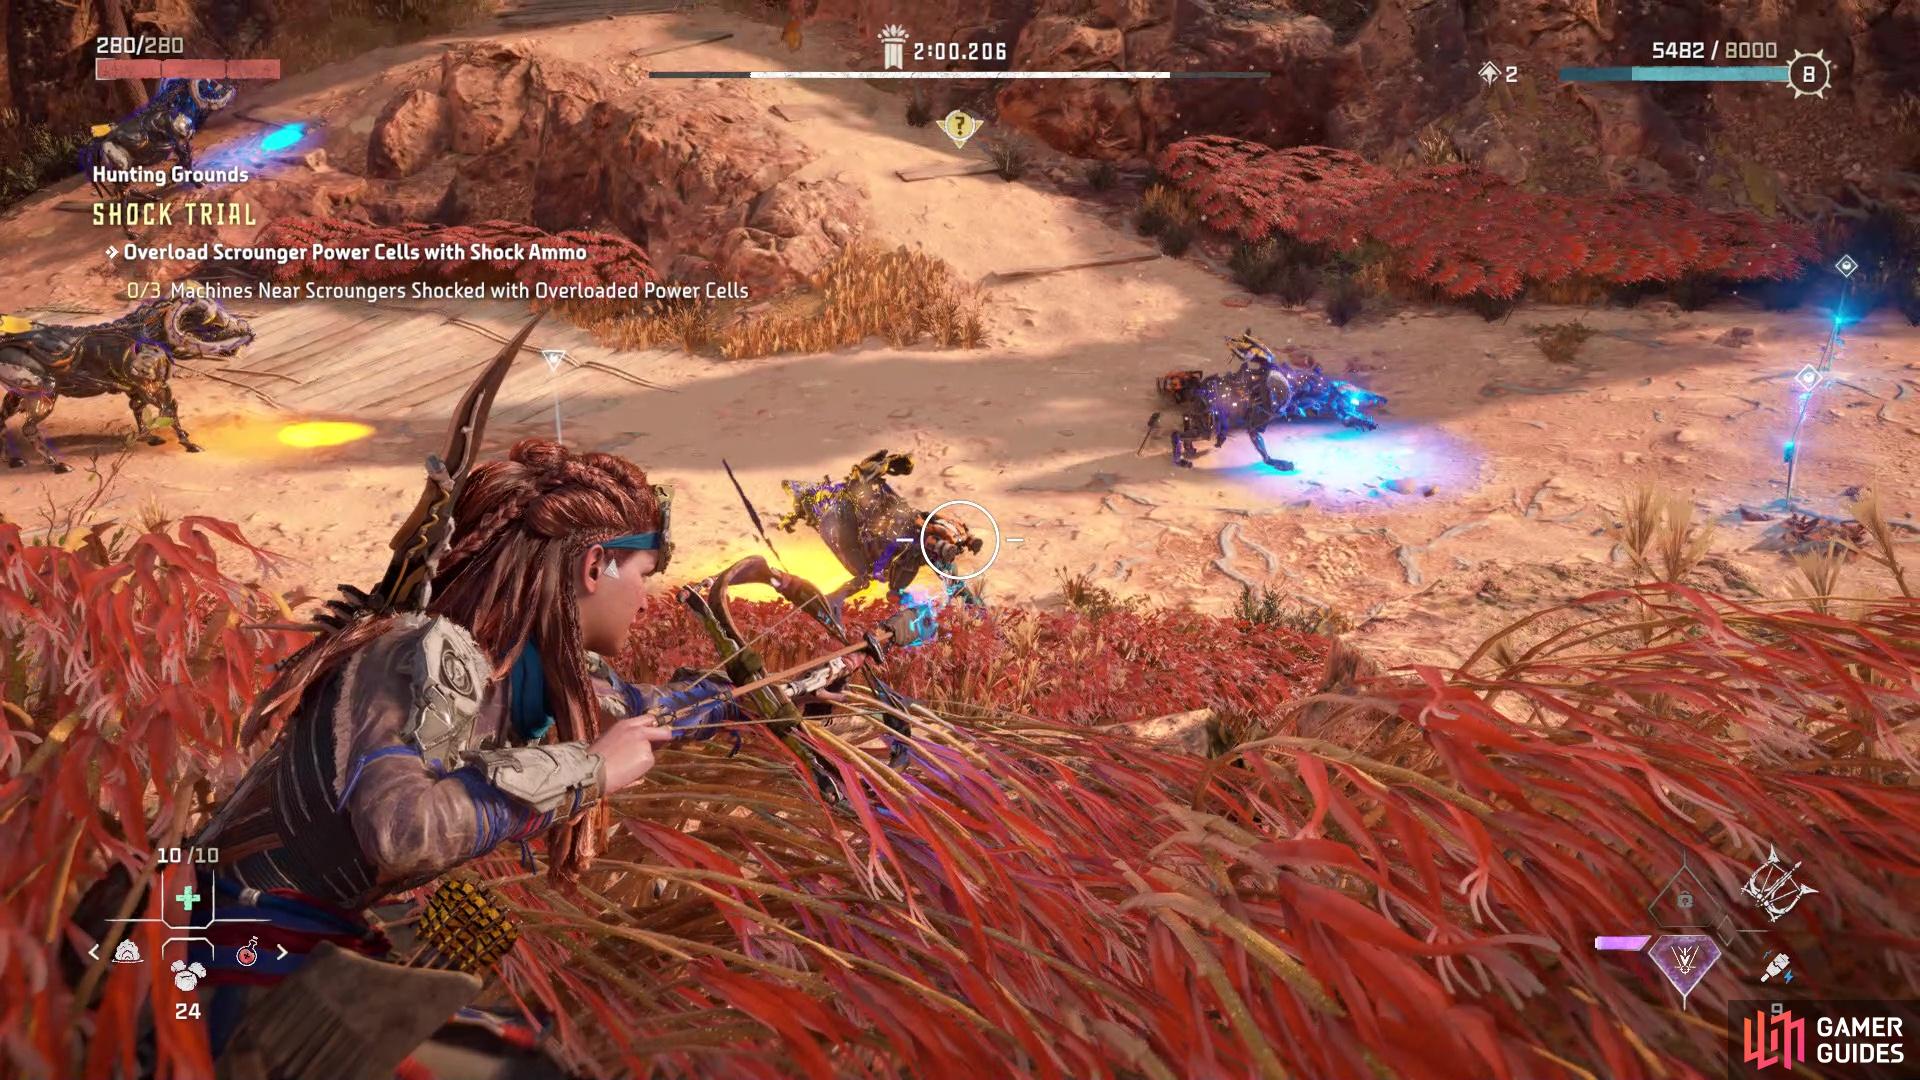
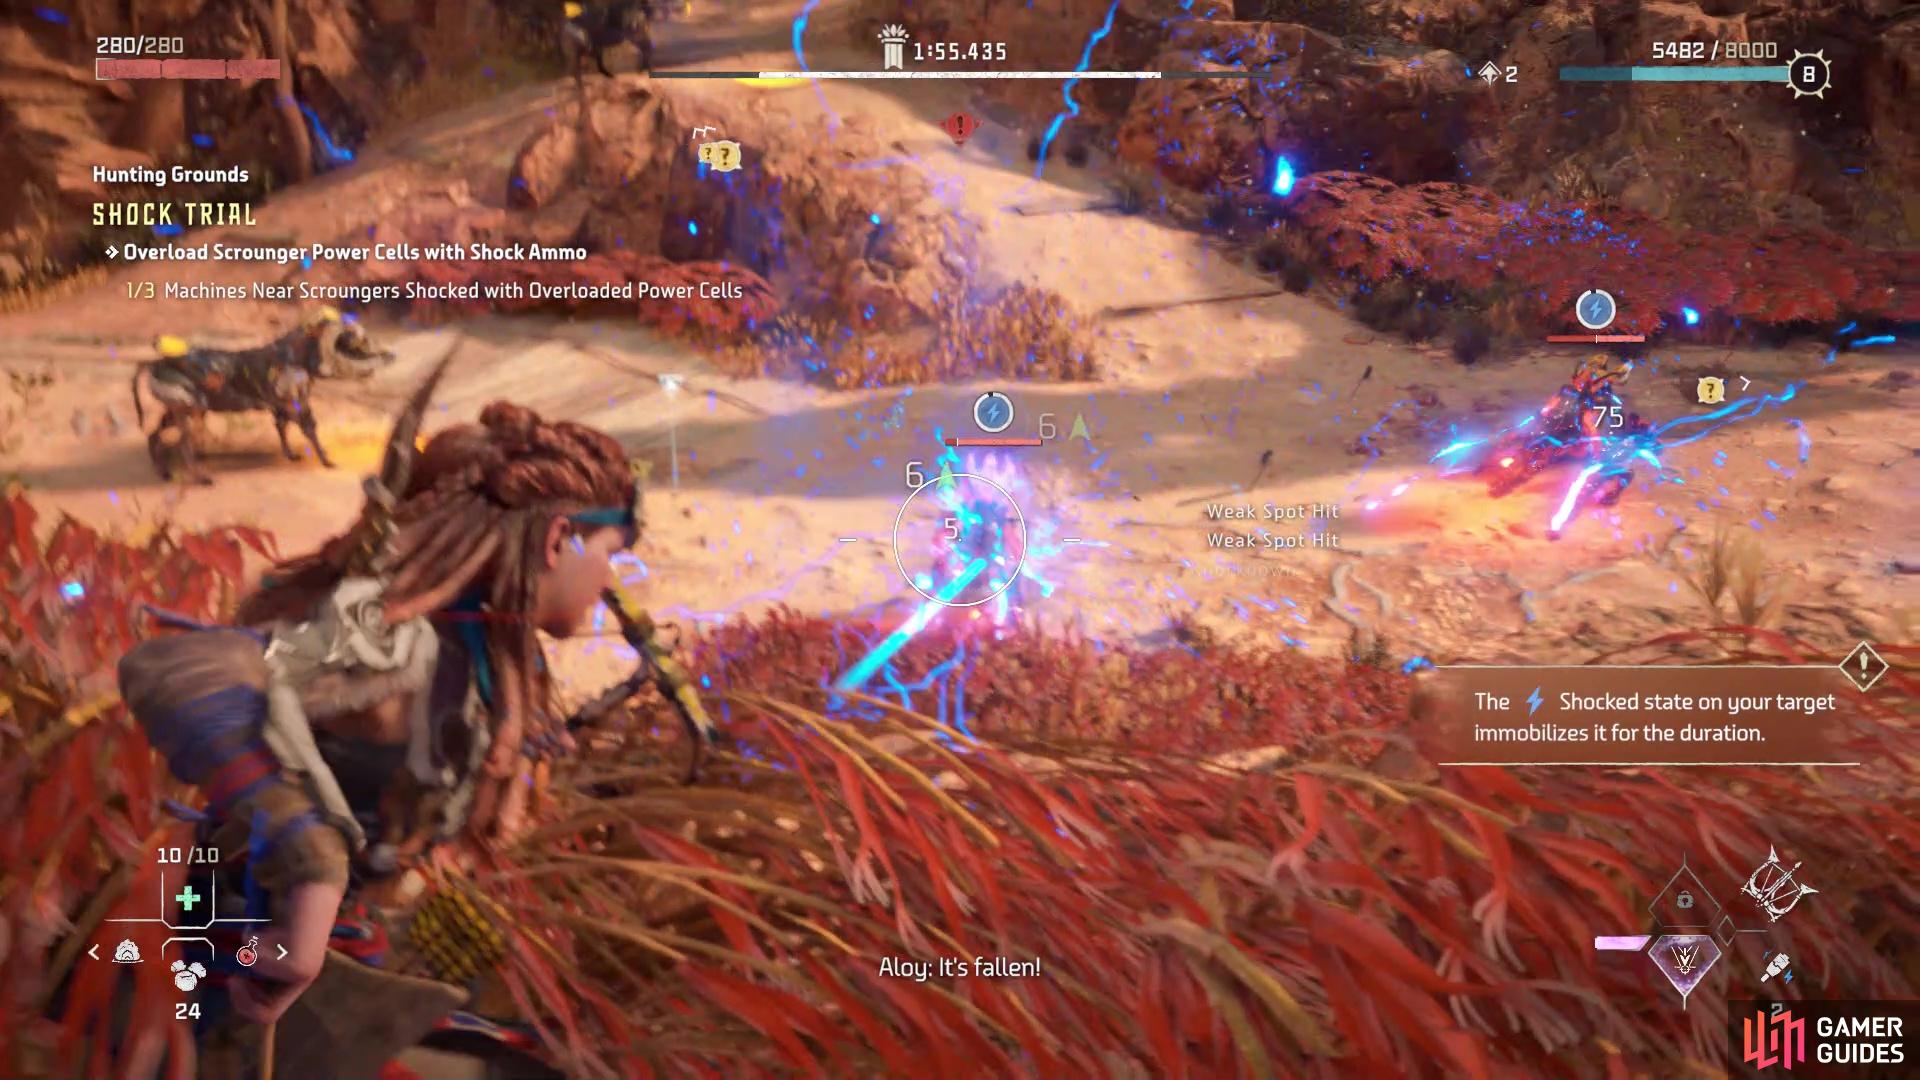
Aim your Shock Warrior Bow at the Power Cell on the back of the Scrounger (left), If hit, it will explode after a few seconds and Shock any nearby machines (right)
The Shock Warrior Bow isn’t the best at building up the Shocked status, so you are going to be seen and will likely need to dodge some attacks. The biggest problem with this is that the Chargers might be running away from you at this point, so you’re not going to have them up close and personal, along with the Scroungers. Due to your weapon choice upon first finding the Hunting Ground, you don’t really have any other option available to you, so you will have to rely a bit on luck in machine placement. If you decide to wait until later on in the game, when you have a Hunter class bow that can deal Shock damage, then this will become much easier, since the Shock build-up is greater with those.
Of course, there is a Workbench at the Hunting Ground, so should you have the resources for it, you can upgrade your Shock Warrior Bow to up the Shock element portion. Doing this should help a lot in hitting the Power Cells and triggering the explosion needed to fulfill the objectives for this Trial. Note that you could possibly keep shooting the other machines nearby to inflict Shock on them, keeping them in place and waiting for the Scroungers to get close enough to hit their Power Cells. If you go this route, the Shock Tripcaster you got during the main story can do wonders, as it will instantly put enemies in the Shocked status.
No Comments