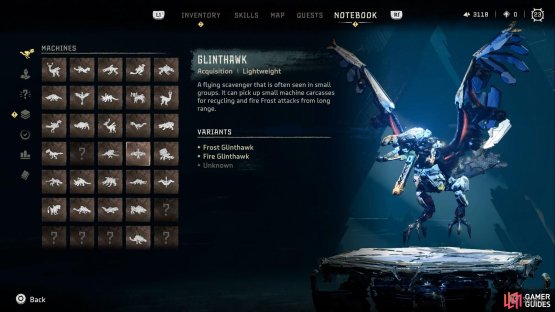
Throughout your journey in Forbidden West, you will come across a variety of Machines, most of which will be out to attack you. This page will concentrate on the Acquisition Machine, the Glinthawk.
(1 of 2) Glinthawk in the game
Glinthawk in the game (left), Glinthawk in the notebook (right)
General Information
A flyin scavenger that is often seen in small groups. It can pick up small machine carcasses for recycling and use elemental attacks from long range.
| Type | Level | Type | Cauldron | Weak | Strong |
|---|---|---|---|---|---|
| Fire | 12 | Acquisition | IOTA Cauldron | Frost  , Shock , Shock  |
Fire  |
| Frost | 12 | Acquisition | IOTA Cauldron | Fire  , Shock , Shock  |
Frost  |
Tips for Defeating the Glinthawk
Depending on the type being fought, you will have to face either Frost or Fire attacks. The Glinthawk can be annoying enemy, since sometimes it will just keep shooting its elemental attacks at you, leaving you not much chance to strike back. However, they are fairly fragile and it shouldn’t really take much to bring one down. First and foremost, the Glinthawk will stay in the air the entire time, so melee attacks aren’t going to be something you will be using against them. That is unless you use a Ropecaster to tie them down, but it’s honestly not worth the effort in doing this. They also don’t have many attacks in their skillset, and you will likely only see two of them.
The first is when they will swoop down to try and attack you with their claws, but this is pretty easy to dodge. The second will have them spit their respective elemental attack at you, with the attack causing a minor explosion upon hitting the ground. While the attack will leave some residue on the ground, it’s easy enough to avoid. The one attack that you likely won’t see much is when the Glinthawk will carpet bomb its respective elemental attack. You won’t have trouble with this, since it will move in a straight line while doing it. The easiest way to take out a Glinthawk is to shoot the elemental sac on its belly until it explodes, which should make it fall to the ground, where you will get some free hits.
Loot (Body)
All of the loot in the table below can drop upon killing the Machine and looting its body.
| Loot | Chance to Drop |
|---|---|
| Blaze | 100% (Fire only) |
| Chillwater | 100% (Frost only) |
| Metal Shards | 100% |
| Glinthawk Circulator | 45% |
| Machine Muscle | 30% |
| Glinthawk Primary Nerve | 23-24% |
| Braided Wire | 21% |
| Small Machine Core | 17% |
| Sturdy Hardplate | 10-11% |
| Metal Bone | 10-11% |
Loot (Beak)
The Beak is on the face of the Glinthawk and looks like it’s split into three/four different parts, although it’s all connected. Detaching this part will not only get you exclusive loot, but you will also disable its ability to scavenge dead machine carcasses.
| Loot | Chance to Drop |
|---|---|
| Glinthawk Beak | 100% |
Loot (Sac)
The Sac is located on the belly of the Glinthawk and considering it flies, the sac makes a prime target for shooting. If you do this enough, it will explode, but the loot that could be had from it will be lost. Should you leave it intact, then you will get extra loot from the body.
| Loot | Chance to Drop |
|---|---|
| Blaze | 100% (Fire only) |
| Chillwater | 100% (Frost only) |


No Comments