
Some of the side quests in Assassin’s Creed: Shadows will open up a new set of targets on your Objective Board, like with The Kabukimono. You will have to hunt down a number of ronin, who are normally not too bad, but this set will do whatever they want, so they must be stopped. This page will detail the locations of every single Kabukimono target, as well as which choice is best for the final three enemies.
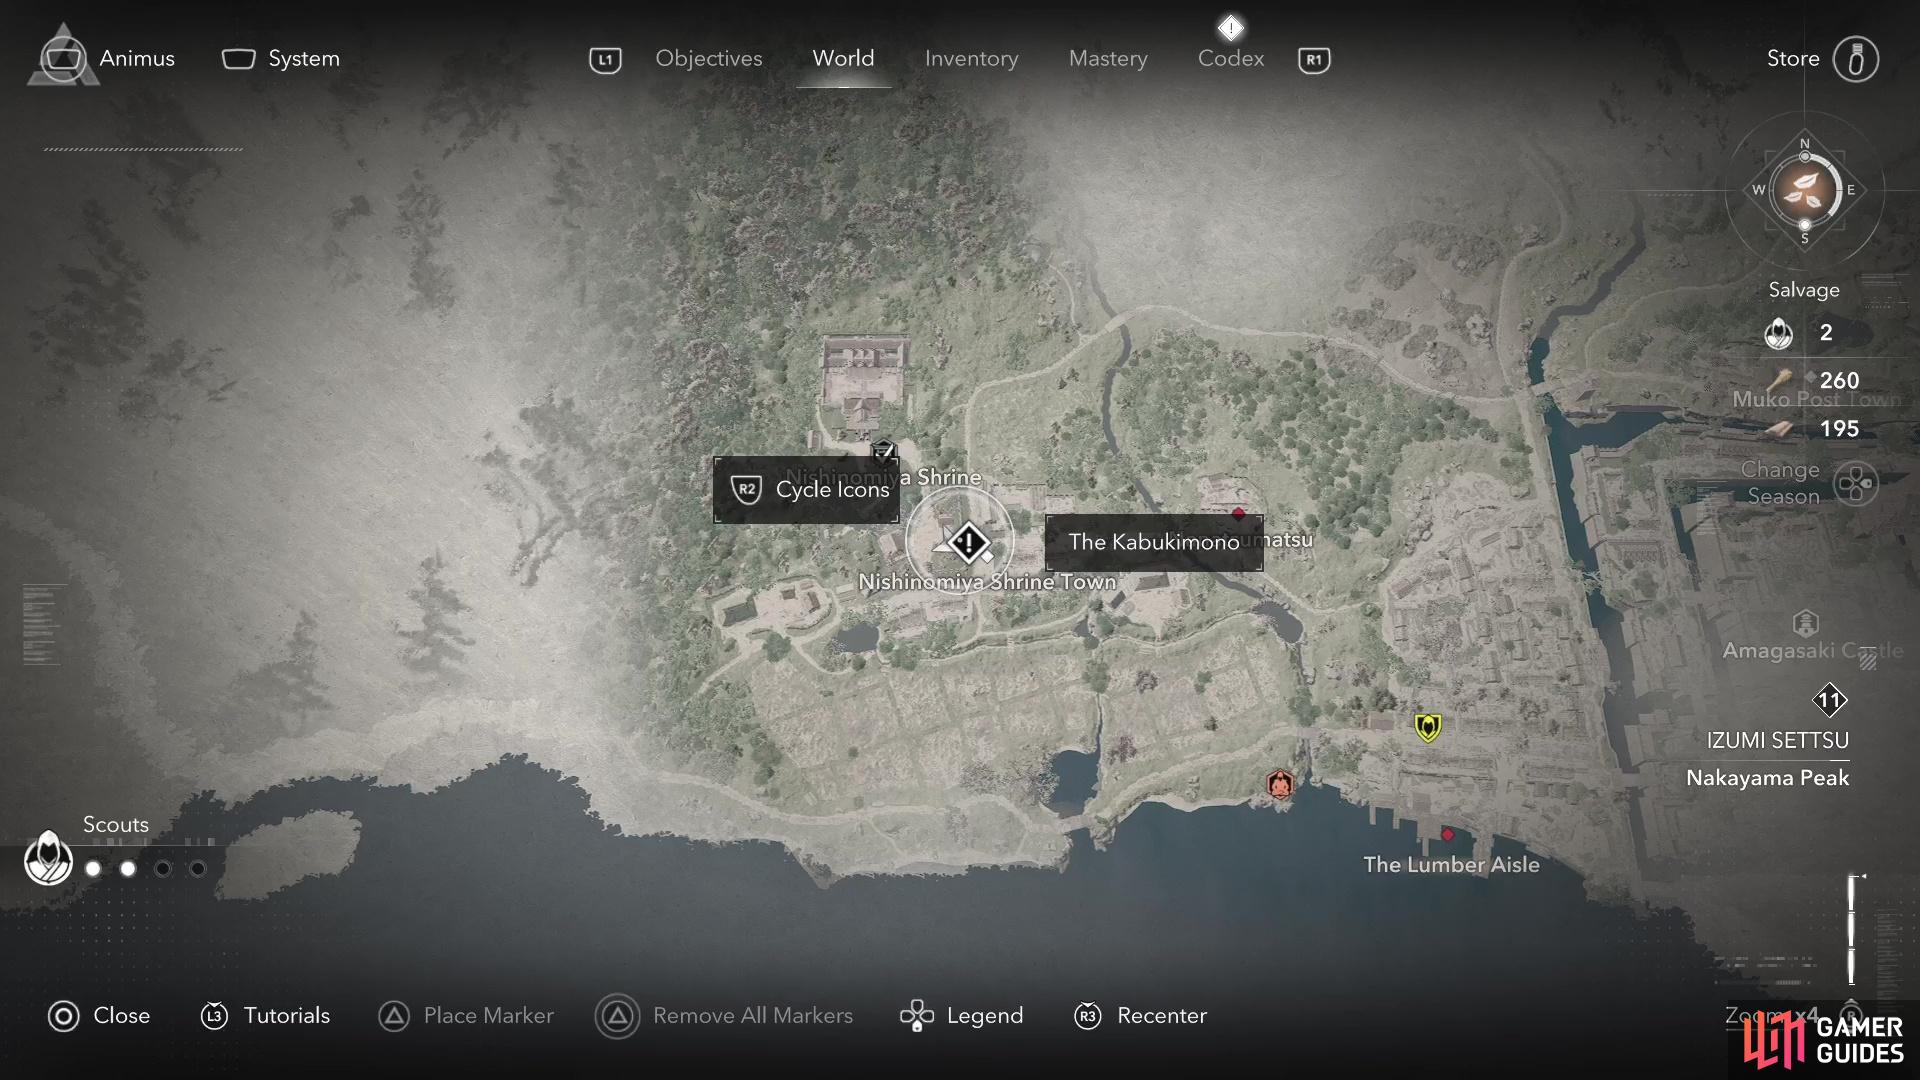

(1 of 2) Go to the Nishinomiya Shrine to find this quest.
Go to the Nishinomiya Shrine to find this quest. (left), Shin’nyo will be standing right by the entrance to the shrine. (right)
The Kabukimono Quest Location
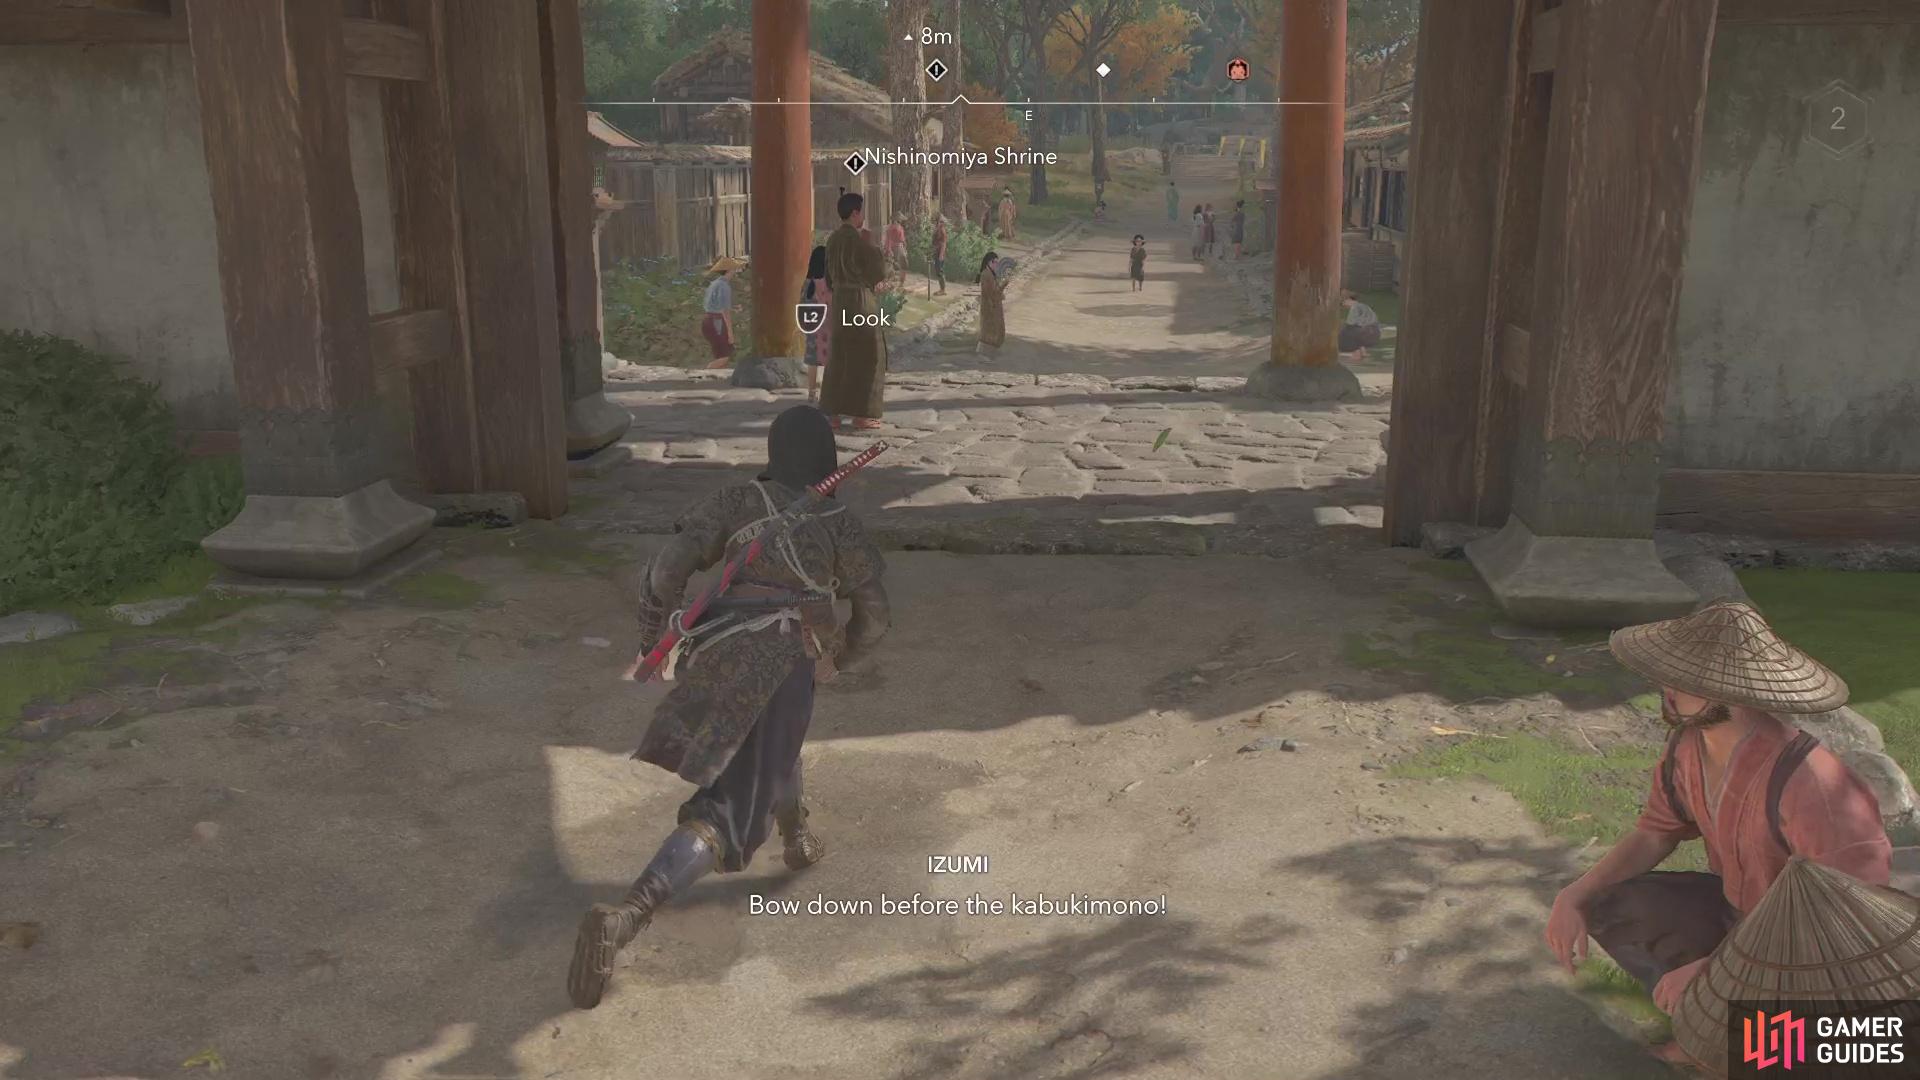
In order to properly start this side quest, you need to venture to the northern part of Izumi Settsu, to the Nishinomiya Shrine. It is here that you will find a man by the name of Shin’nyo. Speak to him to learn about some ronin who seem to disregard any laws or customs, essentially doing as they please. The Kabukimono, as they are called, are definitely causing a lot of trouble for the commoners, but the daimyo are too busy with their own affairs to hear their pleas for help. You decide to take matters into your own hands, which will open up The Kabukimono set on your objective board.
There are a total of eight targets here, with the first five being available right away, as soon as you log the quest. The other three will become available after killing the first five, but they are also a higher level, so you might have to wait until a little later before going after them. It’s entirely possible that you may have killed one or two of these men, since they are already out there in the wild. If you did kill some of them, then they will appear on your board as an unknown organization.
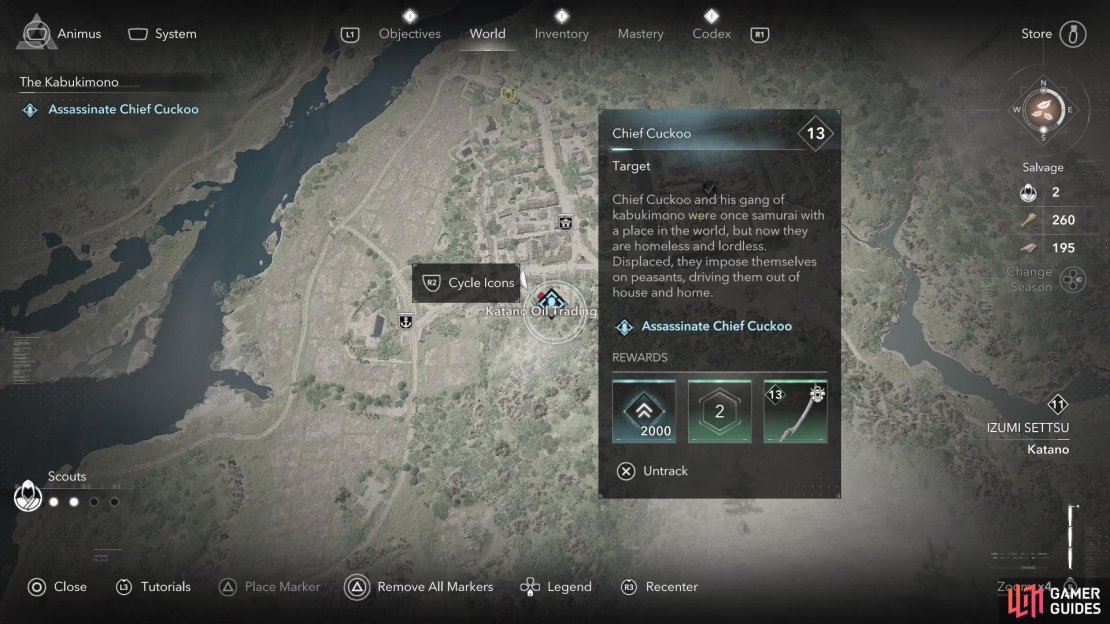
Chief Cuckoo Location
The clues given for this target is that he’s involved in oil trading, and he was last seen in Katano. Head to Katano Castle and southwest of it will be Katano Oil Trading, which is where you’ll find Chief Cuckoo. This is a restricted area, so just being in there will cause all of the enemies to come after you, should they see you, of course. You’ll probably want to thin out the numbers a little bit before going after Cuckoo, since there are quite a few of them. Other than the rooftops, there is a gap in the wooden fence on the western side that allows access.
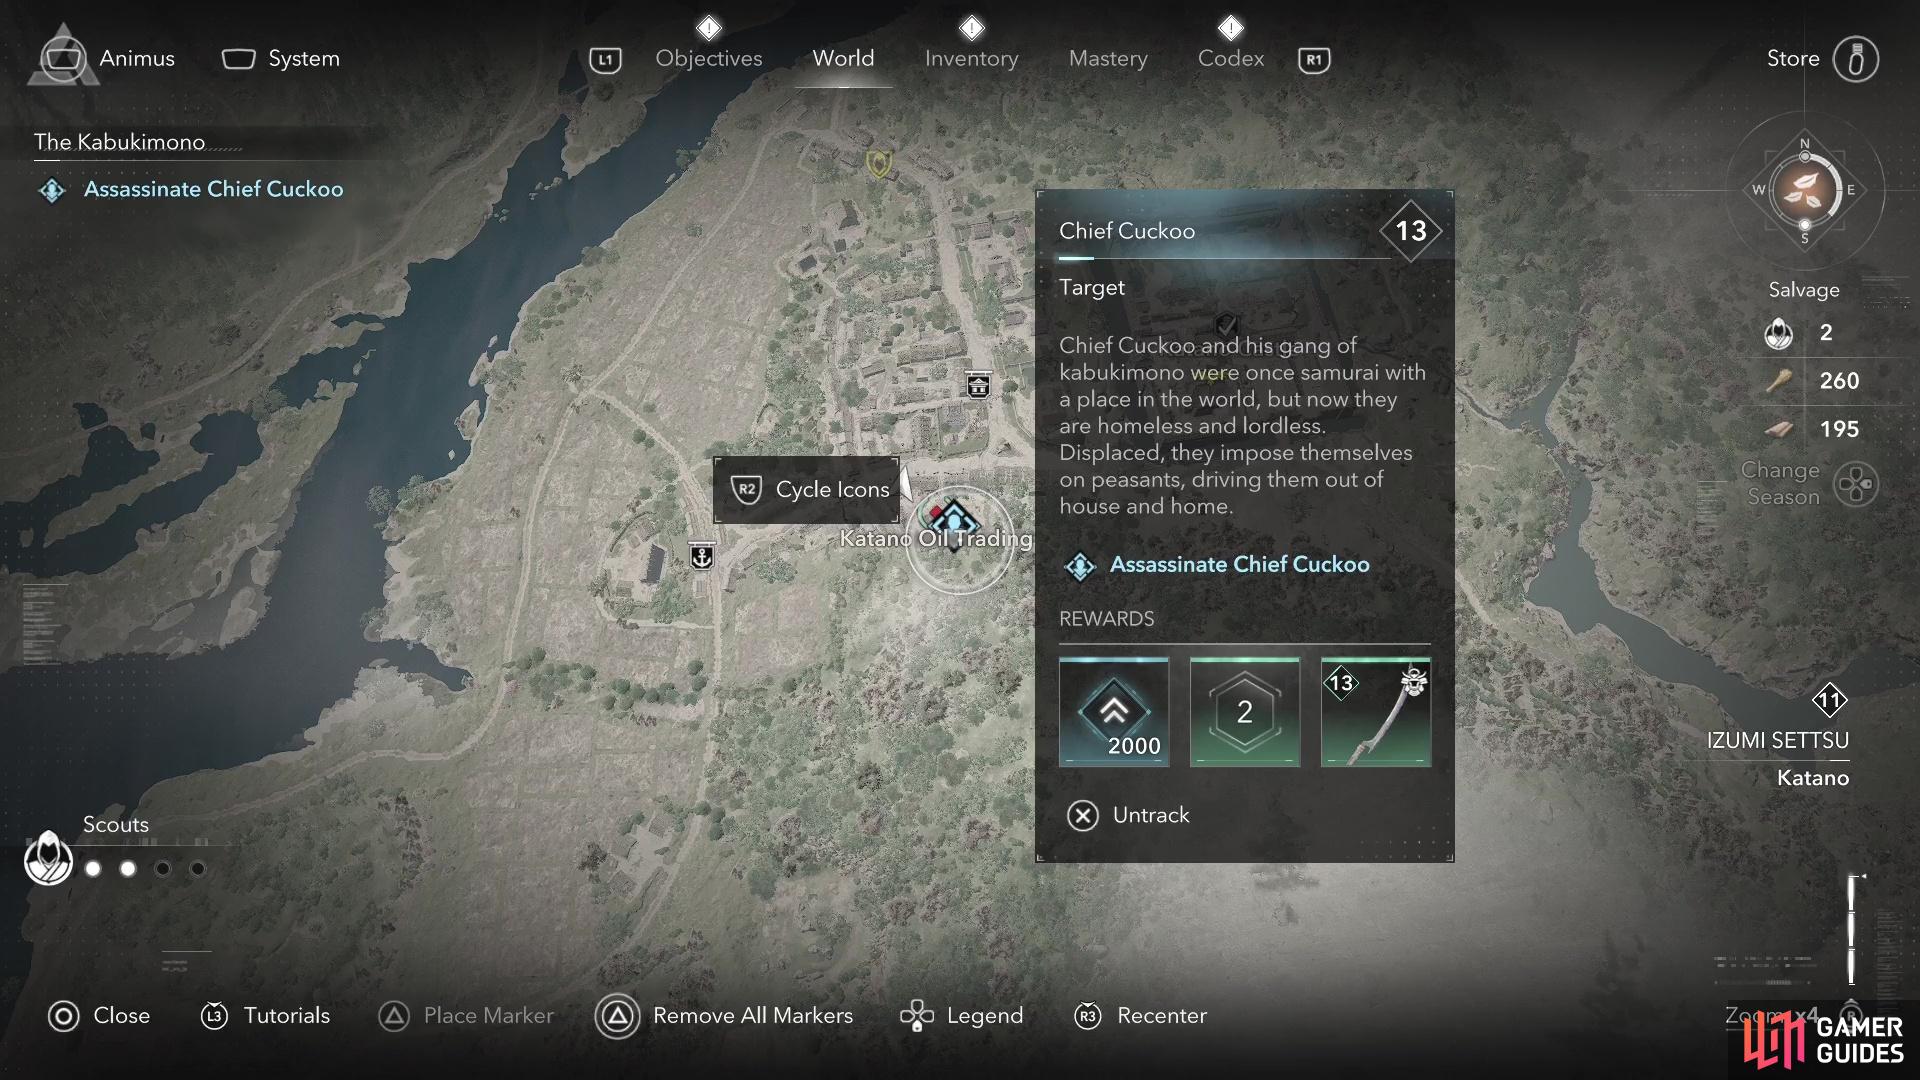

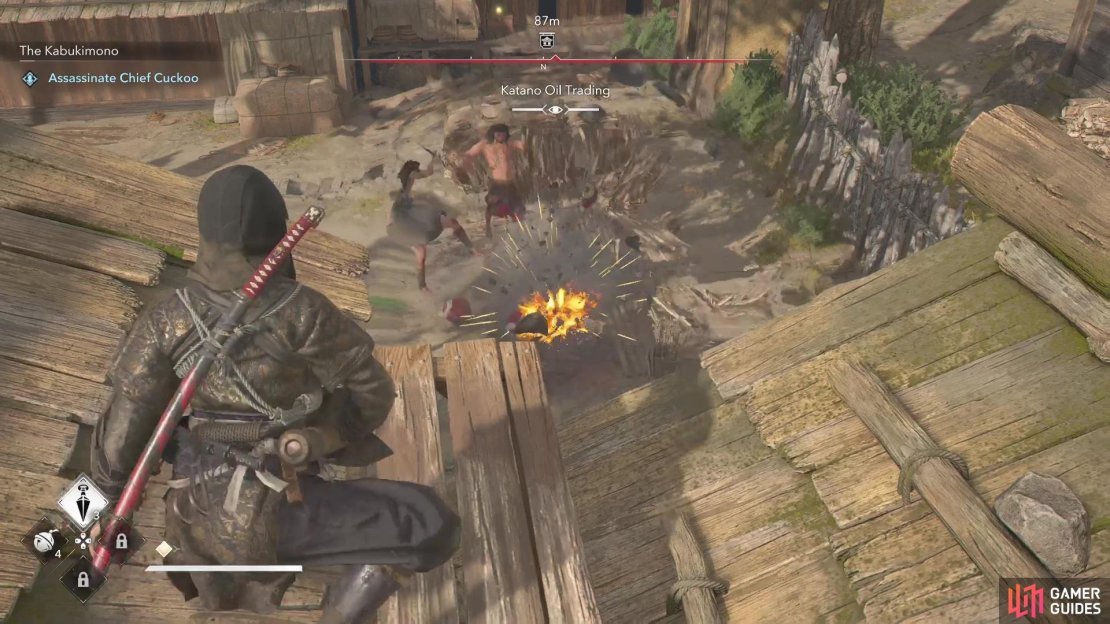
(1 of 4) Chief Cuckoo can be found at the Katano Oil Trading enemy camp.
You should be able to get the Elite by that gap, since he tends to explore alone over there. Once you do, move to the rooftops and go to the eastern end, where you can toss a kunai or shuriken at the explosive pots, taking care of two more ronin. This will cause some of the men to investigate, but remain hidden and they will eventually go back to their normal spots. Chief Cuckoo will always be accompanied by two other men, so getting him alone is not going to be easy.
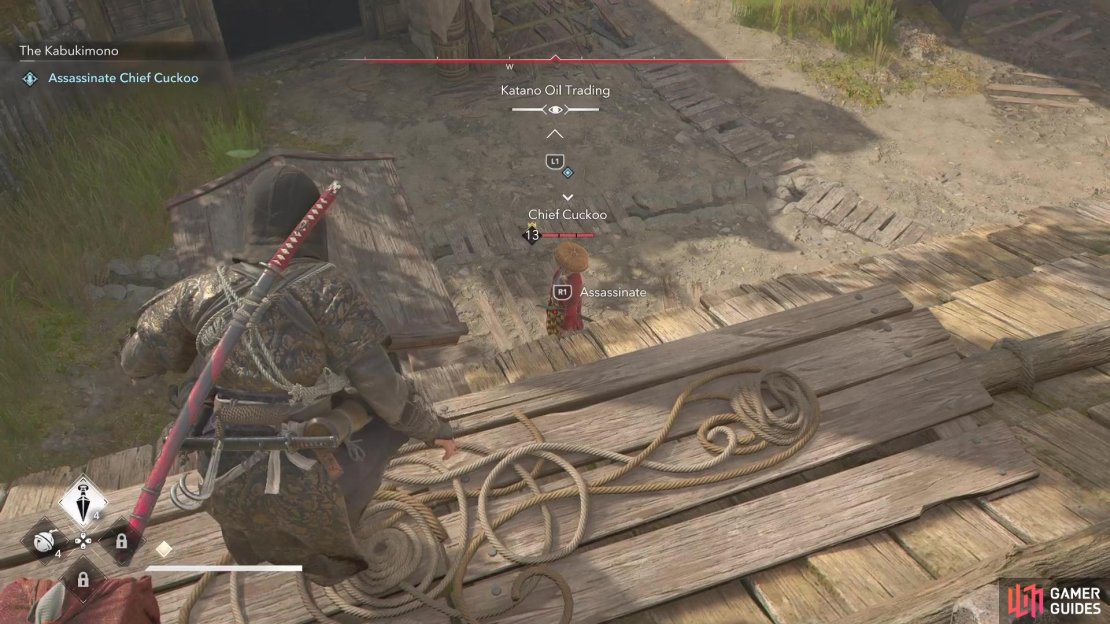
However, there is a brief moment on his normal route where he’ll go to the well by himself, while the other two remain in the one building. This is your chance to either drop down on him from above, or get him via hiding in the well beforehand. However you do it, get the kill and move onto the next target.
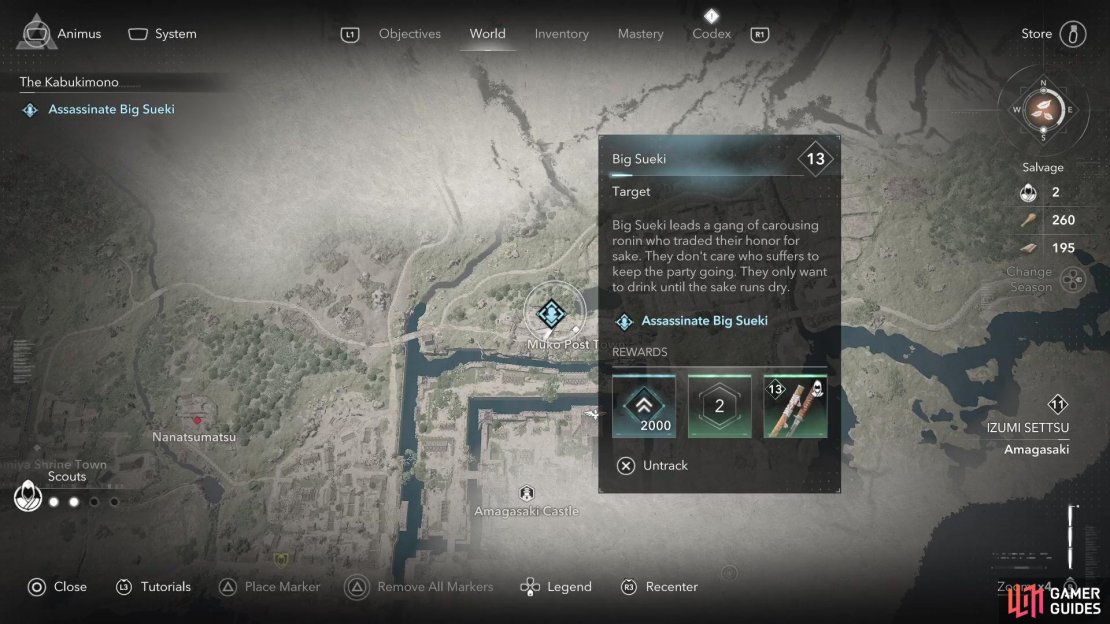
Big Sueki Location
To find Big Sueki, you won’t have to venture too far from the initial questgiver. The clues point out that he’s north of Amagasaki Castle and that he likes to drink in an inn. If you haven’t uncovered the castle yet, it’s just east of Nishinomiya Shrine Town. Just north of the castle is Muko Post Town and that’s where you’ll find Big Sueki. He’s not in a restricted section, but the area in which you find him is quite small, so it’s going to be hard to remain stealthy.

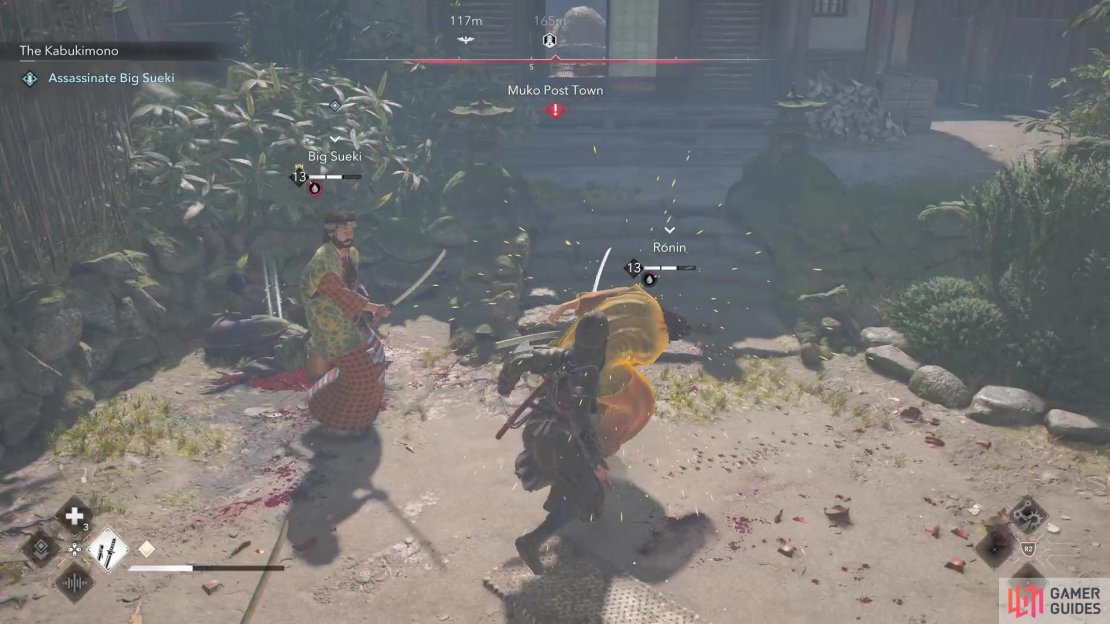

(1 of 3) Big Sueki is at Muko Post Town, north of Amagasaki Castle.
The first thing you should do is get rid of the ronin inside of the building, as he’s isolated and you can easily assassinate him. Outside of that, the rest are going to be tough to navigate around, so you’ll likely need to resort to fighting them all head-on. If you have the Smoke Bomb unlocked, you could try using that and using the smoke to thin down the numbers. Otherwise, after taking out the first enemy, perform an assassination from above on someone else to trigger the start of the fight.
Overall, the enemies here shouldn’t prove too difficult, although they will perform a three-hit combo, so block accordingly. They only seem to do this combo, so you shouldn’t have to worry about dodging any unblockable attacks. The tight space is the biggest problem here, since you’re going to be taking on at least three enemies at once, so make sure you always have them all in your line of sight. Kill Sueki, then clean up any other enemies and move onto the next target.
Grave Dancer Location
This is one of the easier targets to find, since the game flat out gives you his location, which is the Sumiyoshi Shrine. You will find this place to the northeast of Sakai, or pretty much straight south of Osaka Castle. Upon arriving there, you’ll overhear some people complaining about the kabukimono, so you’ll know you’re in the right place. Grave Dancer will be on the shrine’s grounds, but you want to be a little careful, as he’s out in the open. It also might look like he only has a single other enemy with him, but there might be more lurking nearby.
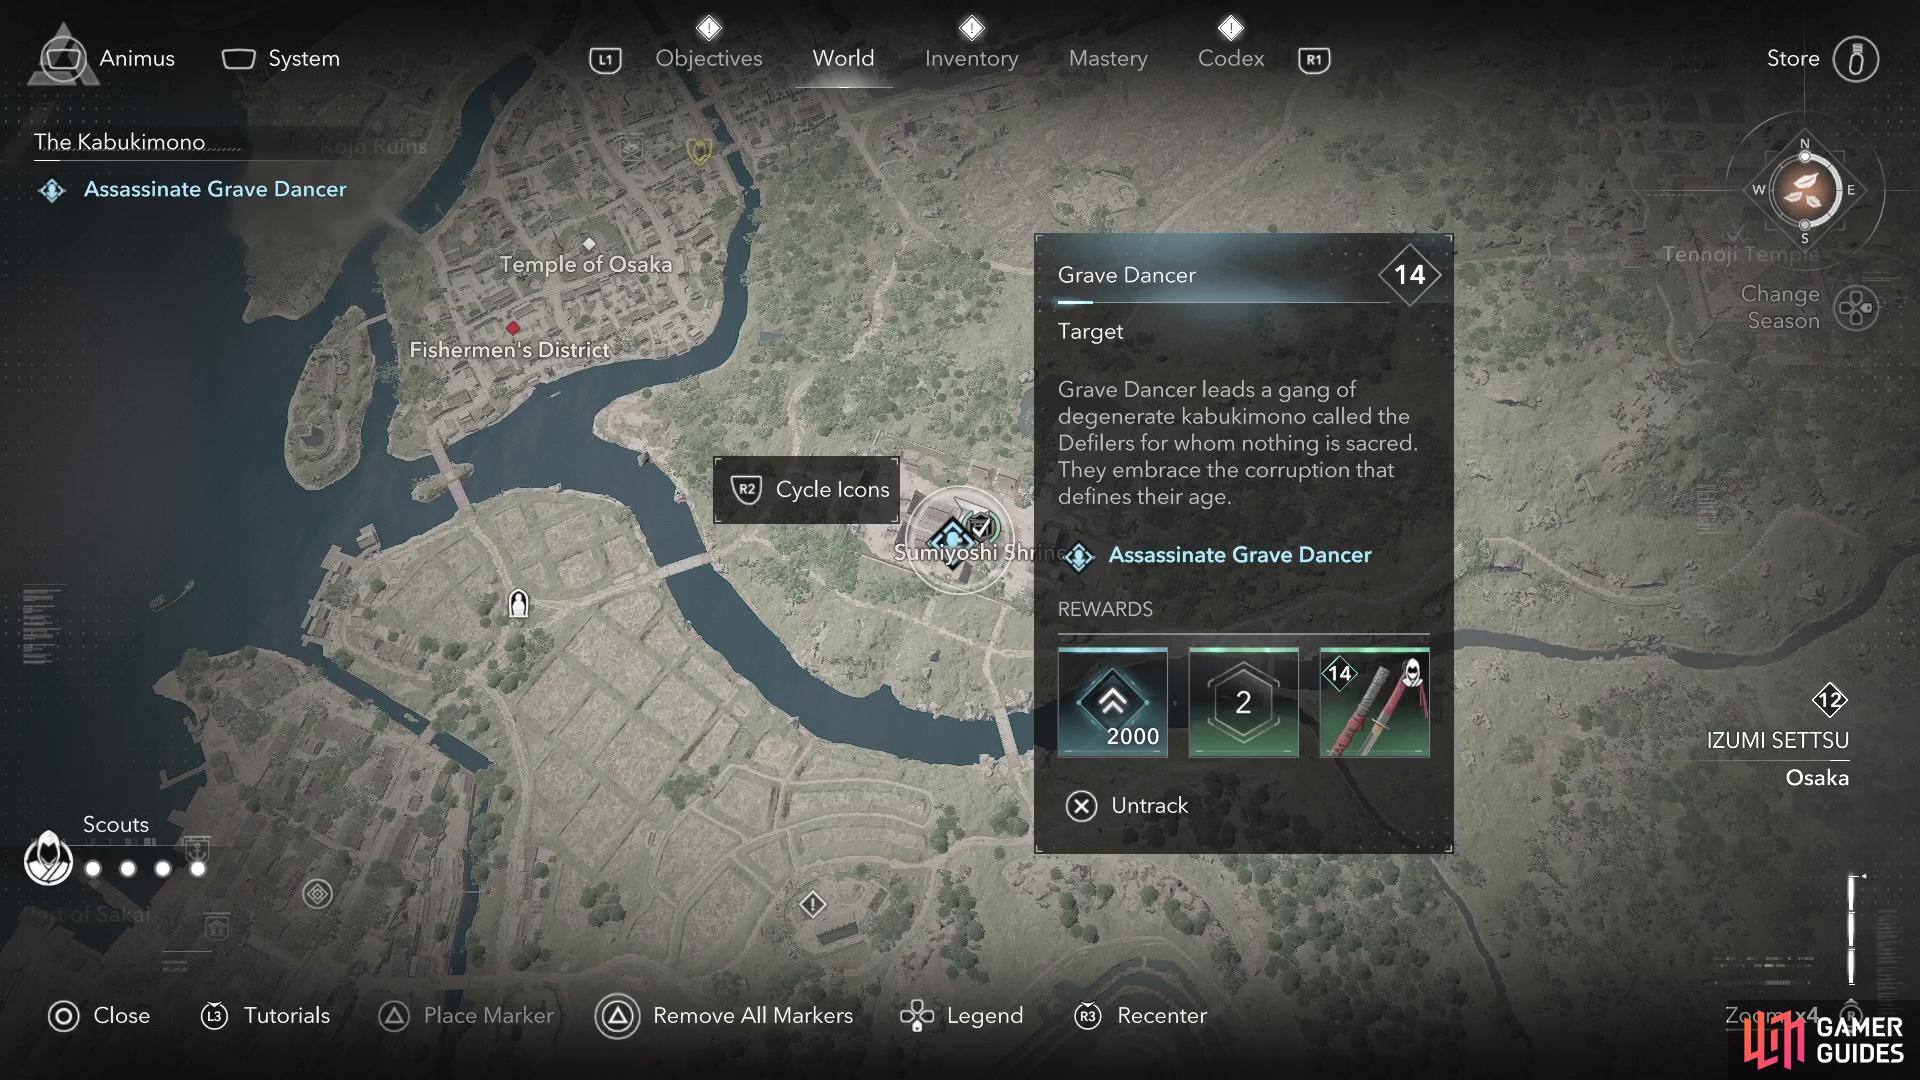

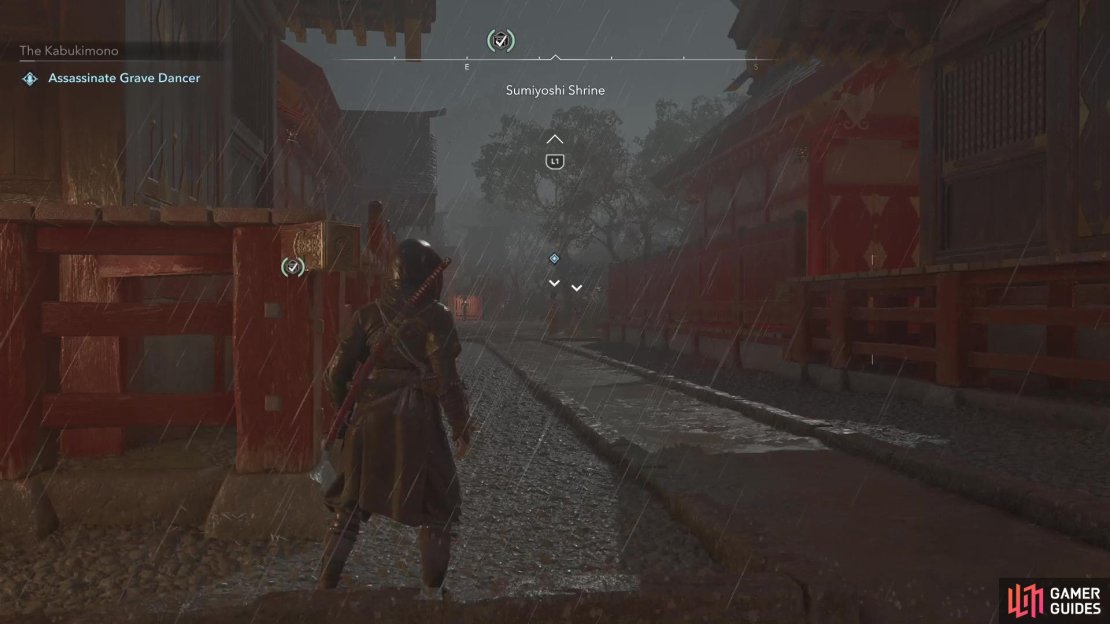
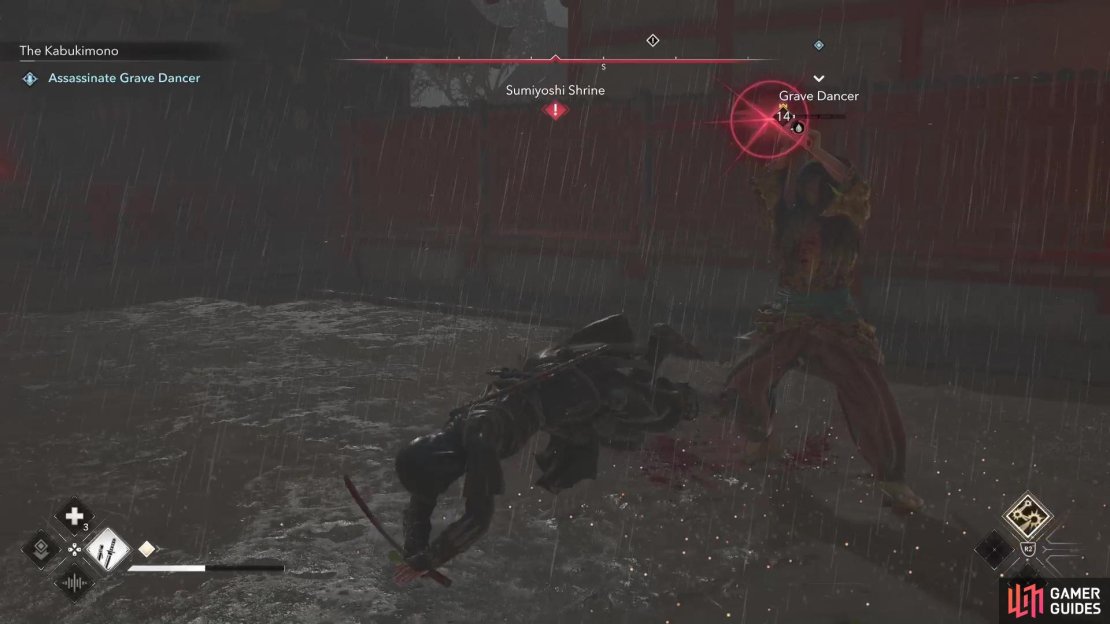
(1 of 4) Grave Dancer is at Sumiyoshi Shrine, south of Osaka Castle.
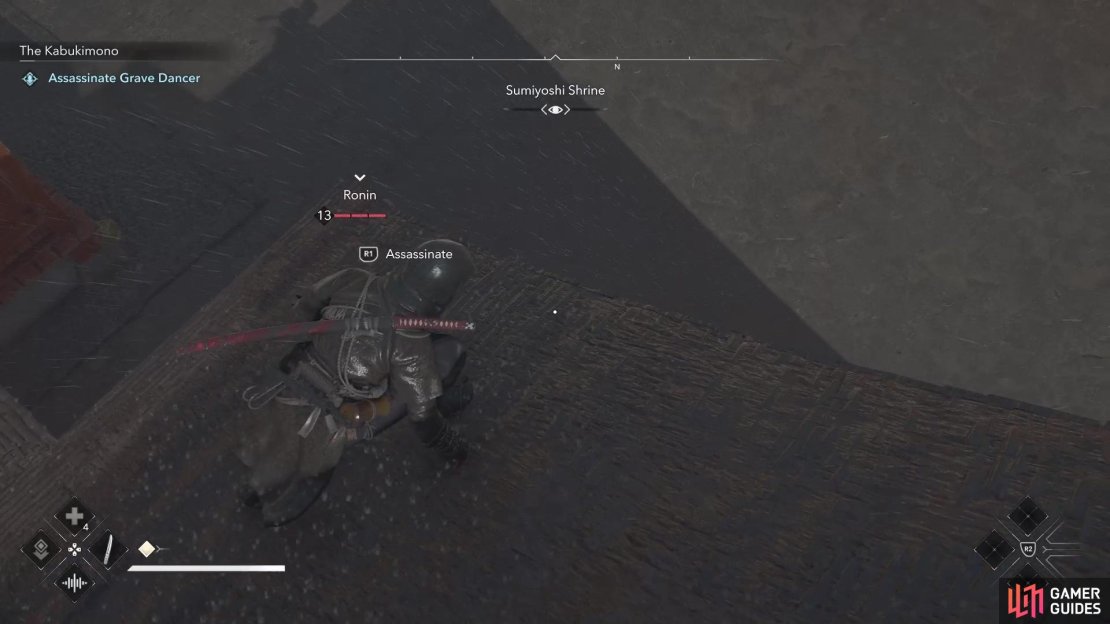
Use the rooftop of the main building to get the jump on the enemies, should they go wandering off on their own. One big problem is that Grave Dancer has four health segments, so unless you’ve been exploring a lot, you’re only going to be able to take off three, at most. That means you’ll be fighting him normally, so be aware of his unblockable attacks that he has. Dodge when needed, and continue blocking/parrying his other attacks to eventually bring him down for good.
Ember Location
The in-game clues don’t offer too much of a clue as to the exact location of Ember, other than he’s southwest of Osaka Castle and found near burnt buildings. To be specific, you will find Ember is the same area as the Temple of Osaka. He is in a small, restricted spot (not named) just west of the Temple of Osaka, so look around for your compass at the top of the screen to turn yellow, which means you’re there. He’s also the easiest Kabukimono to take down, despite him having three other men there and being in a tight space.
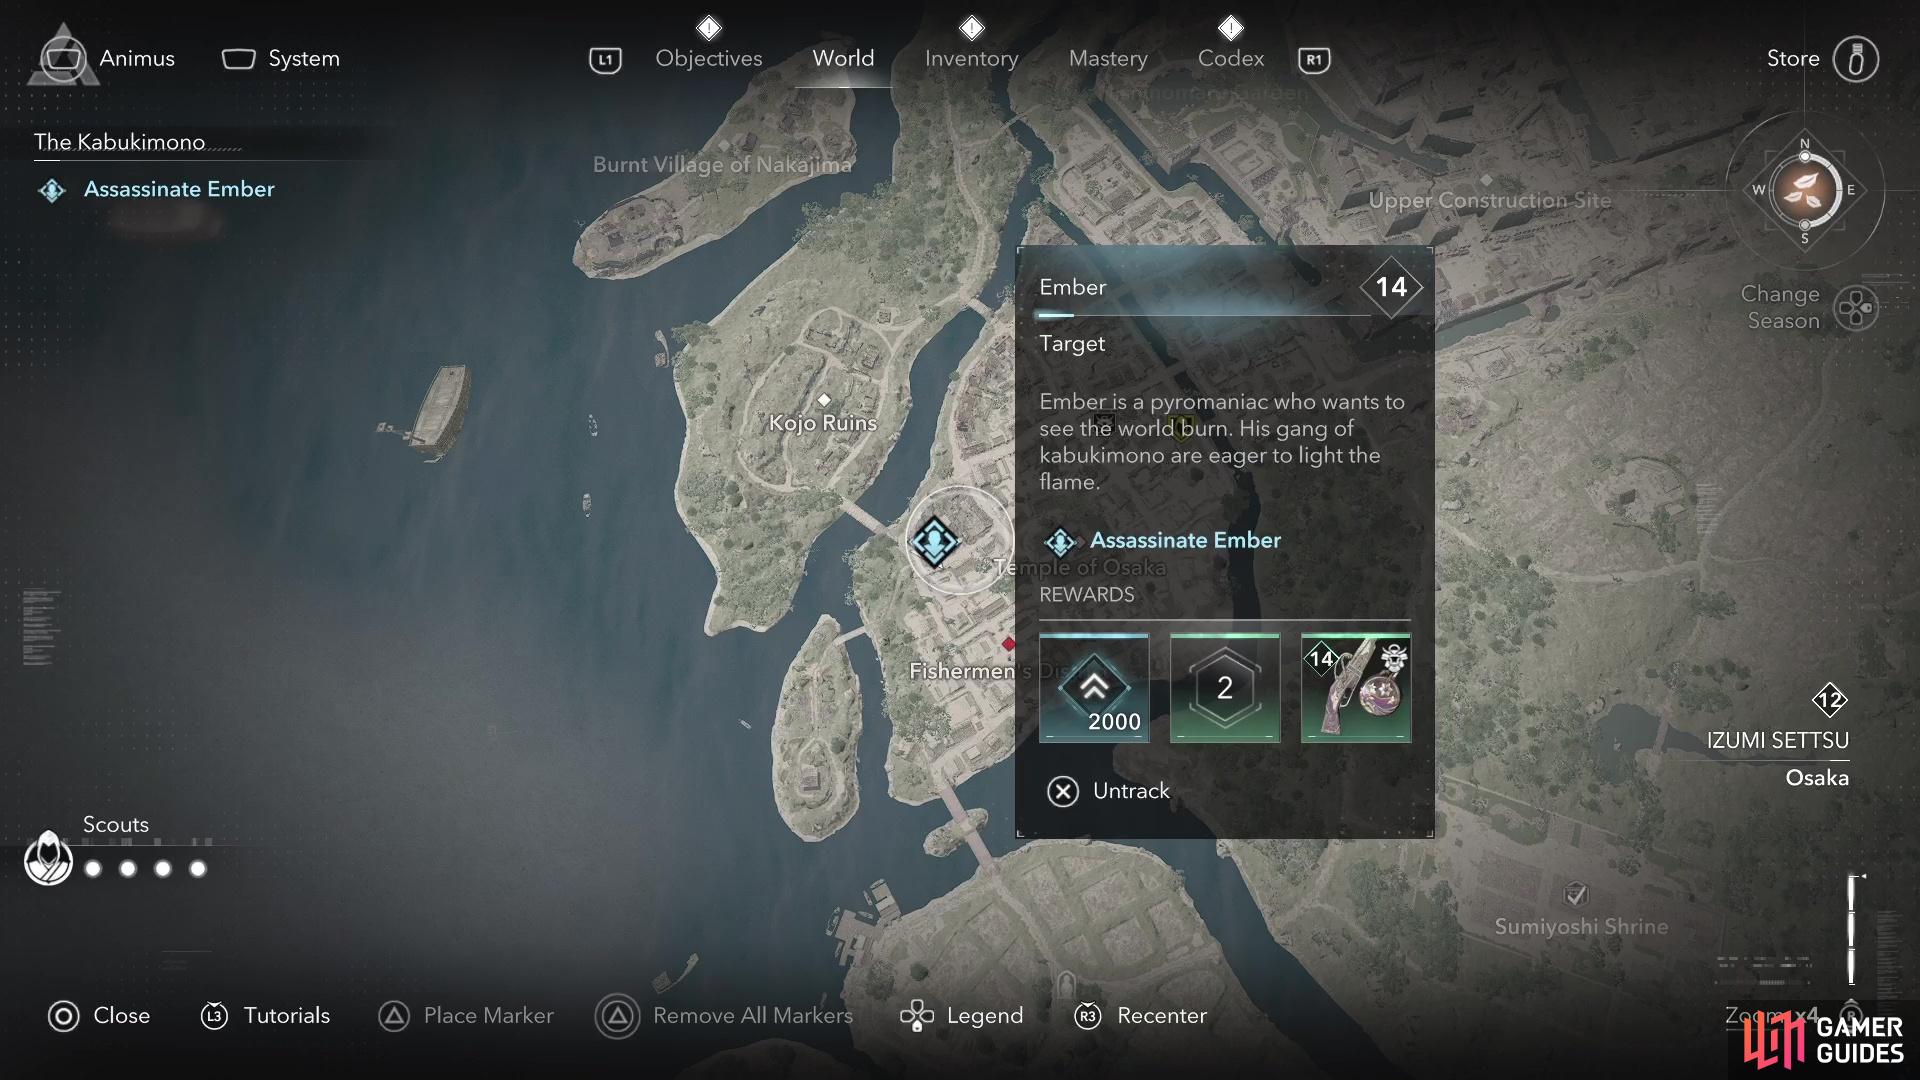
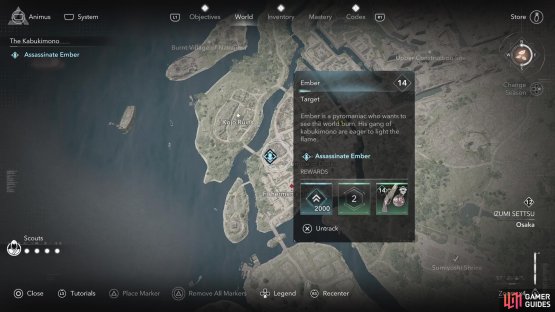
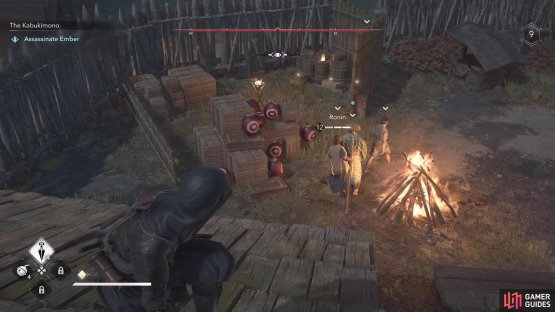
(1 of 2) Ember will be found west of the Temple of Osaka.
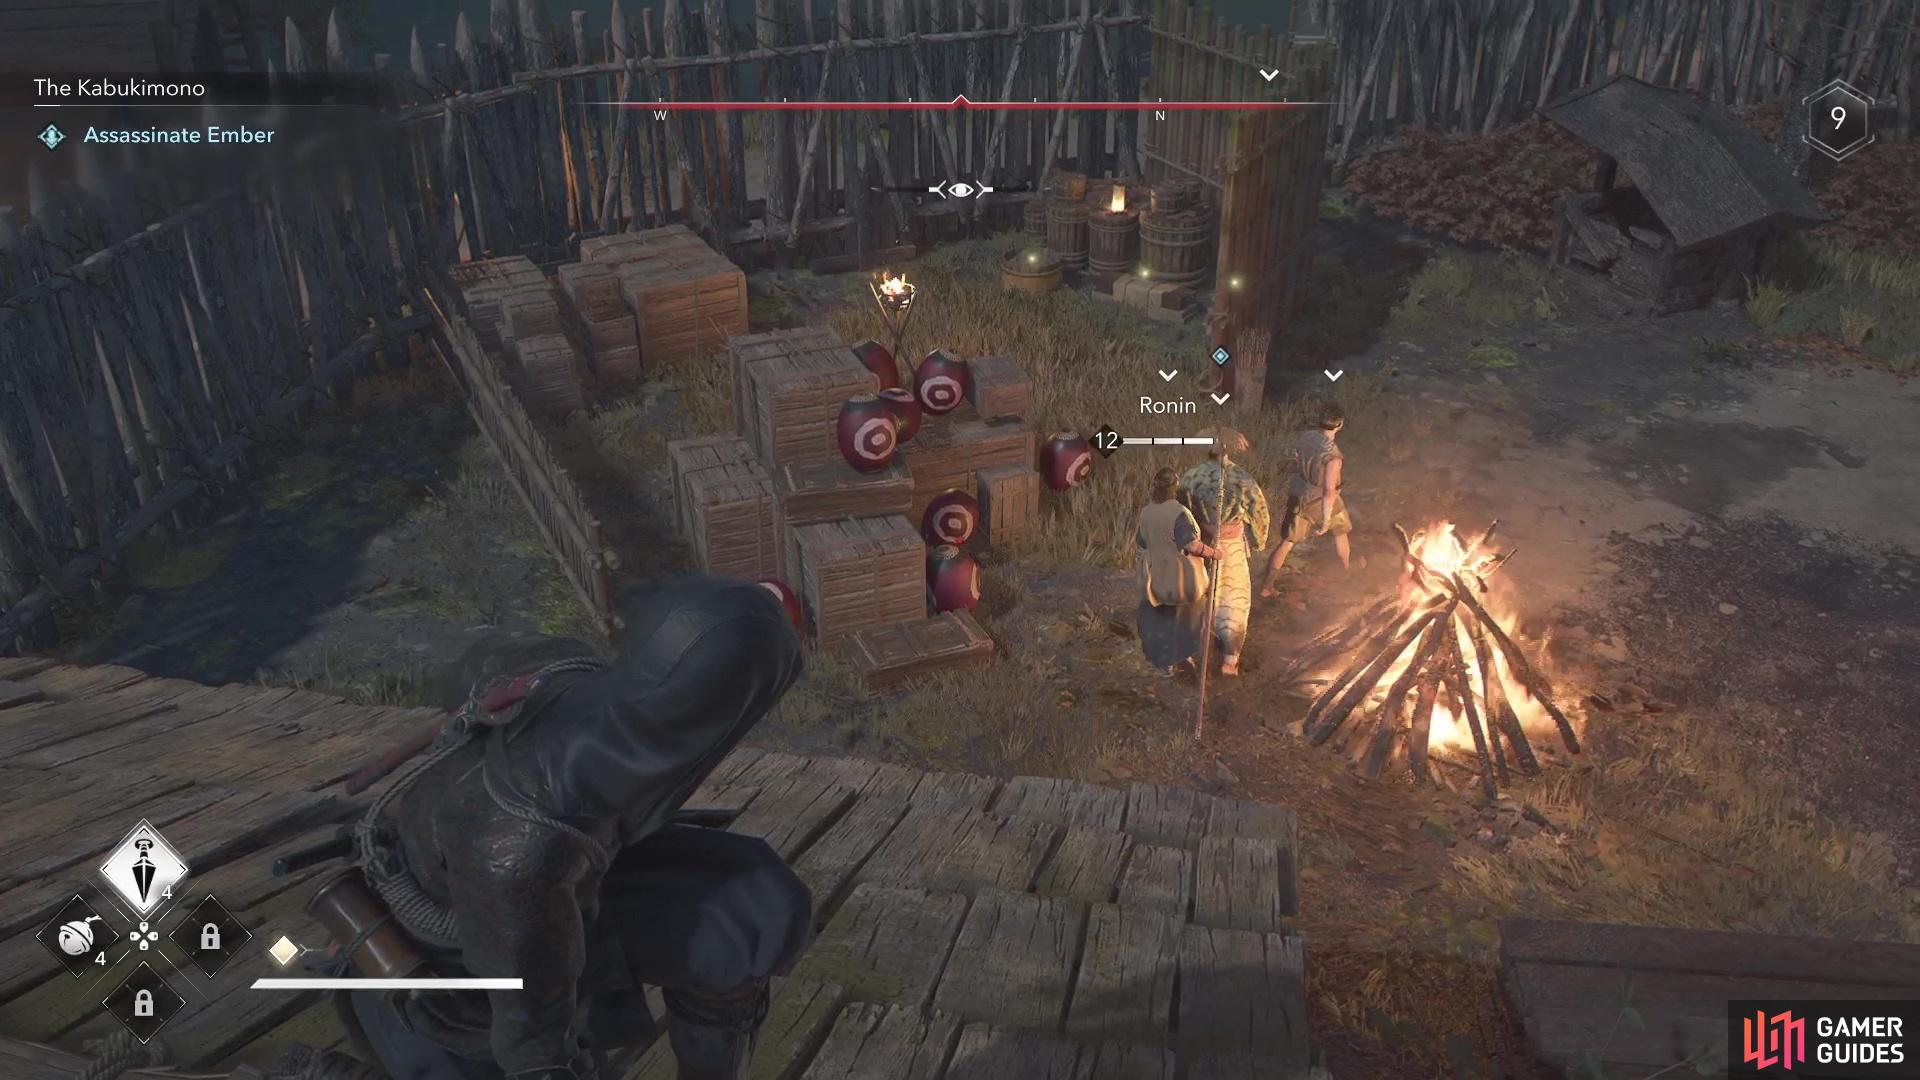
Ember will be found west of the Temple of Osaka. (left), Just wait until he walks by the explosive pots, then hit them to easily kill him. (right)
Ember is a pyromaniac and wants to watch the world burn, but his love for fire is going to cost him dearly. There are quite a number of explosive pots in the area with Ember, so that’s going to be his downfall. You just need to wait for him to walk by the pots, then hit it with a ranged weapon to set them off, basically just instantly killing him. If you want to do things another way, he has five health segments, so you’re in for a longer fight, should you do it that way.
Ghost General Location
You will find Ghost General in the Money Changer District, in the Sakai area. You will usually see him in the restricted area, but he goes wandering off to the north, although he does bring some men with him. Considering the number of other men in the Money Changer District, it’s best to patiently wait and watch him for a bit, to see if he leaves. If he does, then you can follow him away from the other enemies, making this a lot easier on yourself.
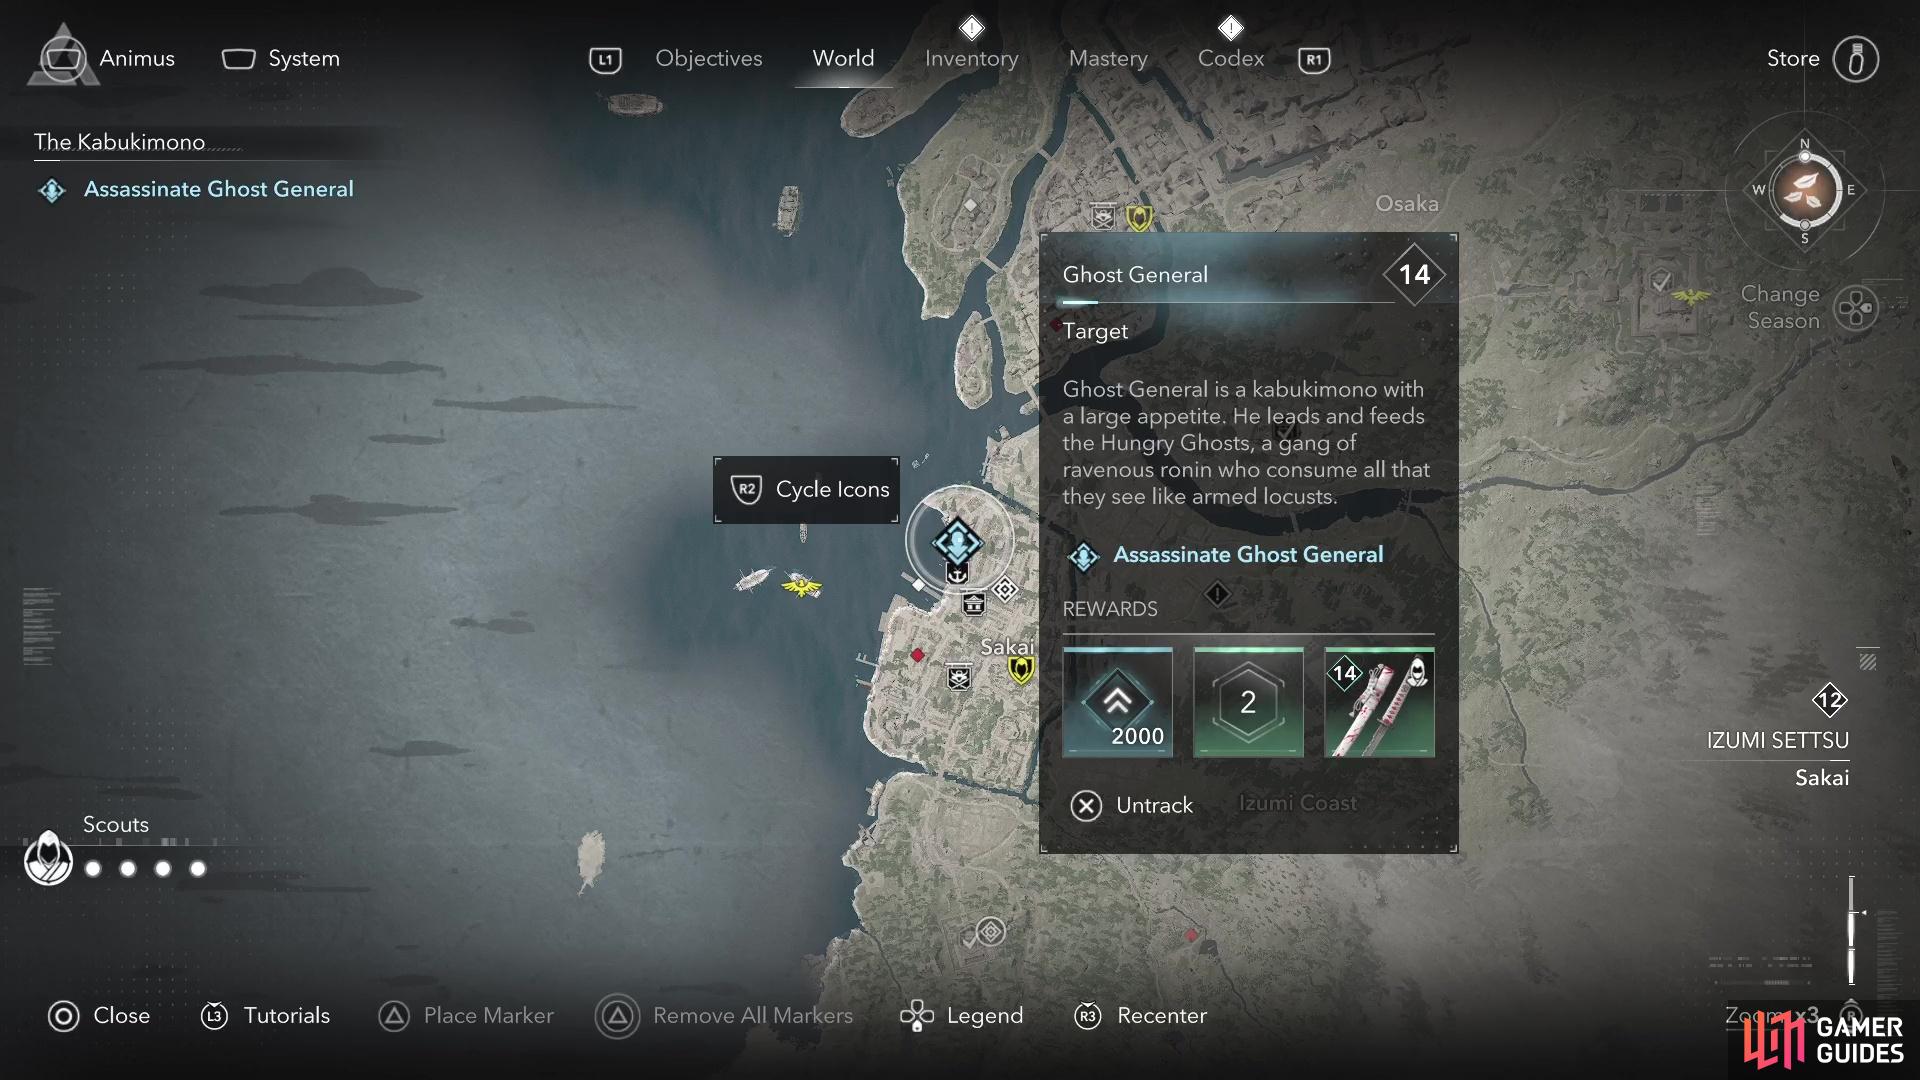
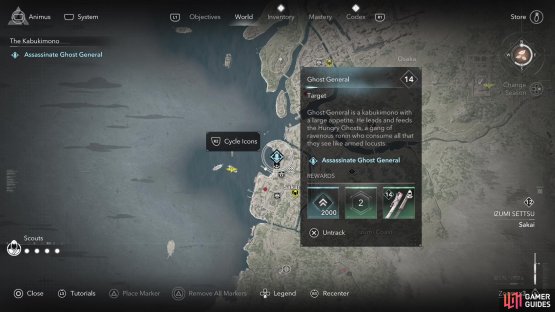
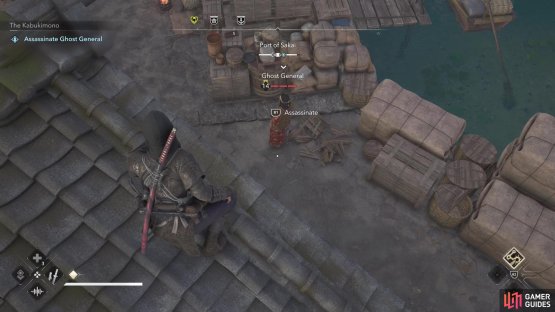
(1 of 2) Ghost General is found along the pier area of Sakai.

Ghost General is found along the pier area of Sakai. (left), Wait until he’s by himself before pouncing on him. (right)
He only has three health segments, so you could do a proper assassination on him, without too much extra work. If he separates himself from any other enemies following him, then you can simply walk up behind him, stick your hidden blade into him, then walk off as if nothing happened.
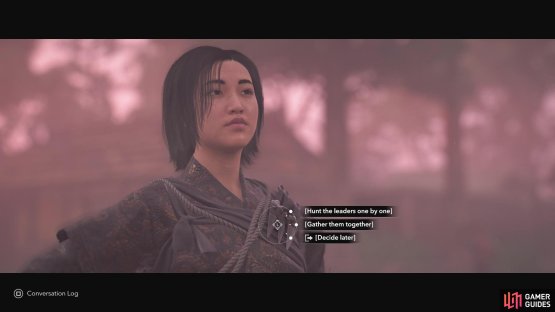
The Kabukimono - Gather Them Together or Hunt One-By-One
After defeating the above five targets, the three leaders should now become available on the objectives board. Navigate to it and you will see Nishinomiya Shrine mentioned, so travel over to it and look for a signboard on the eastern side. Interact with the signboard to leave a message, which will determine whether the remaining three Kabukimono will come together in one spot, or if you will have to hunt them down, one-by-one.
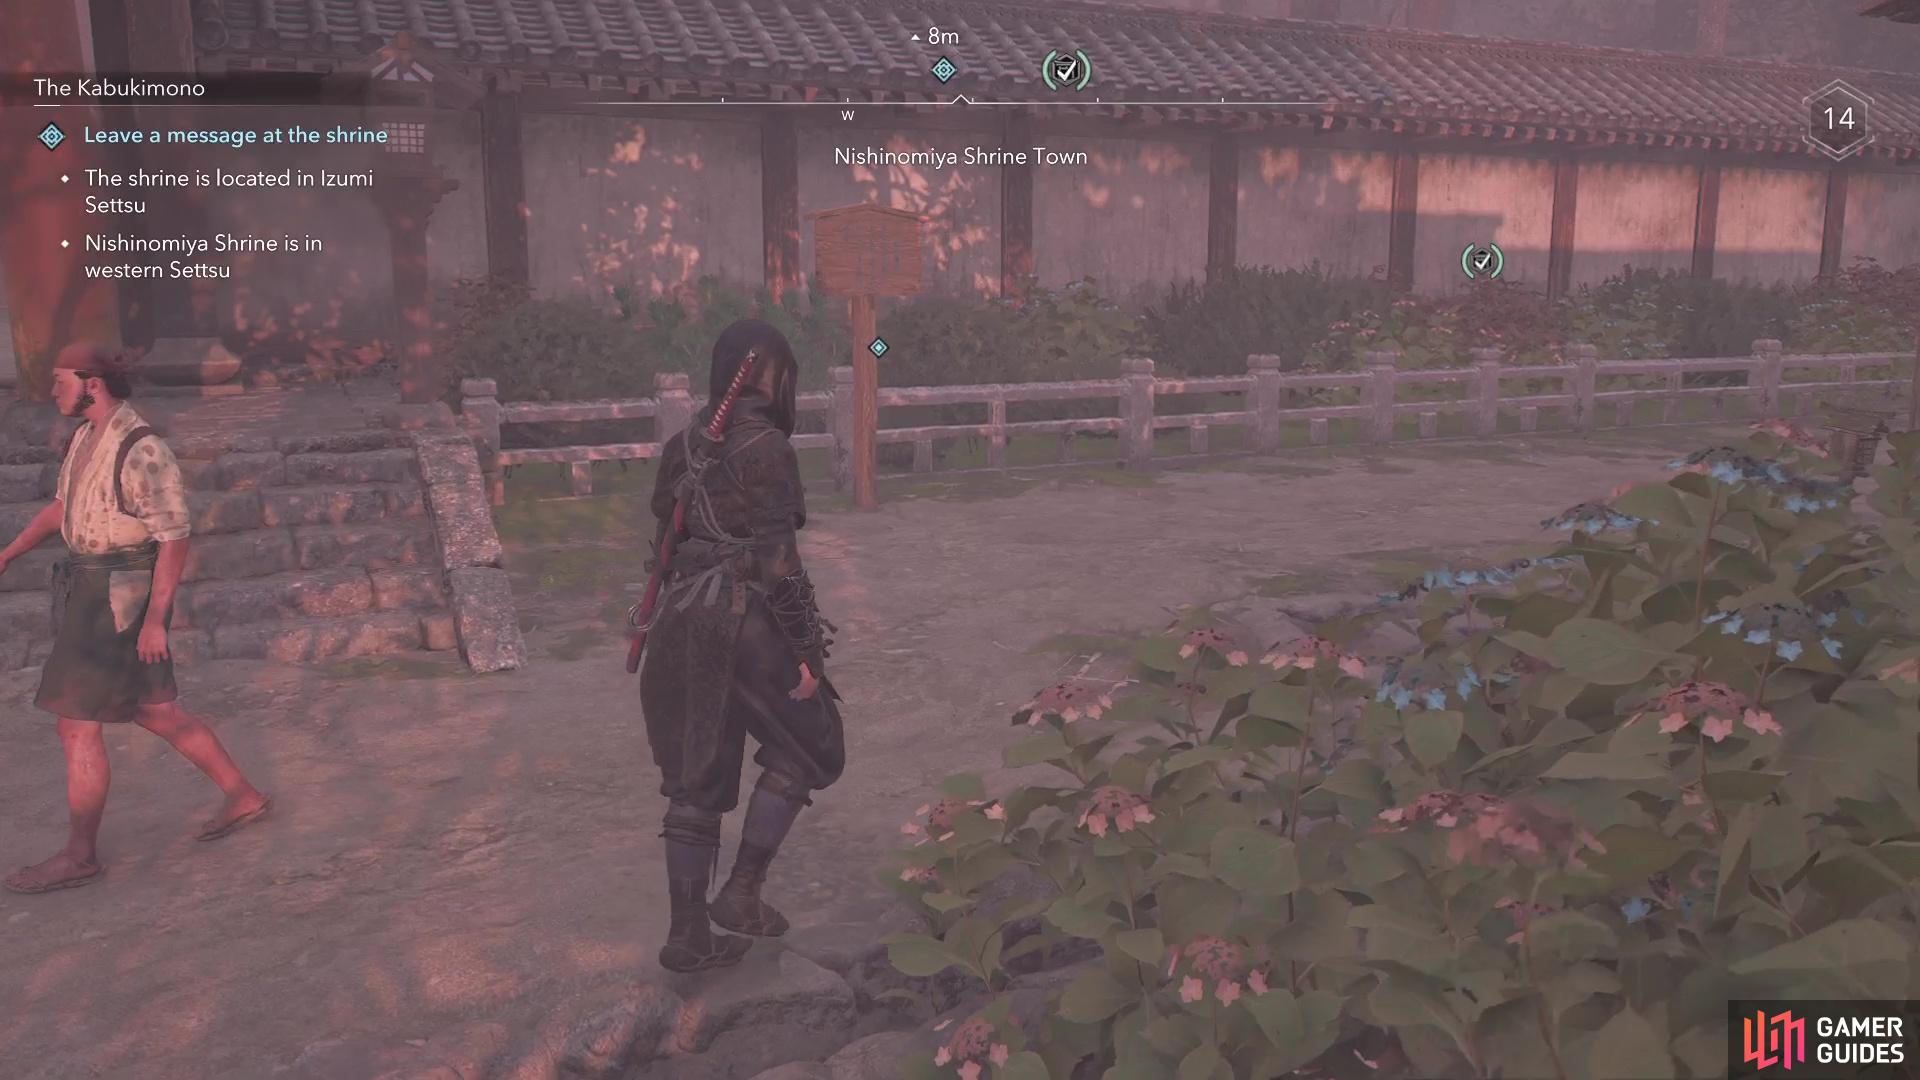

(1 of 2) Interact with the signpost here at Nishinomiya Shrine to get a choice.

Interact with the signpost here at Nishinomiya Shrine to get a choice. (left), You will have the option to gather the remaining three in one place, or go after them separately. (right)
Either way, all of them will be in the Harima region, which is just west of your current location. This region is level 23, at a minimum, and so are the remaining Kabukimono, so you might not be quite ready yet for them by the time you unlock them. If you try to go after them at too low a level, you won’t be able to assassinate them, since they will be too strong. You will have to do other things in the game to boost your own levels, until you’re on par with them.
The Kabukimono - Gather the Leaders
If you chose to gather the leaders in one spot, then you’ll still be going to the Harima Region, but you won’t have to travel too far. East of the Takagi Otsuka Fort, you will find an enemy camp that contains the three leaders, as well as some other enemies. This can be a challenging section to do, especially as just Naoe, so if you wait until you unlock Yasuke, a direct confrontation will be easier. You might also have a tough time with Naoe, since she won’t be able to stealth kill them all, due to them having a lot of health.

(1 of 2) The location of the leaders if you choose to gather them in one spot.
The location of the leaders if you choose to gather them in one spot. (left), They will be in a camp just southeast of Takagi Otsuka Fort. (right)
If you are using Naoe, make use of all of your tools, as well as the whistle distraction. Taking out all other enemies besides the three targets will make it a little easier, although the big three aren’t exactly pushovers. Fighting them all head-on with Naoe is going to be a challenge, but you could see if you have any equipment that have health segment removal for assassinations, just in case you might have a chance to do it in the shadows.
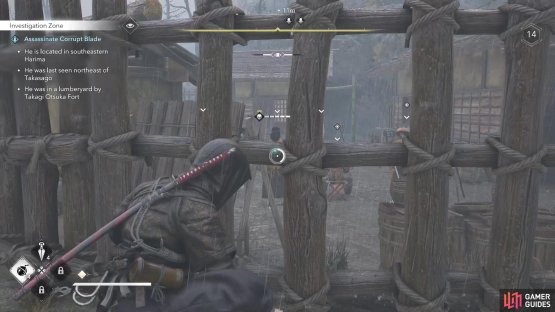
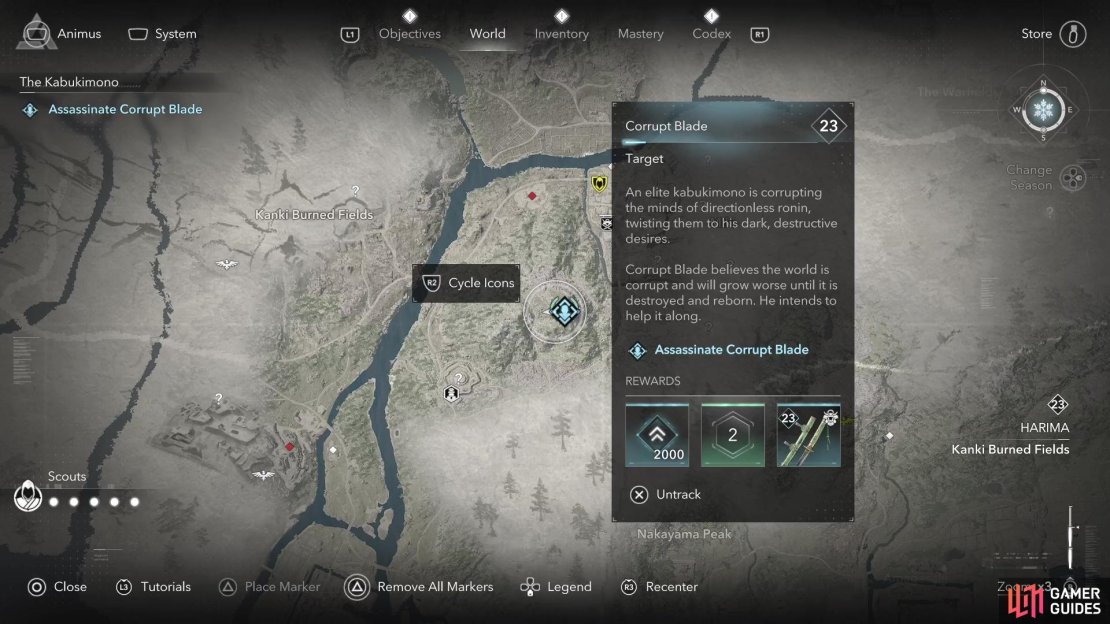
Corrupt Blade Location
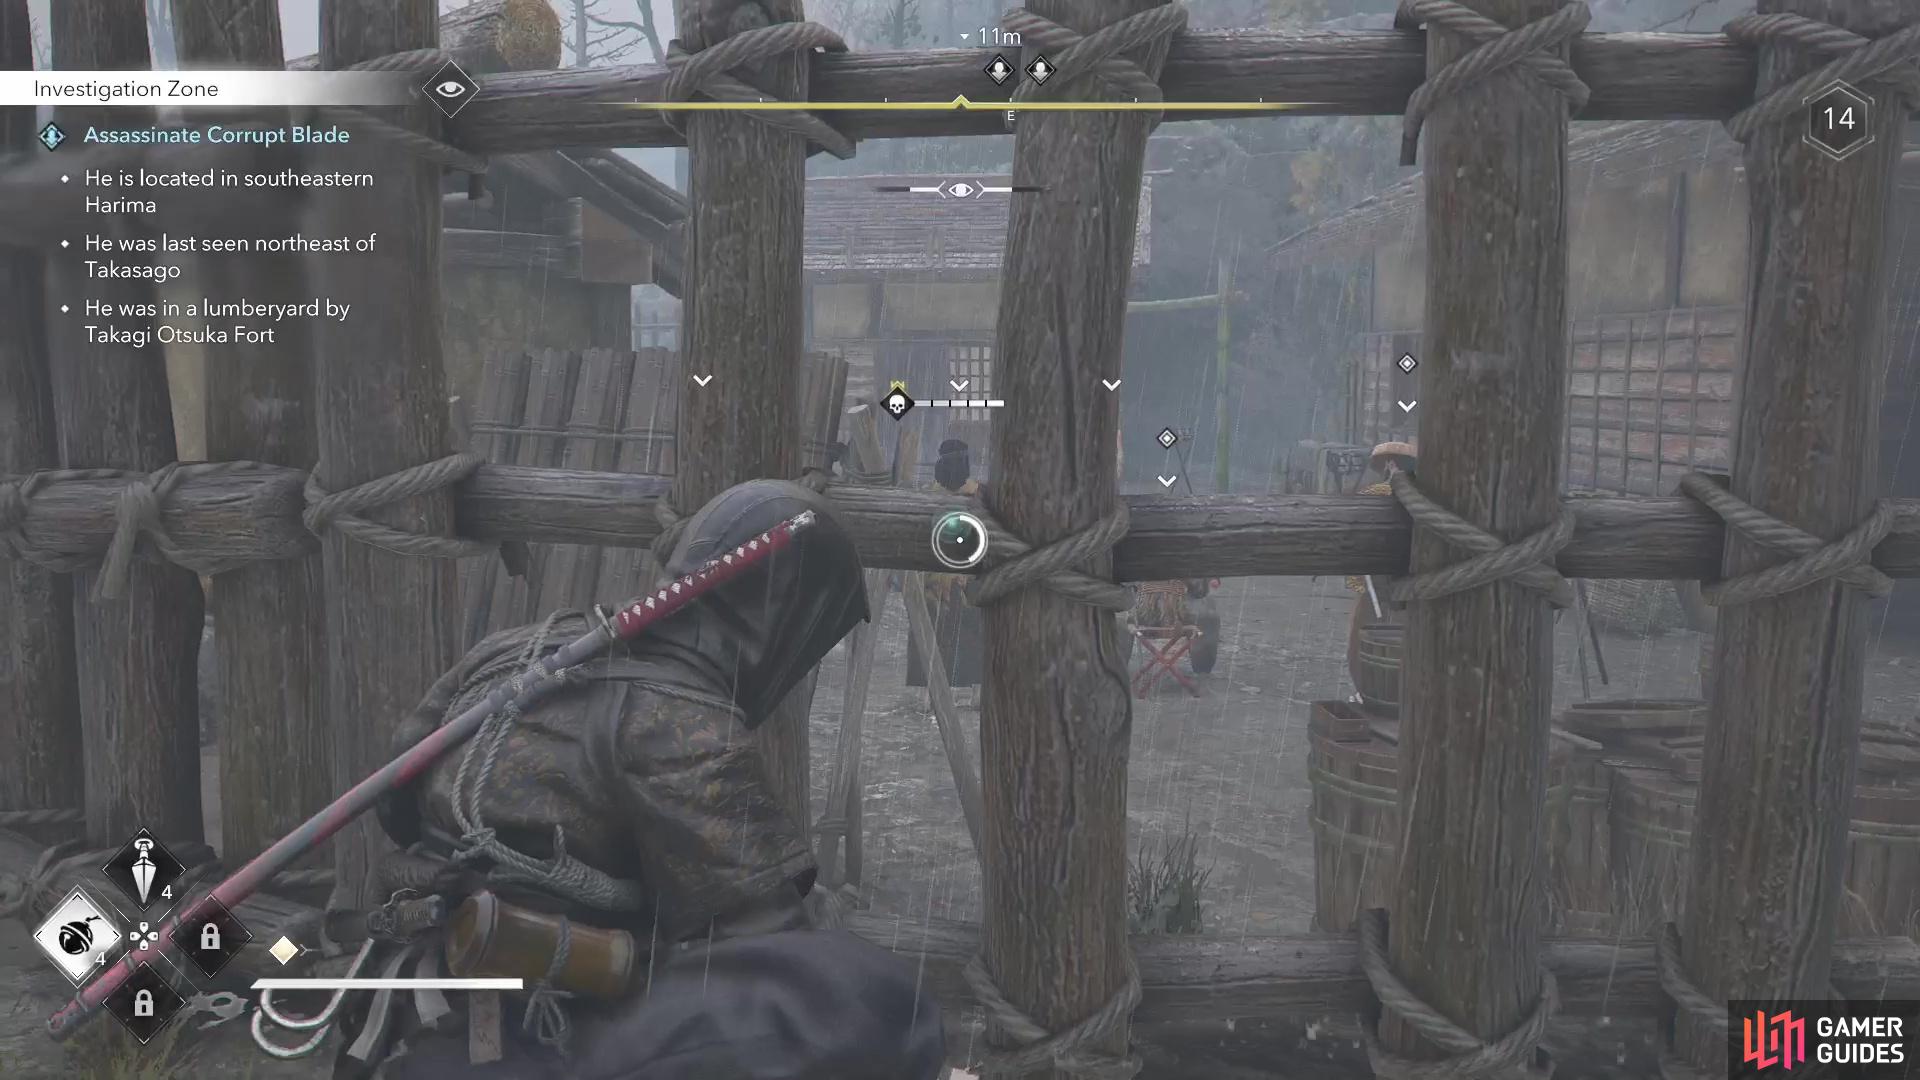
Of the three leaders, Corrupt Blade is probably the toughest, since he’s in a camp with other enemies. Look for the Miki sub-region of Harima and head to the southern shoreline of the river that runs through it. You’re basically trying to find the Miki Docks location, with the Miki Kakurega being right near it. You’ll want to head west from the Miki Docks, past The Chop restricted area and follow the road to the southwest for a little bit.
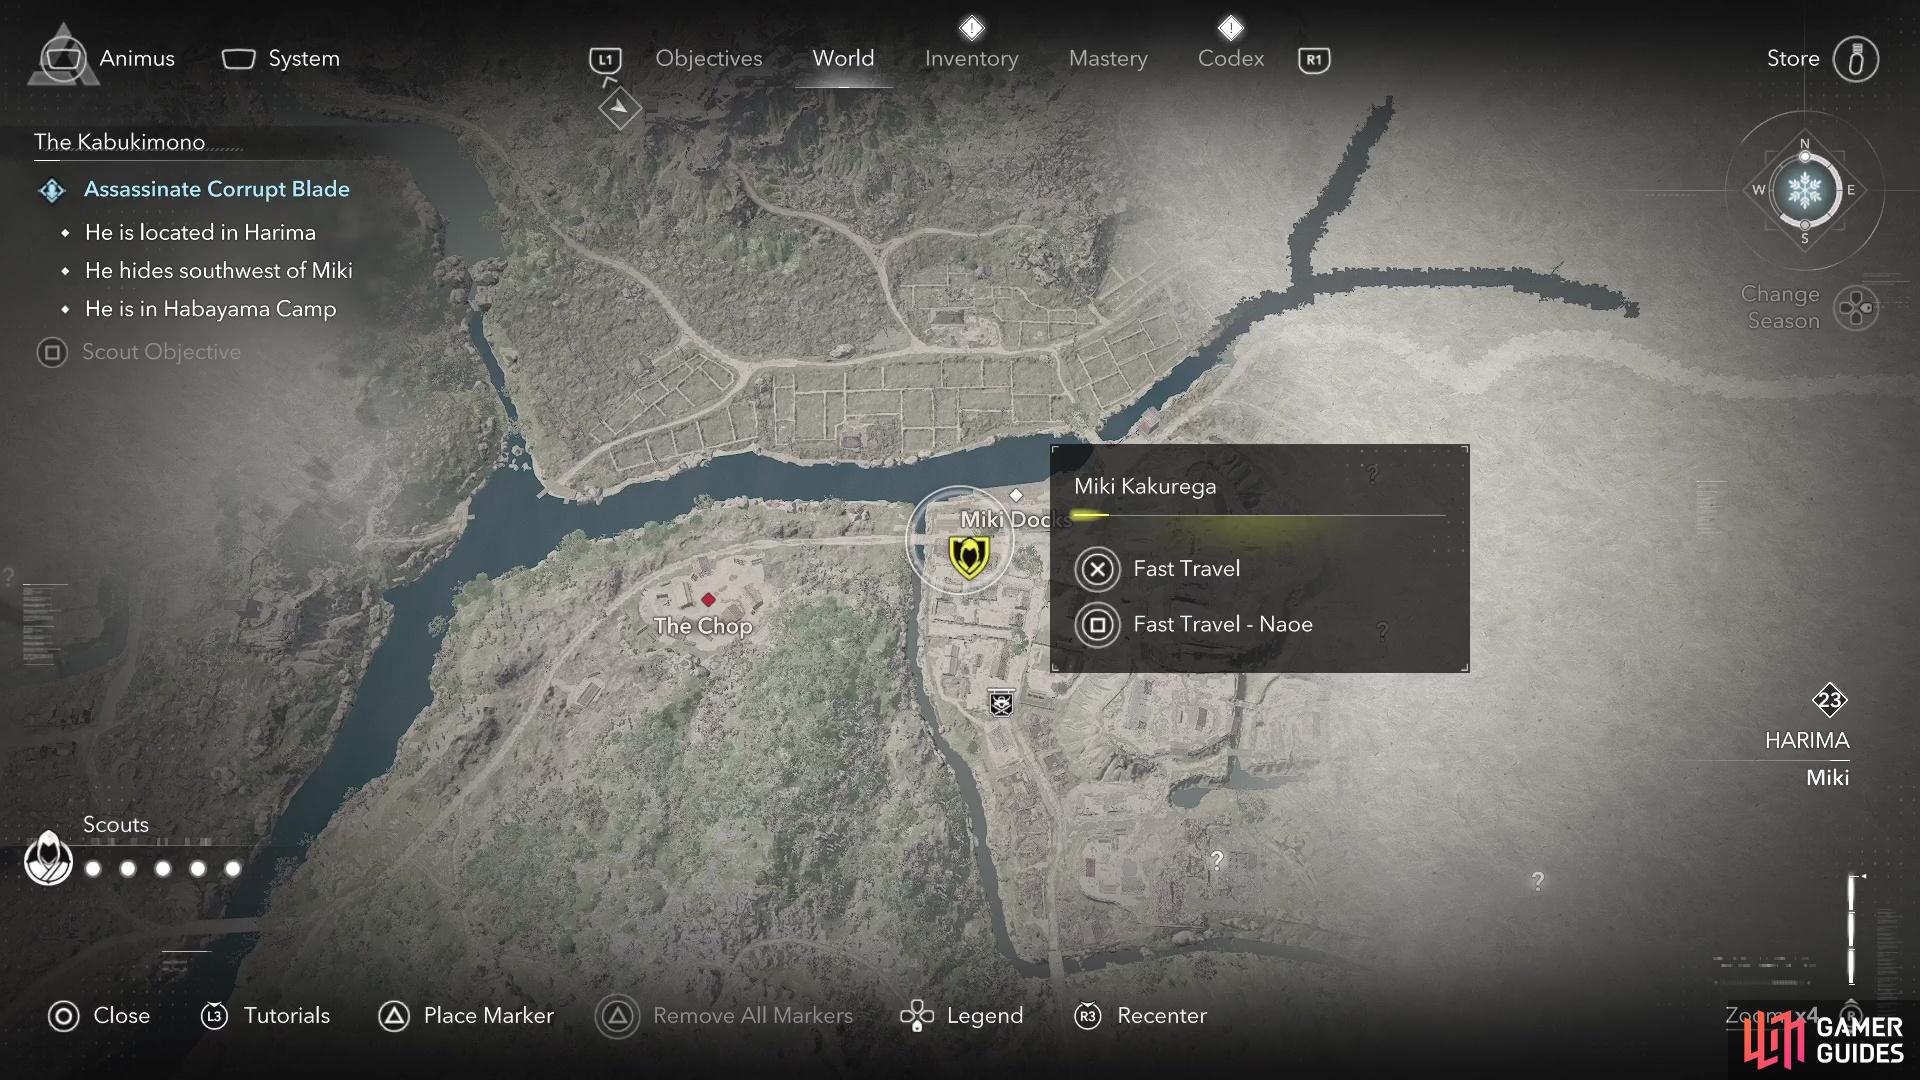


(1 of 4) Start at Miki Docks in the Miki sub-region to have an easier time finding Corrupt Blade.
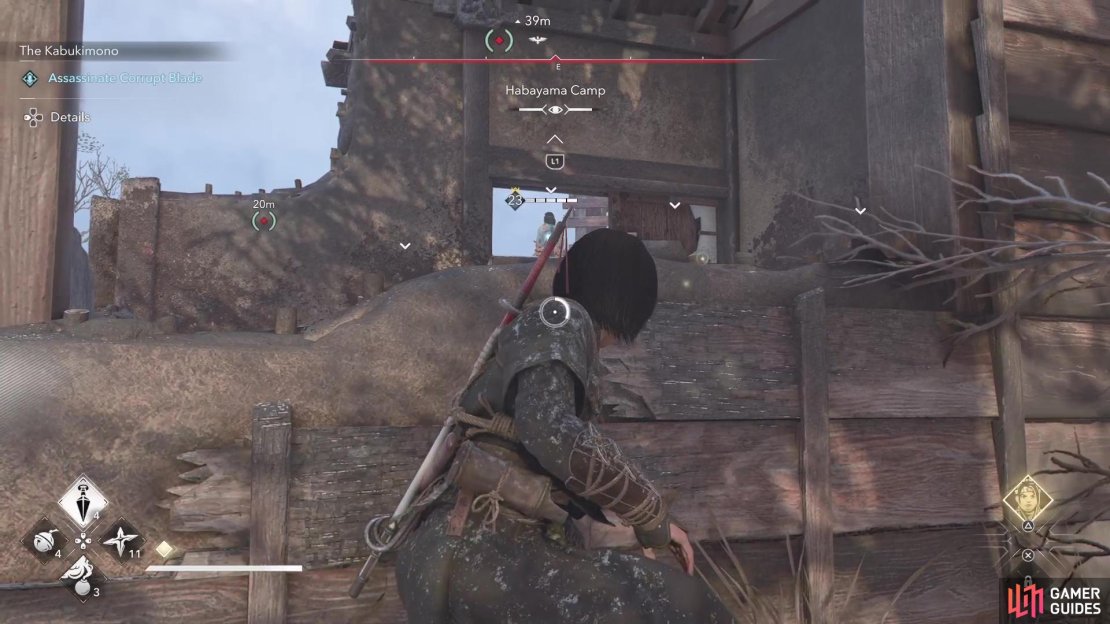
Once you reach a guard tower, take the smaller path leading south/southeast to bring you right to Habayama Camp. While there will be some enemies on the path leading to the camp, the main area with Corrupt Blade only has around 5-6 enemies total. You can either try to stealth kill them all using Naoe, or go in and do battle with Yasuke. Corrupt Blade will always walk around with a Ronin following him, so if you go the sneaky route, you’ll need to likely do a Double Assassination to take them both out at the same time.
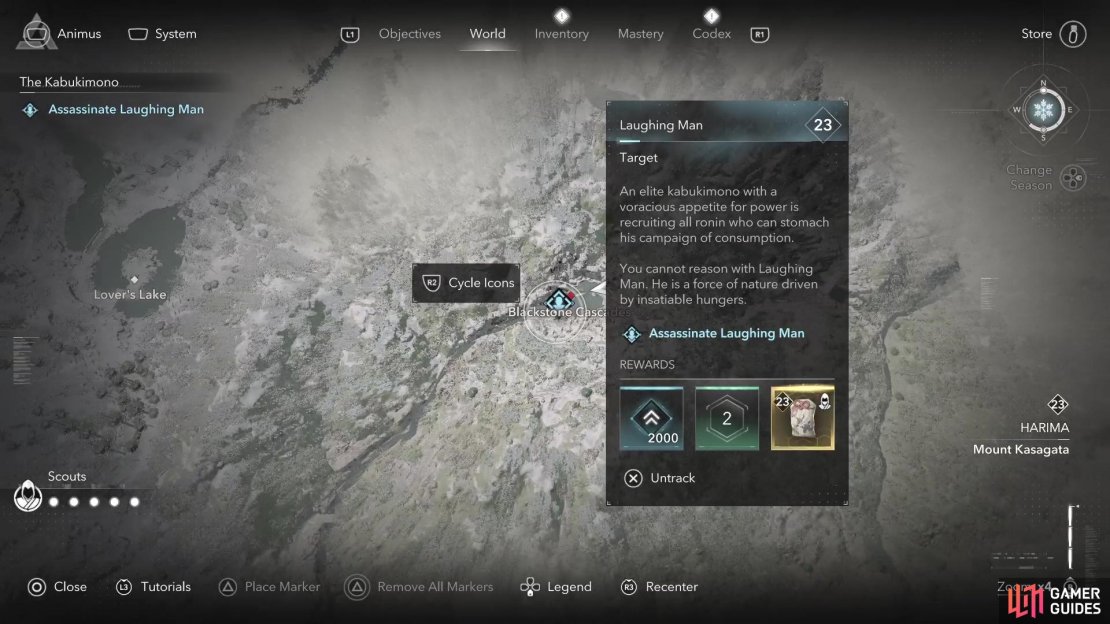
The Laughing Man Location
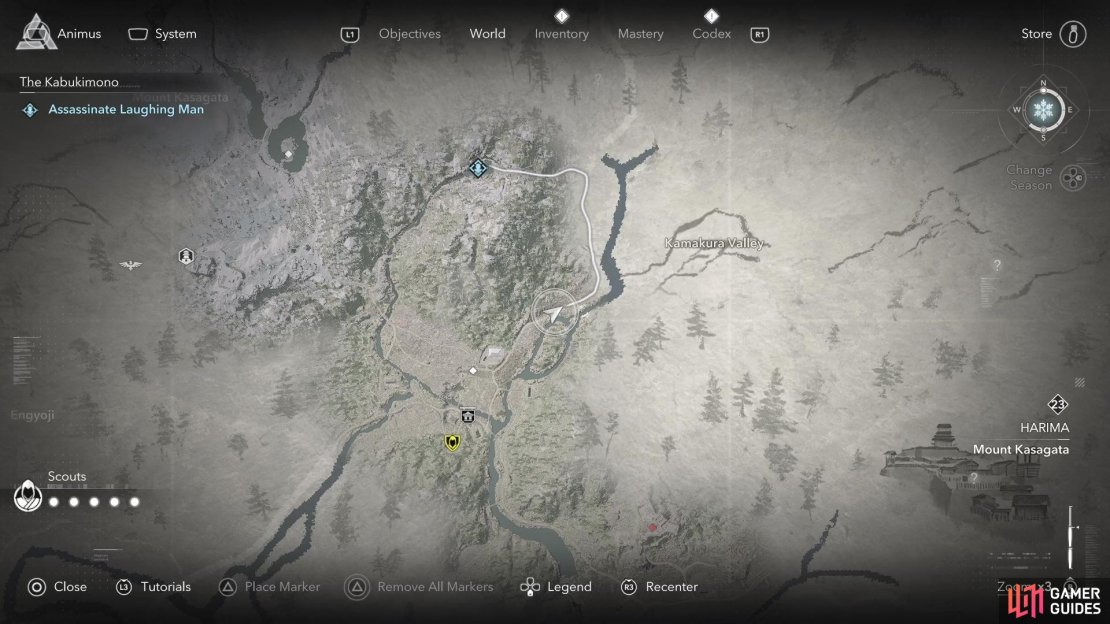
The Laughing Man is located at a spot called Blackstone Cascade, which is pretty isolated from any other spot on the map. As with all of the leaders of the Kabukimono, he will be found in the Harima region. North of the Kanki Burned Fields sub-region is Kitano Village (there’s a kakurega here to discover, so it’s a quick fast travel point). If you have that, then start from there, but if not, then you can try from the Miki Docks spot to the southeast of Kitano. Once you find Kitano Village, then you won’t have to travel too long to reach The Laughing Man.
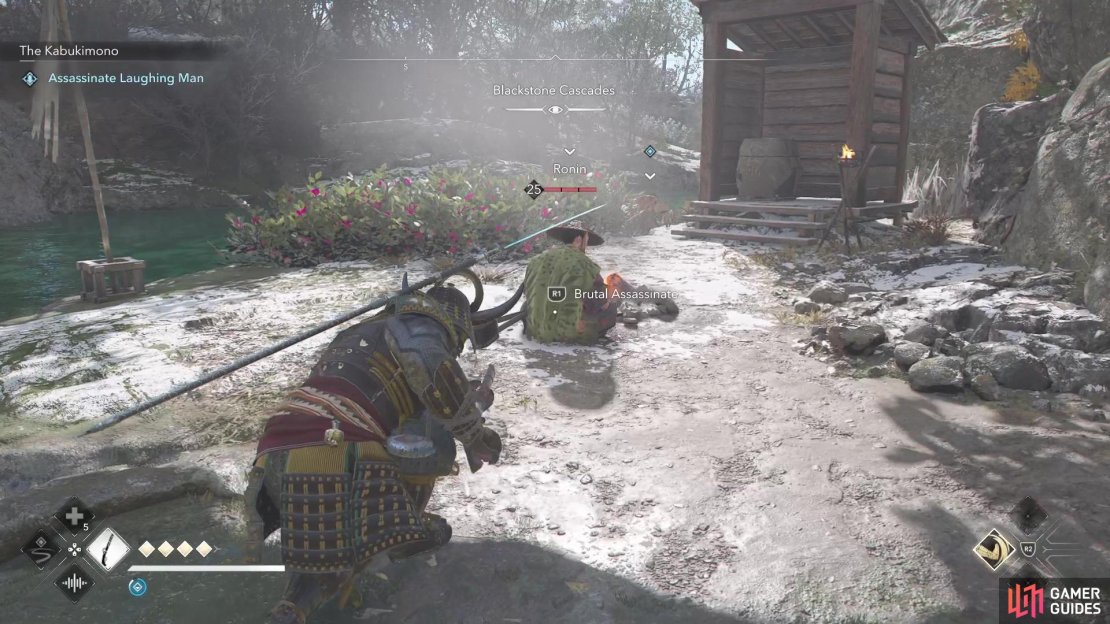
There is a path leading northeast from Kitano, which then curves and goes straight north. Eventually, you will hit a fork, with one path heading northeast and another west; you want the one going west. This will take you straight to the Blackstone Cascade location, where you’ll find The Laughing Man. Note that while you won’t find a whole enemy camp here, there is still a Ronin with him. Said Ronin is going to be a higher level than the target, so you’ll want to be about level 23-24 yourself.

(1 of 4) A guided path you can take to reach The Laughing Man.
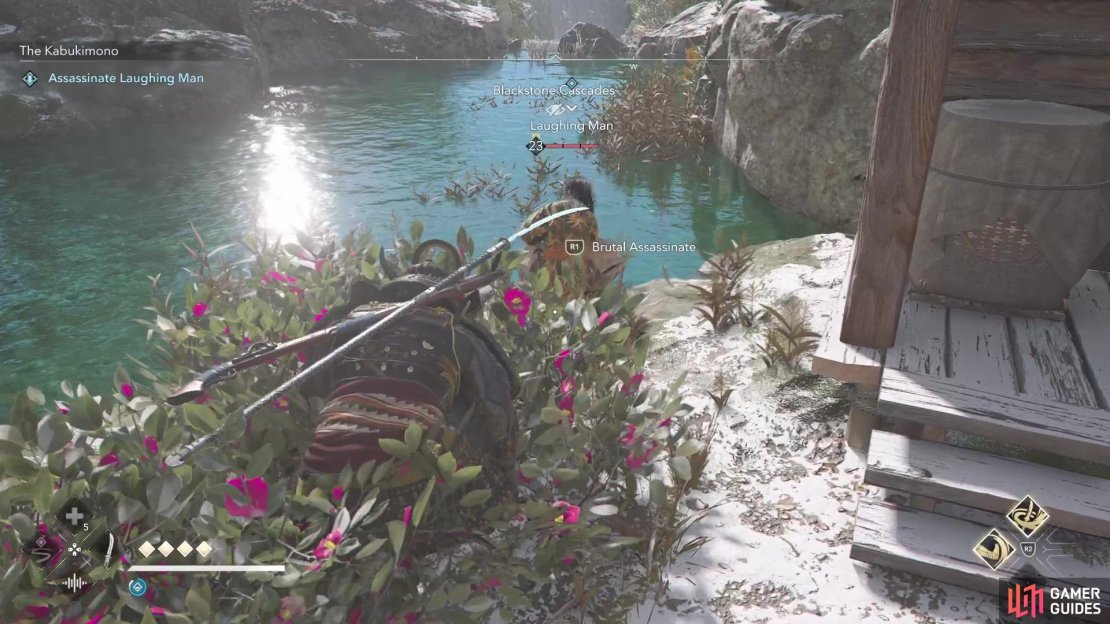
If the Ronin has a skull instead of its level, then you should come back after you gain a few levels. It is possible to sneak up on both of these enemies and assassinate them unseen, as the Ronin doesn’t move, so you only need to really watch The Laughing Man. He will move towards the Ronin, stop for a few seconds, then walk away. When he starts going away, that’s your chance to sneak up on the Ronin for the kill. You can then sneak up on The Laughing Man and do the same thing.
Peacock Location
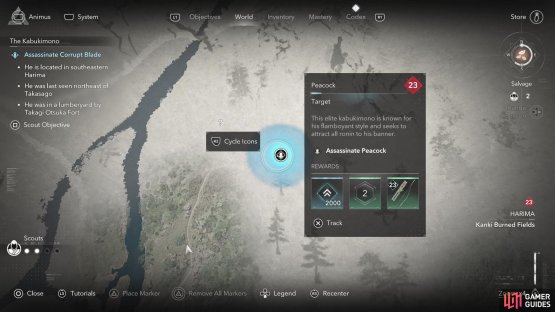
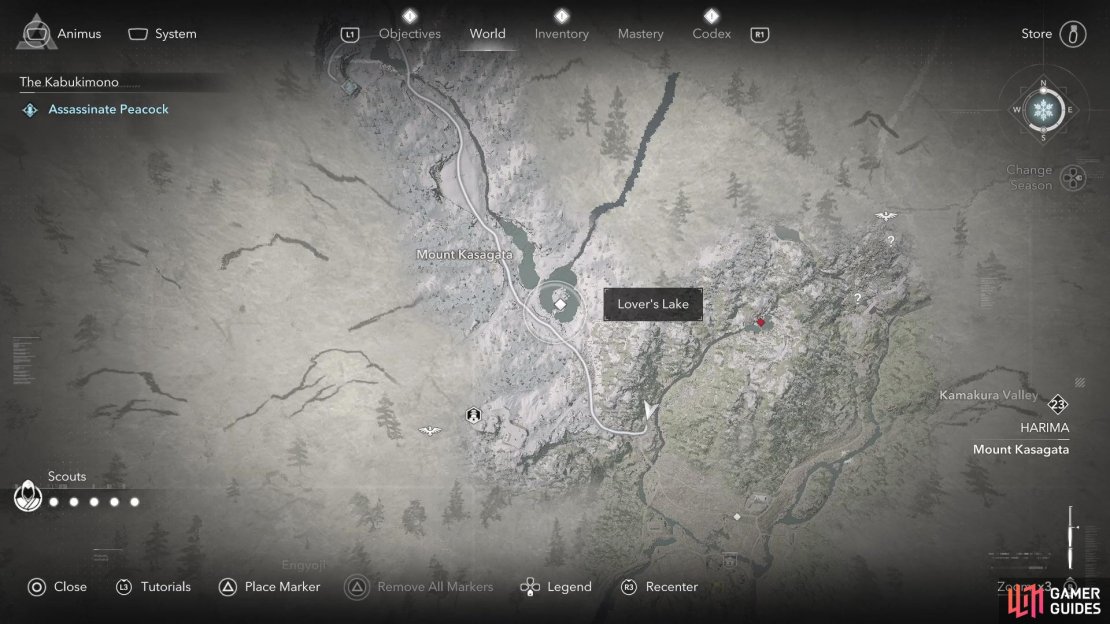
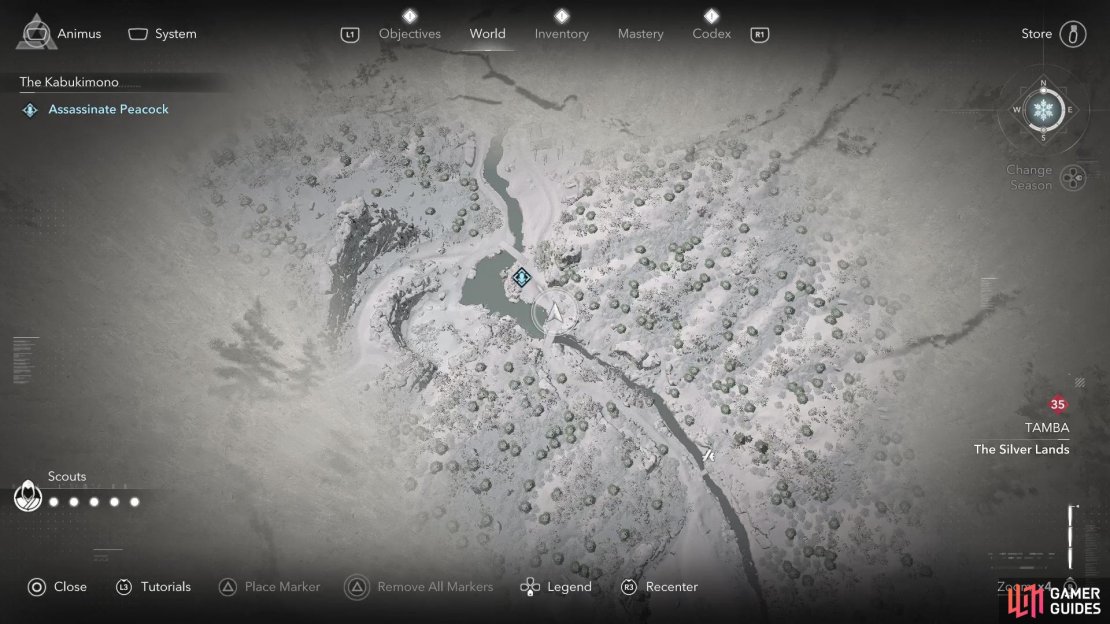
Peacock is probably the one Kabukimono member that requires the most traveling, since he is found near the border to the Tamba region. When looking at the map, find the Mount Kasagata sub-region in Harima, which should have a lake just southeast of the name. This spot is called Lover’s Lake, an actual location you can discover, so that will be where the starting point is. From there, there is a road that cuts through the “Mount Kasagata” name on the map, heading north.
You’re basically just following the small river at this point, to a pair of red bridges on the northern end of the Harima region. Similar to The Laughing Man, Peacock will only have a single Ronin by his side. For some reason, they don’t seem to attack you on sight, since they are just in the open and not in a restricted area. Peacock has four health segments, so you could switch to Yasuke and just slowly move behind him, assassinating when you have the chance. Of course, do this on either one, then fight the other to finish this target.

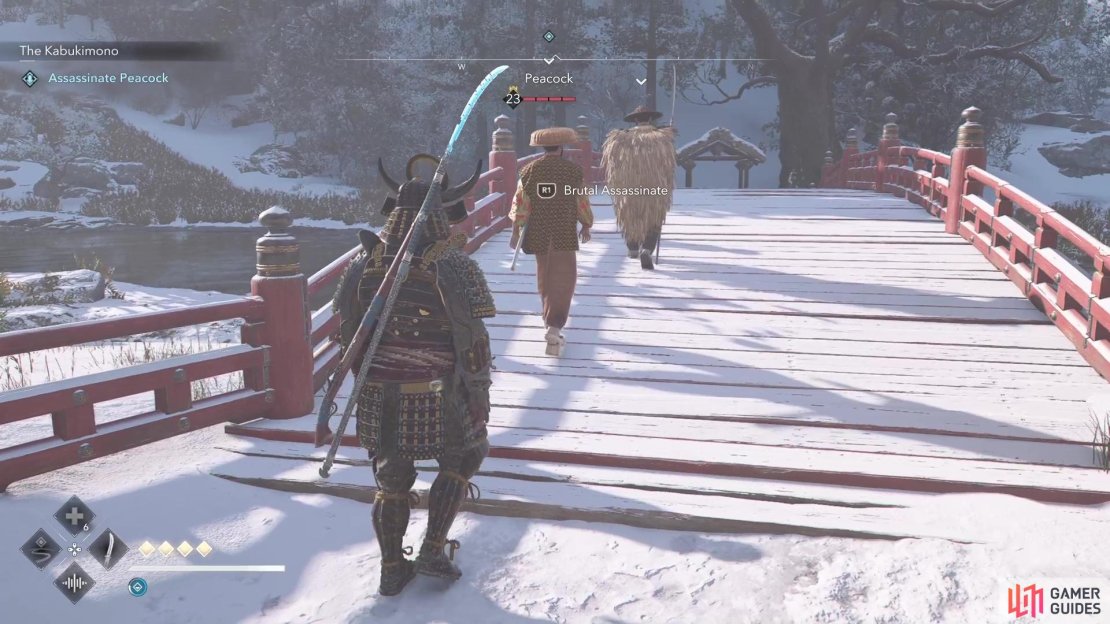
(1 of 3) A path you can follow to reach Peacock in The Kabukimono.
The Kabukimono Rewards
Once you kill all of the Kabukimono, return to Shin’nyo at Nishinomiya Shrine to report your deeds and end the quest. In addition to the individual rewards for each member of the group, you also receive 5,000 XP for finishing the quest.
No Comments