
Once you’ve completed Missing Missive and Inside Help in Assassin’s Creed: Shadows, you will unlock the final quest in the chain for The Fool, Ise Sadaoki. Return to Byodoin Temple in Ogura Pond and speak to Sadatame, who says that it was inevitable that things come to having to kill Sadaoki. Note that you will be using both characters during this quest, so make sure they both have good gear equipped. When you’re ready to go, speak to Sadatame and tell him you’re ready to hear his plan, which will put you right into action.
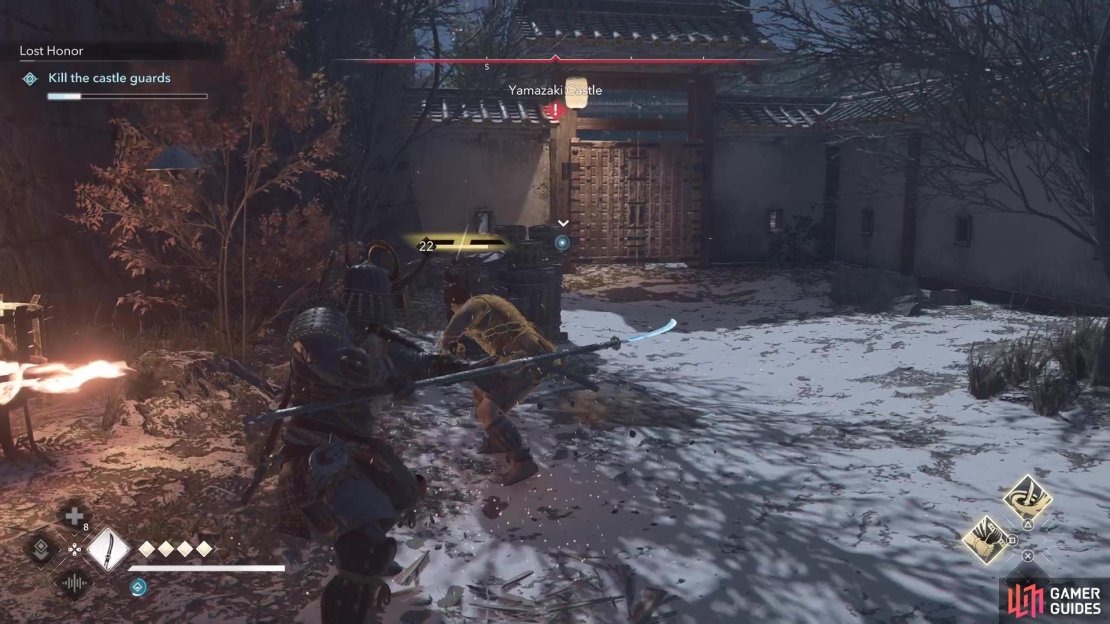
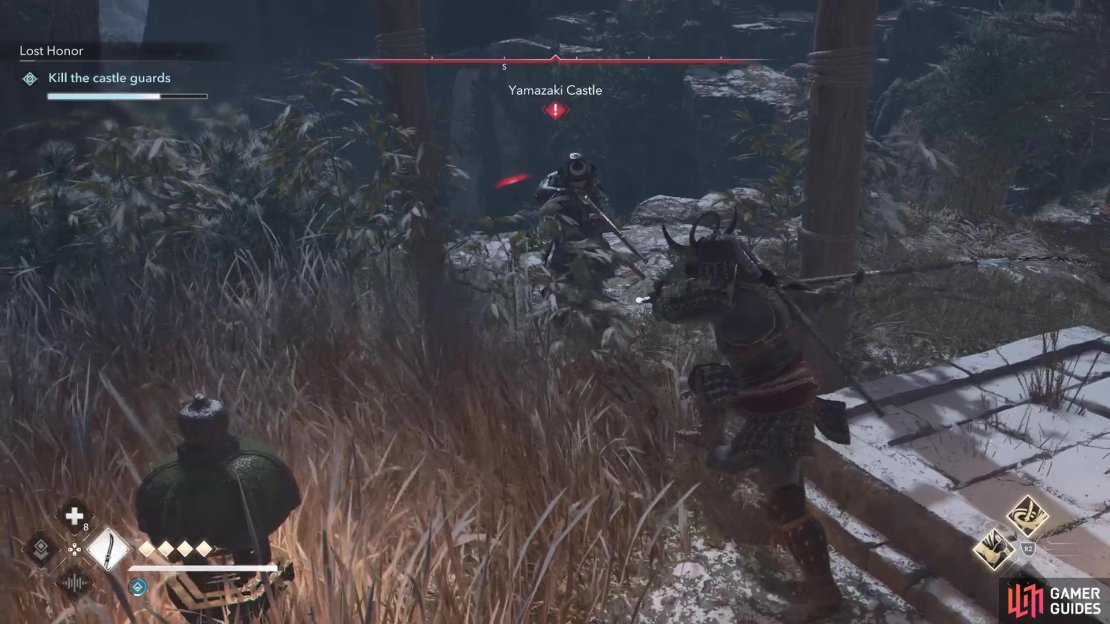
Kill the Castle Guards
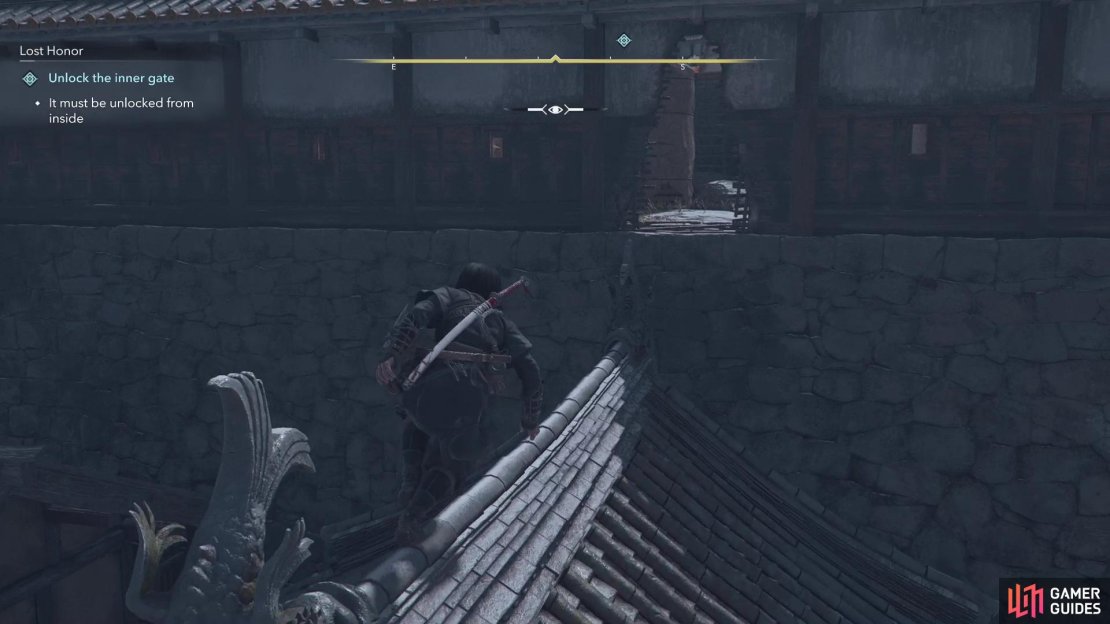
First up is Yasuke, who is serving as a distraction and will be straight up fighting through the first area of the castle. You can either rush ahead or when the guard asks you to leave, you say no and begin the fight. Defeat the first two guards right outside the main gate, then go inside to confront another one. When the coast is clear, get a running start and smash through the wooden doors and into the next section, with more enemies waiting for you there.
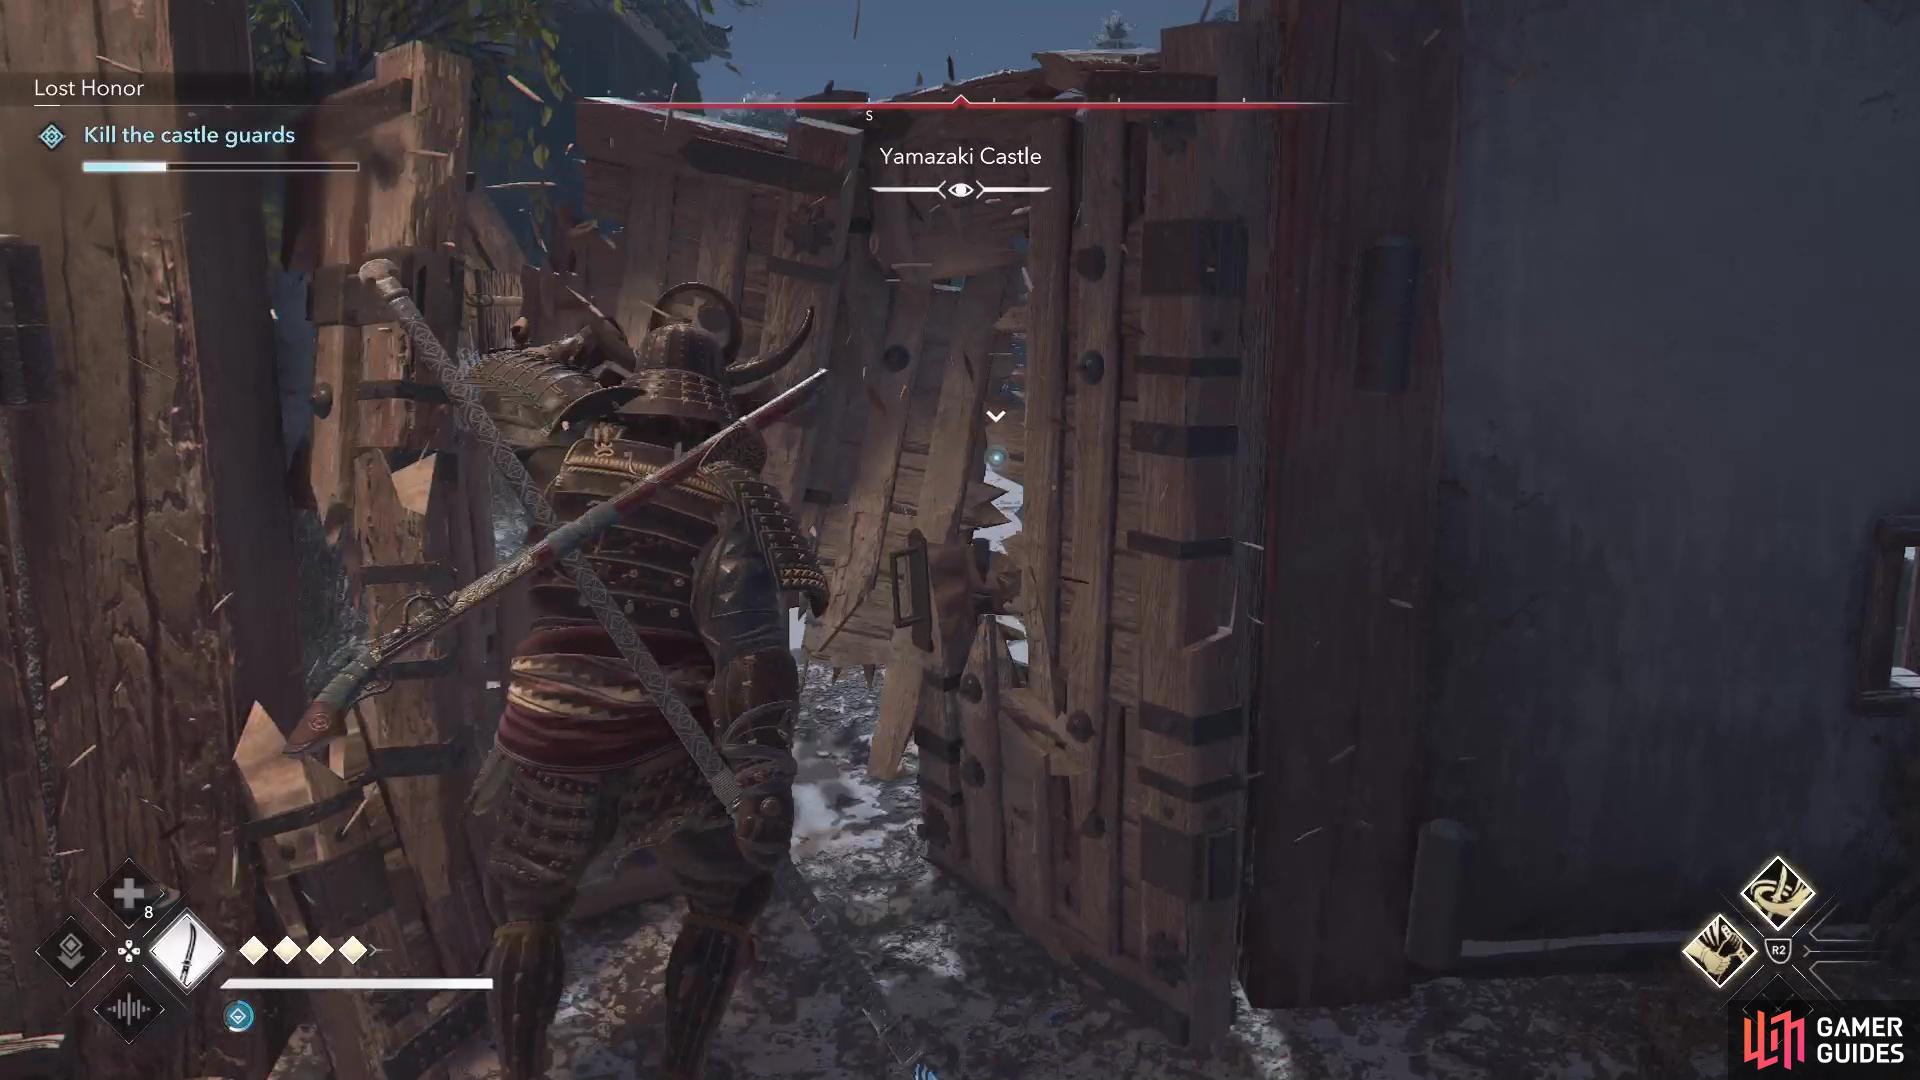

(1 of 3) Don’t forget that Yasuke can just run through the wooden doors.
Both are spear users, so watch out for the quick poke, but they should be nothing. As soon as they are dead, another set will come running to you, including a teppo user. Be mindful of their ranged attacks and dodge when you see the indicator light up. Press forward and the next enemy will be a heavy, with a big club to try and squash you. Remember all of his attacks are unblockable, so dodge accordingly and retaliate with your own strikes. If the meter in the upper left isn’t full after the heavy, then there’s probably one more enemy left, so keep moving along the path. When the gauge is full, then the game will switch over to Naoe.
Unlock the Inner Gate
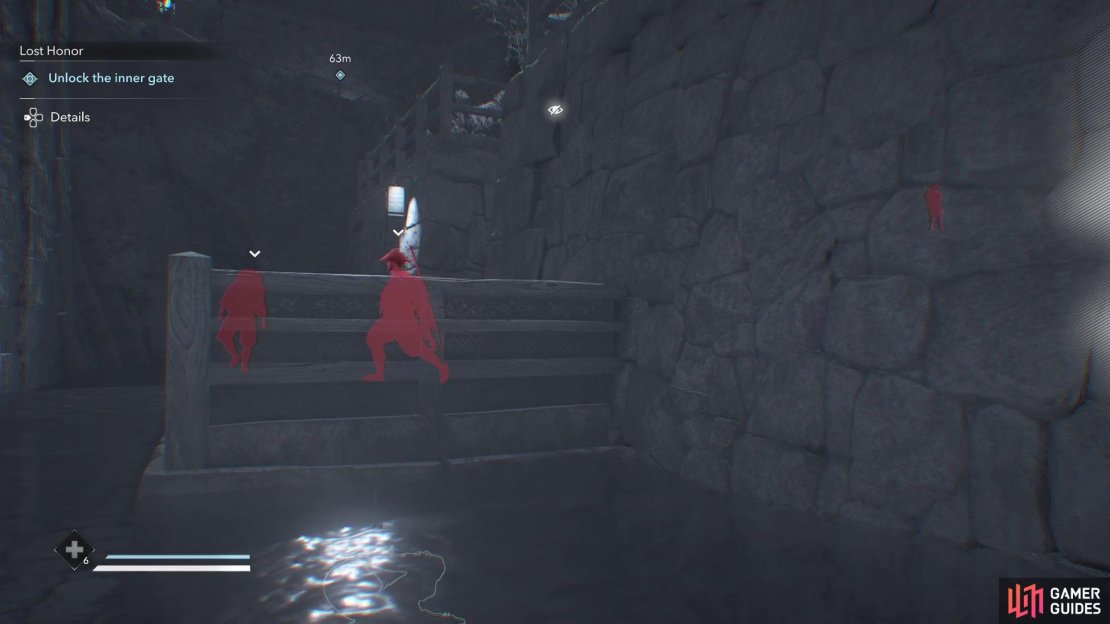
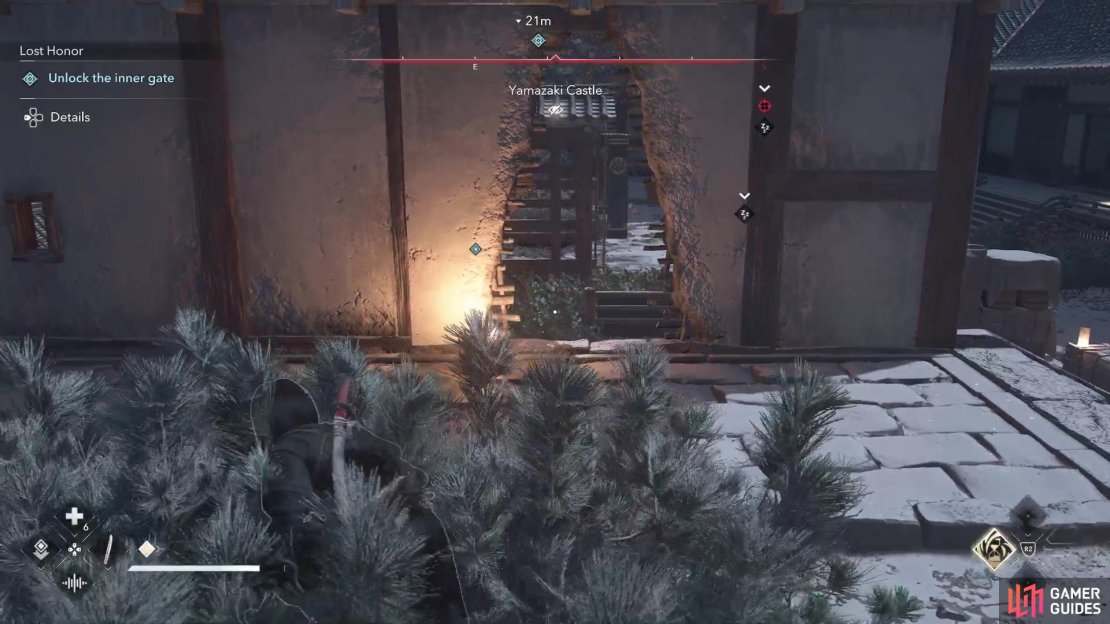
You’ll be encountering a lot more enemies here, so stealth should be a priority. Thankfully, the game is nice and starts you in a normal area, so you won’t have to worry about being ambushed or seen by roaming enemies. Straight ahead will be a hole in the wall, but it’s better to avoid going through it, since there’s a chance you will have your cover blown. While outside of the wall, use your Eagle Vision to pinpoint the locations of enemies and mark them. Test your grip on the outer edge of the wall and shimmy over to the balcony, taking out that enemy first once he’s away from the opening.
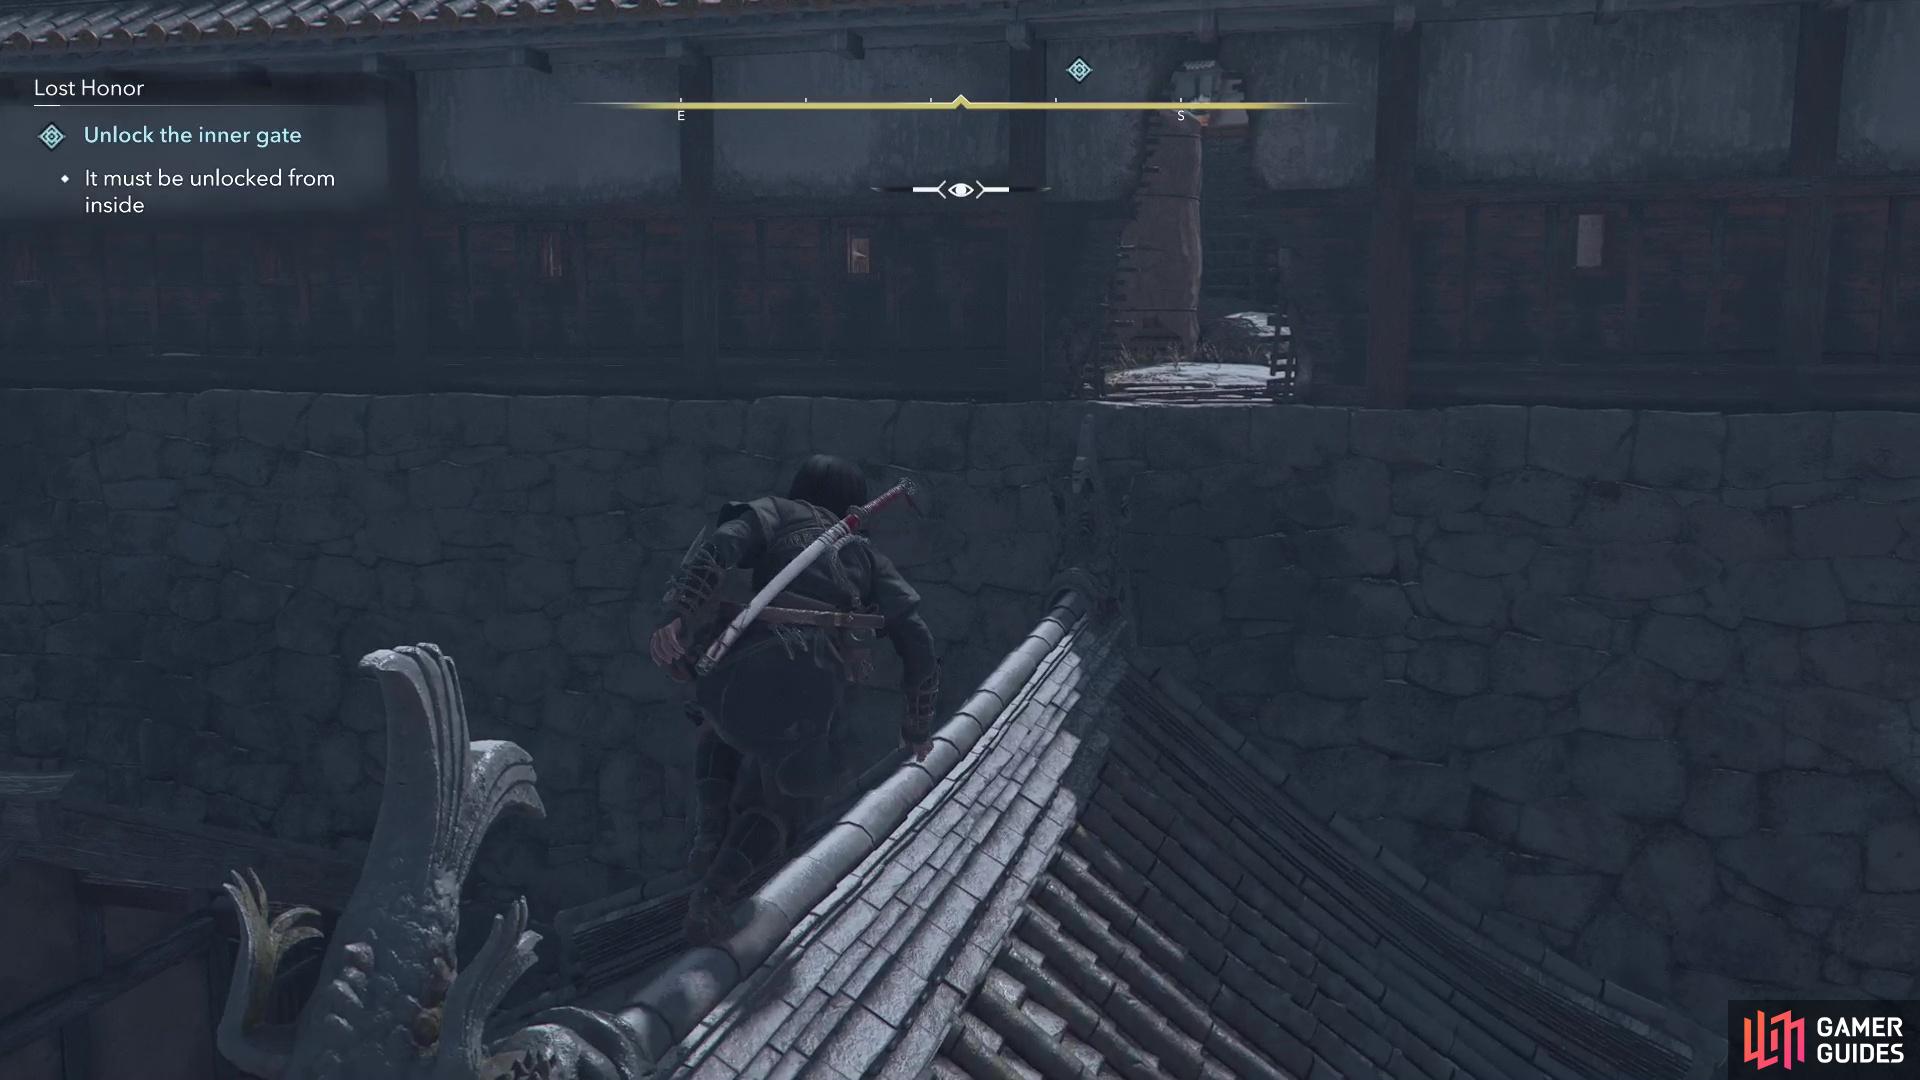
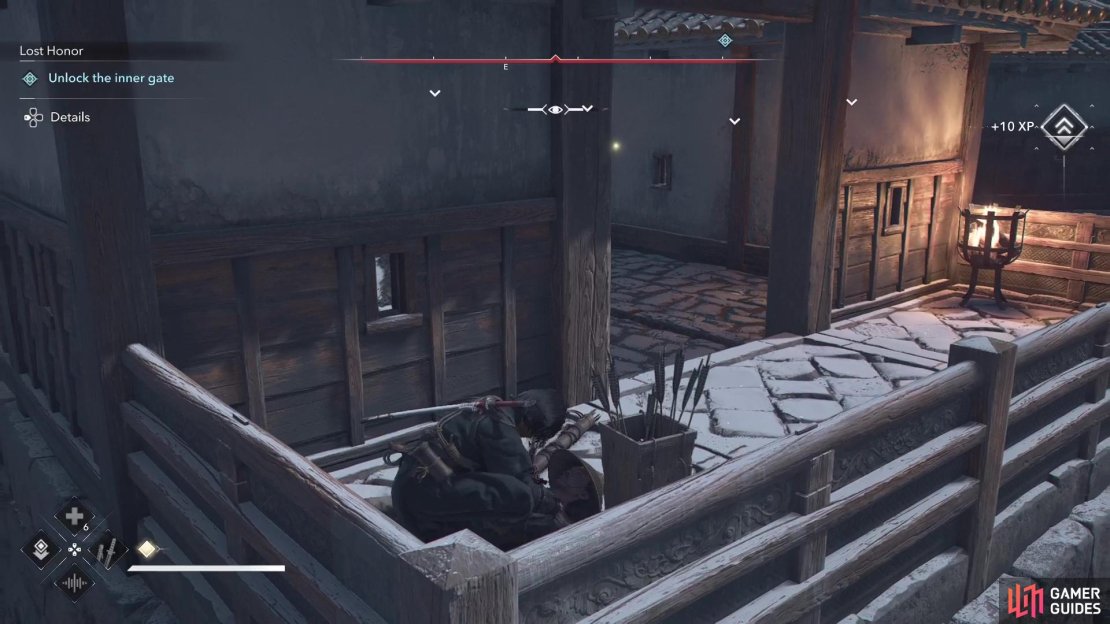
(1 of 4) It’s better to avoid the hole in the wall at the start, for there’s risk of being seen right away.
From there, try to kill the patrolling guard next, using your whistle if needed to get him behind the big building here. You can use kunai to snipe the two enemies on the far end, across from the building (not the ones on the stairs by the big opening), leaving only one more by building itself. Climb the scaffolding into the next area, quickly going through the opening and ducking behind the box right in front of it. Survey the area to tag the enemies, then wait until no other enemies are close to whistle the guard straight ahead to your location to kill him.
Go around the nearby building and hide in the hay pile, waiting for the one roaming guard to come stand in front of it. Despite the close proximity to the two stationary enemies, killing the roamer via the hay pile shouldn’t alert them. If you don’t have Double Assassinate at this point, things will start getting a little tough. If you do, you can hop out of the hay pile, away from the enemies, then sneak up to the pair to kill both. There’s a guard tower straight ahead, on the other side of the little moat, so quickly climb it and take out the sleeping lookout at the top.
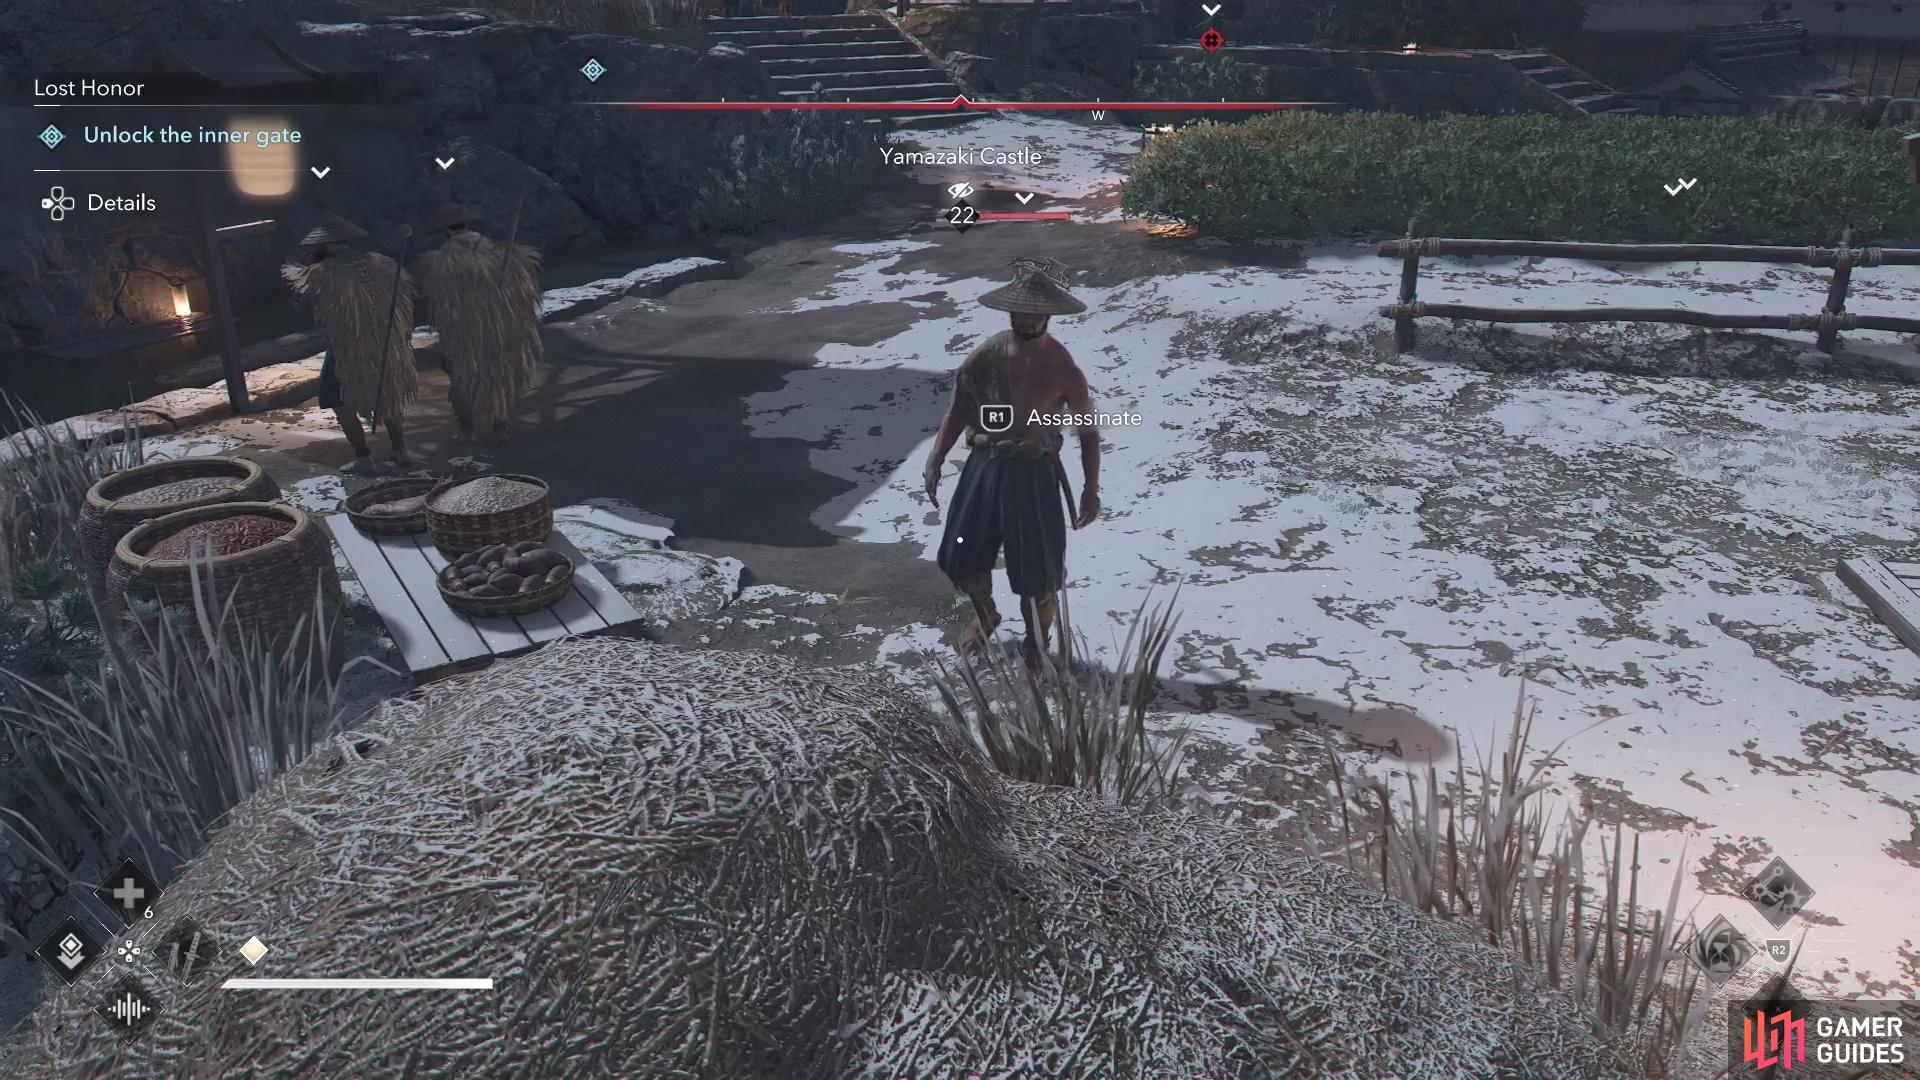

(1 of 2) You can use this haypile to kill the one patrolling guard without alerting the others nearby.
You can use this haypile to kill the one patrolling guard without alerting the others nearby. (left), Climb the guard tower in the second area to kill the guard and progress to the third section. (right)
Third Section
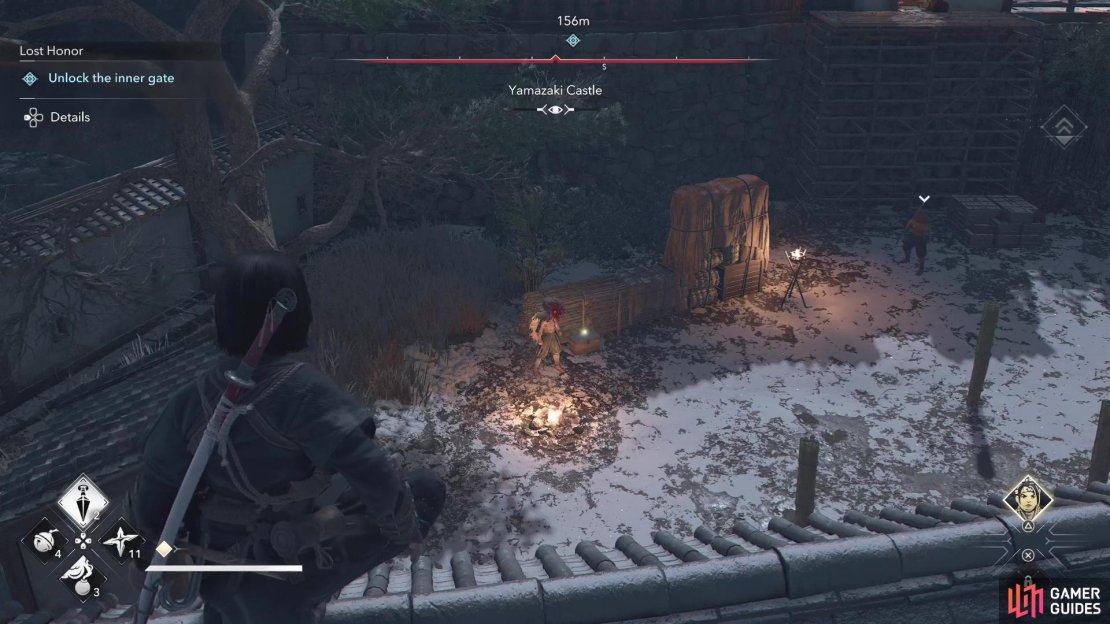
The third section has a lot of enemies, as well as a few servants, but you’re going to bypass a good chunk of it. From the tower, look southeast to spy an opening and make your way over to it. Don’t pass through it just yet, but hide behind the side of this opening, waiting for the one guard to stop his patrol there. This presents a ripe opportunity for you to kill him, so do that then jump over the railing just inside to the south, to land in the shallow water below.
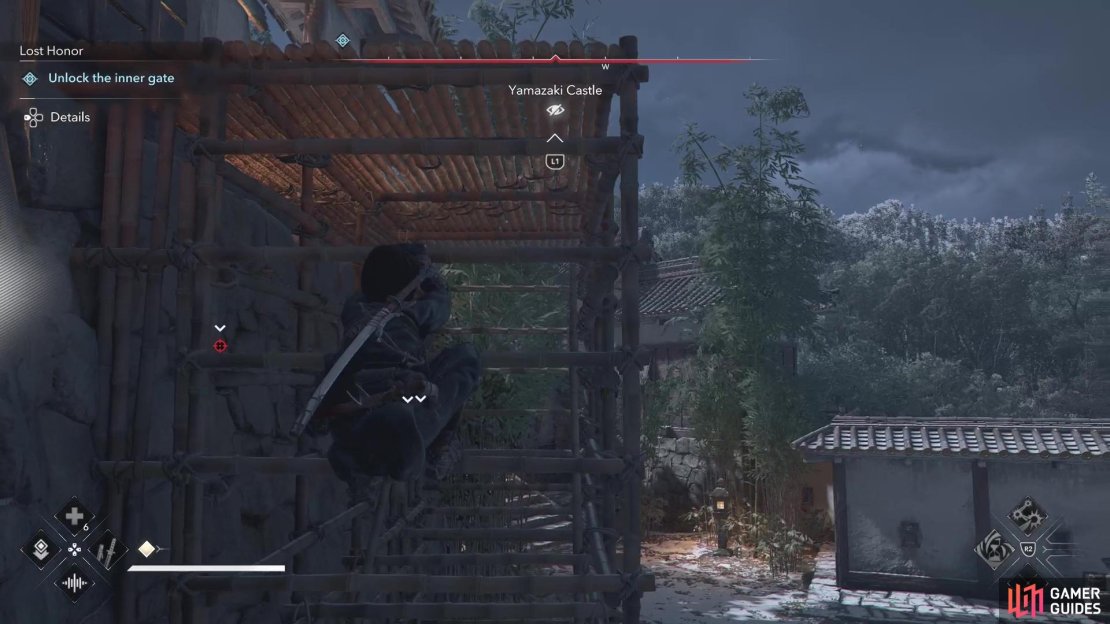
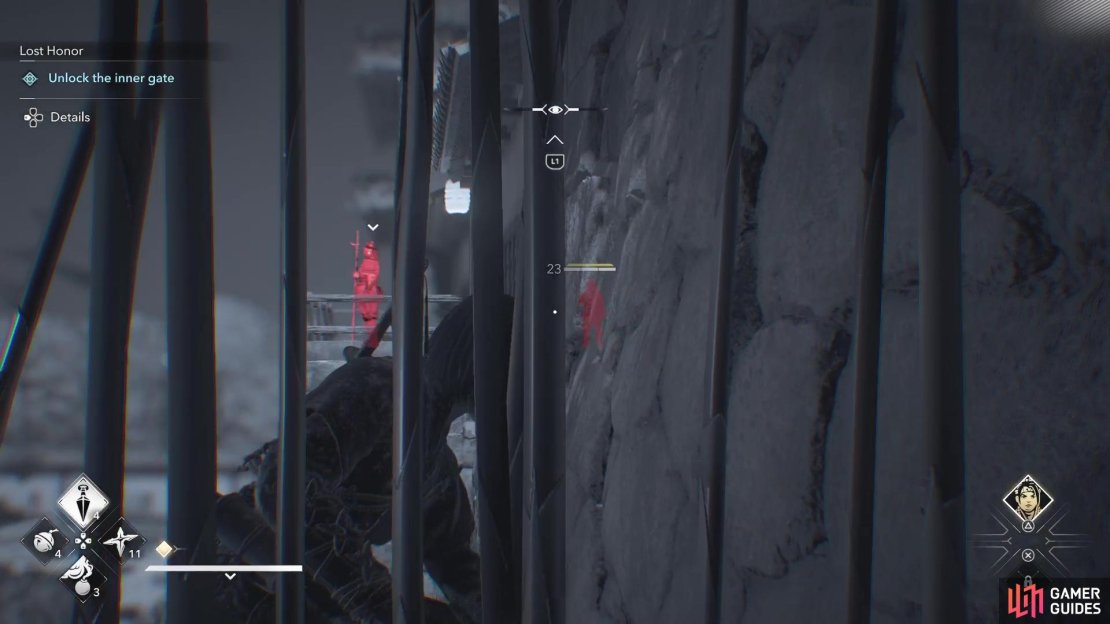
If you have the skill that allows you to use a reed to breathe in shallow water, that can be useful here. However, you can hug the wall by the far guard, waiting for the moving guard to go away before jumping the wall and killing the stationary enemy. After doing that, hug the wall by the stairs and wait for the patrolling guard to come back, do the same thing. Jump back into the water and go to the end, where you can climb some more scaffolding. You’ll want to be a little careful here, as there is a guard stationed on the balcony and he might be able to see you.


(1 of 4) Use the doorway to take out this guard when he approaches, in the third area.
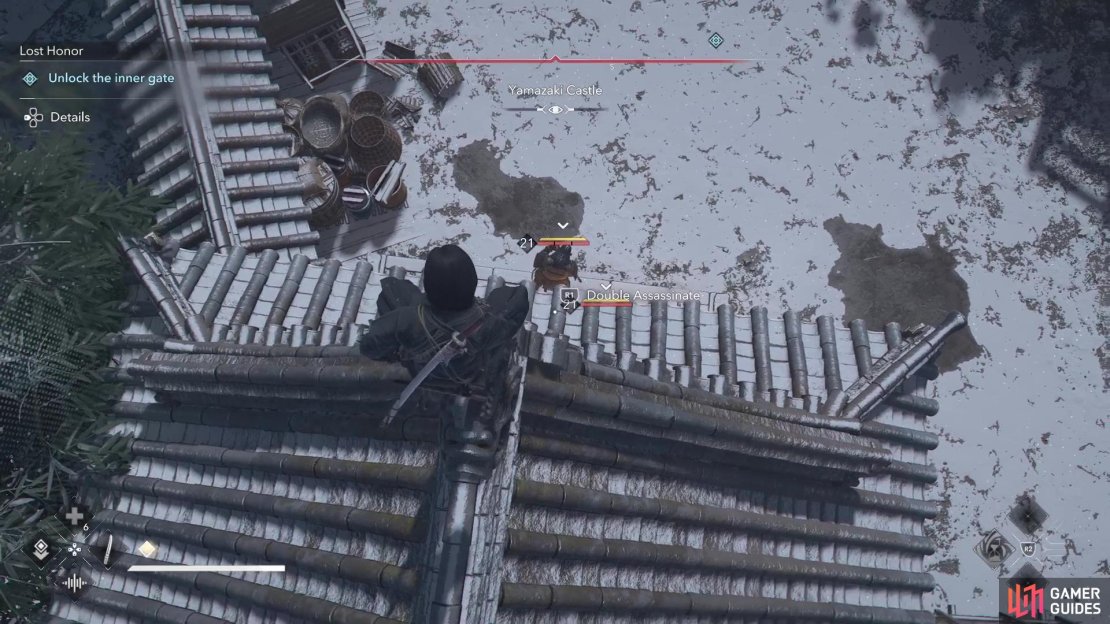
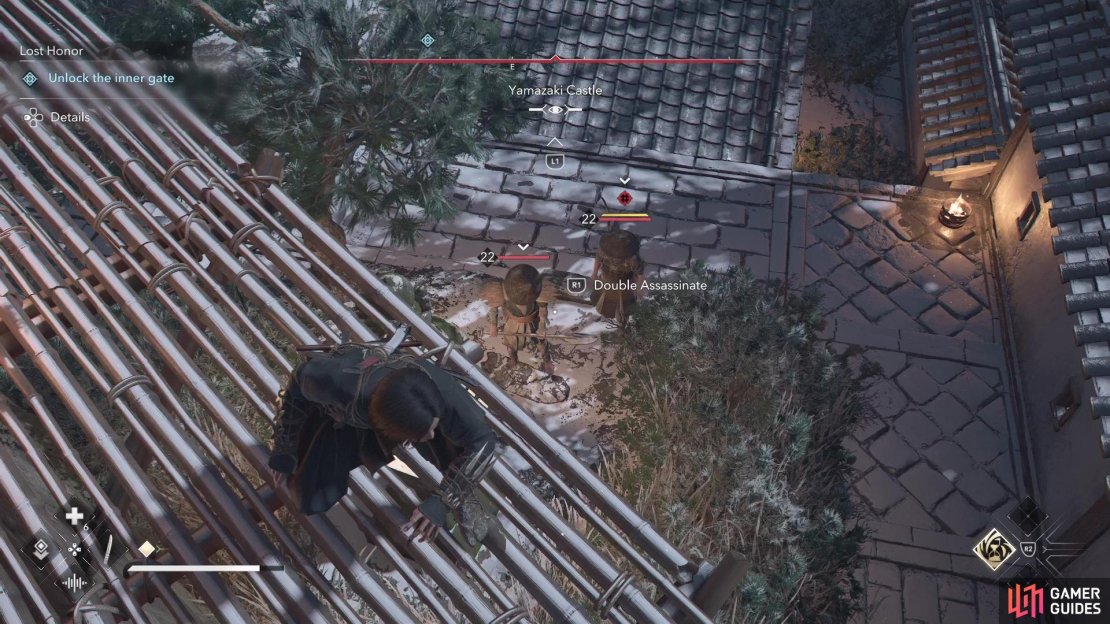
When the coast is clear, enter the next section via the broken wall and immediately hide behind the bamboo pile. Wait for the guard to approach it, then kill him via dragging his body over the pile. Climb to the top of the building next to you, and wait for the roaming guard to line up with the stationary one to do a Double Assassination. If you don’t have that skill, then wait for the patrol to move away before dropping down on the still enemy, then use the distraction upon that body being found to kill the patrol. The other enemies on the wall to the north shouldn’t matter, but it’s better to avoid that trouble if it arises.
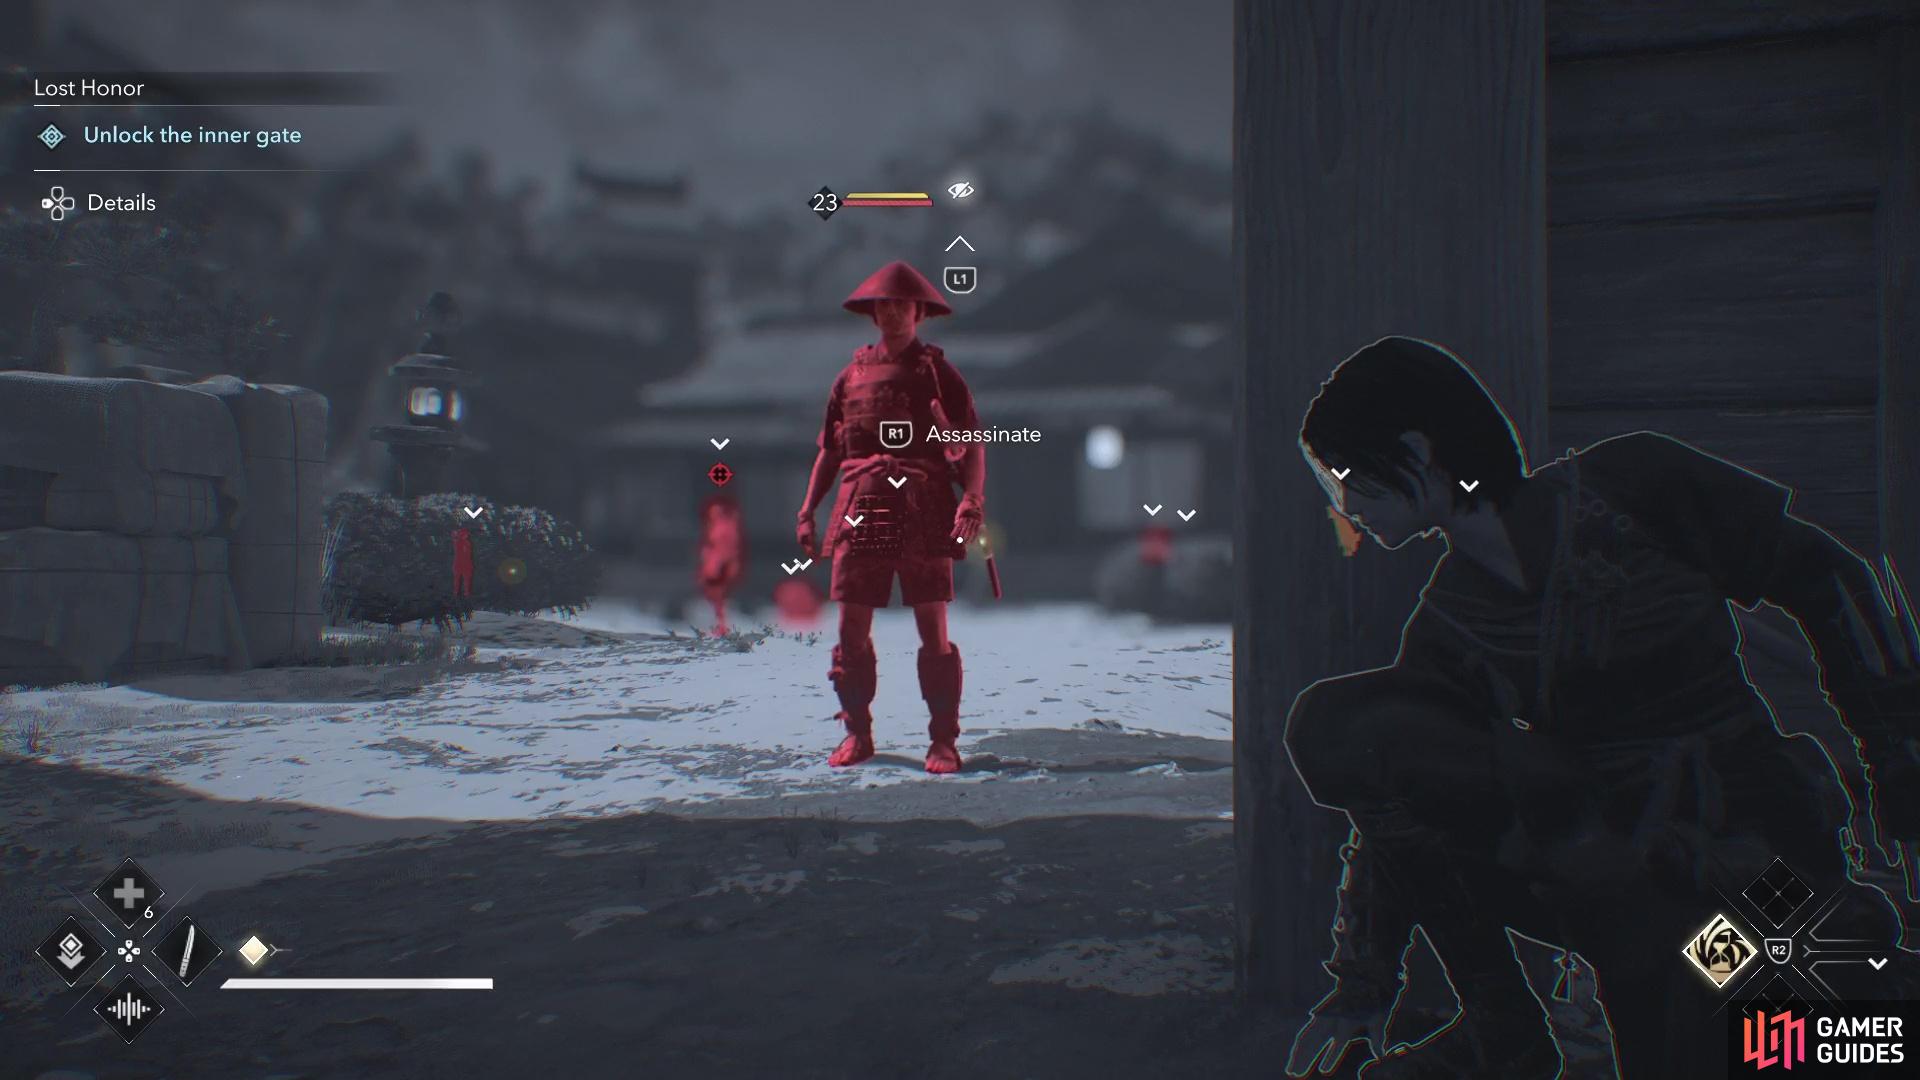
There’s also a sleeping sniper on a platform to the west in this same area. It’s time to move onto the next area, which is the final one for this stealth segment. One guard is standing right in front of the gate you need to unlock, with another off to the side and one more who patrols. The two guards staying still will fall asleep, but end up getting woken up by the patrol. Additionally, two more enemies will be found to the south/southwest, but those aren’t too important right now. Move along the wall to the west and drop down to the little area beyond the hole in the wall, hiding in the bushes there.
You can just sit here and wait for the first patrol to arrive, where you can then kill him. That leaves the two near the gate, who will eventually go back to sleep after some time, so ignore them and go after the other two. Climb the wall near the first kill and use the higher platforms, along with the poles, to get to those two guards. Once again, Double Assassinate comes in handy here, so just wait for the patrol to get close enough for it to trigger. By this time, the last two guards should now be asleep again, so they are easy prey. When all of the enemies here are gone, approach the gate to open it.

(1 of 3) The Double Assassination skill for Naoe goes a long way in this quest.
Lost Honor - Play as Naoe or Yasuke?
Upon opening the gate with Naoe, the game will switch back to Yasuke and you’ll have to escort Sadatame now. Charge through the nearby door and you’ll face off against some enemies, which include a ranged unit and a heavy with a club. Take out all the others first, before concentrating on the heavy. Two more enemies will be waiting for you in the next section, who are nothing special, so they should be easy for you to dispatch. When they are gone, approach the gate and open it to reach the final section of this mission.
Sadatame runs off to plea with his brother to stop this nonsense and go back to the clan. He refuses, but while this conversation carries on, a certain thief appears to complicate things. At the end of the cutscene, you will have the option to either play as Naoe or Yasuke for the big climax. Choosing Naoe will start you out in stealth, but there will be a lot more enemies in the area to kill. Picking Yasuke will not only have fewer enemies, you will also be thrust right into the battle with Sadaoki. Either way, you will have to fight Sadaoki head-on, so Yasuke is definitely the easier of the two.
Assassinate Ise Sadaoki (Naoe)
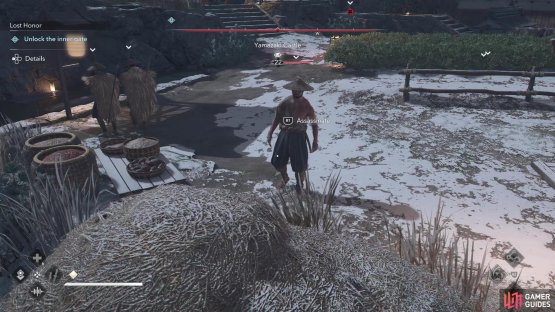
Should you choose Naoe, the first thing to do is tag all of the enemies first, which you will see is quite a few. If you have the skill that allows you to assassinate someone through a shoji door, then you can use the hatch on the roof to enter the building (there is a box to refresh your tools just inside). Go down to the bottom floor, then over to the front door and whistle to lure the guard over to it, before killing him. Exit the building the same way you entered, then leave the immediate area, going to where the gate was from the previous section.
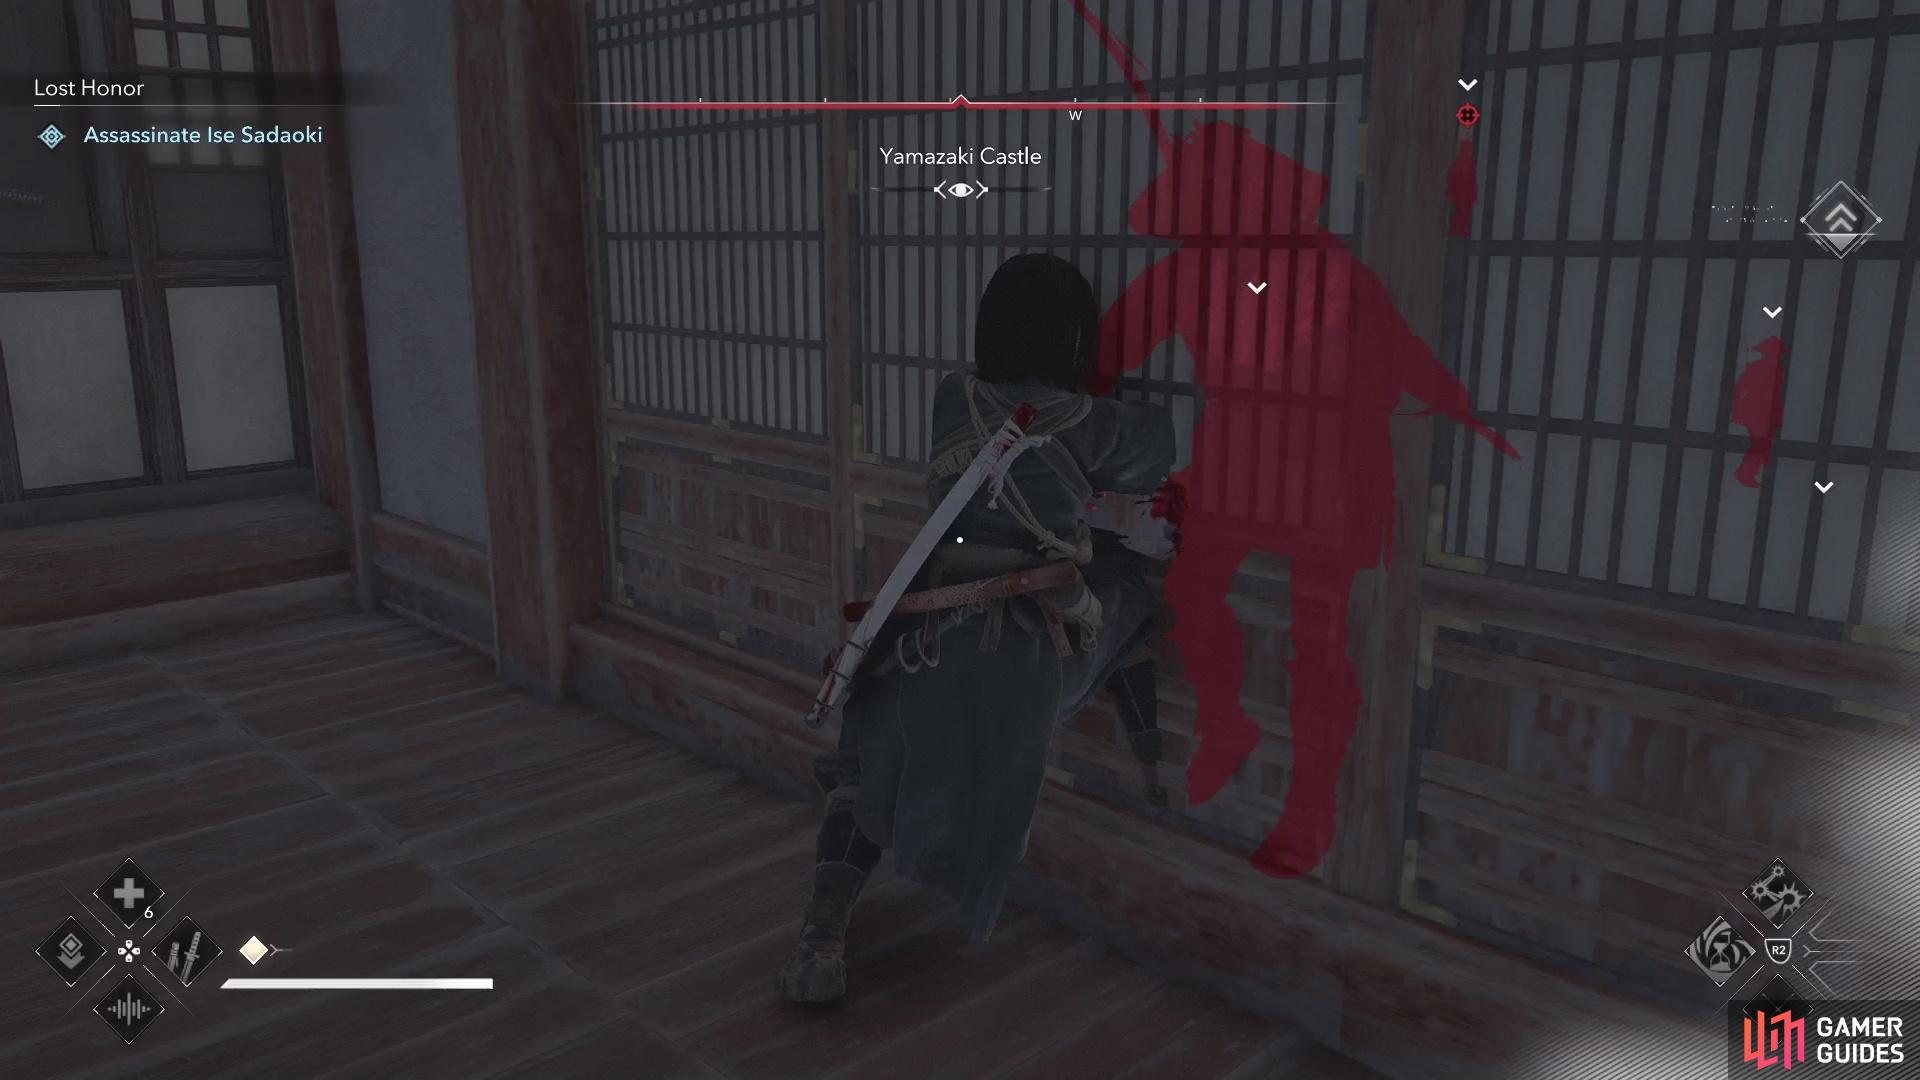
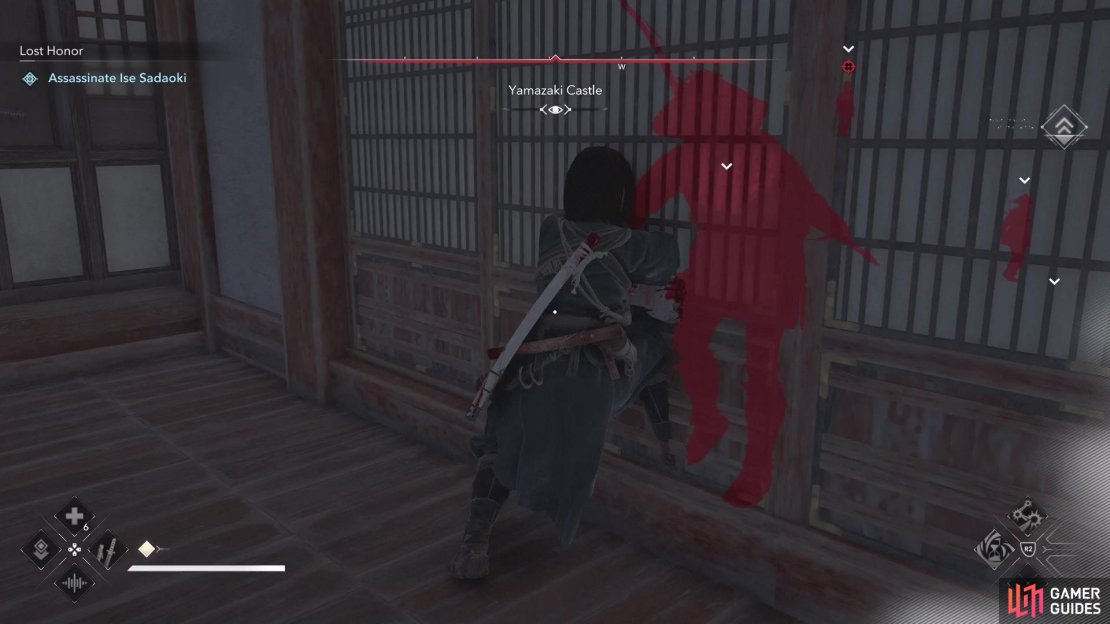
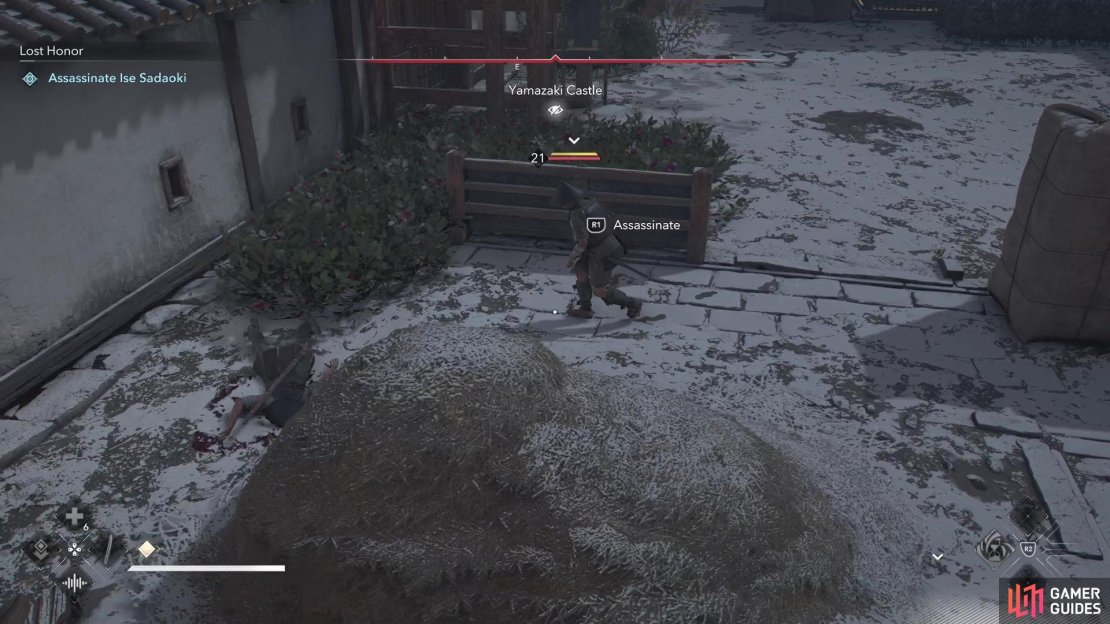
(1 of 3) With the shoji door skill, you can go into the house and lure the one guard inside to kill him, should you choose Naoe.
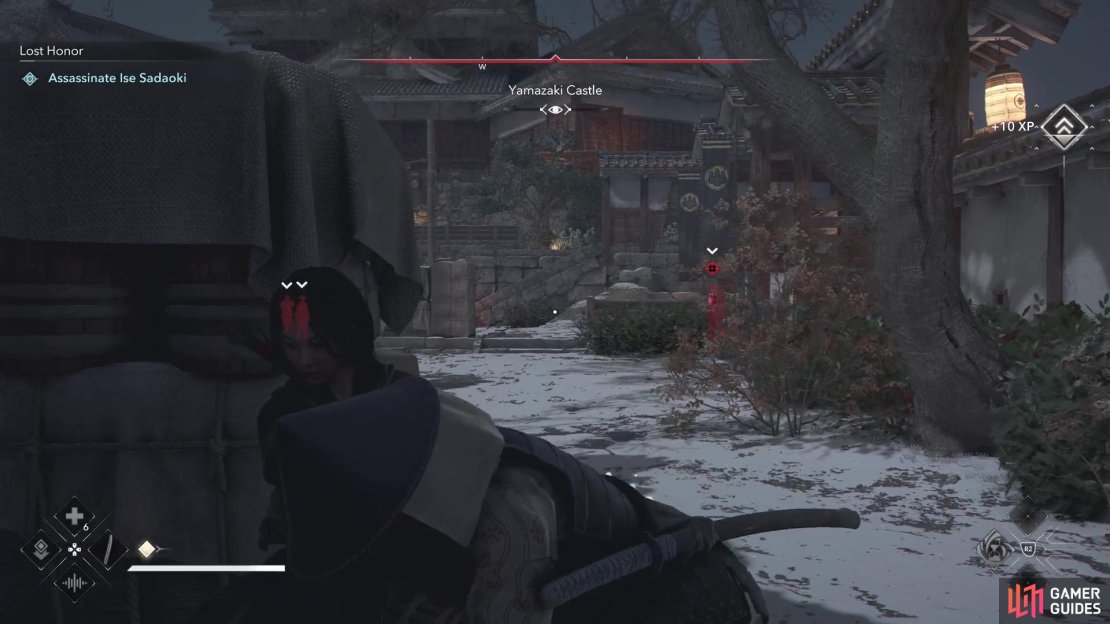
Climb the outer wall and shimmy over to the higher section to the west, where you can then perch yourself on said wall and get the jump on the guard there. Continue in that direction, sticking to the rooftop, and use a kunai on the sniper on the far side. From there, you can then Double Assassinate the two guards that converge nearby, taking them both out in one move. Upon doing the above, you should only have three more normal enemies left. From where you first started on the rooftop, on the ground on the northern side, there are some boxes.
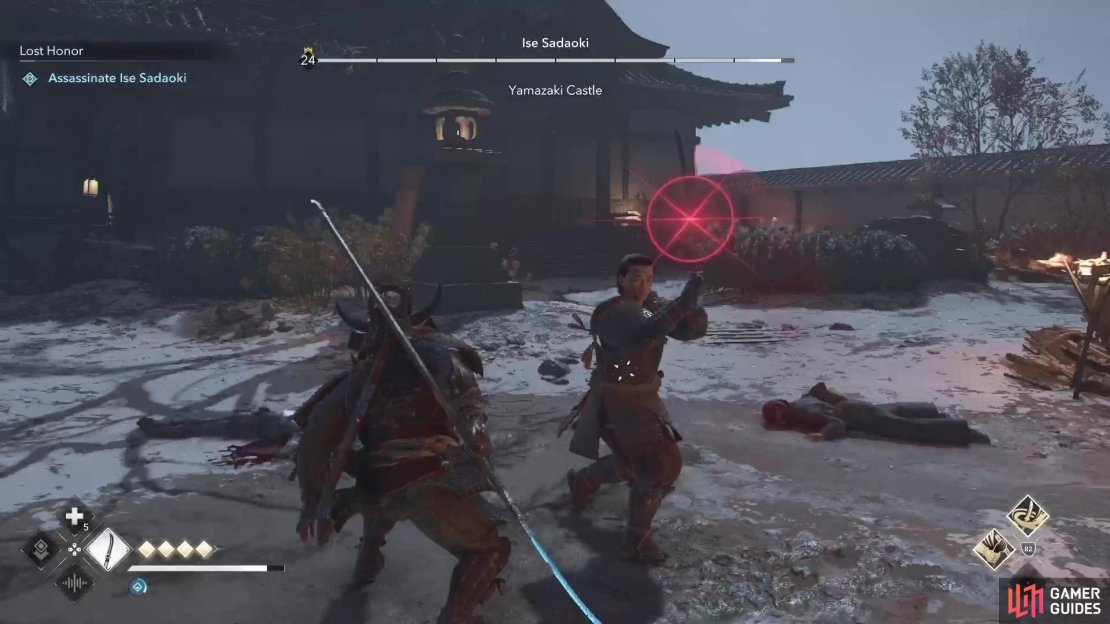
You can hide behind them and lure the one patrolling guard over to it with a whistle, then assassinate him when he gets close. The last two are pretty easy now, since you can just wait until the one is close to Sadaoki, then drop down to the other. With him dead, hide in the haypile and wait for the previously mentioned guard to spot and investigate the body. He should get close enough that you can just kill him from the haypile. This will leave Sadaoki all alone, so use the poles with the rope between them to get a jump on him and take out some health.
Assassinate Ise Sadaoki (Yasuke)
Choosing Yasuke will start the fight with Sadaoki right away, and he’ll have three other enemies with him, all of which are really nothing but fodder. Take them out first, then you can concentrate on Sadaoki. He has a lot of health, a total of eight health segments, so it’s going to be a long fight. He does a lot of stringing his attacks together, with two different sets of the blue combos. His weapon can also inflict Bleed, so try to not get hit too often, or else you’ll lose a good chunk of your health.

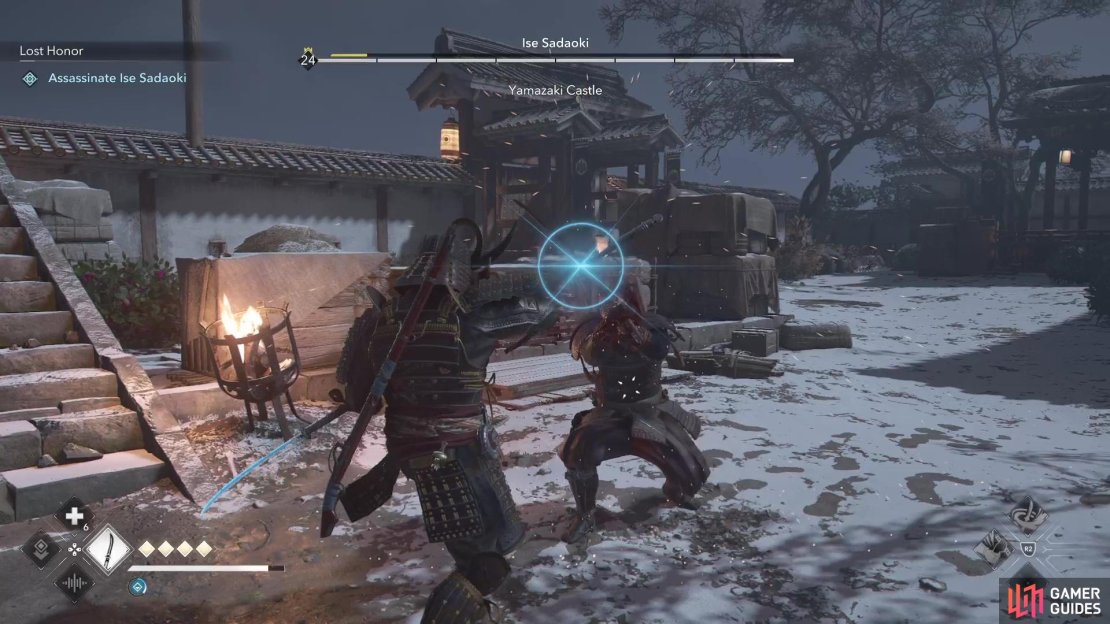
(1 of 3) Sadaoki uses a lot of combos for attacks, meaning you’ll have to block them all to get an opening.
The worst part about this fight is simply getting the chance to strike back against him. As just mentioned, he has two sets of blue combos, with each one being six hits, so you’ll need to dodge them all or try to block/parry them. He also has another combo with unblockable attacks, totalling five hits. Just keep trying to dodge all of those unblockables, especially the last hit, to get the vulnerable state and free hits. Don’t be greedy with your own attacks and eventually, Sadaoki will go down for good.
Lost Honor - Gennojo Romance Answer
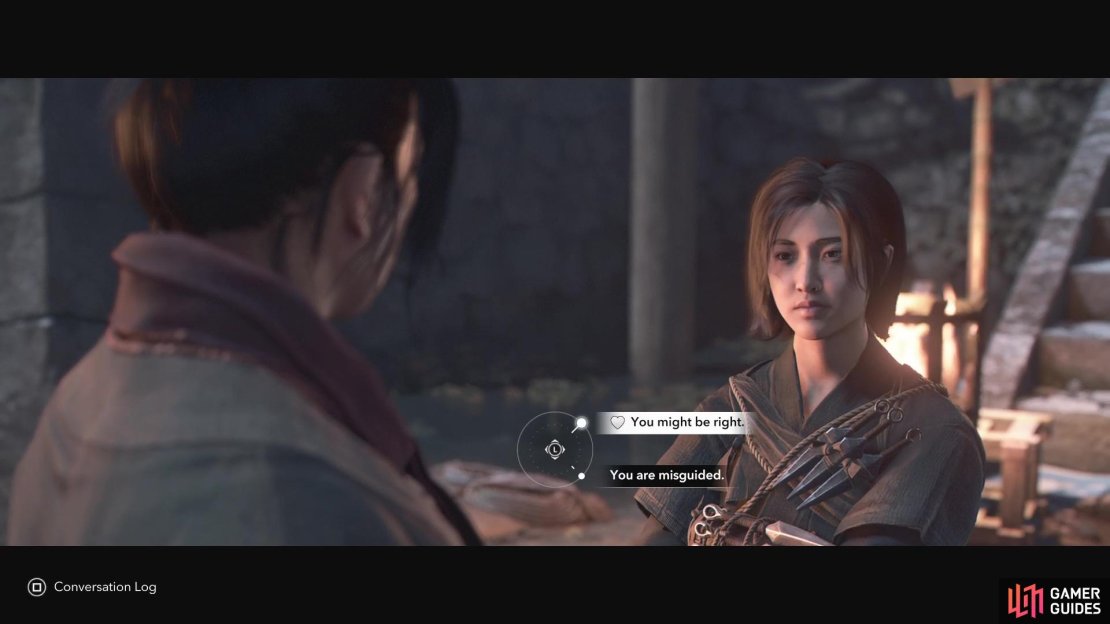
After the fight is over, there will be some scenes, one of which can be important. Gennojo will be speaking with Naoe and you will see a choice pop up here. If you wish to continue a romantic relationship with him, then you want to pick the top answer, “You might be right.” This will bring an end to this quest, as well as The Fool set of quests.
While no new story quests will open up after completing this one, you will gain access to Gennojo’s set of quests, with the first one called Sake and Swords.
No Comments