
The Al-Mardikhwar investigation in Assassin’s Creed Mirage can be started at the Sharqiyah Bureau, located in eastern Baghdad. You need to complete the Dogan bin Arslan investigation before you gain access to it, then explore the Officers’ Club to learn more about the mysterious Al-A’eshma and Al-Rukh, also known as Admiral Nadir and General Jasoor. It won’t be long before you discover that these two are more like fumbling clowns than scheming enigmas, but they’re still dangerous to the people of Baghdad nonetheless. On this page, we’ll show you where to find and how to kill both of these Order of the Ancients members. We’ll also take you through how to infiltrate the Great Garrison where you can assassinate Al-Mardikhwar, also known as Warlord Wasif.
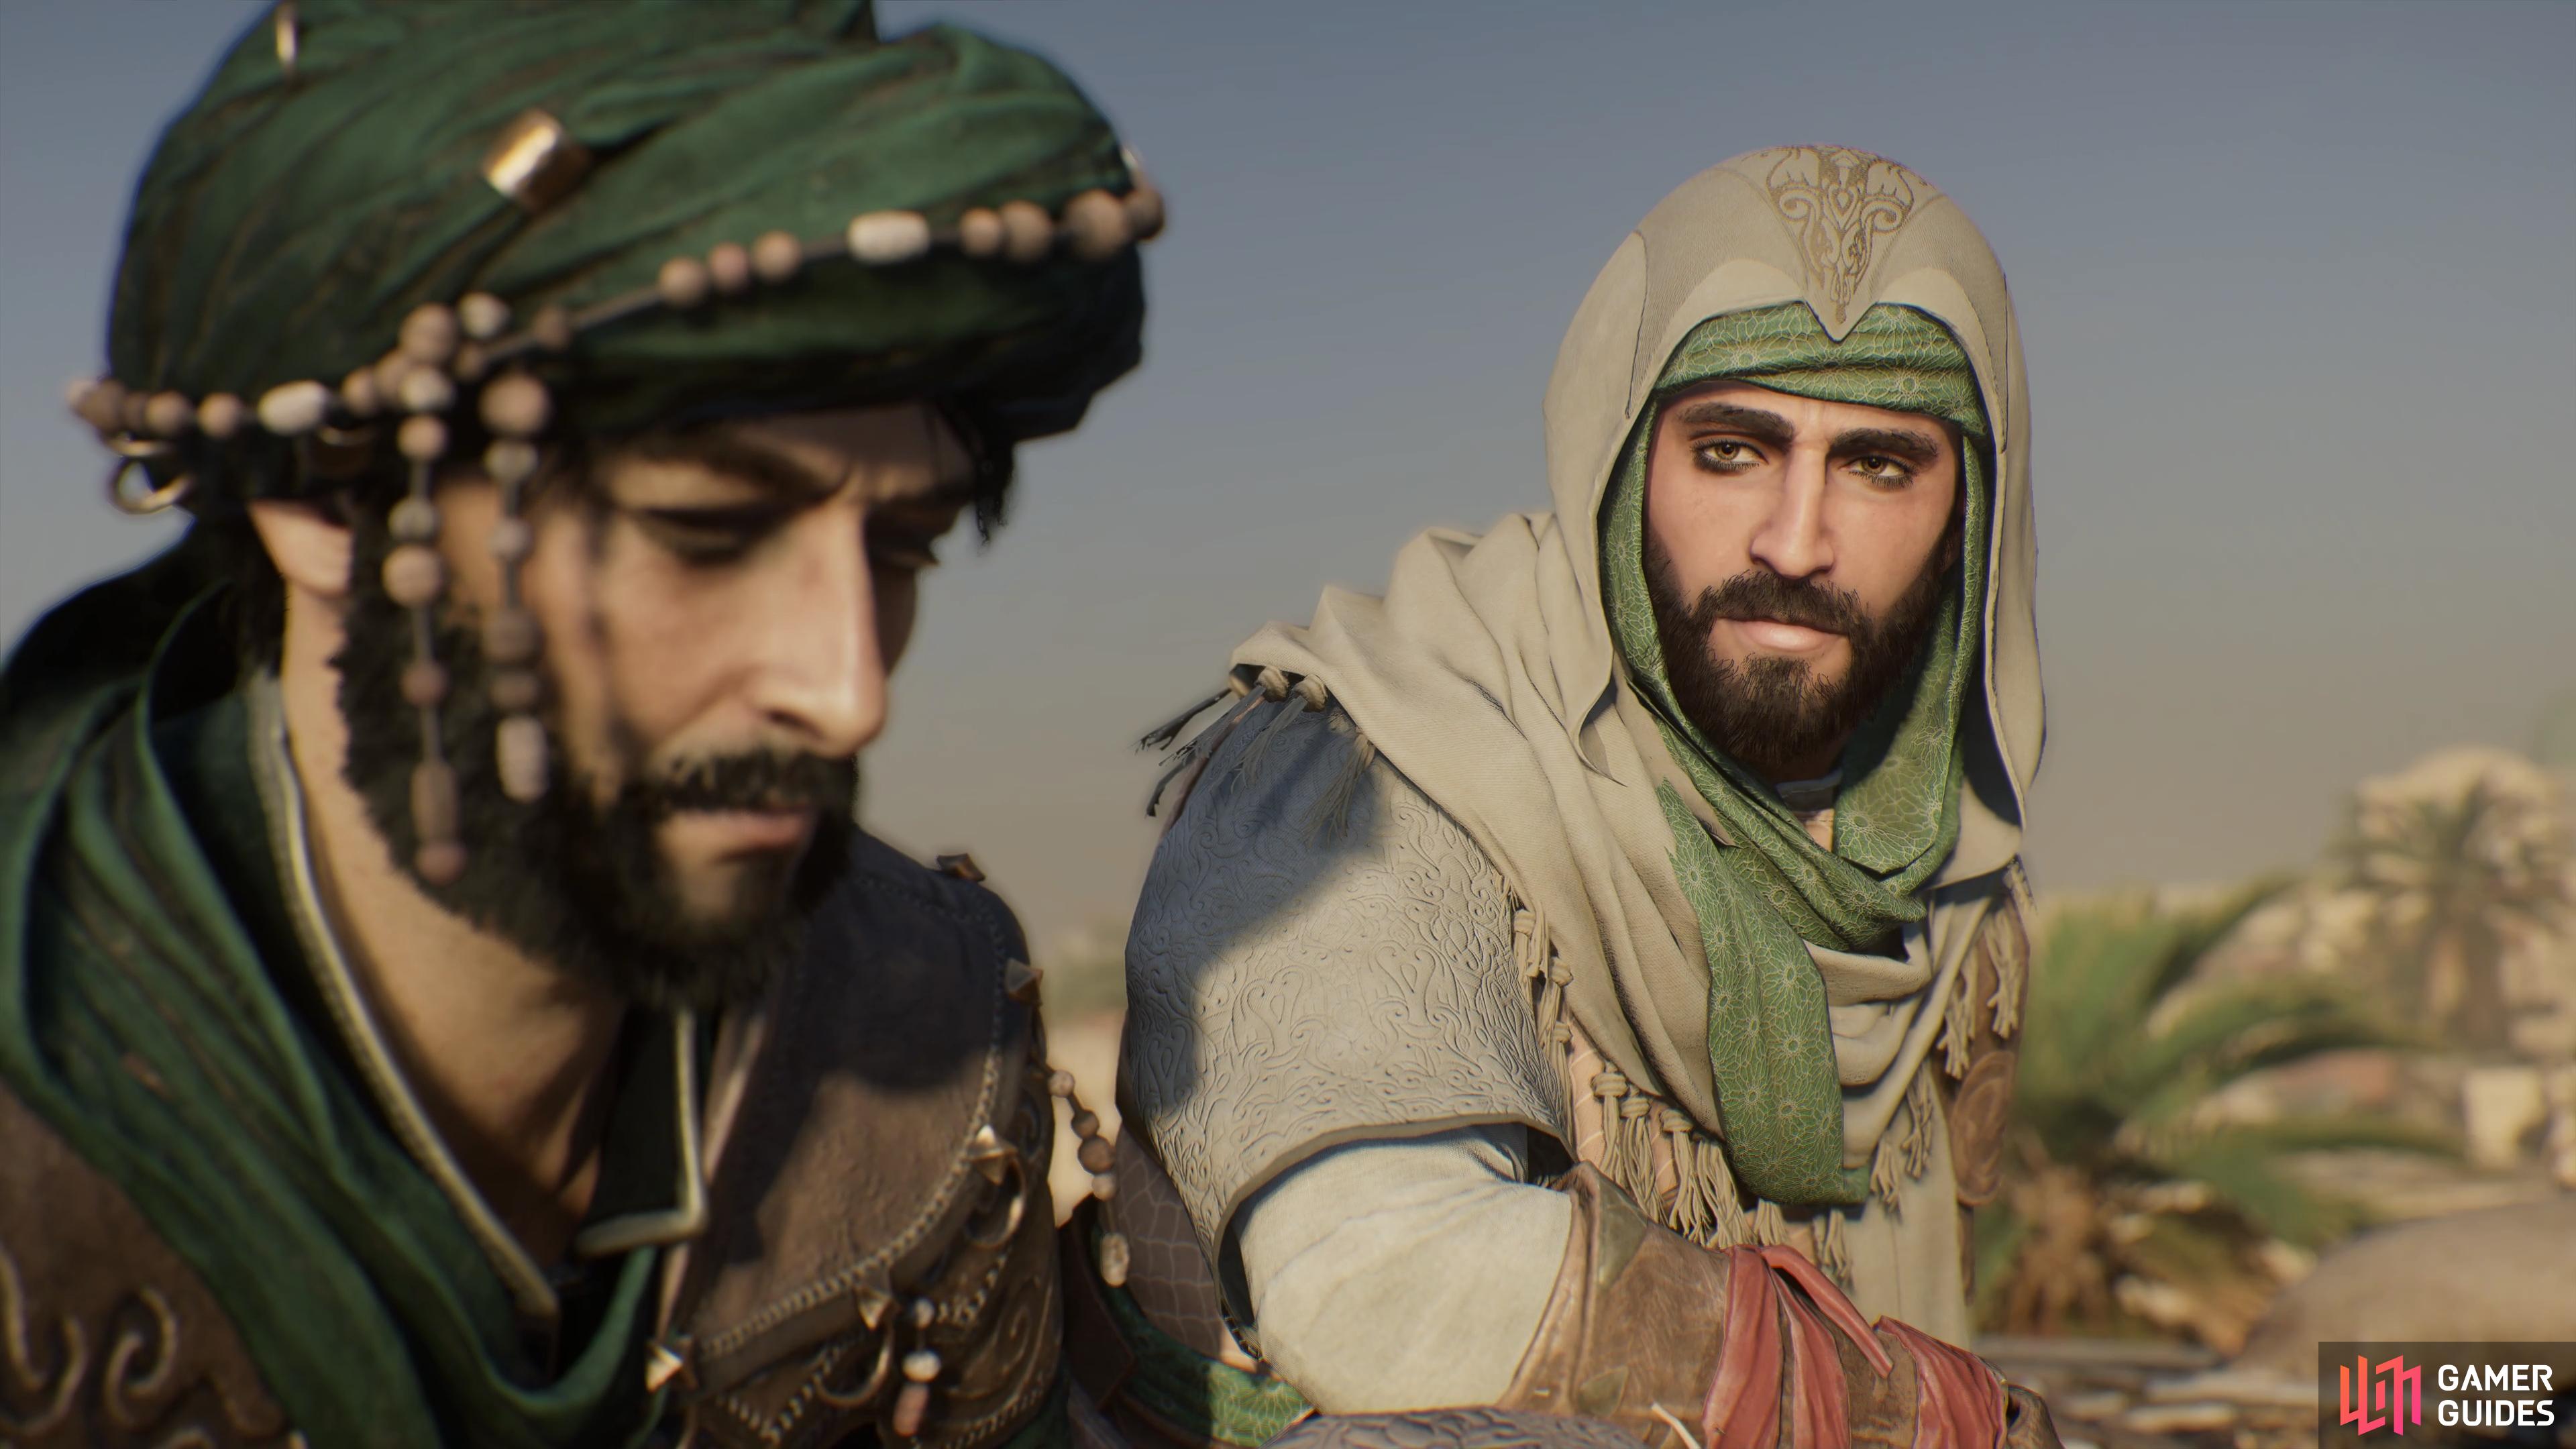
The Al-Mardikhwar investigation in Assassin’s Creed Mirage. Pictured: Basim and Ali.
The Raptor and the Demon - Find the Order Members at the Officer’s Club
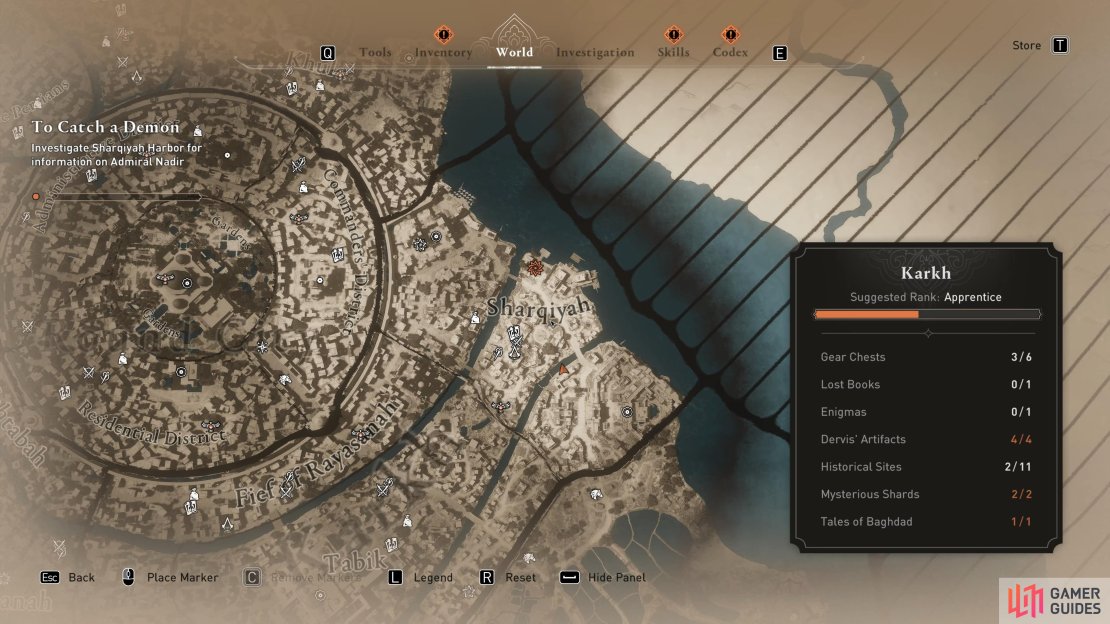
The first part of this investigation requires you to find two members of the Order of the Ancients - Al-A’eshma and Al-Rukh - at the Officers’ Club. This is located in the Karkh region of Baghdad, southeast of the Sharqiyah Bureau. You can travel to the synchronization point which is located just to the southwest of it, then continue on foot. As you approach the building where the Officers’ Club is based, use your bird to scout the area. You’ll find it heavily guarded, with spiked fencing surrounding much of it.
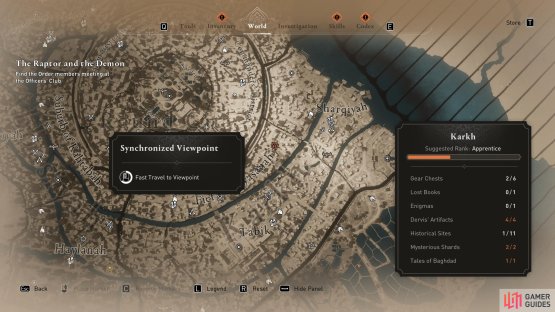
(1 of 2) The location of the Officers’ Club in the Karkh region of Baghdad.

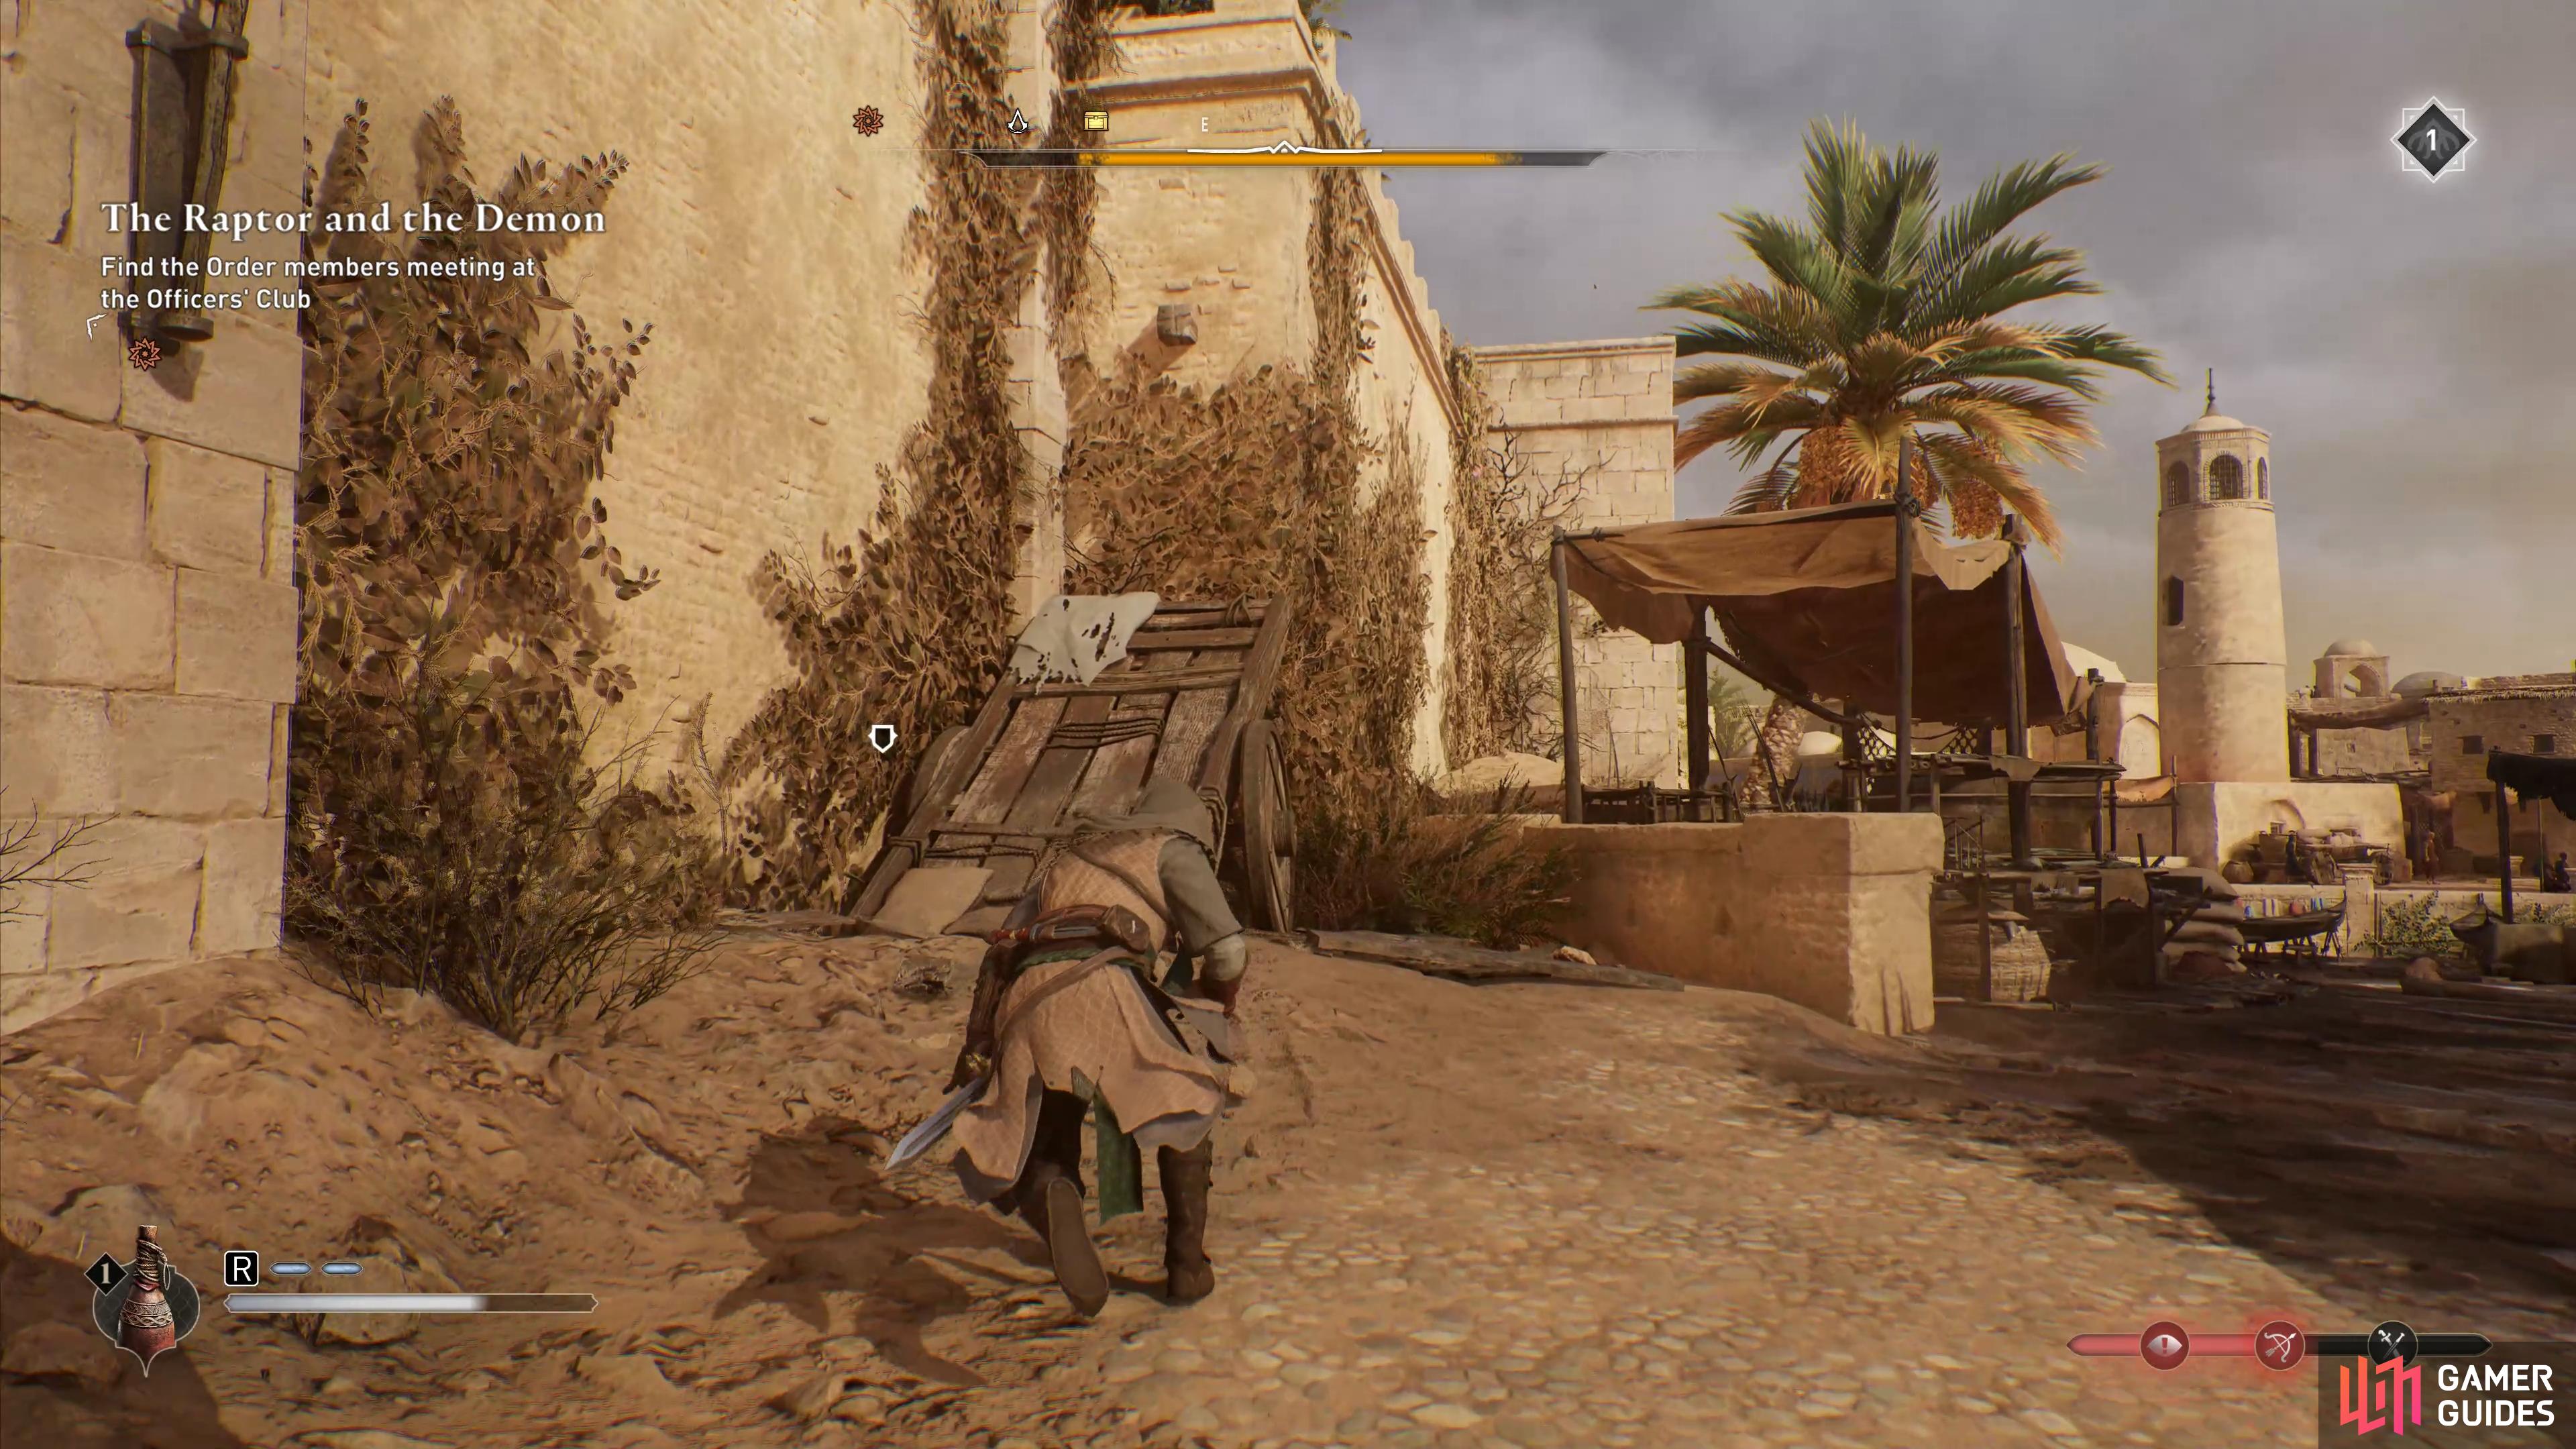
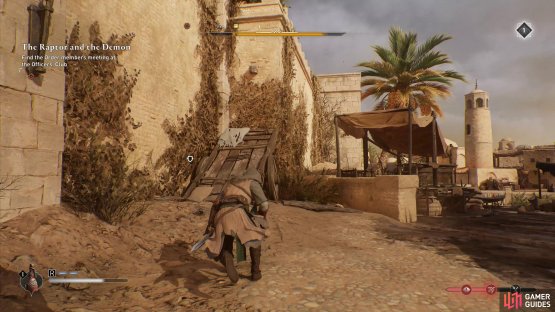
The location of the Officers’ Club in the Karkh region of Baghdad. (left), Climb the ramp on the northwest side to gain access to the ramparts. (right)
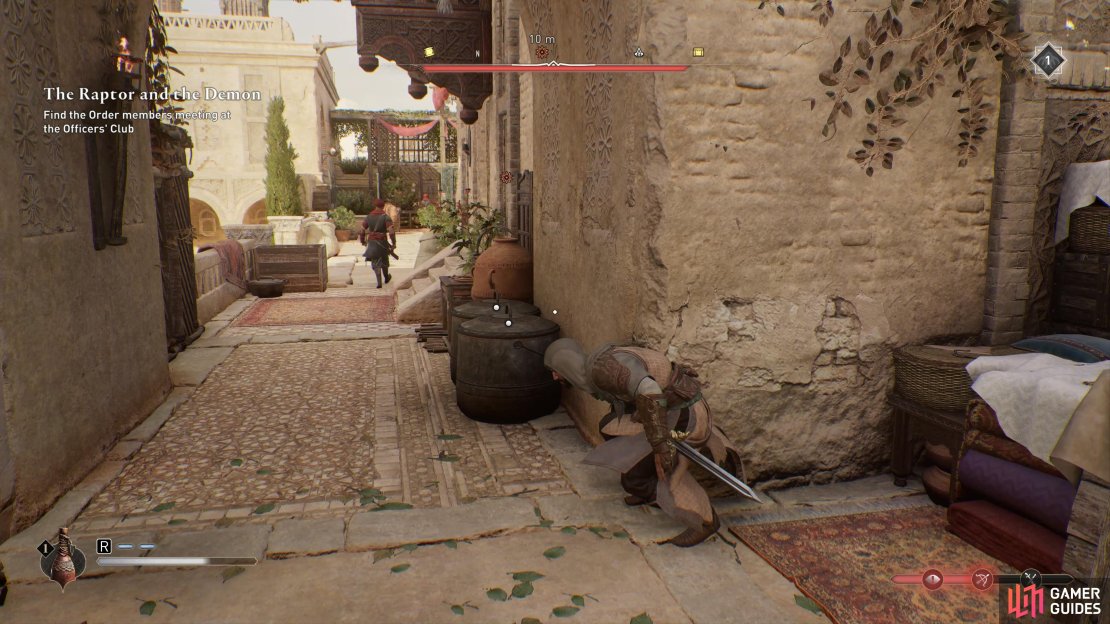
To get inside, you’ll need to find a ramp on the northwestern side, using it to climb the wall as shown in the screenshot above. You can hide in the foliage once you’re up there, then go through the gap in the fence to assassinate the guards on duty. There are five guards in stationary positions here, so it should be easy to take them out. As you turn north and go deeper into the building complex, you’ll see a door to your right, which leads into the Officers’ Club. The door is locked, so you’ll need to find the key first.
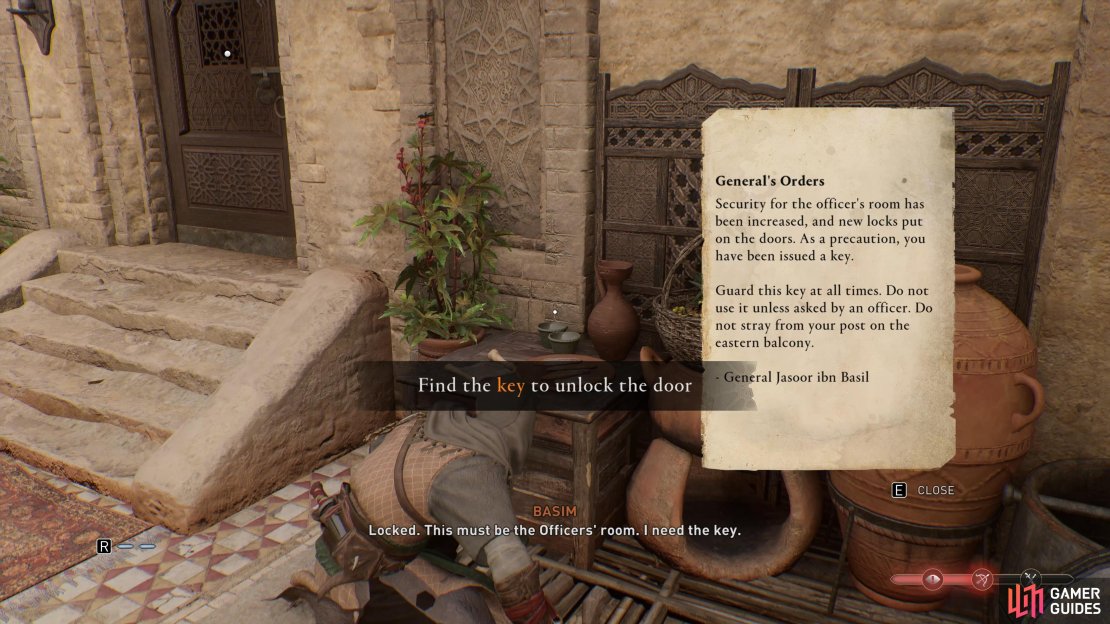
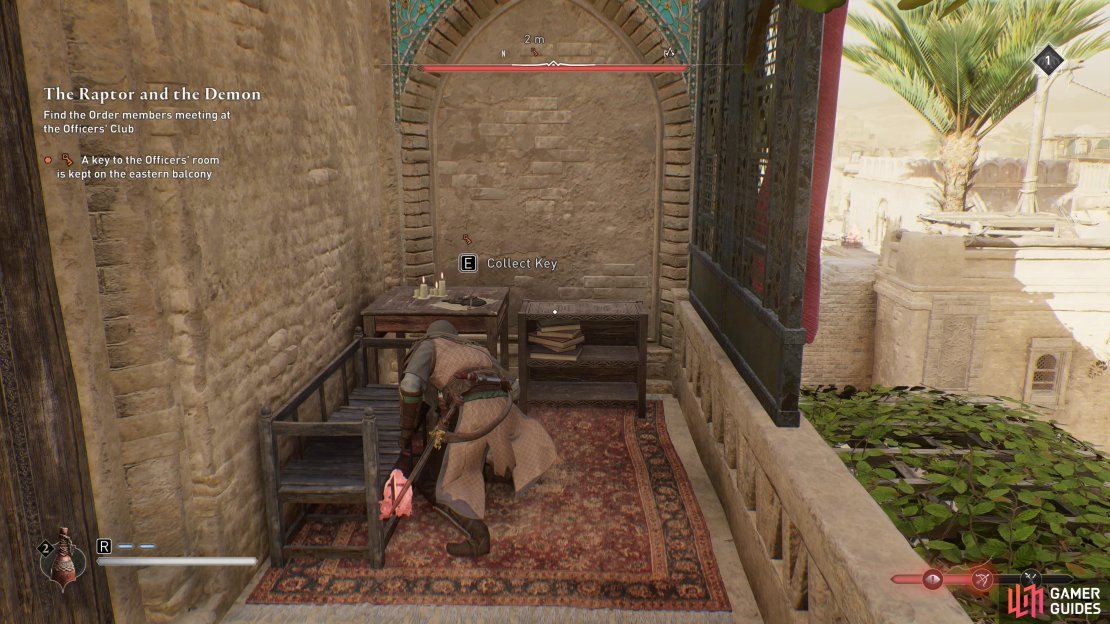
To find the key, read the note on the table just to the right of the door. You’ll learn that the key is kept on the eastern balcony, so you can climb directly up from where you are, then head east towards the balcony, killing any guards along the way. The balcony is guarded by one archer, so be ready to take them out before they call for help when you reach it. The key can be found on a table next to where you killed the archer. Once you have it, return to the locked door to get inside the Officers’ Club.
(1 of 3) You’ll find the door to the Officers’ Club locked when you first reach it.
When you enter the Officers’ Club for the first time, a cutscene will play during which Al-A’eshma and Al-Rukh have a conversation that reveals more about Al-Mardikhwar. After some time, a guard will enter to inform the officers that Dogan bin Arslan has been killed, and most of the soldiers will leave the room, leaving only two for you to deal with. Once both are dead, all you need to do is leave the building complex to finish this part of the mission. You’ll find a zip line on the southeastern side which you can use to make a swift exit.
The Hunt - Return to Fuladh at the Sharqiyah Bureau
Now that you know a bit more about the three Order of the Ancients members, you can return to Filadh at the Sharqiyah Bureau. A scene will play with him, Basim, and Ali ibn Muhammad, during which they discuss the kidnapping of Beshi. Your next move from here is clear: assassinate Al-A’eshma and Al-Rukh.
To Catch a Demon - Investigate Sharqiyah Harbor for Info on Admiral Nadir
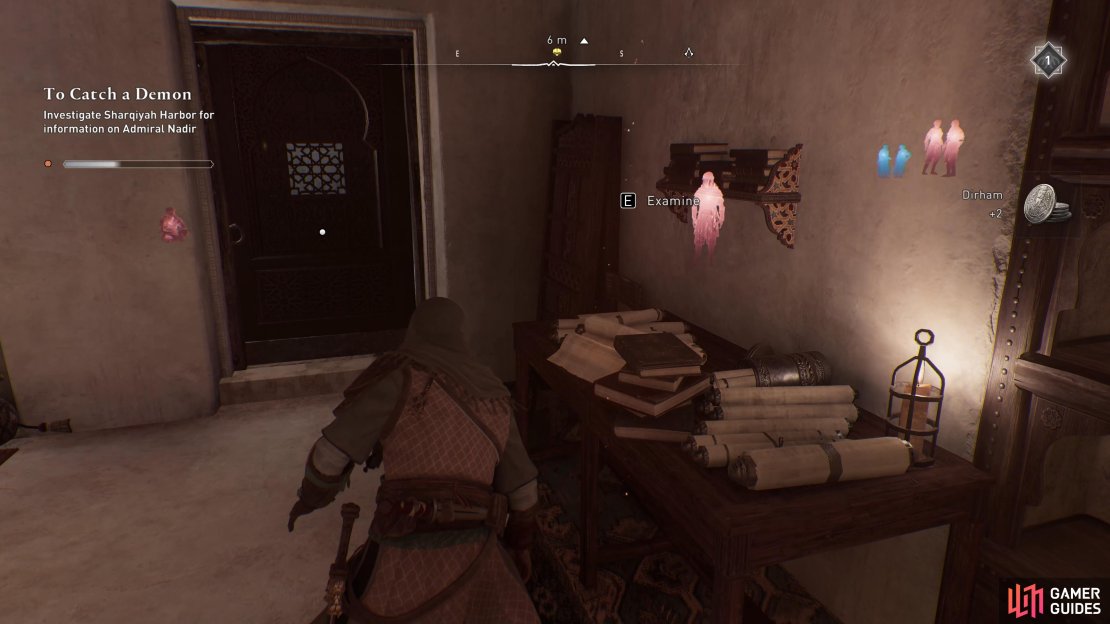
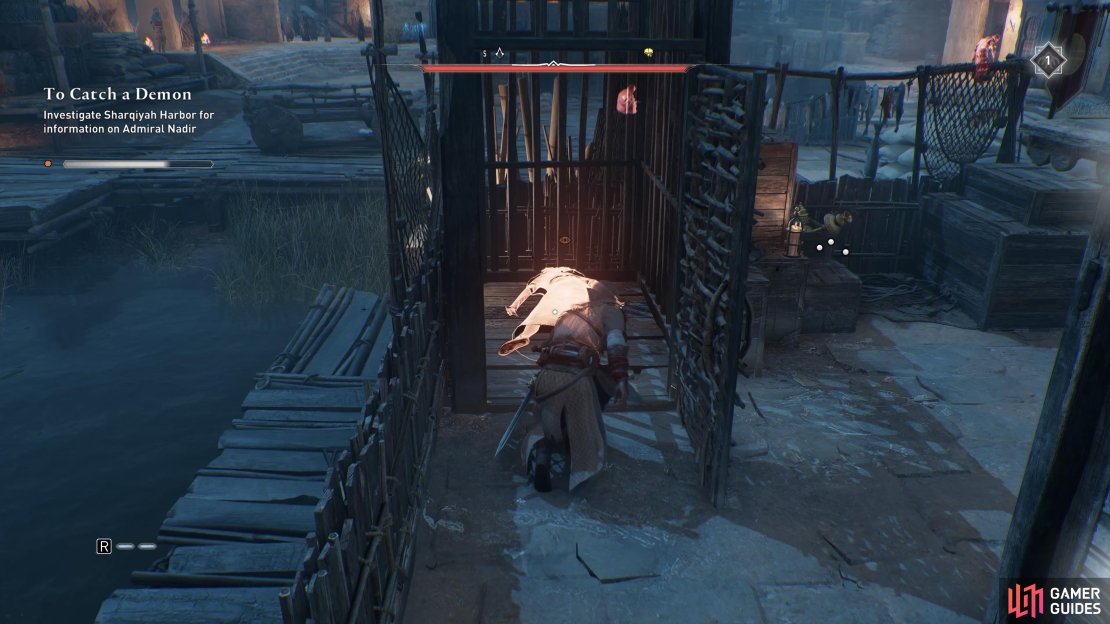
You can choose to pursue either Order member first, but we’ll start with Al-A’eshma (aka Admiral Nadir). To find him, go to the Sharqiyah Harbor in the northernmost part of the district, then use Eagle Vision to explore the area for clues. The first clue can be found at the center of the harbor, within the structure which is surrounded by sandbags. It consists of a weapons shipment that is being prepared to leave the city. The second clue can be found in a building on the southeast side of the harbor. This one is a book containing a detailed diagram of a unique ship. The final clue can be found on the eastern side of the harbor, in the form of a dead body contained within a wooden cage.
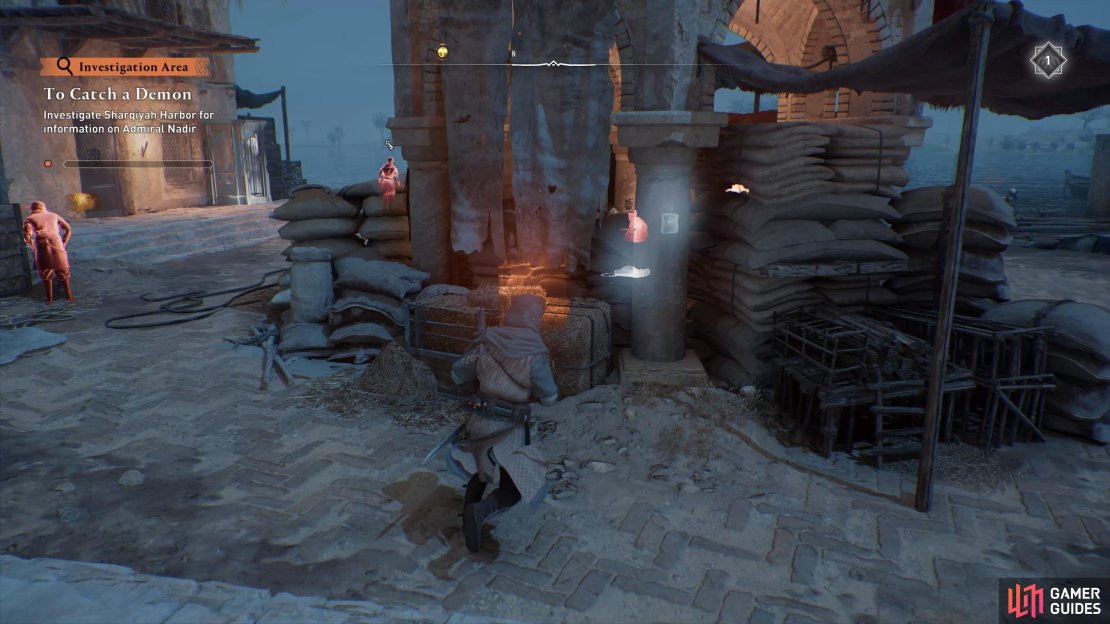
(1 of 4) The location of the Sharqiyah Harbor.
Go to Admiral Nadir’s Camp
Once you’ve read the shipment notice that you find on the dead body, you should leave the harbor and head to Admiral Nadir’s camp. This is located in the marshland to the southeast, as shown on the map below. When you arrive, you’ll see that the camp is referred to as the “Southern Camp”. You can enter it via a hole in the fence on the northern side, then use the foliage as cover while you use Eagle Vision to inspect the area. There are a lot of guards here, so you need to make sure that you’re not seen. Admiral Nadir is locked away in his office, so you’ll have to find a way to lure him out.
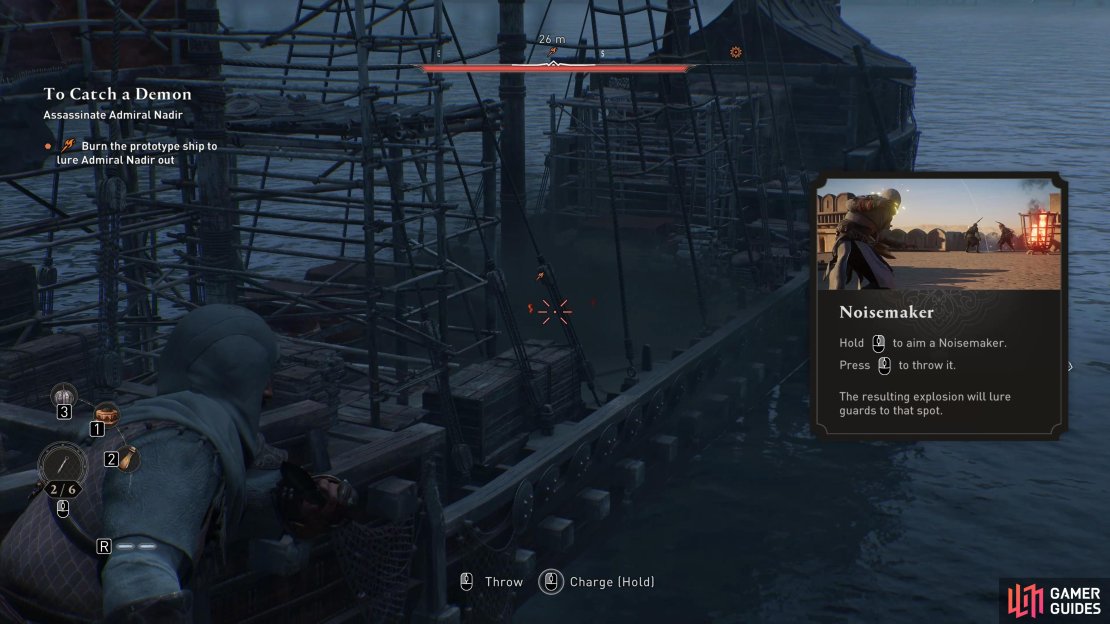
How to Lure Admiral Nadir Out and Assassinate Him
The easiest way to lure Admiral Nadir out is to set fire to his ship, which is currently docked at the shore adjacent to the camp. To reach it, you’ll need to kill a few guards along the way, so be sure to use your whistle to lure as many of them as possible to the foliage where you’re hiding, then take them out one by one. Alternatively, if there’s a group of them approaching, you can use smoke bombs to disorient them before going in for the kill. However you get there, once you reach the ship on the southeastern side, just use a throwing knife to hit one of the fire pots within, which will set off a chain reaction explosion and destroy the ship.
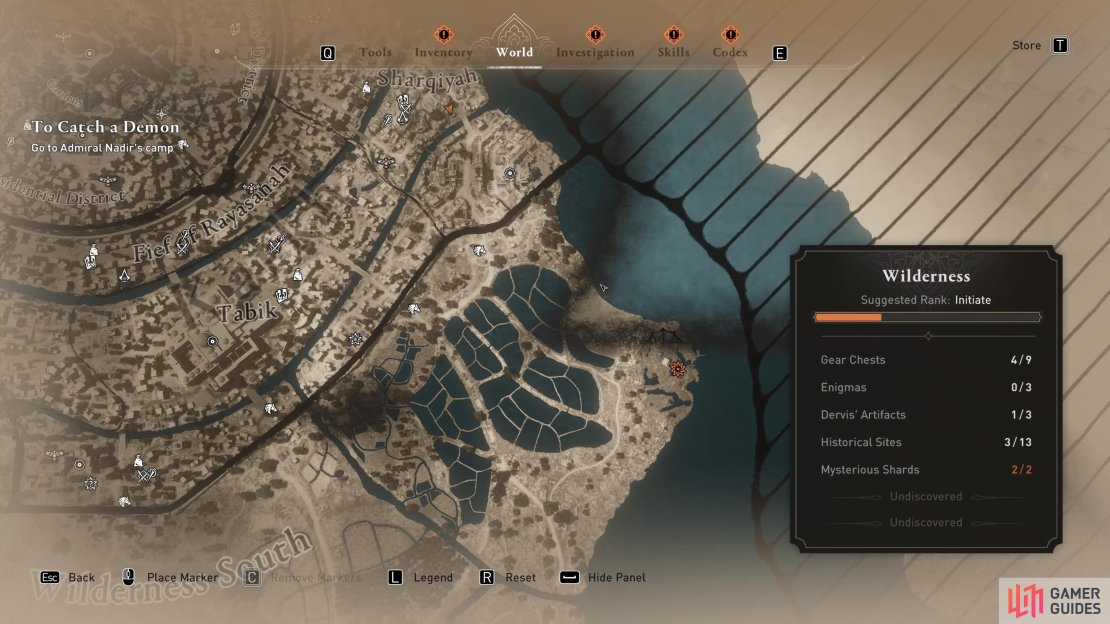

(1 of 3) The location of Admiral Nadir’s camp.
Once you’ve set fire to the ship, all of the guards in the area will be on high alert, and Admiral Nadir will emerge from his office. He’ll be marked with an orange symbol, so he’s easy to spot. Make your way towards him using the foliage on the western side of the camp for cover. Nadir will pass this area soon, so you’ll have your chance to assassinate him before fleeing the camp, thus concluding this part of the mission.
Bird Trap - Assassinate General Jasoor at Qasr Salih
One down, two to go. The next target will be Al-Rukh (aka General Jasoor), who can be found in his office at the Qasr Salih. This is located in the northernmost part of the Karkh region, as shown in the map below. The fortress here is heavily guarded, and there are only a few ways to get inside. One of the easiest methods is to climb the wall on the eastern side, where there’s a recess in the structure. There’s some foliage growing in the recess, so it should be easy to spot. You can climb up here and then take cover behind the boxes while you consider your next move.

(1 of 2) The location of Qasr Salih, where General Jasoor can be found.
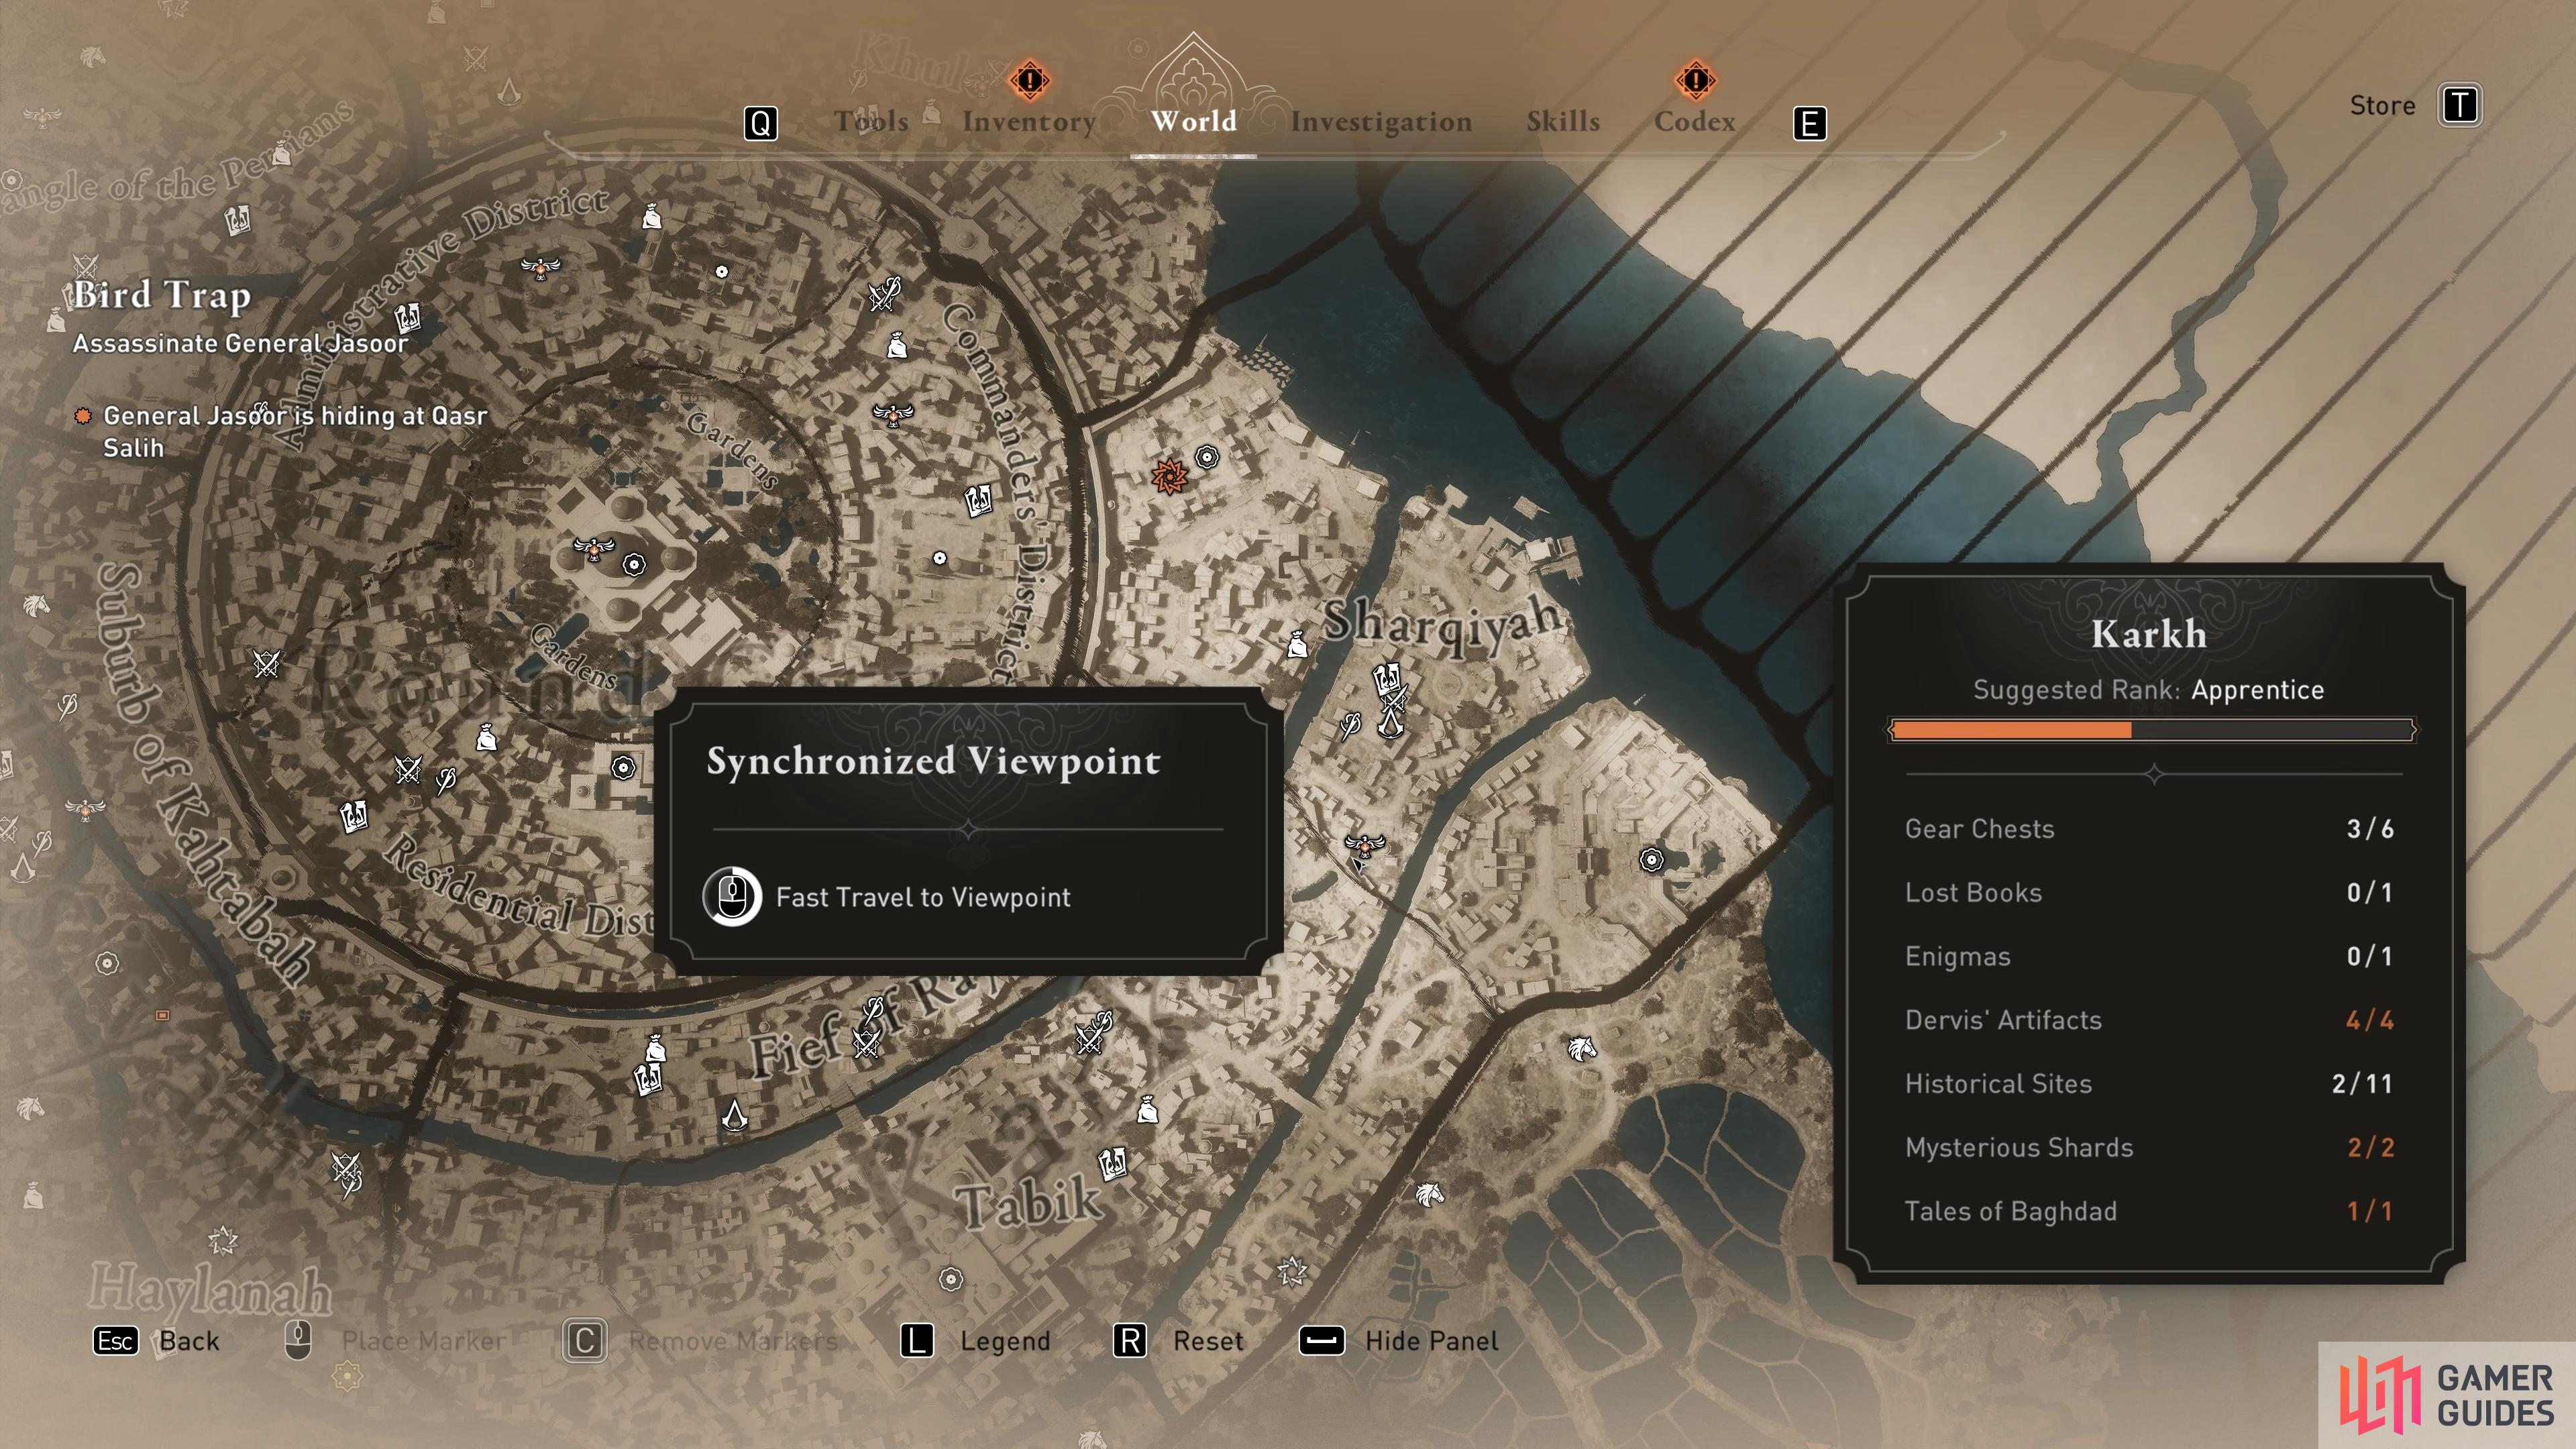

The location of Qasr Salih, where General Jasoor can be found. (left), Climb the recessed wall on the eastern side to reach the ramparts. (right)
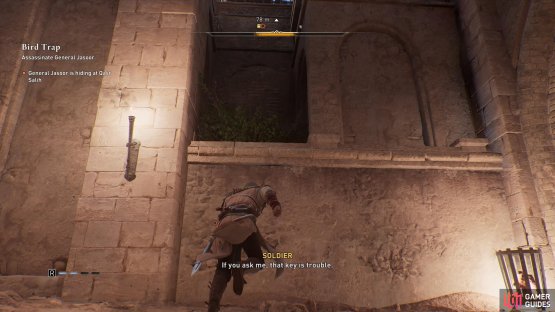
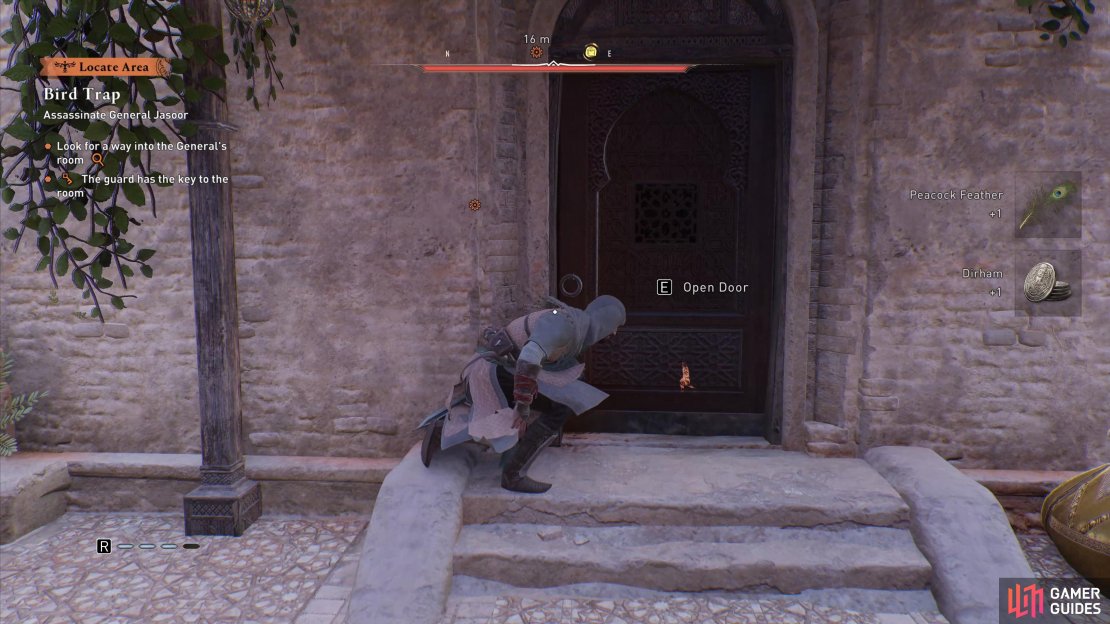
The ramparts of Qasr Salih are crawling with guards, but if you jump over the gap in the wall (directly above the recess) heading south, you’ll find an easier path. Kill the guard who patrols here, then continue southwest using the zip line to reach higher ground. From here, turn south again and then west, following the ramparts up the steps. You can use the poppy flower bed for cover here while you take out the patrolling guards, then continue westward around the central building (within which General Jasoor is hiding) until you find a door that can be opened on the western side.
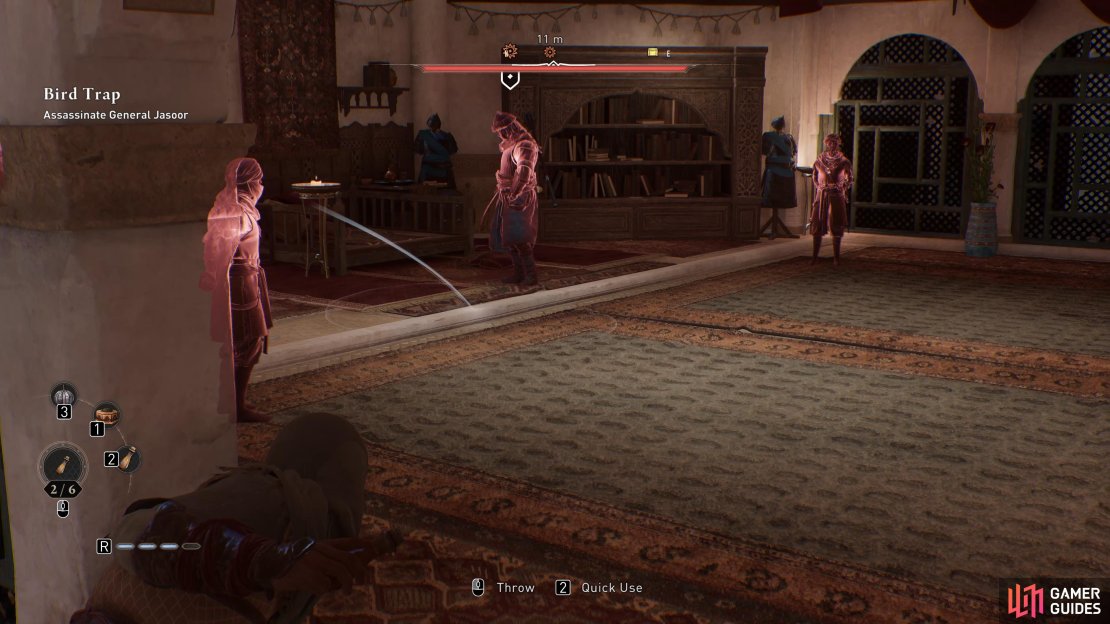
When you enter the building where General Jasoor is hiding, you’ll hear him talking to two nearby guards. The easiest way to assassinate him here is to throw a smoke bomb in the center of the room, then move in and take out all three with successive hidden blade strikes. The guards won’t have time to raise the alarm, and you can escape the fortress the same way you came in before any others come looking.
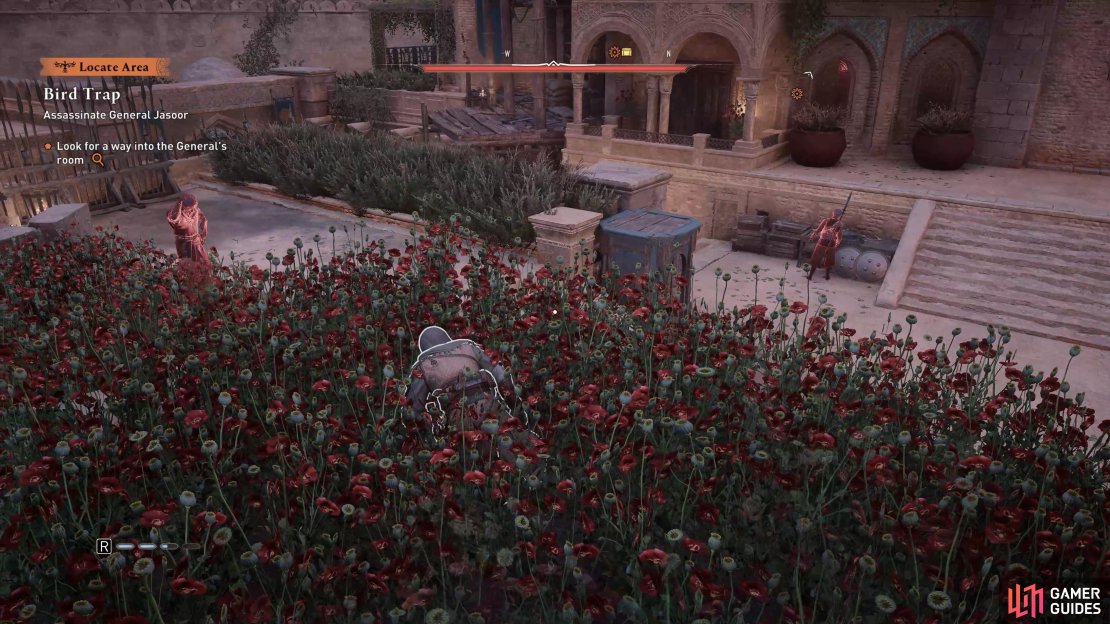
(1 of 3) Use the poppy flower bed to hide from the guards and take them out quietly.
Den of the Beast - Speak to Ali
Now that you’ve killed both Al-A’eshma and Al-Rukh, it’s time to find Al-Mardikhwar. Return to the Sharqiyah Bureau for a lengthy cutscene with Fuladh and Ali, then meet Ali on the rooftops overlooking the Great Garrison to the southeast of the bureau. Another cutscene will play here, during which you finally set eyes on The Warlord, Al-Mardikhwar, also known as Wasif. He seems to have far more influence than he should over the governor of the district, confirming Basim’s suspicions that he’s part of the order.
How to Enter the Great Garrison and Assassinate Al-Mardikhwar
You now know that Al-Mardikhwar is stationed within the Great Garrison, but this is even more heavily guarded than the Qasr Salih. To get inside, you’ll need to use your bird to scout some civilians who are stood just outside the main entrance. Use the nearby bench to blend in and eavesdrop on them. You’ll soon learn that some parts of the defensive wall are broken, and the nearest break in the wall is on the western side. The trouble is, the area has more guards around it to compensate.
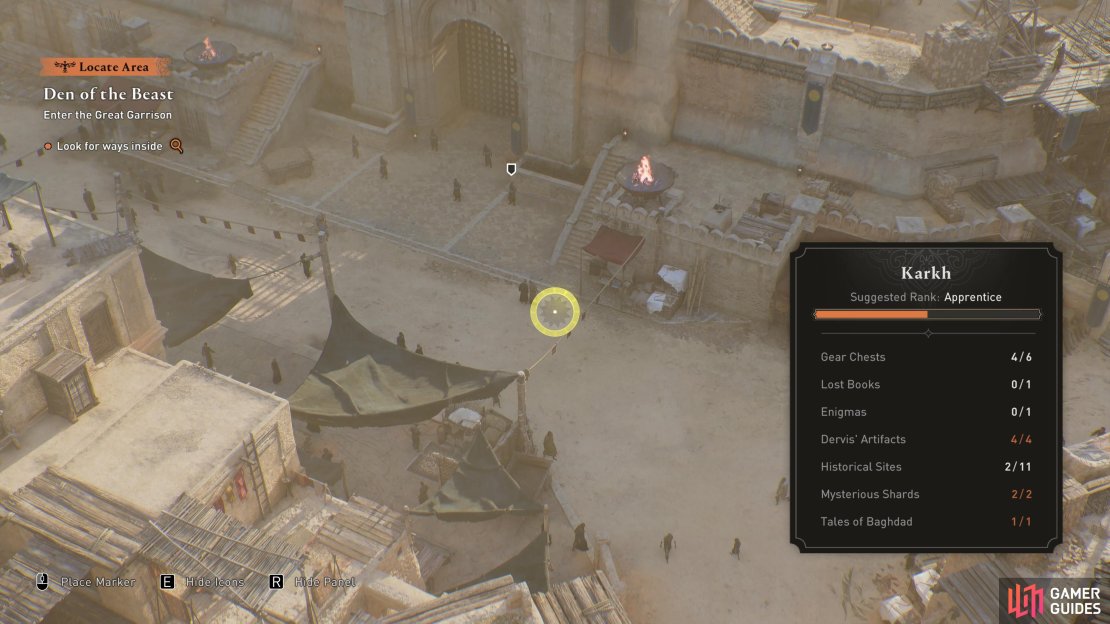
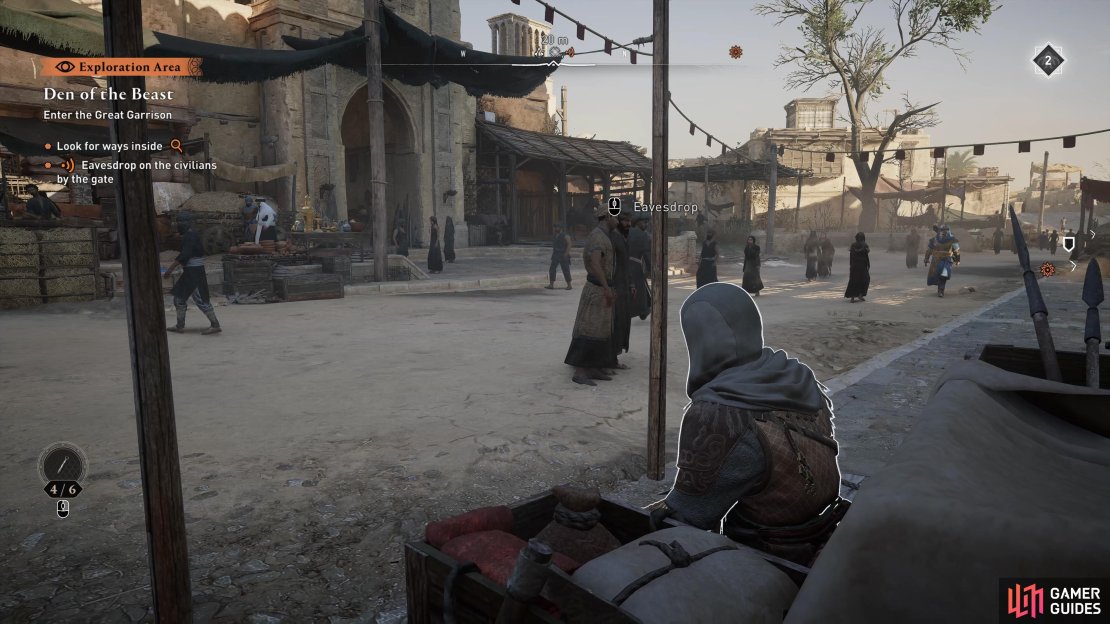
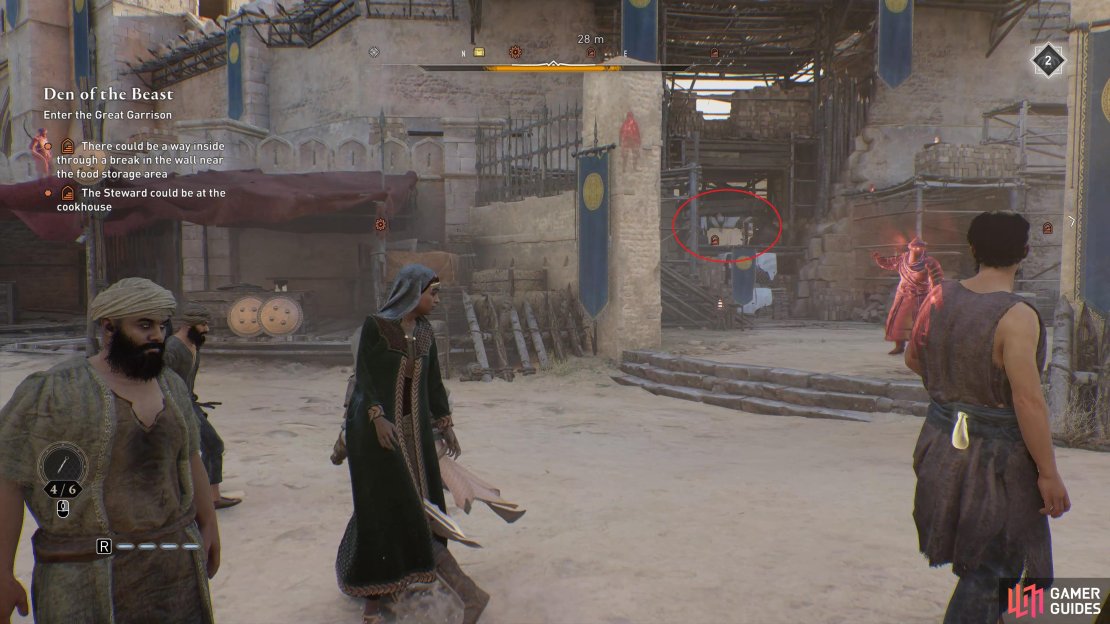
(1 of 4) Use your bird to scout the area for civilians.
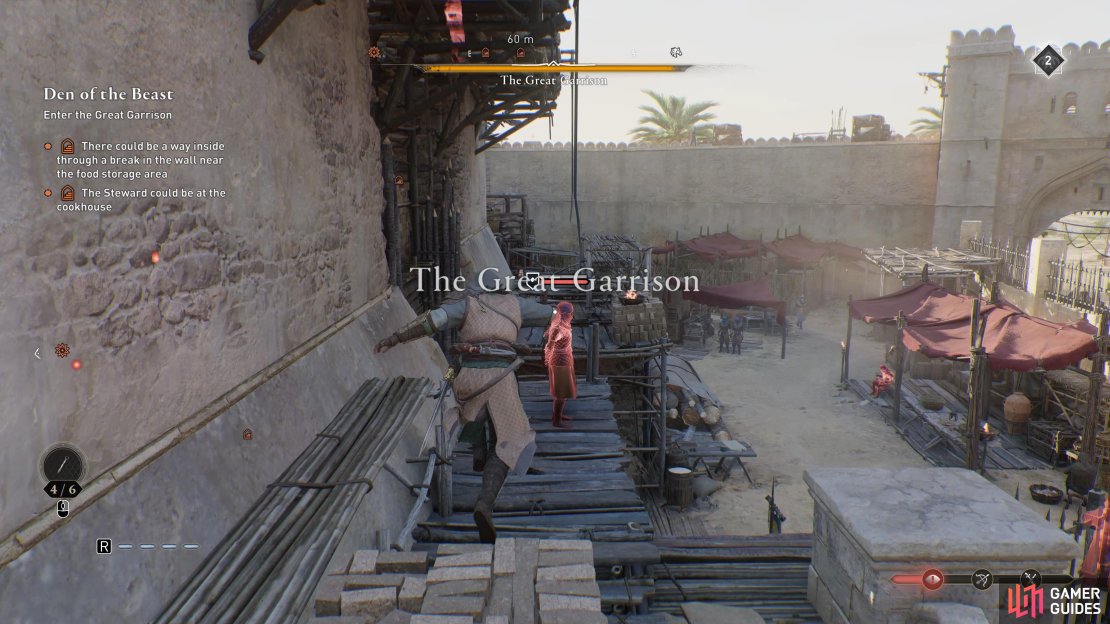
The best way to assassinate the guards near the broken wall is to climb the red canopy just to the left of it. From here, you can take out the guard near the brazier, then make your way toward the hole in the wall to kill the guard standing on the scaffolding. The other guards shouldn’t be able to see you, since they’re looking away from the garrison. Just crouch down from the scaffolding and enter the garrison through the small hole in the wall.
Where to Find Ali’s Contact (the Steward)
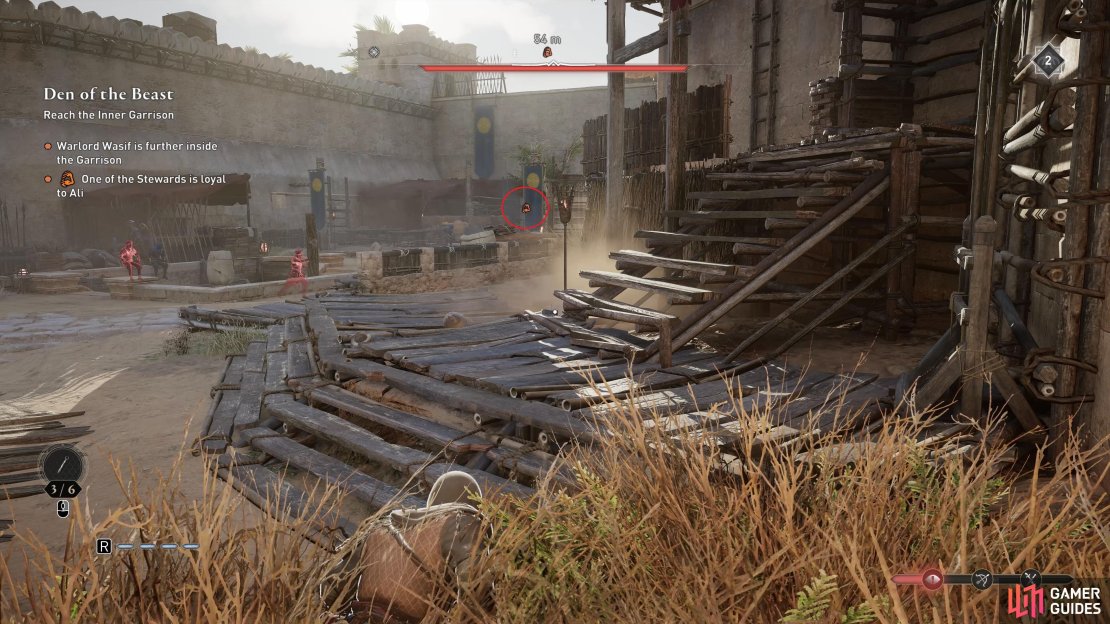
Now that you’re inside, it’s time to look for Ali’s contact within the garrison. He’s located under another red canopy just to the east of where you entered through the hole in the wall, and you can use your bird to scout his precise location. Make your way towards the canopy while keeping out of sight of the guards. The best way to do this is to climb the scaffolding above you, and then follow the wall around.
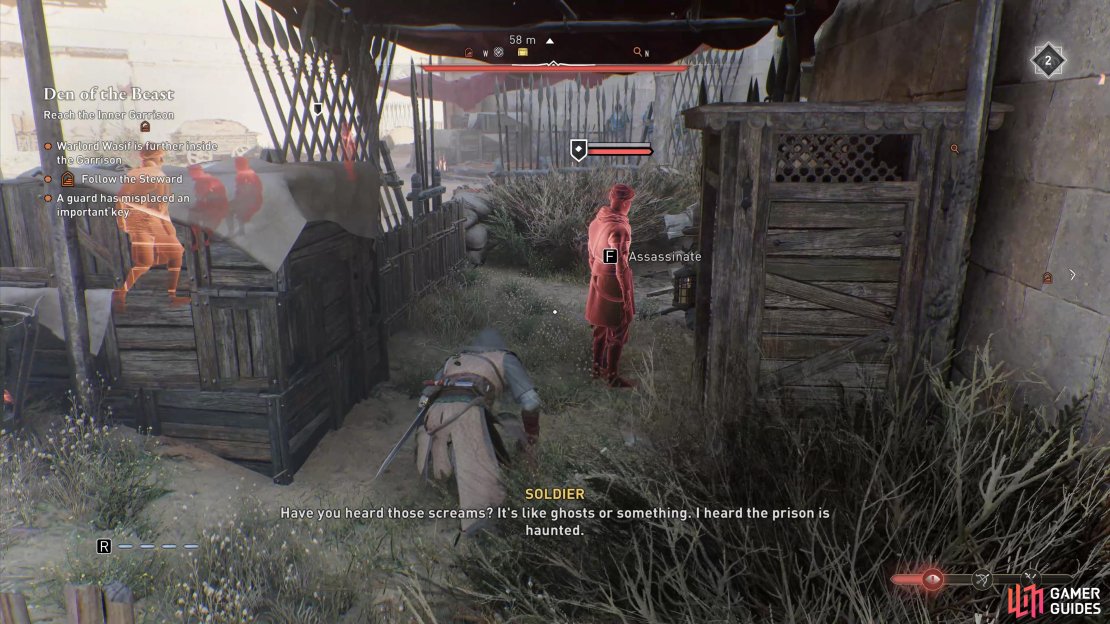
After speaking with Ali’s contact (the steward), he’ll ask you to follow him while remaining out of sight. Take the path behind the fence to his right, and use the foliage for cover as you take out the guard directly ahead. You can keep track of the steward using Eagle Vision, but he won’t move too far away if you have to stop. Keep following him until you reach a locked door that the steward will open for you, then go inside.

(1 of 3) Use your bird and Eagle Vision to locate Ali’s contact within the Great Garrison.
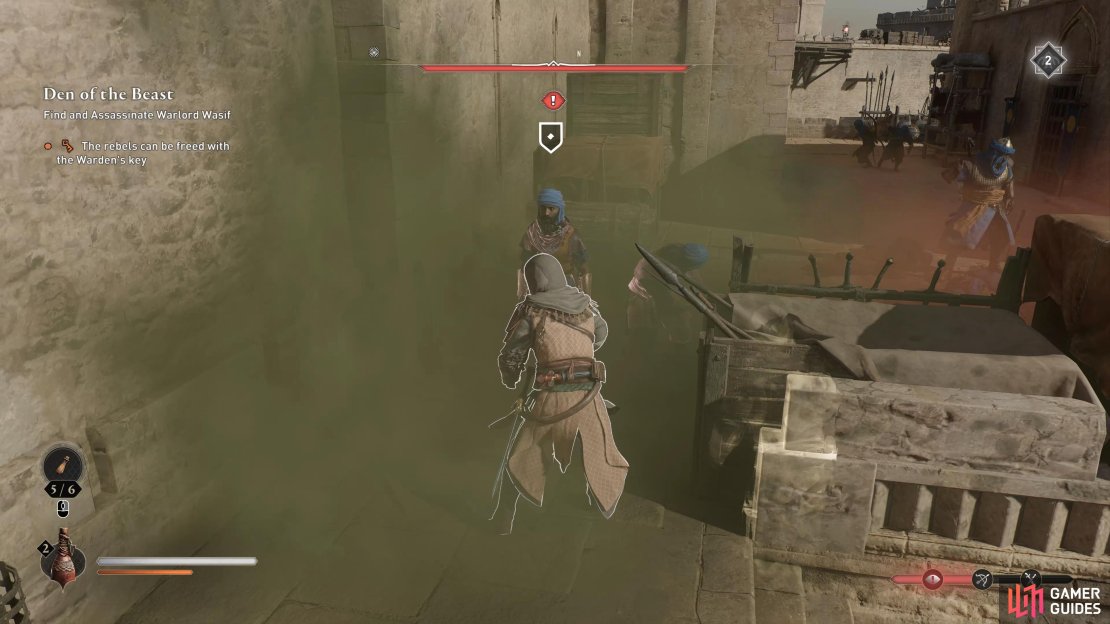
Once you’re through the door where the steward led you, a cutscene will play during which Al-Mardikhwar brutally murders Beshi. This draws the attention of Ali, who appears after the scene. You now need to fight your way to safety by defeating the guards within the garrison. Be sure to make use of smoke bombs to distract some of the guards, then move in for some swift assassination kills.
Find the Warden’s Key and Free the Rebels
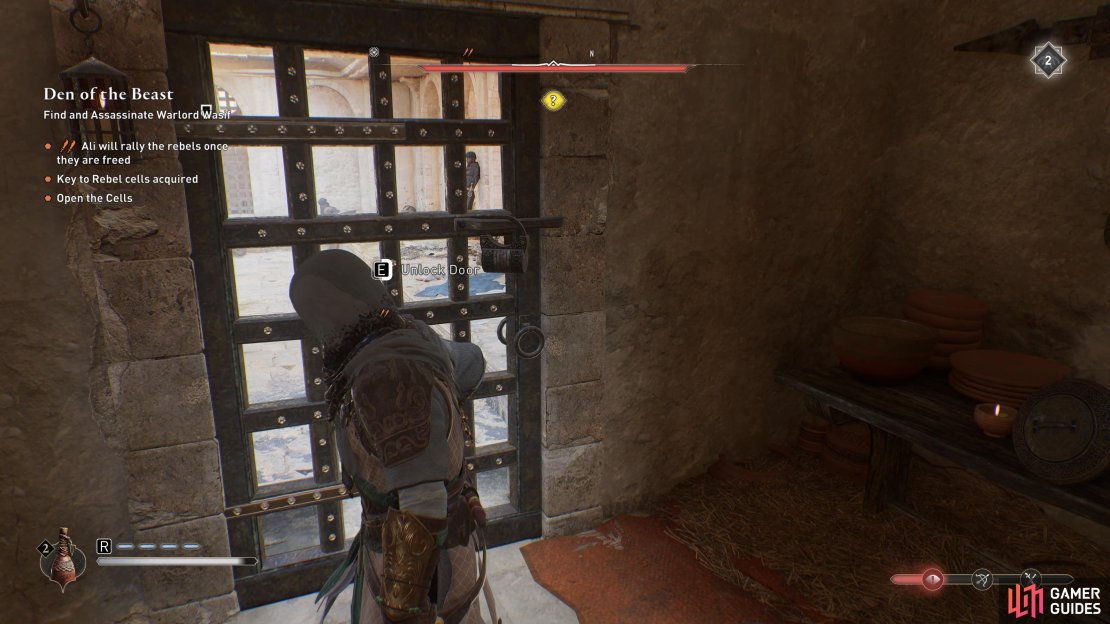
Once all the guards are dead, another scene will play with Ali. He resolves to fight Al-Mardikhwar’s forces from within the garrison, but you’ll need to find a key to the cells to free his rebel fighters. The key can be found on a guard known as The Warden, who is really just a regular captain enemy. Climb the walls to the northwest to locate him, and use a smoke bomb to assassinate all the guards around him quickly. You can then return to Ali and open the cells to free the rebels.
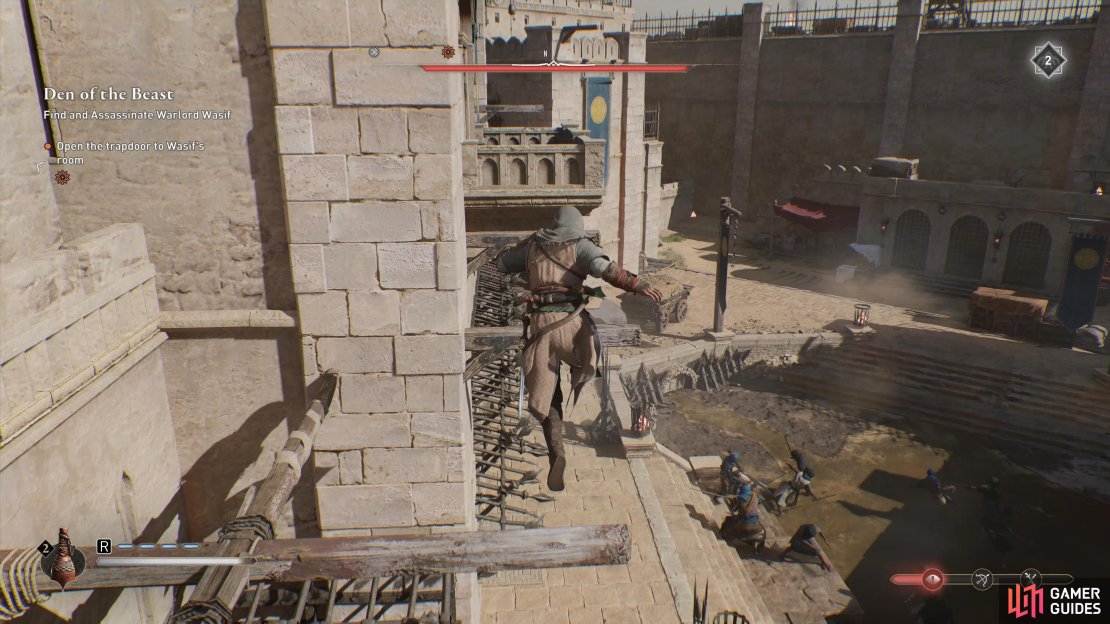
Now that you’re ready to take on Al-Mardikhwar directly, you’ll need to light the nearby beacon to draw his guards out. This can be found just above the central courtyard to the northeast, so all you need to do is climb the walls and then interact with the beacon. A brief scene will play, at the end of which Ali and his rebel fighters will take on the guards. Now is your chance to move in on Al-Mardikhwar, but to reach him you’ll need to parkour across the wooden beams and scaffolding located to the southwest of the beacon.
(1 of 3) Find the warden with the key and use a smoke bomb to take out the guards.
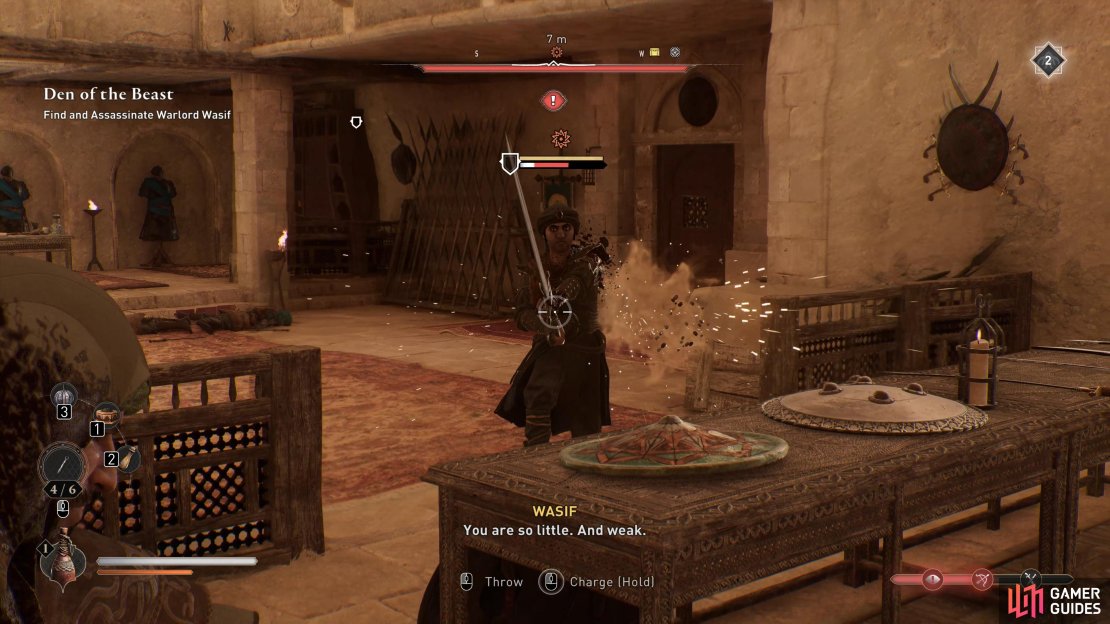
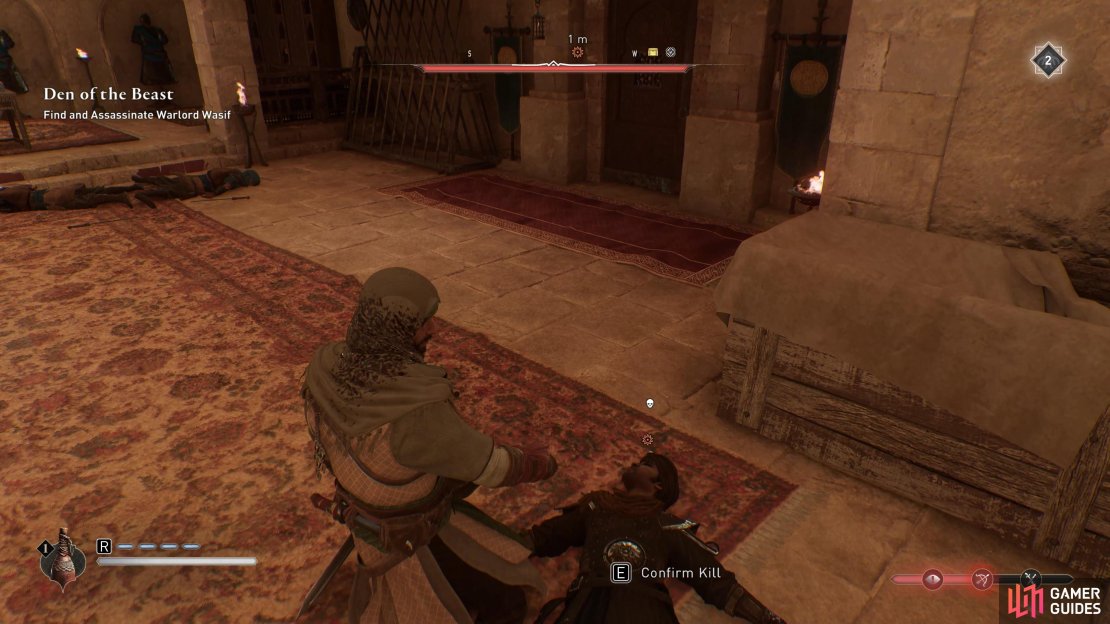
Assassinate Al-Mardikhwar Through the Hatch
The path across the beams and scaffolding will lead you directly to the balcony where Al-Mardikhwar’s office is located. Enter through the door and take out the guard here before dropping down through the hatch. Ali can be found in the room below, accompanied by two guards. We highly recommend that you try to kill him by surprise using an assassination technique. He’s a swift fighter with some attacks that are difficult to dodge. If he spots you first, you can always use a reliable smoke bomb to disorient him before going in for the kill. Alternatively, a few throwing knives will make quick work of him.
With Al-Mardikhwar dead, all you need to do from here is join Ali in fighting your way out of the garrison, then return to Fuladh at the Sharqiyah Bureau. You should probably tear down some wanted posters or pay off a Munadi NPC to reduce your notoriety, since it’s likely to be high after leaving the garrison.
(1 of 3) Climb the scaffolding to the balcony, leading to the hatch down which you’ll find Al-Mardikhwar.
More Assassin’s Creed Mirage Guides
If you’re looking for more AC Mirage guides, be sure to check the links below.
No Comments