The Charge Blade is a weapon introduced in the 4th generation of Monster Hunter games. Like the Switch Axe, it can change modes: From an agile sword and shield to a slow, but hefty axe. The sword form is primarily used to charge up phials for the damage-dealing axe form.
(1 of 2) Sword mode.
Sword mode. (left), Axe mode. (right)
Basic Controls
Sword Mode
| Button(s) | Action | Description |
|---|---|---|
 |
Weak Slash | A simple, but quick sword slash. |
 + +  |
Forward Slash | Slash while moving forward. |
 + +  |
During combo: Fade Slash | Slide in the left stick direction, followed by a slash. |
 + +  |
Morph Slash | Switch to Axe mode, while slashing with axe. |
 + +  |
Charge | Transfer sword energy into phials. |
 |
Guard | Block with shield. |
Axe Mode
| Button(s) | Action | Description |
|---|---|---|
 |
Rising Slash | Slash with axe. |
 |
Element Discharge | Swing axe, while consuming a phial. |
 + +  |
Amped Element Discharge | A powerful finishing move that uses a phial. |
 |
Morph Slash | Switch to Sword mode, while slashing with sword. |
Characteristics
Sword Mode
(1 of 2) You have to get up close and personal with the sword.
You have to get up close and personal with the sword. (left), Once you’ve acquired 5 phials with the sword, it’s time to switch over! (right)
To start with, you’ll always be in sword form. Attacks in this form will build up Sword Energy. This is indicated by the color of the phial gauge below your health and stamina bar. The color will go from white to yellow to red.
If you keep attacking when the gauge is red, after a while, the gauge will become bright red and your attacks will bounce off regardless of sharpness.
To avoid this, hold  and press
  to charge your weapon. This will convert the Sword Energy into the appropriate amount of phials, restoring the gauge to its white color. If the gauge was yellow when charging, you’ll gain 3 phials; if it was red, you’ll gain 5 phials. You can have a maximum of 5 phials.
Besides attacking, your hunter also has a shield in this form, which they can use to block some attacks. You can guard manually with  . Some attacks also block automatically during certain parts of the animation.
Although the sword form does OK damage and is quite versatile, it’s not the Charge Blade’s strongest form. After gathering (ideally) 5 phials, it’s time to let loose.
Axe Mode
(1 of 2) The axe is slow to use, but it’s powerful and has long range.
The axe is slow to use, but it’s powerful and has long range. (left), It also has some incredibly hard-hitting moves. (right)
Holding  and pressing
  will make your hunter perform a Morph Slash and shift your weapon to axe mode. The axe form attacks a lot more slowly and you’ll also move slower. However, attacks deal more damage and have bigger range.
Crucially, phials accumulated in sword mode will greatly increase the damage of  attacks, as well as the Charge Blade’s “finisher” move. These attacks typically consume one phial. Since you’re limited to 5 phials at one time, you can only use a handful of these powered up moves. Therefore, timing when to use axe mode is key.
After exhausting your phials, you’ll want to return to sword mode by pressing  . Then repeat the process to build up phials.
Element Boost
(1 of 2) First, begin using an Amped Element Discharge with at least one phial.
First, begin using an Amped Element Discharge with at least one phial. (left), Then immediately cancel with ZR. All phials will be converted to Element Boost. (right)
When using an Amped Element Discharge in Axe Mode, pressing  before the attack lands will transition to an Element Up Roundslash. If your hunter has any phials, these phials will all be consumed to temporarily power up their shield (also shown by a red shield icon below your health/stamina). This special state is called Element Boost.
During Element Boost, your axe will deal more damage to foes and your shielding ability is improved. Also, if you successfully block an attack, it will trigger a shield explosion. Furthermore, the Amped Element Discharge move will turn into a stronger version that consumes all phials.
Element Boost lasts a finite amount of time–it lasts longer the more phials you used when entering it. In general, you want to be in Element Boost for as long as possible, to take advantage of the buffs.
Sword Boost
(1 of 2) While in Element Boost, start charging your sword, then hold X.
While in Element Boost, start charging your sword, then hold X. (left), Release X at the right moment to do a Condensed Element Slash and activate Sword Boost. (right)
While Element Boost is active, there is another useful buff you can trigger. In Sword mode, begin charging (to convert sword energy into phials). While you’re in the middle of charging, hold  . Your hunter’s animation should change. Wait until after the steam emerges from the weapon, then release
  as soon as you see sparks flying.
If done correctly, you’ll perform a Condensed Element Slash. Now your hunter’s sword will be powered up as well (also shown by a red sword icon below your health/stamina). During this Sword Boost state, your sword will deal more damage and it won’t be deflected, even if your sword energy is maxed out.
Sword Boost doesn’t last as long as Element Boost, but you can keep reapplying it, so long as Element Boost is up.
Special Moves (Sword)
Charged Rising/Double Slash
(1 of 2) Hold down for a few seconds.
Hold down for a few seconds. (left), Then release for a fast double slash. (right)
When pressing or holding  at the start of a combo, your hunter will charge their sword. Releasing
  quickly will perform a Charged Rising Slash, which is a somewhat slow slash upwards.
Holding  for longer will perform a Charged Double Slash instead. This is generally the better option of the two, allowing you to hit twice in quick succession. It’s also one of the better ways to increase sword energy.
Shield Thrust
In the middle of a combo, pressing  and
and  will perform the Shield Thrust instead of the Forward Slash. Pressing
  and
and  again will transition straight to the Amped Element Discharge. This is a very useful move to remember if you’re in sword mode and want to switch to big damage quickly.
Condensed Element Slash
(1 of 2) Starting charging your sword like you’d do normally, but hold X.
Starting charging your sword like you’d do normally, but hold X. (left), Then release after the sparks fly. It’s more obvious when in Element Boost. (right)
This may not be an intuitive move at first. While charging your sword with  and
and  , hold the
  button. Your hunter’s animation should change. After a short while, steam will come out of their weapon. Then sparks will fly. Release
  when the sparks fly to use this move. As long as you’re not early, the timing for this move is quite generous.
The main reason to use this move is to enter Sword Boost while Element Boost is active. It is a strong move in itself, but it takes a long time and has poor reach.
Special Moves (Axe)
Amped Element Discharge
(1 of 2) This move has a slightly long wind-up time.
This move has a slightly long wind-up time. (left), But if it lands, the monster’s going to be hurting! (right)
This is the damage dealing move you want to use at the end of a combo, when a monster is down. The quickest way to perform it is by pressing  and
and  . However, you can also perform it by pressing
  after a combo’d Element Discharge (eg.
  +
+  +
+  ). If you have one phial, this move consumes the phial to deal more damage.
Although it’s a move used in Axe form, you can quickly use an Amped Element Discharge in sword mode by performing a Shield Thrust, then pressing  +
+  again. Or after blocking an attack with your shield.
Element Up Roundslash
(1 of 2) As you begin an Amped Element Discharge, press ZR.
As you begin an Amped Element Discharge, press ZR. (left), This will cancel the move, changing it into an Element Up Roundslash (right)
Also called an Element Boost Spinning Slash. This move is triggered by pressing  as you begin using an Amped Element Discharge. You’ll transition to Sword mode and slash forwards. If you have any phials, they’ll all be consumed to initiate Element Boost.
For prolonged fights, which is most of them, you should use this ASAP to enter or re-enter Element Boost, for the boost to your axe damage and shield.
Ultra Element Discharge
(1 of 2) An Ultra/Super Element Discharge is incredibly strong.
An Ultra/Super Element Discharge is incredibly strong. (left), But it has a narrow range, so you’ll want to line up properly and/or get close. (right)
Also called a Super Element Discharge. This is an Amped Element Discharge used when Element Boost is active. It’s stronger than the ordinary version and uses up all phials, instead of one. The monster won’t know what’s hit them!
Basic Combos
Sword Mode
| Button(s) | Action | Description |
|---|---|---|
 or or  + +  → →  → →  |
Weak/Forward Slash → Return Stroke → Spinning Slash | A simple combo utilizing weak slashes. |
Hold  and long release → and long release →  |
Charged Double Slash → Spinning Slash | A stronger combo that’s not too complicated. |
Mid-combo:  + +  |
Fading Slash | While doing any standard combo, you can slide with Fading Slash to avoid attacks. You can also start a new combo afterwards. |
Mid-combo:  + +  → →  + +  → →  |
Shield Thrust → Amped Element Discharge → Element Up Roundslash | Useful for quickly triggering Element Boost. Or you can stop with the Amped Element Discharge. |
 + +  → Hold → Hold  and long release and long release |
Charge → Condensed Element Slash | Deals good damage, but mainly used to trigger Sword Boost, while in Element Boost. |
Axe Mode
| Button(s) | Action | Description |
|---|---|---|
Mid-combo:  → →  |
Element Discharge II → Amped Element Discharge | A no-nonsense way to rack up damage, when the enemy’s a sitting duck. |
Mid-combo:  → →  → →  |
Element Discharge II → Rising Slash → Element Discharge II | You can chain this combo endlessly by alternating  and and  . . |
Silkbind Attacks
Morphing Advance
(1 of 2) This attack propels you forward.
This attack propels you forward. (left), While switching to axe mode, so you can get axe-swinging straight away. (right)
Press  +
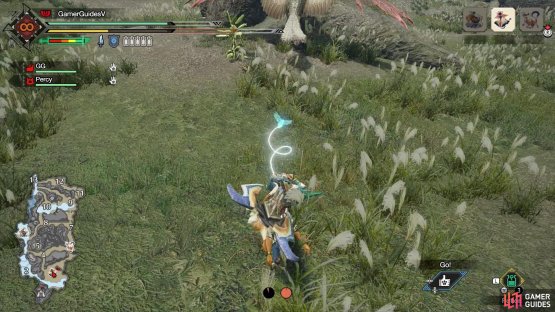
+  to shoot a wirebug forward. You’ll move forward, while changing from sword to axe mode.
After doing a Morphing Advance, press  to slash, while switching back to sword mode. Or press
  to continue using Axe attacks. This is a nice, safe move to close your distance and prepare whaling on the monster with your axe.
Counter Peak Performance
(1 of 2) Use this right before being attacked by a monster.
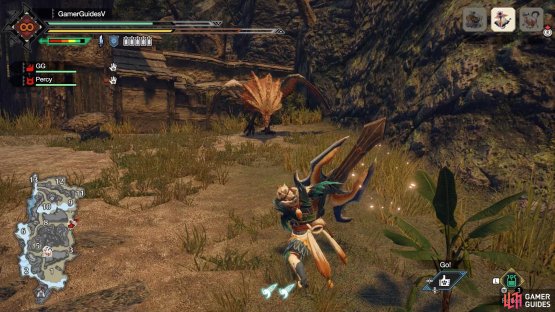
Use this right before being attacked by a monster. (left), You’ll block the attack and instantly get 5 phials! (right)
Pressing  and
and  will spend a wirebug to completely shield your hunter from one attack. If hit by a monster, you’ll regain all phials!
After successfully blocking, you can even transition straight to an Amped Element Discharge by pressing  and
and  . Obviously, only do that if the monster is straight in front of you after attacking.

































No Comments