
Dragonite Ore can be mined from the Lava Caverns. It’s needed for a large variety of equipment.
“An ore that yields metal superior to that of machalite–rare and valuable.”
| Carry | Rarity | Value |
|---|---|---|
| 99 |
Rarity 4 | 480z |
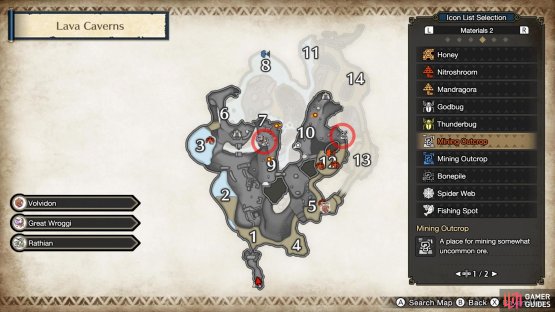
How to Get Dragonite Ore
Lava Caverns

(1 of 2) Dragonite Ore locations above ground.

Dragonite Ore locations above ground. (left), Dragonite Ore locations underground. (right)
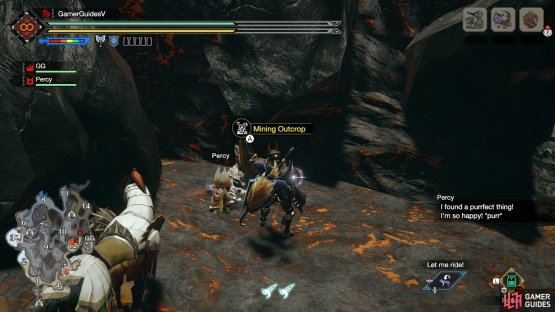
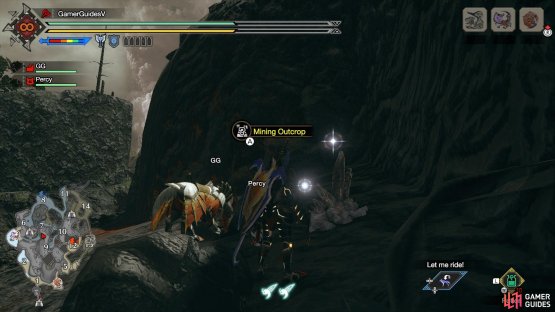
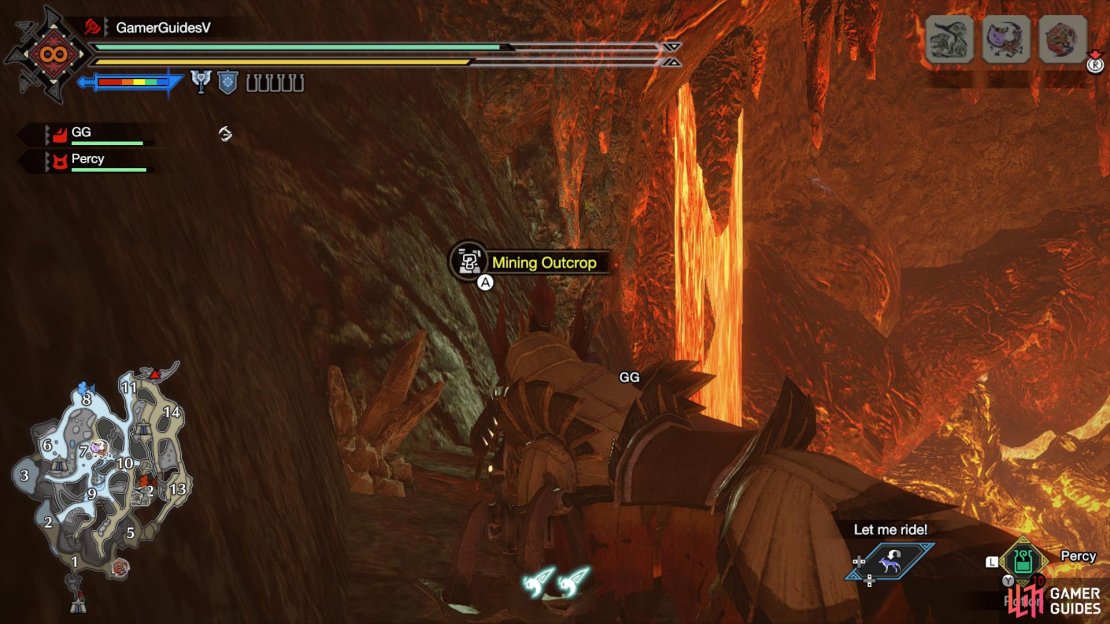
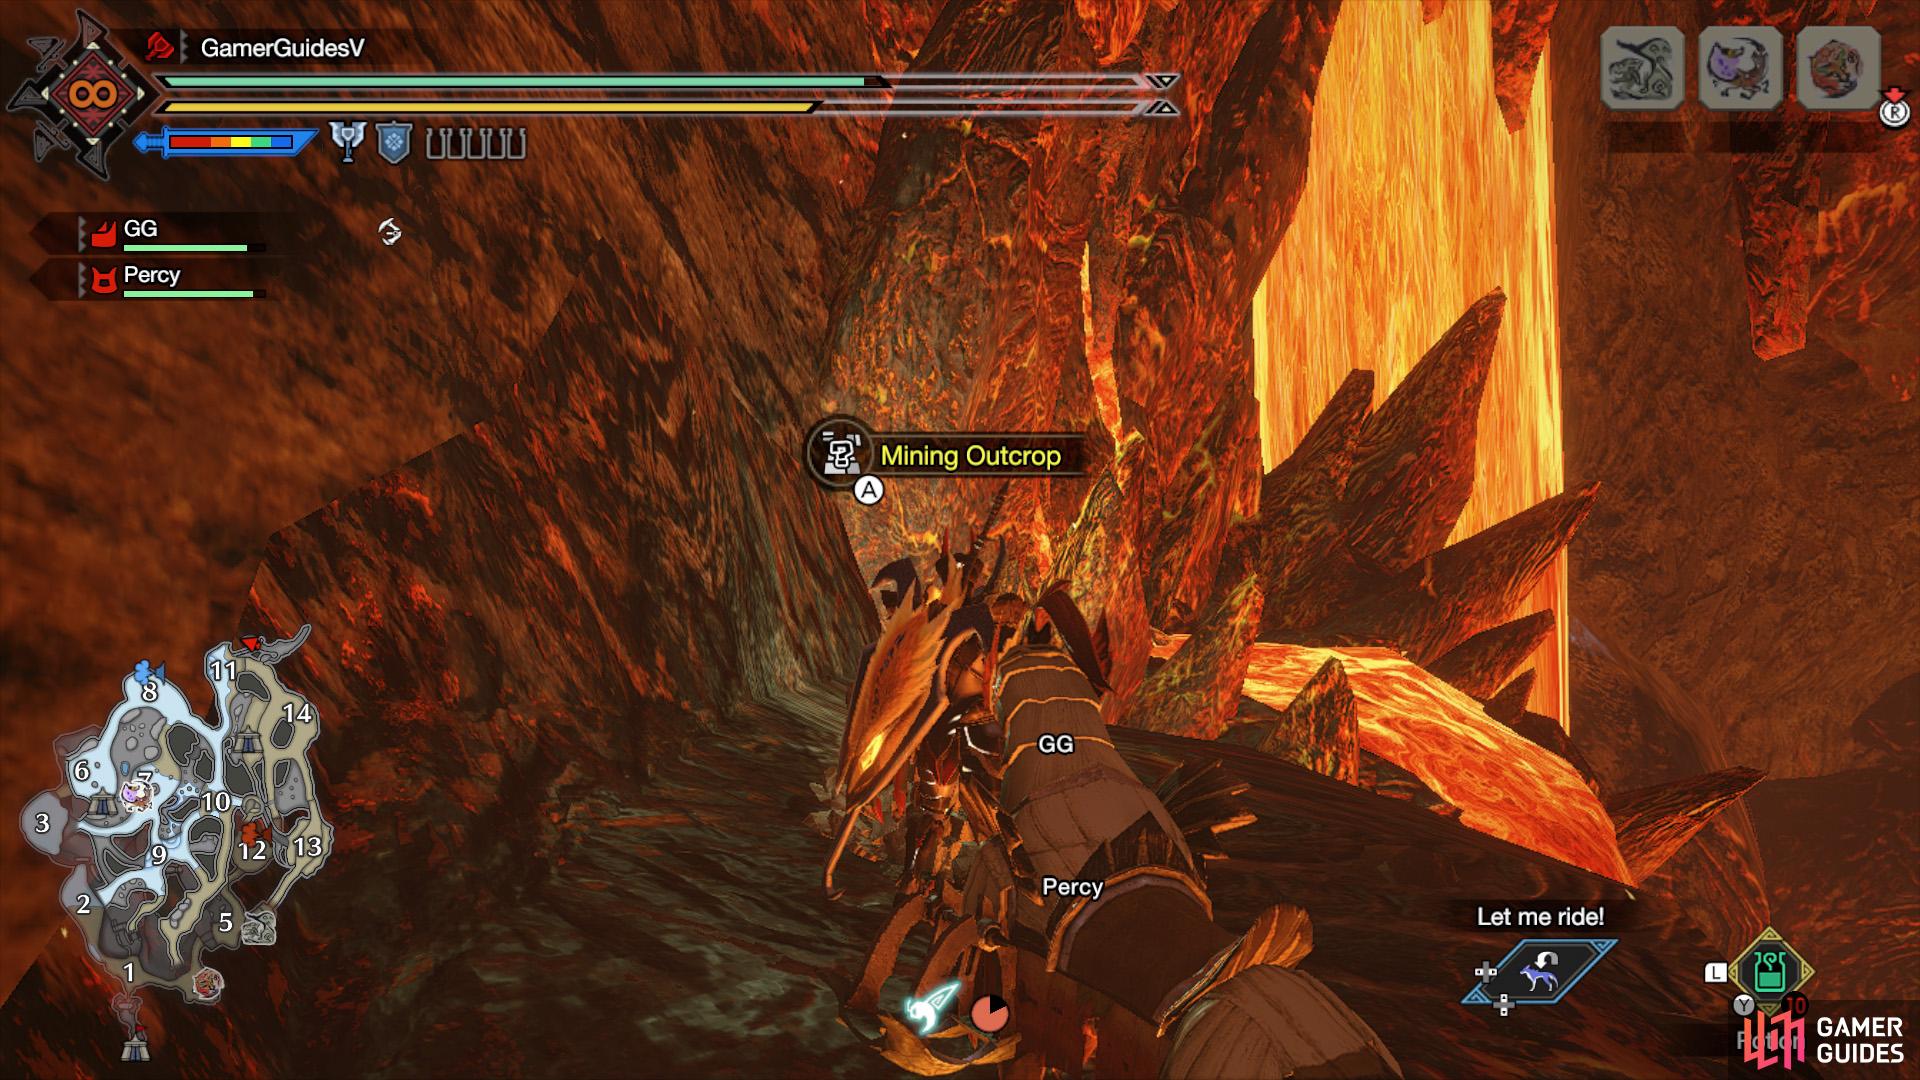
The main method to obtain Dragonite is gathering from mining outcrops in the Lava Caverns. For best results, prioritize the white mining outcrops. You can find 2 such outcrops above ground and 9 underground.
Above Ground
(1 of 2) 1. On the lowest ledge between the area 7 and 9 battlegrounds.

1. On the lowest ledge between the area 7 and 9 battlegrounds. (left), 2. East from the Area 10 battleground, by the wall near Area 12 entrance. (right)
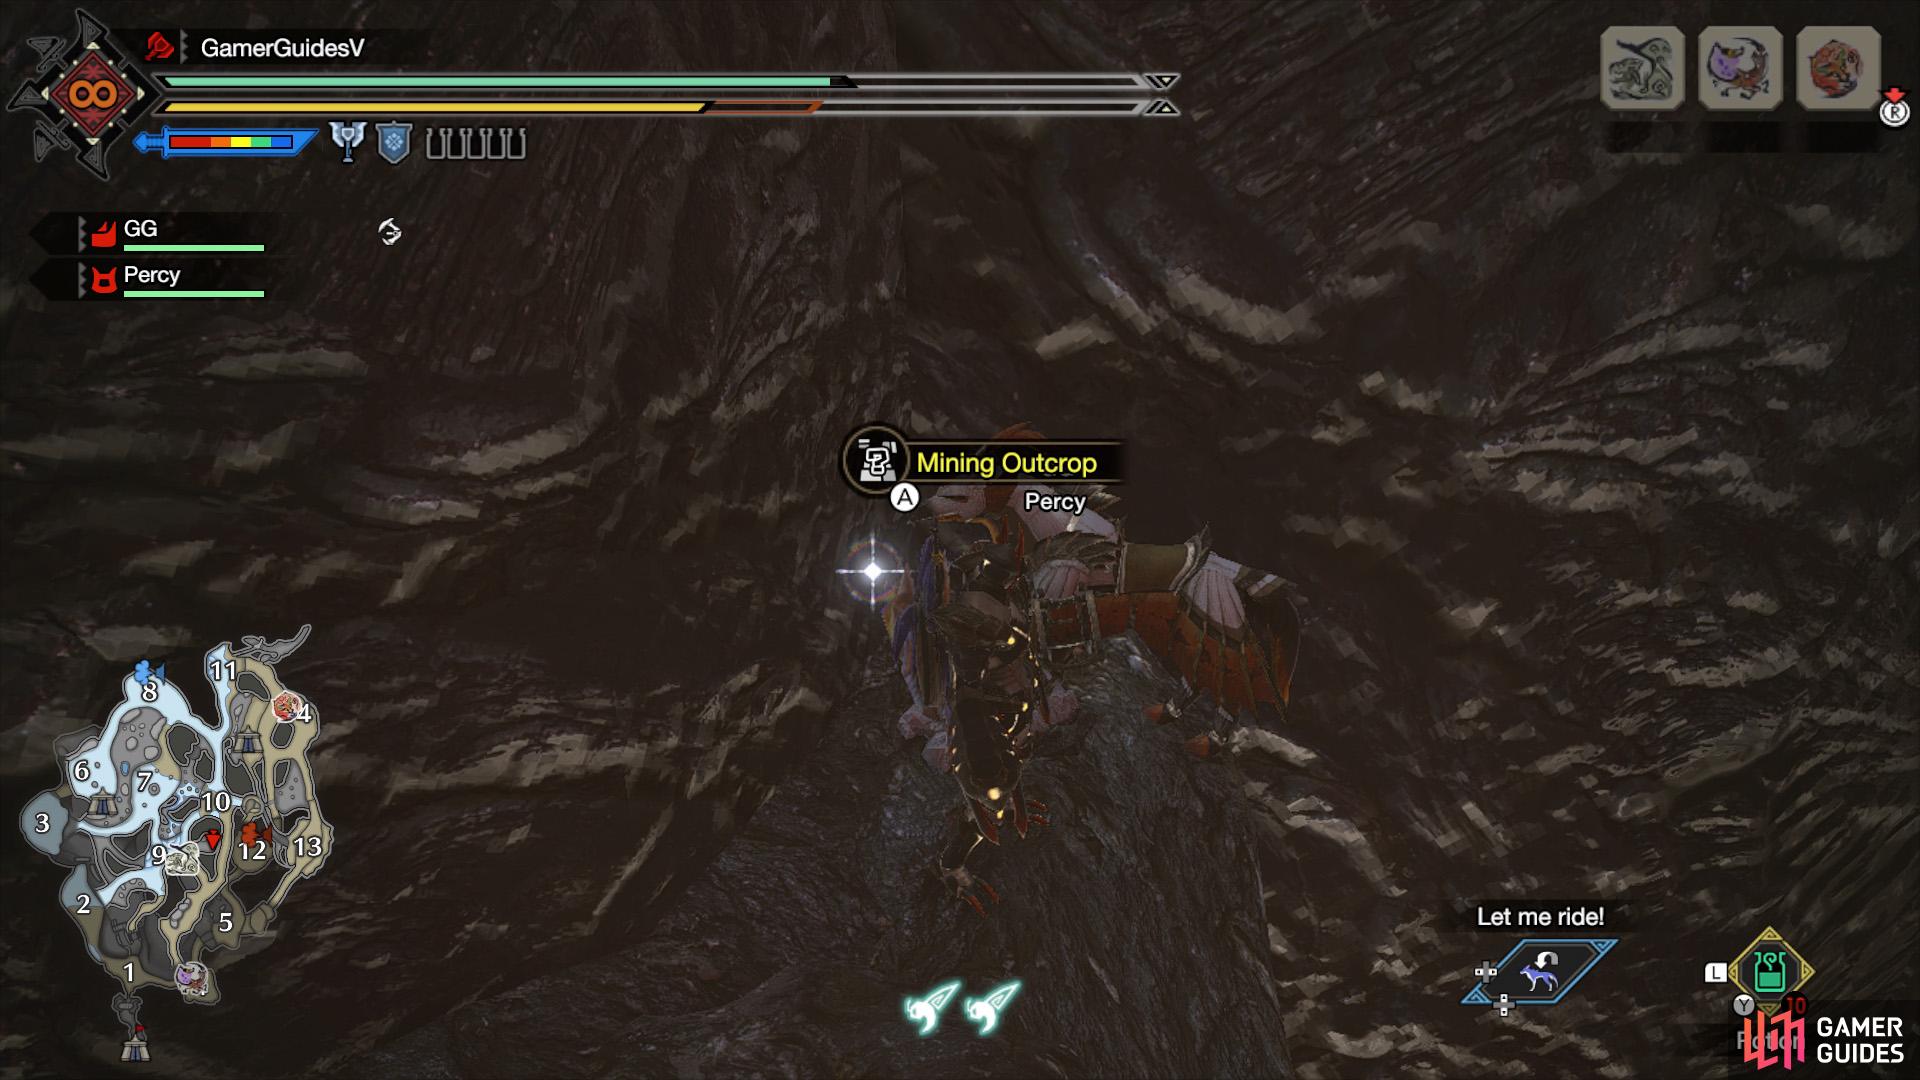
1: On the lowest ledge between the area 7 and 9 battlegrounds. Across the gap from Sub-Camp 2.
2: East from the Area 10 battleground, by the wall near entrance to Area 12. Near Sub-Camp 1.
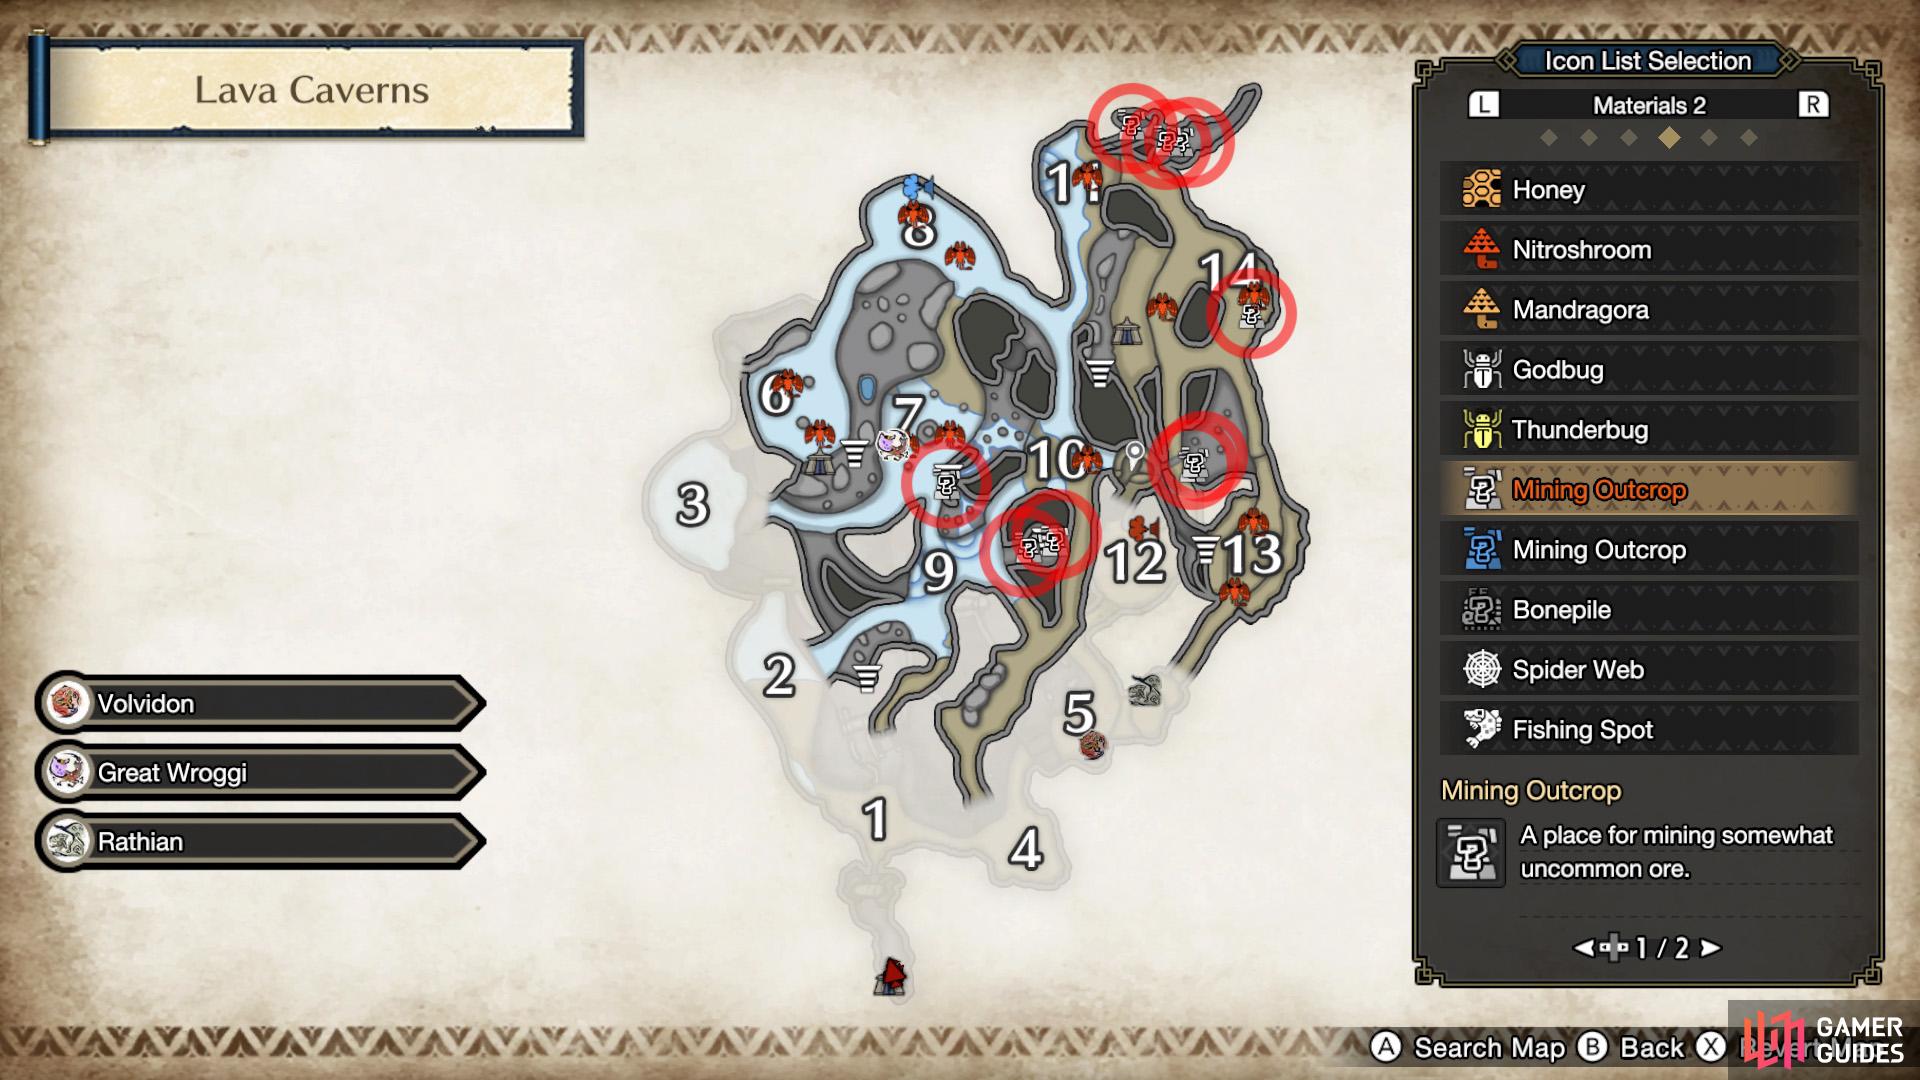
Underground
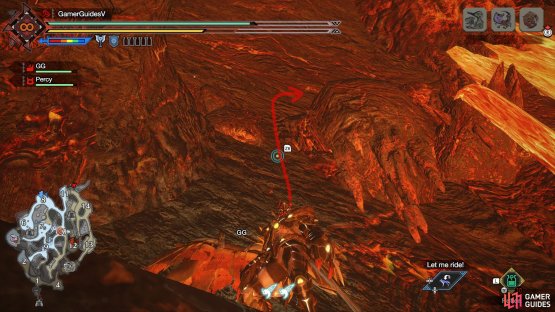
(1 of 2) 3a. Head to the Upwelling Wind between areas 7 and 9 if underground. Or the hole in the floor if above ground.

3a. Head to the Upwelling Wind between areas 7 and 9 if underground. Or the hole in the floor if above ground. (left), 3b. Drop down to the southern ledge from the top. (right)
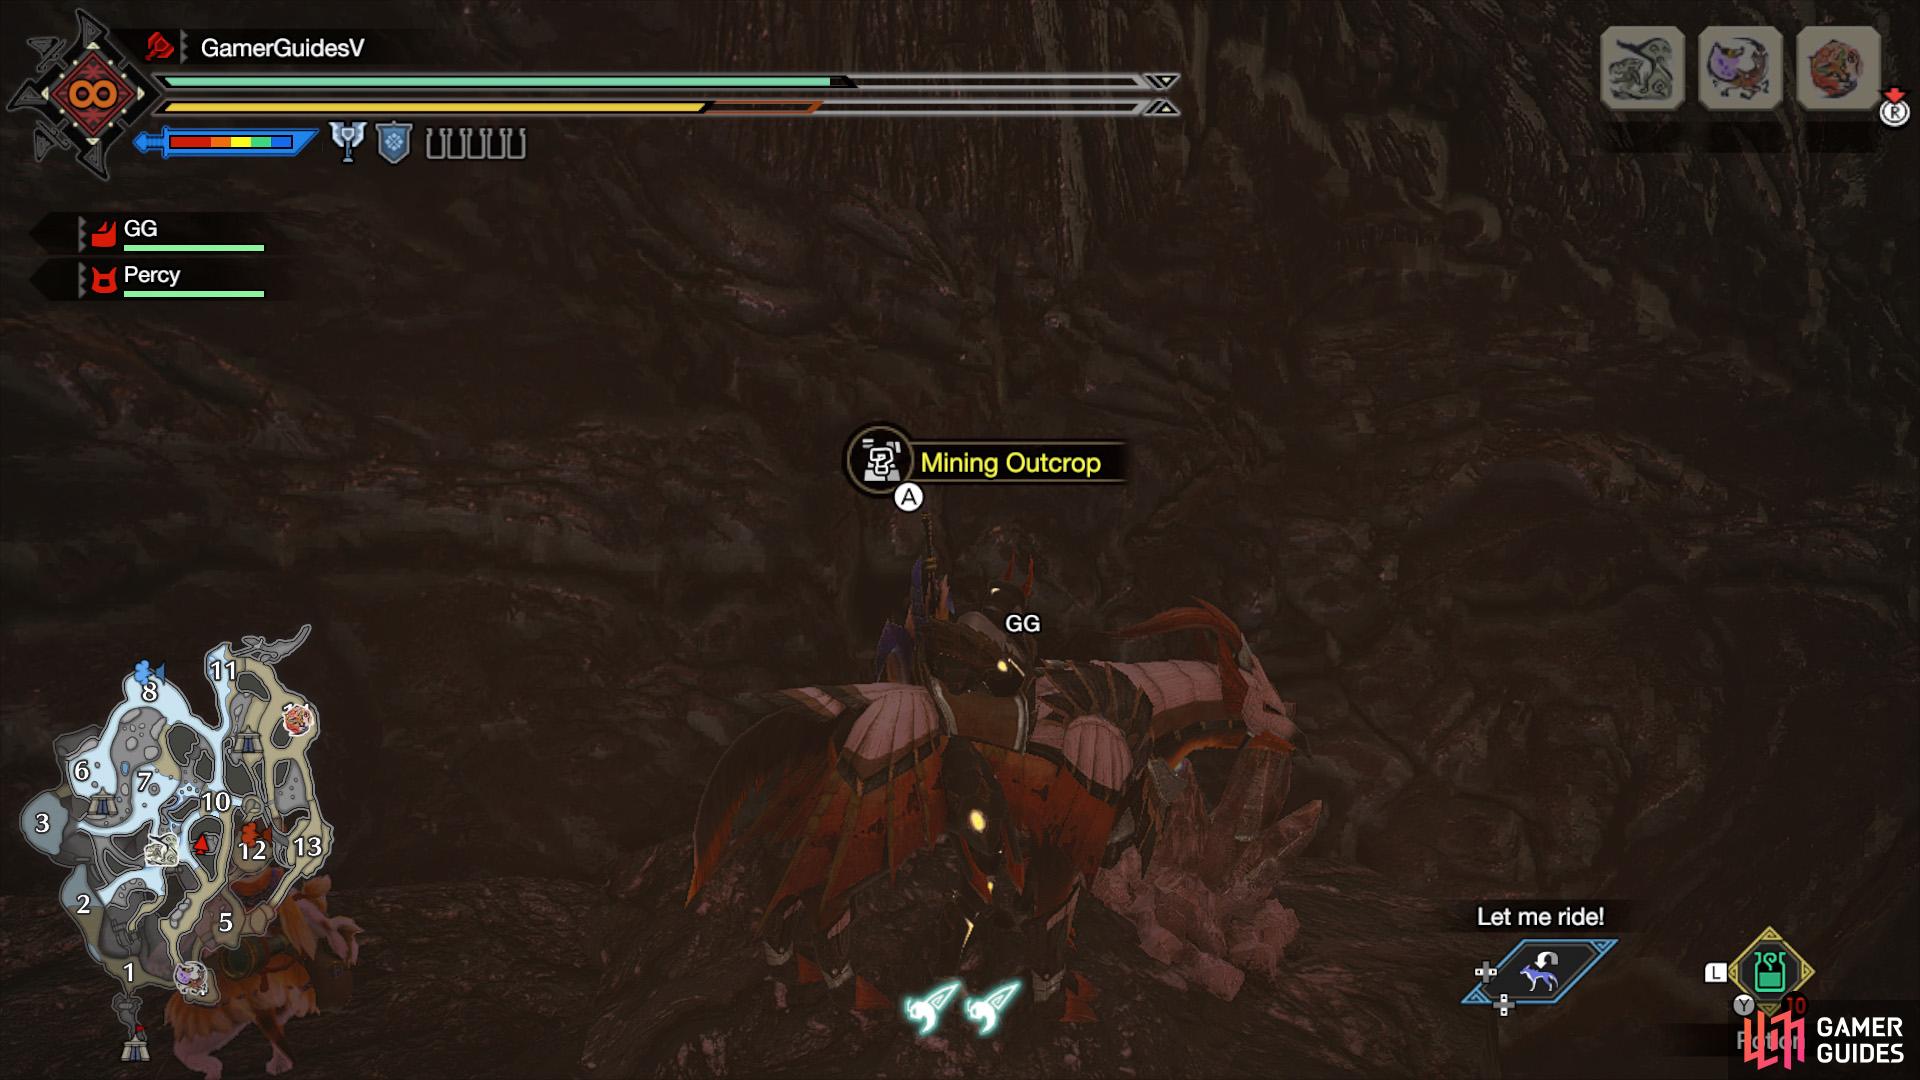
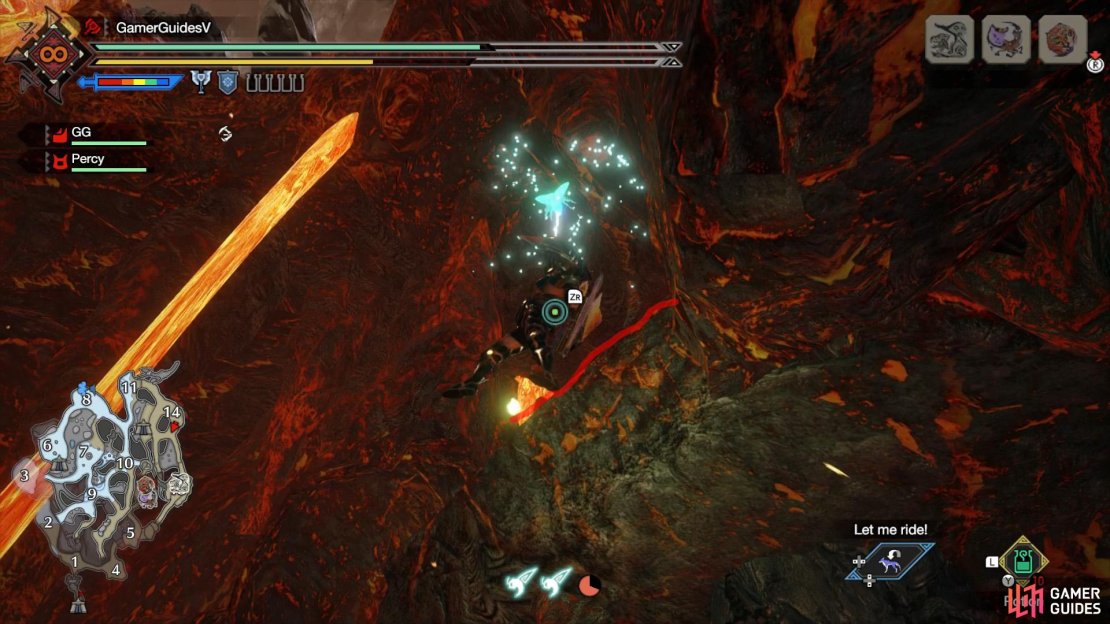
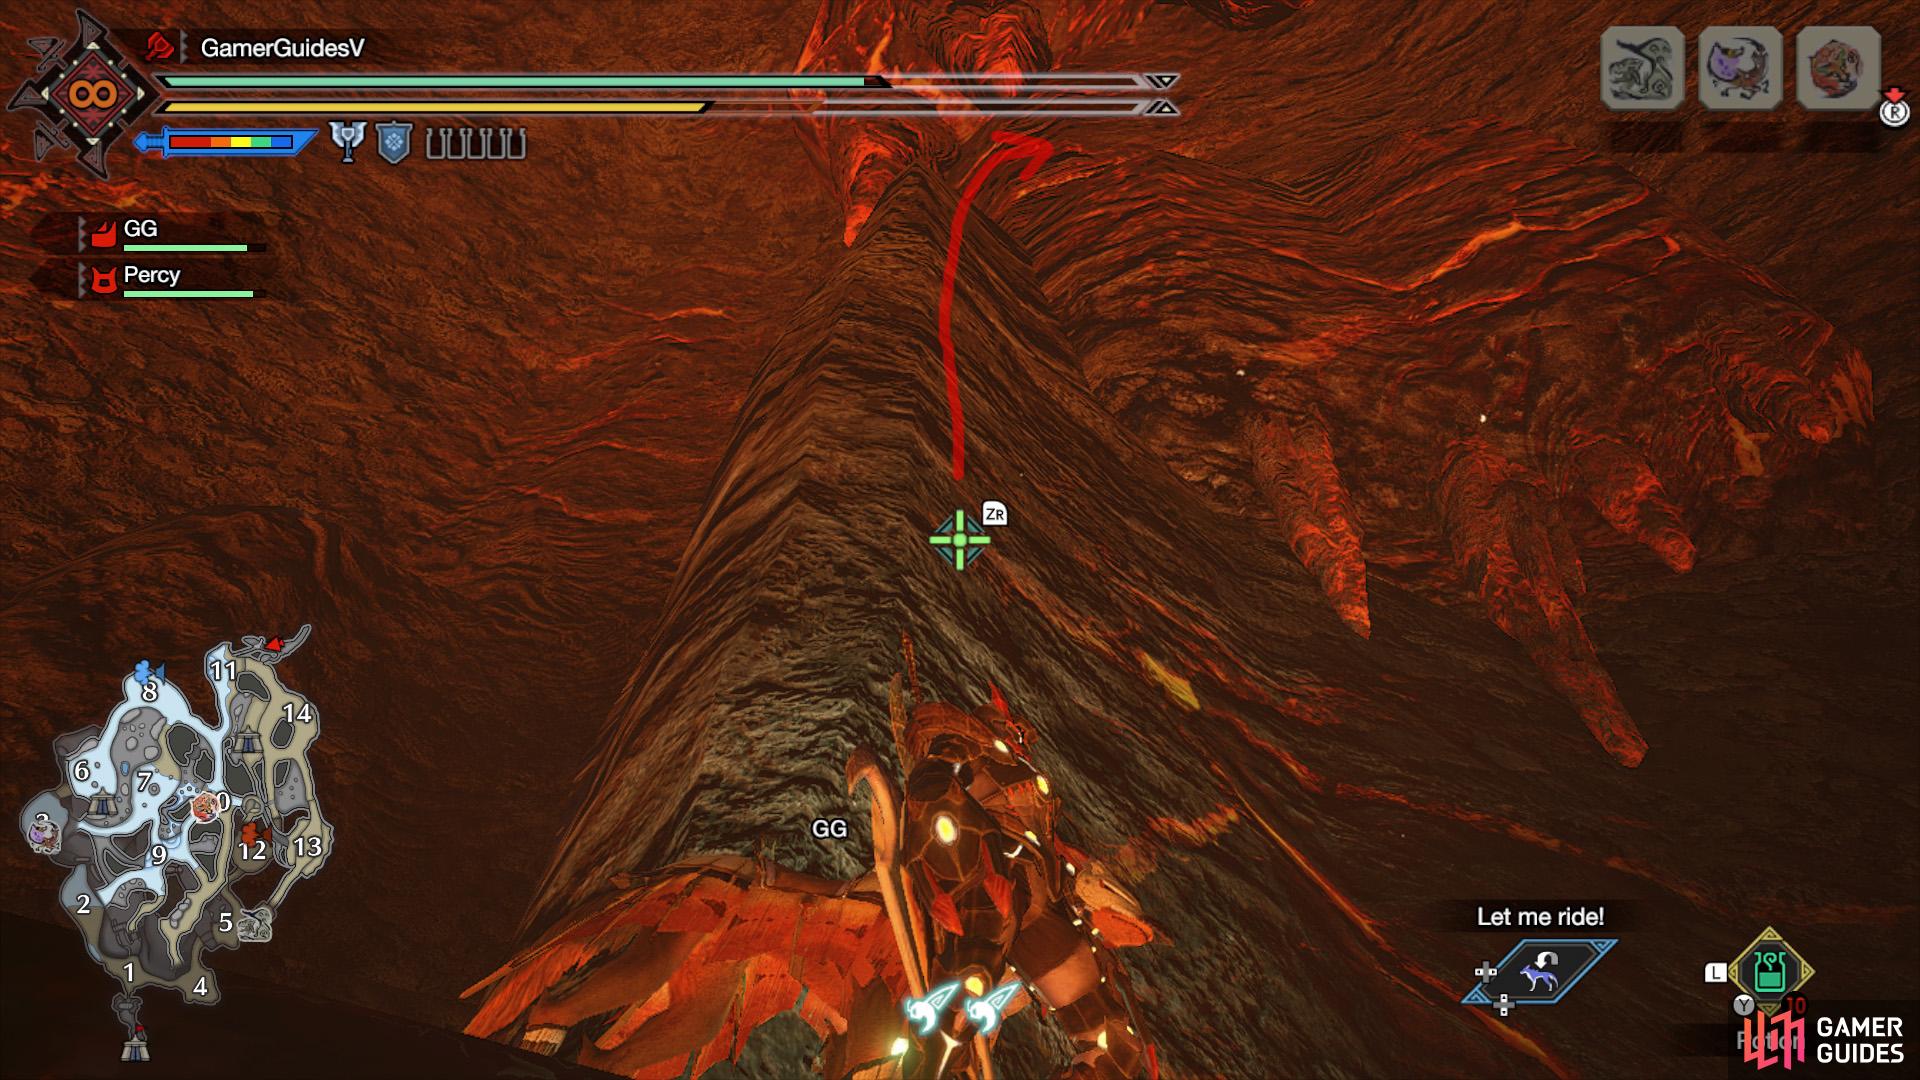
3: Head to the Upwelling Wind between areas 7 and 9 and slightly on the right. Use the wind to fly up, then drop down to the southern ledge halfway up the shaft.


(1 of 2) 4. On a ledge up the shaft east from the Area 9 battleground.
4. On a ledge up the shaft east from the Area 9 battleground. (left), 5. On a ledge on the opposite side of the previous node. (right)
4 and 5: Go to the Upwelling Wind east from the Area 9 waters. When you’re in Area 9, look for a Golden Spiribird by the wall, indicating a ledge you can climb up. Once you’re in the section with the Upwelling Wind, use it to fly up to the surface. Alternatively, fast-travel to Sub-Camp 1 and travel south.
Once you’re outside the shaft, drop down to the first ledge towards the east. Facing the center of the shaft, drop down on your right to a lower, much smaller ledge. Then drop down again in the same direction. You’ll land on a ledge with the first mining outcrop here.
From here, face the center of the shaft again. Look ahead and there should be a wide ledge on the opposite side, lower down. Wiredash across. When you land on this ledge, you’ll be near a second mining outcrop.


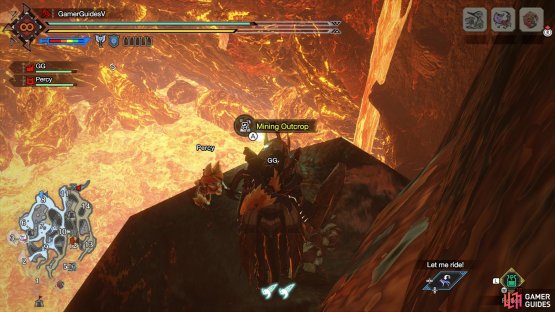
(1 of 2) 6. South-east corner of the lower region between areas 13 and 14. This one’s on the ground.

6. South-east corner of the lower region between areas 13 and 14. This one’s on the ground. (left), 7. While this one is up on a nearby ledge. (right)
6 and 7: In the lower region between the area 13 and 14 battlegrounds, towards the south-west corner. There’s one mining outcrop on the lowest level and another nearby on a higher ledge, which you can climb up using your wirebugs.
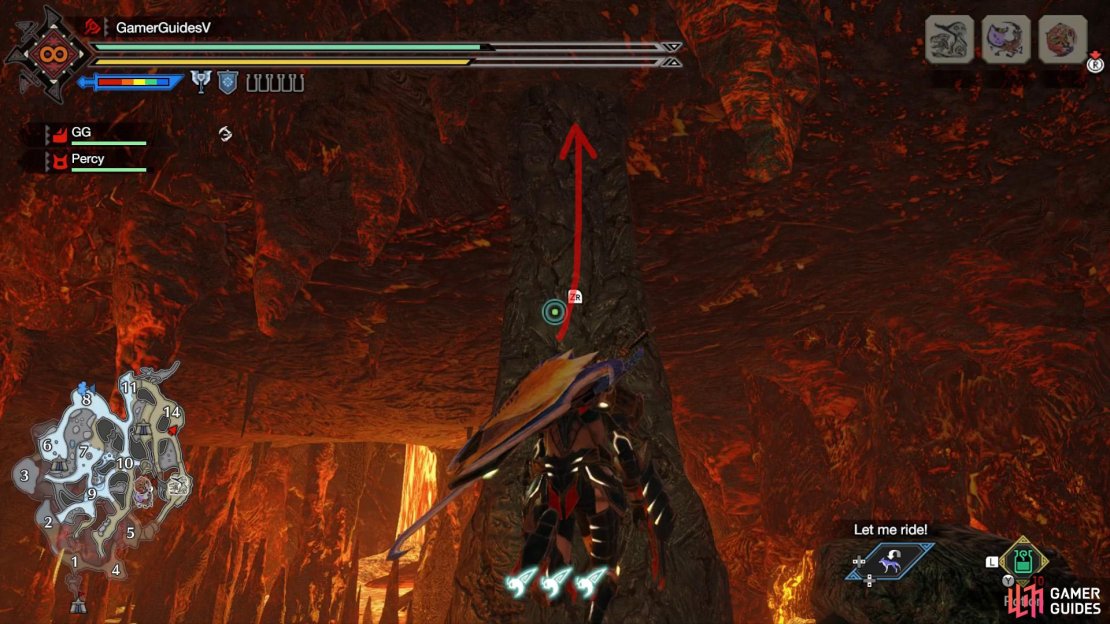

(1 of 3) 8a. Run up this pillar and then somersault off near the top.
8: Area 14, on a high up ledge where a Relic Record is found. Coming from Area 13, look up and keep your eyes peeled for a big gap in the wall. It’s near a rock pillar that touches the roof. Grab a 3rd wirebug if you want. Run up the side of the pillar then, when you’re at the top, let your hunter automatically roll away.
When you’ve rolled far enough from the pillar, press  to hang in mid-air. Then manually shoot a wirebug upwards with
  and
and  to get onto the ledge.
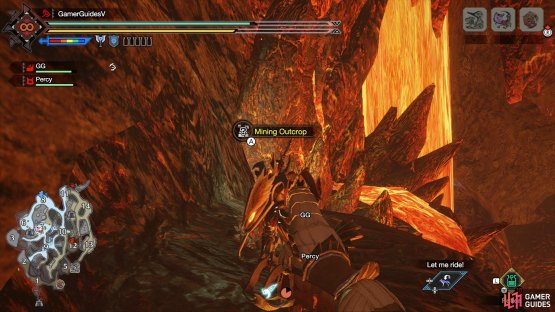
(1 of 3) 9a. Crawl through this gap between areas 11 and 14, near a small lava flow.
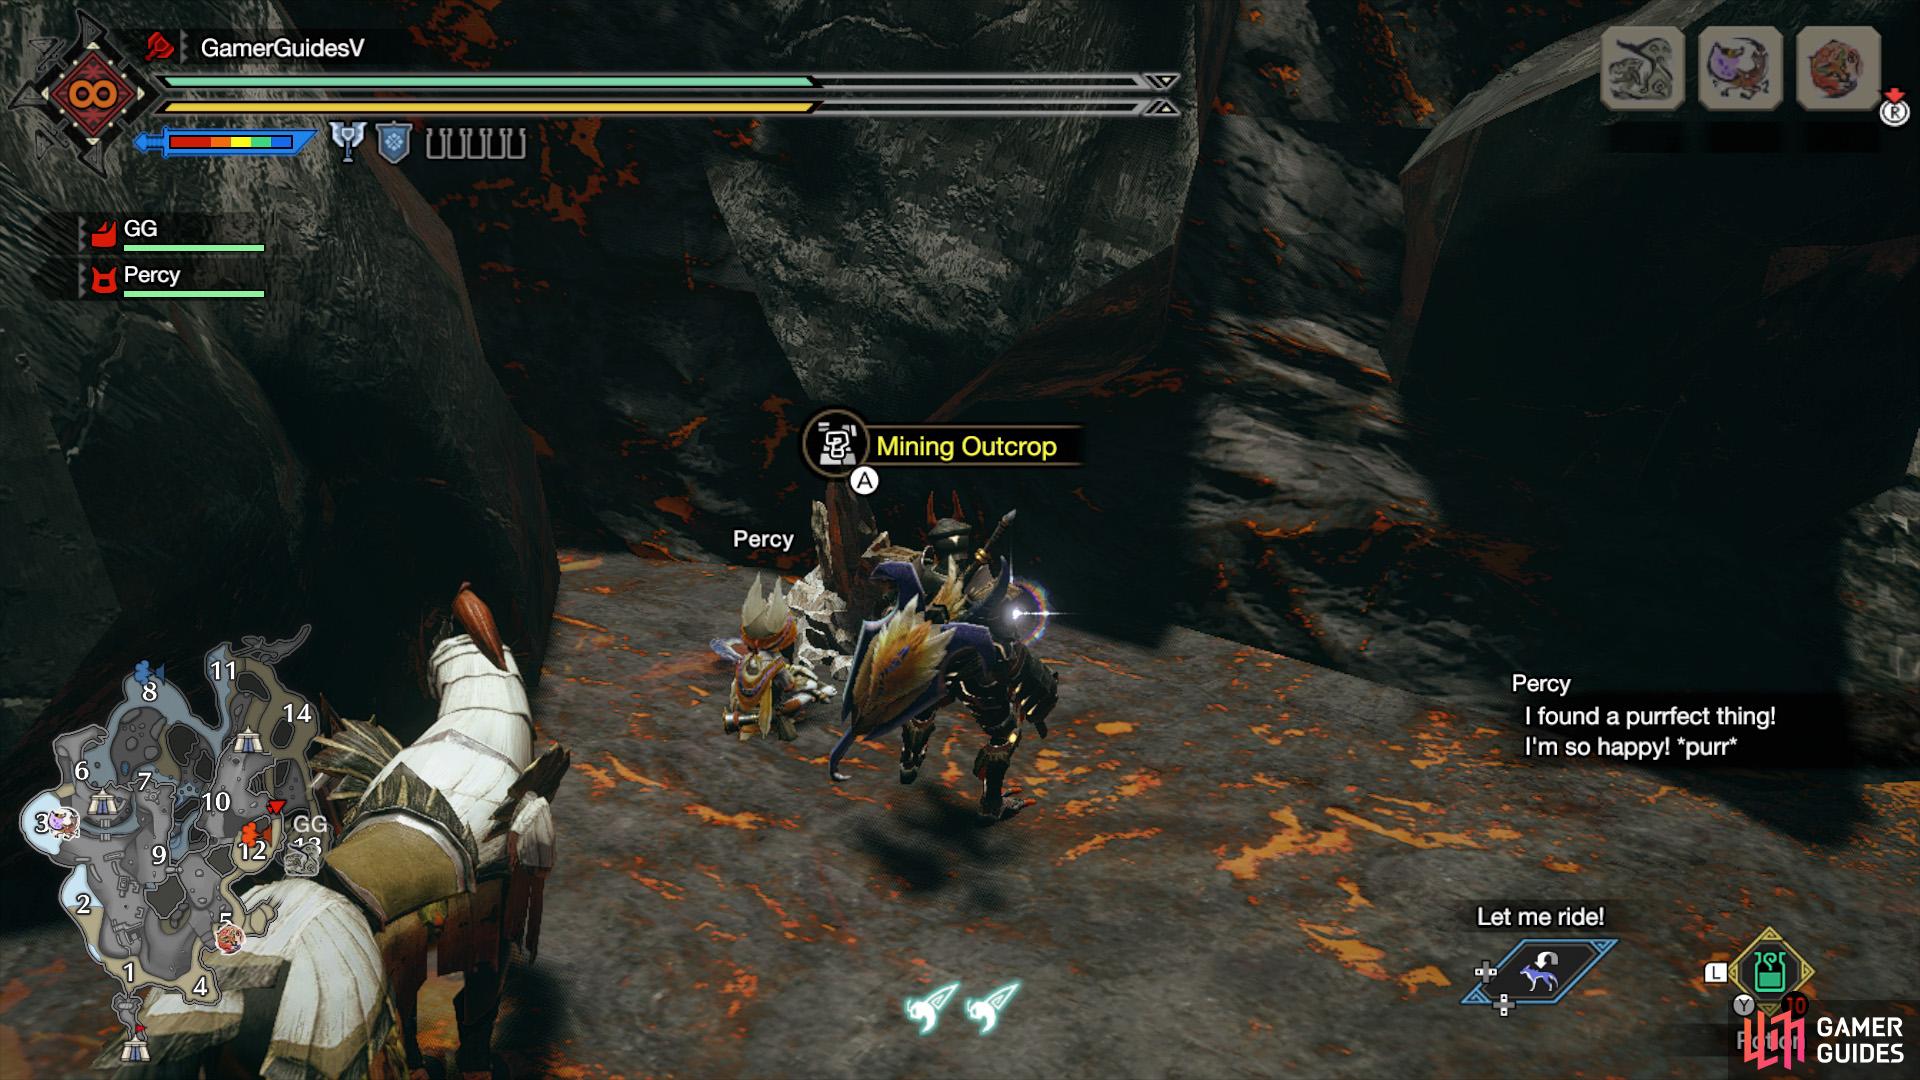
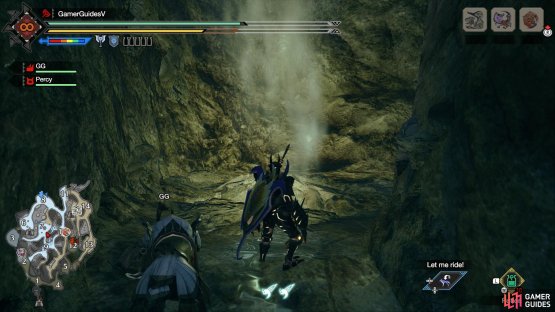
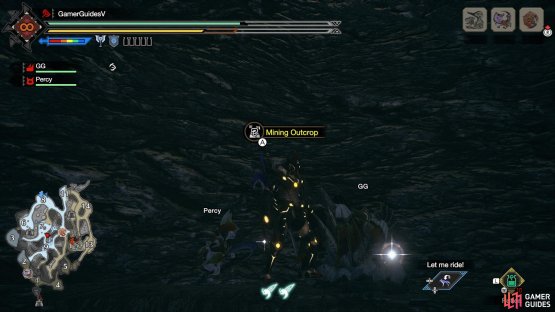
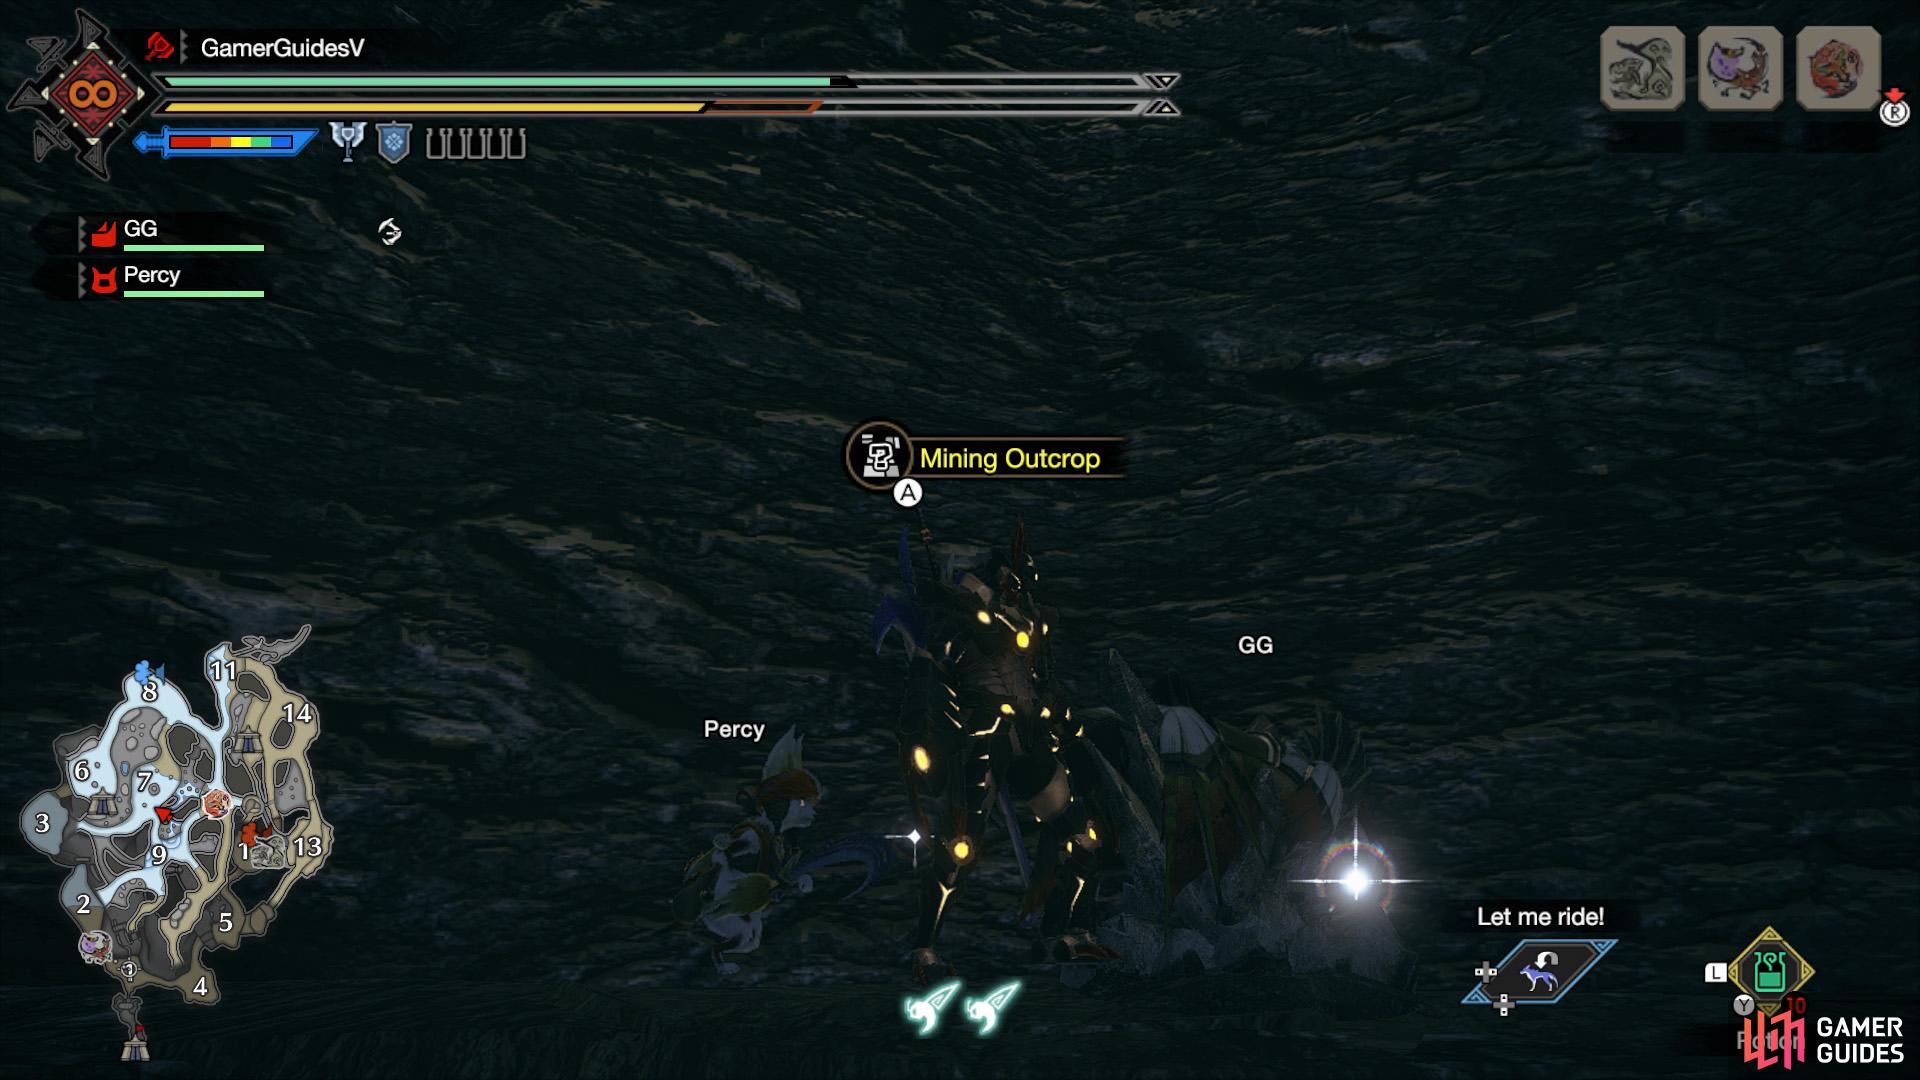
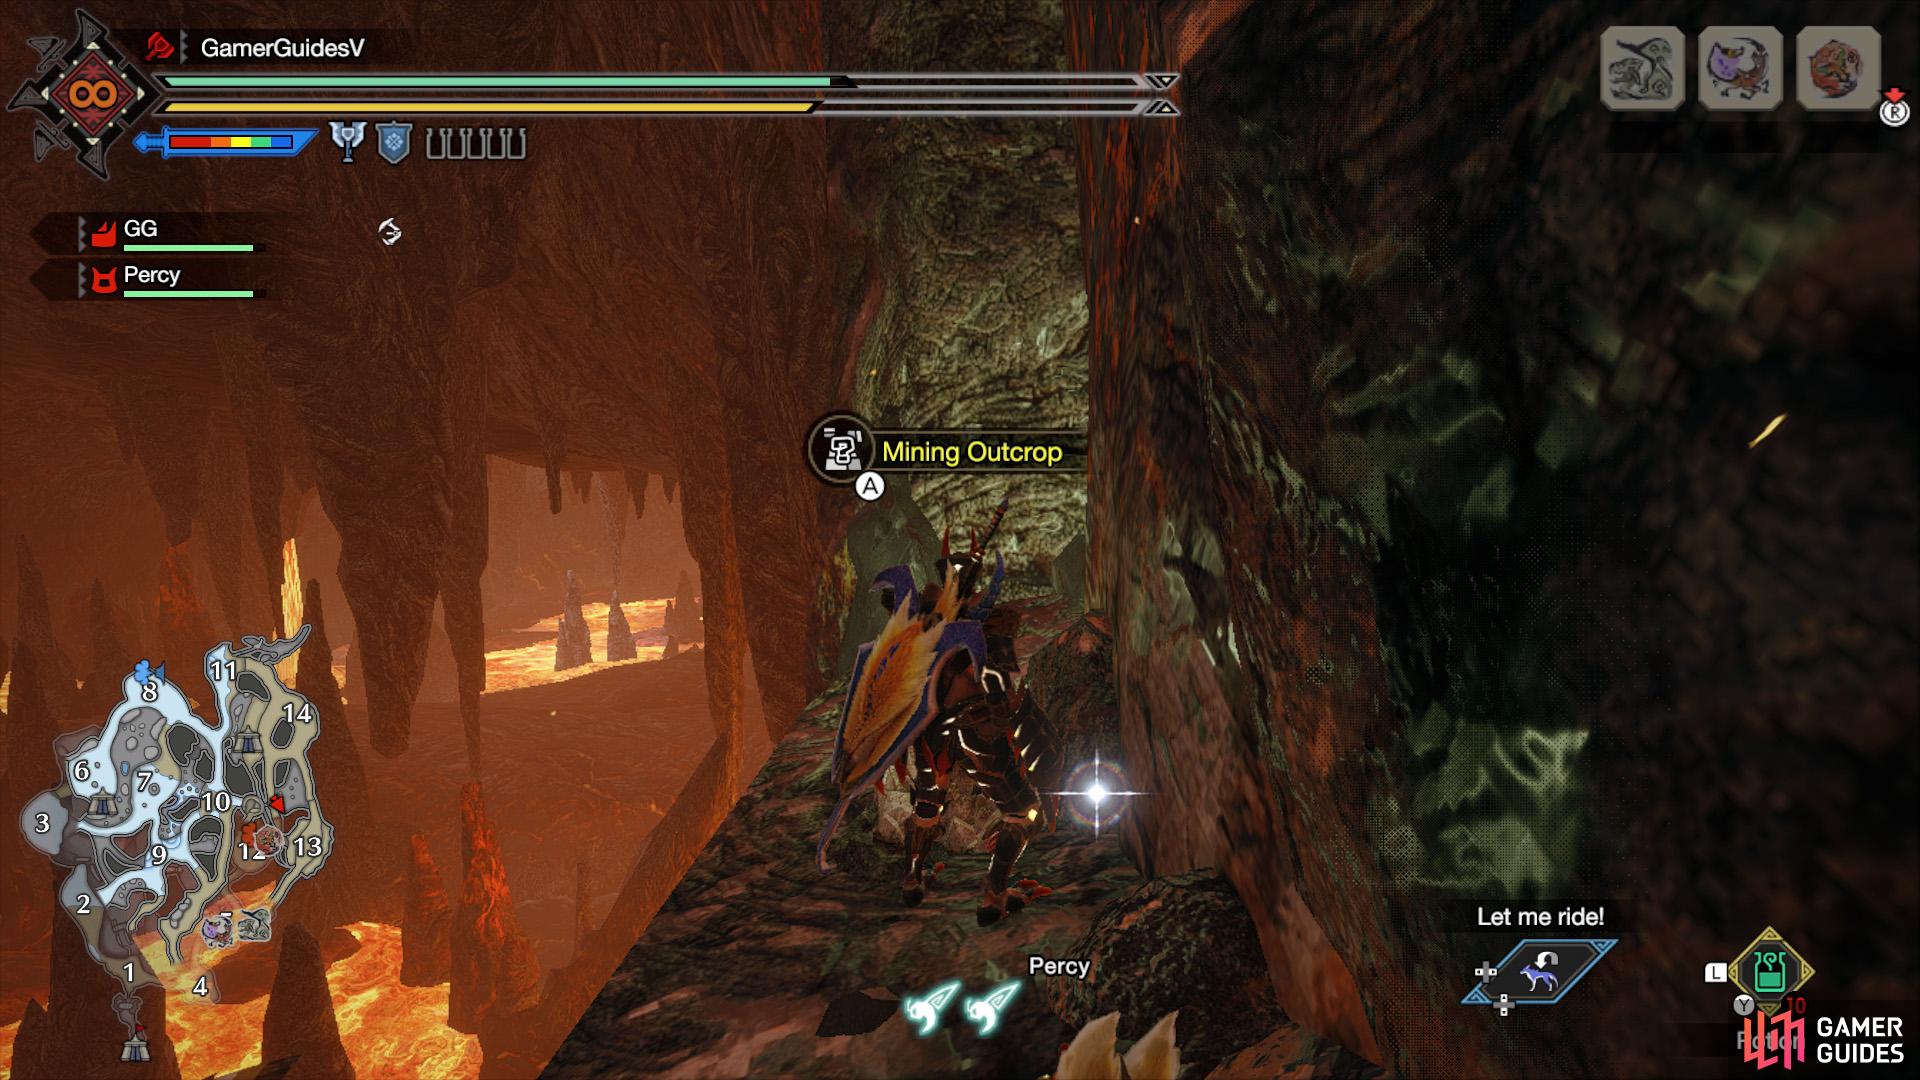
9: The next three mining outcrops are all near eachother in a somewhat secret place. Referring to your mini-map, look for a small gap in the northern wall between areas 11 and 14 that you can crawl through. It’s to the right of a small lava flow. You’ll arrive in a circular room. Face the eastern wall and wiredash up to a small tunnel up the wall.
Go through the tunnel and you’ll emerge on a ledge overlooking a sea of lava. Don’t worry: You can’t fall down here (this isn’t a Mario game). Turn left and the first white mining outcrop is by the wall halfway to the end.

(1 of 2) 10a. Turn around from the entrance and climb up the slightly protruding wall on the right.

10a. Turn around from the entrance and climb up the slightly protruding wall on the right. (left), 10b. Then land on the ledge on the right. (right)
10: From the previous node, walk back towards the entrance but don’t go leave. Facing the entrance, climb up the slightly protruding wall on the right. There’s a mining outcrop above and to the right of the entrance.
(1 of 2) 11a. From the previous node, wiredash west to a lower ledge. Or climb up near the western end of the path.

11a. From the previous node, wiredash west to a lower ledge. Or climb up near the western end of the path. (left), 11b. This is the last white mining outcrop here. (right)
11: Remain on the previous ledge. Stand with the cavern wall on your left. If you look ahead, there’s another ledge further ahead and lower down, where the last white mining outcrop is. You should be able to easily wiredash across. Otherwise, you can climb up near the western end of this section.
Monsters
You can also obtain Dragonite Ore from High Rank Basarios.
| Monster | Type of Reward Drop | Drop Rate |
|---|---|---|
| Basarios (High) | Carves | 15% (x2) |
Quest Rewards
Lastly, there are many quests where it’s a possible reward.
| Quest | Reward | Rate |
|---|---|---|
| Village 4-star: Getting Back the Groceries |  Dragonite Ore x1 Dragonite Ore x1 |
9% |
| Village 4-star: So Hot, It Melts Iron | Dragonite Ore x1 |
9% |
| Village 4-star: THE BEST Quest | Dragonite Ore x1 |
9% |
| Village 5-star: Wind Speed Wyvern | Dragonite Ore x1 |
10% |
| Village 5-star: Electrifying Ephiphany | Dragonite Ore x1 |
10% |
| Village 5-star: Nocturnal Tracker | Dragonite Ore x1 |
10% |
| Village 5-star: Waltzing by Moonlight | Dragonite Ore x1 |
10% |
| Village 5-star: Rathalos Alert! | Dragonite Ore x1 |
10% |
| Village 5-star: Comeuppance | Dragonite Ore x1 |
10% |
| Village 5-star: Nosey Nuisances | Dragonite Ore x1 |
10% |
| Village 6-star: Special License Test 3 | Dragonite Ore x1 |
10% |
| Village 6-star: Hermit of the Swamp | Dragonite Ore x1 |
10% |
| Village 6-star: Thundering Voice | Dragonite Ore x1 |
10% |
| Village 6-star: Twisted Desire | Dragonite Ore x1 |
10% |
| Village 6-star: A Test of Courage | Dragonite Ore x1 |
10% |
| Village 6-star: Like a Flash of Lightning | Dragonite Ore x1 |
10% |
| Village 6-star: King of the Sky, Bane of the Land | Dragonite Ore x1 |
10% |
| Hub 3-star: Down ‘n’ Dirty | Dragonite Ore x1 |
10% |
| Hub 3-star: Bully of the Caverns | Dragonite Ore x1 |
10% |
| Hub 3-star: Twilit Twin Stars | Dragonite Ore x1 |
10% |
| Hub 3-star: My Muse the Mizutsune | Dragonite Ore x1 |
10% |
| Hub 3-star: Champion of the Caverns | Dragonite Ore x1 |
10% |
| Hub 3-star: Wavering Moon and Thunder | Dragonite Ore x1 |
10% |
| Hub 3-star: A Friend in Need | Dragonite Ore x1 |
10% |
| Hub 3-star: A Few Bumps Along the Way | Dragonite Ore x1 |
10% |
| Hub 3-star: Hellfire | Dragonite Ore x1 |
10% |
| Hub 3-star: Disastrously Beautiful | Dragonite Ore x1 |
10% |
| Hub 4-star: Didn’t Get the Memo | Dragonite Ore x1 |
11% |
| Hub 4-star: Dancing A-purr-ition | Dragonite Ore x1 |
9% |
| Hub 4-star: The Frost Islands Arena | Dragonite Ore x1 |
12% |
| Hub 4-star: Even Cute Things Have Fangs | Dragonite Ore x1 |
12% |
| Hub 4-star: Night of the Khezu | Dragonite Ore x1 |
9% |
| Hub 4-star: Dango Duty | Dragonite Ore x1 |
11% |
| Hub 4-star: Study the Sword & Shield | Dragonite Ore x1 |
9% |
| Hub 4-star: Blue, Round, and Cute | Dragonite Ore x1 |
12% |
| Hub 5-star: Foul Play in the Forest | Dragonite Ore x1 |
9% |
| Hub 5-star: Rise above the Mud | Dragonite Ore x1 |
9% |
| Hub 5-star: Go Away, Pukei! | Dragonite Ore x1 |
9% |
| Hub 5-star: Miner Problem | Dragonite Ore x1 |
9% |
| Hub 5-star: Charmed by a Queen | Dragonite Ore x1 |
9% |
| Hub 5-star: The Restless Swamp | Dragonite Ore x1 |
9% |
| Hub 5-star: Honing Your Hammer | Dragonite Ore x1 |
9% |
| Hub 5-star: Learn the Lance | Dragonite Ore x1 |
9% |
| Hub 5-star: Charge Blade Coalescing | Dragonite Ore x1 |
9% |
What Equipment Can You Make With Dragonite Ore?
There are many weapons and armor that require Dragonite Ore.
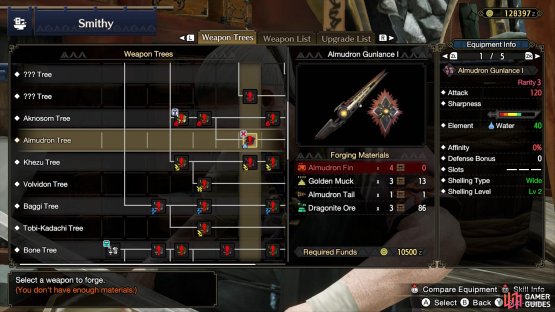
(1 of 2) Almudron Gunlance I.

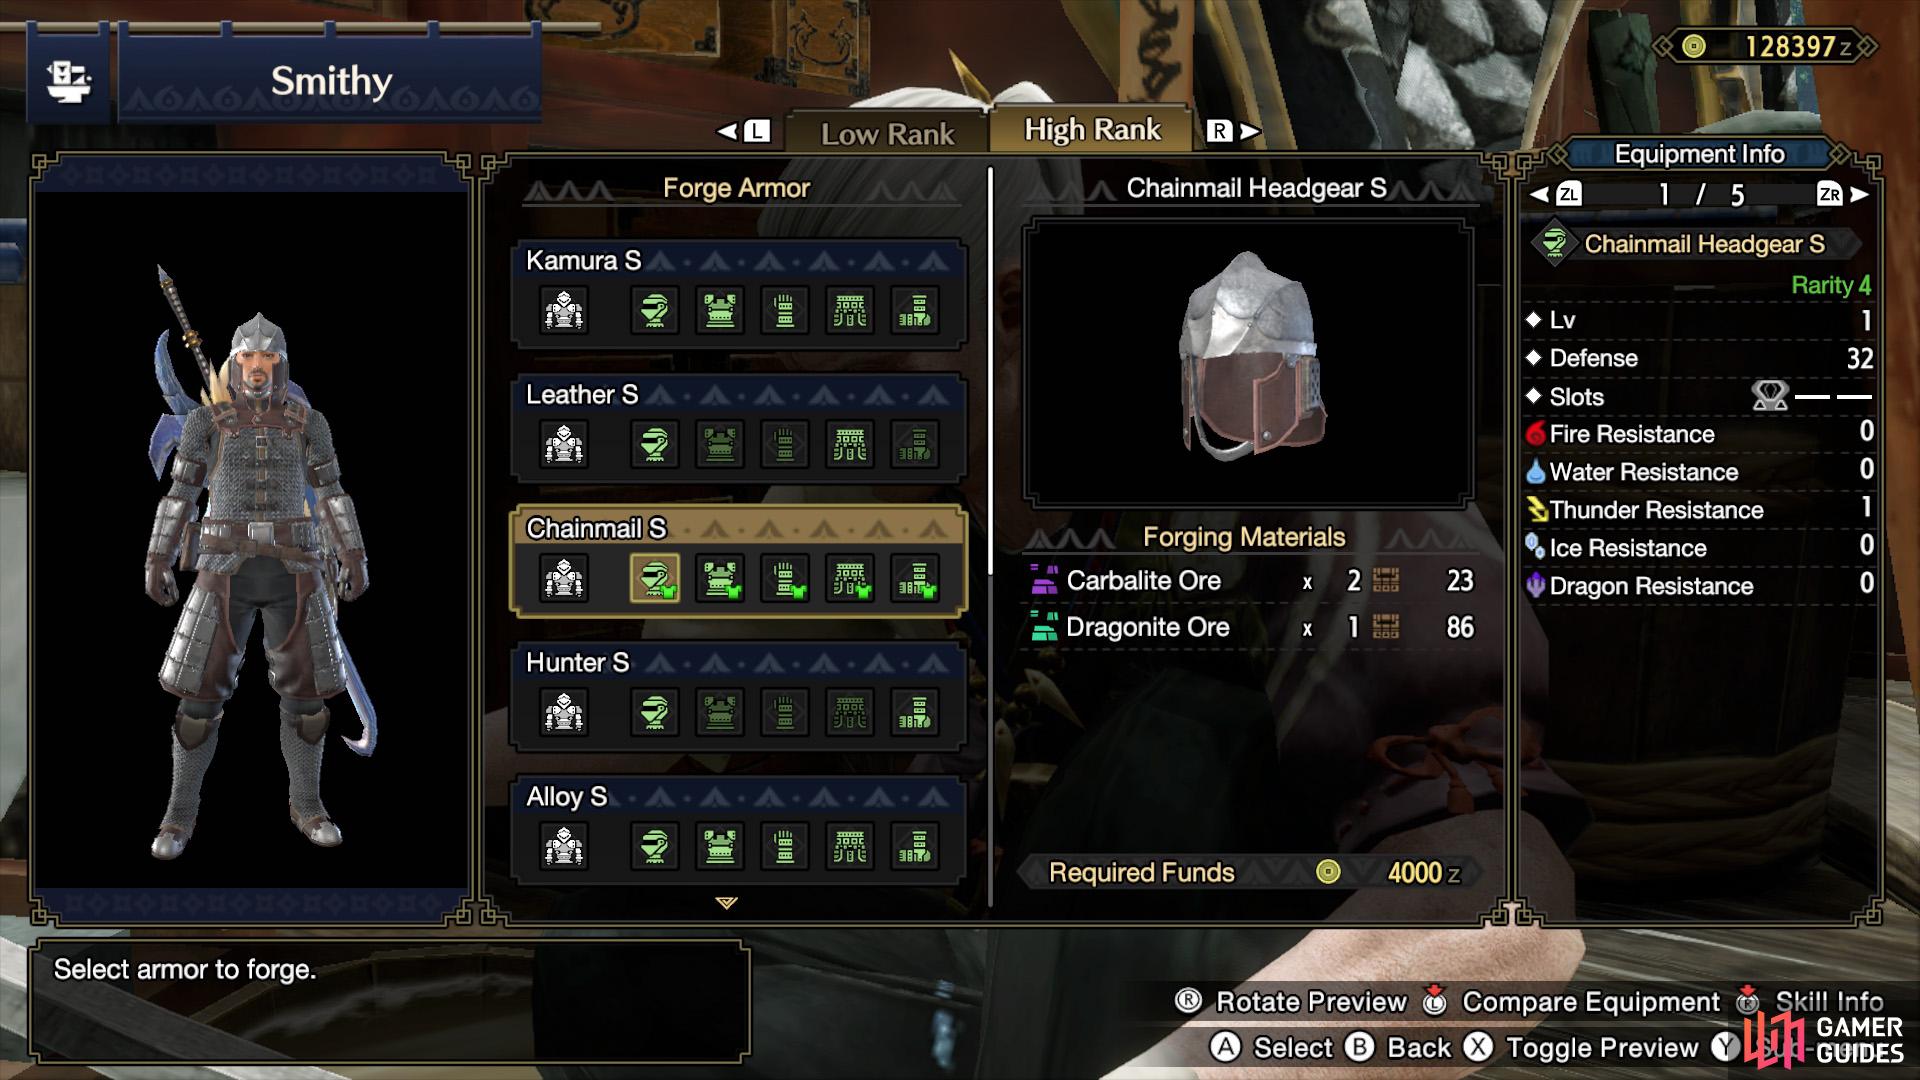
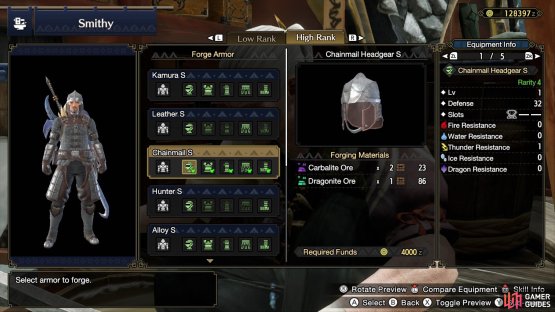
Almudron Gunlance I. (left), Chainmail S Armor. (right)
Forge Weapons
| Weapon | Type | Material Required |
|---|---|---|
| Hanayako Yohino I | Great Sword | Dragonite Ore x5 |
| Chrome Razor I | Great Sword | Dragonite Ore x10 |
| Exorcising Sword I | Sword and Shield | Dragonite Ore x3 |
| Morning Dawn I | Dual Blades | Dragonite Ore x3 |
| Mud Ripper I | Dual Blades | Dragonite Ore x3 |
| Qornu Waga I | Dual Blades | Dragonite Ore x2 |
| Rainy Jelly I | Dual Blades | Dragonite Ore x2 |
| Sworn Rapiers I | Dual Blades | Dragonite Ore x3 |
| Rex Slicers I | Dual Blades | Dragonite Ore x3 |
| Babel Spear I | Lance | Dragonite Ore x5 |
| Fragrance I | Lance | Dragonite Ore x3 |
| Growling Wyvern I | Lance | Dragonite Ore x5 |
| Almudron Gunlance I | Gunlance | Dragonite Ore x3 |
| Canyne Cannon I | Gunlance | Dragonite Ore x4 |
| Almudron Hammer I | Hammer | Dragonite Ore x1 |
| Cyclo-Hammer I | Hammer | Dragonite Ore x4 |
| Poetic Bell I | Hunting Horn | Dragonite Ore x3 |
| Bull Grunt I | Hunting Horn | Dragonite Ore x3 |
| Almudron Axe I | Switch Axe | Dragonite Ore x3 |
| Wheel Axe I | Switch Axe | Dragonite Ore x2 |
| Ricebane I | Charge Blade | Dragonite Ore x2 |
| Almudron Bowgun I | Light Bowgun | Dragonite Ore x3 |
| Lotus Bowgun I | Light Bowgun | Dragonite Ore x3 |
| Arko Nulo Yellow I | Heavy Bowgun | Dragonite Ore x1 |
| Cirrus Blaster I | Heavy Bowgun | Dragonite Ore x2 |
| Highpriest Bowgun I | Heavy Bowgun | Dragonite Ore x2 |
| Journey Jelly I | Heavy Bowgun | Dragonite Ore x2 |
| Dawn Ray Bow I | Bow | Dragonite Ore x4 |
Upgrade Weapons
| Weapon | Type | Material Required |
|---|---|---|
| Axeblade I | Great Sword | Dragonite Ore x3 |
| Buster Blade | Great Sword | Dragonite Ore x3 |
| Pukei Edge II | Great Sword | Dragonite Ore x2 |
| Carapace Sword II | Great Sword | Dragonite Ore x2 |
| Guardian Sword II | Long Sword | Dragonite Ore x3 |
| Kulu Katana II | Long Sword | Dragonite Ore x4 |
| Iron Gospel | Long Sword | Dragonite Ore x4 |
| Khezu Razor II | Sword and Shield | Dragonite Ore x3 |
| Iron Beater I | Sword and Shield | Dragonite Ore x4 |
| Pukei Sword I | Sword and Shield | Dragonite Ore x3 |
| Kulu’s Peck II | Dual Blades | Dragonite Ore x2 |
| Khezu Daggers II | Dual Blades | Dragonite Ore x3 |
| Dual Daggers | Dual Blades | Dragonite Ore x3 |
| Dual Hatchets II | Dual Blades | Dragonite Ore x2 |
| Gelid Mind I | Dual Blades | Dragonite Ore x3 |
| Flammenschild I | Dual Blades | Dragonite Ore x3 |
| Naag Serpentblade I | Lance | Dragonite Ore x1 |
| Millennial Lance | Lance | Dragonite Ore x5 |
| Volvi Stroke I | Lance | Dragonite Ore x2 |
| Delex Harpoon II | Gunlance | Dragonite Ore x3 |
| Lagomberator II | Gunlance | Dragonite Ore x3 |
| Striker’s Gunlance I | Gunlance | Dragonite Ore x3 |
| Calamitous Portent I | Hammer | Dragonite Ore x2 |
| Kulu Bludgeon II | Hammer | Dragonite Ore x4 |
| Flaming Fury I | Hammer | Dragonite Ore x2 |
| Great Bagpipe | Hunting Horn | Dragonite Ore x3 |
| Pukei Bagpipe I | Hunting Horn | Dragonite Ore x2 |
| Valkyrie Chordmaker I | Hunting Horn | Dragonite Ore x3 |
| Vicello Unu | Hunting Horn | Dragonite Ore x3 |
| Striped Dragonga I | Hunting Horn | Dragonite Ore x4 |
| Delex Sail II | Switch Axe | Dragonite Ore x4 |
| Elite Switch Axe II | Switch Axe | Dragonite Ore x5 |
| Improved Steel Axe | Switch Axe | Dragonite Ore x3 |
| The Shredder I | Switch Axe | Dragonite Ore x3 |
| Venom Hatchet I | Switch Axe | Dragonite Ore x3 |
| Elite Blade II | Charge Blade | Dragonite Ore x4 |
| Regas Hyper | Charge Blade | Dragonite Ore x3 |
| Hidden Scythe I | Insect Glaive | Dragonite Ore x3 |
| Kadachi Glaive I | Insect Glaive | Dragonite Ore x3 |
| Rielle Nulo II | Insect Glaive | Dragonite Ore x2 |
| Steel Blade | Insect Glaive | Dragonite Ore x3 |
| Barro Barrel II | Light Bowgun | Dragonite Ore x2 |
| Khezu Syringe II | Light Bowgun | Dragonite Ore x3 |
| Rathling Gun I | Light Bowgun | Dragonite Ore x3 |
| Scale Tornado I | Light Bowgun | Dragonite Ore x3 |
| Sniper Shot | Light Bowgun | Dragonite Ore x4 |
| Arko Nulo Yellow I | Heavy Bowgun | Dragonite Ore x3 |
| Usurper’s Tremor I | Heavy Bowgun | Dragonite Ore x2 |
| Meteor Bazooka II | Heavy Bowgun | Dragonite Ore x10 |
| Steel Assault | Heavy Bowgun | Dragonite Ore x2 |
| Tigrex Howl I | Heavy Bowgun | Dragonite Ore x2 |
| Kulu’s Flight II | Bow | Dragonite Ore x3 |
| Arzuros Bow II | Bow | Dragonite Ore x3 |
| Khezu Bow II | Bow | Dragonite Ore x3 |
| Queen Blaster I | Bow | Dragonite Ore x2 |
| Steel Bow | Bow | Dragonite Ore x4 |
| Wroggi Revolver II | Bow | Dragonite Ore x2 |
Forge Armor
| Weapon | Type | Material Required |
|---|---|---|
| Gargwa Mask | Head | Dragonite Ore x2 |
| Ingot Coil | Waist | Dragonite Ore x2 |
| Ingot Greaves | Leg | Dragonite Ore x2 |
| Ingot Helm | Head | Dragonite Ore x2 |
| Ingot Mail | Torso | Dragonite Ore x2 |
| Ingot Vambraces | Arm | Dragonite Ore x2 |
| Jelly Boots | Leg | Dragonite Ore x2 |
| Jelly Gloves | Arm | Dragonite Ore x2 |
| Makluva Cover | Torso | Dragonite Ore x1 |
| Makluva Pants | Leg | Dragonite Ore x2 |
| Makluva Sleeves | Arm | Dragonite Ore x1 |
| Pukei-Pukei Coil | Waist | Dragonite Ore x2 |
| Pukei-Pukei Helm | Head | Dragonite Ore x2 |
| Rathian Braces | Arm | Dragonite Ore x2 |
| Remobra Feet | Leg | Dragonite Ore x2 |
| Remobra Gloves | Arm | Dragonite Ore x2 |
| Tigrex Braces | Arm | Dragonite Ore x2 |
| Uroktor Coil | Waist | Dragonite Ore x2 |
| Valk Braces | Arm | Dragonite Ore x2 |
| Valk Coil | Waist | Dragonite Ore x2 |
| Volvidon Greaves | Leg | Dragonite Ore x2 |
| Volvidon Helm | Head | Dragonite Ore x2 |
| Volvidon Mail | Torso | Dragonite Ore x2 |
| Leather Headgear S | Head | Dragonite Ore x3 |
| Alloy Vambraces S | Arm | Dragonite Ore x3 |
| Hunter’s Mail S | Torso | Dragonite Ore x2 |
| Chainmail Headgear S | Head | Dragonite Ore x1 |
| Chainmail Gloves S | Arm | Dragonite Ore x1 |
| Chainmail Pants S | Leg | Dragonite Ore x1 |
| Ingot Helm S | Head | Dragonite Ore x3 |
| Ingot Mail S | Torso | Dragonite Ore x3 |
| Ingot Coil S | Waist | Dragonite Ore x3 |
| Ingot Greaves S | Leg | Dragonite Ore x3 |
| Ingot Vambraces S | Arm | Dragonite Ore x3 |
| Makluva Coil S | Waist | Dragonite Ore x2 |
| Makluva Hood S | Head | Dragonite Ore x2 |
| Pukei-Pukei Coil S | Waist | Dragonite Ore x2 |
| Valk Mail S | Torso | Dragonite Ore x3 |
| Kula-Ya-Ku Mail S | Torso | Dragonite Ore x2 |
| Khezu Coil S | Waist | Dragonite Ore x2 |
| Wroggi Greaves S | Leg | Dragonite Ore x2 |
No Comments