
Gracium is an ore found in High Rank Frost Islands. It’s required for many equipment.
“Precious metal from the Frost Islands. Shines bright white when the light catches it.”
| Carry | Rarity | Value |
|---|---|---|
| 99 |
Rarity 6 | 760z |
How to Get Gracium
Frost Islands
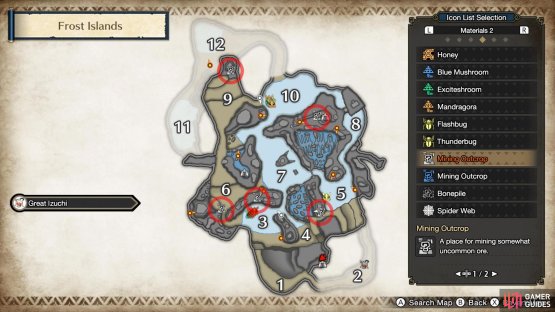

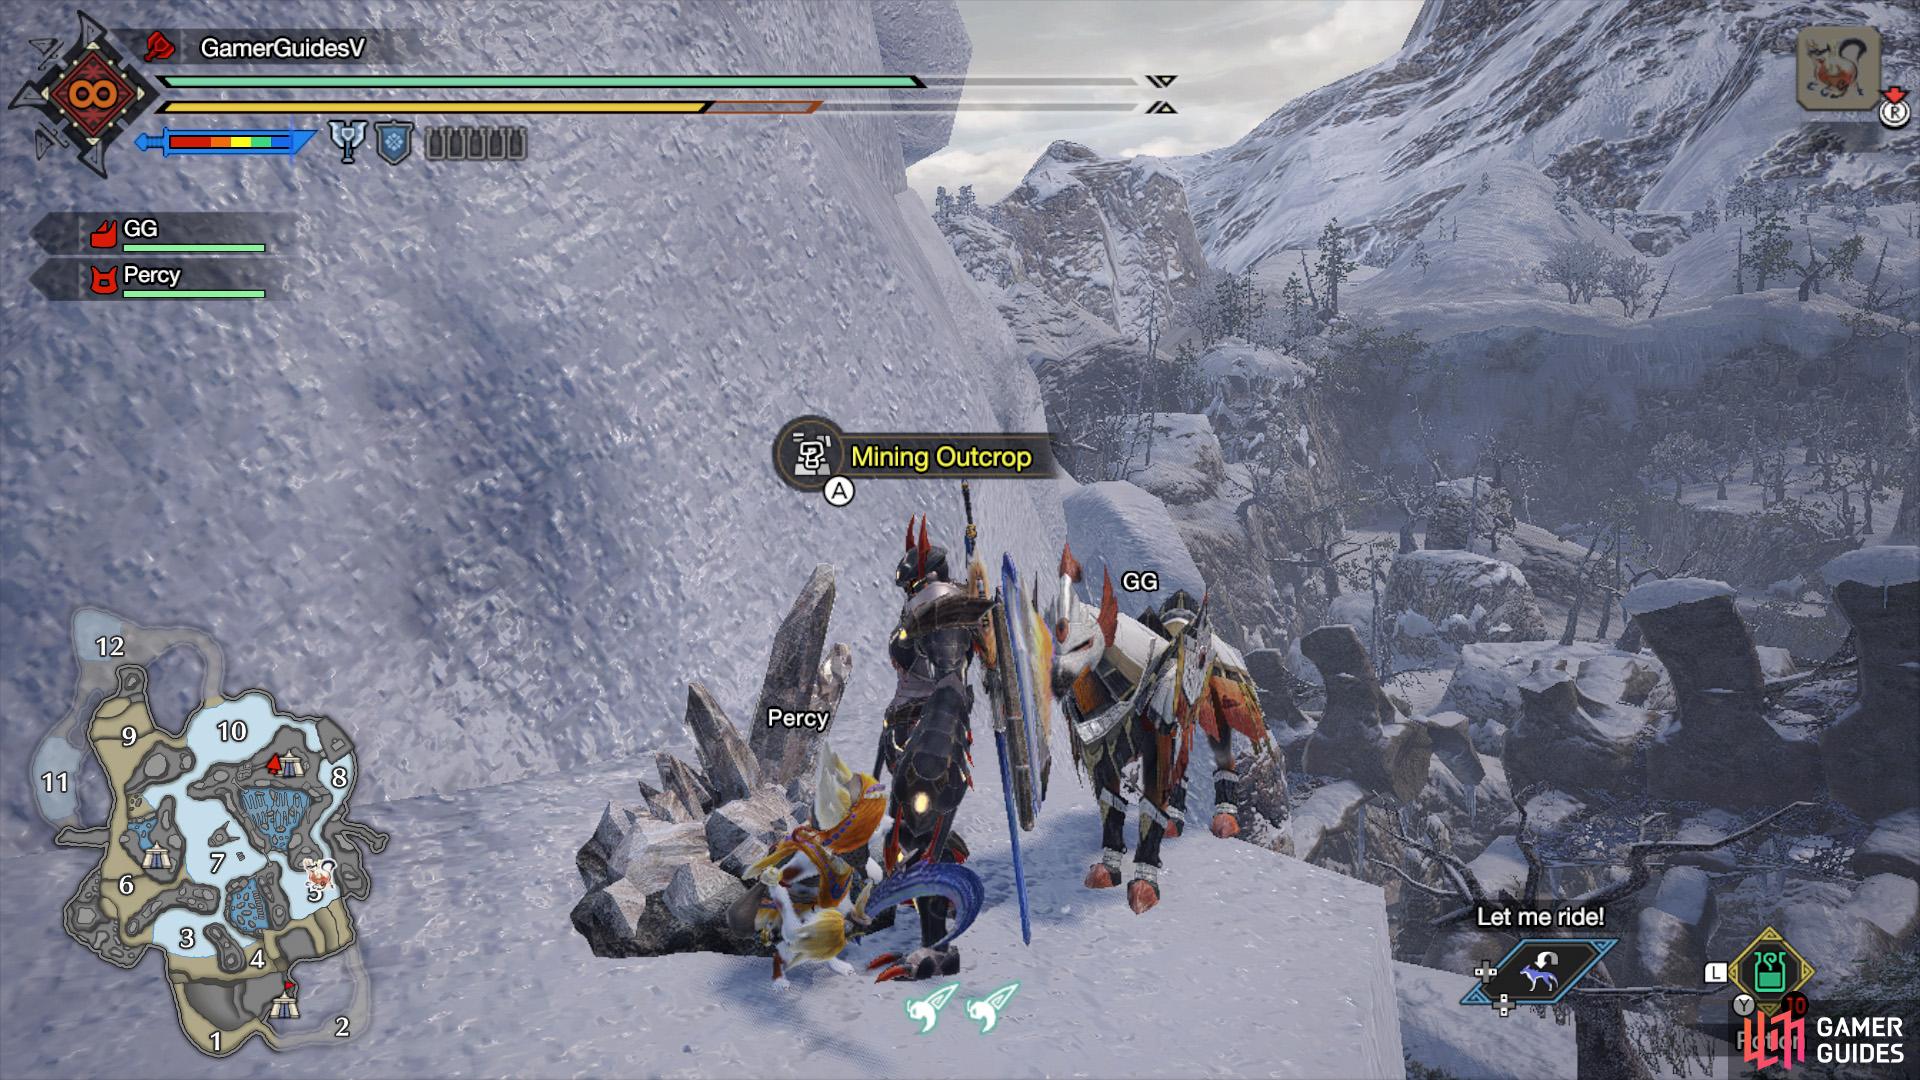
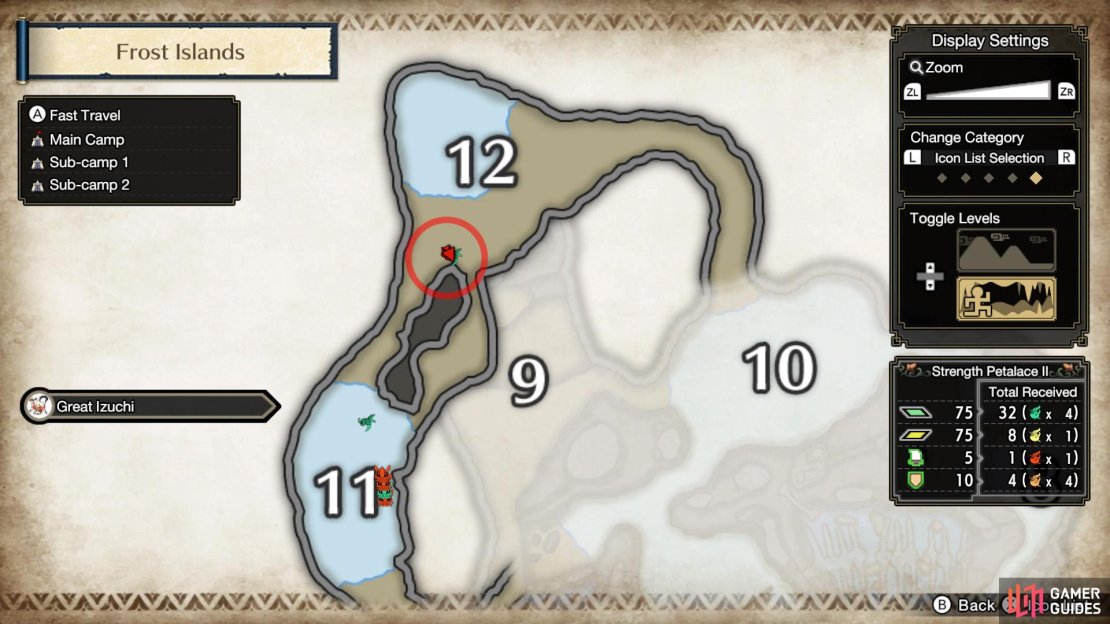
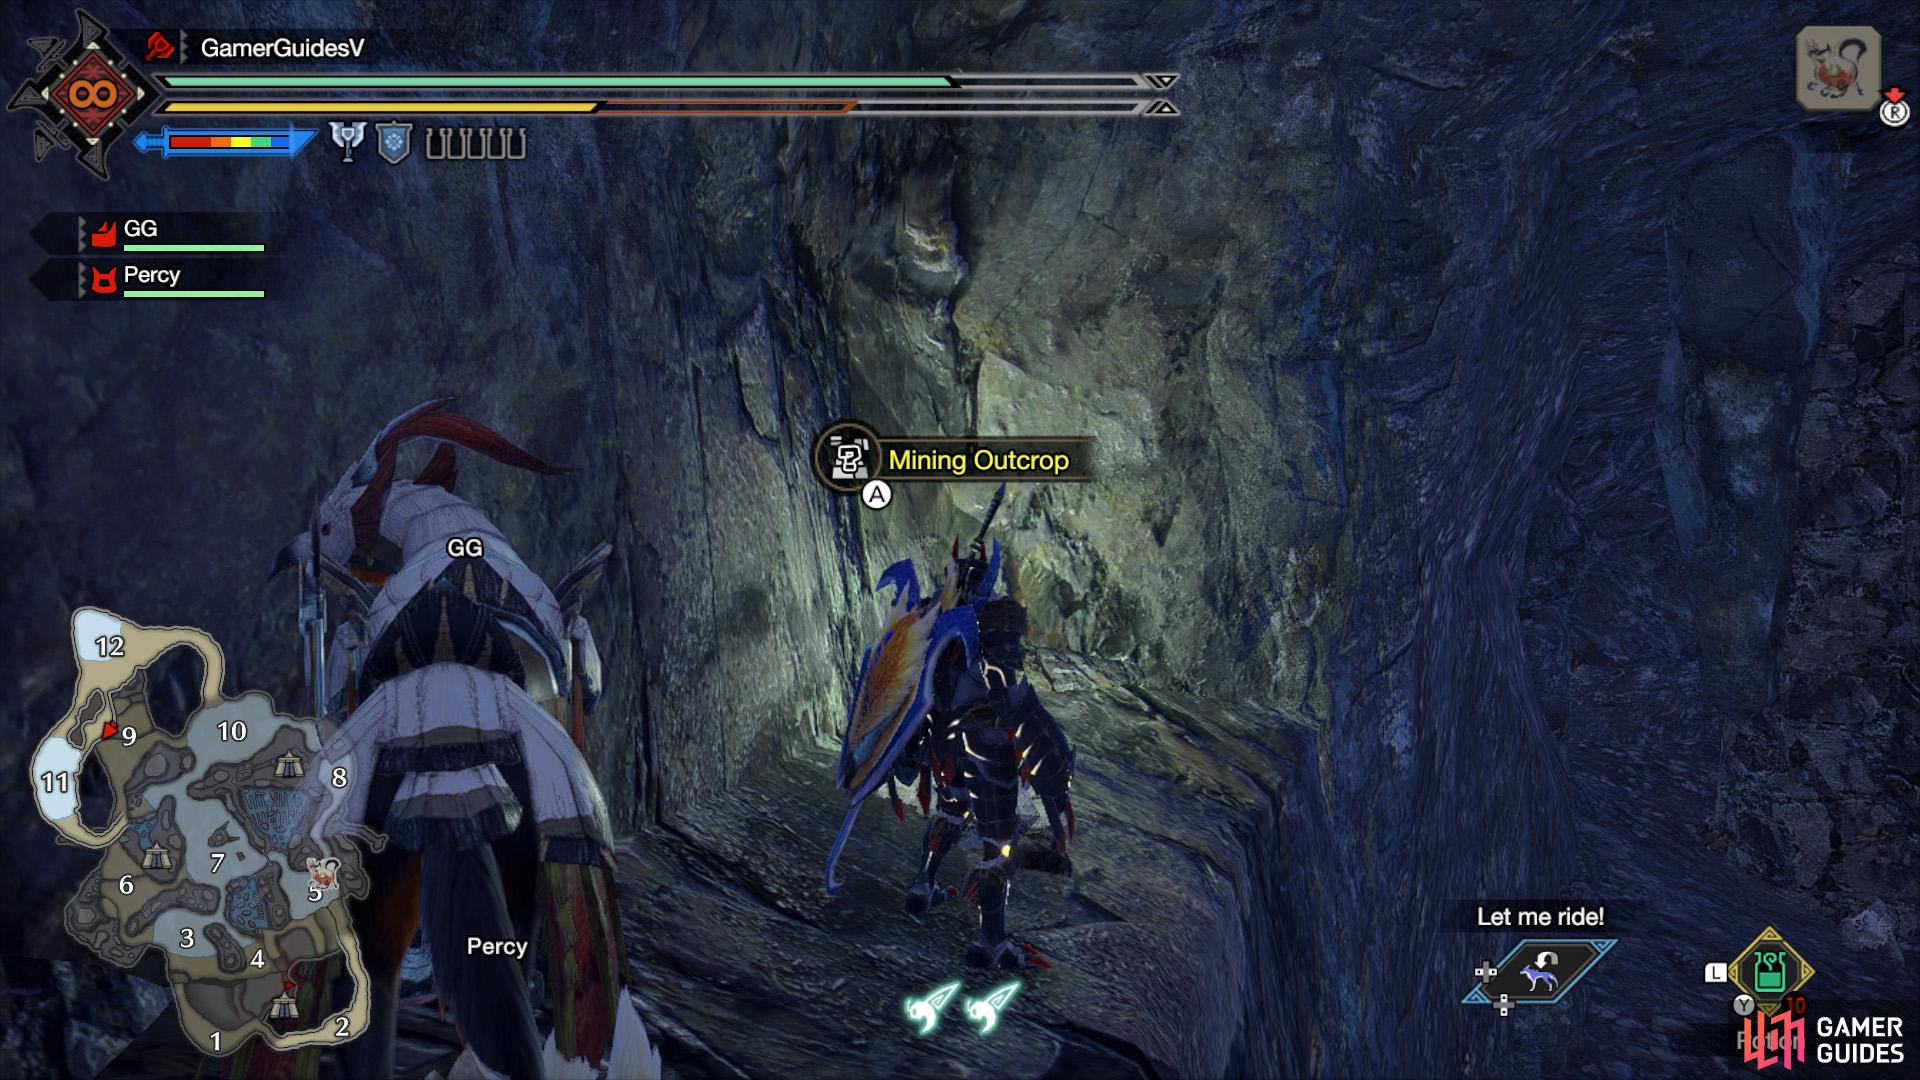
(1 of 2) Gracium locations above ground.

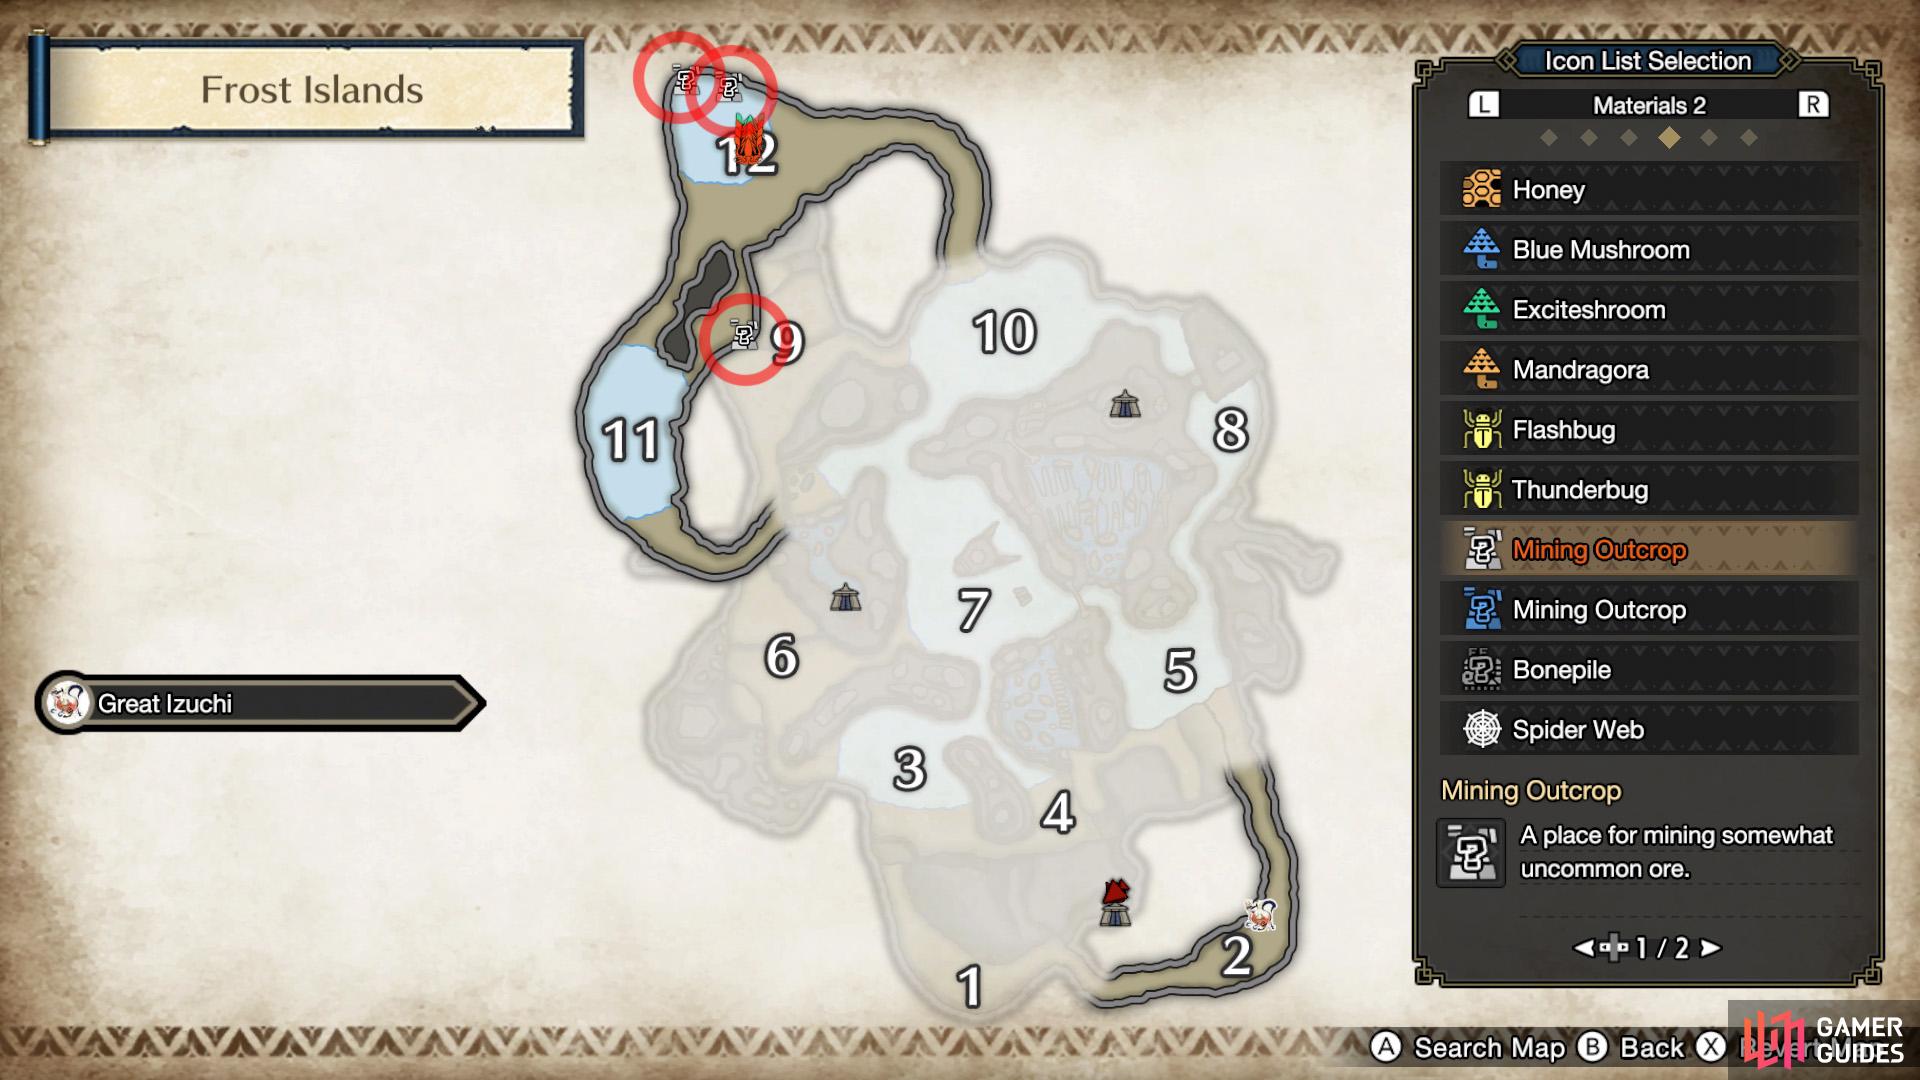
Gracium locations above ground. (left), Gracium locations underground. (right)
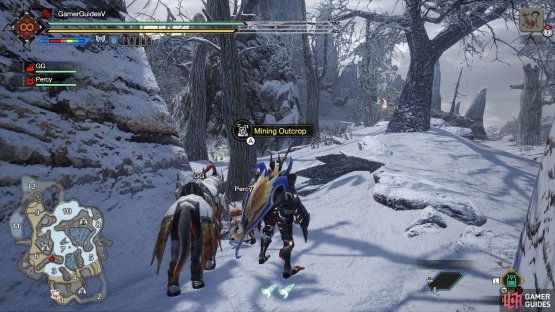
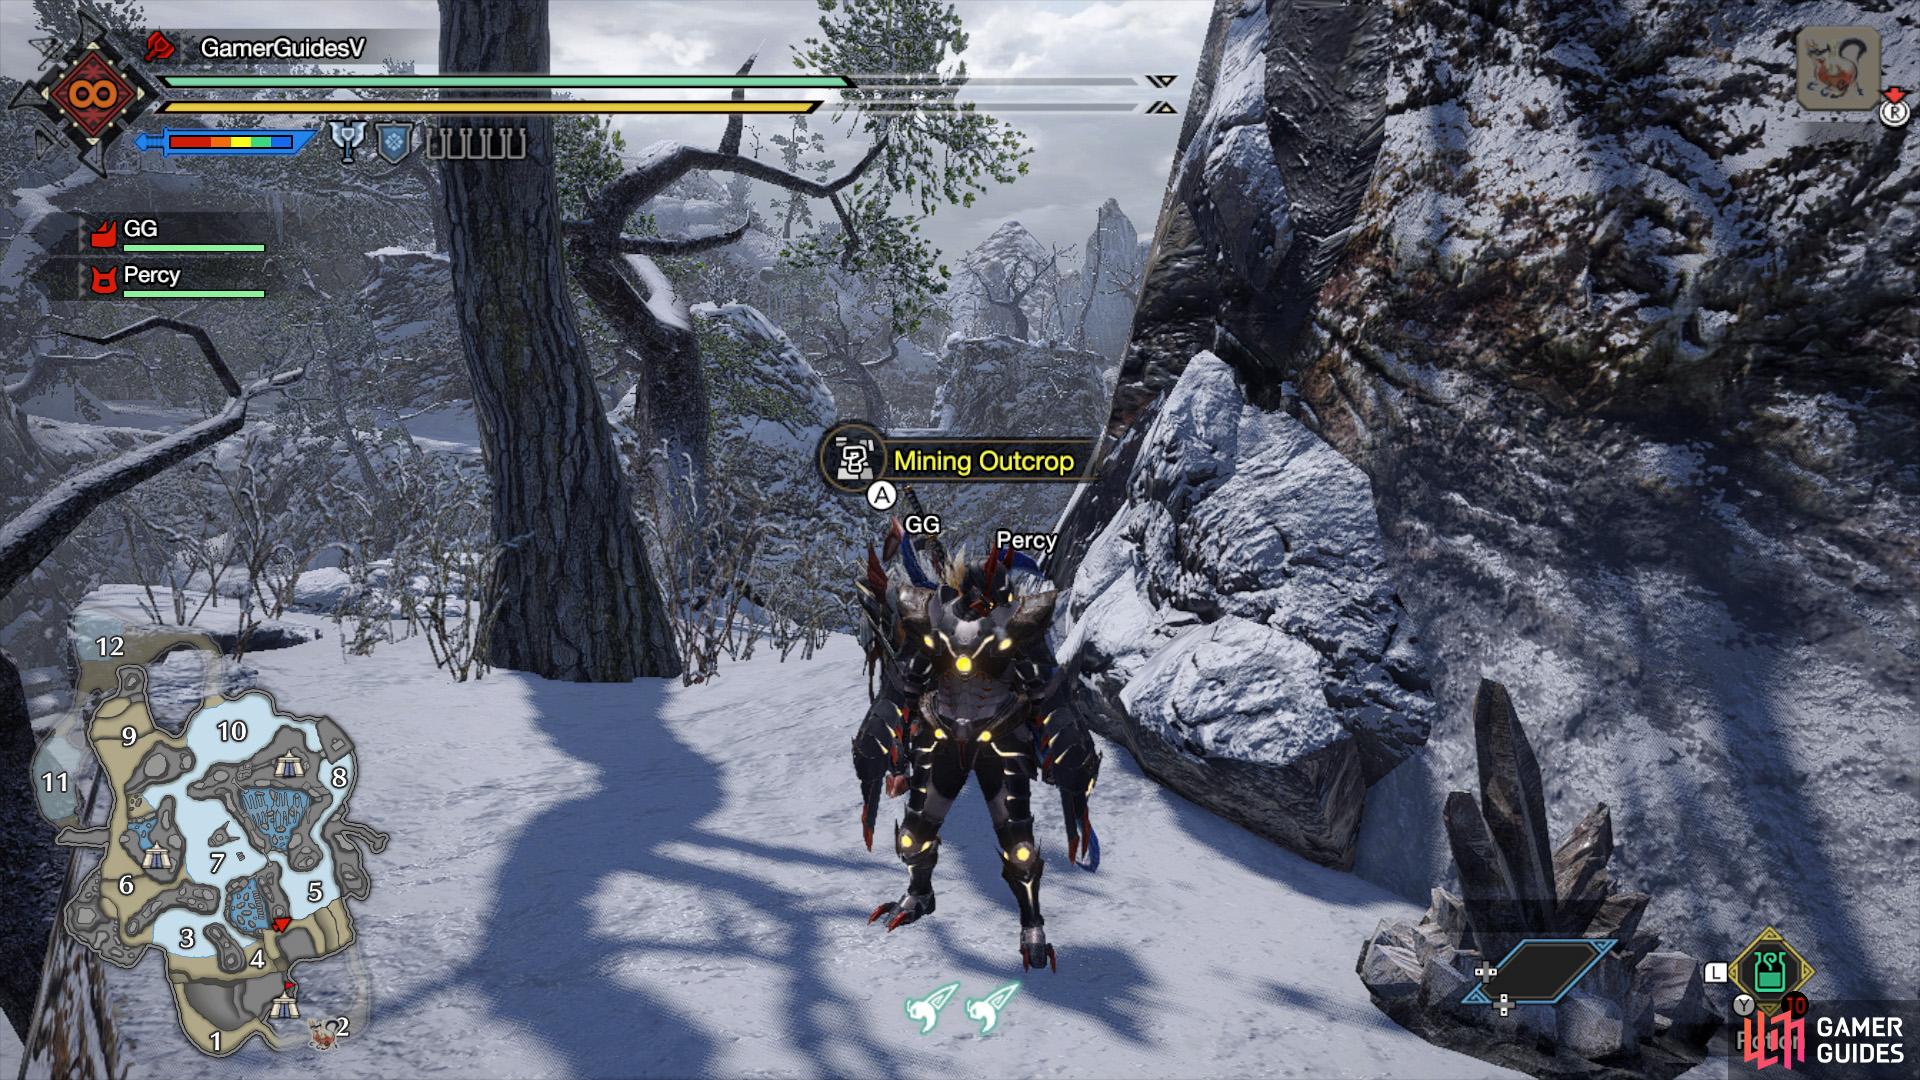
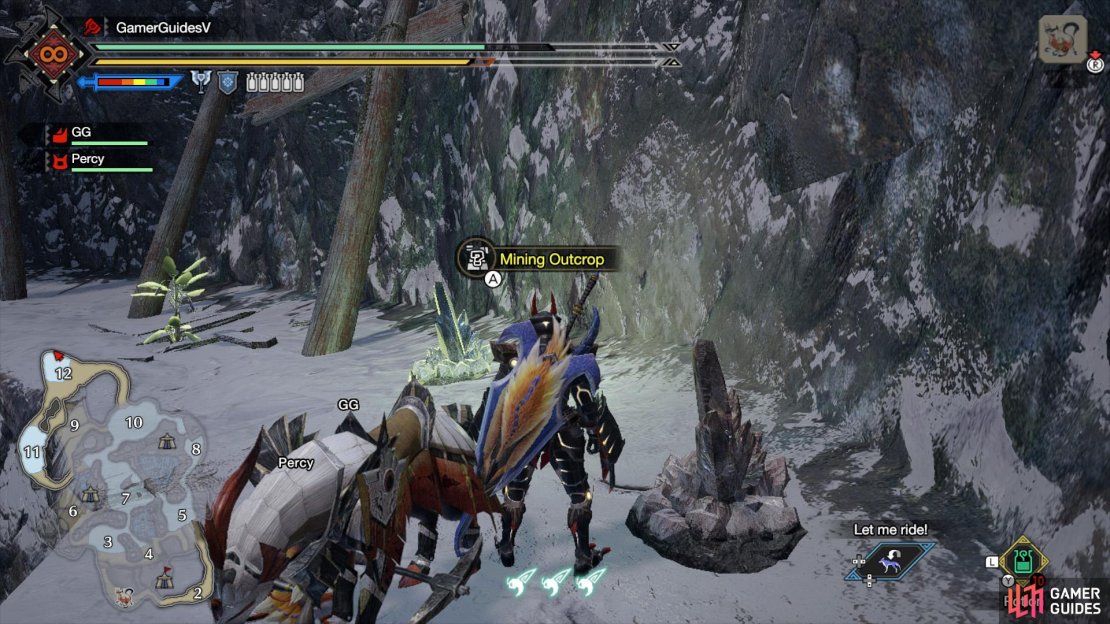
Gracium can be mined from white or blue minining outcrops in High Rank Frost Islands. There’s a higher chance of finding them from white mining outcrops, so prioritize those if you can.

(1 of 2) 1: Southern tip of the highlands on the west side of Area 5, directly north of the main camp.
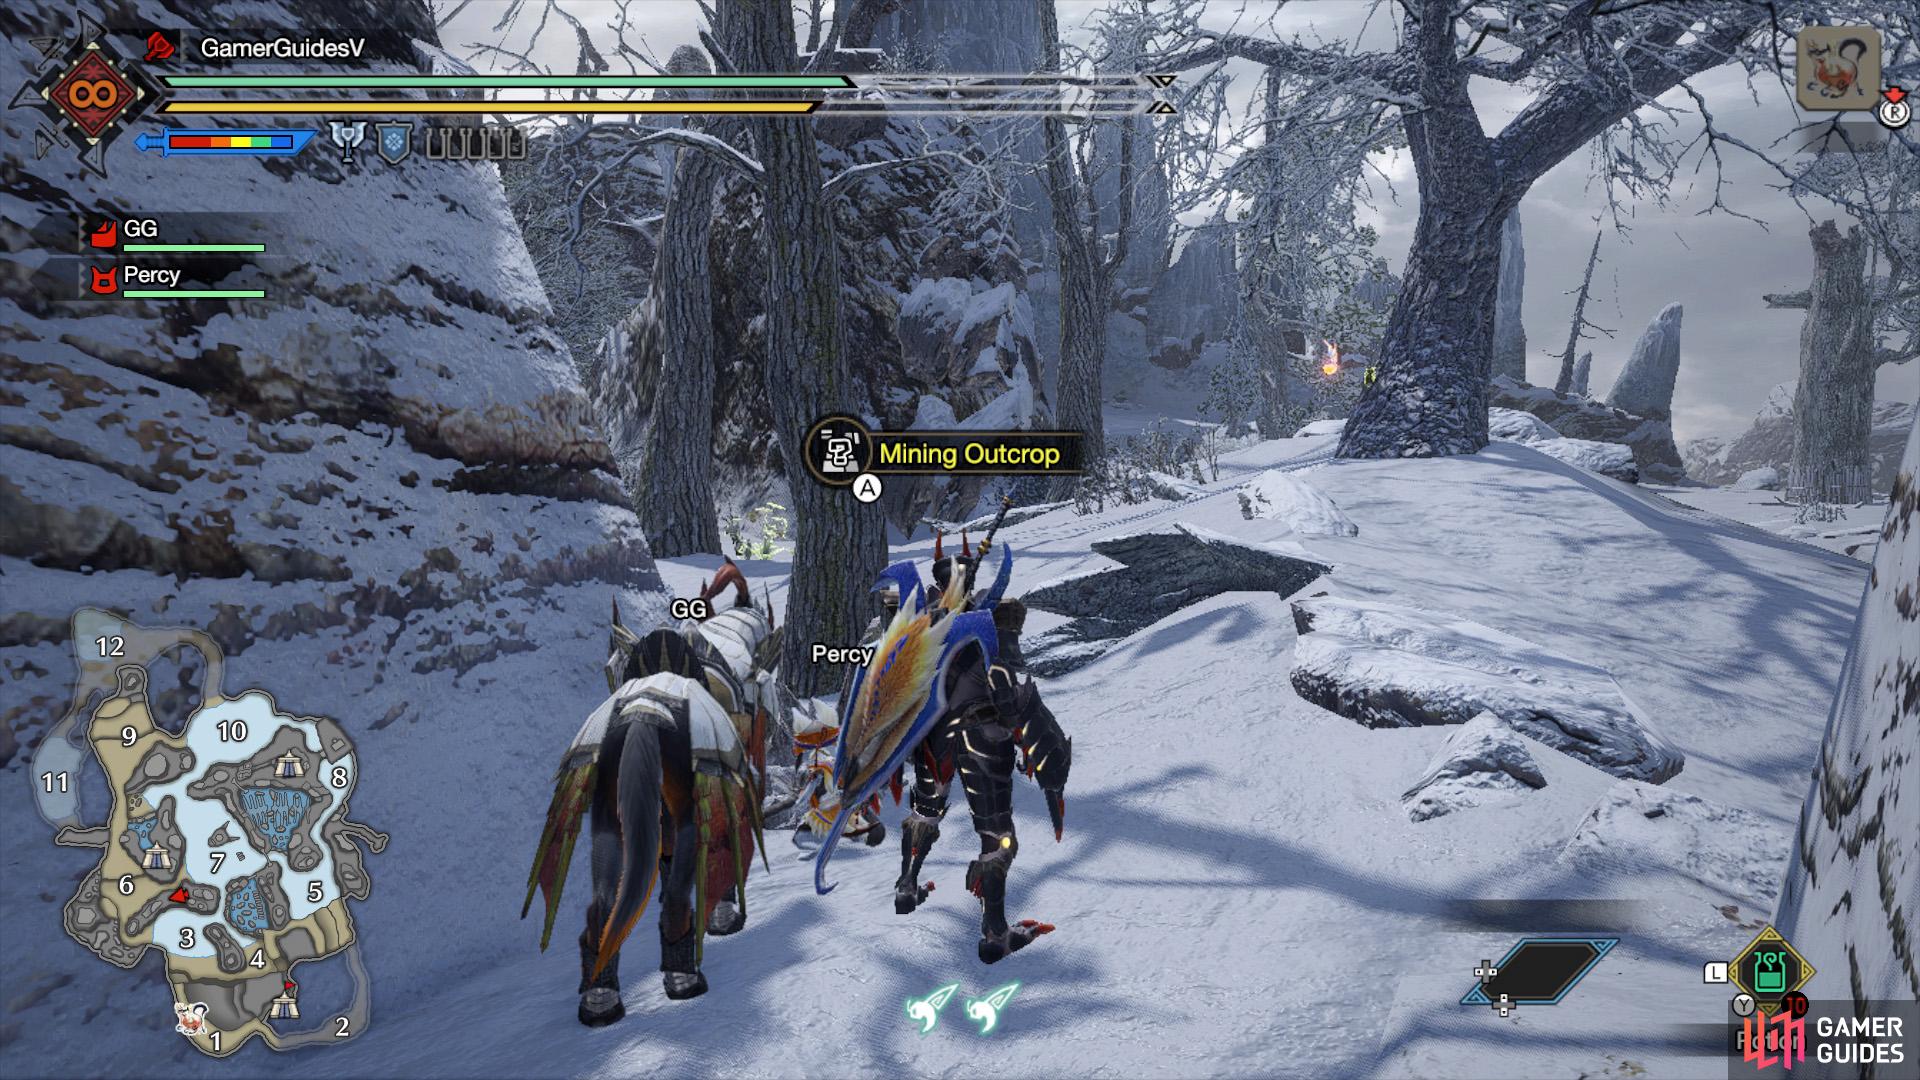
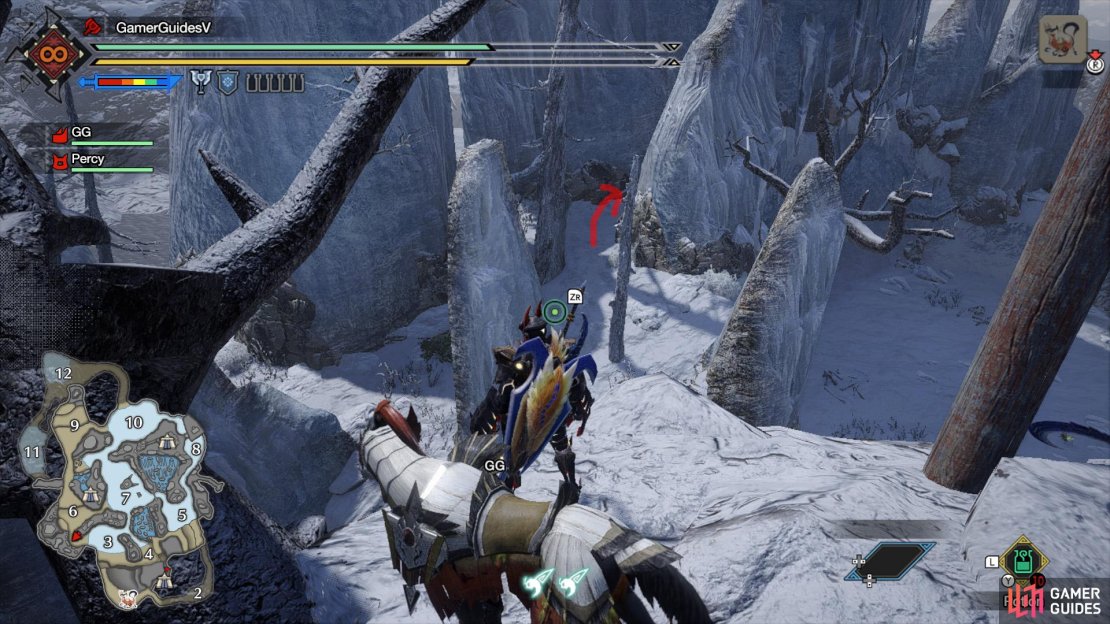
1: Southern tip of the highlands on the west side of Area 5, directly north of the main camp. (left), 2: Near the center of the highlands on the north side of Area 3. (right)
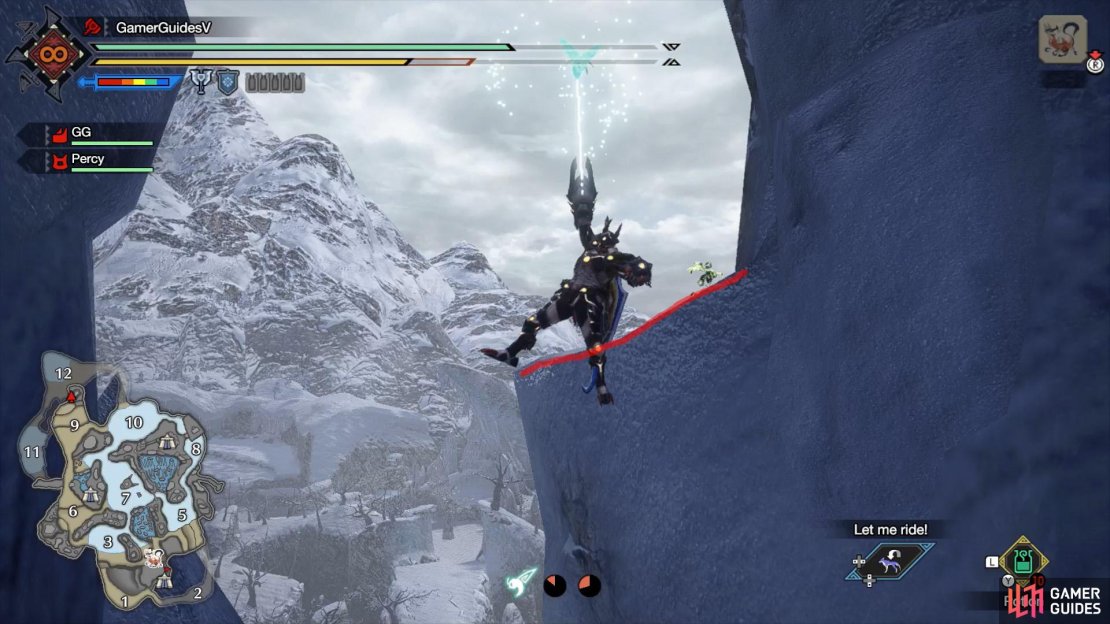
1: Southern tip of the highlands on the west side of Area 5, directly north of the main camp. From the main camp, slide north and then land on the highlands to the right. From there, continue forward (north) and then wiredash across the gap.
2: Near the center of the highlands on the north side of Area 3. From the previous node, climb up the nearby cliff and use the great wirebug to launch yourself west. After landing, drop down right and use the great wirebug below to travel north-north-west. Now head west, between the rock formations and you’ll soon find the mining outcrop.
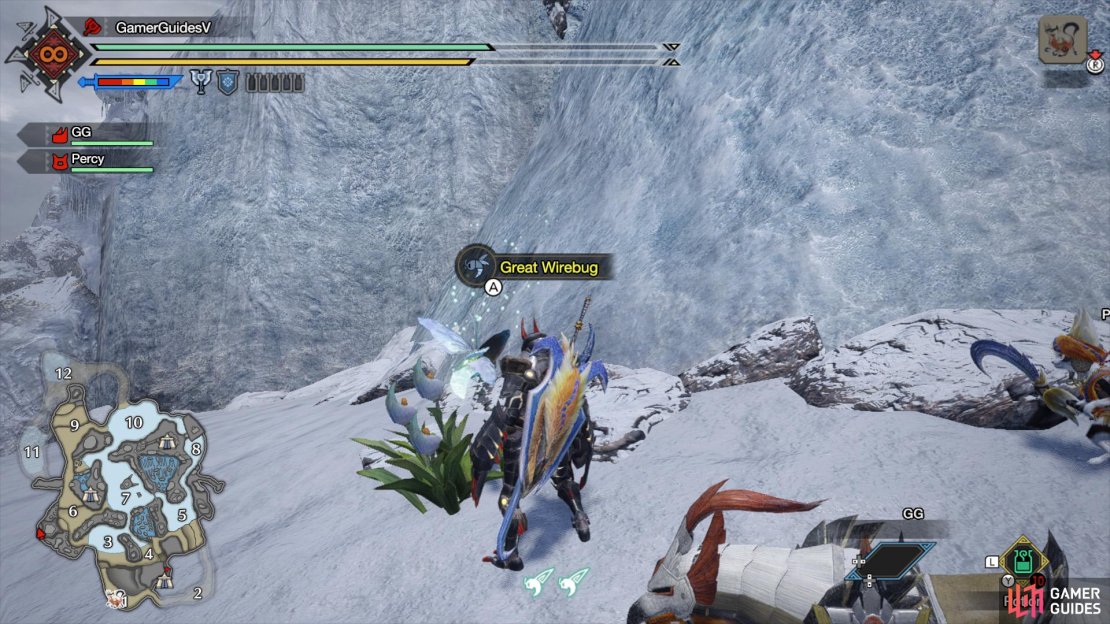
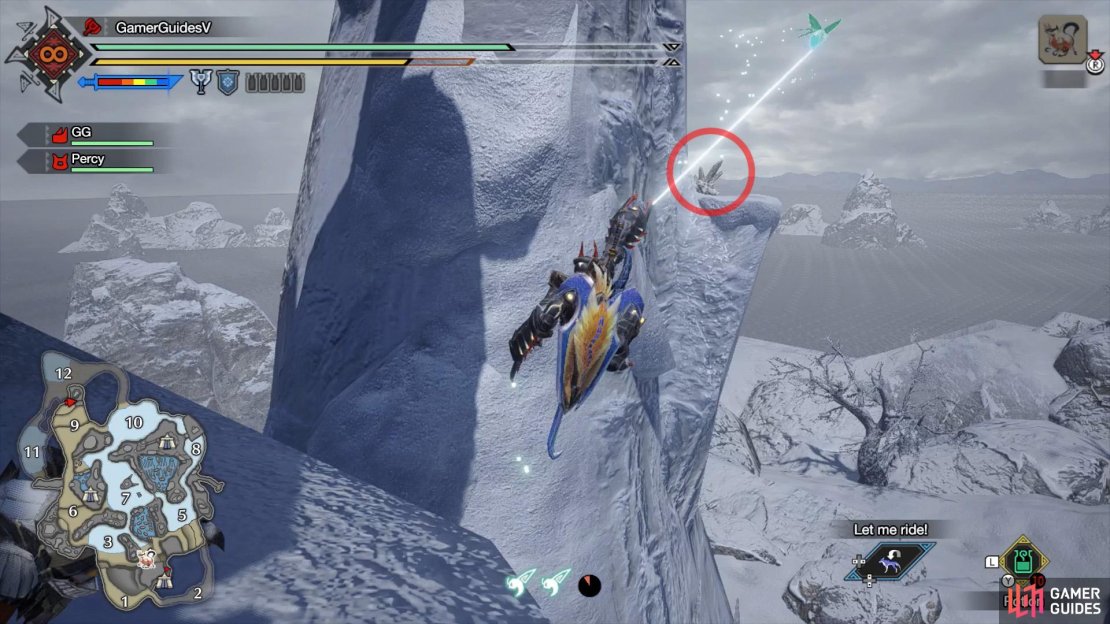
(1 of 3) 3a. From the previous node, carry on west towards the end of the highlands. Clamber up to the highest point, then wiredash across. After that, go around the back of the mountain.
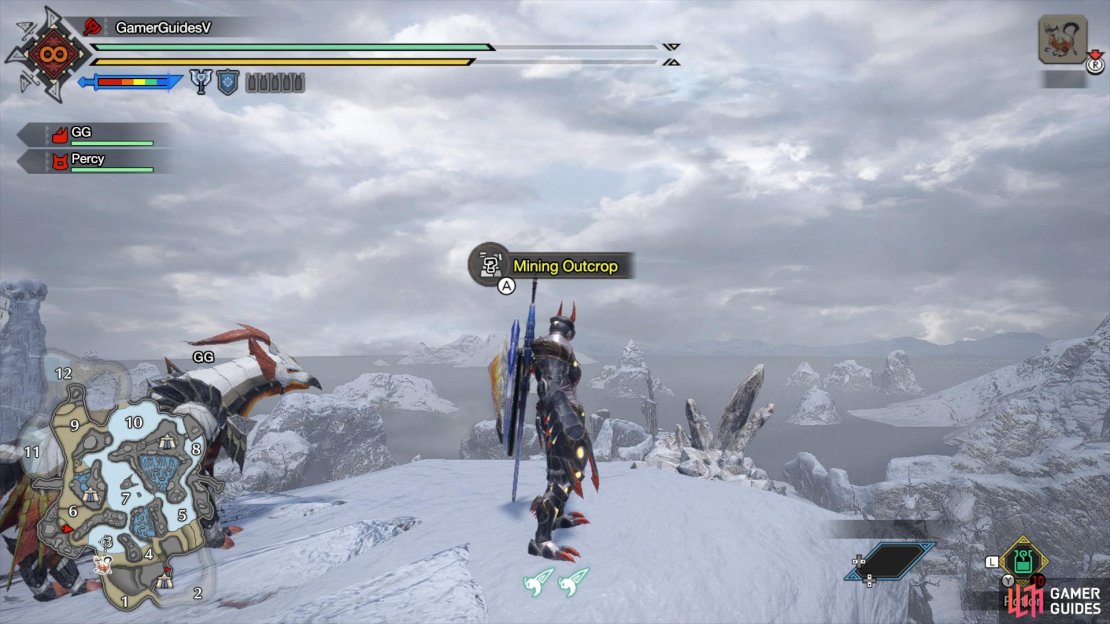
3: At the very top of the mountain west from the previous node. From the previous node, carry on west towards the end of the highlands. Clamber up to the highest point, then wiredash across to the highlands on the other side. Keep going west, then go around the back of the mountain. Use a great wirebug here to reach the mountain peak.
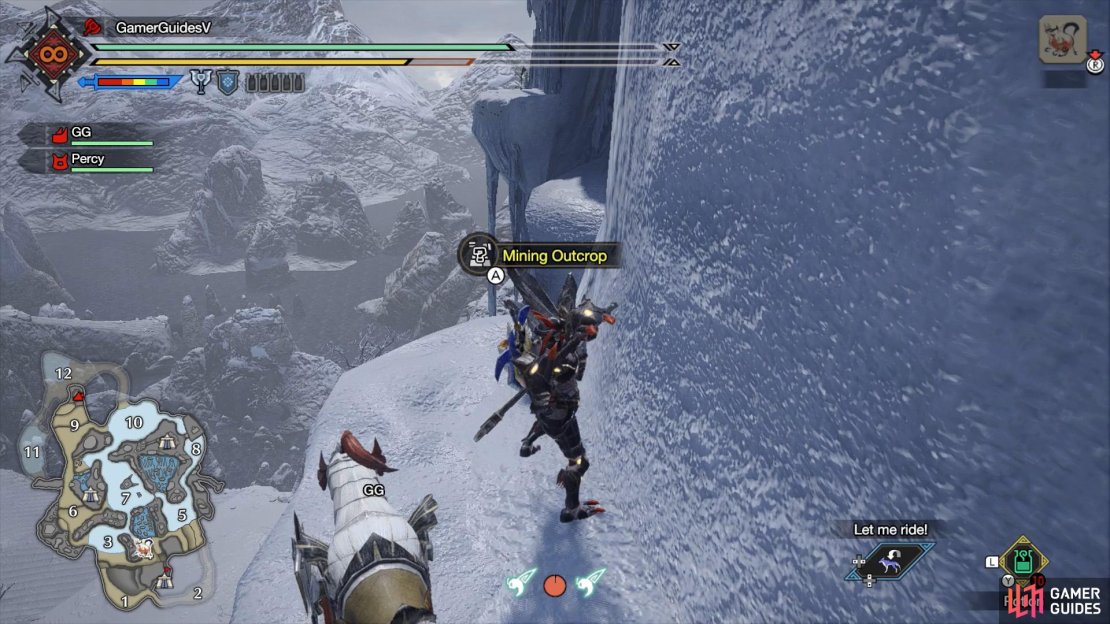
On a ledge near the west side of the wall surrounding Sub-Camp 2.
4: On a ledge near the west side of the wall surrounding Sub-Camp 2. If you haven’t unlocked Sub-Camp 2, it’s on the highlands near the intersection of areas 8 and 10.
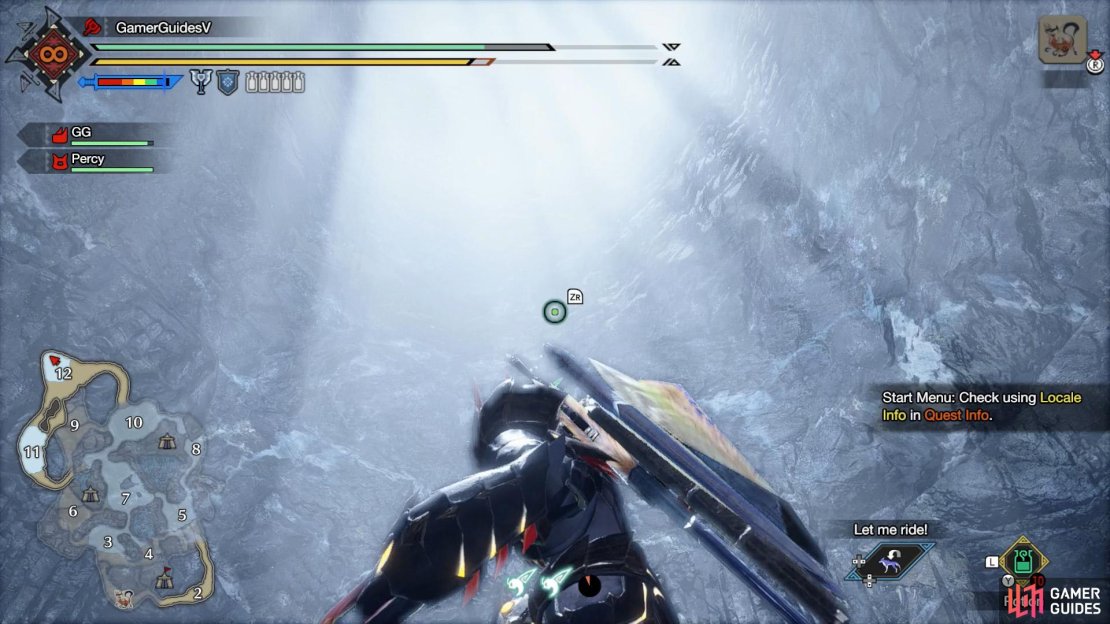
(1 of 3) 5a. Climb up the northern part of Area 9, until you think you’re at the top. Look left and wiredash up to the high up ledge.
5: Do not bother visiting this node, except out of curiosity. It’s on a high up ledge at the northernmost part of Area 9. If you’re adamant, grab an extra wirebug in Area 9. Climb up the vine-covered walls, turn right and clamber up the ledge, then turn left and use wirebugs to surmount the cliff face.
Now for the tricky part. Look left and up. There’s a ledge above, but the wall is too slippery to climb. Manually wiredash upwards with  and
and  . Between wiredashes, press
  to hang in mid-air. Due to the distance, you’ll either need 3 wirebugs or mid-air roll with
  .
.
Managed to climb up? Good. Turn backwards and there’s a ledge ahead, with the fifth mining outcrop. Wait for your wirebugs to recover, then carefully wiredash across. If you’ve come this way, you might as well activate the nearby jewel lily here and grab Relic Record IX.
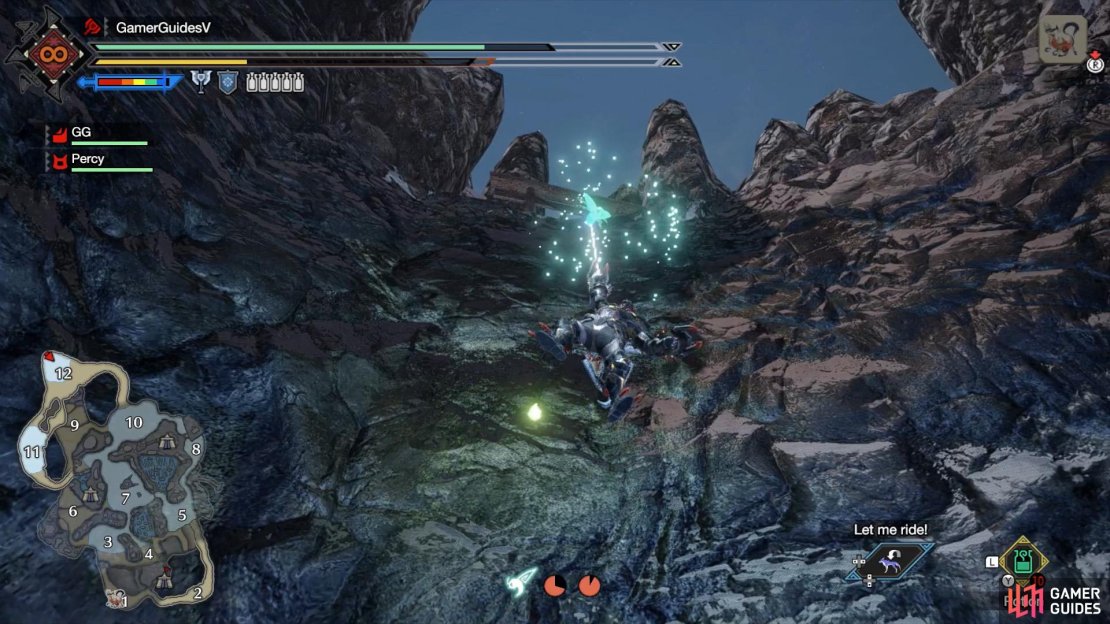
(1 of 4) 6+7a. Grab a third wirebug from somewhere near Area 12.
6 and 7: At the top of a shaft at the north side of Area 12, underground. Grab a 3rd wirebug near the south of Area 12. Near the north, you should see light shining from above. Look up and manually wiredash upwards with and . If you get enough height, you can start running up the side of the shaft. Keep running and you’ll emerge outside, where two outcrops can be found at both ends of a long ledge. Remember to press to pause and regain stamina.
On a ledge in the cramped area between areas 11 and 12.
8: Crawl through a small gap south of Area 12 or north-east of Area 11, underground. You’ll reach an enclosed space below Area 9. The last mining outcrop is on a ledge towards the east.
Quest Rewards
There’s a small chance of receiving Gracium from a few High Rank quests.
| Quest | Reward | Rate |
|---|---|---|
| Hub 4-star: Didn’t Get the Memo |  Gracium x1 Gracium x1 |
8% |
| Hub 4-star: Dango Duty | Gracium x1 |
8% |
What Equipment Can You Make With Gracium?
Gracium is needed to forge/upgrade many High Rank equipment.
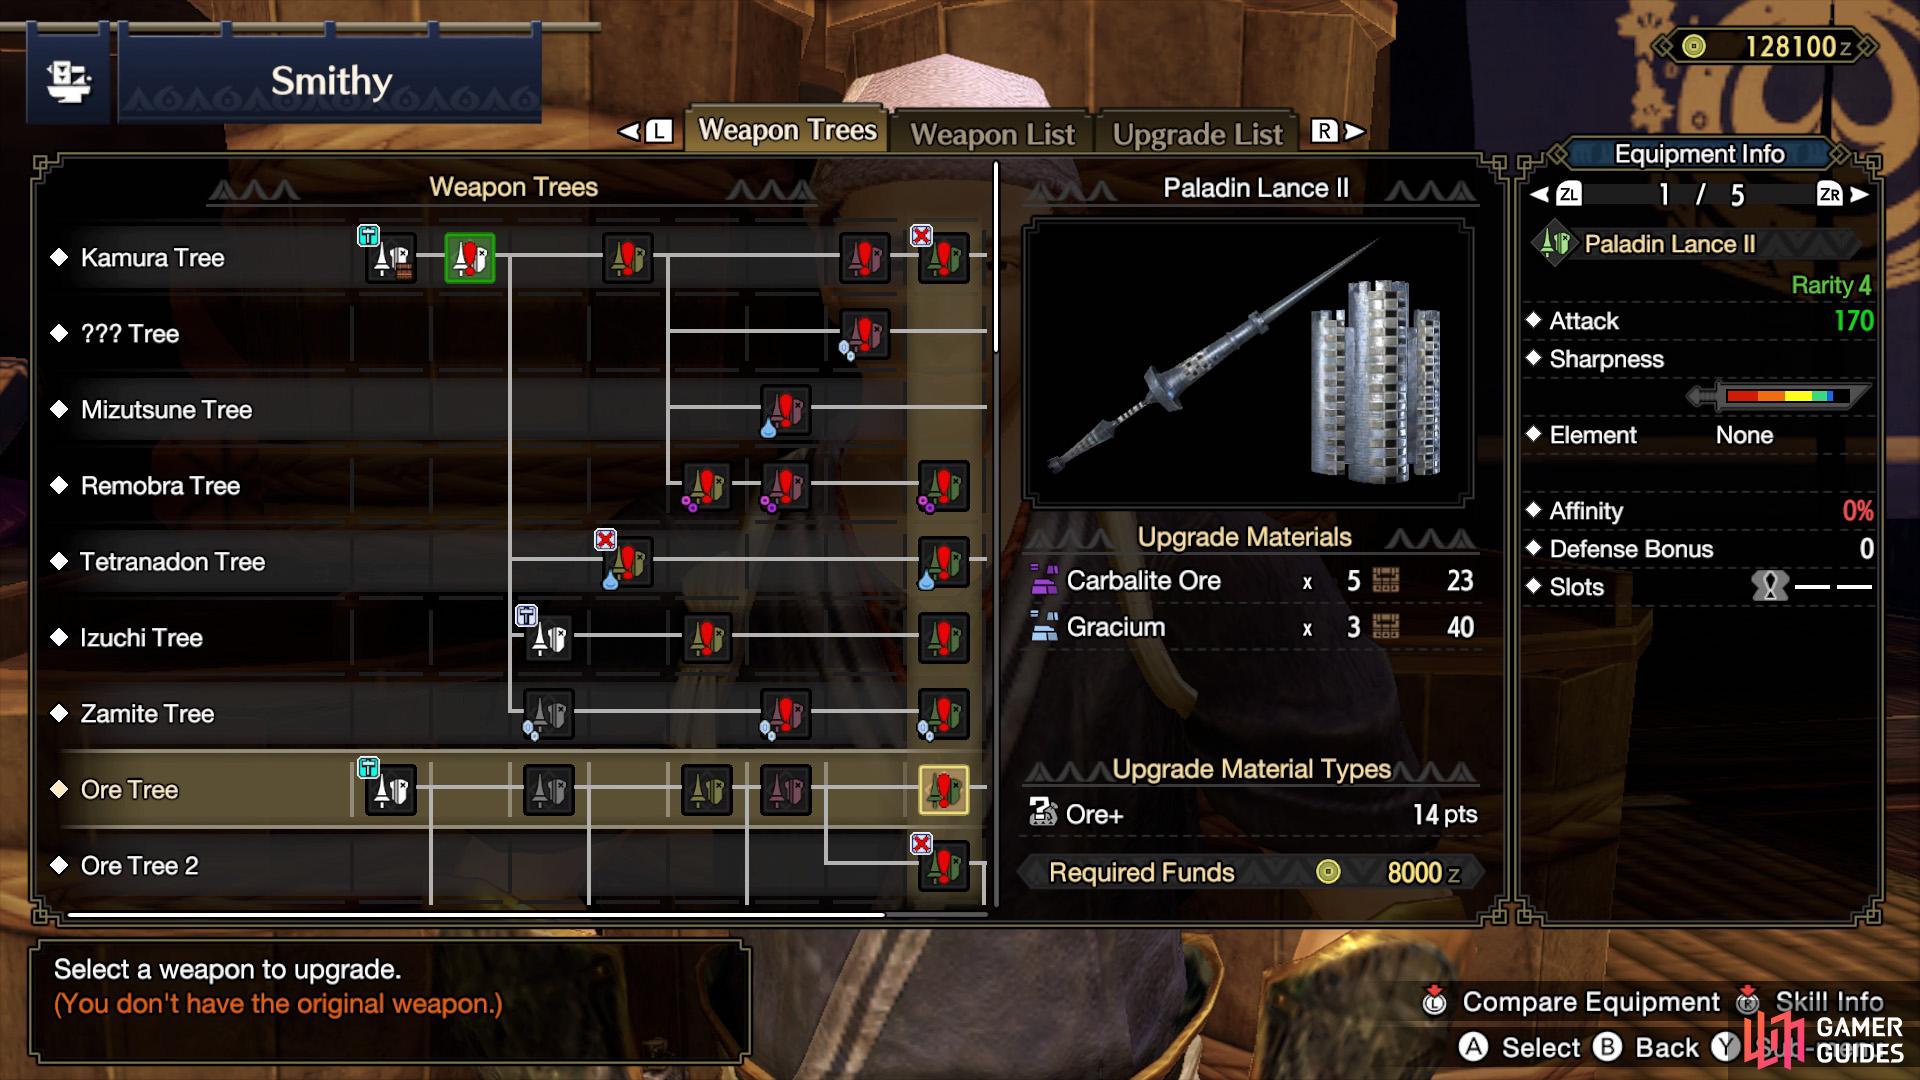
The Paladin Lance III requires 3 Gracium.
Forge Weapons
| Weapon | Type | Material Required |
|---|---|---|
| Chillblade I | Long Sword | Gracium x3 |
| Odyssey Bade I | Sword and Shield | Gracium x3 |
| General’s Arbalance I | Gunlance | Gracium x3 |
| Great Nova I | Hammer | Gracium x3 |
| Vicello Nulo Black I | Hunting Horn | Gracium x3 |
| General’s Strongaxe I | Switch Axe | Gracium x3 |
| K. Captain’s Blade I | Charge Blade | Gracium x3 |
| Guerrera Cannon I | Heavy Bowgun | Gracium x4 |
| Striker’s Bowgun I | Heavy Bowgun | Gracium x5 |
| Crystaline Flower I | Bow | Gracium x5 |
Upgrade Weapons
| Weapon | Type | Material Required |
|---|---|---|
| Colossal Axeblade | Great Sword | Gracium x2 |
| Imperial Sword | Long Sword | Gracium x2 |
| Hi Frost Edge | Sword and Shield | Gracium x4 |
| Gelid Mind II | Dual Blades | Gracium x2 |
| Sworn Rapiers II | Dual Blades | Gracium x3 |
| Babel Spear II | Lance | Gracium x2 |
| Paladin Lance II | Lance | Gracium x3 |
| Razortooth Spear | Lance | Gracium x2 |
| Baggi Gunlance III | Gunlance | Gracium x2 |
| Lagomberator III | Gunlance | Gracium x2 |
| Cocytus | Hammer | Gracium x4 |
| War Stamp I | Hammer | Gracium x3 |
| Magia Charm III | Hunting Horn | Gracium x2 |
| Amber Slash III | Switch Axe | Gracium x3 |
| Gale Sickle | Charge Blade | Gracium x3 |
| Shieldraad | Charge Blade | Gracium x3 |
| Iron Bayonet II | Insect Glaive | Gracium x2 |
| Lagombaglaive II | Insect Glaive | Gracium x1 |
| Jaeger II | Light Bowgun | Gracium x2 |
| Gossgun II | Light Bowgun | Gracium x2 |
| Meteor Bazooka II | Heavy Bowgun | Gracium x3 |
| Reversal Shot II | Heavy Bowgun | Gracium x2 |
| Arko Unu White | Bow | Gracium x3 |
Forge Armor
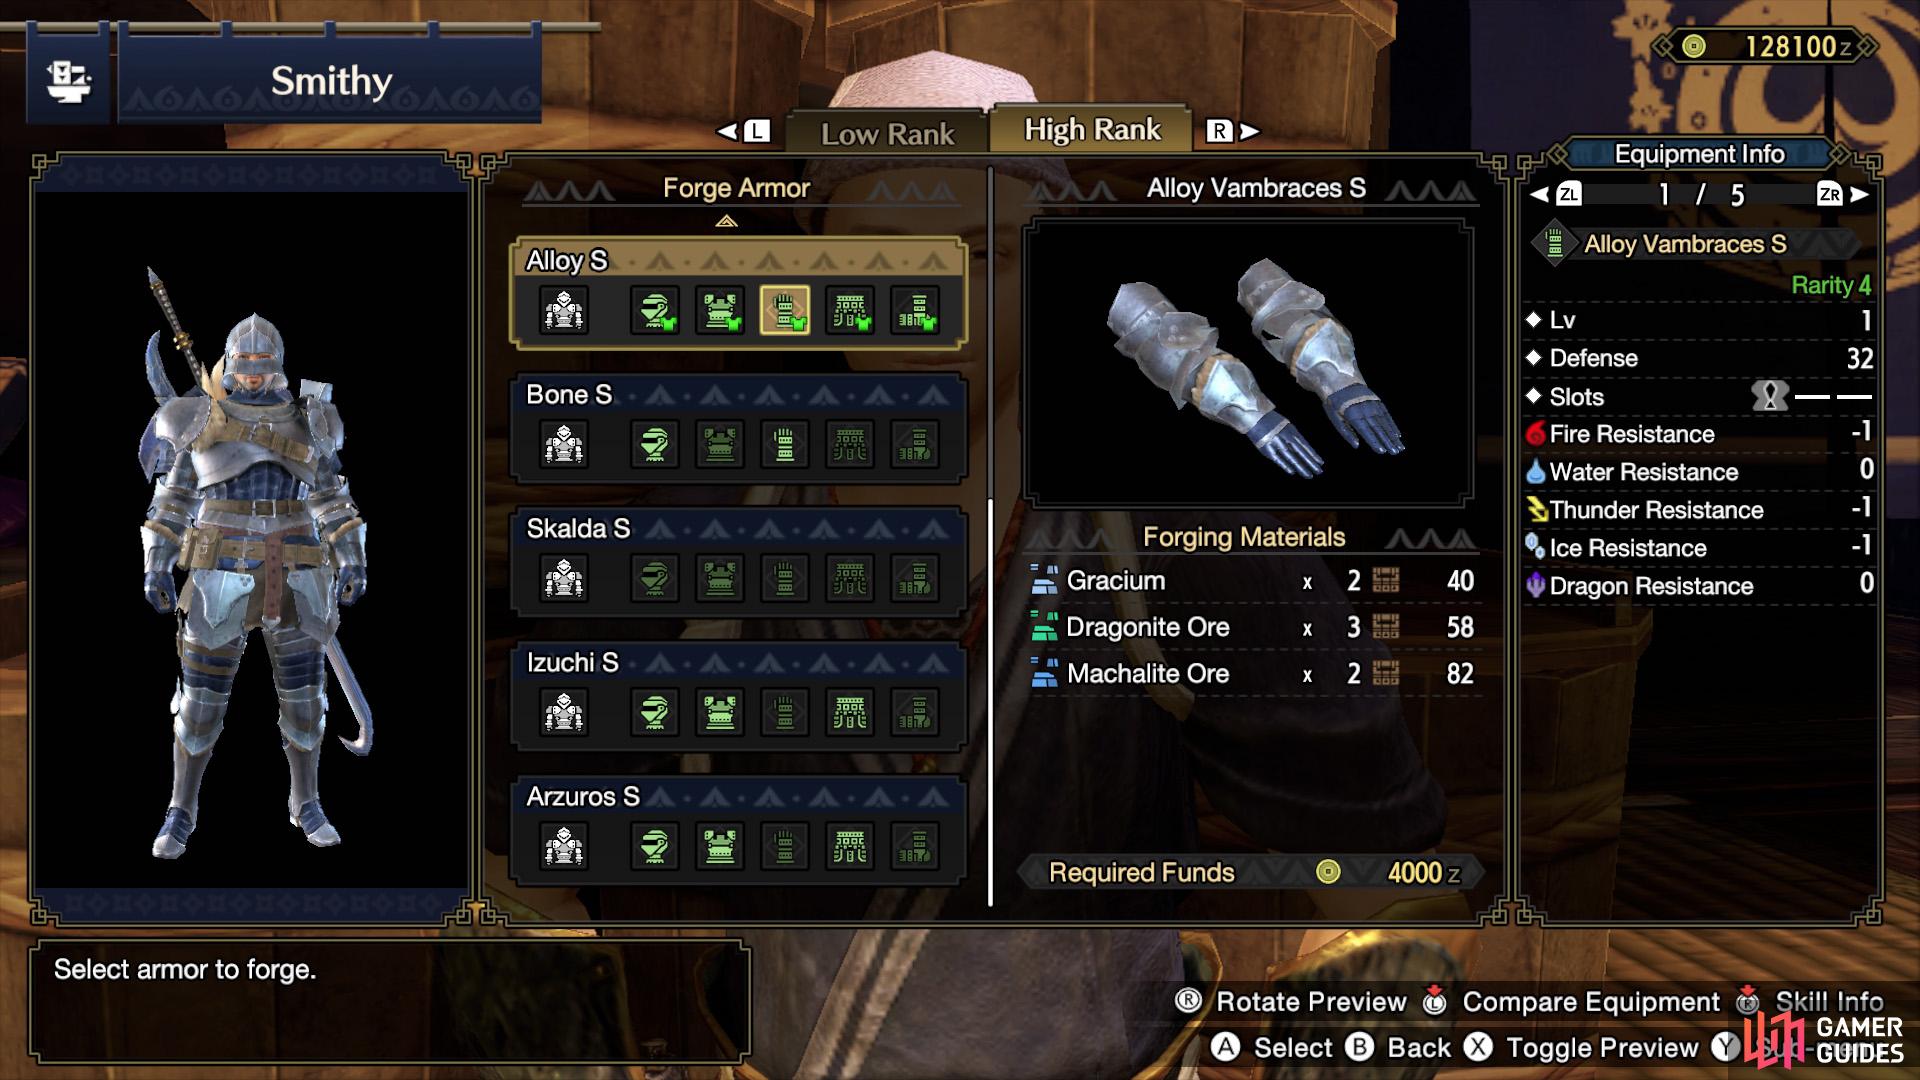
You need lots of Gracium to make the full Alloy S Armor set.
| Armor | Type | Material Required |
|---|---|---|
| Ingot Helm S | Head | Gracium x2 |
| Ingot Vambraces S | Arm | Gracium x2 |
| Ingot Coil S | Waist | Gracium x1 |
| Ingot Greaves S | Leg | Gracium x2 |
| S. Studded Sash S | Waist | Gracium x2 |
| Valk Helm S | Head | Gracium x2 |
| Valk Greaves S | Leg | Gracium x2 |
| Mosgharl Vizor S | Head | Gracium x2 |
| Mosgharl Ribplate S | Torso | Gracium x2 |
| Mosgharl Roots S | Leg | Gracium x2 |
| Baggi Mail S | Torso | Gracium x1 |
| Baggi Greaves S | Leg | Gracium x1 |
| Jelly Vest S | Torso | Gracium x4 |
| Jelly Coil S | Waist | Gracium x2 |
| Lagombi Vambraces S | Arm | Gracium x3 |
| Alloy Helm S | Head | Gracium x2 |
| Alloy Mail S | Torso | Gracium x2 |
| Alloy Vambraces S | Arm | Gracium x2 |
| Alloy Coil S | Waist | Gracium x2 |
| Alloy Greaves S | Leg | Gracium x2 |
| Barioth Helm S | Head | Gracium x3 |
| Goss Harag Greaves S | Leg | Gracium x4 |
| Tetranadon Mail S | Torso | Gracium x2 |
| Utsushi Mask (H) S | Head | Gracium x2 |
| Channeler Hair-tie S | Head | Gracium x2 |
| Utsushi Mask (V) S | Head | Gracium x2 |
| Medium’s Hair-tie S | Head | Gracium x2 |
No Comments