The Cave of the Dead
As the group arrives they find Megara injured. Help her up then check the Moogle Shop for some weapon upgrades.
Mosh’s Moogle Shop
| Item | Price |
|---|---|
| Comet Staff | 200 |
| Adamant Shield | 100 |
| Falling Star | 200 |
| Potion | 40 |
| Ether | 120 |
| Tent | 100 |
| Hammer Staff | 100 |
Head to the Cave of the Dead: Entrance where you will meet a new enemy, the Rabid Dog. On the left side of the room you can get the Heart #3 puzzle piece before moving to the next section.
Monster - Rabid Dog
The Rabid Dog has low defense and is easily taken out with magic or quick strikes with the Keyblade. It does have a howling attack that shoots shockwaves from its mouth and can pounce and bite but other than that, there isn’t much to worry about with the Rabid Dog. In a pack you might take some damage but if you get up close to a group and use Fire it should take them all out.
Head through the Passage to the split and turn left. Grab the Mythril Shard (2/20) from the chest then continue down to another chest that has an Ether (4/20). Defeat the Heartless and continue down the steps to a chest with an AP Boost (5/20). At the end of the path, turn around and go back up the path you neglected. Open the chest for a Hi-Potion (6/20) then head to the end of Passage to find another chest, a Mythril Stone (3/20) inside.
In the Inner Chamber you’ll find a book labelled, “Absent Silhouette” and two chests – the Underworld Map (7/20) and a Mythril Shard (8/20). You can fight Zexion’s Absent Silhouette using the book (actually Lexicon) just not until later. Head into the Valley of the Dead when you’re done with this room.
Valley of the Dead
In this area you’ll have to fight your way up the three platforms. You’ll encounter the new Creeper Plant as well.
Monster - Creeper Plant
Creeper Plants don’t move but they shoot a long-range seed projectile. If you are close to the Creeper Plant it can also stab you with its roots. Using Reflect is one of the best ways to avoid taking damage from the seeds that it fires. Periodically you’ll get the Reaction Command “Root Ravager” which will have Sora uproot the Creeper Plant that will create a shockwave damaging other enemies in the surrounding area. In addition to firing seeds and attacking with its roots, the Creeper Plant can flail with its vines to the sides. In a group with other Heartless, the Creeper Plant is usually the second enemy you want to take out.
In Hades’ Chamber you’ll join forces with Auron. You can’t hurt Hades, but you need to attack him to start a scene. Fight your way back across the Valley of the Dead. On the first platform and second platforms you should be able to easily wipe out the Heartless, but on the third you might want to just use Auron’s Limit when the Large Body shows up. Fight back up to the entrance to discover the way back is locked and Cerberus is here for a fight.
BOSS - Cerberus
Cerberus has a few attacks that you’ll need to dodge in order to have success. The tail spin is telegraphed, just move back a little bit to dodge it. Cerberus also jumps and will cause a shockwave, just jump over it. He also shoots balls of darkness that you’ll want to simply run away from. Target one of the heads and let him have it. Eventually Cerberus will smash his heads together which gives the Reaction Command “Evade” that leads to “Jump” and “Dog Paddle” which does decent damage and stuns Cerberus for some time.
Rewards : Counterguard (Sora), HP +40 (Auron)

Bushido is a strong Limit (left). Cerberus (right) does a stomp attack so keep your distance if he jumps.
Phils Training
Head up to the Coliseum and you’ll meet Hercules. You receive the Coliseum Map after the scene and you will want to speak with Phil in the arena. The first practice round has you get 20 orbs from pots in 90 seconds. It’s really simple and there will be more of a tutorial on the next part. The second part isn’t much harder; just focus on the large pots since they drop 30 orbs each. For completing all the training you’ll learn Aerial Dive . Approach Hercules after your training is complete.
Caverns of the Underworld
Head back to the Underworld Entrance and notice that the flames have dissipated. Open the chest for a Power Boost (1/20) then head to the Underworld Caverns. Jump off the cliff through the smoke and snag Heart #9 then fight off your new foe.
Monster - Trick Ghost
The Trick Ghost alone isn’t much of a threat but in small groups it can be annoying to deal with. Trick Ghosts fire dark energy from their mouth and not always just a single shot; sometimes three at a time and usually from distance. Up close you will have to contend with candle strikes and a violent head-whip attack. You can deflect the dark energy balls back at the Trick Ghost if you Guard against it. Other than that, use magic at range like Blizzard to counter the long range that the Trick Ghosts possess.
Hop back up the cliff and open the chest for a Mythril Shard (11/20). Head to the Lost Road where you’ll quickly discover its namesake. Clear out the Heartless in the initial area and open the chest for an Ether (13/20). At the split go left to a Bright Shard (12/20) then look right down the hall to another chest with a Mythril Stone (15/20). Defeat the Heartless and move down either path to the Two Sides #6 puzzle piece and a chest with a Mythril Shard (14/20) inside.
If you head back to where you got the second chest, there are stairs that lead back to the Entrance. Head up from here to find two chests – a Lucid Shard (9/20) and an AP Boost (10/20). If you are a crafty jumper or can aerial combo off the Trick Ghost you can reach the puzzle piece but it might be best to just come back at a later time.
Recovering the Olympus Stone
Head into the Atrium from the Lost Road. Open the chest straight ahead for a Lucid Stone (16/20) then grab Heart #4 before going up the ramp. Jump over the gap to a chest for an AP Boost (17/20) then head into the open space to fight Demyx.
BOSS - Demyx
You aren’t technically fighting against Demyx in this fight. Instead, you are fighting the water forms that he creates. You have 80 seconds to destroy 100 water forms. It seems like a tall task but these things go down in a single hit and offer the “Wild Dance” Reaction Command that helps destroy large amounts quickly. Focus on attacking then mashing Triangle when the Reaction Command appears and you shouldn’t have any issues.
Rewards: +5 HP (Sora), MP Rage (Donald), +5 HP (Goofy)
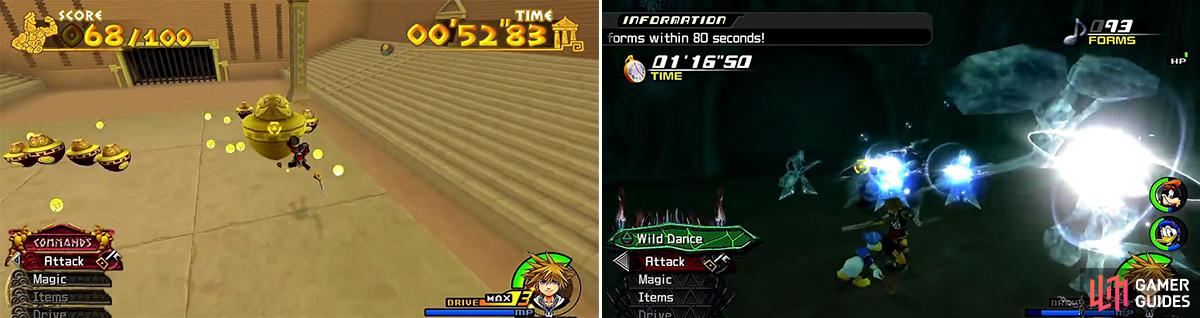
Hit the large pot (left) to obtain 30 orbs at once. Demyx (right) is an easy battle if you use Wild Dance.
You will get the Olympus Stone back and Secret Ansem’s Report 5 , along with access to the Drive Command! Demyx talks about the Absent Silhouette from before and leaves, but now is not the time. Open the three chests in the Lock to obtain the Caverns Map (18/20), a Mythril Shard (19/20), and another AP Boost (20/20). Grab the Two Sides #10 puzzle piece as well before saving your game.
Saving Olympus
Use the statue to reveal a beam of light. Jump in to save Meg, but it’s not that simple. You have to defend her while taking out Hook Bats and Soldiers and Pete too! It is not a terribly difficult fight and isn’t counted as a boss battle so just focus on the lesser Heartless then Pete. Pete is invincible with his shield up, so just ignore him. Pick up the orbs that drop from the Heartless to boost Meg’s health if it gets low. After the scene it’s time to fight Pete for real.
BOSS - Pete
This go around with Pete is a bit easier since you don’t have to protect Meg and Hercules is here to support. Take out the Trick Ghosts first and use “Bat Cry” to get in some easy damage. When Pete is alone he’ll try to use his shield, but this opens up the Reaction Command “Pinball” where you get some good damage and a stun on Pete. Sometimes Pete will summon a large boulder to crash down but just use “Aura Guard” from Hercules to avoid the damage. You only have 2 minutes, but that’s more than enough.
Rewards: Trinity Limit (Sora), +5 HP (Donald), Hyper Healing (Goofy)
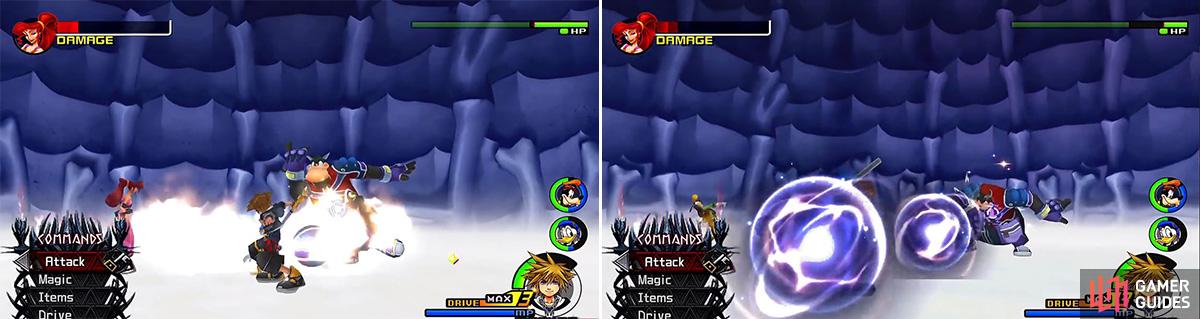
Watch out for this attack (left). Pete can also summon enemies during the battle (right).
Head back to the Coliseum Gates after you’ve saved for a battle with the Hydra.
BOSS - Hydra
This fight is based on Reaction Commands so you need to pay attention when they pop up. The battle starts with the Hydra and a singular head. It uses tail sweeps and shoots lightning balls. When it dips its head, attack it and you should prompt the “Vanquish” command. Use this to sever the head and have three more pop up in its place. Take the three heads out then listen for Phil to call Sora. Jump on the Hydra’s back and use “Phil One-Two” and combo into the “Urninator” to knock the heads silly. From here pick a head and drain its health then use “Vanquish” to get rid of it. Repeat this for the next two heads.
The Hydra will come back up with seven heads this time, so start with Valor mode when the Hydra lowers its heads to get a lot of damage in. Watch out for the swinging attacks and dark energy. You can visit Meg to the left of the Hydra, she’ll toss HP, MP, and Drive Orbs. As the Hydra’s HP gets lower it will use an attack that summons blue pillars of fire. To avoid this, use “Pegasus Run” to get several “Attack” commands. At this point you just need to deal enough damage to stun the Hydra and use “Vanquish” one last time to win the battle.
Rewards: HP +5 (Sora), Thunder Element (Sora), Gained Armor Slot (Goofy), HP +5 (Goofy)
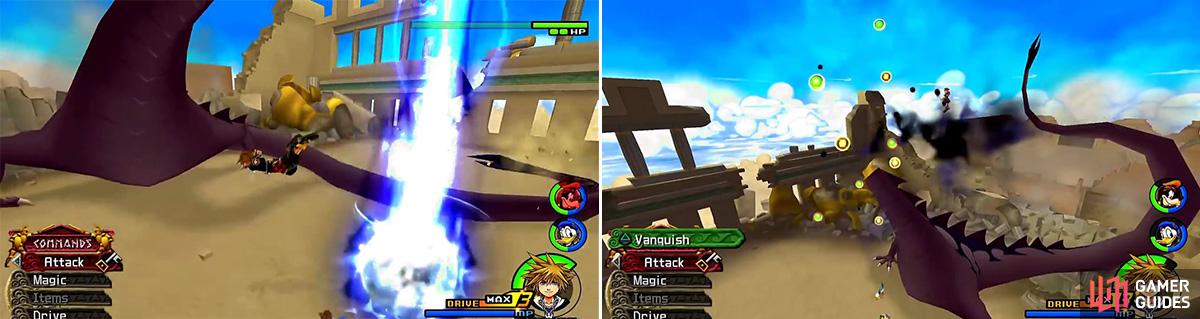
Hydra throws out bolts of energy which you should dodge (left). Using Vanquish (right) will chop off a head of the Hydra.
After the battle Sora receives the Hero’s Crest Keyblade. There is a short scene with Minnie where she calls for help. Time to provide that help by going to Disney Castle.
No Comments