Checking up on the Beast
After the initial scene you’ll be forced to fight quite a few Shadows. Once you beat enough of them Beast will come in for clean up duty. Head to the Entrance Hall after shopping at the Moogle Shop. You’ll meet a new enemy here, defeat it and exit into the Courtyard.
Monty’s Moogle Shop
| Item | Price |
|---|---|
| Ability Ring | 80 |
| Sardonyx Ring | 160 |
| Silver Ring | 160 |
| Potion | 40 |
| Ether | 120 |
| Tent | 100 |
Monster - Hook Bat
Hook Bats fly around and have a swooping somersault attack and an ultrasonic attack that you’ll need to watch out for. The attacks aren’t difficult to avoid and you’ll find it harder to hit them then dodge. Use the Reaction Command Bat Cry to swing around and deal damage to all foes in the surrounding area.
In the Courtyard you’ll find plenty of Heartless but also a few chests– a Hi-Potion (2/21), a Mythril Shard (3/21), and an AP Boost (1/21). Head back through the Entrance Hall and up the stairs to the right. After talking to Belle, open the chests for the Castle Map (4/21) and a Mega-Recipe (5/21).
Monster - Large Body
Large Bodies can only take damage from their backside or via magic. After striking it 5 times, the Large Body goes into a frenzy and charges but this can be Guarded. Doing so offers the Reaction Command Kickback then Full Swing which can instantly defeat the Large Body. If you aren’t good at timing the Guard or parry you can always rapidly use Fire to kill the Large Body.
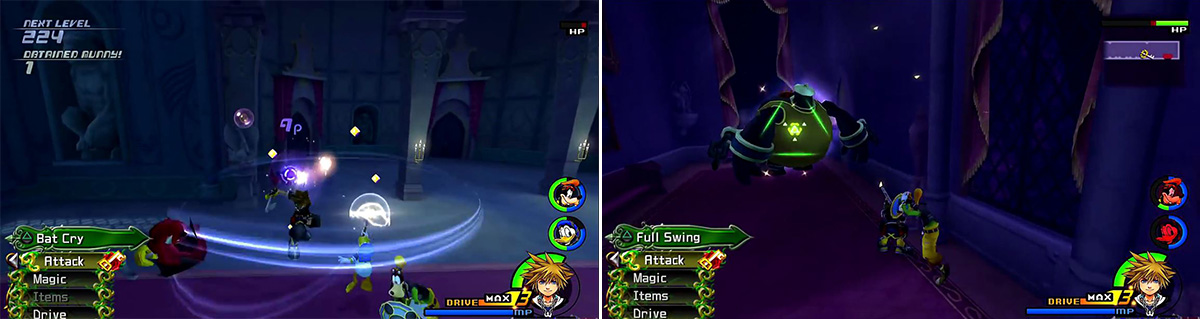
Hook Bats (left) are pretty easy to kill but come in large groups. Large Bodies (right) are very dangerous when they launch into a frenzy so watch out!
Freeing the Servants
Back in the East Wing you’ll fight a Large Body and find a chest with a Tent (7/21) inside. On your way out you’ll find a second chest with a Mythril Shard (6/21) inside. Cross over to the West Hall for a quick scene then turn around. The scene moves you past two chests – a Mythril Shard (9/21) and a Hi-Potion (8/21). To the right of the steps is a chest with a Power Shard (10/21) and to the left are two more chests– a Bright Stone (13/21) and a Mythril Shard (11/21).
Approach the dresser opposite the steps and “Move” it. You’ll have to slowly push her out of the way, just avoid using “Waken” when the Reaction Command changes. Head into the Undercroft and you’ll be forced into a boss fight.
BOSS - Possessor
Initially you’ll be fighting against the Thresholder, a Gargoyle Knight, and a Gargoyle Warrior. After they go down Hook Bats appear. Bat Cry quickly takes them out and deals some damage to the Thresholder. A second wave of Hook Bats will appear, once again use Bat Cry. The Thresholder is open for attack at this point though it can still swat you to the back of the room or unleash its dark energy to harm you. Once you defeat the Thresholder, the Possessor will float around the room. Deal a bunch of damage to it and it floats back to become the Thresholder again. Repeat this sequence twice and you will have defeated this foe.
Rewards: Upper Slash (Sora), Donald Fire (Donald), +5 HP (Goofy)
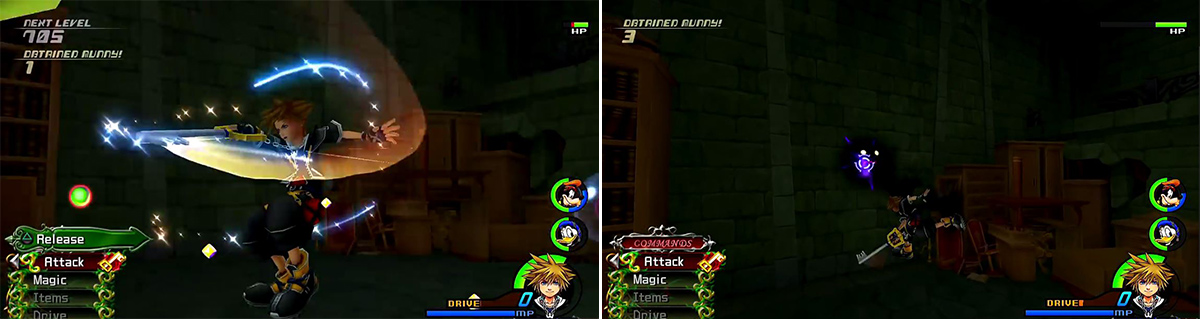
The Release command causes the real Possessor to appear where you can proceed to kill it quickly.
Turn around and grab Awakening #10 and Awakening #4 ; they are easily reached. Head into the Dungeon to meet the rest of the servants. Open the two chests for the Basement Map (14/21) and AP Boost (15/21).
Facing the Beast
Head back to the Undercroft and talk to Cogsworth. In the next room you’ll have to use the Reaction Command Sprinkle to cast off the darkness from the lanterns. Cogsworth gets tired though, so use Restore and he’ll jump back up. Between the second and third lanterns you can snag the Awakening #9 puzzle piece. Between three and four you can snag Awakening #7 . After you get all four lanterns you’ll have a short scene. Head back and open the two chests to claim a Mythril Shard (16/21) and a Hi-Potion (17/21). On your way back to the West Hall you’ll pass a chest with a Lucid Shard (18/21).
Monster - Gargoyle Knight
The Gargoyle Knight is a statue that is animated via a Possessor. It will blend in with other statues and attack out of nowhere. The Gargoyle Knight has a sword and wings allowing it to fly and swoop in for harmful blows. Among its attacks are: Multi-Slash - A triple sword slash. Drop Slash - A thrusting attack while swooping from above. Rising Slash - An upward swing while rising into the air. Reverse Slash - A double-charge and slash attack. This foe is also immune to magic so you’ll have to rely on getting close. Guard then counter for best results.
Monster - Gargoyle Warrior
The Gargoyle Warrior is a statue that is animated via a Possessor. It will blend in with other statues and attack out of nowhere. The Gargoyle Warrior has an axe and often attacks by spinning around for damaging blows. The main difference between this Heartless and a Gargoyle Knight is its lack of wings and an axe in place of a sword. Among its attacks are: Tomahawk - The Gargoyle Warrior flings its axe. Bamboo Splitter - A vertical spinning double-slash. Spin Attack - A constant spinning attack. Like the Gargoyle Knight, the Gargoyle Warrior is immune to magic so you’ll want to Guard then counter.
Grab the AP Boost (12/21) and defeat the Gargoyle Knight. Head to the West Wing and clear out the Heartless. Open the chest for a Tent (20/21) then grab the Heart #12 puzzle piece. Open the chest atop the steps to claim the Mythril Shard (19/21) then head to Beast’s Room.
BOSS - Beast
This isn’t really much of a battle. During the battle use Cogsworth’s Reaction Command “Wake Up” and it will stun Beast allowing you to hit him. Beast will attack with slashes and bites and occasionally uses a roar that puts Cogsworth out of commission. Once you’ve drained Beast’s health use Cogsworth again and then mash Triangle to fulfill the “Charge” Reaction Command and end the fight.
Rewards: Gained Armor Slot (Sora), +4 HP (Donald), Defender (Goofy)
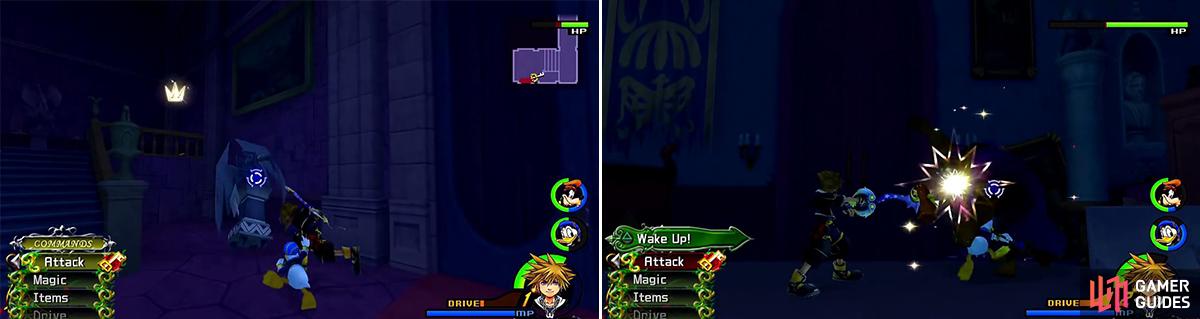
The Gargoyles (left) are quite powerful and can appear out of nowhere. Beast (right) is a simple fight. Use Cogsworth to stun him and then attack.
Mending a Relationship
Open the chest to get a Blazing Shard (21/21) then get Awakening #6 , it should be your last one for this puzzle. Head back to the Entrance Hall where you’ll meet a new enemy.
Monster - Lance Soldier
The Lance Soldier isn’t hard to defeat but its attacks are quick and can quickly deal a lot of damage. The rush attack can be countered with the Reaction Command Lance Tug which is useful for quickly taking one of these Heartless out. In a group the Lance Soldier can be a nuisance with its spinning attack. This is undoubtedly its most powerful attack since it becomes impossible to move while you are caught, leaving you open for a chain of attacks. Use Blizzard and Thunder to quickly take them out in groups or you’ll get hit with Reckless Lancing. Of note, the Lance and Soldier are actually separate from one another though the Heartless is considered a single being.
Level up out in the Entrance Hall if you want then enter the East Wing and then into Belle’s Room. Approach the dresser then head to the Ballroom for a boss fight.
BOSS - Shadow Stalker and Dark Thorn
During the phase with the Shadow Stalker it will possess either the wall, chandelier, or columns. When it takes over the wall, get to the sides behind the columns to avoid taking damage. When it takes over the chandelier, run around it tightly to avoid the energy beam then strike to defeat it. When it takes over the columns you’ll have to find the one it’s on and avoid the flailing. Lastly, Shadow Stalker can emerge from the floor, you just have to time your jump away from it. Once you defeat its possession you’ll get the “Release” command to which you can strike it. Once defeated, the Shadow Stalker becomes the Dark Thorn.
Dark Thorn is more straightforward in that the battle isn’t constantly gimmicks and Reaction Commands. You want to focus on attacking it while it is invisible to draw out the Reaction Command “Stepvault” which leads to two more commands that allow you to smash into it and make it visible. If it spins at you just get out of the way or use the Reaction Command to hit him back. Using Limits and Valor Form are a surefire way to a quick win.
Rewards: HP +5 (Sora), Retaliating Slash (Sora), HP +4 (Donald), Item Slot (Goofy), HP +35 (Beast)
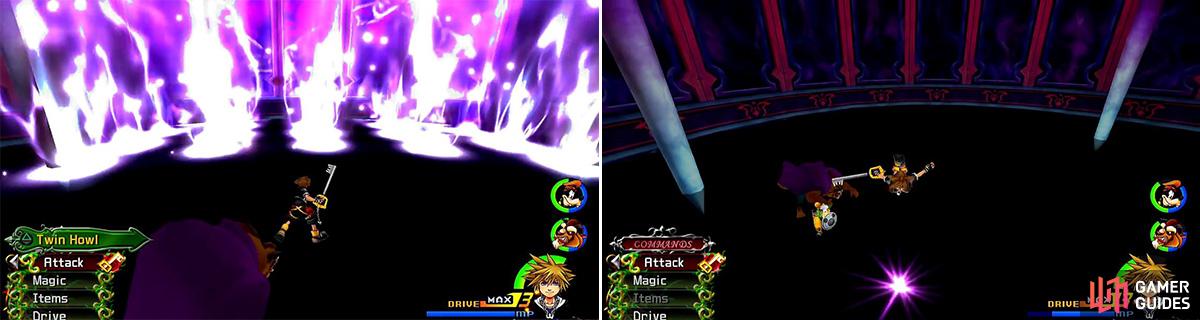
The Shadow Stalker (left) can shoot out light beams that need to be dodged. It can also appear from beneath you so jump away when you see the light (right).
After the battle you’ll gain the Cure element and be taken back to Hollow Bastion where you are forced to visit 100 Acre Wood.
No Comments