

Cauldron XI
Now that you’ve knocked out Redmaw and did a bit of exploration of the southwest, it’s time to wrap things up here. Return to the campfire right next to the Tallneck you just liberated and follow this path to the west, ignoring any deviations that head northish. The path itself will curve a bit northwestern, then it will curve to the south, which is where you will want to go. Keep to the south and continue in that direction until you discover both a campfire and Cauldron Xi, your destination.
You’ll find things a bit different with this one, as the place is overrun by Eclipse cultists. There are probably around eight or so cultists out front, one of which is packing a Deathbringer Gun, so either stealth your way around or go with an all-out fight. Note that there are quite a number of Blaze barrels scattered about for your explosive pleasure. When they’re all dead, loot an Excavation Key and use the ramps to reach the entrance to the Cauldron and enter inside.
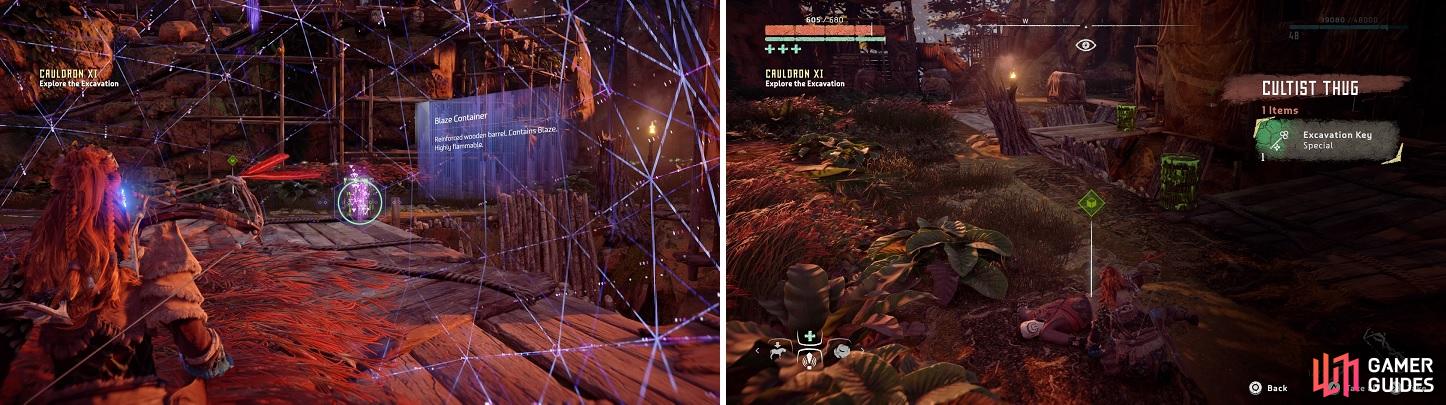
There are a lot of blaze containers around the area to help in fighting the cultists (left). You need an Excavation Key to enter the Cauldron (right).
This place is definitely not like the others, as both Mother Nature took over, as well as the Eclipse. Follow the path set before you, taking out the two goons that are patrolling, until you reach a slightly open area with three more enemies. These cultists aren’t too close together, so you should be able to sneak into a spot where you can snipe them with a headshot. Continue on after that and you will come to the first big area of the Cauldron. You will be at the top of some scaffolding, with a bunch of Eclipse in the area below.
In order to reach the area below, though, you’ll need to use the rappel point, as you will likely die if you drop down without that. However, before you do that, mark the targets that you can from your current spot and try to get a clean shot on them, which should help eliminate any chances of being seen as you rappel down. Essentially, treat this place like a bandit camp and you should be fine, although there aren’t any hostages or alarms. When you do rappel down and start heading west, you will see the large number of enemies with which you will have to kill.
It’s probably in your best interests to avoid alerting the Eclipse to your presence, solely based on numbers alone. If you see any with canisters on their back, shoot the canisters with fire arrows to make them explode in a few seconds. Keep killing your way to the west, where you will find the exit to the next area. There won’t be any more enemies here, so just continue southwest until you come across a cave-like area, making sure you avoid accidentally falling into the large hole in the ground along the way.
Here, you want to look for the ledge that has some yellow rope, letting you progress further. This will lead you to the Cauldron Core, where you will find a Stormbird! Ok, not really, as there will just be more cultists, including one with a Deathbringer Gun. If you can, snipe them from the entry hallway to avoid causing trouble for yourself. Remember that if you an opportunity to take out multiple enemies by shooting a blaze container, don’t hesitate to let that opportunity escape you. Also, memorize the location of that Deathbringer Gun, as you will be needing it shortly.

Before overriding the core, lay down some traps (left). The Deathbringer Gun will help in defending the core (right).
When the coast is clear, go and override the Cauldon Core, only things are a bit different this time. Your objective will be updated to defending the core, as a bunch of Eclipse will storm into the area. This is why you will need that Deathbringer Gun, as it makes short work of them, especially any new Deathbringer Gun enemies. To matters even worse, machines will begin appearing, like Scrappers and Watchers, but the biggest threat will definitely be the Ravager. The only upside of this chaos is that the Eclipse and the machines will be distracted by each other, giving you a chance to possibly get another heavy weapon.
Have a looting bonanza after the battle is over, then look for the ramp that lets you get to the upper area that allows you to escape the core room. On your way back to the main entrance of the Cauldron, you will encounter a lot more enemies, likely more than on your way in. In fact, in the very first room after the core, there will be more cultists and even some Stalkers. You can lure the Stalkers to a certain position by shooting their signal flares on the ground, although whether they uncloak or not is random.
As you make your way east, there will be a few more cultists, including one elite, and two more Stalkers. After taking them down (or just bypassing them), look for the discharge pylon that you can climb, letting you get to the ledge above, where another fight will break out. This time, it will be Scrappers, Watchers and more cultists. Let them fight it out, then slowly make your way to the exit, which isn’t far now, knowing you’ll encounter a few more cultists on the way out. Once you get outside, you’ll be finished with Cauldron XI, despite the battle going on between more cultists and machines. You can now override Stalkers, Behemoths, Glinthawks, and both kinds of Bellowbacks.
| Objective | Reward |
|---|---|
| For overriding the Cauldron XI Core | 8,000 XP / XI Overrides / +1 Skill Points |
Metal Flower
Return to that campfire just southeast of the Tallneck and head to the campfire you see to the northwest. From that campfire, go west past the first fork and then north at the second. Right as that path goes northeast now is a rock wall with some handholds you can use to climb it (there are handholds on the southern and western sides of this large rock formation, too). At the top, you will find three Glinthawks fluttering about, so kill them and return to the ledge where you came from. Go west and look for a big rock to your north, which is where you’ll find the Metal Flower - Mark III (F) .
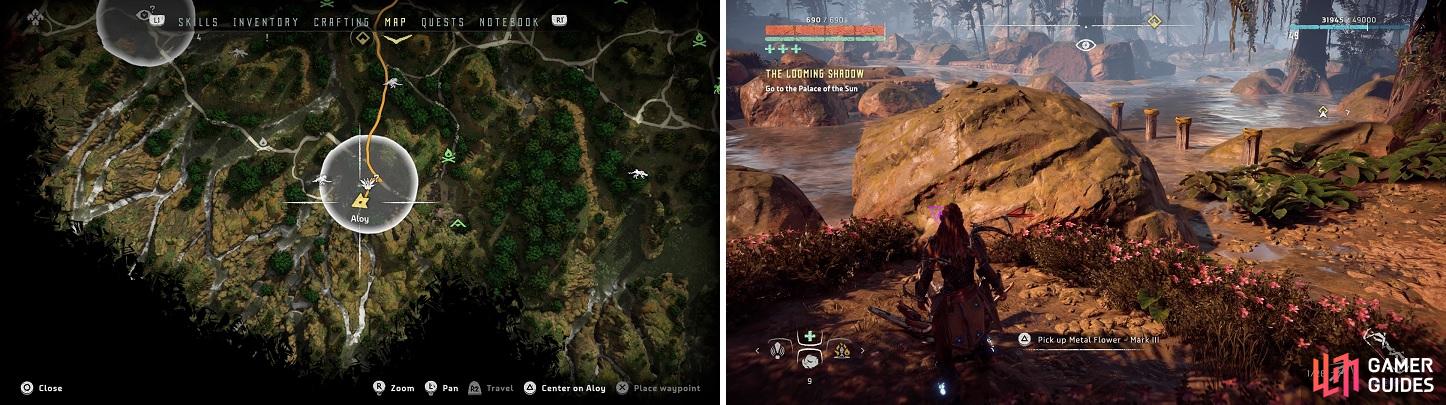
The location of the Metal Flower, both on the map (left) and in-game (right).
Metal Flower
Return to the entrance of Cauldron XI, as this Metal Flower is located close to it. Take the western exit to find a Freeze Bellowback site, so it might be a good idea to take those out so you can freely search the area. In fact, as soon as you exit Cauldron XI’s little outside area, look to the west with your Focus to see the Metal Flower not too far. It’s very close to some wooden poles that you can use to cross the water. Pick up Metal Flower - Mark III (D) and return to the campfire just north of Cauldron XI.
Blackwing Snag Bandit Camp
Go north from the campfire, ignoring the paths heading west, and continuing north to the Charger Site on your map. Eventually, the path will take a turn to the northwest, which is the way you want to go. Keep going to the northwest to find a campfire, then follow the path to the west as it will bring you to the southern side of the bandit camp. You’ll have a hard time hitting anyone from where you are right now, so sneak into the encampment by the way of the water and quickly find the tall grass up the hill a little bit to the northeast.
If you remain unseen, then you should be right in front of the alarm, so disable it by putting an arrow through it and scout the place out. There should be an elite enemy that crosses right by you, as well as another enemy by the western gate. Start making your way to the north to find a few more isolated guards, then look for the “bridge” that connects to the separate area to the north, where you’ll find a few more bandits. That should only leave one concentrated area, which is by the campfire.
Blackwing Snag can be a bit confusing in navigating.
Stick to the bridge path and head southeast or so to find a path leading to an elevated area. Be careful of the enemy or two up here, then look around a bit to find it’s a perfect spot to get the remaining bandits. Some might be walking around and others might be a little too close to each other, so you can distract them by tossing rocks or using Lure Call. Once you’ve killed everyone, the camp will be liberated and it will be populated with the usual merchant and other people. Also, if you’ve been following this guide, then will be the final bandit camp!
| Objective | Reward |
|---|---|
| For clearing the Blackwing Snag Bandit Camp | 10,000 XP |
Cause for Concern - Farewell
Since you’ve cleared all six bandit camps, Nil should appear just outside the northern part of the camp. Go and talk to him to find out he’s a bit disappointed there aren’t any bandit camps left in the world. He says he will meet you on top of a plateau south of Meridian and if you look at your map, it’s a place you’ve already been to, just northwest of the Tallneck in Spearshafts. Since you’ve been there already, you can just fast travel to the campfire on the plateau.
Talk to Nil and it appears he’s brought you out here for a duel, to the death, of course. Whether you accept or not is entirely up to you, with the quest finishing either way. Deny him his duel and the quest will end right then and there. Accept his duel (you have to do it twice) and it’s time to fight. Nil has a sling that fires shots that behave similar to the Watcher’s blinding blast, and Nil also has a bow and arrow that is probably his most dangerous asset. His melee attacks, while very strong, are very slow and easy to dodge. He doesn’t have too much health, so it shouldn’t take long to down him. Talk to him after to put an end to this sidequest.

If fighting him, Nil will almost always start by attempting to blind you (left), then follow up with melee attacks (right).
| Objective | Reward |
|---|---|
| For accepting his duel and defeating Nil | 5,000 XP |
Vantage Point
Fast travel back to Blackwing Snag and take the southwestern exit out of the liberated camp. Keep following this path past a campfire, until you see what looks like a town or outpost in the distance. Approach the place and you’ll see some people fighting two Behemoths. This is Sunstone Rock, so take it on your good self to help out in subduing these massive beasts. The easiest way to do this is while the Behemoths are distracted by the NPCs, target their Freeze Canisters on their backs with freeze arrows.
Once you’ve hit them, they will explode and freeze the machines, making them much easier to kill because of the increased damage you deal to them. When you fell both of them, the Sunstone Rock sidequest will automatically start. Well, you’ll be getting to that shortly, as there’s a Vantage Point nearby that you can grab. From the entrance to Sunstone Rock, take the road going east just a little bit to the edge of the actual place. There will be some handholds here that lead to a zipline, which will bring you to the Monument Valley Vantage Point .
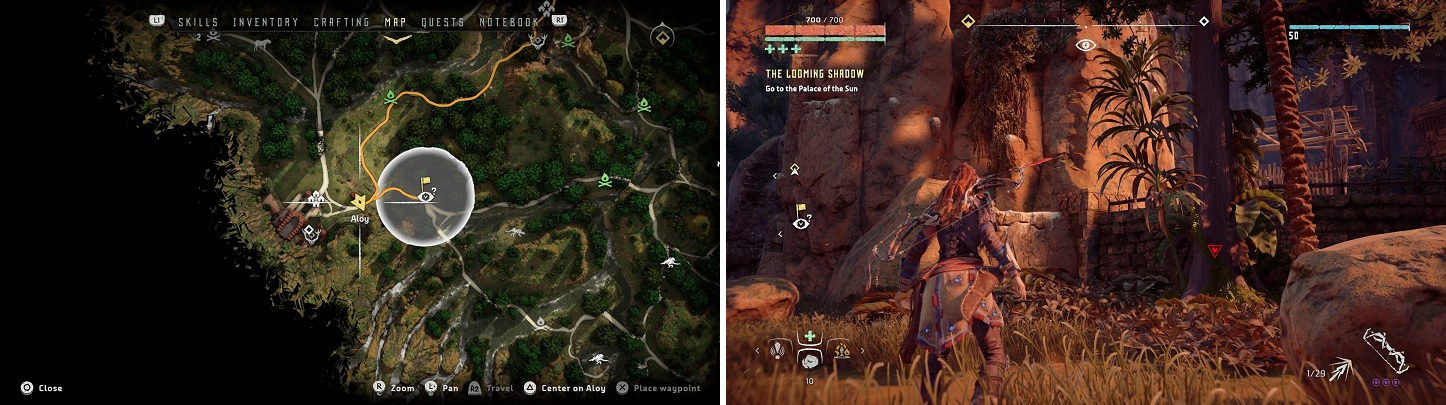
The location of where you need to start climbing to reach the Vantage Point, both on the map (left) and in-game (right).
Sunstone Rock
Rappel down from the Vantage Point and return to Sunstone Rock, entering a side entrance and speaking with Janeva. It appears three dangerous criminals escaped during the Behemoth onslaught and Janeva wants you to track them down for her, as she needs to stay in Sunstone Rock. She’ll give you a lead on all three of them, with Ullia being the closest. Funny enough, she can be found inside of Blackwing Snag, which you’ve liberated not too long ago. She is on top of a lookout point, talking to some people, which makes her incredibly easy to sneak up on to kill. Talk to her after, then be on your merry way to the next target.
Rasgrund will be next and will require you to do a little bit of running to reach. Fast travel to the campfire just southwest of Meridian Village and follow the road as it goes west/northwest. Continue past a Corrupted Zone and as the road starts to bend to the southwest, go straight south into the woods to find what looks like a cave. You will want to be extremely careful here, as Rasgrund has set up some proximity traps, so use your Focus to find and shoot them from afar.
Not far into the ravine, there will be some handholds you can use to climb to a rope you can cross. Follow this path to the south/southeast to more handholds, then you’ll spot a gap you need to jump over. Go south and before you jump into the waters, there will be another trap. Look southeast to spot more, then swim to that location, climbing out of the water and crossing a log. Use this ledge to get any more traps, then look for the handholds on the opposing wall, which will get you to the platform that Rasgrund is on. Of course, he decides to go out with a bang than be arrested again.
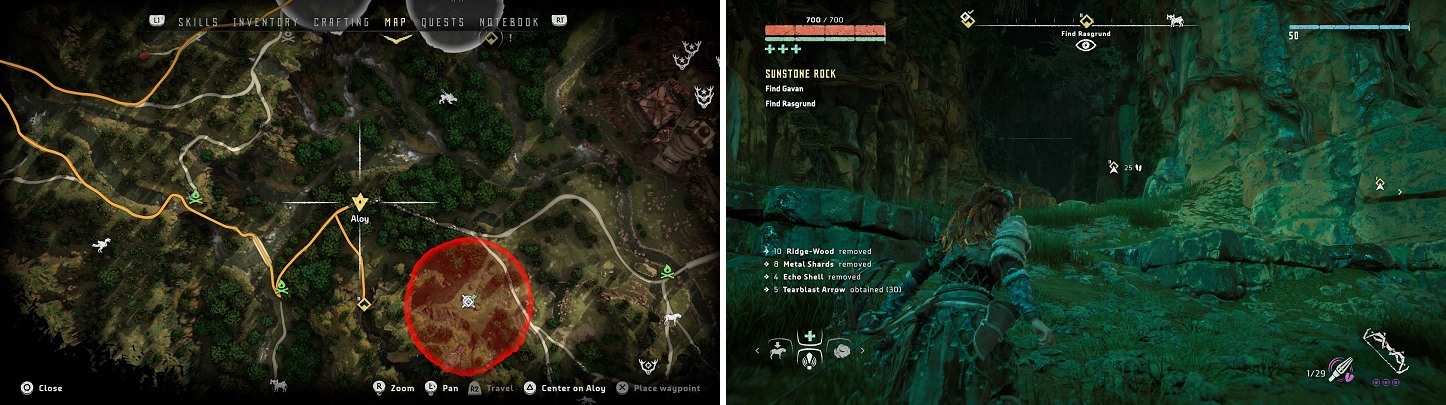
Go south from the location on the map (left) to find the entrance to the valley where Rasgrund is located (right).
The final escape prisoner, Gavan, is in Brightmarket, a village to the northwest of Meridian. When you enter the village, Aloy suggests speaking with the Innkeeper, who doesn’t seem obvious at all that he’s hiding something. Investigate the inn by exiting to the north and using your Focus to find some manacles by some rocks. Examine them and highlight the trail that goes southwest. This will lead you out the southwestern exit and to some building west of the village. It seems some bandit friends found Gavan and are holding him hostage. Kill them all, then speak with Gavan. That’ll be all three prisoners, so return to Sunstone Rock to put an end to this quest by talking with Janeva.
| Objective | Reward |
|---|---|
| For tracking down the escaped criminals | 6,670 XP / +1 Extraordinary Reward Box |
No Comments