| Banuk Figurines |
|---|
| Banuk Artifact - Punishment |
| Metal Flowers |
|---|
| Metal Flower - Mark I (H) |
More Machines in the Mountains
Exit the Hollow Fort Bandit Camp via its southwestern gate and follow the road beyond in a westerly direction, past a Bellowback Site (north of the road) and a Broadhead Site (south of the road). Eventually you’ll discover a Campfire south of the road, which is a good place to rest up before you venture into the snowy slopes to the north. When ready, follow the road north, then west and head across a bridge to reach a fork, at which point turn north past a Lancehorn Site.
What’s a Lancehorn? Another herbivore-mimicking machine like the Strider, Charger and Broadhead. Like them they’re prone to charging, and have ample defense in melee, as well, they’re more aggressive then most small machines, however, so don’t expect them to bolt when spooked. You can dislodge their Drill Horns with Tear damage, or you can target their Freeze Canister, which, like a Blaze Canister, will explode if struck with the right element - in this case, Freeze damage. Other than that, just be wary of their relatively high durability - they may well survive a Silent Strike, and if so, you’ll need to quickly follow up with a fast attack to finish them off.
When you’re done picking on Lancehorns, continue following the road west, then north past a Charger Site. You’ve encountered Chargers before, but these ones, fortunately, aren’t corrupted. They’ll be a little less aggressive, but you can expect them to take more than one Silent Strike to bring down, unless you’ve invested in the Strong Strike and Strong Strike + skills. East of the Charger Site you can find a Shell-Walker Site, if you feel like picking on some robo-crabs. More interestingly, northwest of these machines you’ll find another Campfire with a merchant nearby, if you want to save your game and offload some junk.
Continue northeast along the road until you reach a fork, at which point turn east and follow the road until it turns north. South of this bend in the road you’ll find another Campfire (generous, aren’t they?) which is worth approaching for the fast travel potential if for no other reason. When that icon turns green on your map, return to the trail and make your way along it as it runs north, then northeast until you reach another Charger Site. These mountains are positively infested with machines, it seems.
Turn north and keep following the road uphill, but be wary of a Bandit ambush, as several ruffians may burst out from the cover of high grass and turn the tables on you, for a change. The advantage of surprise probably won’t help them much, however, as they’re contemptible weaklings. Dispose of them and continue north until you find a Campfire near the road, next to a Metal Flower map marker… there’s also a new enemy prowling these peaks.
Ignore the scavenger hunt for the Metal Flower for a moment and continue north of the Campfire to find a lake, where a Glinthawk Site can be found. Glinthawks are, in fact, more akin to vultures as far as how they fit into the robot ecosystem - like Scrappers they recycle disabled robots. They also fly, which makes them instantly annoying, as far as foes go. Glinthawks have three main attacks, two of which involve shooting icy projectiles. In one case, they’ll fly in a line and drop ice projectiles as they fly overhead, while they’re also capable of hovering and shooting such projectiles directly at you. In either event, not only will a direct hit cause harm, but the ground where the projectile lands will remain frozen for a while damaging Aloy if she enters the area. Their other attack is a dive body assault, which can usually be dodge fairly easily.
As for bringing them down, you can target the Beak to deal damage and disable scavenging, or you can aim for their Freeze Sac, located on their neck. Destroying this will cause an explosion and prevent them from using their projectiles. A far simpler method, however, is to just pelt them with Fire Arrows, which they’re weak to. Hit them with enough fire damage and they’ll plummet gracelessly from the sky, where you can continue to punish them with your spear. Repeat until victorious.
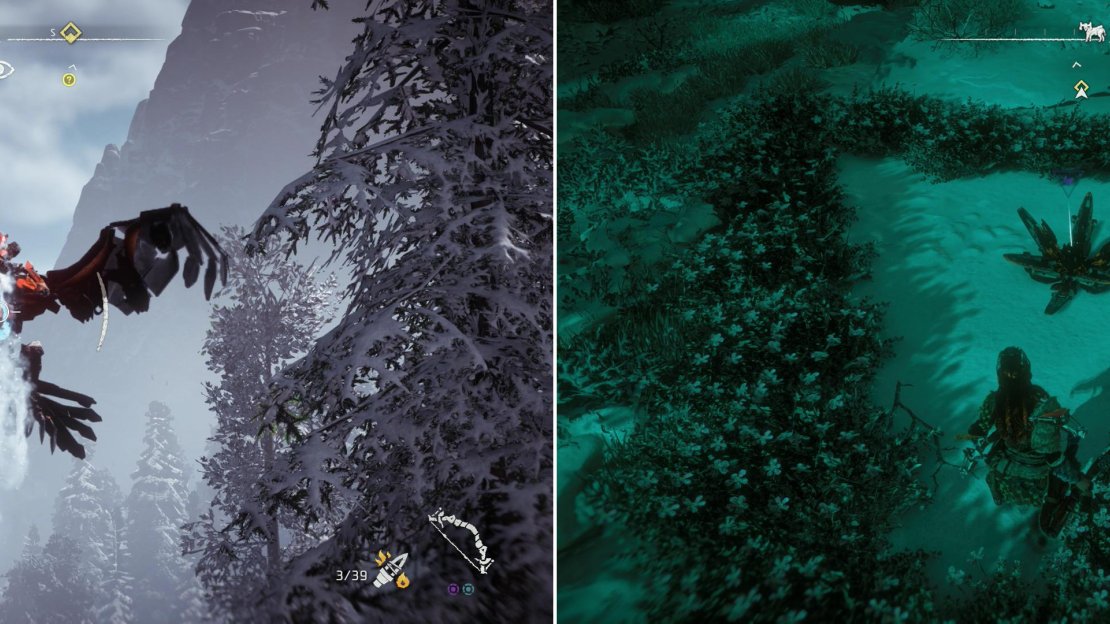
A few Fire Arrows will knock a Glinthawk out of the sky… at least temporarily (left). Search south of a Campfire to find Metal Flower - Mark I (H) (right).
Metal Flower - Mark I (H)
When the Glinthawks are dispatched, search southeast of the Campfire nearby to find Metal Flower - Mark I (H) , sitting right out in the open. There’s little else to see along this path - to the west of the Campfire is a Merchant you can do business with, while if you follow the road north you’ll find a bunker, “The Grave-Hoard”. Not only can you not get into this place yet, but given the spooky name, you probably don’t want to, either.
That being the case, return back south to the fork, either on foot or by fast traveling to a Campfire, then take the western path this time. Turn northwest when the road does and eventually as you continue uphill you’ll run across another Glinthawk Site. West of this Glinthawk Site is a Lancehorn site, which is home to a massive herd of the machines, while further west still is another Glinthawk Site… which is to say, not much worth seeing.
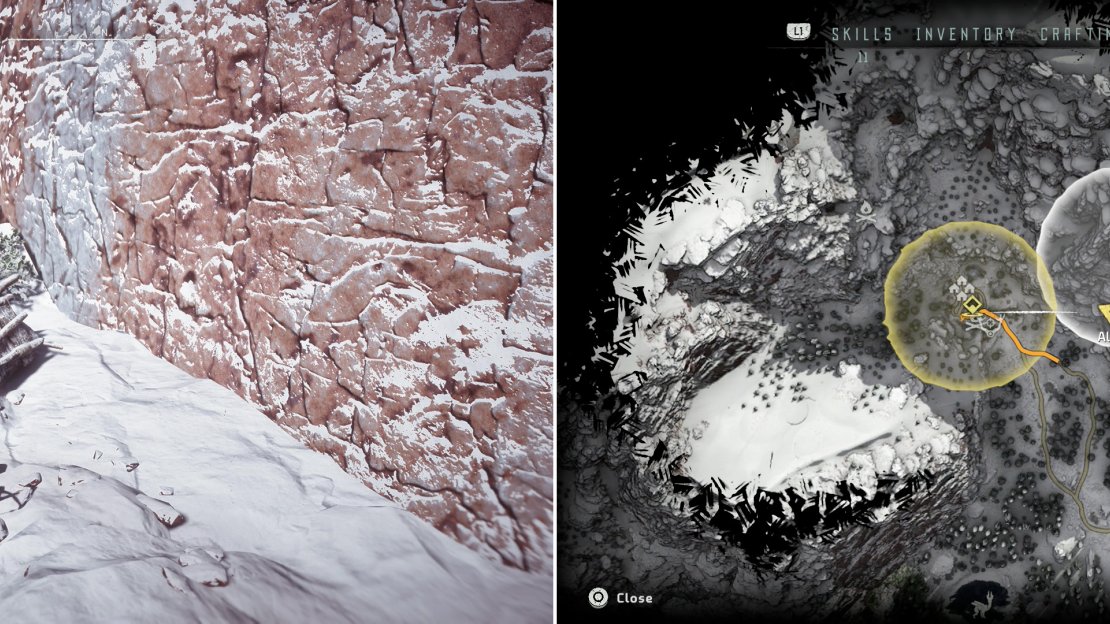
Climb the painted cliffs to find the Banuk Artifact - Punishment (left) at the location indicated on the map (right).
Banuk Figurine - Punishment
Continue along the road north of the Glinthawk site and you’ll eventually reach a fork… and you’ll spot some obvious signs of tribal civilization. Ignore the latter for now and head up the road to the northeast, and when this road turns northwest, continue northeast to find some painted cliffs. Climb near the painted symbols on the cliff and when you reach a ledge, jump onto a taut rope between two poles, then from there jump northeast onto another rope which serves as a handhold on the nearby cliff. Ascend the stone pillar, leaping across some poles and onto another ledge, then turn west to leap to the top of the stone pillar you were climbing a moment ago. From here, ascend a wooden pole and use its hand-holds to reach a scalable cliff to the north. Climb until you reach the top of this particular cliff and head northwest to find Banuk Figurine “Banuk Artifact: Punishment” sitting on a humble wooden shrine, then use the nearby zipline to get back do the ground… or, rather close enough.


No Comments