

Bandit Camps are just as they sound, congregations of enemy bandits that can be found around the map. Your goal in each one, of which there are six total, is to basically eliminate all of the bandits inside by any means necessary. Each bandit camp has two staples, besides the bandits of course, to them, an alarm and prisoners. The alarm is detectable by your Focus and is some kind of electric pole with a green sac hanging from it; shoot this green sac with an arrow (preferably a precision arrow) to destroy it.
Prisoners are held by the bandits in cages and you can free them by just walking up to them and holding the designated button. Once freed, the prisoners will go around and attack the bandits of their own free will, but you don’t get any extra rewards for freeing them and they can cause more problems than not. Upon killing all of the bandits in a camp, it will be liberated and two things will happen. The camp will spawn a merchant and you will be able to use it as a fast travel point.
Devils Thirst Bandit Camp
You will likely get an inkling of these as you go north from the Main Embrace Gate and happen upon a campfire with a merchant. Just north of that campfire will be someone named Nil, who asks you to help him with taking down a bandit camp. This particular camp is located to the north, in the Devil’s Thirst area. Nil can be found just outside the camp, to the west, overlooking it. Talk to him to get an overview of the camp, showcasing the alarm and a cage with some captives.

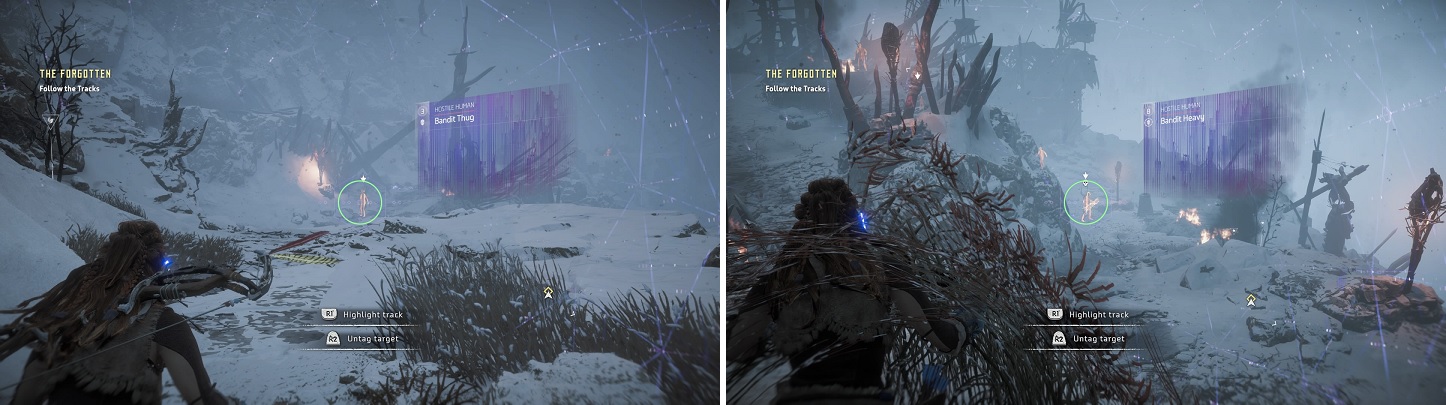
All bandit camps have an alarm that can be shot to disable it (left). They also feature prisoners that can be set free (right).
If the bandits sound the alarm, that means you’ll have to fight more of the thugs. Should you manage to release the prisoners, then they will help you in fighting off the bandits. It’s optional to do either of these two things and there’s no extra reward for doing them, so it’s up to your discretion. There are two ways to approach the bandit camps, either doing them stealthily or run in with bows blazing, literally or not. The former is a better approach, as it limits the damage you will take yourself, so start off by picking any stragglers near the bridge.
Being able to mark your targets and see where they are with your Focus will help a lot. Once you thin the herd a bit, the first thing you should do is disable the alarm, which you can do by simply shooting it with an arrow. Note that saving a prisoner will likely make it so the others will be alerted, since the prisoner will freely attack without abandon. The bandits inside the ruins might be trickier to kill, unless you can manage to draw them out. Once all of the bandits are dead, speak to Jom, who will ask permission to move in with some others (it doesn’t matter and they will move in regardless). Speak with Nil outside of the camp to get your reward.
| Rewards |
|---|
| 5,000 XP |
Hollow Fort Bandit Camp
This bandit camp is located northwest of Devil’s Grief and is recommended as level 25. There are a few noteworthy things about this, such as some enemies taking more than one headshot to kill, who are marked with a skull when you tag them. These are considered leaders and cannot be stealth killed without the Leader Strike skill. There is one Bandit Heavy that has a Firespitter weapon, which can deal some heavy damage if you are unprepared.
The prisoners, when freed, do make for some nice distraction, but if you’re keeping to the shadows, then they will make it difficult to do that, since they head straight out into the open with no concern for their lives. If you have the Sharpshot Bow and the Double Shot skill, then loading two arrows at the same time into a leader’s head will usually kill them. One thing you should always do in a bandit camp is disable the alarm, simply by shooting it with an arrow of some kind.
| Rewards |
|---|
| 15,000 XP |
Two-Teeth Bandit Camp
You will find this bandit camp not too far southeast from Daytower; it’s in the mountains there. As usual, the bandit camps are pretty much all the same, but you might have an easier time approaching this from the northernmost road that is going to the camp from the west. There is a single bandit up here and it will lead to some high ground, where you’ll find the alarm and the prisoners, should you wish to rescue them, which you probably don’t since they can blow your cover.
Keep to the top at Two-Teeth to gain a height advantage (left). Be careful of the elite here, as he carries a powerful weapon (right).
All of the enemies you face will be normal bandits, except for one Bandit Heavy that is equipped with a heavy weapon. So, you will want to clear out the upper area and then use that higher ground to start taking out the ones below you. This is a fairly easy bandit camp, due to the slight separation of altitude, lack of elite enemies and just limited numbers of bandits, so you should have no trouble at all with clearing the place.
| Rewards |
|---|
| 7,500 XP |
Gatelands Bandit Camp
West of the Copper Deeps Tallneck will be this bandit camp, which has multiple approaches to it. By far the best approach will be on the southern side, where you can find some ledges to grab to reach the southern wooden wall. From this position, it is possible to pick off a few of the bandits, including a sniper on said wall, as well as the alarm for the camp. Once you’ve exhausted your options for targets, enter the main camp and tag the rest of the bandits.
You’ll notice that all but one of them are ordinary bandits, so one headshot with a Precision Arrow will take them down. The Bandit Heavy is the one with a skull under its tag and is equipped with a Firespitter heavy weapon, so if you get seen, quickly take out this bandit to avoid taking big damage. Overall, the camp is fairly easy and shouldn’t take too long to clear it.
| Rewards |
|---|
| 10,000 XP |
Shattered Kiln Bandit Camp
You will find this bandit camp to the south of Maker’s End in the northwest corner of the map. You will likely be approaching this camp from the southeast, where you should notice two bandits in watchtowers, who you can easily pick off from outside of the camp with precision arrows. One thing you will notice is that there are many more Elite bandits at this camp, which was something similar to the Hollow Fort Bandit Camp.
Circle the perimeter of the camp, picking off any stragglers or bandits in towers, and when you get to the northwestern side, you will find the alarm. Once you’ve feel satisfied with the perimeter of the camp, sneak inside and start going after the other bandits. If you have the Triple Shot skill, that combined with precision arrows will pretty much one-hit kill an Elite if you headshot them. One of them is equipped with a Firespitter, so be careful if you do alert them.
| Rewards |
|---|
| 15,000 XP |
Blackwing Snag Bandit Camp
Northeast of Sunstone Rock in the southwestern portion of the map is where you will find this bandit camp. In fact, approaching the camp from the southwest of it is ideal, as there are only a few bandits guarding that entrance, plus the alarm is not too far inside. The rest of the camp shouldn’t be too hard, but there is an elite enemy inside you need to keep an eye on.

Approach Blackwing Snag from the southwest (left) to easily access the camp alarm (right).
There is a slightly isolated section that requires you to cross a “bridge,” which shouldn’t be too hard to find. One area you will have to watch out is around the campfire, as there will be a lot of bandits here. Also, be on the lookout for enemies above you, which you can use to gain a good advantage over the main areas of the camp.
| Rewards |
|---|
| 10,000 XP |
No Comments