

| Text Datapoints - World |
|---|
| Special Orders |
| Vantage Points |
|---|
| Vantage - Air Combat Museum |
Challening the Nora Hunting Grounds
Before continuing to the north, let’s clear out the last few areas worth exploring to the south. The first stop you can consider making is the Nora Hunting Grounds, which are northeast of the Main Embrace Gate, between who Campfire which are more or less equidistant from the Hunting Ground. Fast travel (or run) down there, and if it’s your first visit be sure to smash Training Dummy XIV and Training Dummy XV. Once done picking on decoys, talk to the keeper, who will tell you a bit of backstory before getting down to business: presenting you with the Hunting Ground challenges.

You’ll find more Training Dummies to smash near the Nora Hunting Grounds (left). Talk to the Nora Keeper to learn about the individual trials (right).
There are three trials you can undertake here - the “Parts Alone Trial”, the “Logpile Trial” and the “Blast Wire Trial”, each of which charges you with completing a specific task in a specified time. The fast you do it, the better mark you’ll earn. The better mark you earn, the better your reward will be. The best reward (+1 Skill Point), of course, can be earned by getting the best mark in all three trials. The trial times and their rewards as as follows:
| Parts Alone Trial Time | Reward |
|---|---|
| 20:00 | Half Sun Box |
| 2:00 | Full Sun Box |
| 1:30 | Blazing Sun Box |
| Log Pile Trial Time | Reward |
|---|---|
| 20:00 | Half Sun Box |
| 5:00 | Full Sun Box |
| 2:00 | Blazing Sun Box |
| Blast Wire Trial Time | Reward |
|---|---|
| 20:00 | Half Sun Box |
| 6:00 | Full Sun Box |
| 3:00 | Blazing Sun Box |
Obviously there are some good rewards to be had here, but be cautioned: You will be expending real resources attempting these trials. If you don’t have the right weapons or ammunition, you’ll need to craft them, and if you fail a trial (or rather, fail to exceed a previous mark), you’ll lose whatever tools you expended in the process. Also, the machines in the trials aren’t going to play along - expect the Watchers to bother you while you go about your task, and the Grazers flee if alerted, just as normal… in fact, that last bit is rather required for two of the trials. Fortunately there’s a Campfire nearby, and there’s no shame in save/loading if you feel stingy. Plus, you can loot the machines you destroy in the process, and you will be getting the normal XP along the way, so it’s not all loss. With that out of the way, onto the trials.
Parts Alone Trial
This trial is rather straight-forward, you need only hop down the nearby zipline and take cover in the tall grass where you land. Ahead of you should be a herd of Grazers chaperoned by some Watchers. Your goal? Shoot off ten Blaze Canisters. Each Grazer has four, but you should only take one shot at each Grazer. After hitting one, it’ll become suspicious, and if you shoot again, they’ll likely turn hostile and stampede off, forcing you to waste time dealing with Watchers and chasing the Grazers down. Use the Hunter Bow and Double Shot or Triple Shot if you have it. Those two skills really are helpful, as they’ll allow you to remove several Blaze Canisters per shot. Once you’re close to the ten total, be less frugal and just try to remove the last few, even if it involves shooting already suspicious machines. Naturally skills like “Concentration”, “Concentration +” and “Faster Reload” will come in handy.
Logpile Trial
Spook Grazers with the Blast Sling’s Blast Bomb (you’ll need to buy one if you don’t have it), then sneak, mark their location, and shoot log piles with your Hunter Bow to collapse the logs onto the robots. It sounds simpler than it is, especially since the Grazer are often fond of running down the northern-most ravine. Anticipate this and make use of the log traps there - picking the right moment is far more important than rushing.
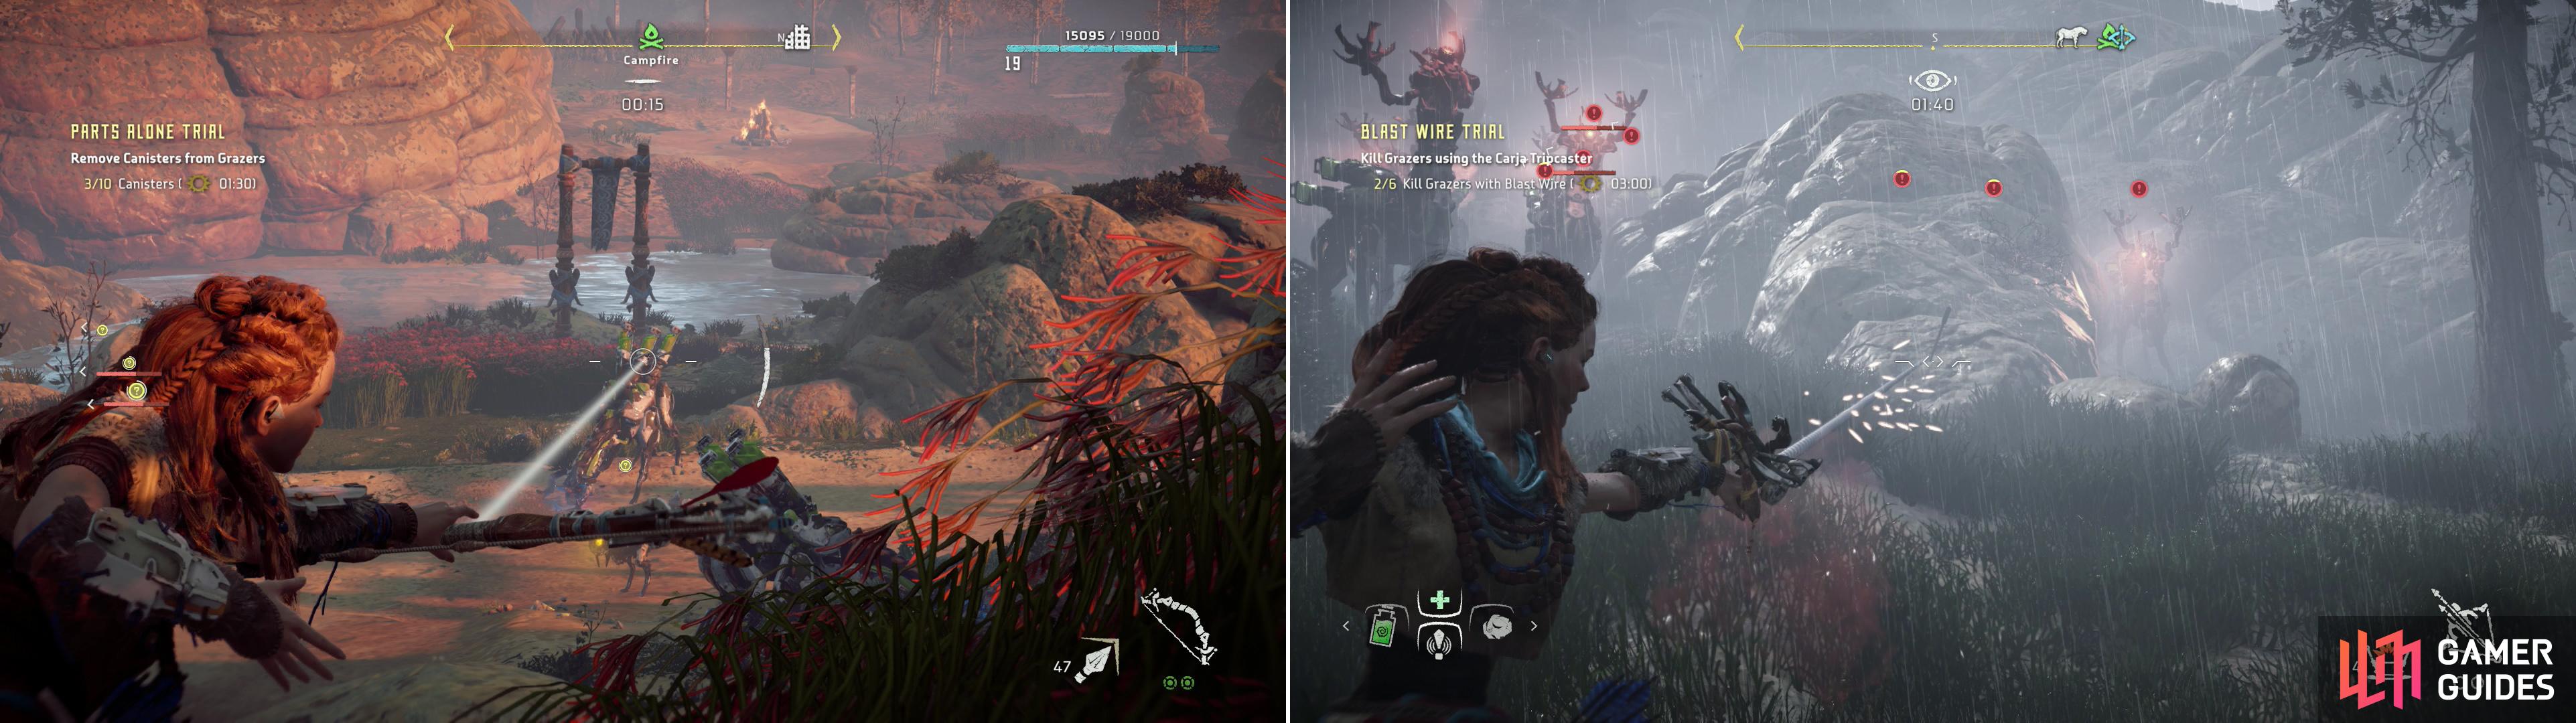
Snipe the Blaze Canisters off the backs of Grazers for one trial (left). Subtlety isn’t needed for the Blast Wrie Trial - the more Blast Wires you lay in front of Grazers, the better your odds of success (right).
Blast Wire Trial
Possibly the easiest of the three, you’ll need the Carja Tripcaster for this, as well as some Blast Wire. Same principle as the Logpile Trial, save you need to spook Grazers into running into your Blast Wires. Fortunately you have plenty of time, and you really don’t have to be all that tactical - put a Blast Wire in plain sight, spoke the herd, watch them explode. Generally speaking, the more Blast Wires you’re willing to lay down, the easier this trial is to complete.
| Objective | Rewards |
|---|---|
| For earning a Blazing Sun Rank in all three trials | 52,500+ XP / +1 Skill Point |


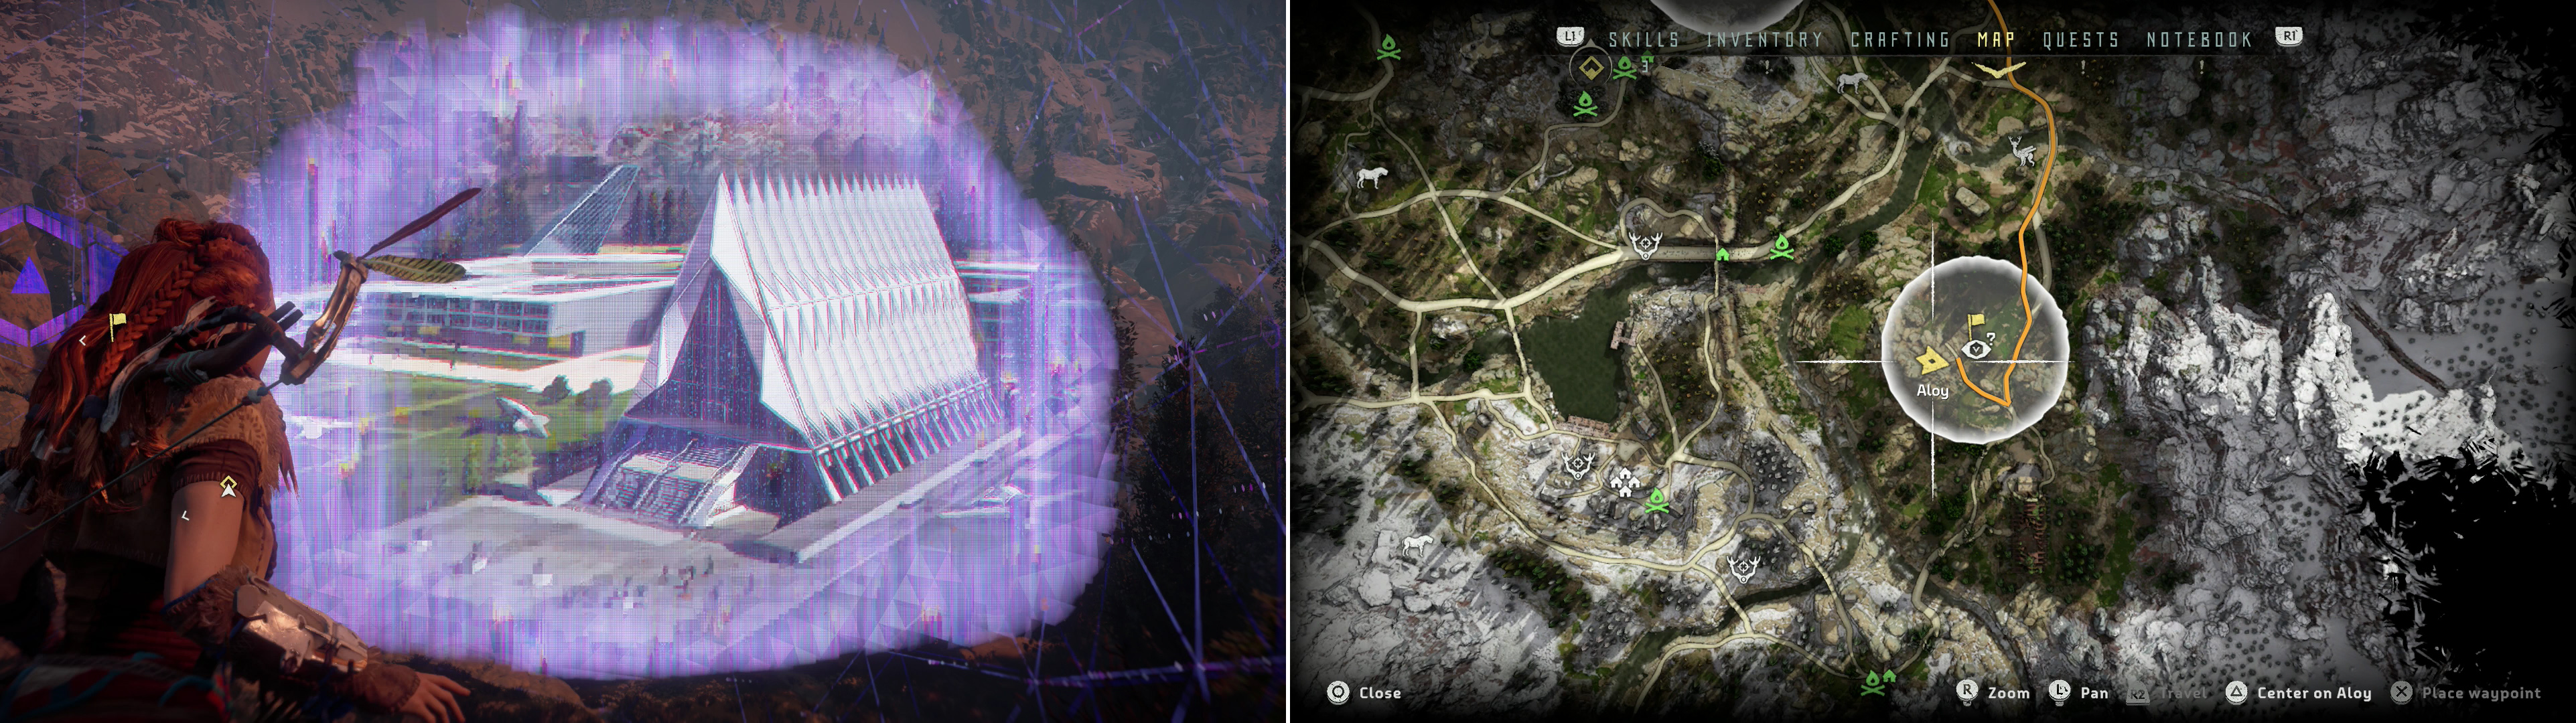
Scan and log the Vantage - Air Combat Academy (left) at the location indicated on the map (right).
Vantage - Air Combat Academy
Spend as much time and resources as you care to on the Nora Hunting Trials - you can always attempt to improve old scores later - then, when you’re satisfied (or fed up!) move on to the next areas of interest. Fast travel back to the Campfire near the Main Embrace Gate and follow the road northeast and cross a bridge over the river. Once across turn southeast until you hit a river, which you should cross again (this time without the benefit of a bridge) and continue south along the road past a Strider Site. Follow the road until you find a thoroughly ruined tank sinking into the dirt, at which you should turn west to find a rocky hill, atop which is a Vantage Point.
Head uphill to the west to reach the northern edge of this rock formation, which is where you’ll find the handholds you can use to ascend to the top. Do so, loot a Supply Crate, then access the Vantage Cache to log the “Vantage - Air Combat Academy” collectible.
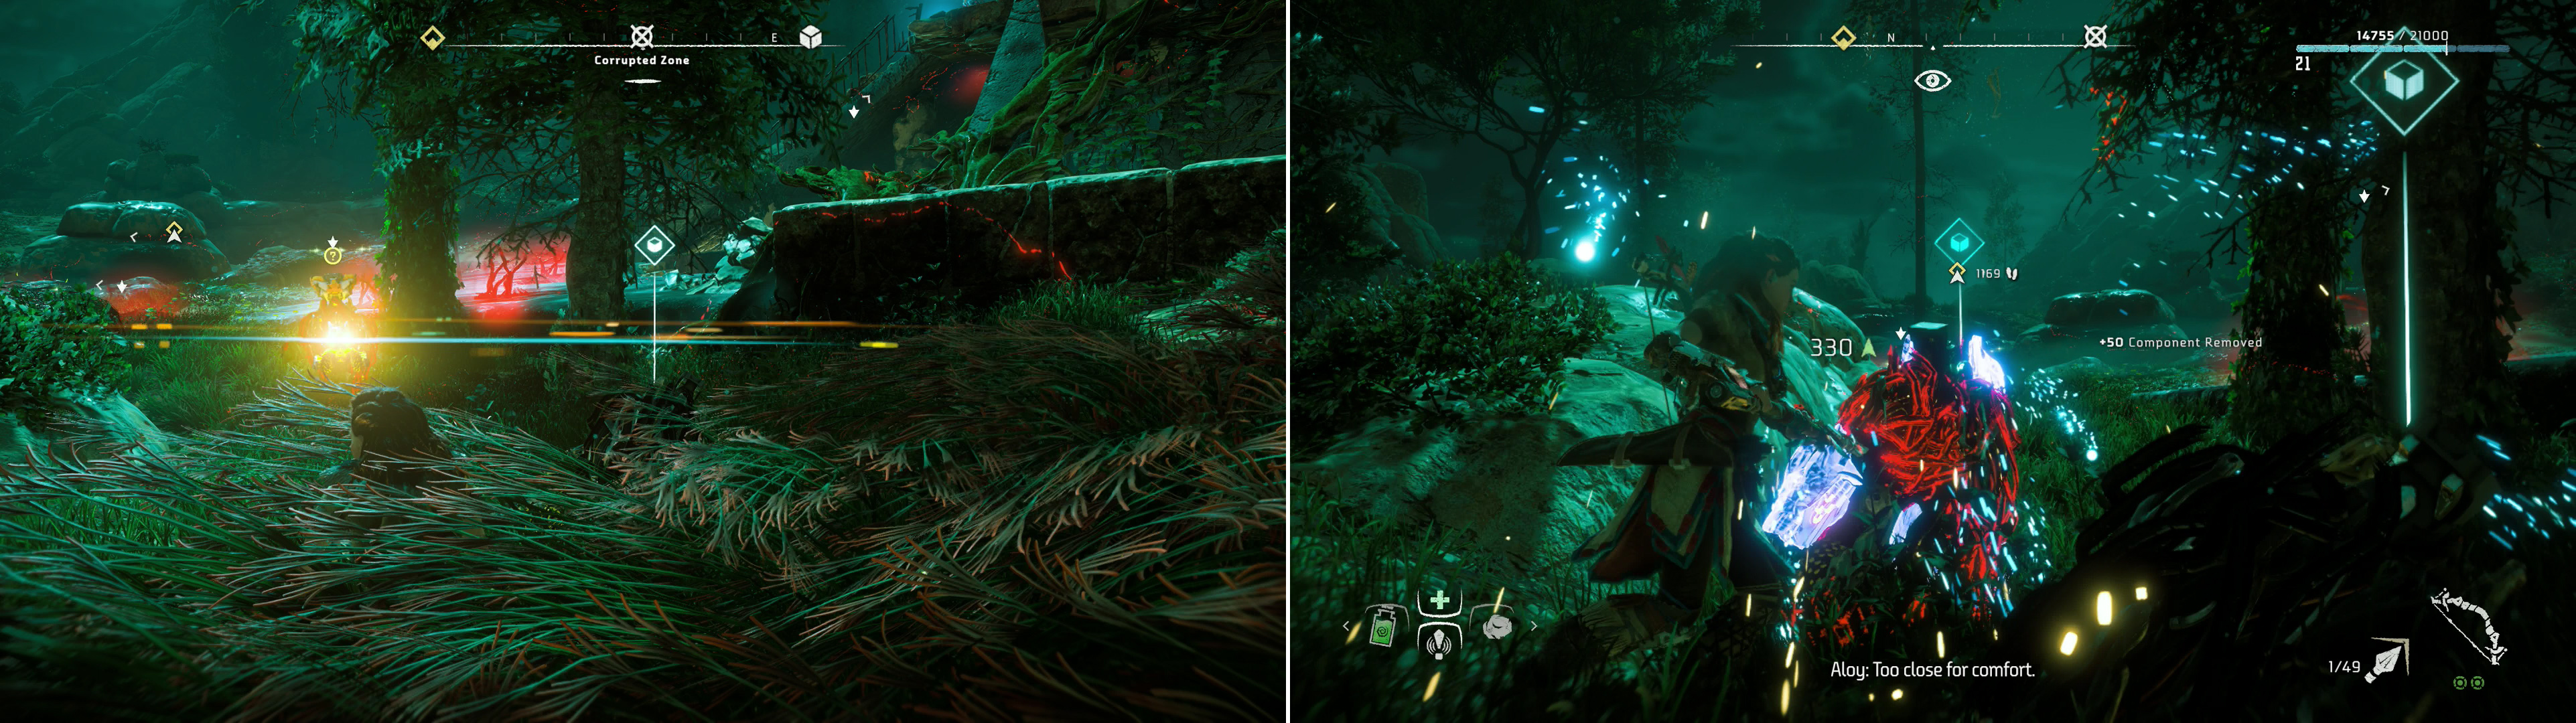
As in the last Corrupted Zone, you can use Lure Call to attract machine (left) and dispatch them quietly with Silent Strike (right).
Corrupted Zone
Drop back down the rock formation and return east to the road, then follow it south to reach the peripheral of a Corrupted Zone. You know the drill - extra strong, unusually aggressive machines prowl here, and you need to scrap them all to clear the area… for a rather hefty XP reward, at that. In this case, there are four Scrappers prowling around. There is, however, plenty of tall grass to hide in, and Lure Whistle has a surprisingly good range, so it should be little trouble to simply take cover and let the Silent Strike/Lure Whistle combo lead you to victory. The only bot this won’t work on is the Scrapper prowling inside the ruined building here. You’ll just have to sneak up the stairs, use the short, crumbling wall as cover, and stealth-kill the machine the old-fashioned way… minding the line of sight and all that rot. When the machines are all wrecked, search the floor inside the structure to find the Text Datapoint - World “Special Orders “, then pillage a pile of Ancient Debris.
| Objective | Rewards |
|---|---|
| For destroying the corrupted machines | 5,000 XP |
No Comments