

| Ancient Vessels |
|---|
| Ancient Vessel - Arches |
| Metal Flowers |
|---|
| Metal Flower - Mark I (C) |
| Metal Flower - Mark I (F) |
| Metal Flower - Mark I (D) |
| Text Datapoints - Machines |
|---|
| Observer Log US-W-17 |
| Text Datapoints - World |
|---|
| Leaks spark fears |
| “Haere Mai” |
| Training Dummies |
|---|
| Training Dummy XIV |
| Training Dummy XV |
To the Massacre Site
Time to head north to the massacre site. There’s plenty to see and do along the way, but that’ll be covered later, after you’ve completed a few more side quests… and of course the task at hand. Continue along the road east of the Main Embrace Gate until you find your first Campfire outside the Embrace. Save if you must, then follow the road northeast, where it will near a river. If you cross the river to the east you’ll find a Grazer Site, should you feel like hunting the herd-beasts.
Grazers aren’t any more dangerous than Striders, in fact their multiple Blaze Canisters if anything provides you with more weak spots to exploit. A single Fire Arrow placed smartly should be enough to finish one off… with a bang! Knocking off their Rotor Blade “horns” will further neutralize them in combat, at which they most certainly do not excel, but the best course of action is still probably the reliable, cost-effective Silent Strike/Lure Call combo.
When you reach a fork at the riverside road you’ll be presented with three new directions to head - northeast will take you to the Nora Hunting Grounds. You can talk to a man named Cren near the crossroads to learn a bit about the Hunting Grounds and his embarrassing attempt at honing his skills, and his warning is worth bearing out: the trials at the Hunting Grounds aren’t free of danger, and require you to expend resources to complete them. Probably a task best saved for when you’ve got a healthy stockpile of resources (assuming you already don’t) and for a later date, in any event. On the other hand, you can find Training Dummy XIV and Training Dummy XV near the lodge at the Hunting Grounds, if you want to run over there real quick and smash them.
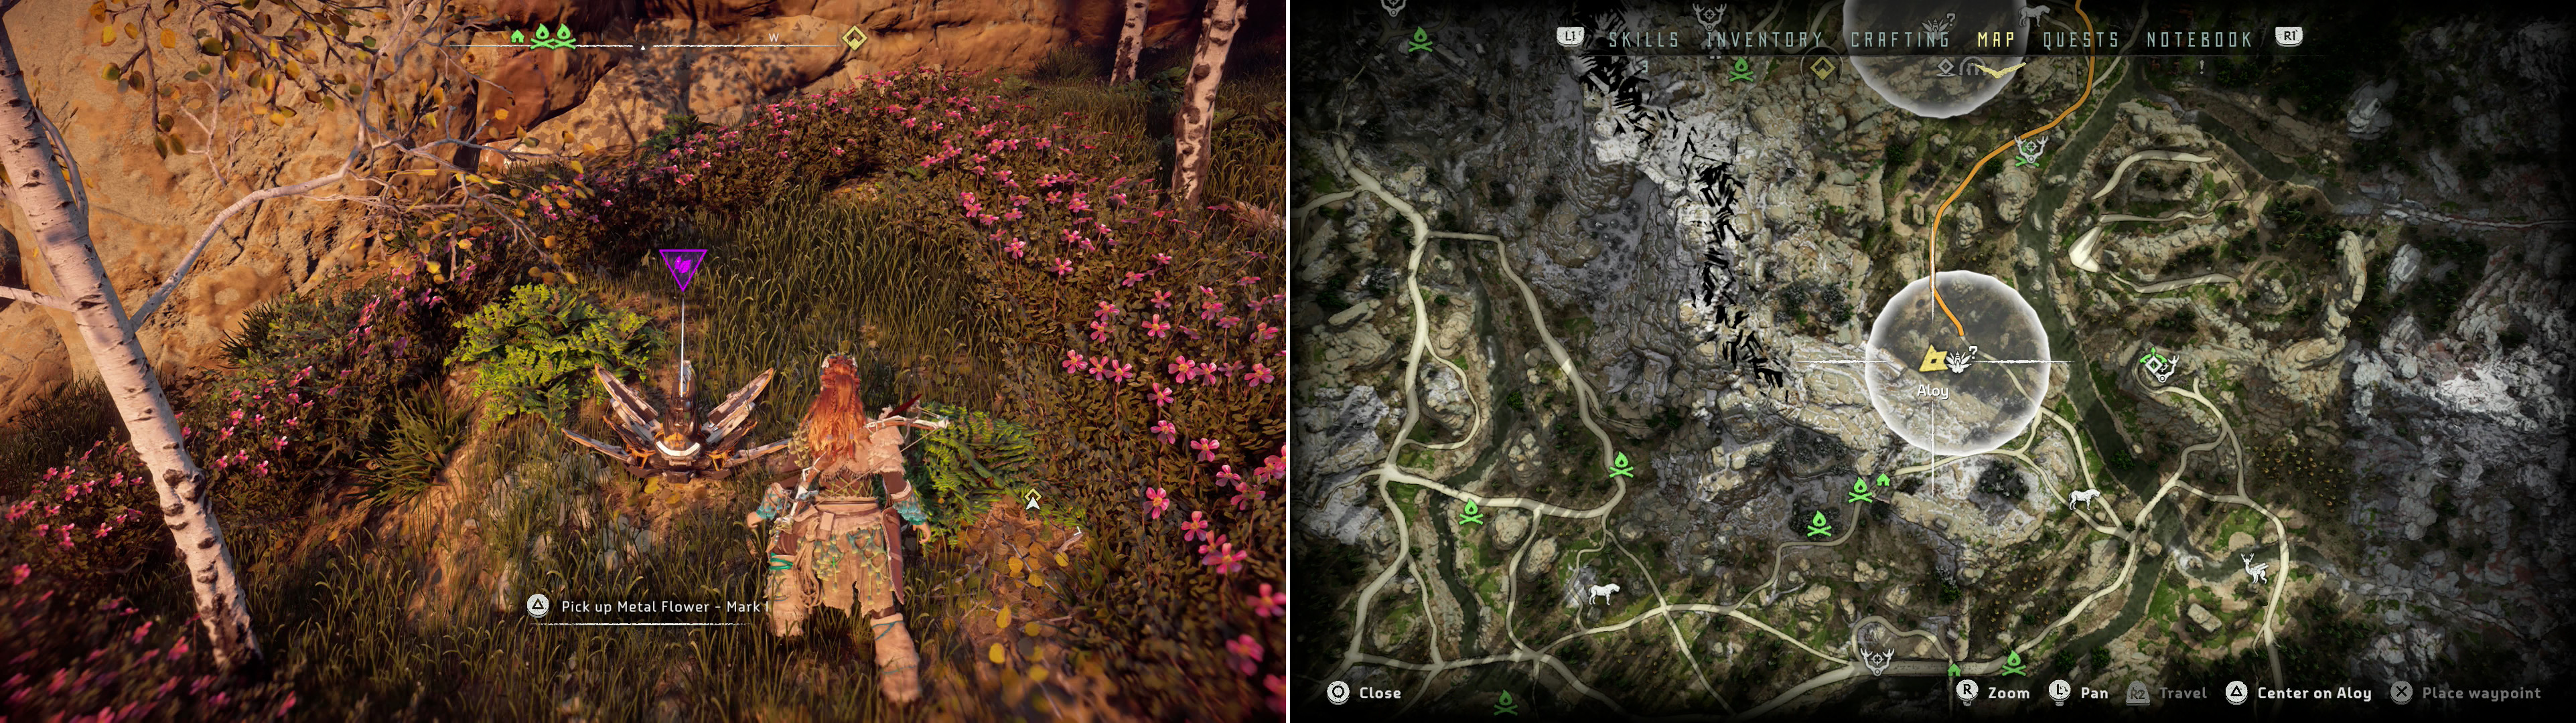
Pick up Metal Flower - Mark I (C) (left) at the position indicated on the map (right).
Backtrack southwest to the fork in the road near the river and turn your attention to the two remaining new paths. The western-most one leads back to the Northern Embrace Gate, so take the central path to the northwest through a Strider Site until you come across some ruined houses - the handiwork of the Sawtooth you defeated earlier. If you bought the “Map - Metal Flowers” from the merchant near the Main Embrace Gate you should notice that there’s a Metal Flower marker nearby. Search some high ground west of the Metal Flower map marker to find Metal Flower - Mark I (C) .
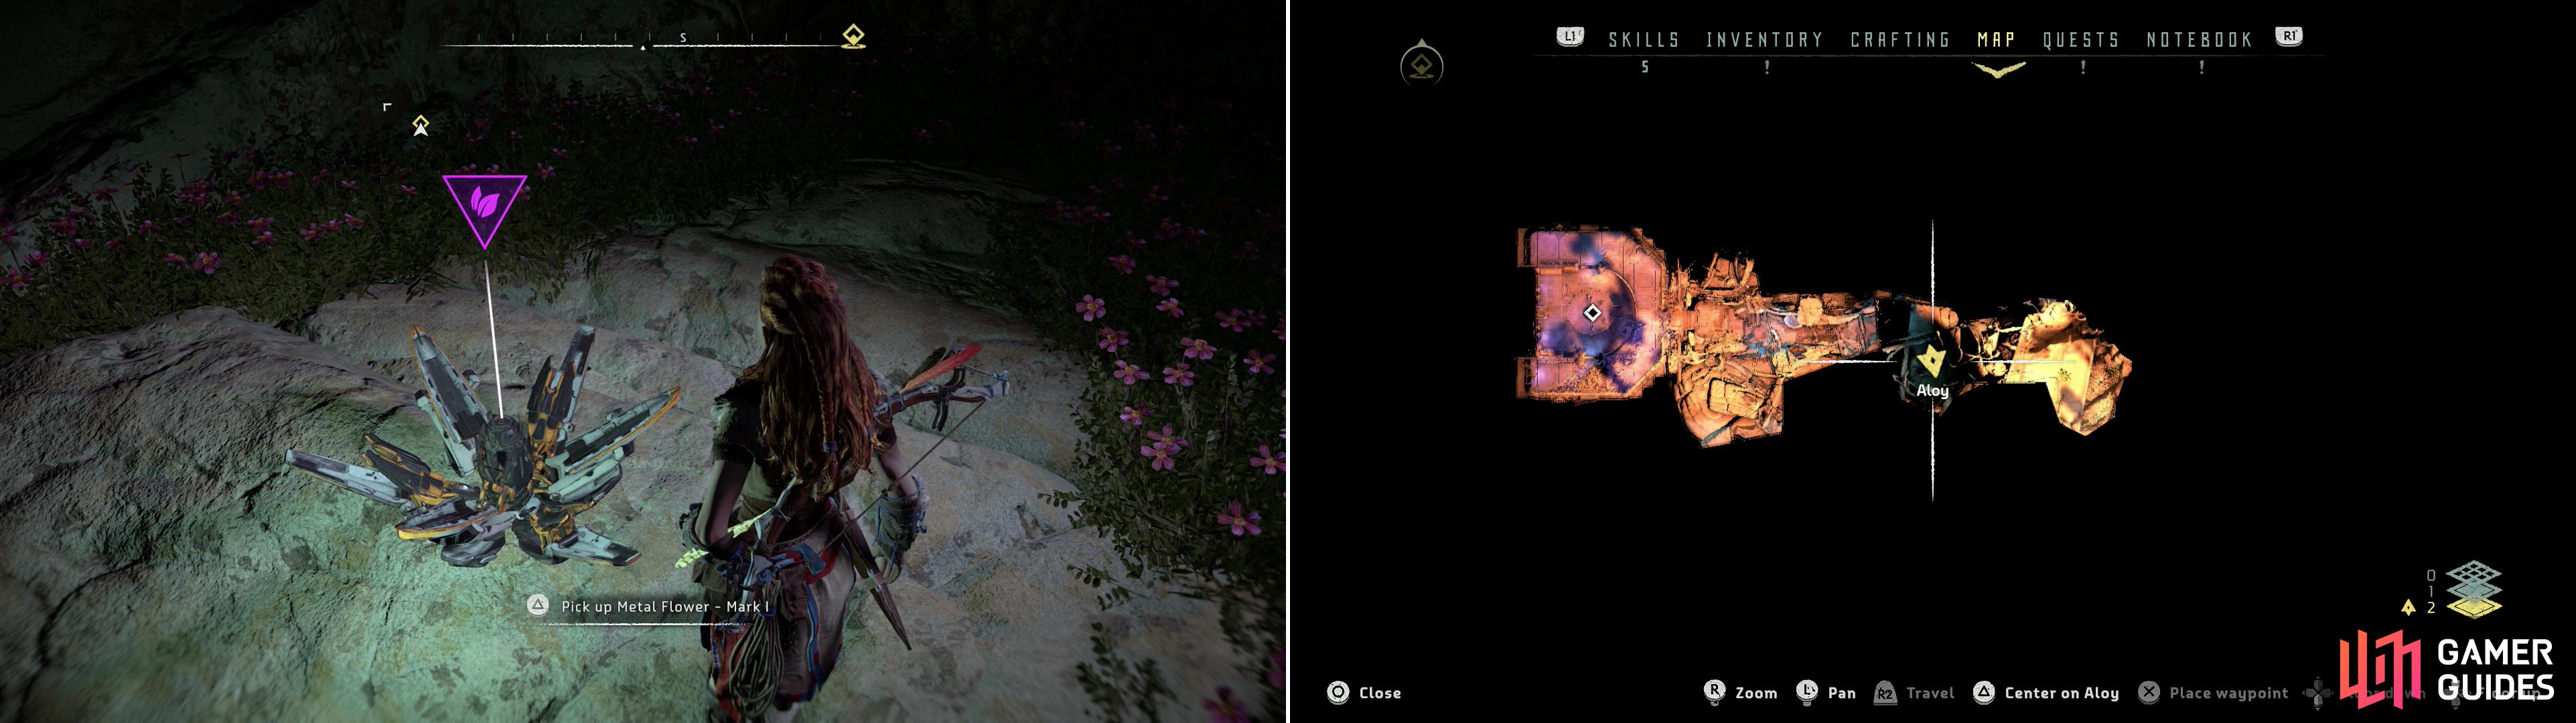
In some ancient ruins you’ll find Metal Flower - Mark I (F) (left) at the location indicated on the map (right).
Return to the road and continue following it north, then northeast and pass a Campfire with a merchant nearby. He doesn’t sell anything new, but if you’ve accumulated more junk to sell… and also, discovering new Campfires never hurt. When you’re ready, press on to the northeast and at a fork, turn north. At a second fork take the northwestern branch and pass another Strider Site. If you want to score another Metal Flower, head southwest from the Strider Site icon to find some ruins. Pick your way carefully down some rocks into the depths of the earth and when you reach a ledge press [Square] to drop down, then use the [Left Analog] to climb down the cliff face. Hop in some water and swim to the west, but keep your eyes turned to the south to spot a Metal Flower on a stone ledge. Climb out of the water and pick up Metal Flower - Mark I (F) , then leave the ruins the way you came - at the moment there’s no need to explore further, although the ruins ahead do contain arguably the best suit of armor in the game… alas, you’ll need to accumulate more Power Cells to access it.
Backtrack to the road north of the Strider Site marker near the ruins, then follow the road northwest, then west under a watch tower. Beyond the watch tower the road will fork, and you’ll be presented with two options: continue southwest to Mother’s Rise, or cross a bridge to the northwest and continue on your way. Take a detour to the southwest, cross a bridge and climb a ramp to reach the Campfire near the Mother’s Rise settlement.
While there are two sidequests waiting for you in Mother’s Rise, (“Insult to Injury” and “A Daughter’s Vengeance” respectively) they can wait for later, but discovering the Campfire (and hence unlocking it as a fast travel option) will save you some time later. Once done, backtrack to the northeast to return to the bridge near the watch tower. Continue northwest across the bridge and past a Grazer Site, dealing with the machines however you deem appropriate. Past the Grazers you’ll find another bridge to the north.

Search the destroyed Corruptor to find out more about the massacre (left) then talk to a survivor to find out where to look for War-Chief Sona (right).
Cross the bridge and immediately turn west, heading uphill to reach the massacre site. Activate your Focus and scan the remains of a destroyed Watcher (of which there are plenty) and of a destroyed Corruptor, then drop your Focus and search them physically. Shortly afterwards a survivor, Dran, should should up behind you, so go talk to him to find out more about the specifics of what happened, and where Sona went.
Through Devils Thirst
Looks like you’re going to have to head into Devil’s Thirst, which can’t be a nice place, given the name. Fortunately there’s lots to see and do along the way. Head back east to the bridge you crossed earlier and from there make your way downhill to reach a river. Cross the river and continue on the trail to the east, which passes through some ruins from the old world. You can expect a variety of machines to lurk here, including Grazers and Watchers, but in the distance you’ll be able to spot a massive Tallneck which paces around here.
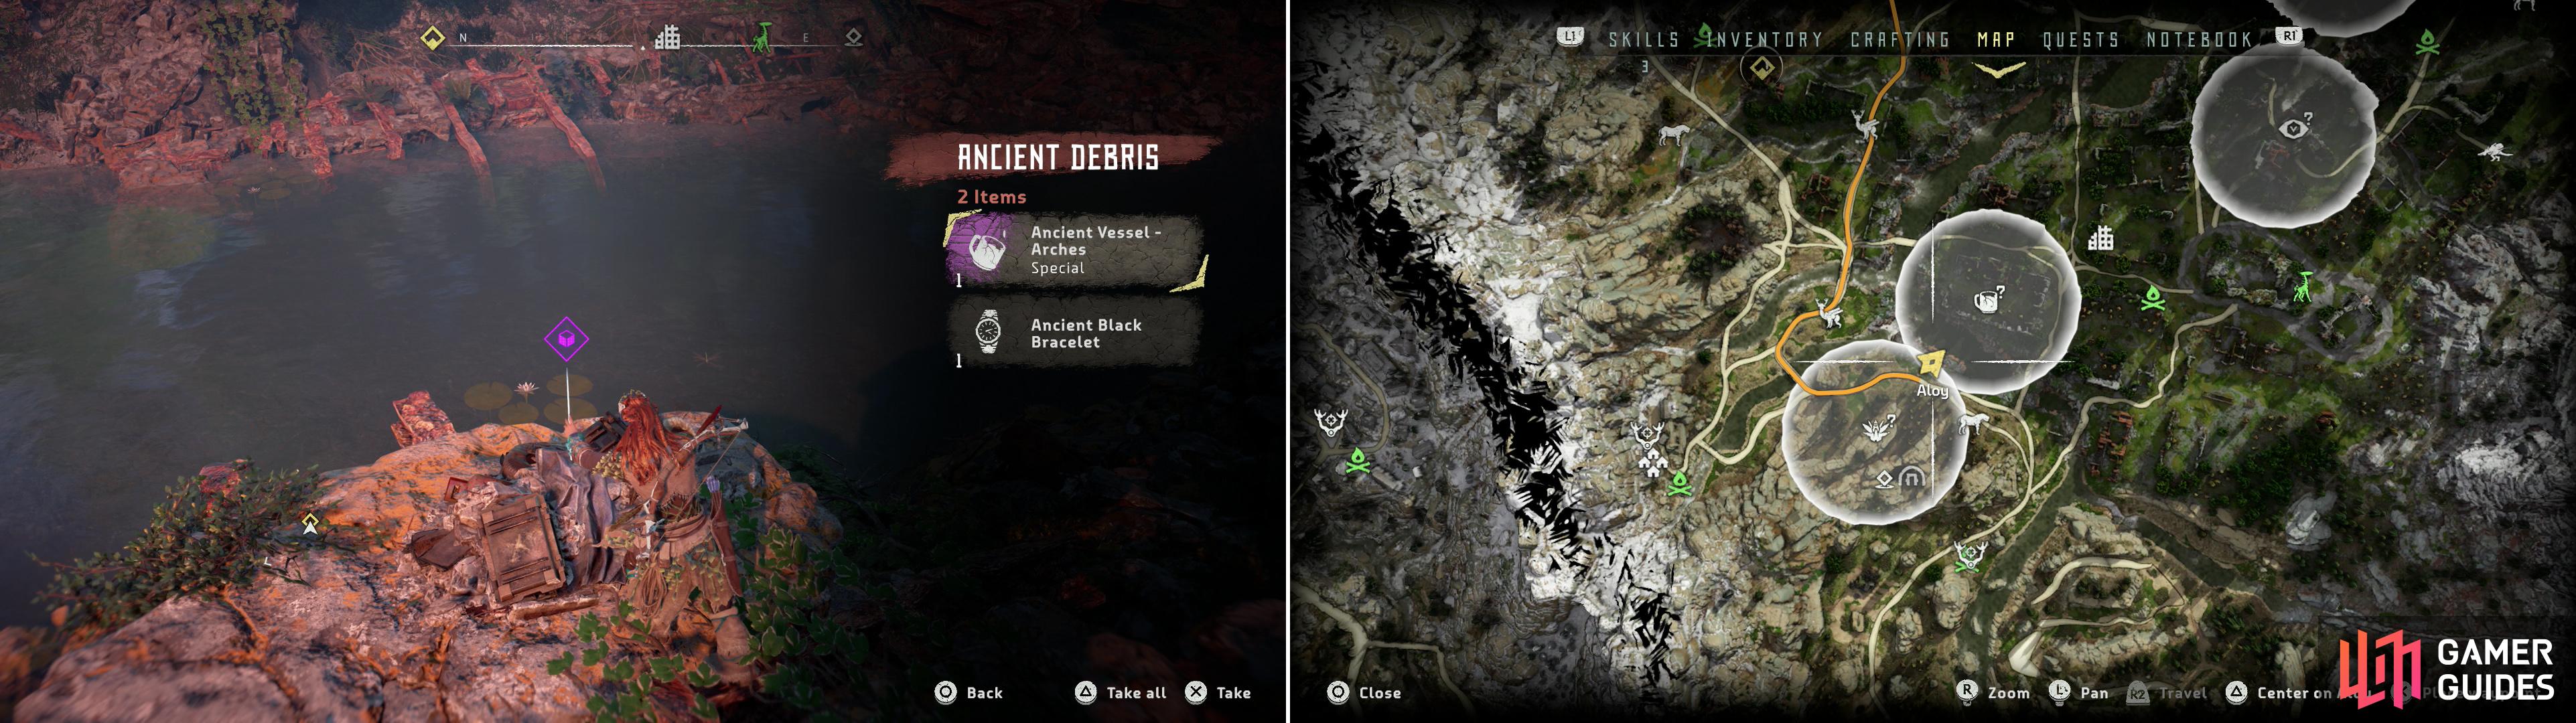
Search a pile of Ancient Debris to find the Ancient Vessel - Arches (left) at the location indicated on the map (right).
Ignore the giant for now and instead head into the ruins south of the road, where two Watchers prowl. Dispatch them, then check your map. If you bought the “Map - Ancient Vessels” from the merchant earlier you’ll see one such treasure marked on your map, with the map icon being centered in these ruins. If you head southwest from the Ancient Vessel map marker and cross the river you’ll find some Ancient Debris on the edge of some old world ruins. The purple loot icon over it should be enticing enough to provoke you into looting it, in which case you’ll obtain the Ancient Vessel - Arches .


Tallneck - Devils Thirst
Swim back north across the river and continue north through the ruins to return to the path, then follow said path east through the ruins until you come to a Campfire. Further east the road will run past the building around which the Tallneck paces, and it’s well worth your time to deal with this humongous robot. Put all thoughts of killing it out of your mind, you don’t have anything in your arsenal that can even scratch such a foe. Plus, the Tallneck is docile. The Watchers in the building the Tallneck encircles, however, are not, and should be exterminated.
Destroy the four Watchers lurking in and around this building, then head up some stairs along the western side of the building and work your way around the surviving remnants of the second floor, jumping gaps as necessary. When you’ve made it to the eastern corner of the second story, look out to the northeast to find a ramp. Wait for the for the Tallneck to pass by and make a running jump onto the platforms jutting out from the back of its neck, then leap from platform to platform and ultimately onto its disc-shaped head. Once again, the color yellow will be your guide.
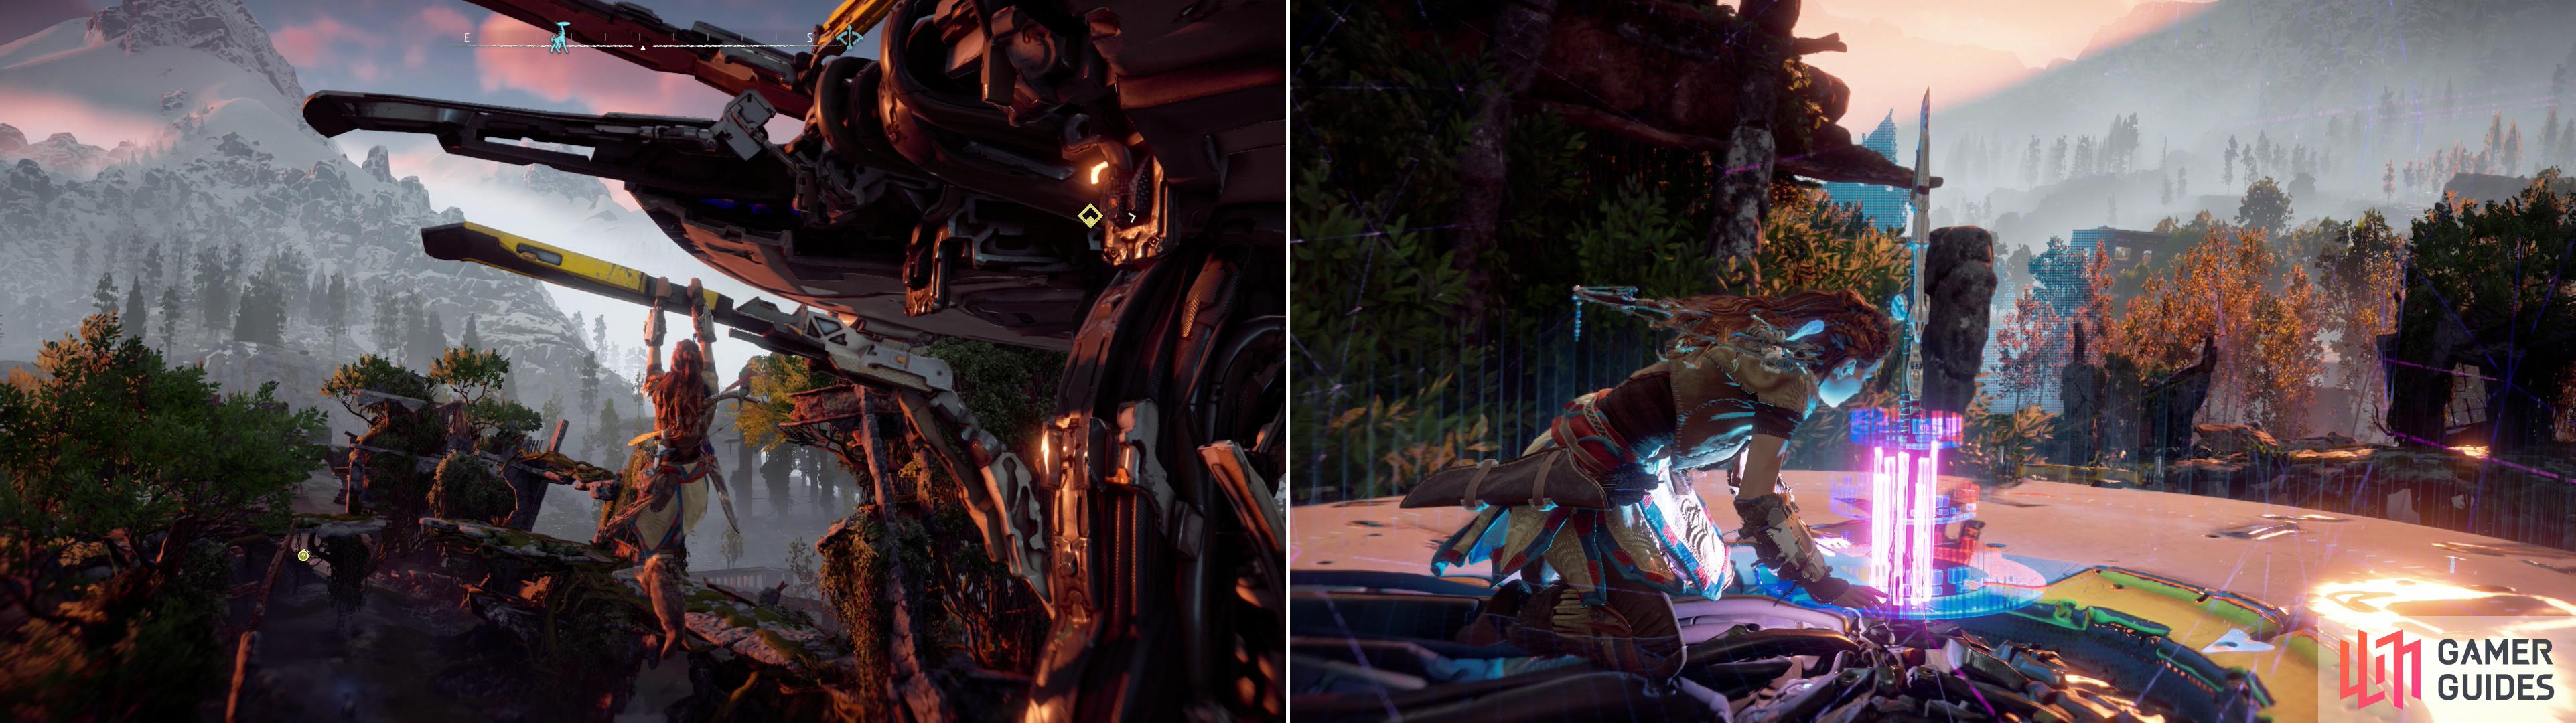
Use the Tallneck’s antennae to reach its disc-like head (left) then override the massive machine to reveal a huge section of the map (right).
When you reach the top of the Tallneck’s tall neck, press [Triangle] to override the machine, then head to the edge and press [Triangle] again to rappel down to safety. For your daring deed you’ll record the Text Datapoint - Machines “Observer Log US-W-17” , as well as reveal a massive stretch of the map to the north. Oh, and the reward for this feat is nothing to turn your nose up at, either.
| Objective | Rewards |
|---|---|
| For overriding the Devil’s Thirst Tallneck | 7,500 XP / +1 Skill Point / Map Revealed |

Warchiefs Revenge
Before you move on there are a few more goodies to grab. From the ruins around which the Tallneck patrols head north, northeast to find some more ruins. Specifically make your way to the eastern eastern exterior of these to find the Text Datapoint - World “Leaks spark fears” . Another Text Datapoint - World, “Haere Mai” , can be found in some ruins south, southwest of the building the Tallneck encircles, along with some Ancient Debris, which can be looted for some old world treasures.
Time to get back on track. From these ruins head south, southeast towards a thoroughly rusted water tower, along the leg of which you can find some climbing spots. If you’re adventurous, climb the signature yellow hand-holds to reach a ledge with a Supply Crate on it. Once done, descend back down and continue southeast to reach some cliffs, which you can scale to reach the Warchief’s camp. Unfortunately, however, the campsite is abandoned. Activate your Focus and scan various objects about the camp, including some arrowheads, a cleaned rabbit carcass hanging from a tree, a bow, some bandages and the campfire, then deactivate your Focus and examine the objects without its aid.
When Aloy mentions a blood trail, activate your Focus again and press [R1] to highlight the track. Once done, follow the purple ghosts and triangles to the north, then northeast, scaling ledges, leaping gaps, and generally performing all sorts of unnecessary acrobatics along the way. Just before you run across the rope you might encounter some Corrupted Watchers, which are somewhat stronger than normal Watchers, but there’s no real need to engage them when you can just run past. Continue scaling ledges and leaping gaps until the trail ends and Aloy notices a Sawtooth which may yield some clues. Examine Sona’s handiwork, after which you’ll get to witness a display of her prowess first-hand.
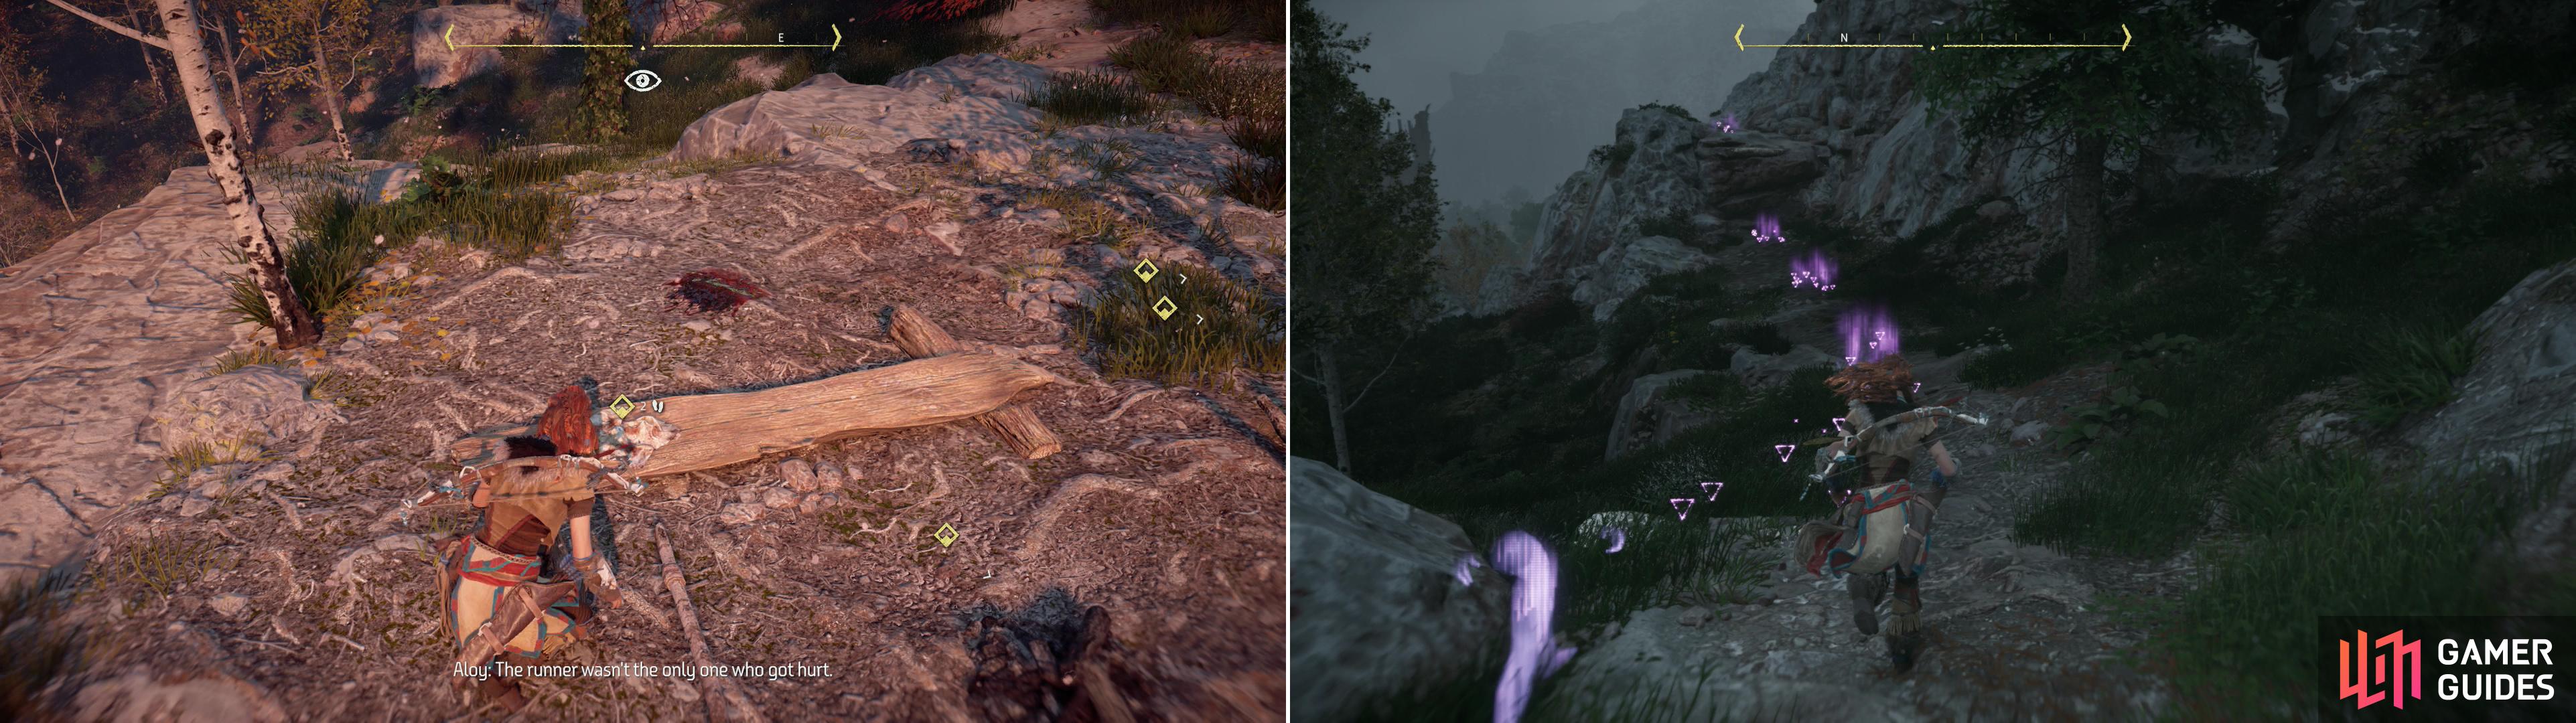
Investigate the War-Chief’s camp (left) then use your Focus to track the missing Braves (right).
She’s refreshingly brief and to-the-point. She’s here to kill those who attacked the Nora, and has little time for anything else. Follow her across two fallen logs and to a Campfire, during which time Sona and Aloy will banter a bit. Eventually she’ll lead you to a ledge over-looking the Nora’s attackers, who seem to have brought their machine allies with them. Sona wants to take a direct approach, but Aloy cautions her - successfully - in favor of targeting some Blaze barrels, which naturally will explode if you introduce them to some Fire Arrows. Exploding barrels? In a video game? How novel!
Seriously, though, you can use those Blaze barrels as a way to opportunistically eliminate some of the enemy. In fact, if you’re patient and stay hidden, you can probably pick off most of the enemies in the pit below you. Just retreat from the ledge if you miss or if your kills are noticed and wait for the enemy to stop being alert. Human enemies can, of course, be killed with a single shot to the head, and the Corrupted Watchers can similarly be dispatched by shooting them in the eye. Disposing of the machines may be easier with Silent Strike, however, and if you circle around to the northern end of the pit you’ll find a grassy ramp you can descend to safely reach the enemy.
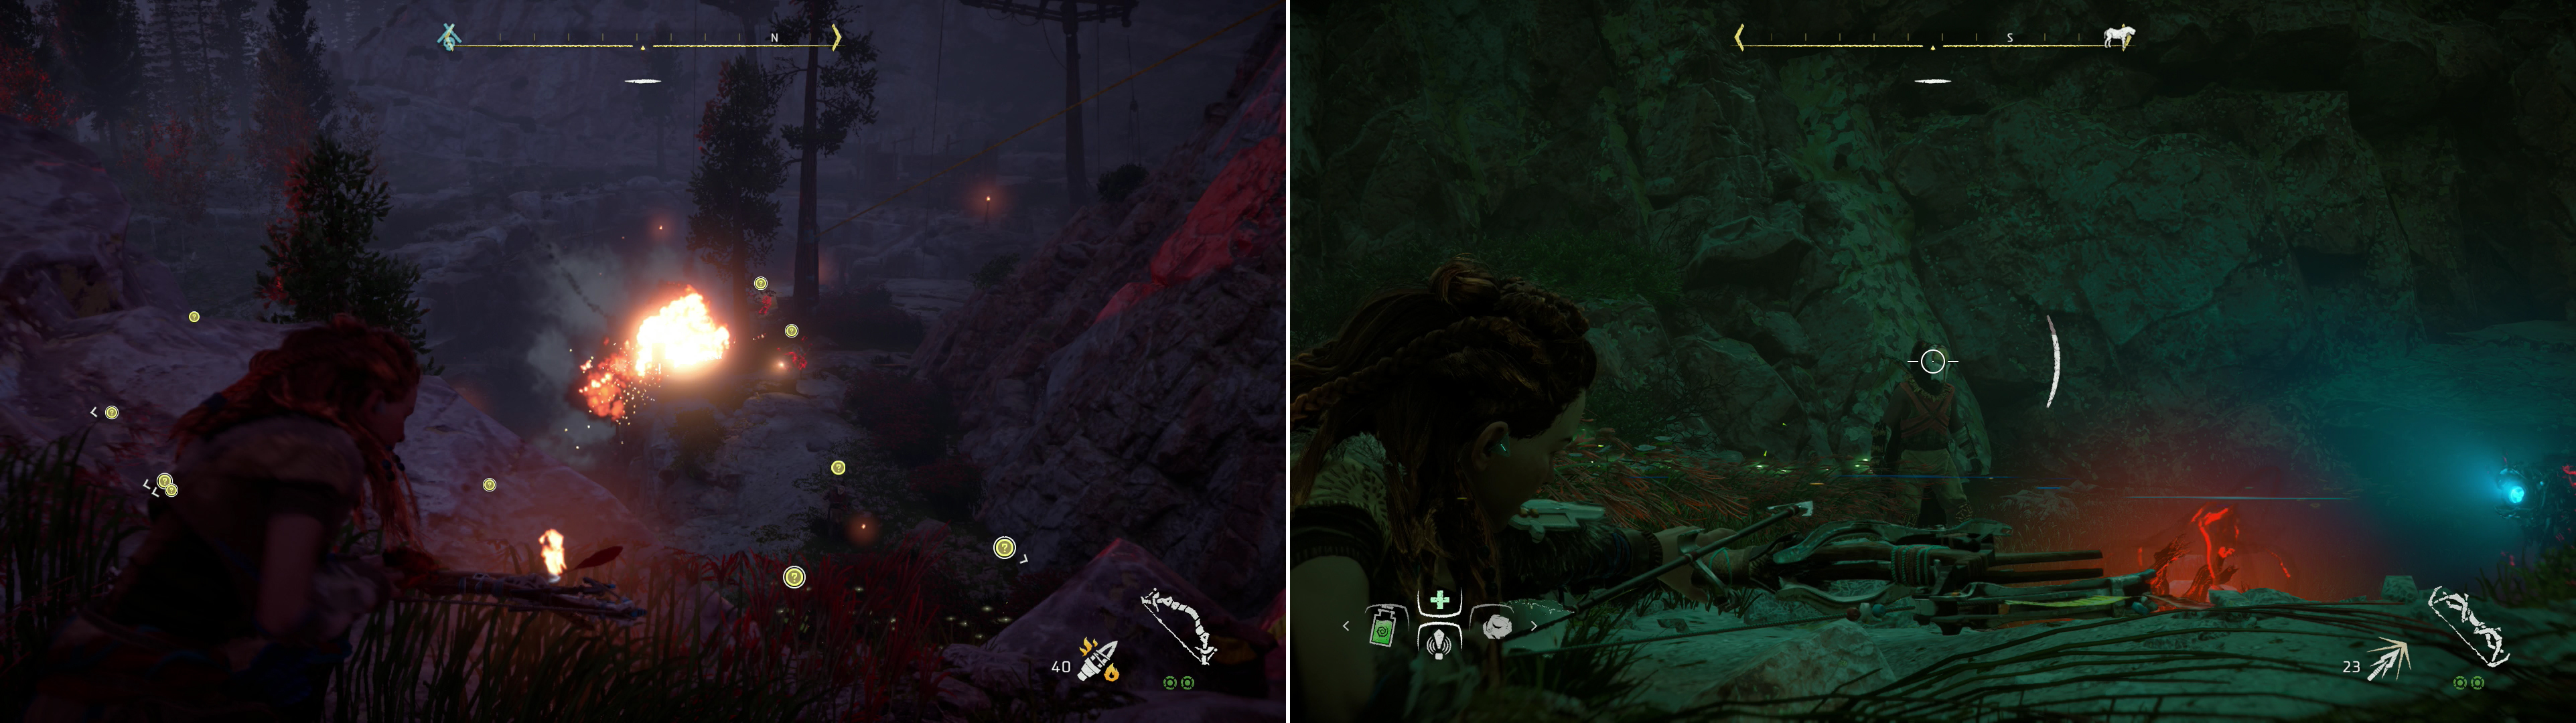
Take advantage of Blaze barrels to eliminate foes (left), or take a somewhat more direct approach (right).
Take it slow, use Blaze barrels to your advantage (you can lure enemies near them by throwing rocks), pick off humans whose heads offend you, sneak down into the tall grass and use Silent Strike… or any combination thereof. You’ve got plenty of options for dealing with this area. The Sharpshot Bow is made for this kind of engagement, so if you have it, you’ll likely get some use of it here. If you manage to get caught, however, Sona and her braves will jump into the fray, providing you with support, so even the worse-case scenario isn’t all that bad.
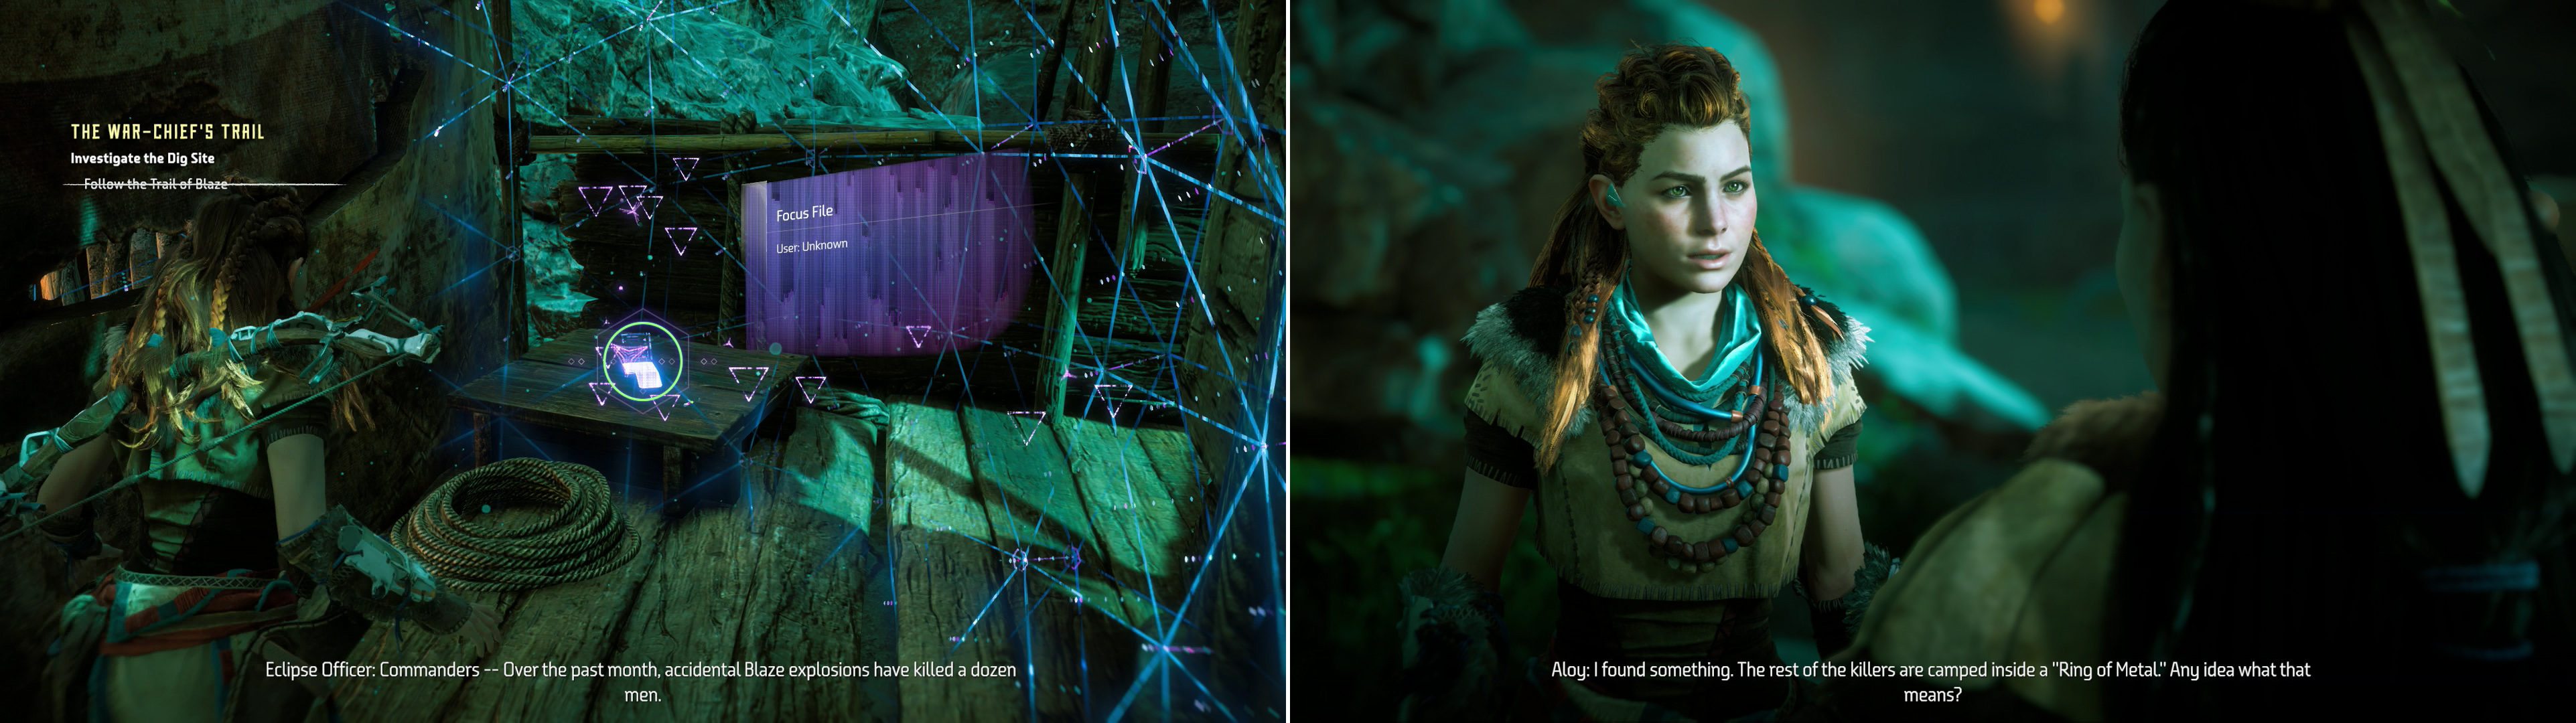
Search the cultist camp to find a Focus File (left) after which you’ll meet with Sona and determine the next plan of attack (right).
When all your foes lie broken and bloodied, seek out Sona in the pit, who only regrets there aren’t more to kill. Varl will interrupt and a family squabble will ensue, which a noticeably uncomfortable Aloy makes an excuse to extricate herself from. Use your Focus to scan some tracks, then follow them to the southwestern end of the pit, then turn west to spot a tent. Scan a Focus File in the tent to learn that your foes are basically tactically inept: what’s worse than setting up a base on low ground and ceding high-ground to the enemy? Stocking you base with explosive Blaze barrels, of course! Talk to Sona and her and Aloy will devise a plan of attack on the next enemy base. This ends the quest “The War-Chief’s Trail” and begins “Revenge of the Nora”.
| Objective | Rewards |
|---|---|
| For finding Warchief Sona | 1,750 XP |
Metal Flower - Mark I (D)
Now seems like a fine time to make your way to Mother’s Crown and seek out this Marea, but there’s more exploration you can do on the way… plus there’s a sidequest back at Mother’s Rise which you can largely complete on the way. Efficiency and all that. That’ll be your next goal then, but first, there’s some treasure worth picking up in the area. Obviously there are several Supply Crates to loot in the pit itself, but a more interesting treasure - a Metal Flower - lies northeast of this pit. Seek out a crane along the northeastern end of the pit and at this device turn east to spot a grassy ramp you can climb - perhaps the same ramp you descended when you assaulted the camp. Ascend the hill to the east and turn north when you get a chance to find Metal Flower - Mark I (D) waiting for you.
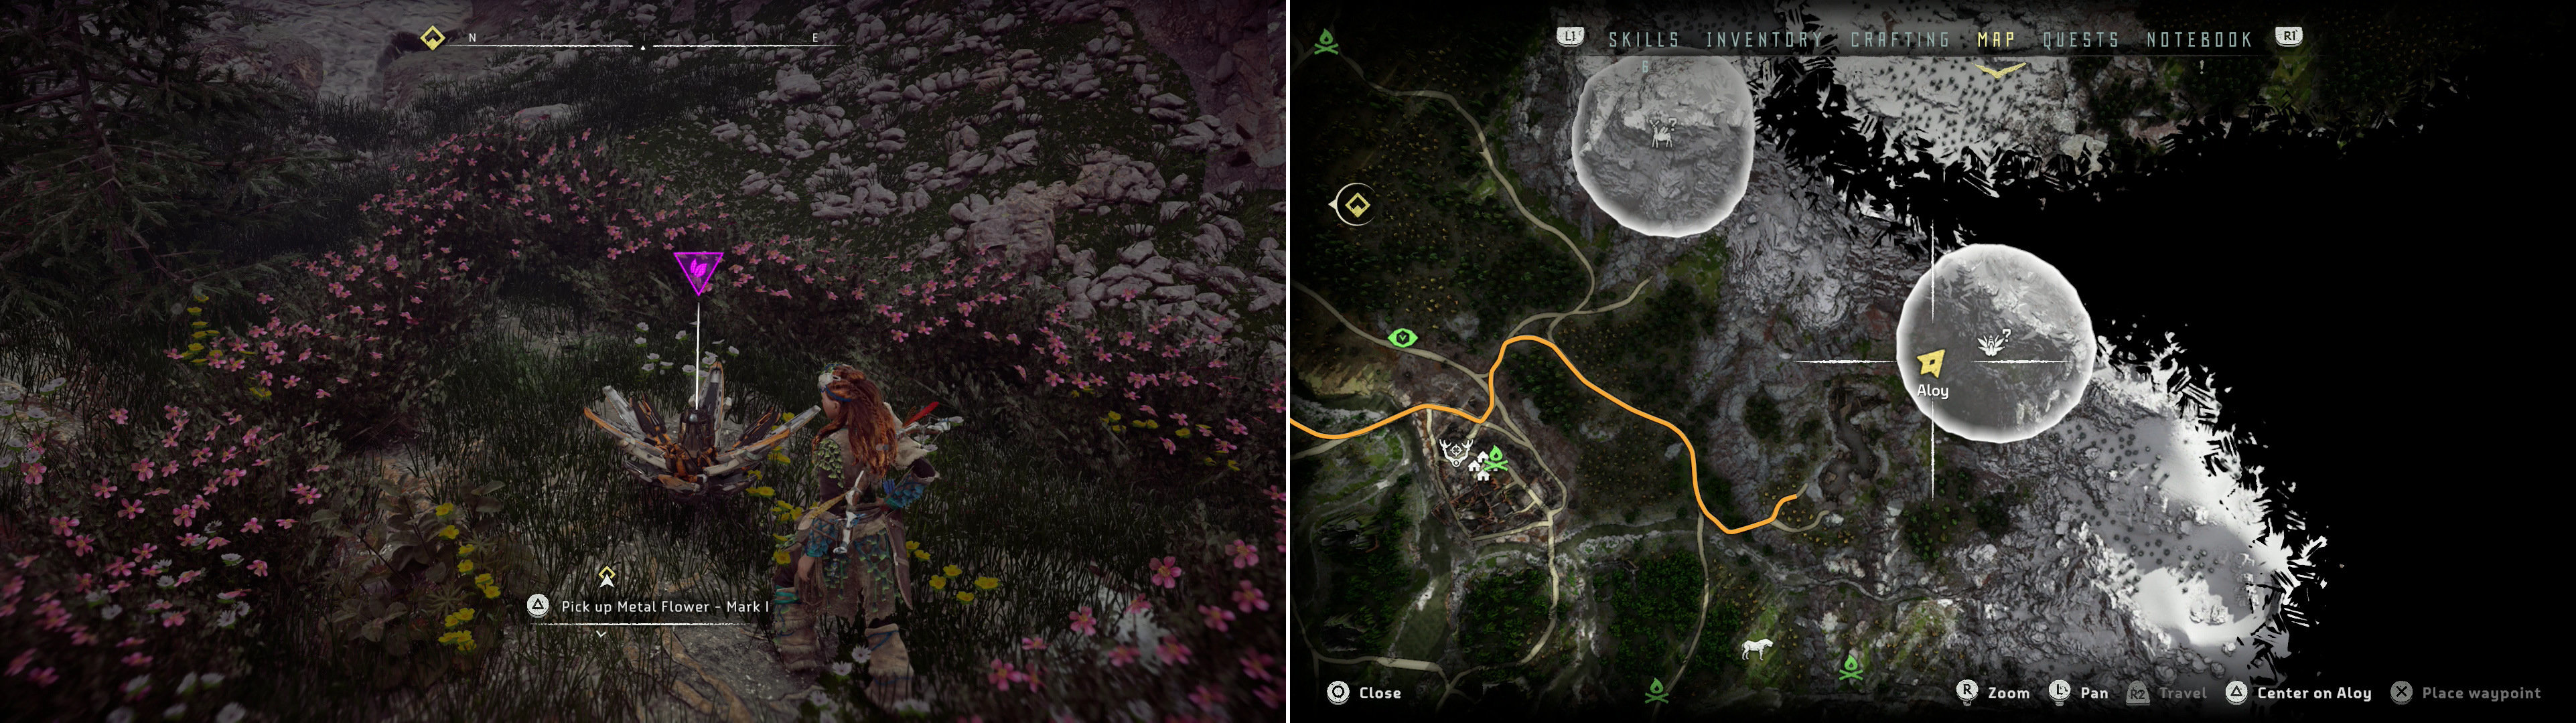
Search near the cultist camp to find Metal Flower - Mark I (D) (left), at the location indicated on the map (right).
No Comments