Dragon Age: The Veilguard gives you plenty of tools to play with when it comes to building your dream playstyle for Rook. One of the first choices you’ll make is where you want to be a Warrior, Mage, or Rogue, and then beyond that, what kind of Specialization you want. Once you’ve figured that out, it’s all about what skills you purchase, what equipment you wear, and what Enchantments you set. This page will detail everything you need to know about a Warrior Slayer build focused on using Charged Attacks.
The Rolling Thunder Slayer build is all about Charged Attacks as the Warrior in Dragon Age: The Veilguard.
Table of Contents
If you want to jump to a specific section, click on the links below.
Rolling Thunder Slayer Playstyle and Abilities
The goal of the Rolling Thunder Slayer is, well, using Charged Attacks to their fullest while in the Slayer Specialization. There are two main goals that you’ll want to achieve with this build to play it fully effectively, and they are:
- Increasing the damage of Charged Attacks
- High Rage regeneration
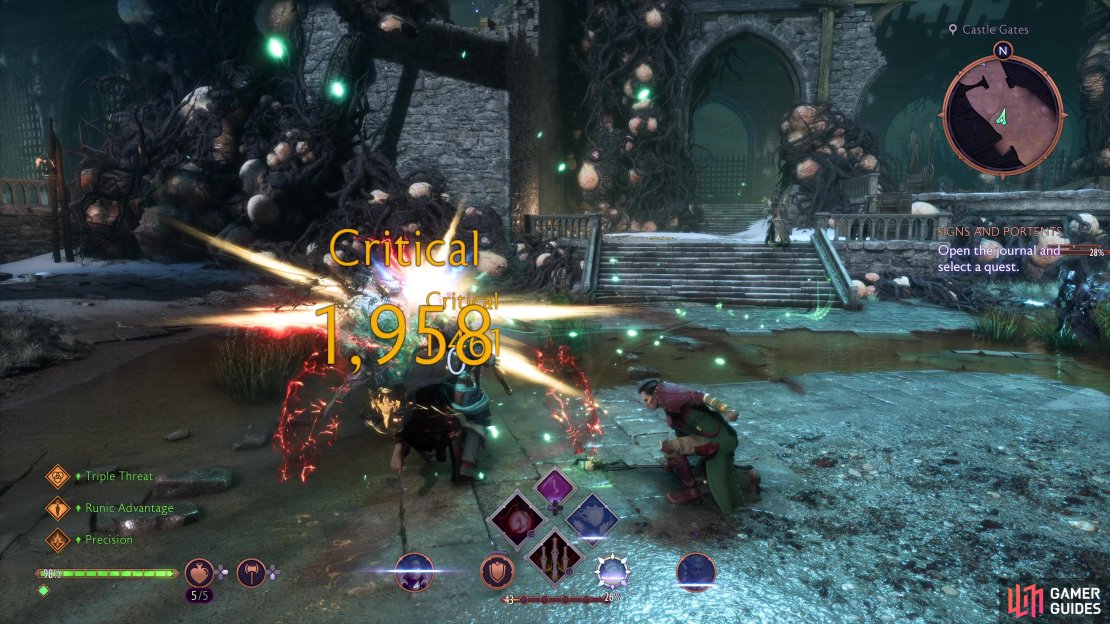
The first one is fairly self explanatory, after all, it is the theme of this build. There are many skills and equipment bonuses that either boost the damage of Charged Attacks or alter them in some way, be it adding additional attacks to the combo, increasing the Stagger rate, or more. As such, you’ll want to be wearing Medium Armor for the bonus it provides and purchase any skills that alter the combo in any way.
As a Warrior, Rage is very important to you in a number of ways as it allows you to really impact the battlefield. With this build, you’ll gain access to skills that can knock an enemy to the ground easily, this will allow you to do two different things. One is guaranteed criticals to downed enemies, the other is to buy yourself time to charge your Two-Handed weapon and get it off before being struck. Additionally, you’ll have skills that both heal you and deal damage whenever you spend any of your Rage.
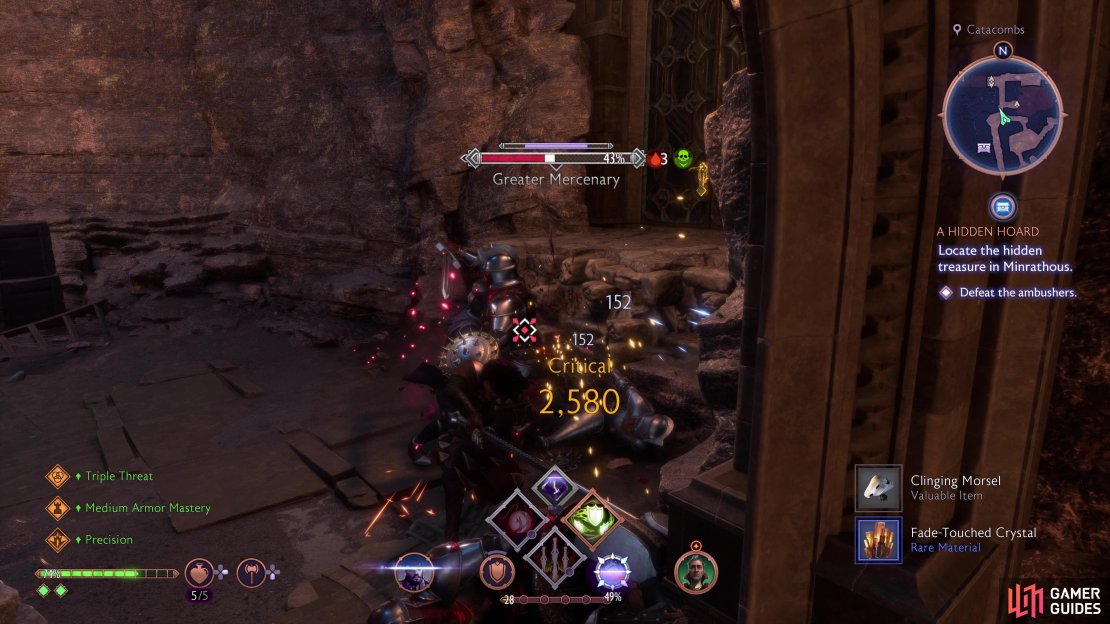
(1 of 4) The Rolling Thunder skill adds an additional attack to your Charged Attacks.
It should go without saying, but you’ll want to be using Two-Handed weapons with this build, and what type will depend on if you want to deal more Stagger damage so you can use Takedowns more often, or pure damage, both are viable. Charged Attacks do take time to set up, that’s why using skills that can cause knockdowns are so important, as is having two Companions that can easily set up Combos as enemies are slowed down before the detonation effect, again, perfect for charging an attack.
The three Abilities we take for this build are the following:
- Heroic Leap (Smash)
- Fury of the Forge (Strike)
- Spectral Bulwark (Duration)
Heroic Leap is the Slayer exclusive ability and is one of your most effective methods of downing enemies, with high Rage generation, you’ll be able to use this often. Fury of the Forge is our pick for a Strike ability, it only costs 50 Rage, can hit enemies at range, and will down enemies that are weak to Fire. Finally, Spectral Bulwark is our pick for a Duration ability as you’ll be in enemies faces often and won’t have much protection from the more defensive skills of the Warrior while wearing Medium Armor. The reason for taking a different type of ability is so we can activate the Triple Threat Skill that offers +20% damage to every ability if you’re equipping three different types.
Rolling Thunder Slayer Skill Allocation
Now that you know how the build plays and what abilities you’re aiming for, here is the breakdown of the skills you’ll want to acquire. Remember, you can get more Skill Points by finding all of the Fen’harel Altars across Thedas, this offers you an additional 16 Skill Points on top of the 49 you get from your Levels.
The tables below will list all of the skills we purchase in each section of the Warrior’s Tree, and while you can unlock them in any order (provided you make your way there), make sure you have access to Slayer at Level 20 and the various skills in that section at both Level 30 and 40.
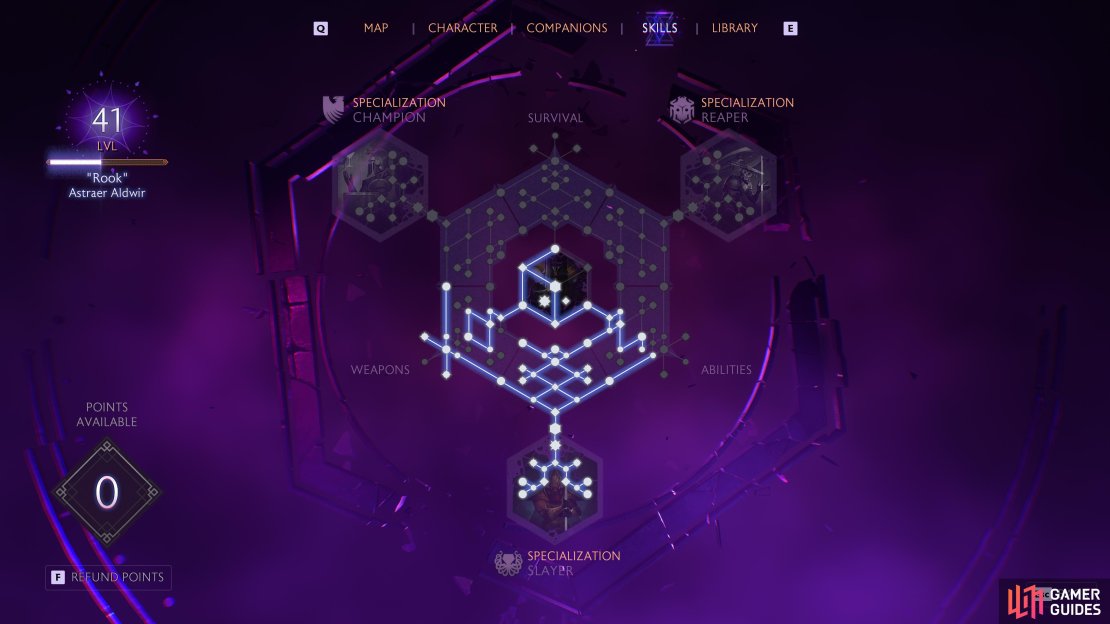
Here is a look at how your Skills will start looking at around Level 40.
Warrior Core - 5 Skill Points
| Skill | Type | Description |
|---|---|---|
| Counterblow | Trait | Deflect your enemy’s attack and perform a powerful Counterattack |
| Downfall | Greater Passive | Jump attacks guarantee Critical hits if the target is Knocked Down |
| Focused Retaliation | Greater Passive | Gain Precision (the next Charged or Final attack will be Critical) after a successful Perfect Defense |
| Tumbling Blades | Trait | Use your speed to unleash a powerful attack immediately after performing a Combat Roll |
| Rancor | Greater Passive | Rage takes 50% longer to begin to decay |
Most of the Warrior Core skills you’re going to want to get as they form the basis of the playstyles for Warrior. Of particular interest is the Downfall and Focused Retaliation skills, the latter of which will mean that your Charged Attacks will be critical following a Perfect Defense!
Abilities - 10 Points
| Skill | Type | Description |
|---|---|---|
| Spectral Bulwark | Ability | [Smash][Duration] Hone your guard and protect yourself from enemies foolish enough to attack. Enemies who hit you with a melee attack take damage and very high Stagger. Increases Defense by 50% while active |
| Enraged | Passive | Rage generation +10% |
| Explosive Toss | Trait | Charge your shield to at least one level and press the Light Attack button to make it explosive, dealing damage in an area and possibly disrupting them |
| Killer Instinct | Passive | Stagger from Abilities +20% |
| Enervation | Passive | Damage vs. Barrier +20% |
| Enduring Rage | Greater Passive | Your Rage no longer decays below 50, allowing you to sustain it between fights |
| Depth of Fury | Passive | Maximum Rage +50 |
| Shellbreaker | Passive | Damage vs. Armor +20% |
| Triple Threat | Greater Passive | Equipping an Ability of each damage type increases Ability damage by 20% |
| Blunt Force | Greater Passive | Enemies are Knocked Down when their Armor breaks |
The Abilities tree offers some hugely important skills that you’ll want to get sooner rather than later. Spectral Bulwark is a great defensive Ability and is needed to activate the Triple Thread Greater Passive. Enduring Rage is one of the most important skills full stop, this means your Rage will never drop below 50 when not being used, allow you to use them a lot more often and of course, an Enraged Passive means you’ll be generating it a lot quicker.
Lord of Fortune - 16 Points
| Skill | Type | Description |
|---|---|---|
| Shellbreaker | Passive | Damage vs. Armor +20% |
| Medium Armor Mastery | Greater Passive | While wearing a Medium Helm and Armor: Final, Agile, Charged, and Takedown damage +20% |
| Concentration | Passive | Charged Attack damage +20% |
| Guardian’s Reprieve | Greater Passive | Performing a Takedown heals you for 250 Health and grants Deflect (take no damage from the next attack) |
| Flames of Victory | Greater Passive | Gain Flaming Weapons after a Takedown. Weapon hits generate 25% more Stagger while active |
| Staggering Charge | Passive | Stagger from Charged Attacks +20% |
| Overhand Smash | Ability Upgrade | Smash Abilities now deal an additional 50% damage vs. Armor and 50% more Stagger. |
| Precision Strikes | Ability Upgrade | Hitting enemies with Strike Abilities deals increased damage equal to 50% of your base Weakpoint damage. |
| Bulwark | Passive | Physical Resistance +10% |
| Quick Strikes | Ability Upgrade | Defeating an enemy with a Strike Ability replenishes 25 Rage |
| Concussive Smash | Ability Upgrade | Hitting enemies with Smash Abilities permanently reduces their Defense by 20 |
| Whirlwind | Ability | [Area][Smash] Hits enemies around you and deal increased damage and Stagger with the final hit. Costs 100 Rage |
| Heavy Hitter | Passive | Heavy Attack damage +10% |
| Bulwark | Passive | Penetration +15% |
| Rolling Thunder | Trait | After Charged Attacks, use a Light or Heavy attack to follow up with an additional, powerful Charged Attack. Requires a full charge |
| Executioner’s Gaze | Greater Passive | Final Attacks are Critical vs. enemies with Low Health |
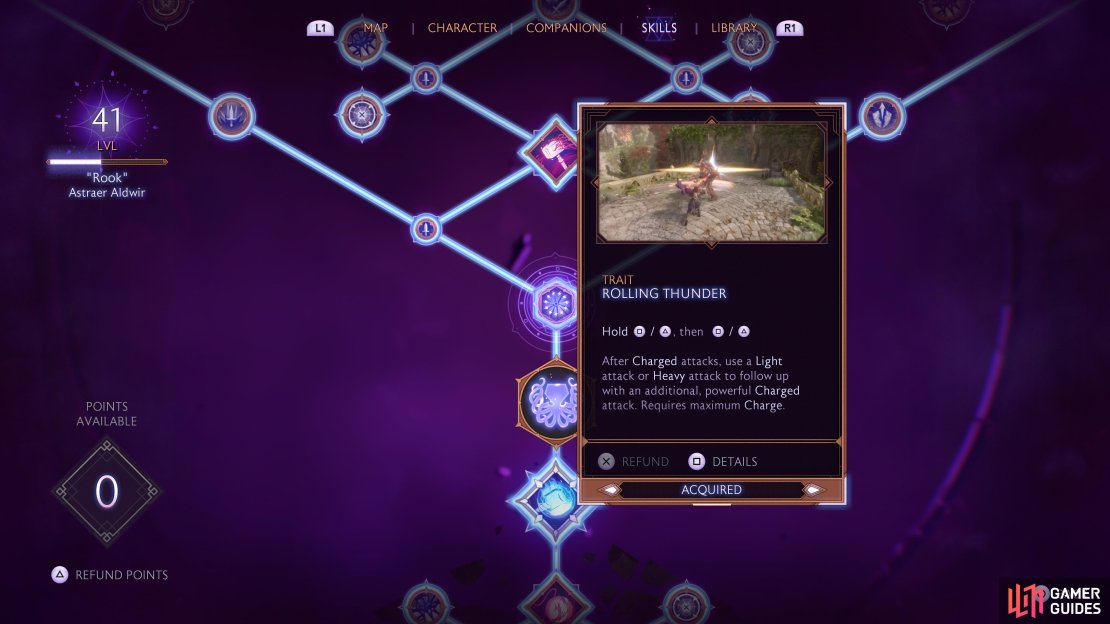
Rolling Thunder can be found in the Lords of Fortune section of the skill tree.
This is arguably the most important section when it comes to the Rolling Thunder build, not least because the Rolling Thunder skill can be found here. As you can see, you’re going to purchase every skill in this section, but Rolling Thunder and Medium Armor Mastery are the most important. Wearing a full set of Medium gear (Helm and Armor) will see all of your attack types increase by 20%, along with Takedowns, this is reason enough to stay in Medium Armor for this build. Rolling Thunder is where the fun begins though, with this skill, you can now do an additional attack at the end of your Charged Attack combo to deal massive damage.
Weapons - 15 Points
| Skill | Type | Description |
|---|---|---|
| Fury of the Forge | Ability | [Strike][Projectile] Burning steel blades rain down on your enemies, inflicting Burning |
| Velocity | Passive | Stagger from weapon attacks +20% |
| Decisive Finish | Passive | Agile, Charged, and Final Attack damage +10% |
| Sly Strike | Greater Passive | Agile, Charged, and Final Attacks deal 15% bonus damage to enemies suffering from an Affliction (damage over time) |
| Determined Death | Trait | You can now hold down your Final Attacks, offering a powerful finisher based on your weapon type if timed perfectly |
| Underestimated | Passive | Light Attack damage vs. Health +10% |
| Wrath | Passive | Critical damage +10% |
| Incite Violence | Greater Passive | Generate 15% more Rage from weapon attacks. Doubled when enemy is suffering an Affliction |
| Concentration | Passive | Charged Attack damage +10% |
| Bloody Vengeance | Greater Passive | Charged Attacks with swords or Axes apply Bleeding. Charged Attacks with Mauls or Shields deal 15% bonus damage to Bleeding enemies |
| Fighting Dirty | Ability Upgrade | Hitting enemies with a Strike Ability applies an Affliction associated with the Ability type |
| Wear and Tear | Ability Upgrade | Damage from Area Abilities gain 30% Penetration |
| Depth of Fury | Passive | Maximum Rage +50 |
| Explosive Anger | Greater Passive | Spending Rage deals 200% of the cost as Fire damage to enemies within 6 meters. |
| Spill Blood | Passive | Maximum Bleeding Stacks +1 |
Another important section of the Warrior Skill Tree where you’ll want to purchase the majority of the skills here. Bloody Vengeance will allow your Charged Attacks to deal heavy damage to Bleeding enemies, while you will learn many skills that boost how you generate and spend Rage. Sly Strike is another reason why Fury of the Forge is a great Strike skill to take, as it will inflict Burning and thus, proc this Greater Passive for a 15% damage increase.
Slayer - 14 Points
| Skill | Type | Description |
|---|---|---|
| For Gold and Glory | Ultimate Ability | Deals massive Physical damage and very high Stagger to enemies over a massive area of effect |
| Heroic Leap | Ability | [Strike][Smash] Leap forward and deal heavy damage to any nearby enemies. Detonates Weakened and will disrupt and Stagger enemies |
| Sharper Edge | Passive | Penetration +15% |
| Charged Smash | Ability Upgrade | Smash Abilities are now Charged Attacks. For Whirlwind, this only applies to the final hit |
| Two-Handed Wind-Up | Trait | Charged Attacks with Two-Handed weapons can be charged further, adding new powerful attacks and effectiveness |
| Decisive Finish | Passive | Agile, Charged, and Final Attack damage +10% |
| Furor | Greater Passive | Charged Attacks generate more Rage relative to Charge Level |
| Blindside | Greater Passive | After a short delay, Charged Attacks deal an additional 150 Physical damage |
| Determination | Passive | Physical Damage +10% |
| Striking Precision | Ability Upgrade | Hitting an enemy with Strike abilities grants Precision (next Charged or Final attack is Critical) or resets it. |
| Arc of Destruction | Trait | After Sprint Attack, use Light or Heavy attack to follow up with an additional Final attack |
| Harder Hit | Passive | Weapon and Ability damage +10% |
| Double-Edged | Greater Passive | Bonus Ability damage also applies to Weapon damage at 20% of its value. This also works in reverse (Weapon to Bonus damage) |
| Violent Catharsis | Greater Passive | Expending Rage heals you for 100% of the Rage spent |
The Slayer section is what your chosen build is all about, and nearly all of the skills here will improve Charged Attacks in every way, although you will need to hit Level 40 to fully max out all of the skills here. Heroic Leap will be one of your main Ability uses as it is classed as both a Strike and Smash Ability, enjoying the benefits from all of the other passives and traits. Two-Handed Wind-Up will grant you your final form of Charged Attacks, bringing them to their deadliest conclusion.
Grey Warden - 5 Skill Points
| Skill | Type | Description |
|---|---|---|
| Staggering Charge | Passive | Stagger from Charged Attacks +20% |
| Wildfire | Passive | Fire damage +10% |
| Fiery Resolve | Greater Passive | Gain Flaming Weapons on Perfect Defense and make them last 50% longer |
| Enraged | Passive | Rage Generation +10% |
| Reinforcement | Greater Passive | Each of your Advantages (buffs) increases your damage by 10% |
Your final five skill points can be spent anywhere, but if you want to visit one of the sections you’ve not spent points in yet, you can easily access some important skills from the Grey Warden section. More Rage generation is never a bad thing and with this build, you’ll have a lot of Advantages on you during battle, procing the effects of Reinforcement all of the time.
Gear, Runes, and Enchantments
Now that you know what skills you’re going to need for this build, it’s time to look at what weapons, equipment, and enchantments will get the most out of the build. The table below is subjective based on the skills we’ve chosen, so you may wish to exchange any of them for your own personal favorites, although try to aim for some of the substats that benefit this build.
Weapons
| Weapon | Type | Properties | Enchantment |
|---|---|---|---|
| Executioner’s Blade | One-Handed Weapon | +30% Charged Attack damage, +25% Stagger dealt by Charged Attacks, Charged Attacks deal Critical Damage vs. Overwhelmed enemies, Charged Attacks deal bonus damage relative to the enemy’s stagger | +10% Weapon Damage |
| Bandit’s Bulwark | Shield | +20% Heavy Attack damage, +25% damage vs. Armor, Gain Immovable when breaking an enemy’s armor, Gain 50% Penetration while Immovable is active | +20% Barrier Damage |
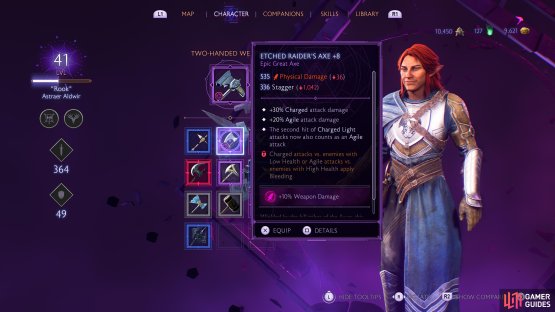
| Etched Raider’s Axe | Two-Handed Weapon Axe | +30% Charged Attack damage, +20% Agile Attack damage, The second hit of Charged Light Attacks now count as an Agile Attack, Charged Attacks vs. Enemies with Low Health or Agile Attacks vs. Enemies with High Health apply Bleeding | +15% Charged Attack Damage |
| Vigilant Greathammer | Two-Handed Weapon Maul | +30 Defense, Weapon Attacks gain 10% of your Defense as bonus damage, Gain 1 Defense for each percent of missing Health, Gain +20 Defense per each active Advantage | +15% Charged Attack Damage |
You’ll find options for all weapon types here, but the main ones you need to concern yourself with for this build are the Two-Handed weapon choices. Your main decision you need to make is whether you want higher damage (from Axes) vs. higher Stagger (from Mauls), you can’t go wrong either way and the build will benefit from each. Regardless of the choice you make, be sure to slap on the +15% Charged Attack Enchantment on your chosen weapon!
(1 of 2) The Etched Raider’s Axe is great for Charged Attacks.
The Etched Raider’s Axe is great for Charged Attacks. (left), The Defiant Silence Helm will offer many great attacking bonuses. (right)
Armor
| Name | Type | Properties | Enchantment |
|---|---|---|---|
| Defiant Silence | Medium Helm | +20% Critical damage, +25% Stagger with Critical hits, 10% Critical damage relative to Shadow Dragons Allied Strength, You now have a 10% chance to deal Critical damage with any weapon attacks | +10% Ultimate generation |
| Garb of Kinship | Medium Armor | +25% Advantage duration, +10% damage for each active Advantage, +10% increased effectiveness for all Advantages, Heal for 5% Health when gaining an Advantage | +30 Defense |
| Brawler’s Decorated Leathers | Medium Armor | +15% Rage generation, -50% Rage decay rate, While Rage is above 50 take 10% less damage from all sources, Double Rage generation when its below half of your total | +30 Defense |
When it comes to your Armor, you’ll need to be wearing full Medium Armor to get the bonuses of Medium Armor Mastery. For your Helm, there’s one standout which is the Defiant Silence, this is all about boosting your Critical damage, just bear in mind you’ll want to have a good standing with the Shadow Dragons to bring out the best in it. There are then two choices for your armor, Garb of Kinship will see you get many benefits from any Advantages you have, of which this build does provide many. Brawler’s Decorated Leathers, on the other hand, is all about Rage, allowing to use Abilities more often.
Accessories
| Name | Type | Properties | Enchantments |
|---|---|---|---|
| Tincture Kit | Belt | +20% Healing received, +1 Revival Charges, -30% duration of companion healing cooldowns | – |
| Warping Wrap | Belt | Grants Time Dilation on Potion use, +15% Rage generation, Grants Precision on Potion use, Time Dilation effect is increased by 20% | – |
| A Pale Reflection | Amulet | +20% damage vs. Enemies with Low Health, Standard enemies are now considered to have Low Health (does not affect boss enemies), Defeating an enemy grants 5% Ultimate | +10% Health damage |
| Grey Emblem | Amulet | +25% Precision duration, +10% Precision effectiveness, Gain Precision on enemy defeat, Precision can now be triggered by Ability damage | +10% Health damage |
| All-Mother’s Copse | Amulet | +20% Smash Ability damage, +25% Armor damage from Smash Abilities, Gain 25 Rage when using a Smash Ability vs. an enemy with Armor or Barrier, Smash Abilities gain added damage from Flaming Weapons | +10% Health damage |
| Twin Palladium | Ring | +4 Rage on kill, +15% Rage generation, +50 maximum Rage, Damage increases with your current Rage | +25% Rage generation, +25% Smash Ability damage, or +50 Max Rage |
| Biting Thumb | Ring | +10% Weapon damage, +10% Final, Agile, and Charged Attack damage, +25% Armor and Barrier damage with weapons, +15% weapon Critical and Weakpoint damage | +25% Rage generation, +25% Smash Ability damage, or +50 Max Rage |
| Bleeding Shard | Ring | +20% Bleeding damage, +20% damage vs. Bleeding enemies, +25% Bleeding duration, +1 maximum Bleeding stacks | +25% Rage generation, +25% Smash Ability damage, or +50 Max Rage |
| Amaranthine Loop | Ring | +25% Stagger, +25% Staggered duration, +25% Takedown damage, Takedowns are now considered lethal at 10% higher health remaining | +25% Rage generation, +25% Smash Ability damage, or +50 Max Rage |
| Call of the Hall | Ring | +50% Takedown damage, +50% Stagger, Gain a random Advantage on Takedown | +25% Rage generation, +25% Smash Ability damage, or +50 Max Rage |
When it comes to accessories, you have quite a lot of choice so here are a few examples that you can look at. For your Belt, your choice is between survivability (Tincture Kit) or Rage generation (Warping Wrap), we prefer to go with the Tincture Kit to help on the higher difficulties. There are some very good Amulets available, but A Pale Reflection is our main choice, although you’ll need to reach Act 2 and complete the Regrets of the Dread Wolf quest to reach the chest.
For your rings, any two of the five listed there are useful, although some are harder to get than others. Call of the Hall works well with this build as it will give you a random Advantage whenever you do a Takedown, and the rest of the build has bonuses when you have Advantages. Biting Thumb will grant you an increase to most weapon damage, including Charged Attacks, which this build relies upon.
(1 of 2) Call of the Hall is an excellent Ring for Advantages.
Call of the Hall is an excellent Ring for Advantages. (left), The Vivify Rune provides a great passive of Rage Regeneration. (right)
Runes
The final matter to look at when it comes to the Rolling Thunder Build is what Runes you should equip. It’s equally as important to look at the Passives a Rune will provide, seeing as you can only have one active at a time anyway.
| Name | Active | Passive |
|---|---|---|
| Ravage | Deal 50% more damage vs. Health for 20 seconds | +10% damage vs Health |
| Vivify | Your Ability cooldowns are refreshed, and your next Ability is free | +10% Rage Generation. |
| Hemorrhage | All weapon attacks apply Bleeding for 10 seconds | +10% Bleeding Duration |
| Overflow | Your current Potion’s additional effects are applied | +1 Max Potions |
| Scorch | All of your weapon attacks deal Fire damage for 20 seconds | +10% Fire damage |
Of the three Runes that you can have set at any time, Ravage is always a useful one to have, and used for it’s active too. Once you’ve stripped an enemy’s Armor or Barrier, you’ll be dealing damage vs. Health so anything that increases that damage is always a bonus. Overflow is great to equip for its Passive, granting you an extra Max Potion and Vivify is great for its Rage Generation Passive.
There you have it; you now know how to make the most out of a Two-Handed Warrior Slayer making the most out of Charged Attacks and the Rolling Thunder skill. Played right, this will make you a killing machine that not many enemies will be able to stand against!










No Comments