The open world of Avatar: Frontiers of Pandora has been described by Ubisoft as a glimpse into the next generation of visuals for their games. It’s difficult to argue that they haven’t taken steps toward this after you spend more than five minutes in the game. You’re introduced to a vast dynamic world in which foliage can be seen moving to match the flow of weather effects, shadows and textures blend relatively seamlessly beneath the forest canopy, and the overall impression of particle effects, lighting, and fog build an atmospheric environment that feels truly alive. All of this comes at a cost, however, especially if you’re playing on an older gaming rig, or if you’re pushing current hardware to its limits in 4k resolutions. On this page, we’ll cover the best graphical settings to get the most FPS out of your hardware for the game.
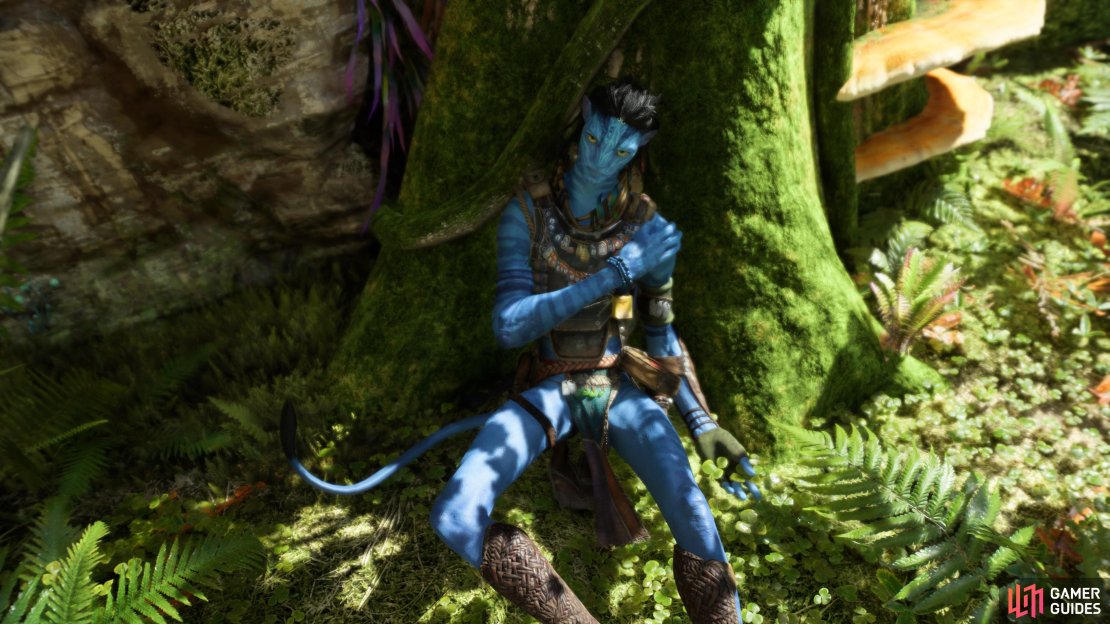
The level of fine details in things like shadows, foliage, and textures is impressive in Avatar: Frontiers of Pandora.
All Graphical Settings in Avatar: Frontiers of Pandora
There are quite a few graphical settings that you can choose from when playing Avatar: Frontiers of Pandora on the PC. Most of them will be familiar to veteran gamers, but some use different phrases that may be confusing at first glance. We explain what each of the settings do below while providing our recommendations for the best one to use based on your setup.
Graphics Quality
The first option you’ll see in the graphics settings is the generic “Graphics Quality”. This can be used to set a specific baseline for the quality of the graphics, ranging from Low, Medium, High, Ultra, and Custom. If you have an ancient rig but you’re still desperate to play Avatar, you’ll probably need to try using the Medium or Low settings to achieve a consistent 60 FPS. Alternatively, you can try setting it to High and then tweak some of the settings mentioned below to see how things change, which will result in the Graphics Quality setting being changed to “Custom” as soon as you change things from their default values.
If you have a rig with all the latest hardware, you should be able to achieve a consistent 60 FPS in most environments with Graphics Quality set to Ultra. However, this may not be the case if you’re playing in 4k since you’re much more likely to experience dips in FPS as you enter the most intensive regions, where a lot of graphical elements are present at the same time. In this scenario, you may want to tweak some of the settings listed below.
Motion Blur
There are few graphics settings that are more divisive than motion blur. Some gamers don’t mind it, others hate it. The main purpose of this setting is to add a blur effect to moving objects, but it will also introduce blur to static objects when you’re moving around the world. The intention is for this to obscure sharp lines and undefined textures, which in theory should make the world feel more immersive. In practice, motion blur can often introduce excessive distortion to an image, thereby obscuring details that you might need to see for the purposes of a quest. In the worst-case scenario, it actually makes some people feel nauseous, so if you’re susceptible to that you’ll want to turn it off altogether. It’s often best implemented as a gradient scale, but in Avatar you’re limited to an Off / On setting.
Depth of Field
This setting is similar to motion blur, but it functions in a way that obscures details outside of the camera’s focal point. For example, if you’re looking directly at a specific object, the details around it will become increasingly blurred as you look further away from it. The effect of this isn’t too severe in the game, so you should only need to turn this off if you’re particularly vulnerable to motion sickness.
(1 of 2) You can see the Depth of Field effect at work here, with the foreground image being clear while the background is blurred.
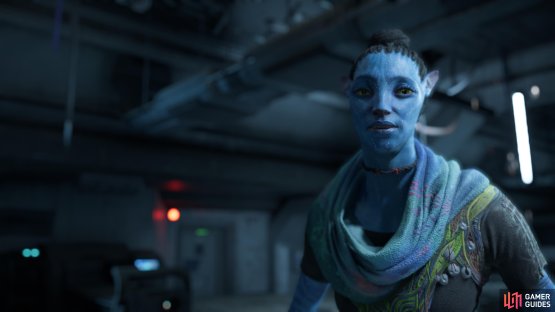
You can see the Depth of Field effect at work here, with the foreground image being clear while the background is blurred. (left), Depth of Field and Motion Blur will vary in intensity based on the type of scene. (right)
Shadow Quality and Raytracing
Now we come to the settings that can have a significant impact on the quality and performance of your game. There are five individual graphics settings related to shadows in Avatar, each of which change the way shadows work in specific circumstances. It’s good to see this level of customization for a setting that is too often limited to “Shadow Quality” alone, especially in a game where shadows are so prominent beneath the trees. We’ve briefly listed what each shadow setting does below while providing our recommendation.
-
Shadow Quality – A baseline for shadow quality throughout the game. The higher the setting, the smoother the shadow edges, but the greater the impact to performance.
-
Sun Contact Shadows – This is essentially raytracing. Most people will want to keep it at Medium or lower, but those with the best hardware can try it on High.
-
Spot Shadows – This is a specific setting that will come into play around human settlements, where spotlights are more common. If you find that you’re lagging in these areas, try reducing it to Medium or Low.
-
Spot Shadows Resolution – If the above doesn’t work for you, try reducing the resolution of spot shadows first, or at the same time, with this setting.
-
Shadow Proxies – This setting can greatly increase the speed at which shadows are rendered, thereby reducing lag in areas with a lot of foliage, but you’ll lose a lot of detail in the process. We recommend keeping it off where possible.
Reflections
There are three main graphics settings for reflections in Avatar, as follows:
-
Specular Reflections – This is a fancy phrase for how raytracing interacts with wet surfaces, such as puddles or deep-water surfaces. This can massively impact performance, so we recommend turning it down if you notice FPS drops around water.
-
Diffuse Reflections - Similar to the above, but this time for foliage; if you notice FPS drops in areas with a lot of foliage, try turning this setting down.
-
Environment Reflection Quality – This setting directly impacts the quality of large objects that can be seen in mirrors or highly polished surfaces. It improves immersion, but you may want to reduce it if you’re running an old rig. You’ll mostly notice this in interior spaces where computer dashboards are present.
Volumetric Effects
There are two main settings for Volumetric Effects in Avatar, one for clouds and the other for fog. You may not notice much of a difference between the individual settings for these, so you can get away with having both at Medium or lower. However, if you enjoy flying and you tend to look at the sky a lot, you may want to turn the option for Volumetric Clouds up if your rig can handle it.
(1 of 2) Volumetric Effects can also influence things like shafts of light that pierce into darker spaces.
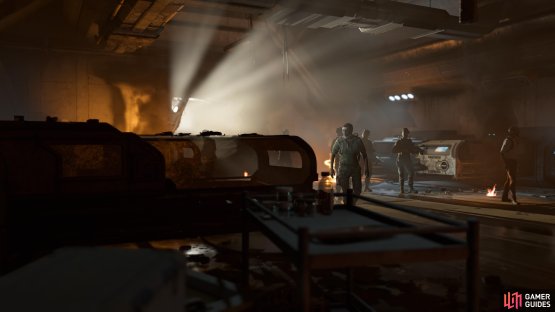
Volumetric Effects can also influence things like shafts of light that pierce into darker spaces. (left), Raytracing can influence the level of detail on a wet surface, such as your skin after coming in from the rain. (right)
You’re more likely to see a difference with Volumetric Fog when it appears under a forest canopy, where the density of fog effects can help to bring a scene to life and make it more immersive, especially as the fog moves through trees. With that said, it’s one of the most graphically demanding settings for the game, so you may have to reduce it if it tanks your FPS.
World Detail
The settings in this category are among the most important because they can greatly influence the sense of immersion in the game. If you enjoy thoroughly exploring every corner of an open world, these settings will matter most to you since they influence things like the density of foliage, particles, and the draw distance of objects.
-
Extra Streaming Distance – This is another fancy phrase for a familiar setting: draw distance. There’s a sliding scale from 0 to 10, and the greater the number, the more objects you’ll be able to see from a distance. If you reduce this to 0, you’ll be missing out on a lot of details from objects that you’d otherwise be able to see in the distance. It doesn’t affect overall FPS too much to have this turned all the way up, so it’s worth experimenting with.
-
Object Detail – This is another setting that changes the level of detail for objects, but for this setting, it impacts the detail for all objects that you encounter. Although it’s not in the “Textures” category, it’s basically the same as the classic “texture detail” setting that you’ll find in many open-world games. The slider goes from 0 to 25, and we didn’t notice much of an FPS drop when maxing it out, but there’s a noticeable difference in the quality of textures.
-
BVH Quality – This setting has limited scope in terms of how it impacts the visuals of your game. It essentially determines the quality of how geometric shapes are reflected and it’s most relevant in low-light environments, such as caves. We recommend leaving this at the default value to ensure consistent FPS.
-
Microdetail Quality – This setting can have a massive impact on the visuals of the game. It will determine not only the fine details on objects such as rocks, plants, tree leaves and bark, but it also changes the density and variety of foliage in any given scene. We recommend keeping this at Ultra where possible, especially since any FPS drop will be more impacted by texture detail settings.
-
Particle Detail – This is another setting that can greatly influence your visual experience of the game. It mostly changes the detail and density of particle effects such as rain or other weather effects, but it can also impact how visible Pandora-specific flora and fauna are, especially at night. We recommend keeping this on High where possible.
-
Scatter Density – The Scatter Density setting functions in a similar way to Microdetail Quality, but rather than focusing on changing the fine details of objects, it mostly impacts the sheer quantity of foliage patches, such as grass. This can have some negative impact to FPS on older rigs, but most people should be fine keeping it at High or Ultra. The biggest difference can be seen when transitioning from Medium to Low.
-
Dither Fade – This setting won’t impact performance much, but it’s more of a visual preference. It determines whether objects will gradually fade from view as you get further away from them, or whether they’ll disappear in an instant once you reach the threshold. The latter setting can disrupt immersion, so we recommend keeping it on.
Textures
The final category of textures primarily relates to resolution scaling. There are three main settings here, each with varying levels of impact to the overall visual experience:
-
Spotlight Projection Resolution – This setting will have a massive impact on the fine details of both textures and shadows in a scene. The lower the setting, the more you’ll find textures being blurred and blended. We highly recommend keeping this at the maximum setting unless you’re experiencing severe FPS drops on the oldest of rigs.
-
Destruction Quality - This setting has a rather specific application, namely to scenes where the destruction of objects is taking place. The higher the setting, the more individual fragments of destroyed objects you’ll find being scattered about. You’ll also find that they have slightly higher textures on High, but these can be difficult to see as they’re scattering through the air!
-
Terrain Tessellation – This is another setting that is important to maintain as high as possible. It provides more detail for landscape features in general, but particularly things like muddy, rocky, and wooded surfaces. You’ll notice the biggest drop in detail on the Low setting, while the difference between Medium, High, and Ultra isn’t always so noticeable, so you may want to experiment between them if you need to.
Resolution Scaling – DLSS and FSR3
If you’re one of those PC gamers lucky enough to own an Nvidia or AMD graphics card capable of utilizing DLSS or FSR3 respectively, you’ll be glad to know that both are implemented impressively well in Avatar.
Nvidia and DLSS in Avatar – Scaling Quality and Mode
You may be wondering where you can find the DLSS setting in Avatar, and that’s because it’s not officially referred to as DLSS in the settings. Instead, it’s broken down into two main settings: Scaling Quality and Scaling Mode, and you’ll find both in the Video settings menu.
The Scaling Quality setting should be familiar to most Nvidia card owners, but in this case, you have five main options to choose between: Ultra Performance, Performance, Balanced, Quality, and Ultra Quality. It goes without saying that you’ll get the best performance from the Ultra Performance setting, and you should be using this if the smoothness of gameplay is your primary concern, but you’re struggling to achieve a consistent 60 FPS even after adjusting most of the settings mentioned above.
If you’re playing with a 4k monitor, you can struggle to achieve a consistent 60 FPS even with the best hardware. In this scenario DLSS can come to the rescue, giving you consistent performance while retaining higher resolutions where possible. You should be able to get away with using the Quality settings in this case, but if you want to extract a bit more performance from your rig, you can always try the Balanced or Performance settings.
Difference Between Fixed and Biased Scaling Mode
The options for refining DLSS in Avatar don’t end there. You also have the Scaling Mode setting, with two main options: Fixed and Biased. In reality, you shouldn’t notice too much of a difference between these, but in the simplest terms: you can expect Fixed to maintain the nearest resolution default that it can scale to in order to achieve 60 FPS, such as 1440p on a 4k monitor, or 1080p on a 1440p monitor, while Biased will attempt to maintain the highest resolution possible while staying as close to 60 FPS as it can achieve.
AMD and FSR3 in Avatar – Frame Generation Setting
For those running an AMD graphics card, you have less to worry about in terms of different options. Avatar is officially supported by AMD so you’re going to get the most seamless experience by default, and we’re happy to say that all the evidence suggests that the once-troubled implementation of FSR3 in other games has been significantly improved in Avatar. You should be able to achieve a consistent 60 FPS with a decent AMD graphics card with this setting enabled but do note that it’s referred to as “Frame Generation” in the video settings menu. It should be enabled by default if you have an AMD card, but it’s worth checking regardless!
Temporal Upscaler
And now for the final choice between the two wordiest settings in the game: should you use AMD’s FidelityFX Super Resolution 3, or Nvidia’s Deep Learning Super Sampling as the preference for your upscaling and anti-aliasing? Well, in this game you shouldn’t notice much of a difference, but we’d recommend going with the version that corresponds to the brand of your graphics card for the best integration.
More Avatar: Frontiers of Pandora Guides
If you’re anything like me, you prefer to explore the graphics options first before you get stuck into a game. Once you’ve got all your settings tweaked to perfection (or as close to it as you can get with your rig), you can get properly stuck into the world of Pandora! Avatar doesn’t hold your hand as much as other Ubisoft games, so you may find some of the pages below useful as you get to grips with the basics.





No Comments