
This is a guide for Chapter 4: The Struggle Continues in Fire Emblem Warriors: Three Hopes, this page focusing on Garreg Mach Monastery.
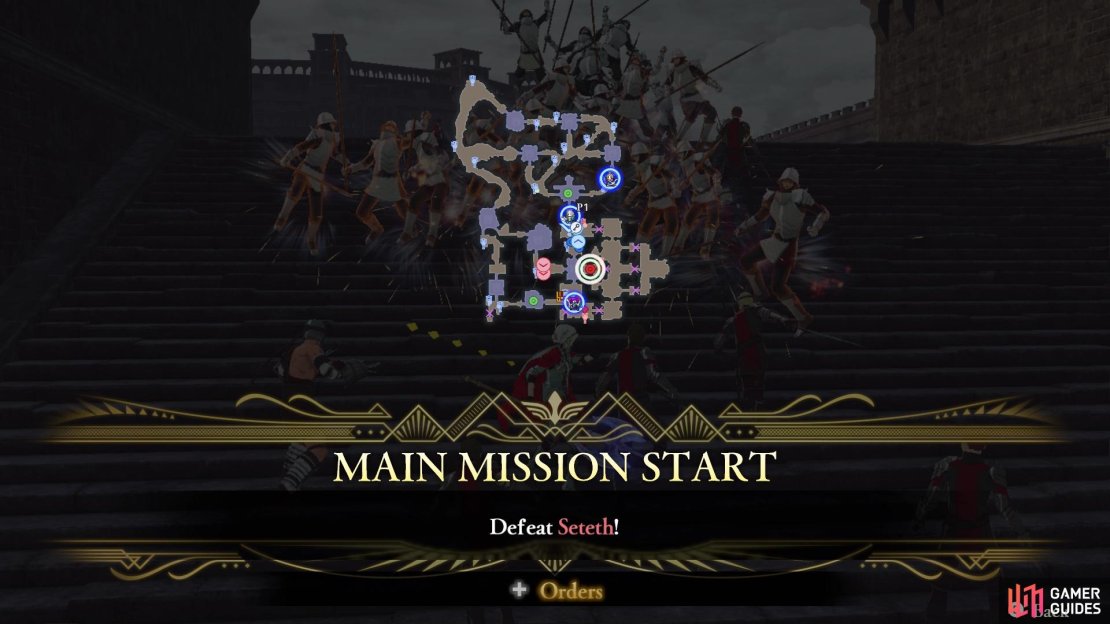
It’s time for the final battle of the chapter
A quick reminder that this is the main quest for Chapter 4 of Scarlet Blaze, so make sure you have done everything else you wanted to do before starting this battle. That includes the side battles, spending all of your Activity/Training Points in the camp, and checking out all of the Surveying Spots. You will be unable to do these and get the rewards for them later. Note that you will eventually be able to replay battles for S Ranks, so don’t worry too much about that right now.
Which Strategies to Choose for Garreg Mach Monastery
Since this is the main battle of the chapter, you will see something new upon starting it. You will have the option to choose Strategies prior to the battle, with some determining positions for units at the start, while others might activate during the battle to provide an advantage. Each Strategy has a point value attached to it and in order to earn Strategy Resources, you will need to complete the side battles on the War Map. For Chapter 4, each of the side battles will grant you 10 Strategy Resources, making it a total of 30 if you do all three.
Looking at the table below, you will definitely want to choose Persuade Hapi and Persuade Constance, as both of those will allow you to get new playable characters. They cost 10 each, so that would leave you with one more Strategy to get, should you want it. None of the others are particularly going to change the tide of the battle, but Impregnable Wall can help, due to some of the events that happen during the battle. Note that both Impregnable Wall and Blaze are Strategies that unlock via the Surveying Spots from other regions.
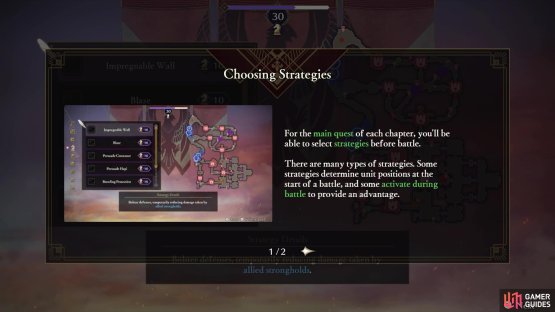
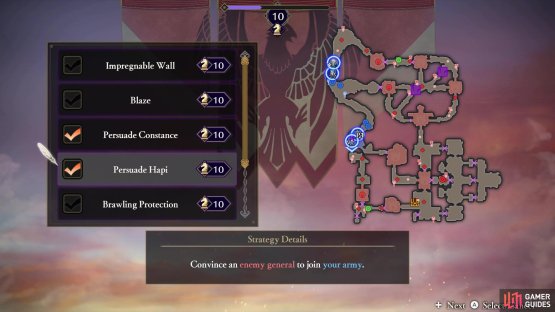
(1 of 2) The main battle of each chapter will allow you to choose Strategies before it begins
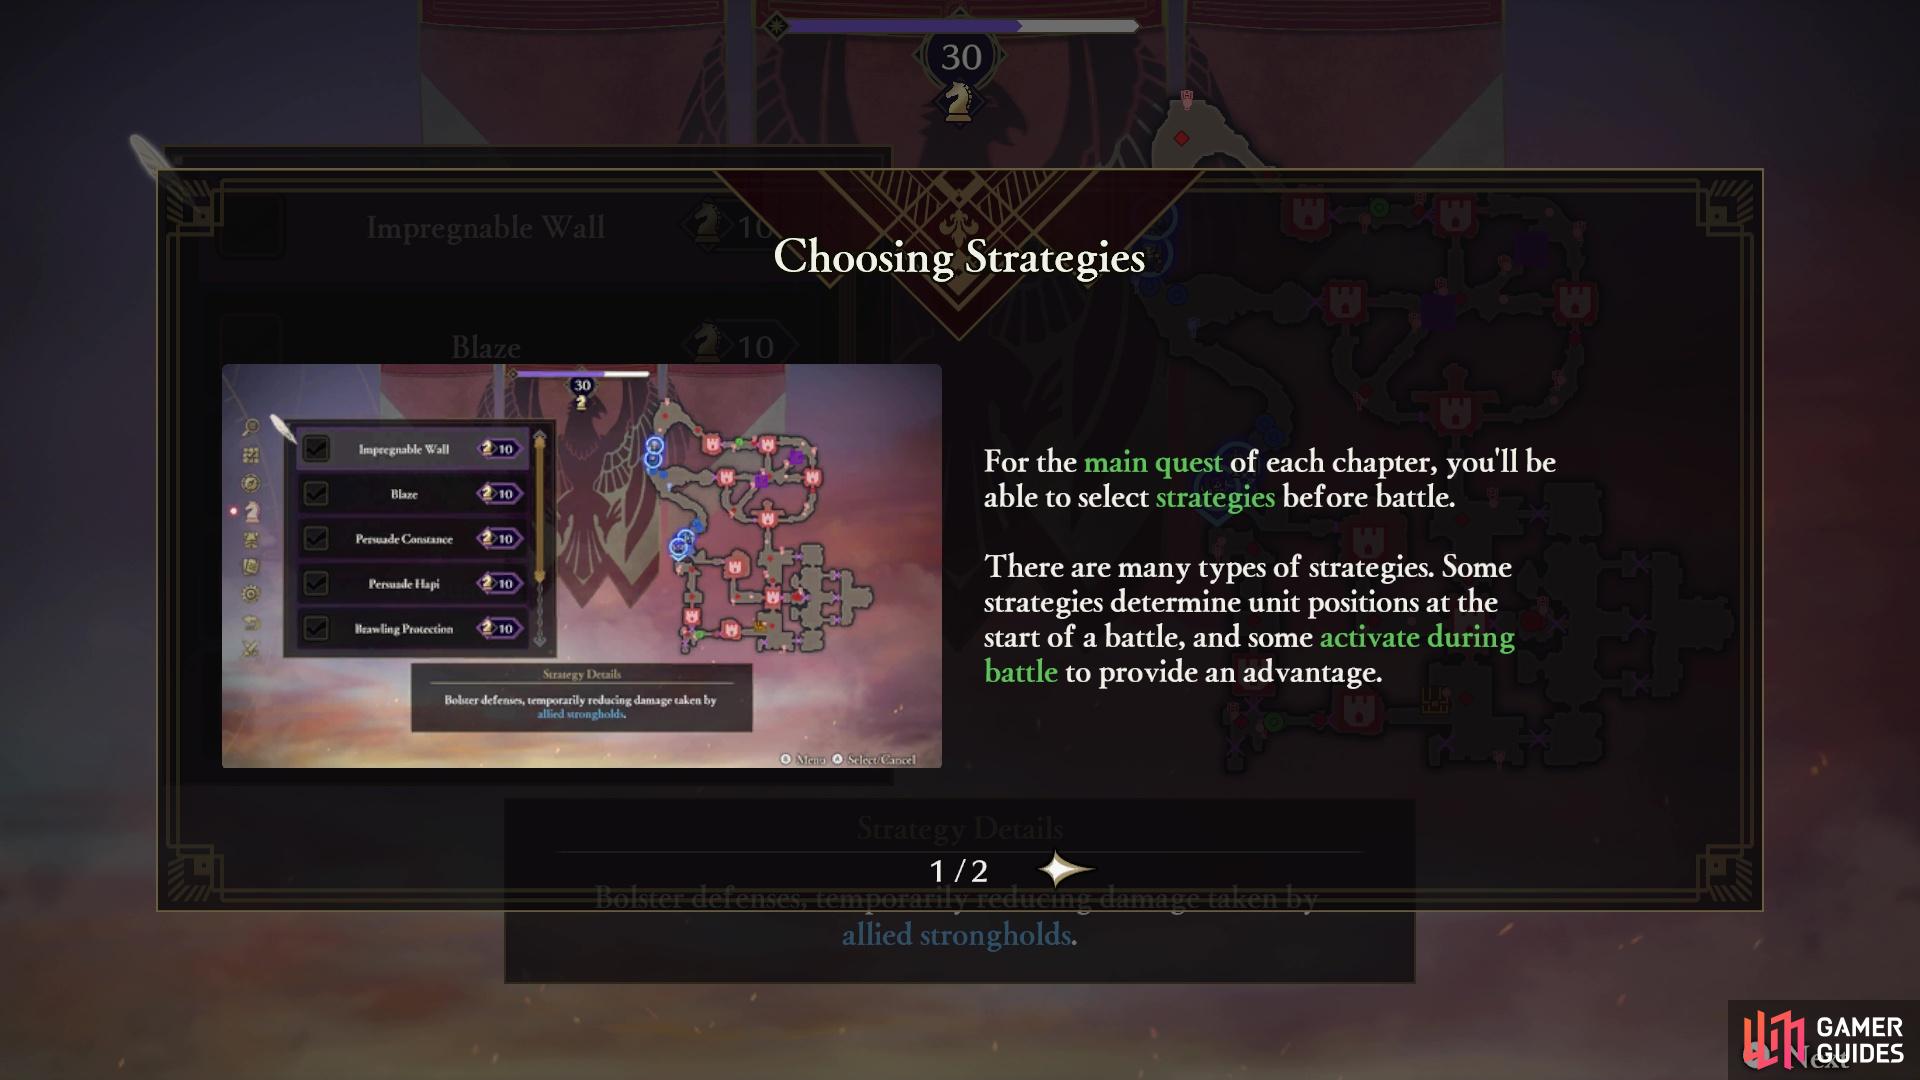

The main battle of each chapter will allow you to choose Strategies before it begins (left), You definitely want to choose the two shown in this screen to get more playable characters (right)
| Strategy | Cost | Strategy Details |
|---|---|---|
| Impregnable Wall | 10 | Bolster defenses, temporarily reducing damage taken by allied strongholds. |
| Blaze | 10 | Spread flames to continuously damage enemies within an area. |
| Persuade Constance | 10 | Convince an enemy general to join your army. |
| Persuade Hapi | 10 | Convince an enemy general to join your army. |
| Brawling Protection | 10 | Assign a brawler unit to protect allies as they advance. |
| Well-Stocked | 10 | Begin the battle with allied strongholds stocked with healing items. |
| Assign Staff Officers | 10 | Slightly strengthen allies for a period of time at the start of battle. |
How to S Rank Garreg Mach Monastery
| Completion Time | Enemies Defeated | Damage Taken |
|---|---|---|
| 18:00 | 1500 | 50% |
Before beginning the battle, you will probably want to position your troops to anticipate the reinforcements that appear. Place Bernadetta in the northern batch, since there will be some flying units a little later, and place Shez in the bottom half. You will also want to make sure that Edelgard is participating, putting her in the northern section, with her class being her Armored Lord. This makes it easier to bust through the cracked walls and get at a stronghold a little later.
The first order of business should be to recruit both Hapi and Constance, then you can start working on the strongholds. Keep a magic user or two back at the central stronghold on the western side of the map, for when the Armored Knights appear. Continue the mission, alternating between the northern and southern paths, until Flayn’s event appears. Cut through the cracked walls, defeat her, then get ready for the reinforcements that try to take back your strongholds. Pegasus Knights will be in the north, so send Bernadetta after them, while Cyril will be in the south (Shez should be more than enough for him, but you might want to control them).
The rest of the battle should be pretty cut and dry after this, other than the ballistae/fire orbs side mission to avoid taking too much damage.
Mission 1: Defeat and Recruit Hapi and Constance

(1 of 2) You will see a brief tutorial on how to initiate Strategies
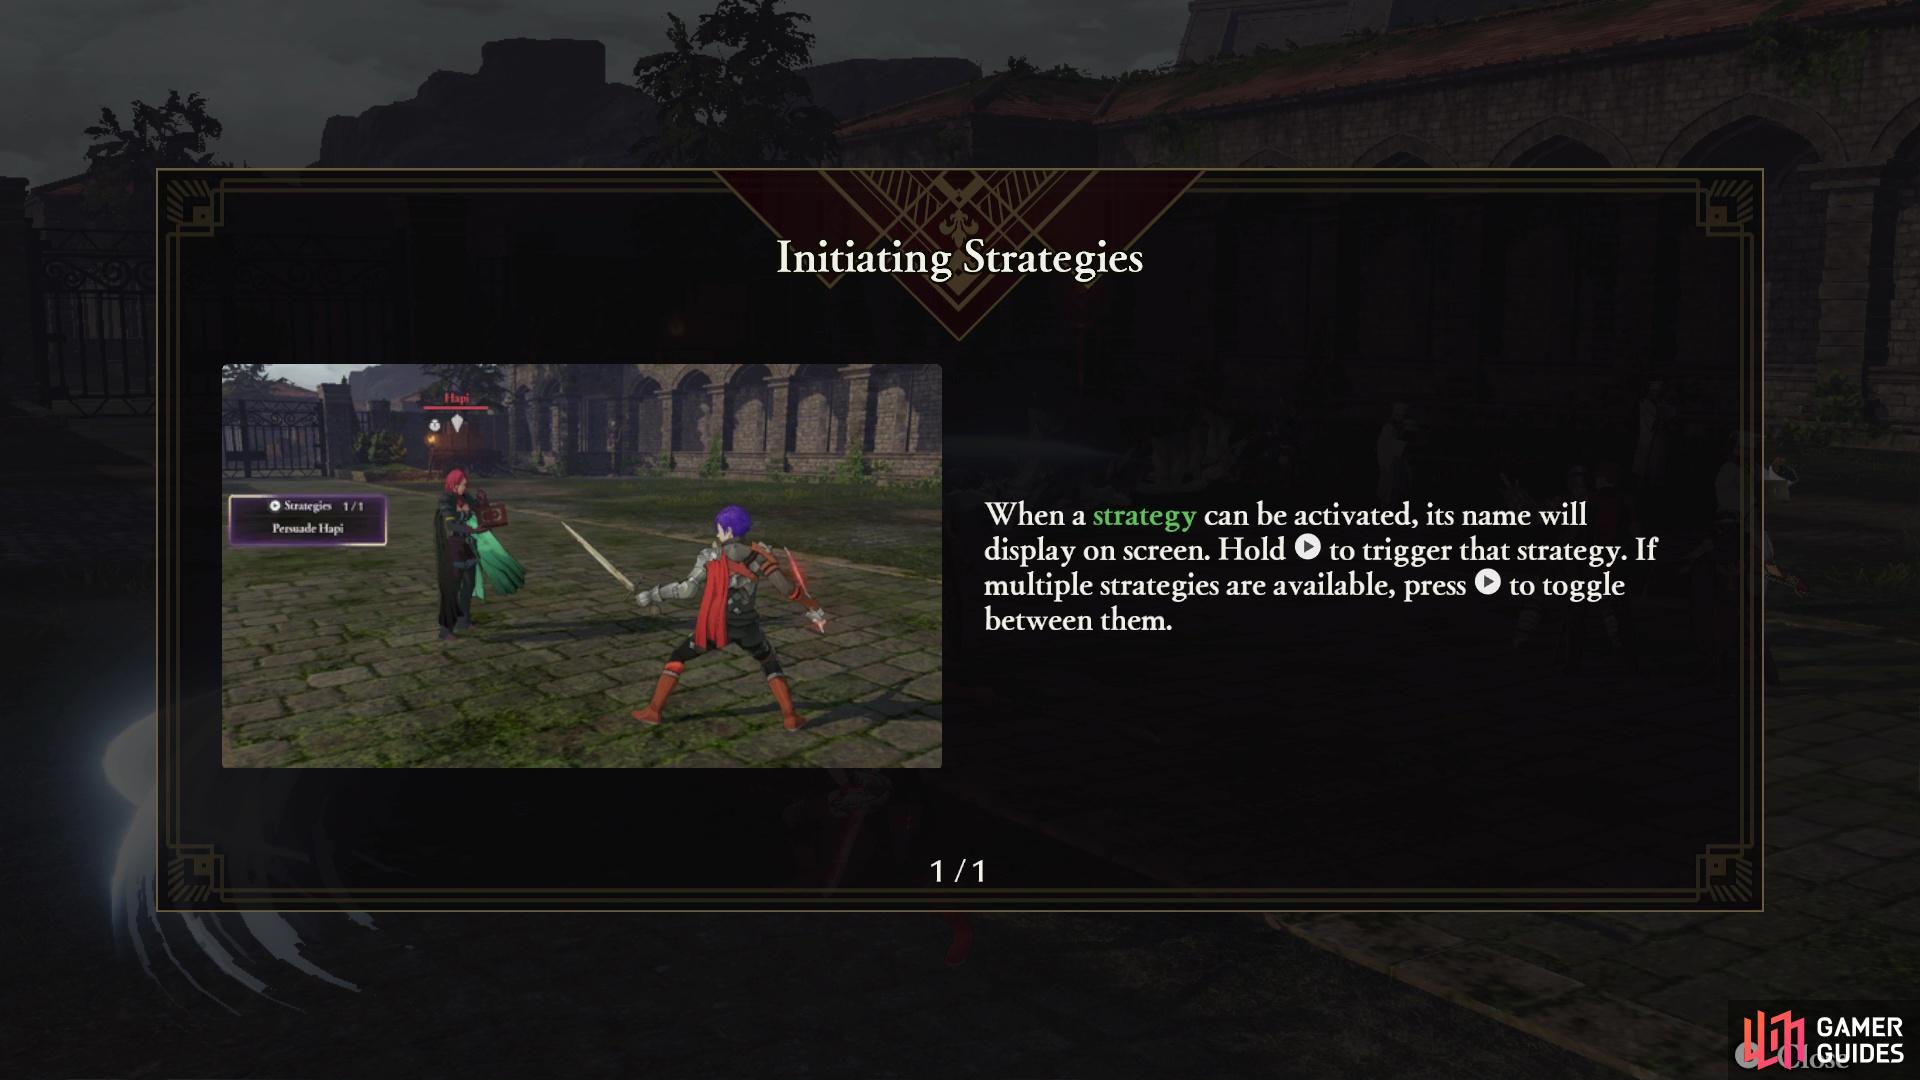

You will see a brief tutorial on how to initiate Strategies (left), When the time is right, hold the button shown to start the Strategy (right)
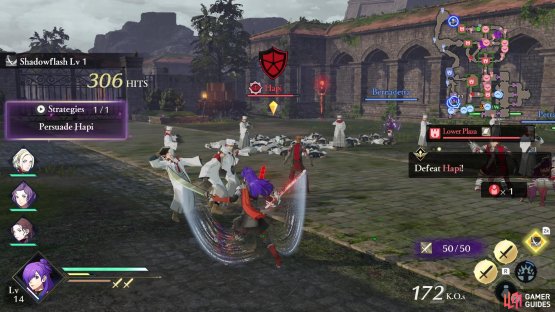
Your main mission, for right now, is to capture all of the strongholds, of which there are nine of them. Before concentrating on that, you can actually utilize two of the Strategies you picked prior to the beginning of the battle, Persuade Hapi and Persuade Constance. Basically, as any of your allies approach these two enemy units, there will be a short scene introducing them, then you should get a notice on your screen to initiate the Strategies. Thankfully, both Hapi and Constance are not too far from the starting positions of your allies.
Hapi will be in the stronghold directly south of Shez’s initial starting position, while Constance will be in the first stronghold along the northern end of the map. Once the Strategy notification appears on your screen, hold the  button to start the Strategy, which will change the mission briefly to defeating that enemy unit to recruit them. Do this with Hapi first, then with Constance, although you will likely have to switch characters, since they are both on the opposite sides of the map. Once you have recruited both of them, it’s time to move on with this battle.
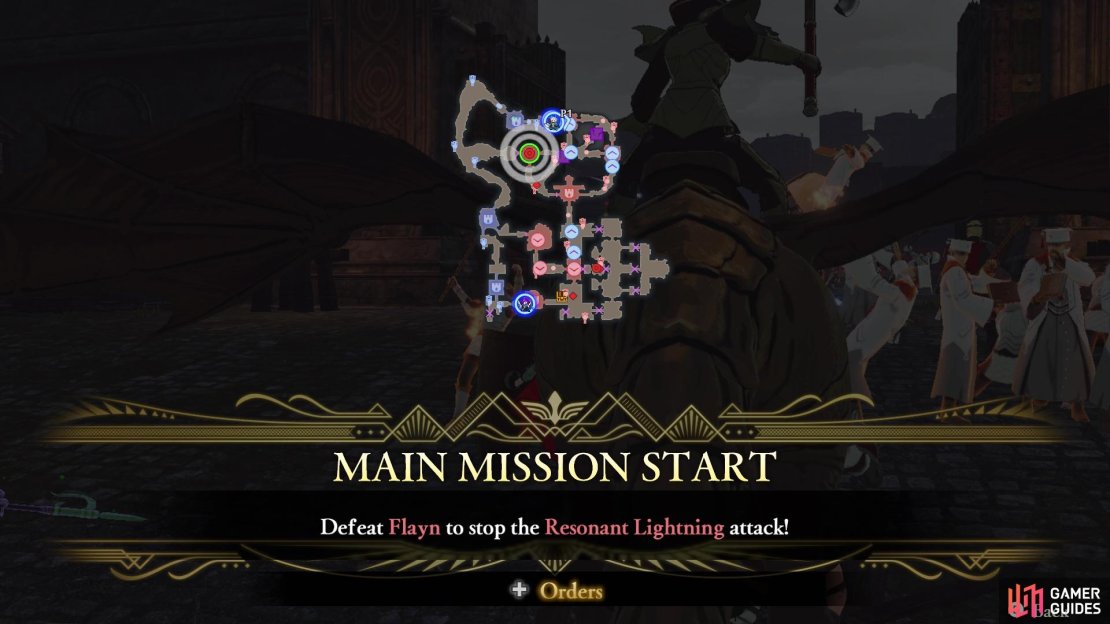
Mission 2: Defeat Flayn to stop the Resonant Lightnng attack

(1 of 4) Flayn’s Resonant Lightning will be kept to her stronghold
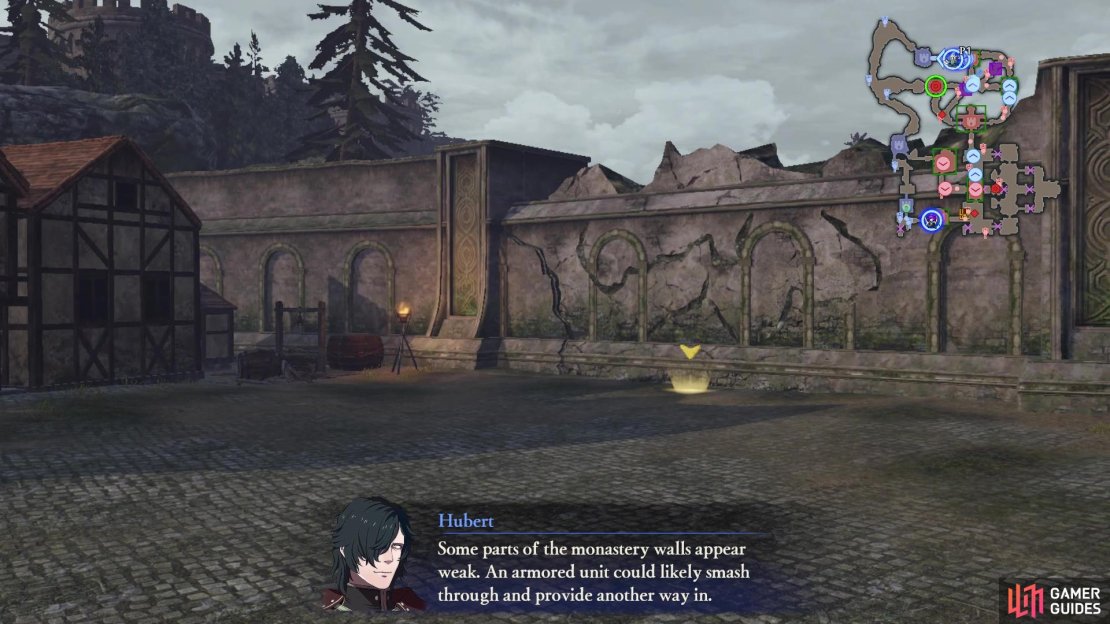
A little bit further in the battle, an event will happen with Flayn, who will start a Resonant Lightning attack. While you could circle back to come at Flayn from the west, there will be another opportunity to come at her from the east shortly. Stick to the northern path and continue east, capturing the next stronghold. Not too far beyond the second stronghold, you should see a cracked wall. Taking the hint from Hubert, an armored unit has the ability to bust through these cracked walls, creating a new path.
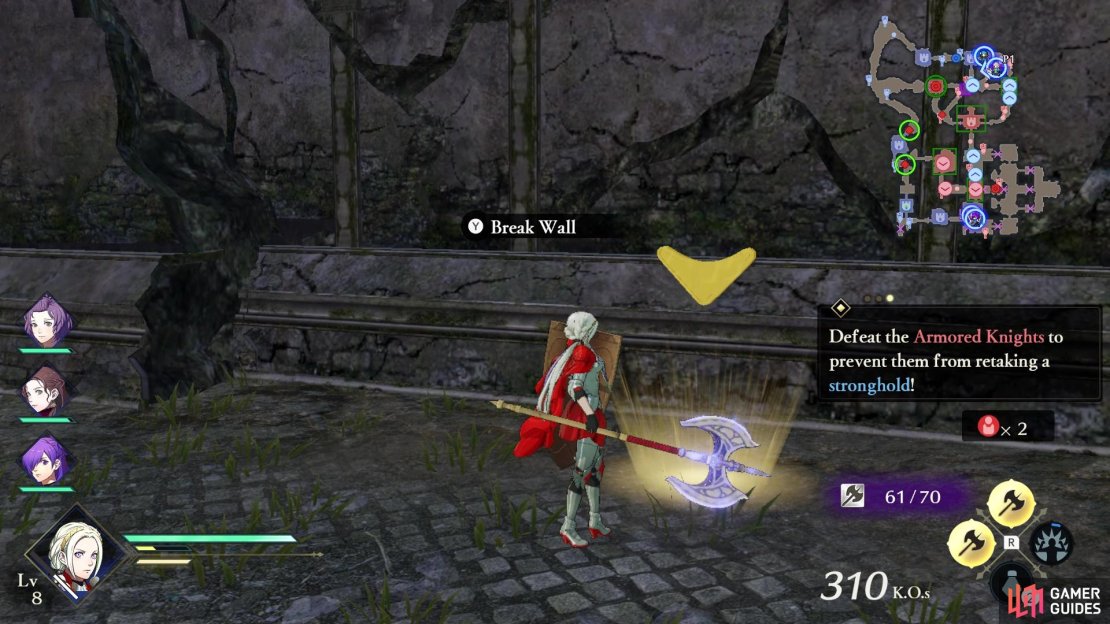
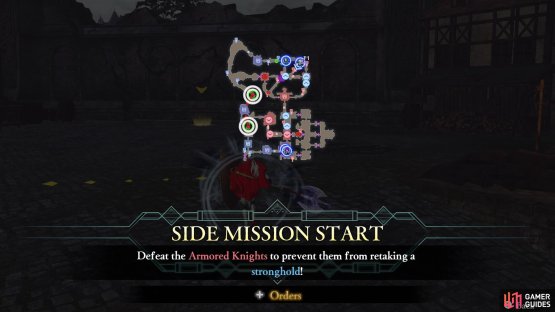
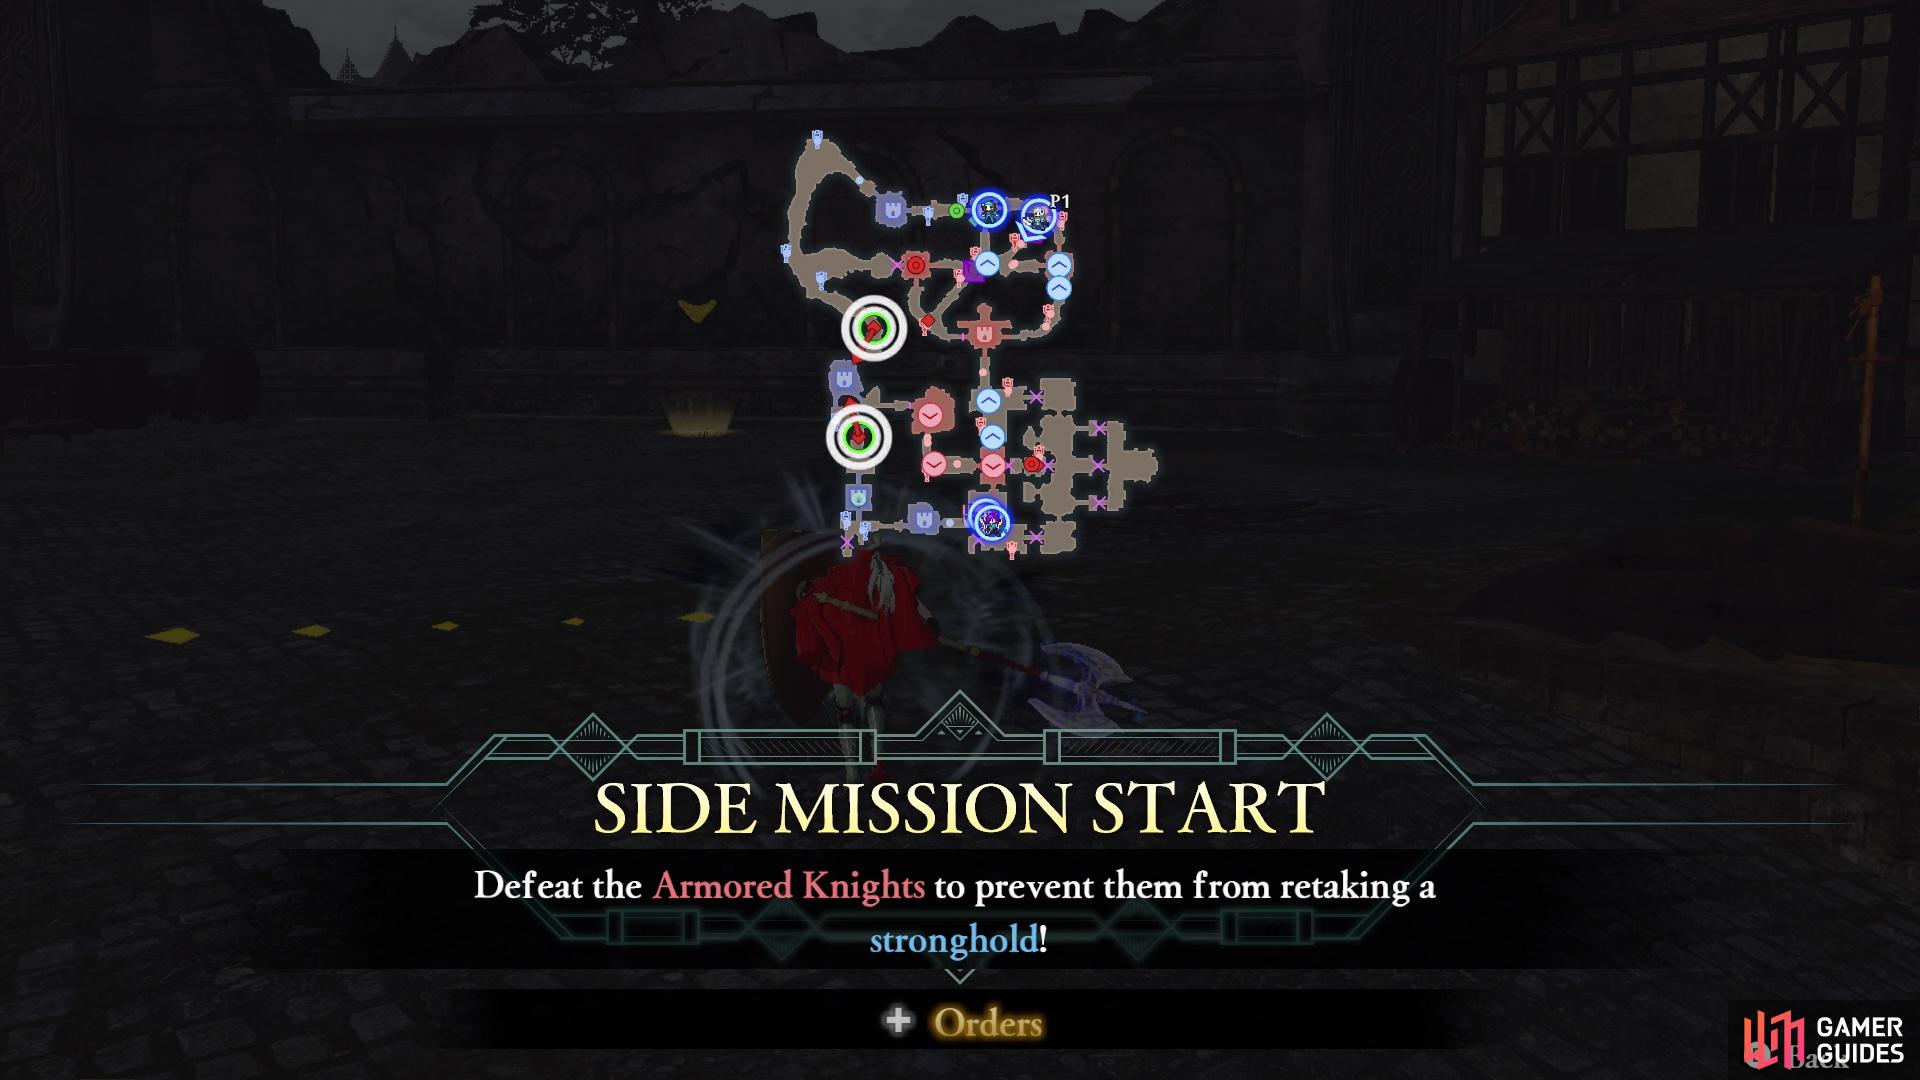
Side Mission: Defeat the Armored Knights
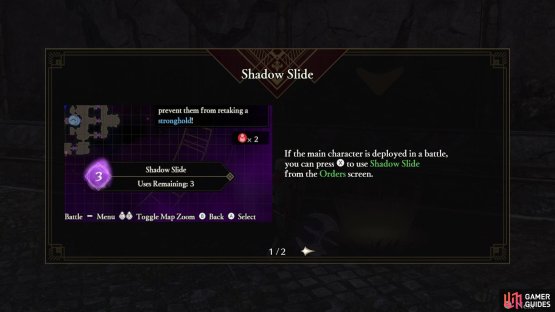
Around the time you reach the first cracked wall, some Armored Knights should show up to try and retake a stronghold, located in the middle of the map along the left side. Of course, if you left a magic user to guard it, as pointed out above, they should be more than capable. You should also get a short tutorial about the Shadow Slide ability for Shez. Basically, if you have Shez deployed in a battle, they can use this from the Orders menu to teleport to any of your allied strongholds. So, if you didn’t leave anyone behind to protect the stronghold, you can teleport back with Shez. Be wary that you are limited in how many times you can use this in a battle.
(1 of 2) The Armored Knights will attack the western stronghold, in the center
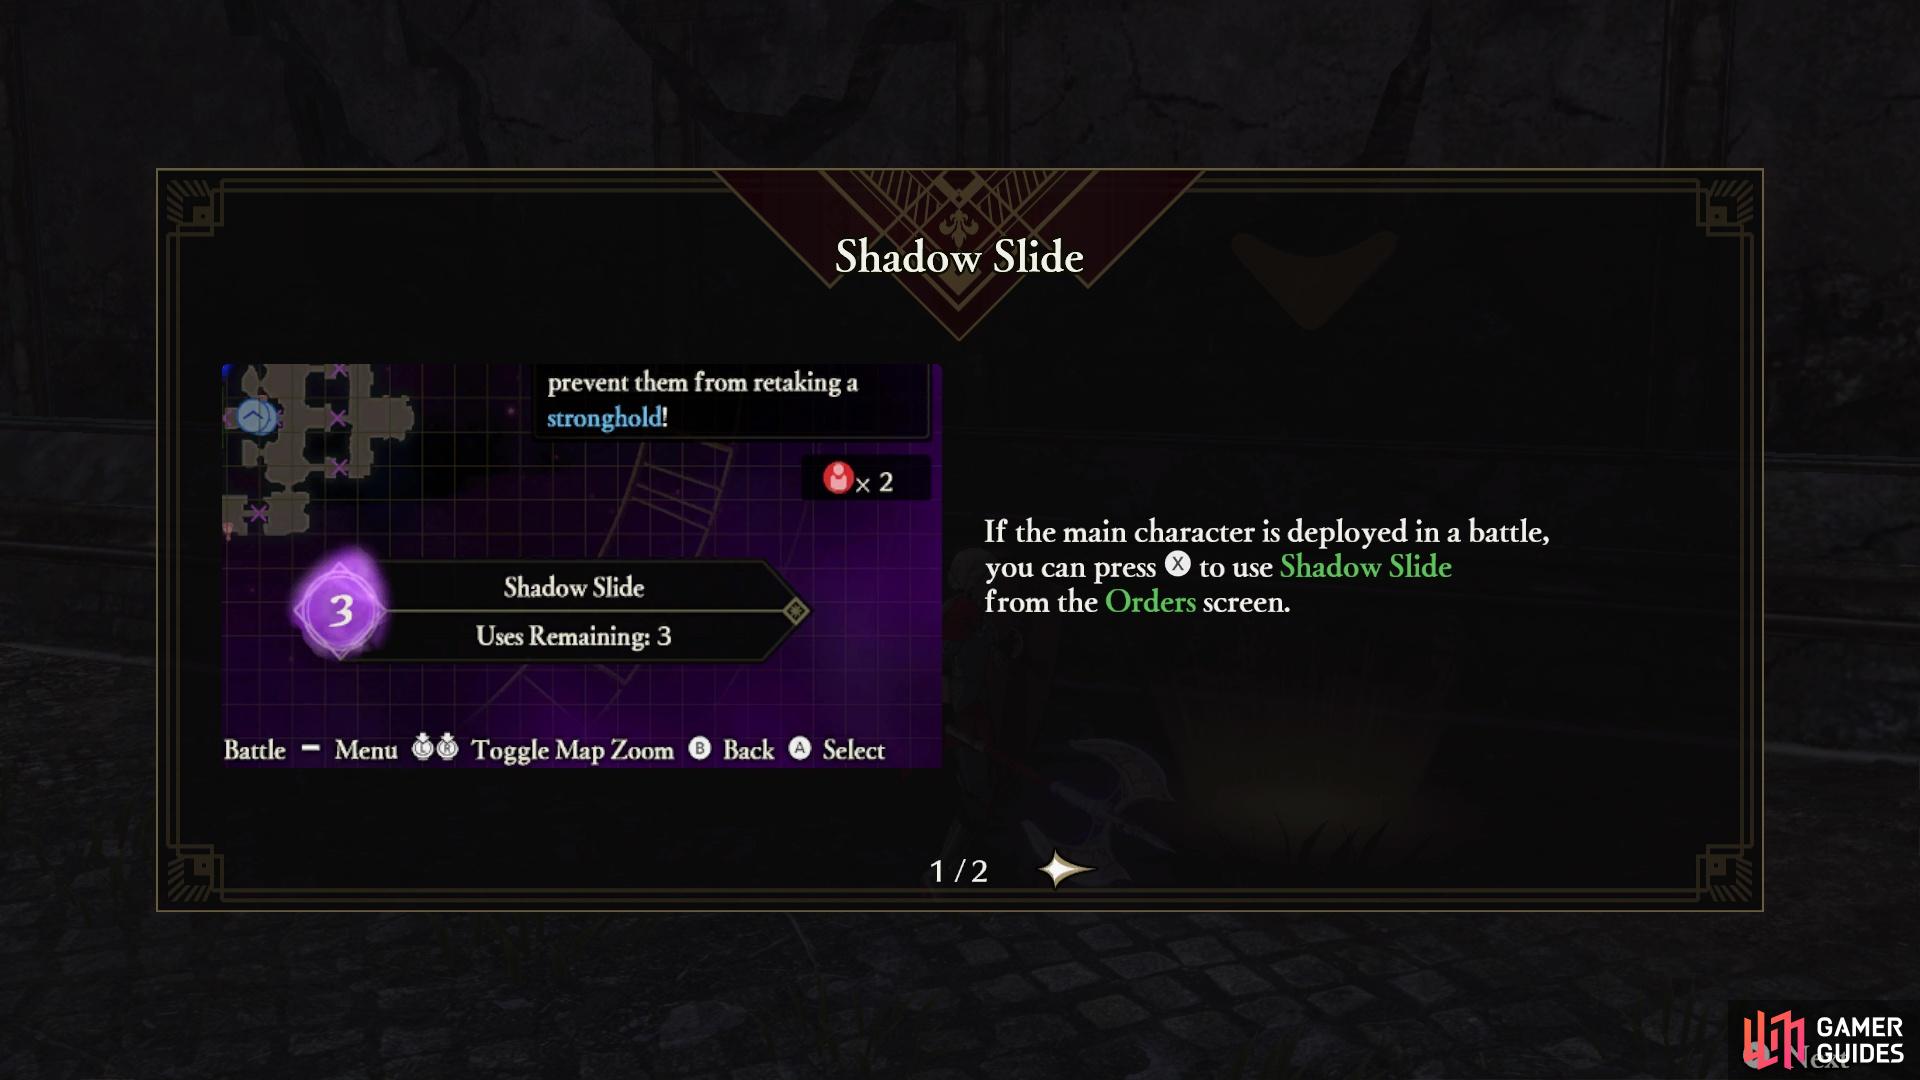
The Armored Knights will attack the western stronghold, in the center (left), You can use Shadow Slide to teleport to any allied stronghold (right)
Resume your previous mission and bust through the first cracked wall, then the second a little southwest of the first. This should place you a little east of the stronghold with Flayn. Lightning bolts will periodically strike the stronghold here, designated by a big red circle (similar to the fire orbs from The Shadows of Adrestia). Make sure not to get hit by these and take out Flayn, which will stop the lightning strikes all together. Things will be getting pretty hectic at this point…
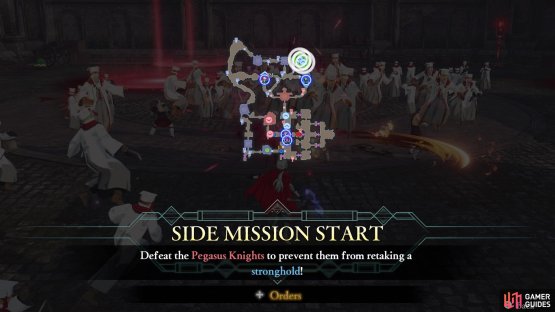
Side Mission - Defeat the Pegasus Knights
After taking the stronghold in the northcentral portion of the map, two Pegasus Knights will eventually show up to try and retake it. Since they are flying units, that makes them highly susceptible to a bow user (Bernadetta is one by default). You can either order someone to take them down, or if you have a controllable unit in the vicinity, do it yourself.
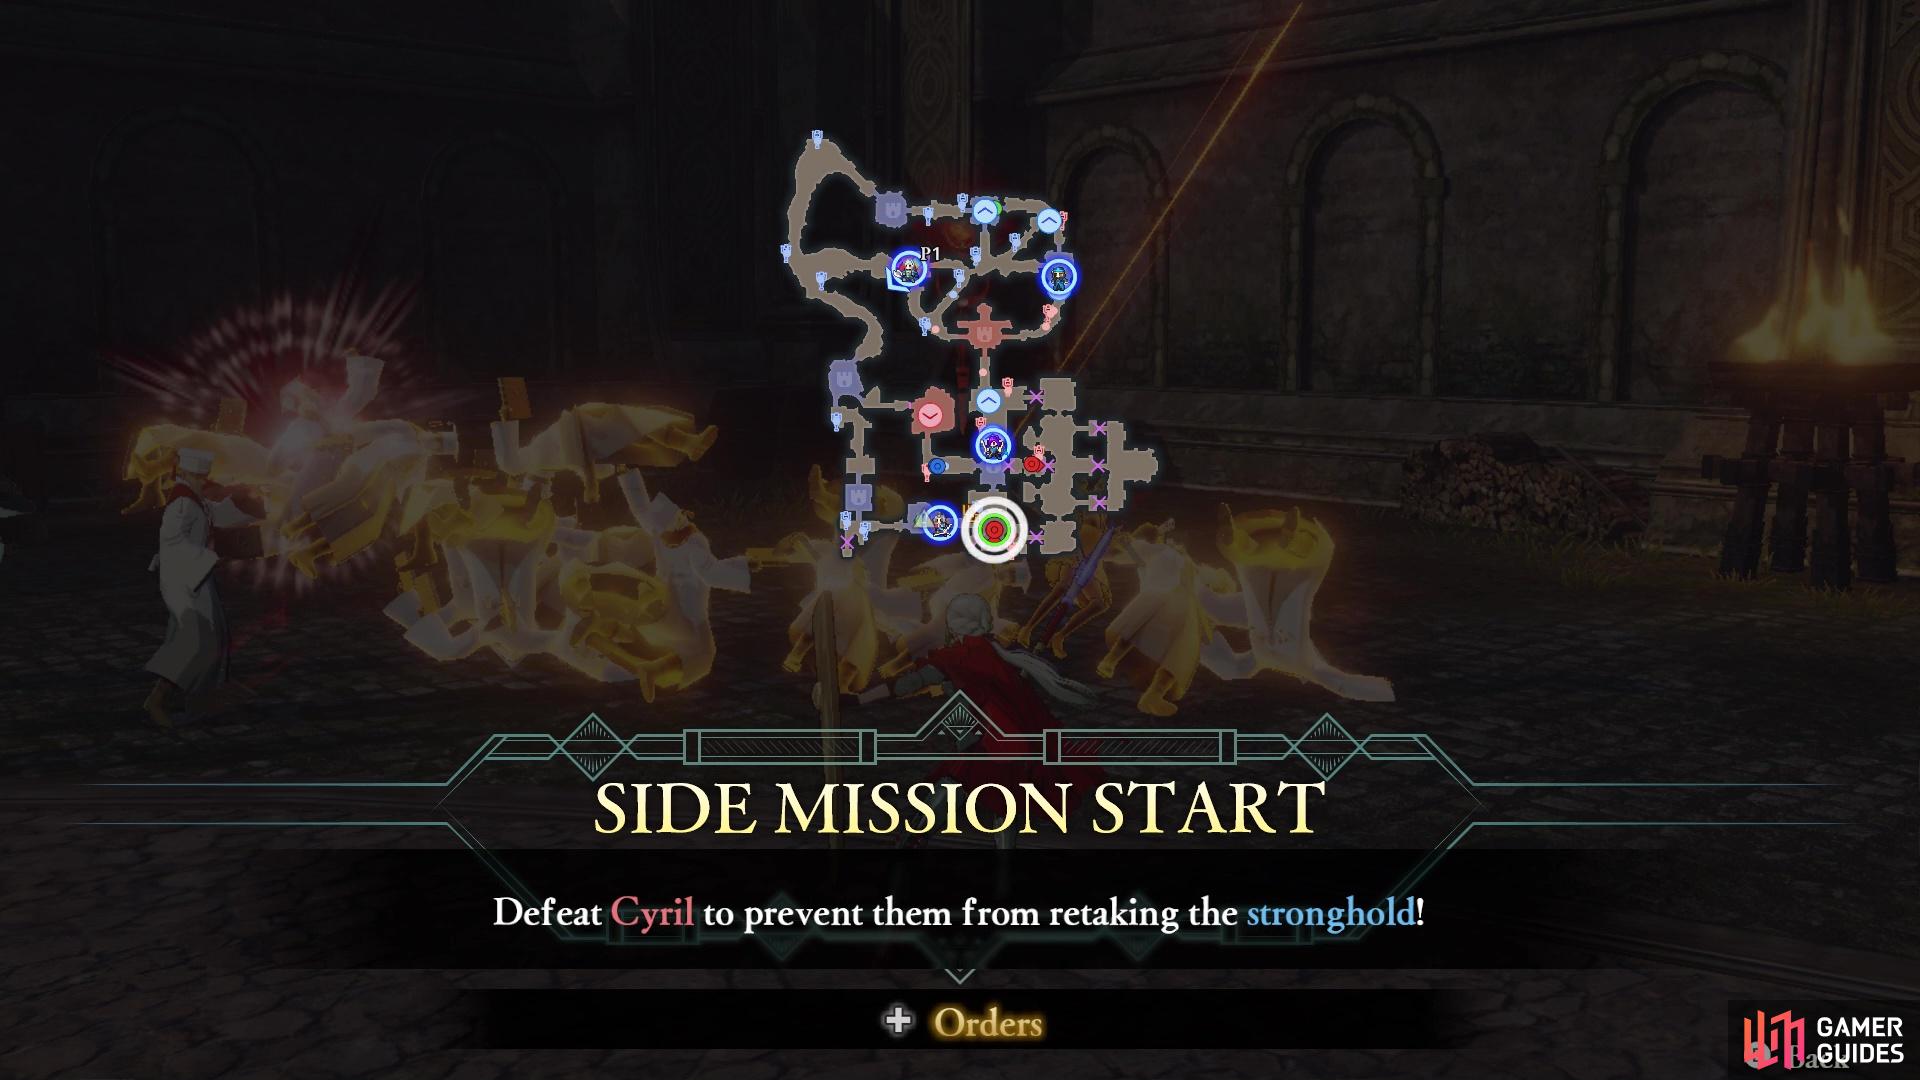
Side Mission - Defeat Cyril

(1 of 2) The Pegasus Knights will attack the stronghold in the north
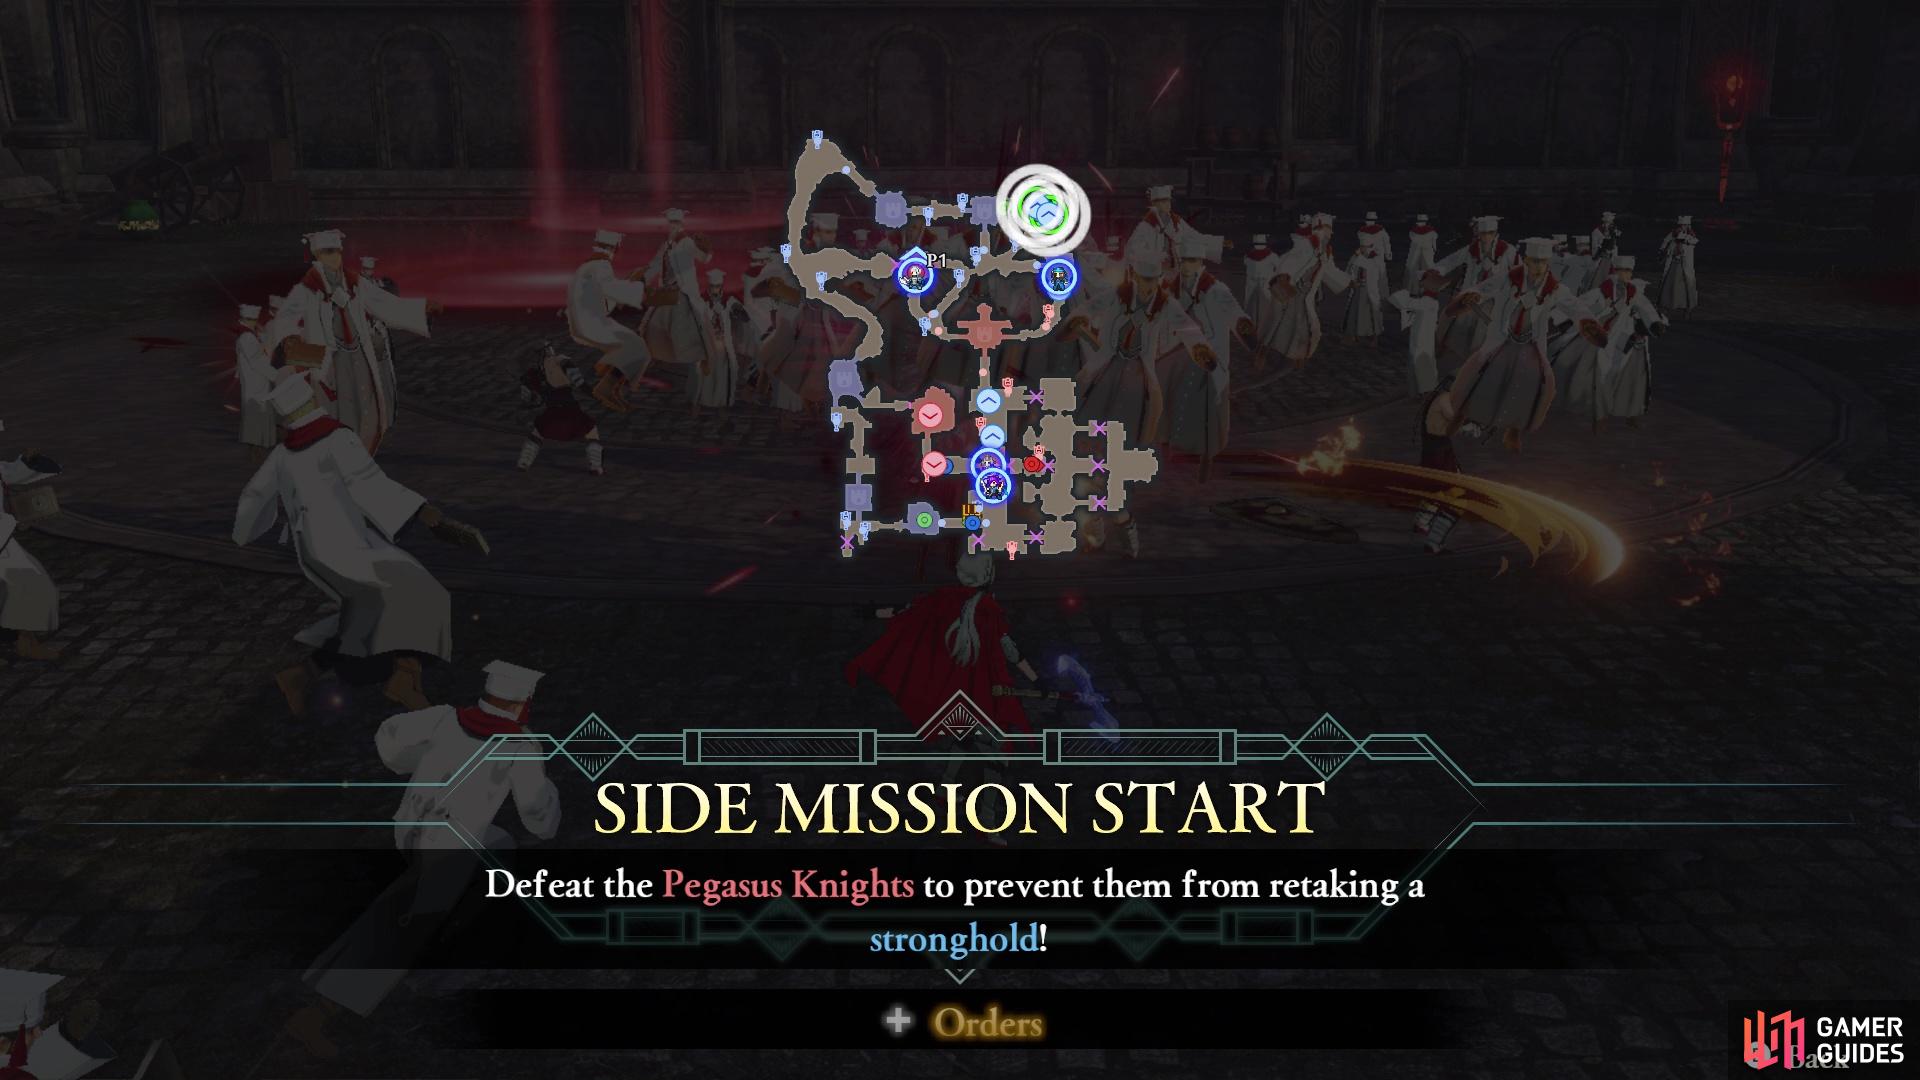
The Pegasus Knights will attack the stronghold in the north (left), while Cyril will attack the one in the south (right)
Meanwhile, at around the same time, assuming you’ve taken a certain stronghold, Cyril will appear in the southcentral portion of the map. His goal is to retake the stronghold slightly to the west of where he appears. Of course, he is probably a bigger threat over the Pegasus Knights, since he is actually a named character and all. He is an axe user, so send a sword user after him. Note that if you take all of the territories that was dictated to you in the first main mission, Cyril will retreat and you will fail this side mission.
Mission 3: Defeat Seteth
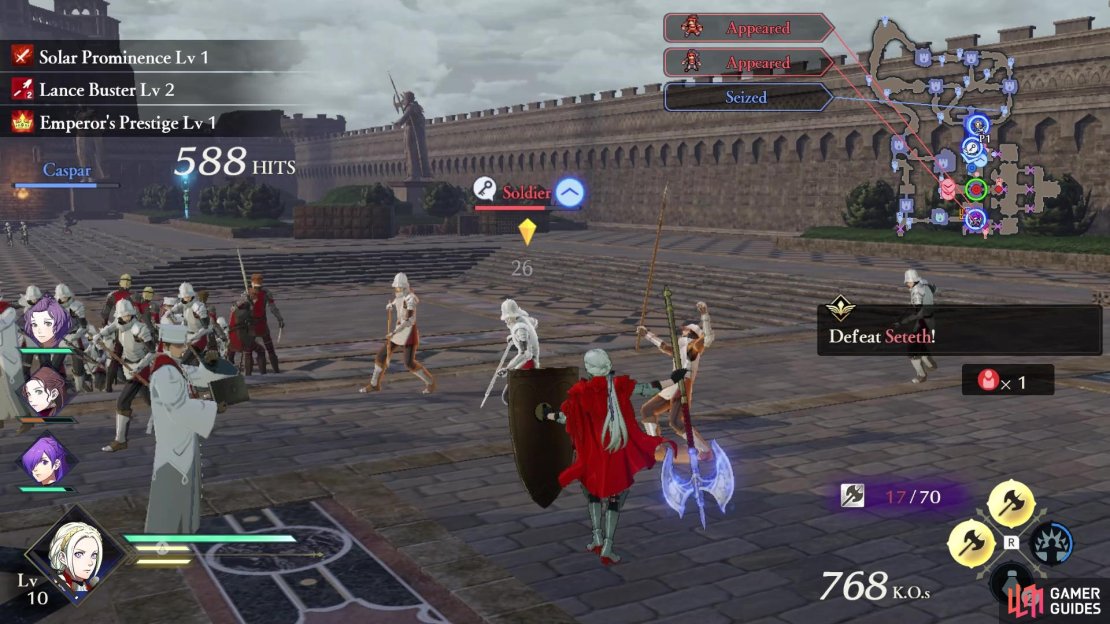
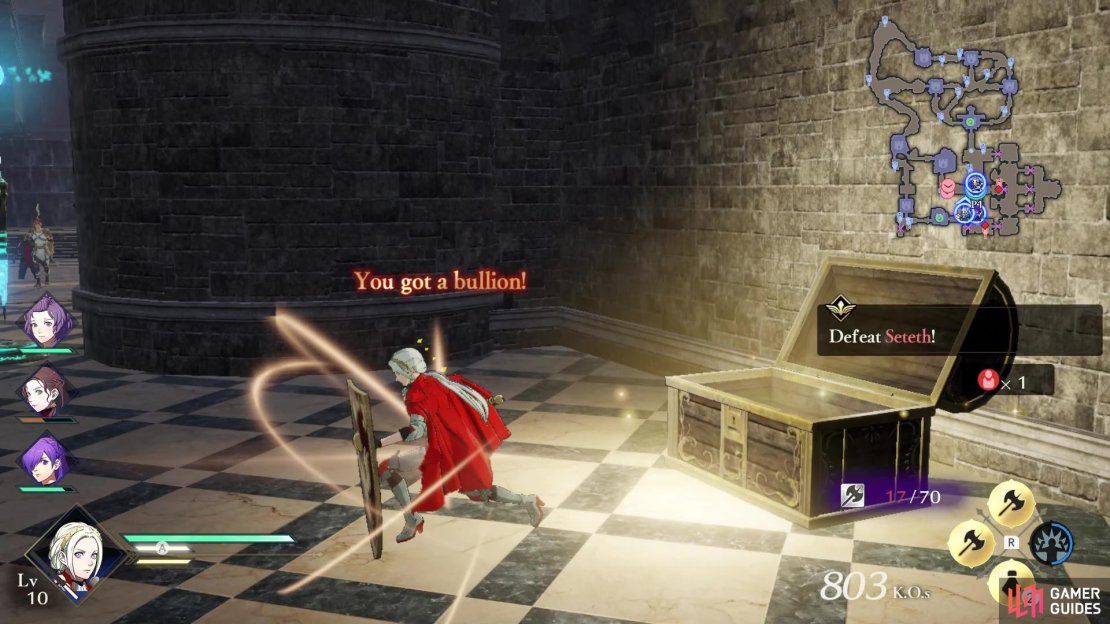
Once you take over all of the designated strongholds, your army will begin marching onto the Garreg Mach Monastery itself. This will cause some enemy reinforcements to appear towards the southern part of the map, plus Seteth will open the gates of the Monastery itself to come out and play. One of the reinforcements that appears will be a Soldier with a key, so if you want to open the treasure chest on this map, quickly defeat him to obtain said key (the chest will contain a Bullion, an item that sells for a lot of gold).
(1 of 4) Seteth will come out to play after taking over all strongholds
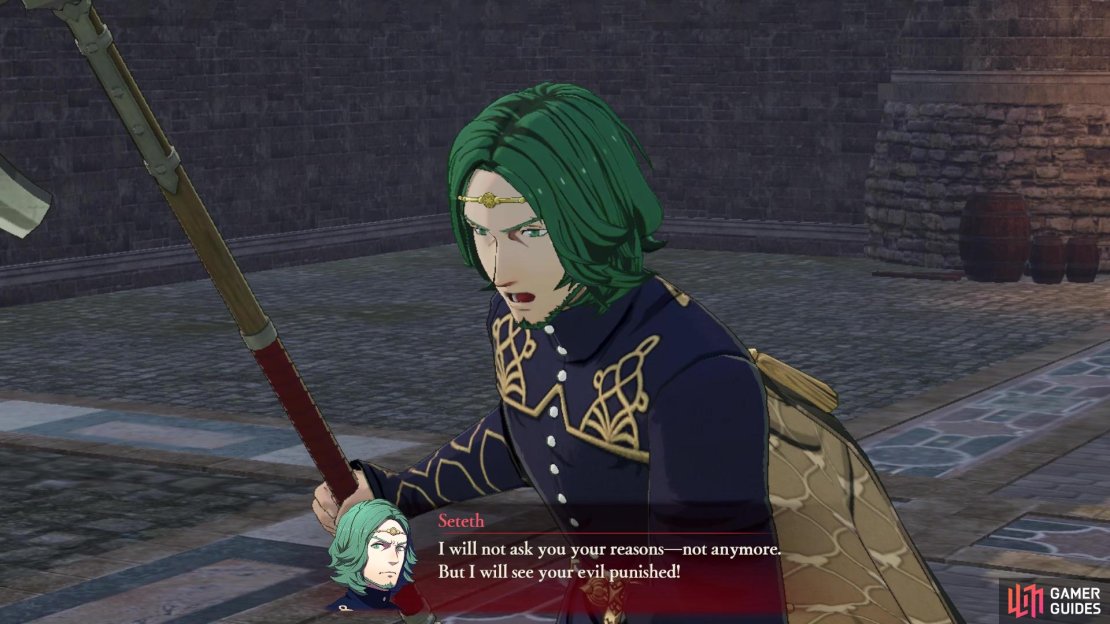
Moving onward to the main mission, Seteth will be pretty similar here to the encounter at Eastern Garreg Mach. He will be riding a wyvern, making him very vulnerable to bows, and wields an axe, so he’ll also be vulnerable to swords. Overall, he shouldn’t put up much trouble, although you might want to be careful with the other officers potentially being around the same area. Once you defeat Seteth, he will retreat and…
Side Mission: Seize the Strongholds to stop the Ballistae and Fire Orbs
The main force of Archbishop Rhea will appear in the southeast, which will bring a lot of troops. This also involves a new side mission to appear, which will have ballistae and fire orbs firing upon you. In order to stop these, you will need to take over the strongholds on the northern and southern sides of the area. To avoid taking too much damage here, you should make a beeline to both strongholds and take them out as soon as possible.

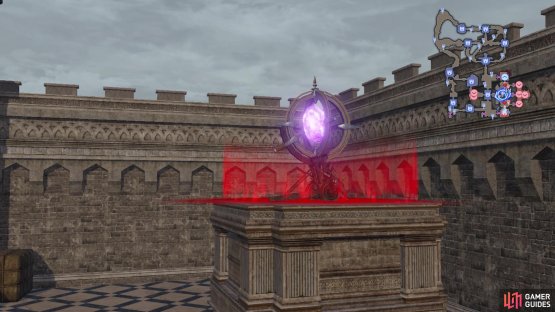
(1 of 2) You will want to do this side mission
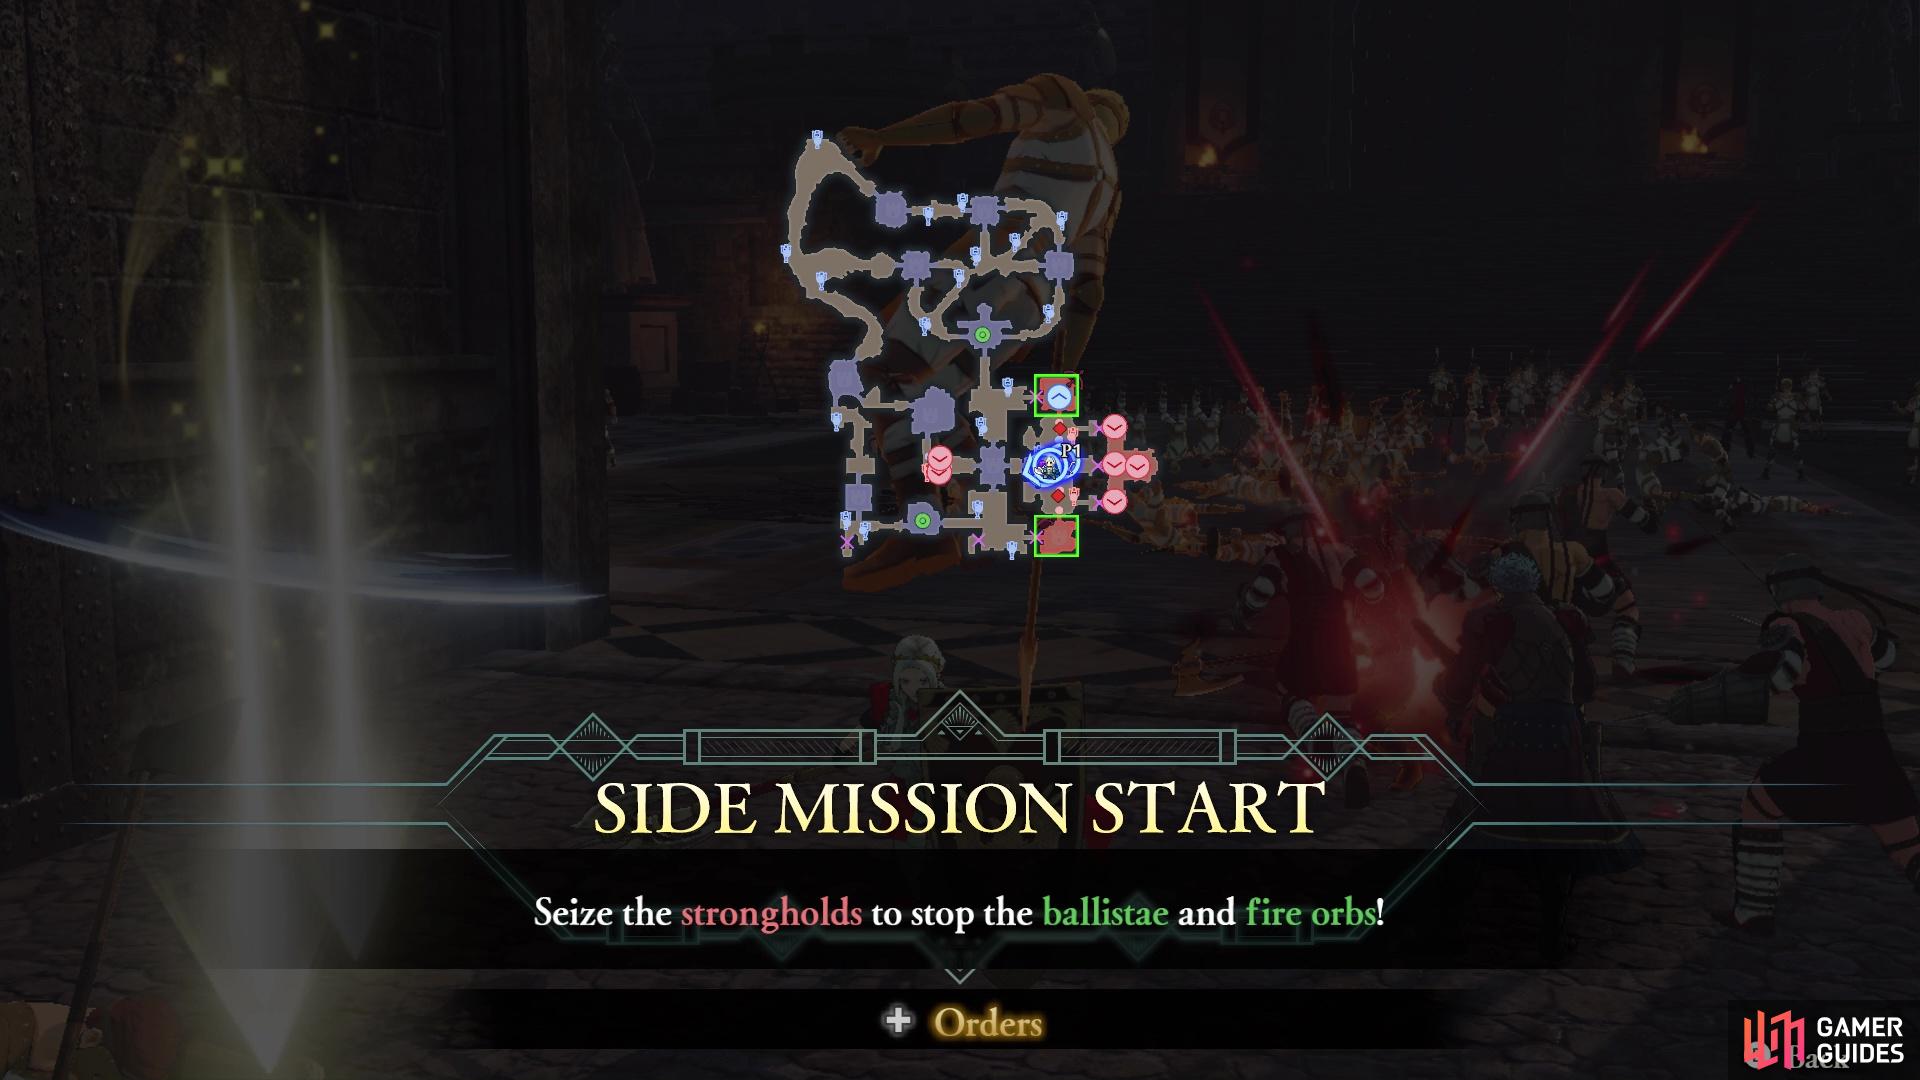

You will want to do this side mission (left), due to the weapons dealing a lot of damage (right)
Mission 4: Defeat Cyril
As soon as the forces with Rhea appear, Cyril will also reappear, no matter the outcome of the previous battle with him earlier. He will appear right where Seteth originally came from, so he will be right front and center as you enter the Monastery proper. He isn’t any different than earlier, so don’t expect anything more out of him here.
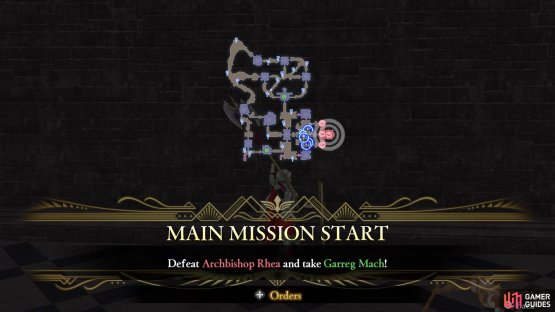
Mission 5: Defeat Archbishop Rhea and take Garreg Mach
Cyril’s defeat will open up the doors leading to the very last section of the map, where Rhea will be residing. Rhea will be the final commander of the battle, so with her defeat, you will be victorious. There will be a few other officers with her, so it might be a good idea to bring them down first, since that will net you some extra goodies. However, if you’re going for the S Rank and might be running out of time, then it’s imperative you simply go straight after Rhea. While she shouldn’t really pose any big problems, having a full Warrior Special ready and/or an Awakening gauge should be more than enough to win the battle.

(1 of 2) Rhea will be the final obstacle of the map

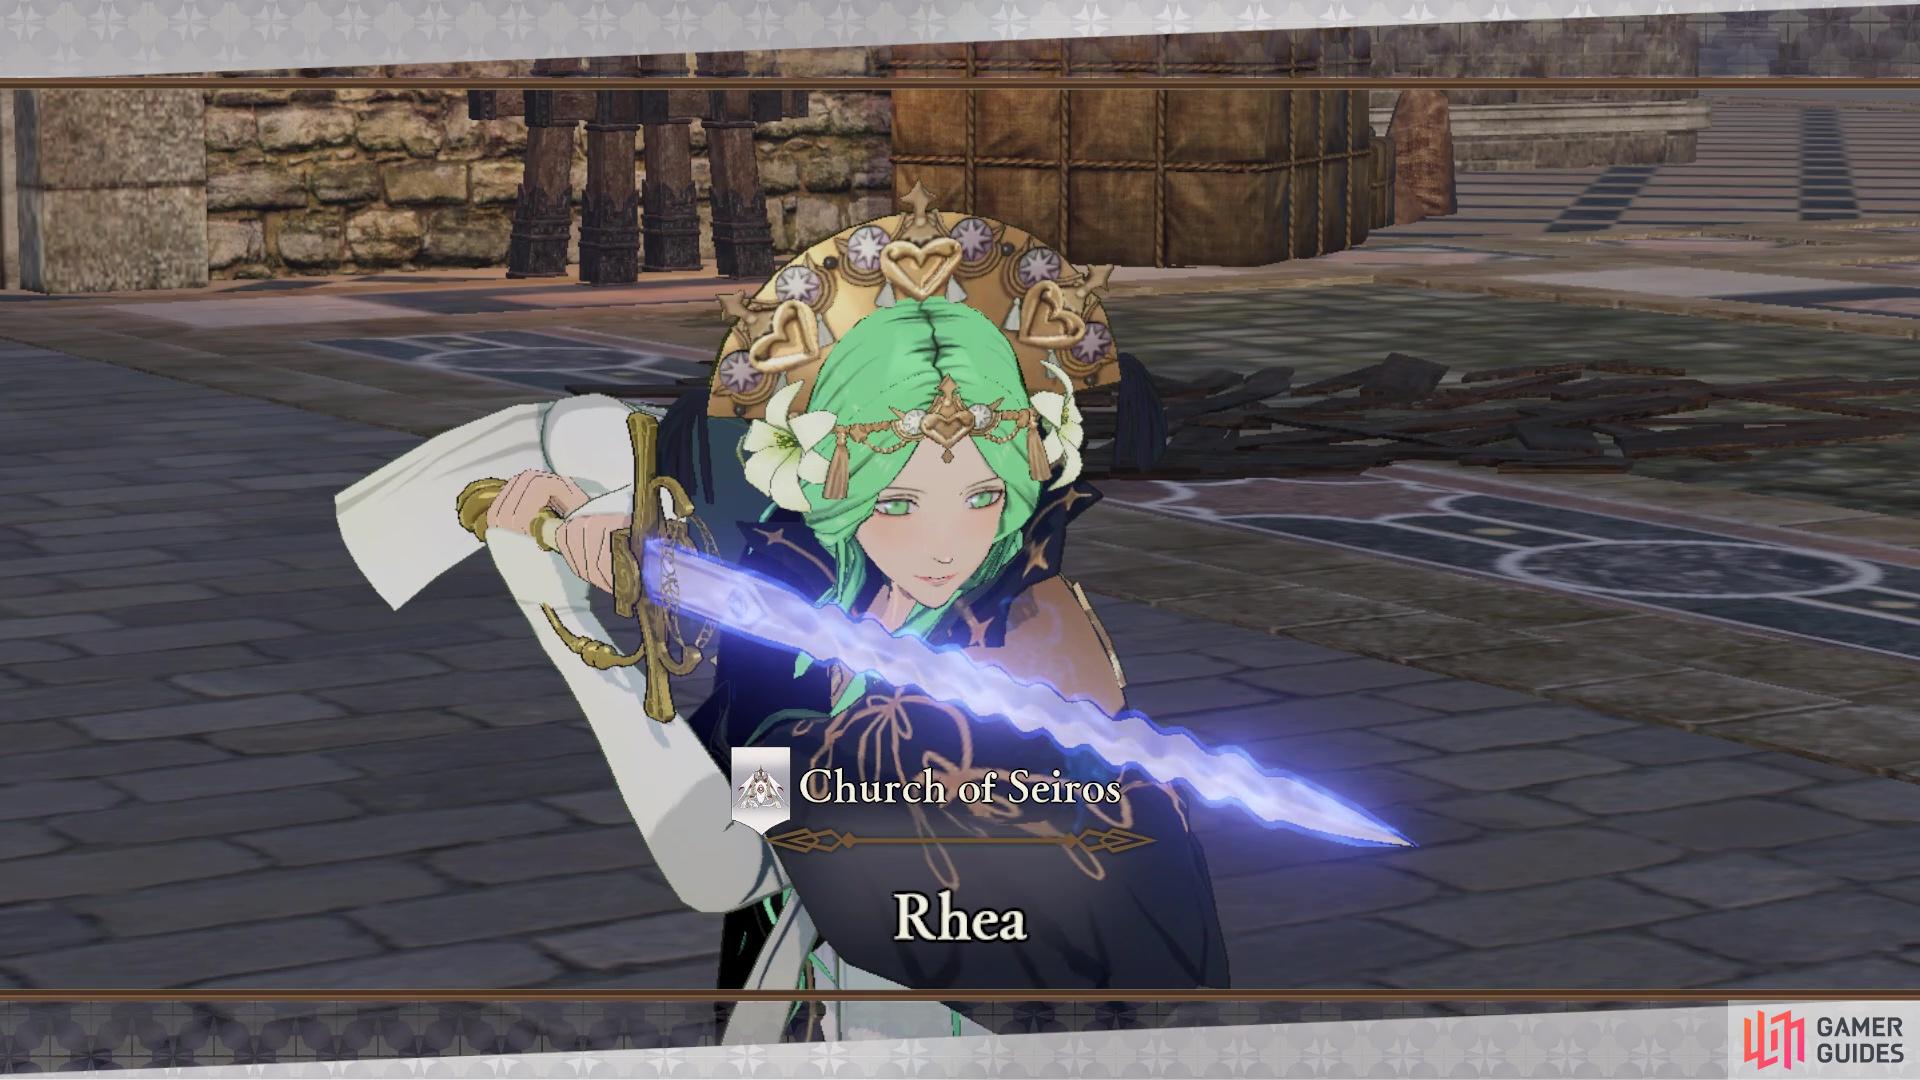
Rhea will be the final obstacle of the map (left), Defeat her to finally take control of Garreg Mach (right)
After the battle is over, depending on the Strategies successfully used, you should have recruited both Hapi and Constance. If you took all other regions in the chapter, then completing this main battle will also reward you with 10 Renown. Note that the game mentions completing the main battle, while clearing as few other regions as possible, will give you more Renown. However, this isn’t really all that significant of an increase, plus the rewards for clearing the other regions far outweighs just making a beeline for the main battle. This will bring an end to Chapter 4 of the Scarlet Blaze route, so it’s time to move onto Chapter 5.
No Comments