
Meditation Spots in Black Myth: Wukong reward you with a Spark (skill point) upon resting at one. These are hidden around the area and require thorough exploration. Chapter 2: Yellow Wind Ridge has a total of six Mediation Spots to find each rewarding a Spark. Read on to find out where you can find all six Meditation Spots in Yellow Wind Ridge and how you can get to them.
Table of Contents
If you want to jump to a specific Meditation Spot, click on the links below.
1. The Altar, Sandgate Village Meditation Spot
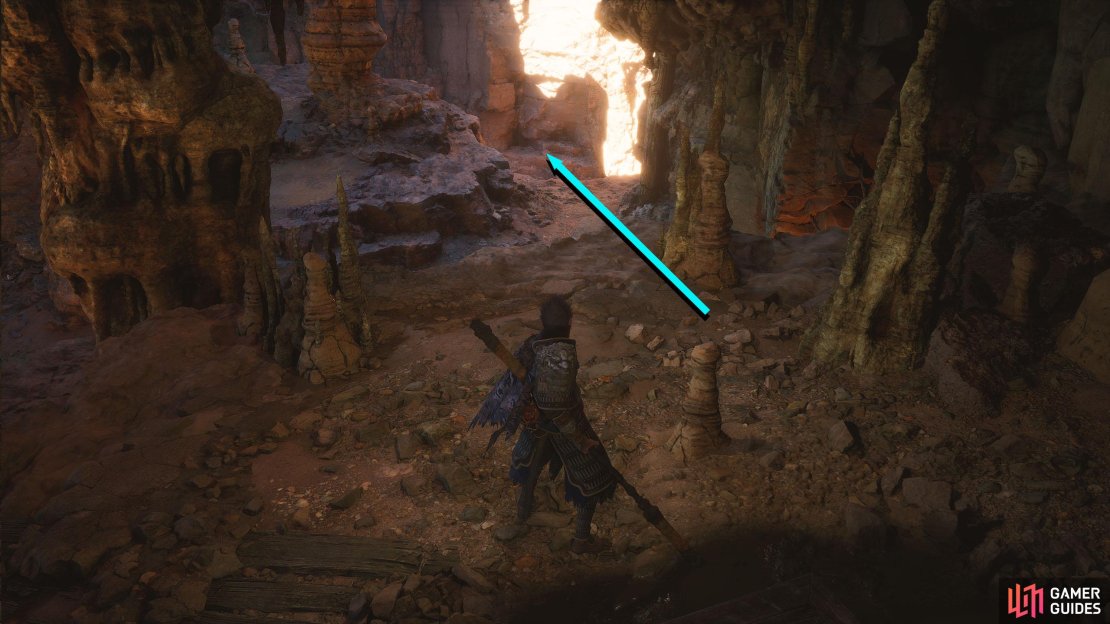
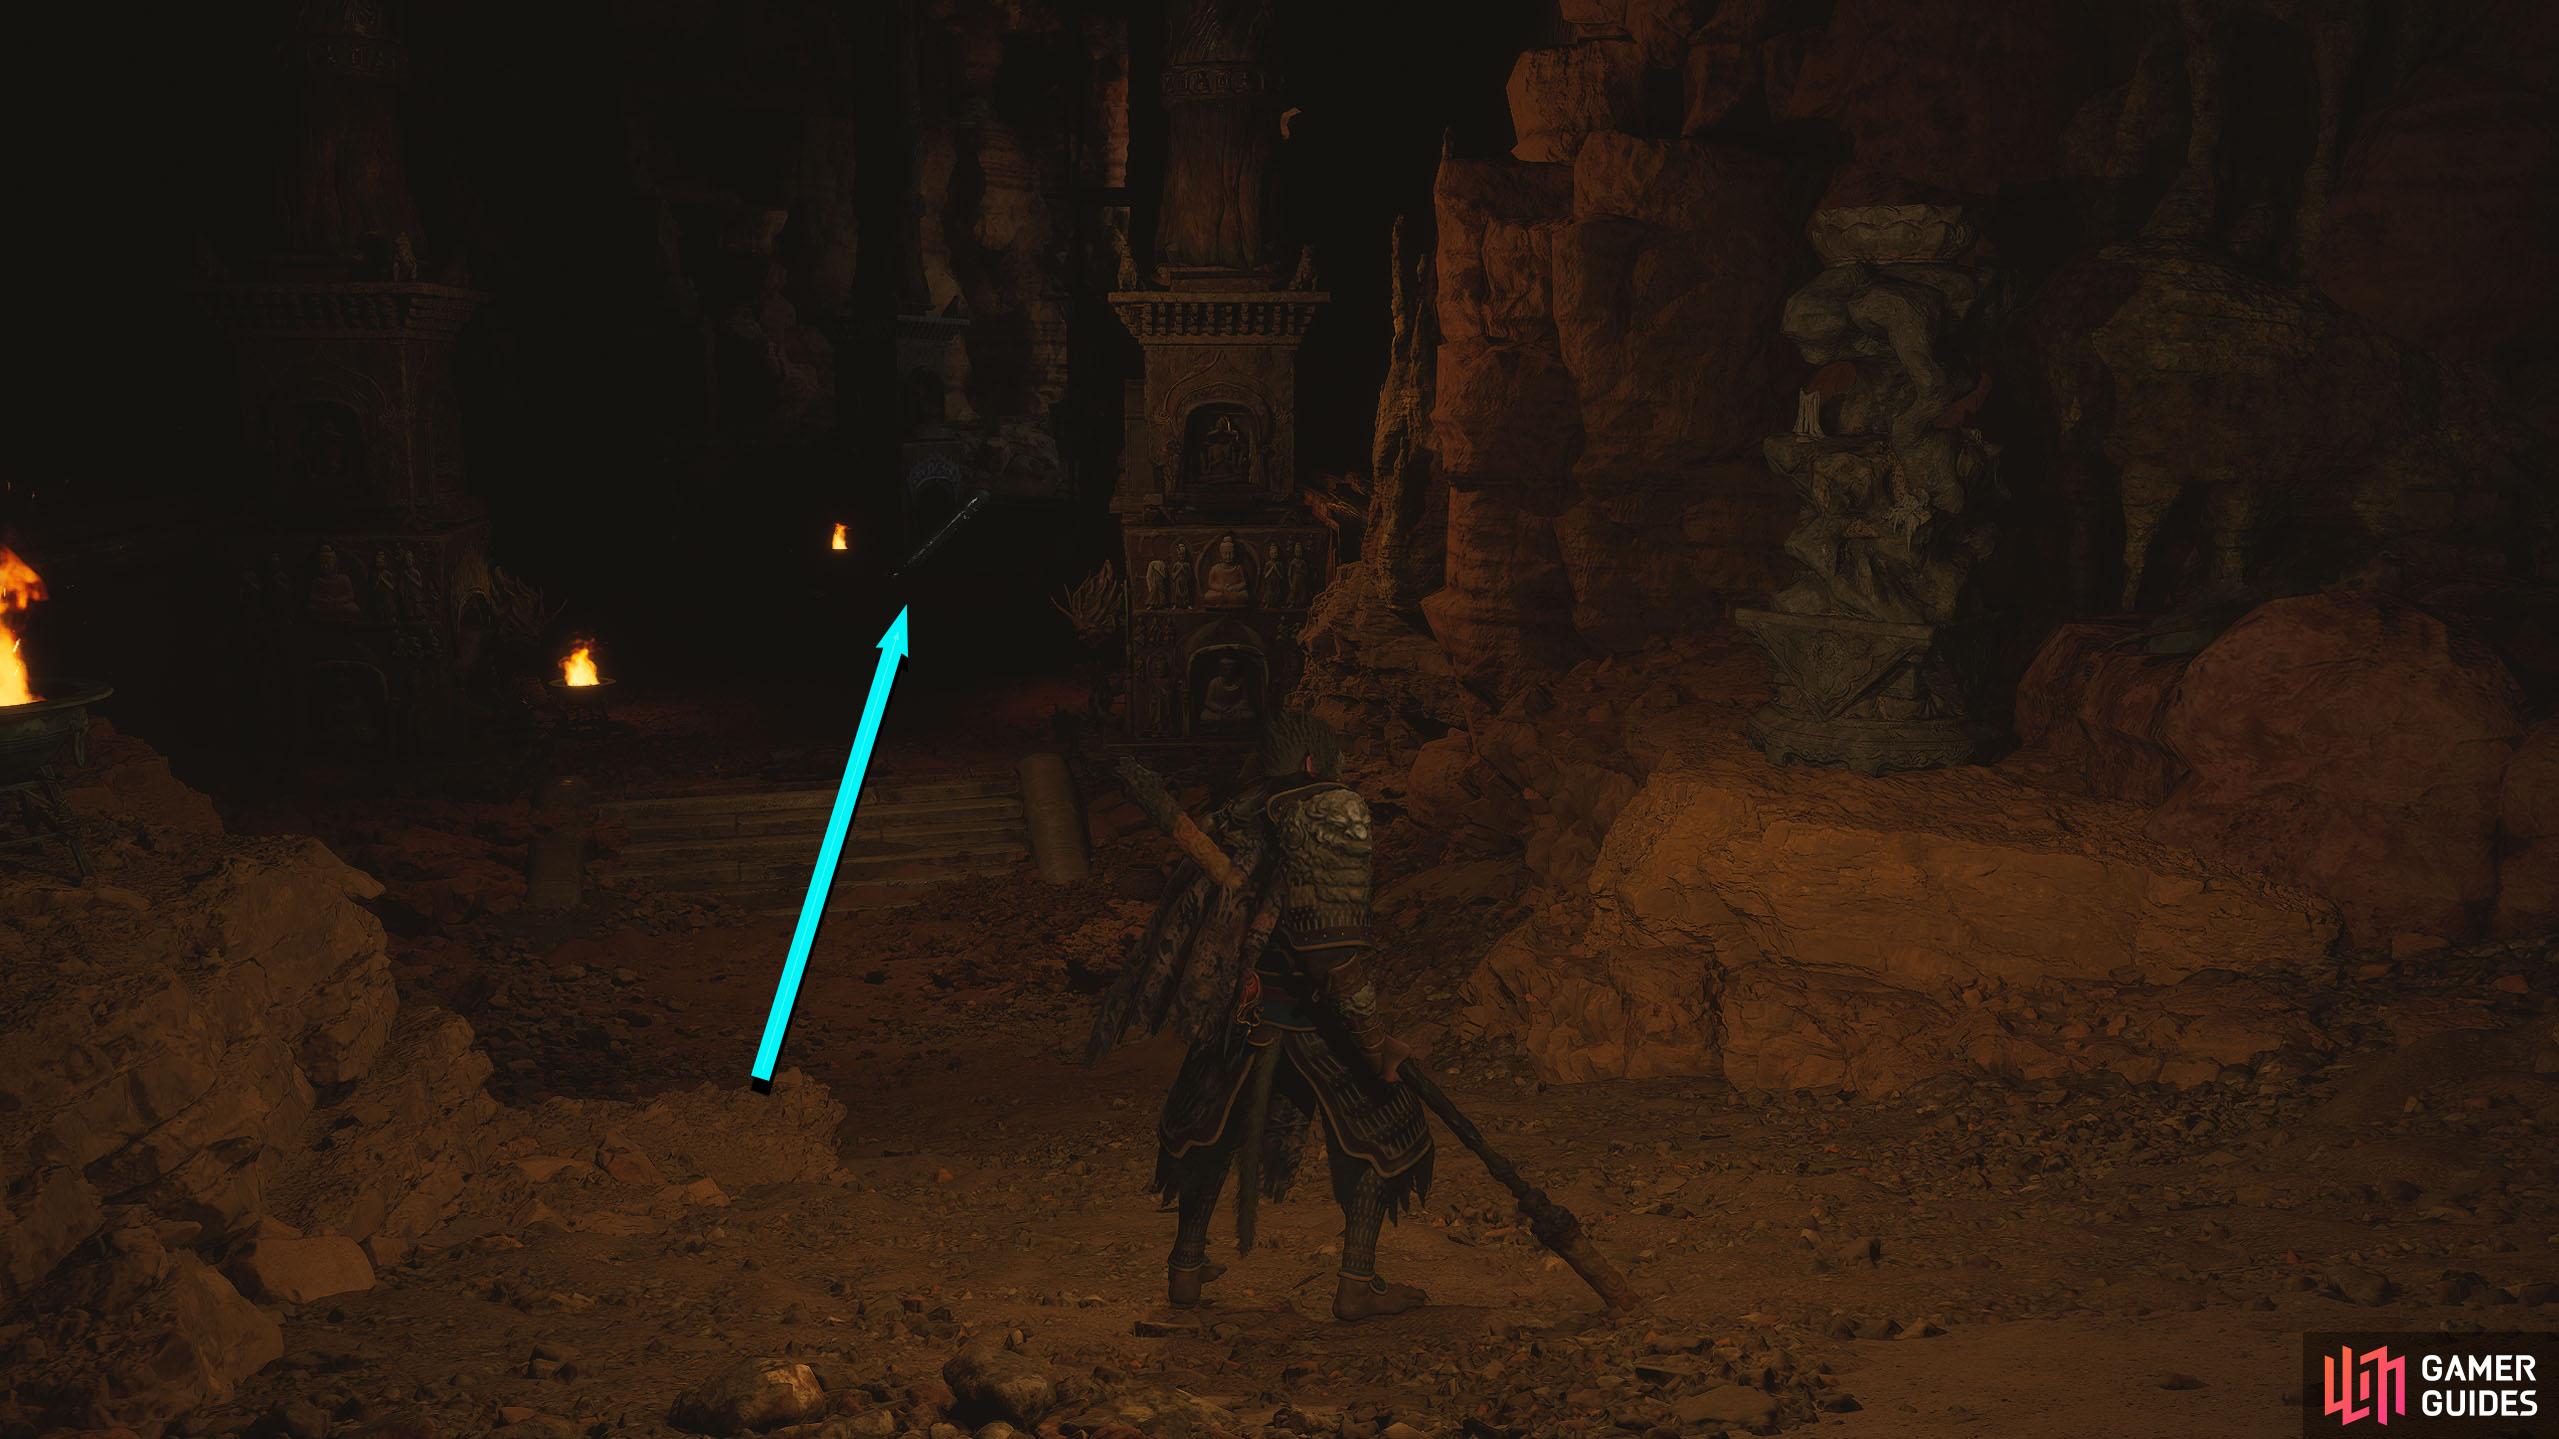
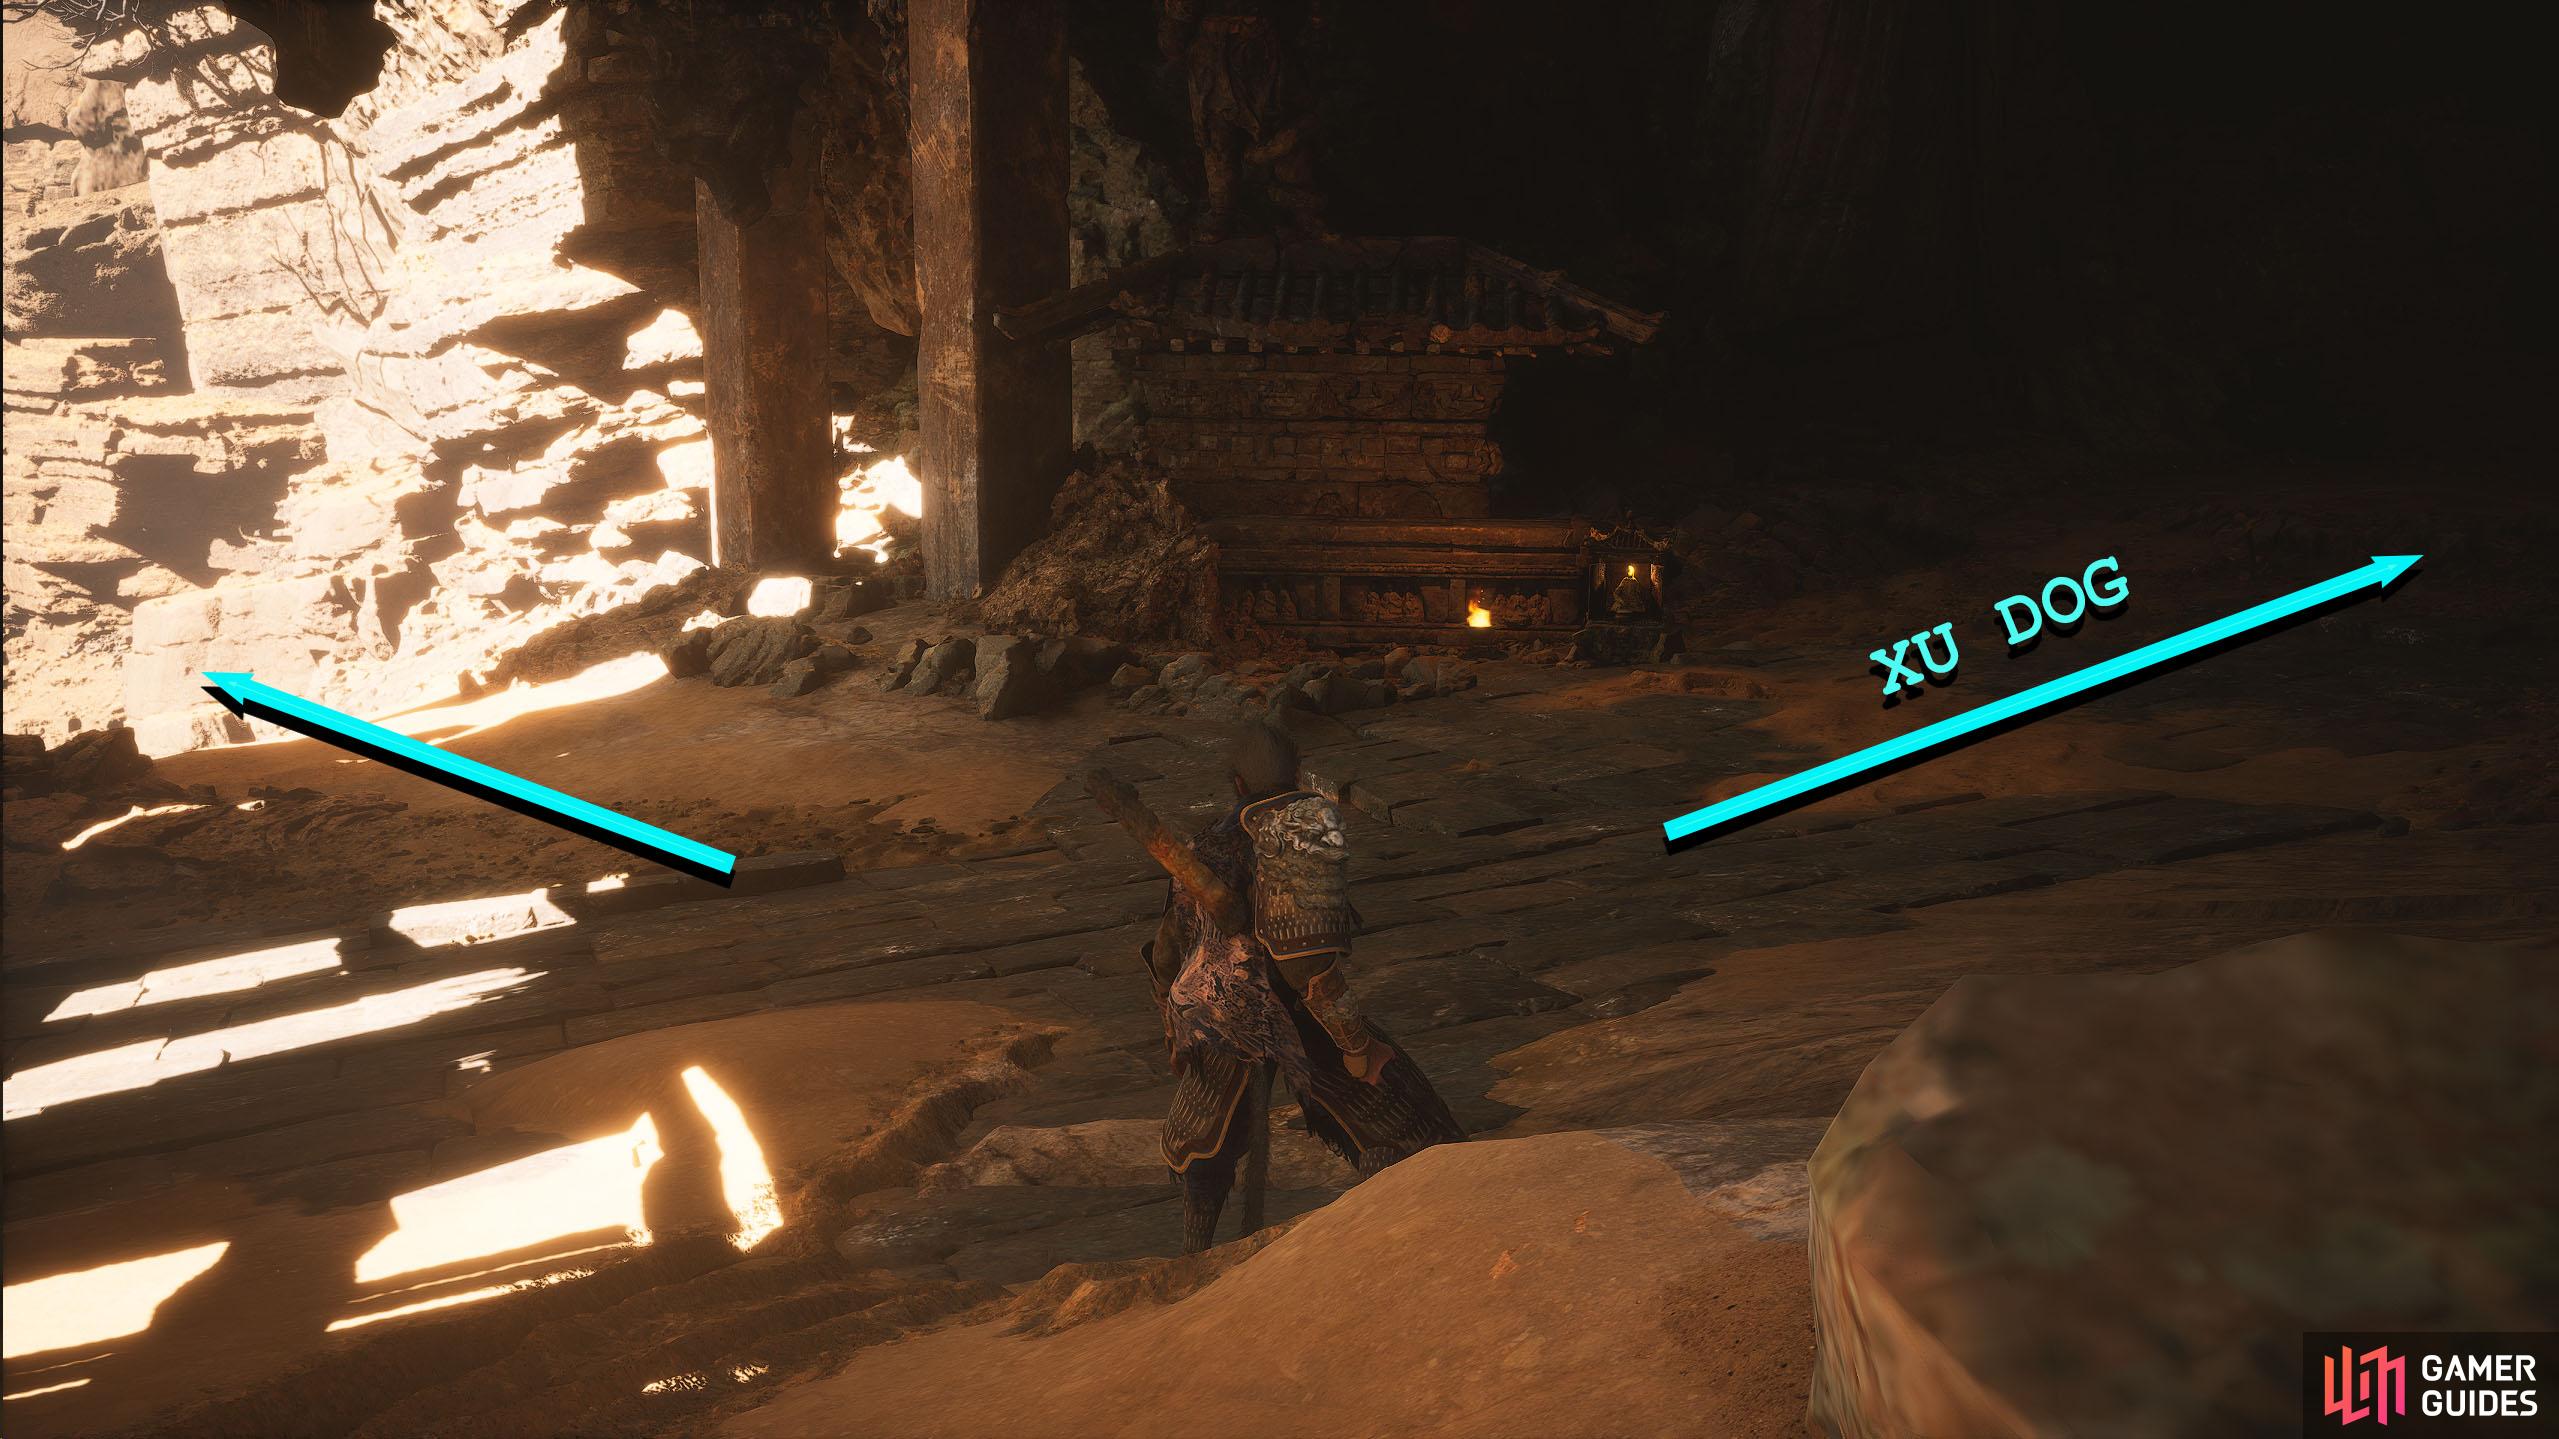
The first Meditation Spot can be found near the Sandgate Village, Village Entrance Shrine, which is the first Shrine you’ll encounter in Yellow Wind Ridge. When you reach the Shrine, head forward a little to find a small wooden bridge going over a gap. Drop into the gap and head into the cave to the right. In the cave, you’ll find an NPC who goes by Xu Dog (who will have a quest for you). Continue onwards toward the frog that Xu Dog wants you to defeat, but instead of dropping into the water, head left to find a dilapidated structure with a pillow at its base. This is the Meditation Spot, rest at it to acquire a Spark.


(1 of 3) From the Shrine, head over to the wooden bridge, drop into the gap, and go into the nearby cave.
2. The Ravine, Rock Clash Platform Meditation Spot
The second Meditation Spot can be found not too far from the Fright Cliff - Rock Clash Platform Shrine. You can find out how to reach Fright Cliff by reading our guide here. From the Rock Clash Platform Shrine, head forward where you’ll get attacked by an empowered Rat Governor who will drop it’s Spirit upon death. Defeat the enemy and continue down the stairs to find the Meditation Spot in the middle of the statues.
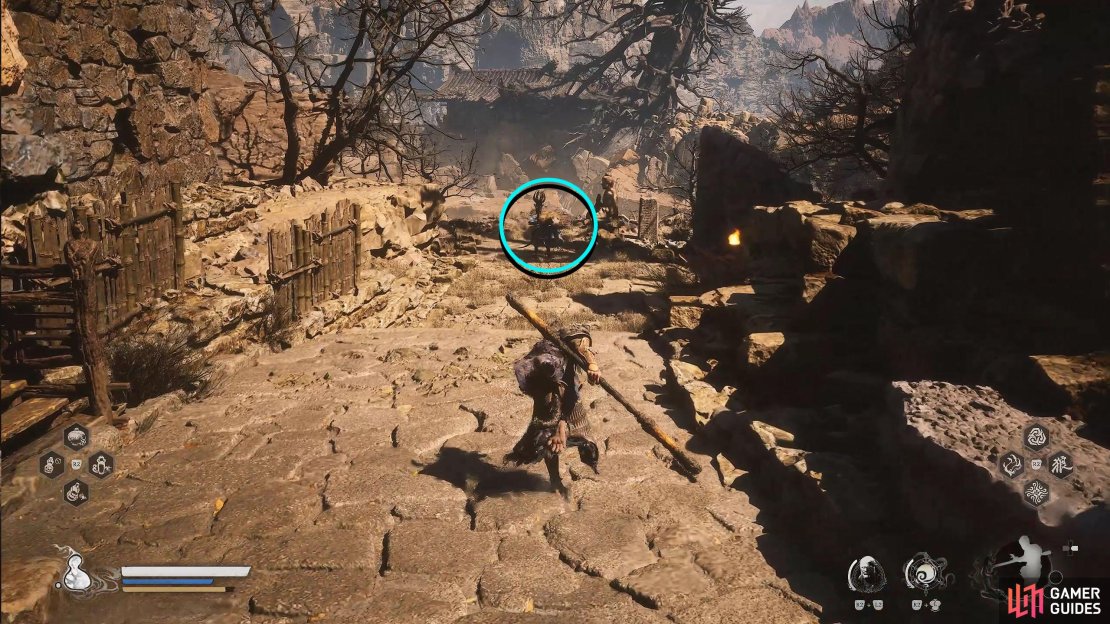
(1 of 3) From the Shrine, head forward along the path next to the house.
3. The Sculpture, Crouching Tiger Temple Meditation Spot
This Meditation Spot can be near the Crouching Tiger Temple. Unfortunately, this will require some exploration to find it. Continue through the area until you reach the second Shrine, Valley of Despair, which is after the first boss. From the Shrine, head into the nearby cave to the right of the Shrine, and follow it until you reach the locked door to your right (shortcut door later). At the back, you’ll see a brazier glowing brightly, head toward it, and drop off the rocky platform.

(1 of 3) Head into the nearby cave from the Valley of Despair Shrine.
Follow the left path and go right at the brazier, where you’ll find a stone bridge leading up. Go over the stone bridge while defeating the enemies along the way, and follow the path until you reach the crack in the wall. When you go through here, you’ll fight a difficult enemy called a Swift Bat. This particular version is empowered, and you’ll obtain its spirit upon defeat. After you defeat the Swift Bat, enter the open area to the right to find the Crouching Tiger Temple.


(1 of 4) At the brazier, go right.
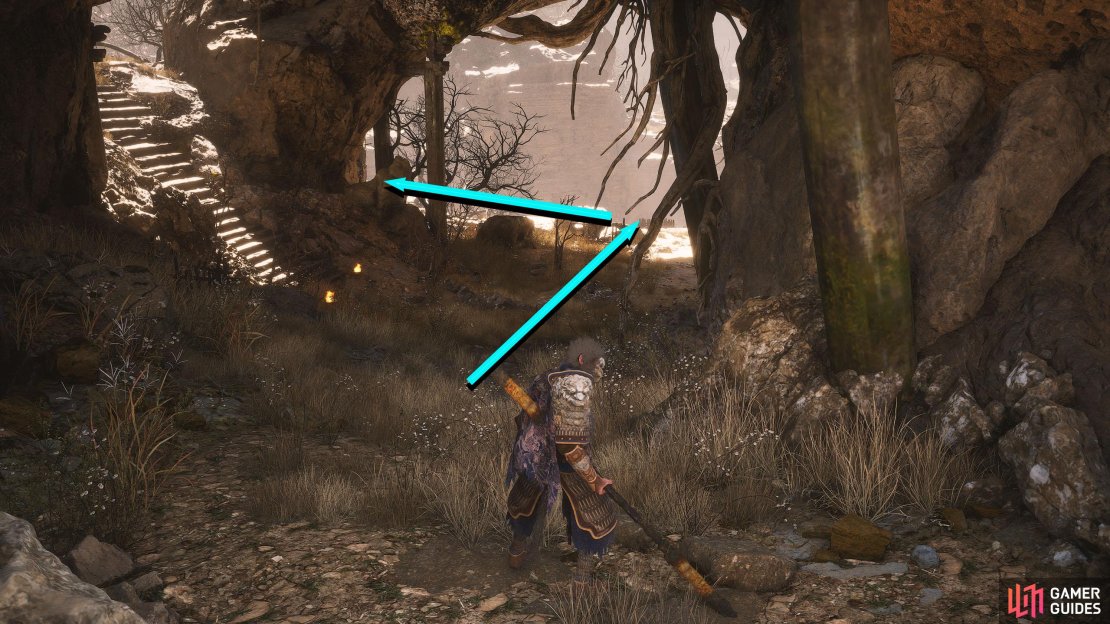
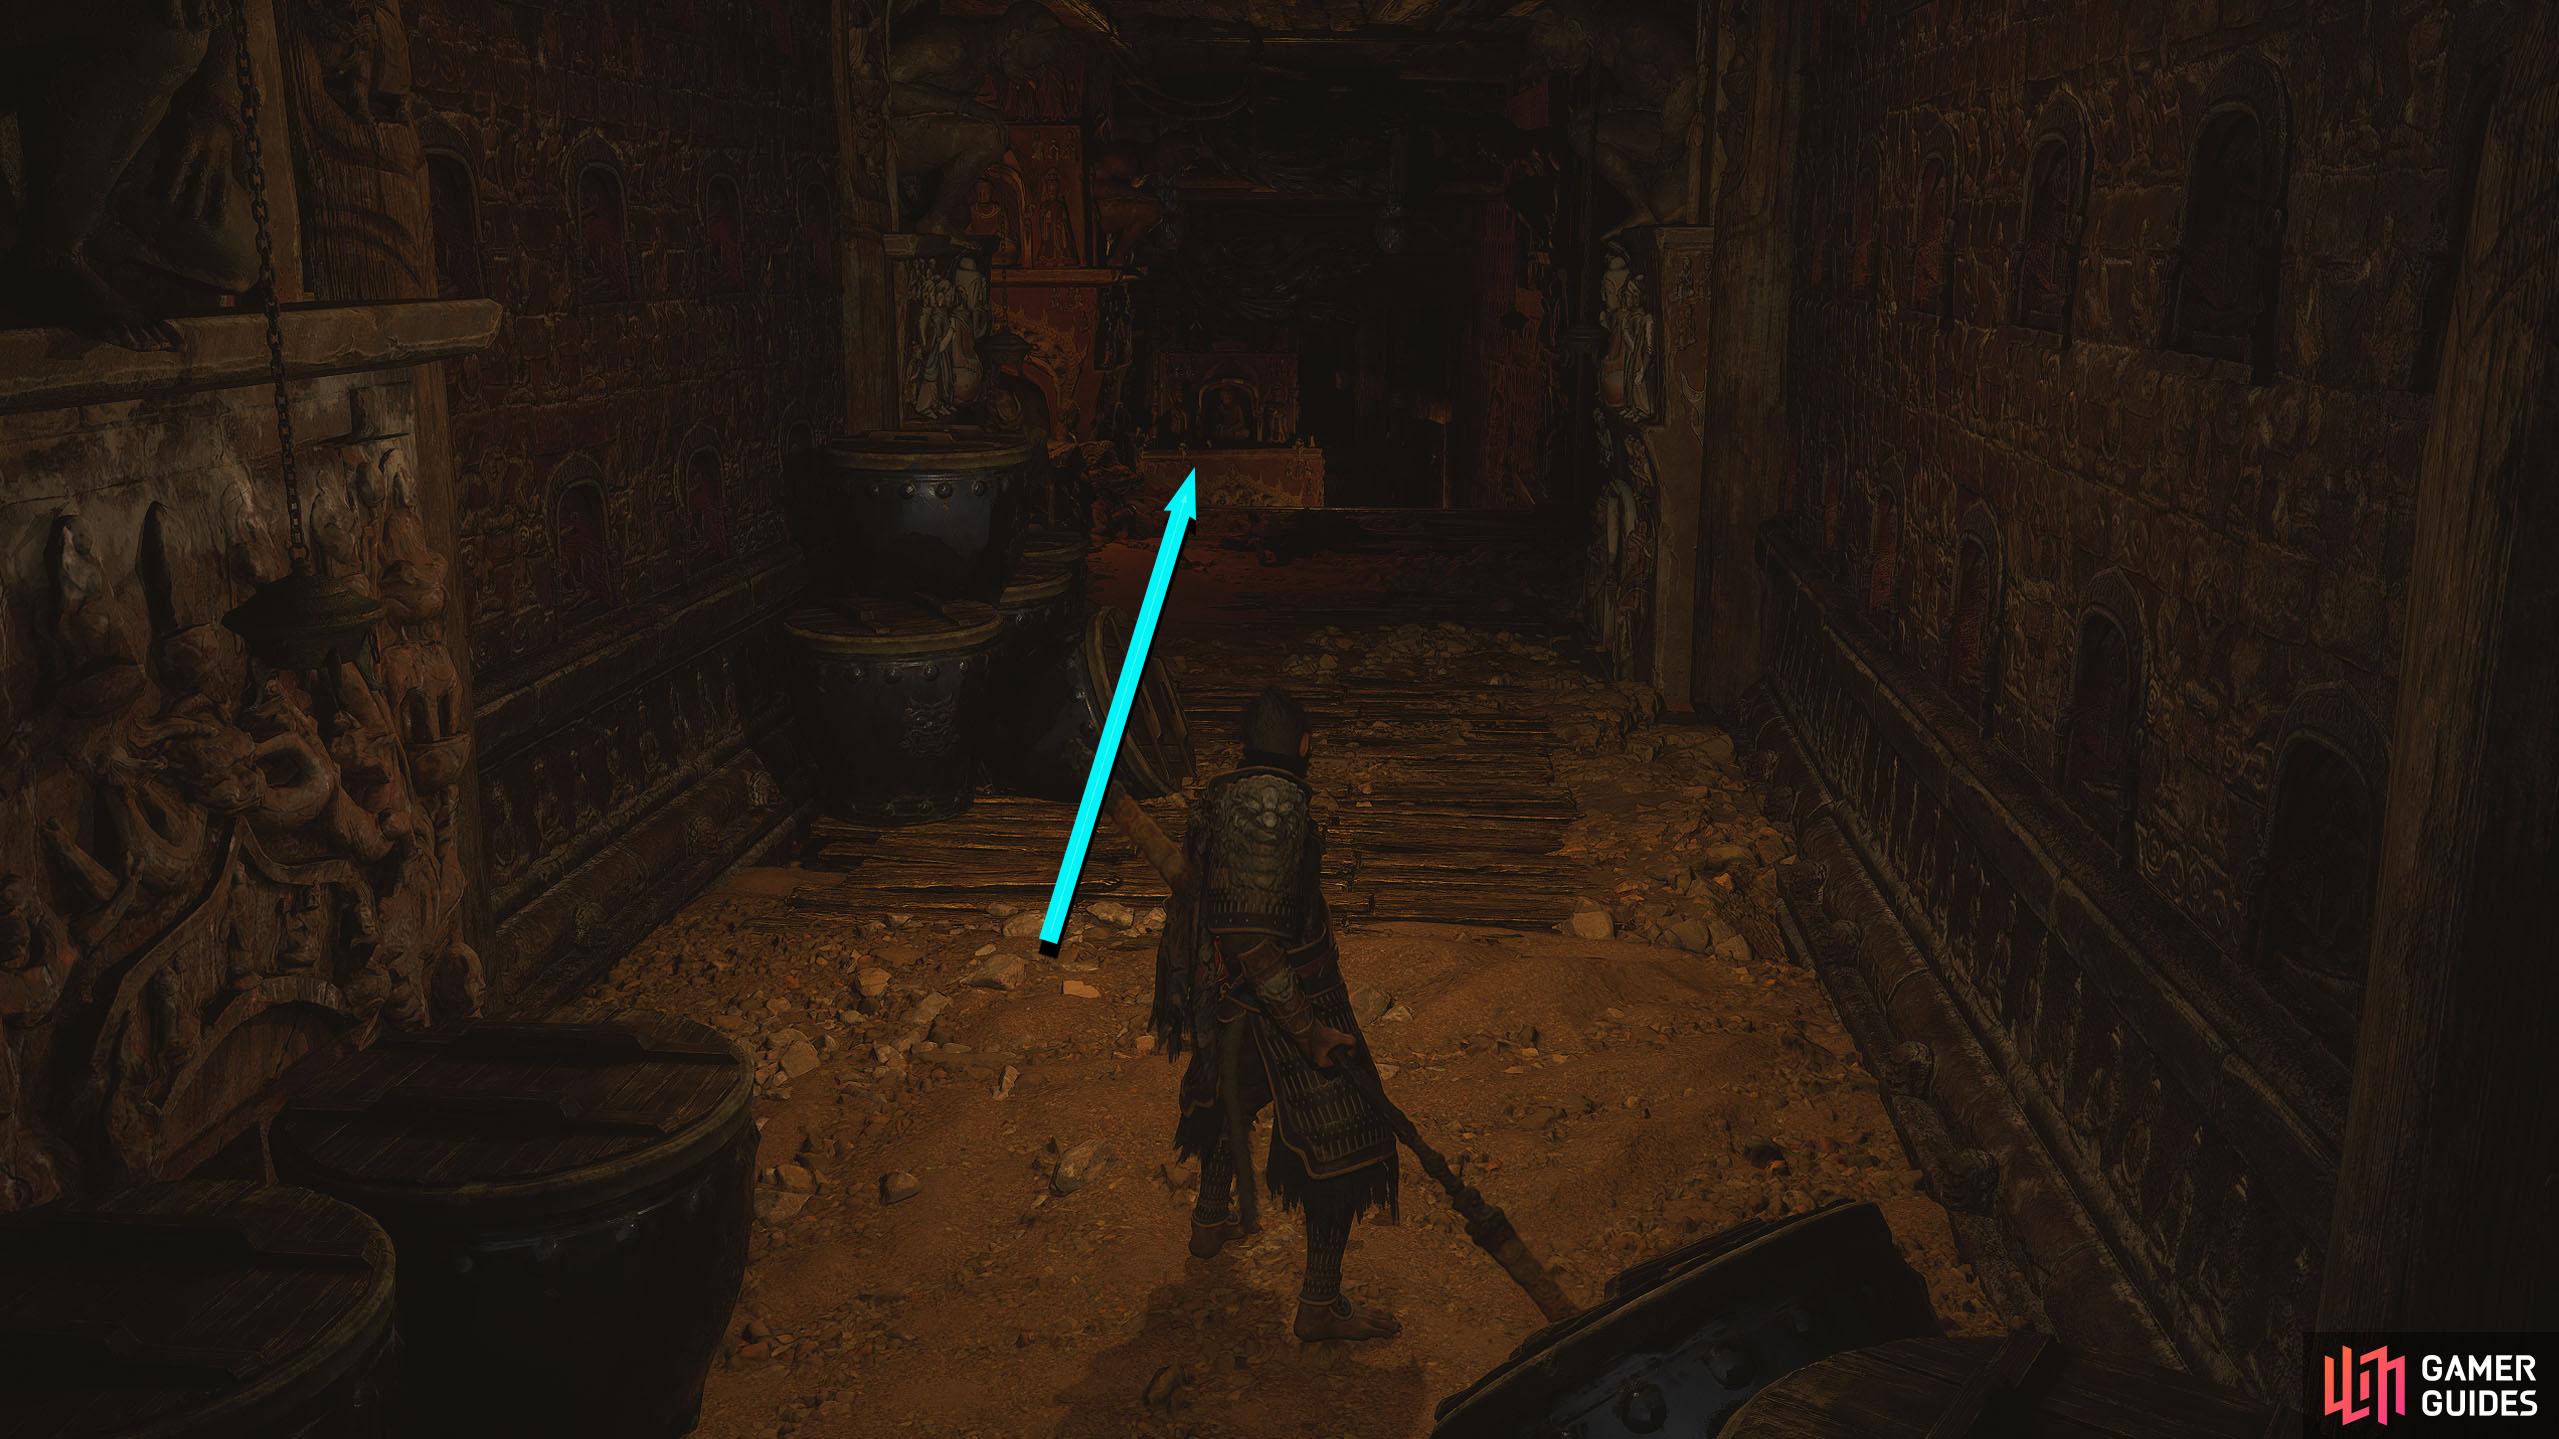
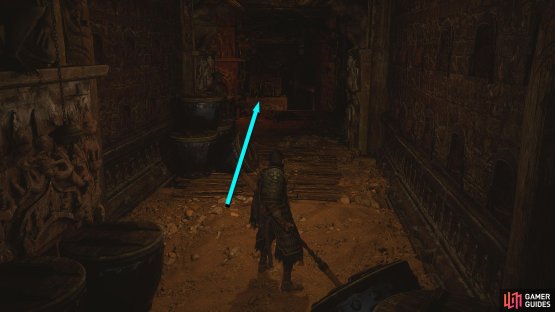
You’ll find the Shrine for it at the base of the stairs to the left. Once you’ve activated the Shrine, head into the temple, where you’ll see carcasses scattered on the stairs. Continue up another set of stairs and halfway up the next set, you’ll be able to go left.

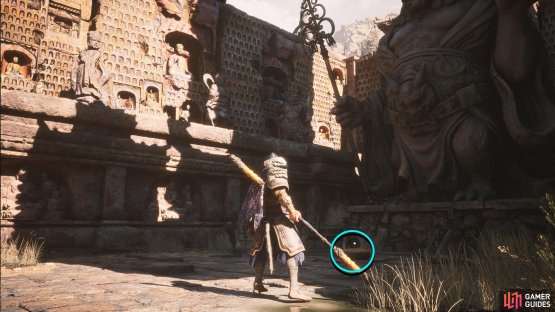
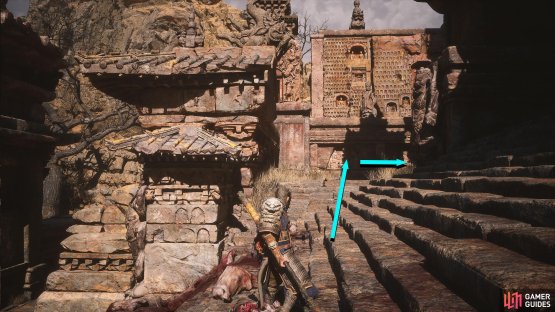
(1 of 2) Go up the stairs in the temple and, halfway up the second set, head left.
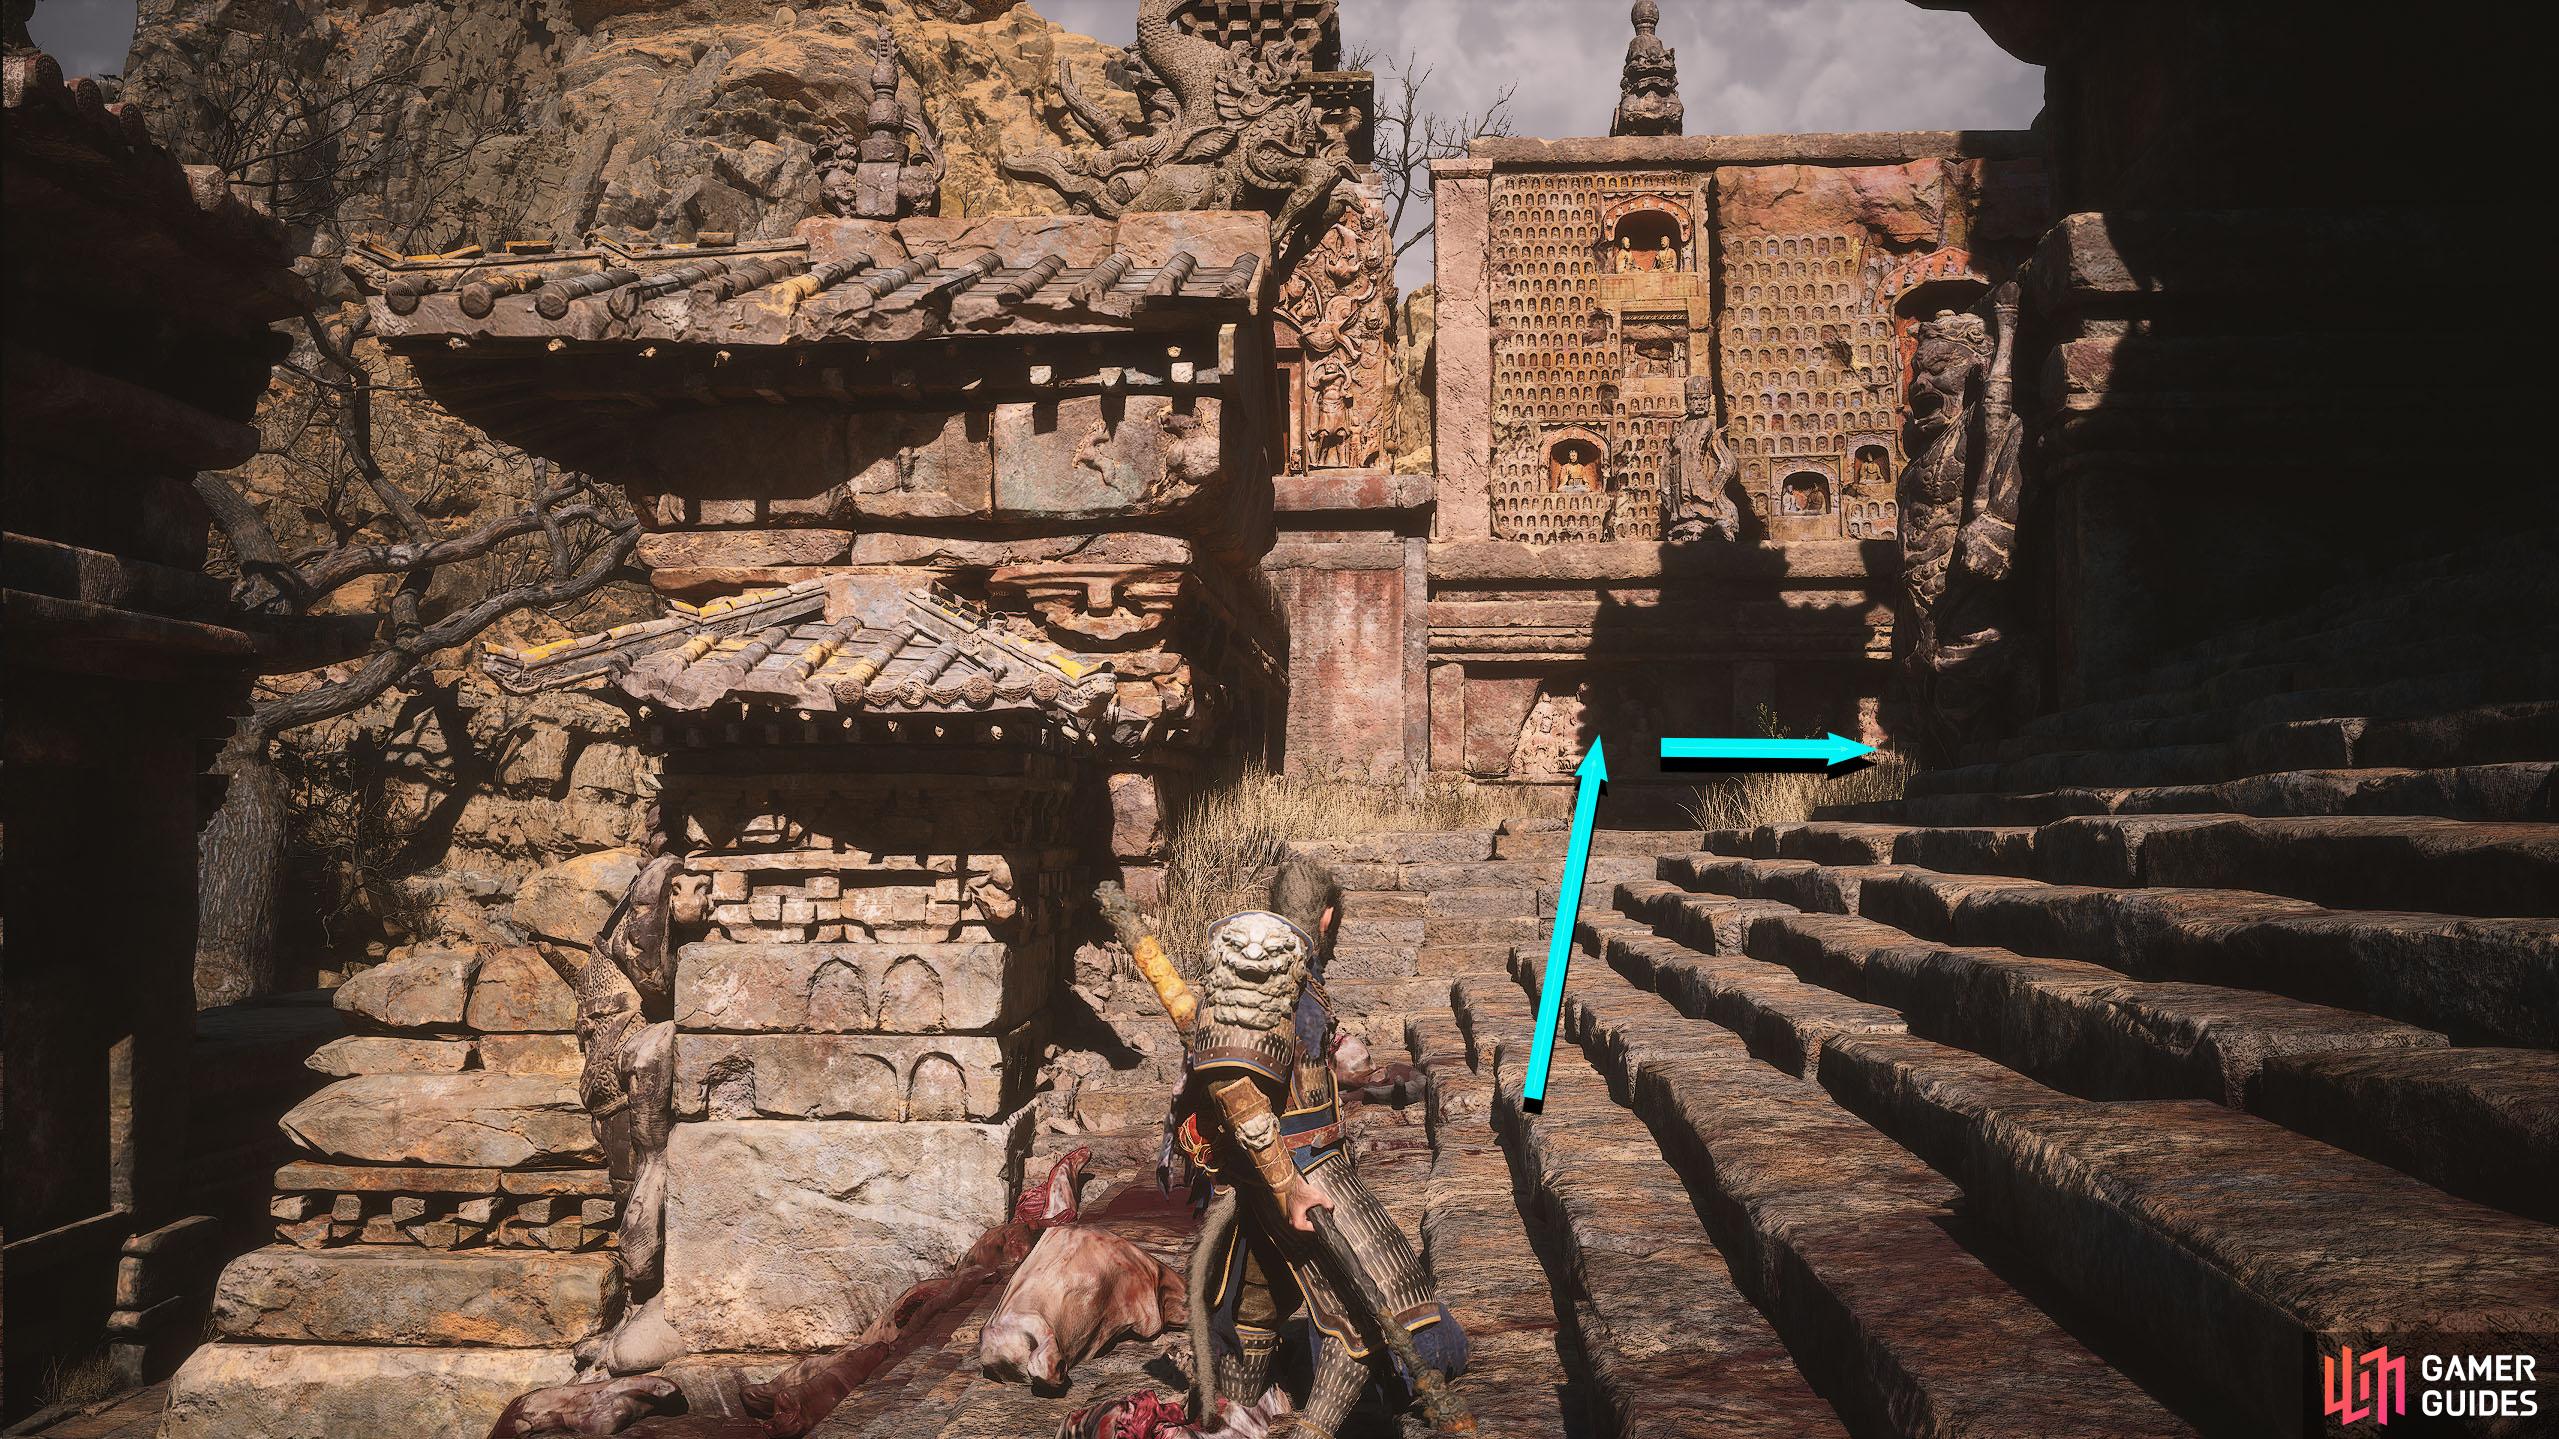
Go up the stairs in the temple and, halfway up the second set, head left. (left), The Meditation Spot will be at the base of the statue. (right)
4. The Deadwood, Rockrest Flat Meditation Spot
The fourth Mediation Spot is in Fright Cliff again, but you won’t have to travel as far this time. This Spot can be found near the Rockrest Flat Shrine, which is the second Shrine you’ll find in Fright Cliff. Upon reaching the Shrine, follow the left path, past the boss arena to your left, and start heading right slightly to find an enemy by a fence. Defeat the enemy, break the fence, and continue into the large open area. Make your way to the back of the area, where you’ll see an unusual-shaped tree. In front of the tree is a campfire along with a Meditation Spot.
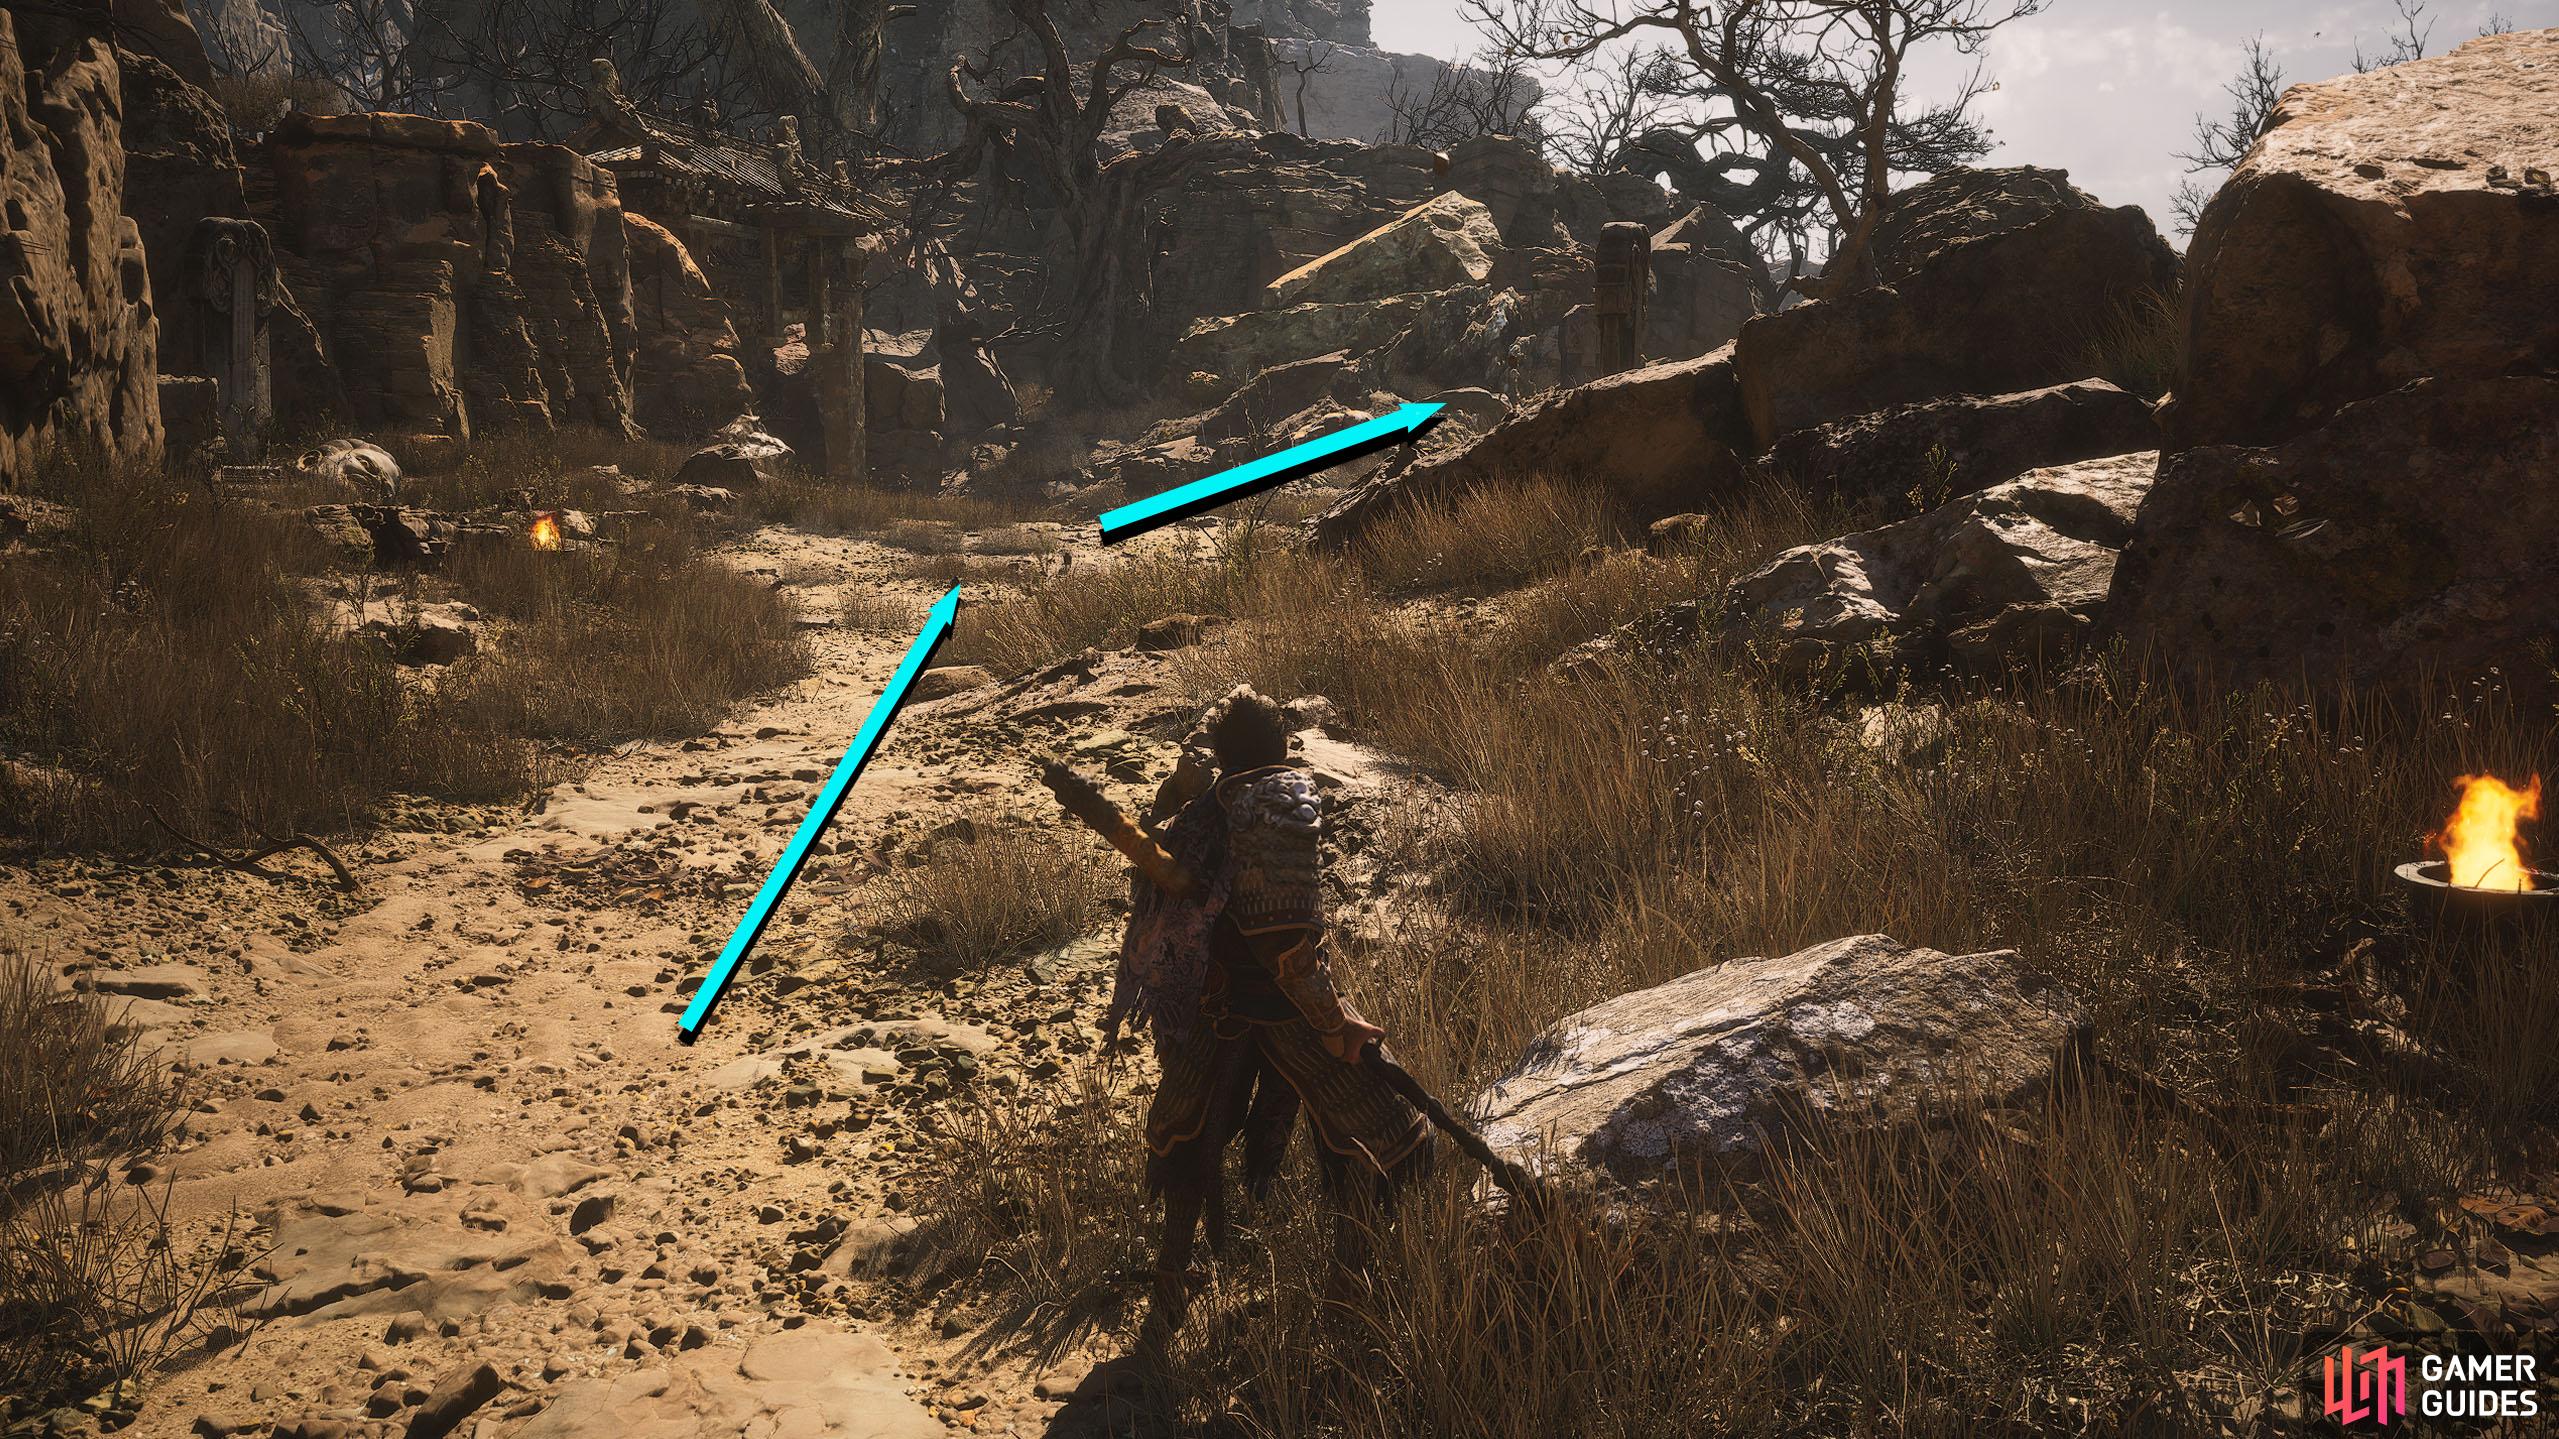


(1 of 3) Follow the left path past the boss arena (left) and head right slightly.
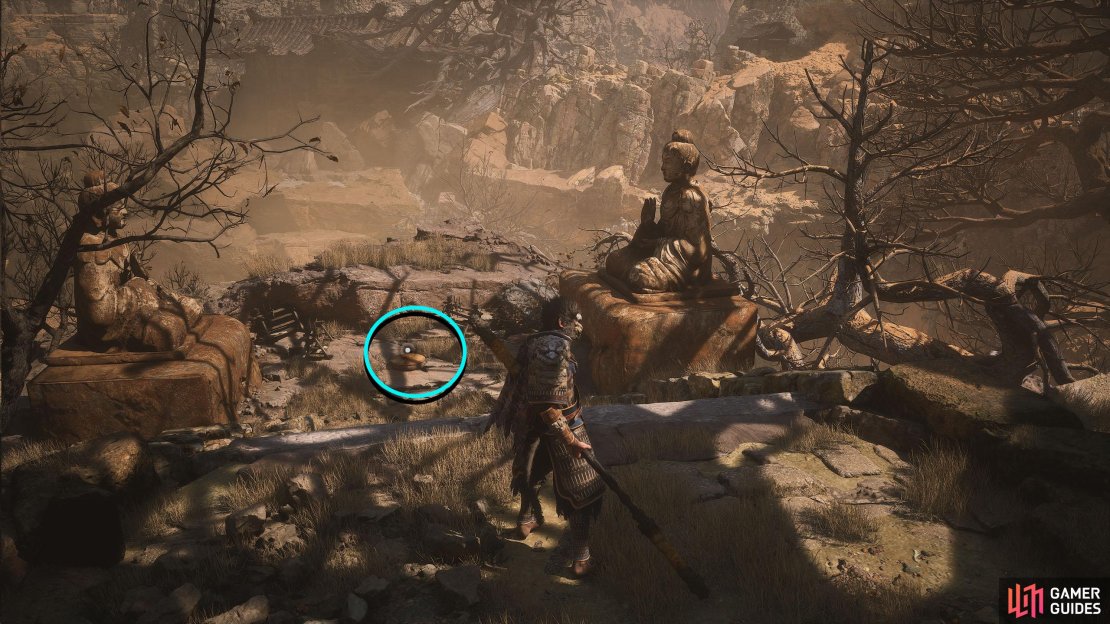
5. The Grotto, Yellow Wind Formation Meditation Spot
This Mediation Spot can be found near the end of the level, near the final boss of the area. It will require you to obtain the Sternness of Stone Key Item from the Stone Vanguard boss. From the Crouching Tiger-Temple Entrance Shrine, head to the top of the temple to find the difficult Tiger Vanguard boss. This needs to be defeated to unlock the cellar area. Defeat the boss, and interact with the pedestal at the dilapidated statue.

(1 of 2) Defeat the Boss at the top of Crouching Tiger Temple and place the key item on the pedestal.
Defeat the Boss at the top of Crouching Tiger Temple and place the key item on the pedestal. (left), This will drain the pool of blood and reveal a hidden entrance. (right)
After placing the key item on it, the blood will drain away and an entrance to the cellar will reveal itself. Jump in the mouth of the statue and follow the path while defeating the enemies along the way. At the bottom of the path, you’ll find what looks like an altar of some kind. Head behind the “altar” to find a passage leading further on. Continue toward the darkness, where you’ll get ambushed by four Civet Sergeants, one of which is empowered (they will drop their Spirit). These are relatively difficult enemies, so make sure you’re careful here.

(1 of 2) Defeat the enemies and follow the linear path before going behind the altar.
Defeat the enemies and follow the linear path before going behind the altar. (left), Continue along the path, defeat some more enemies, and follow the path outside. (right)
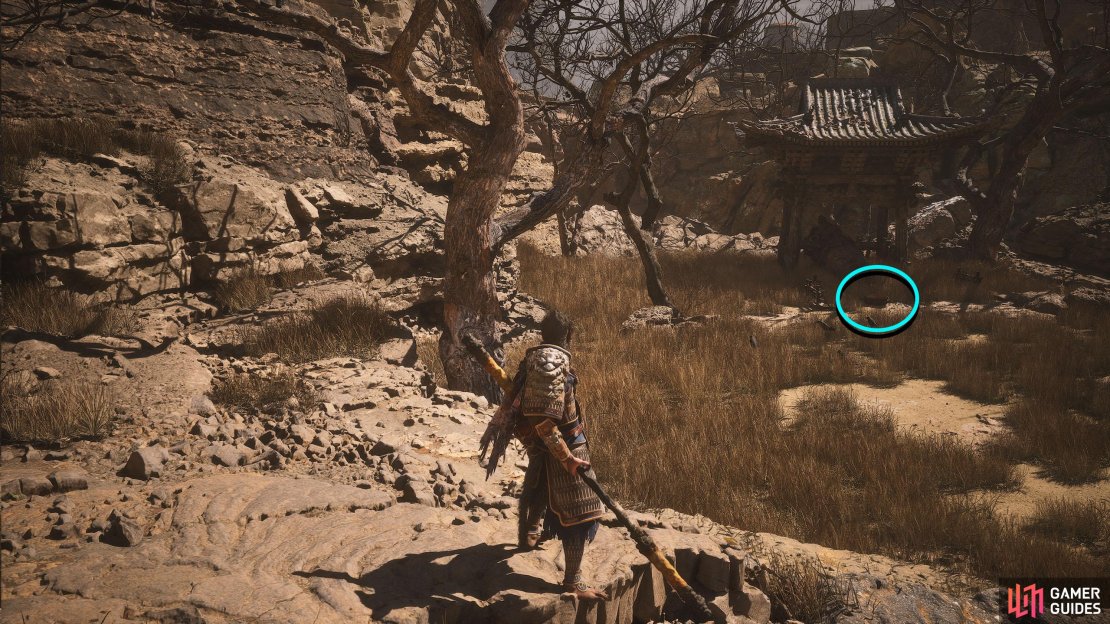
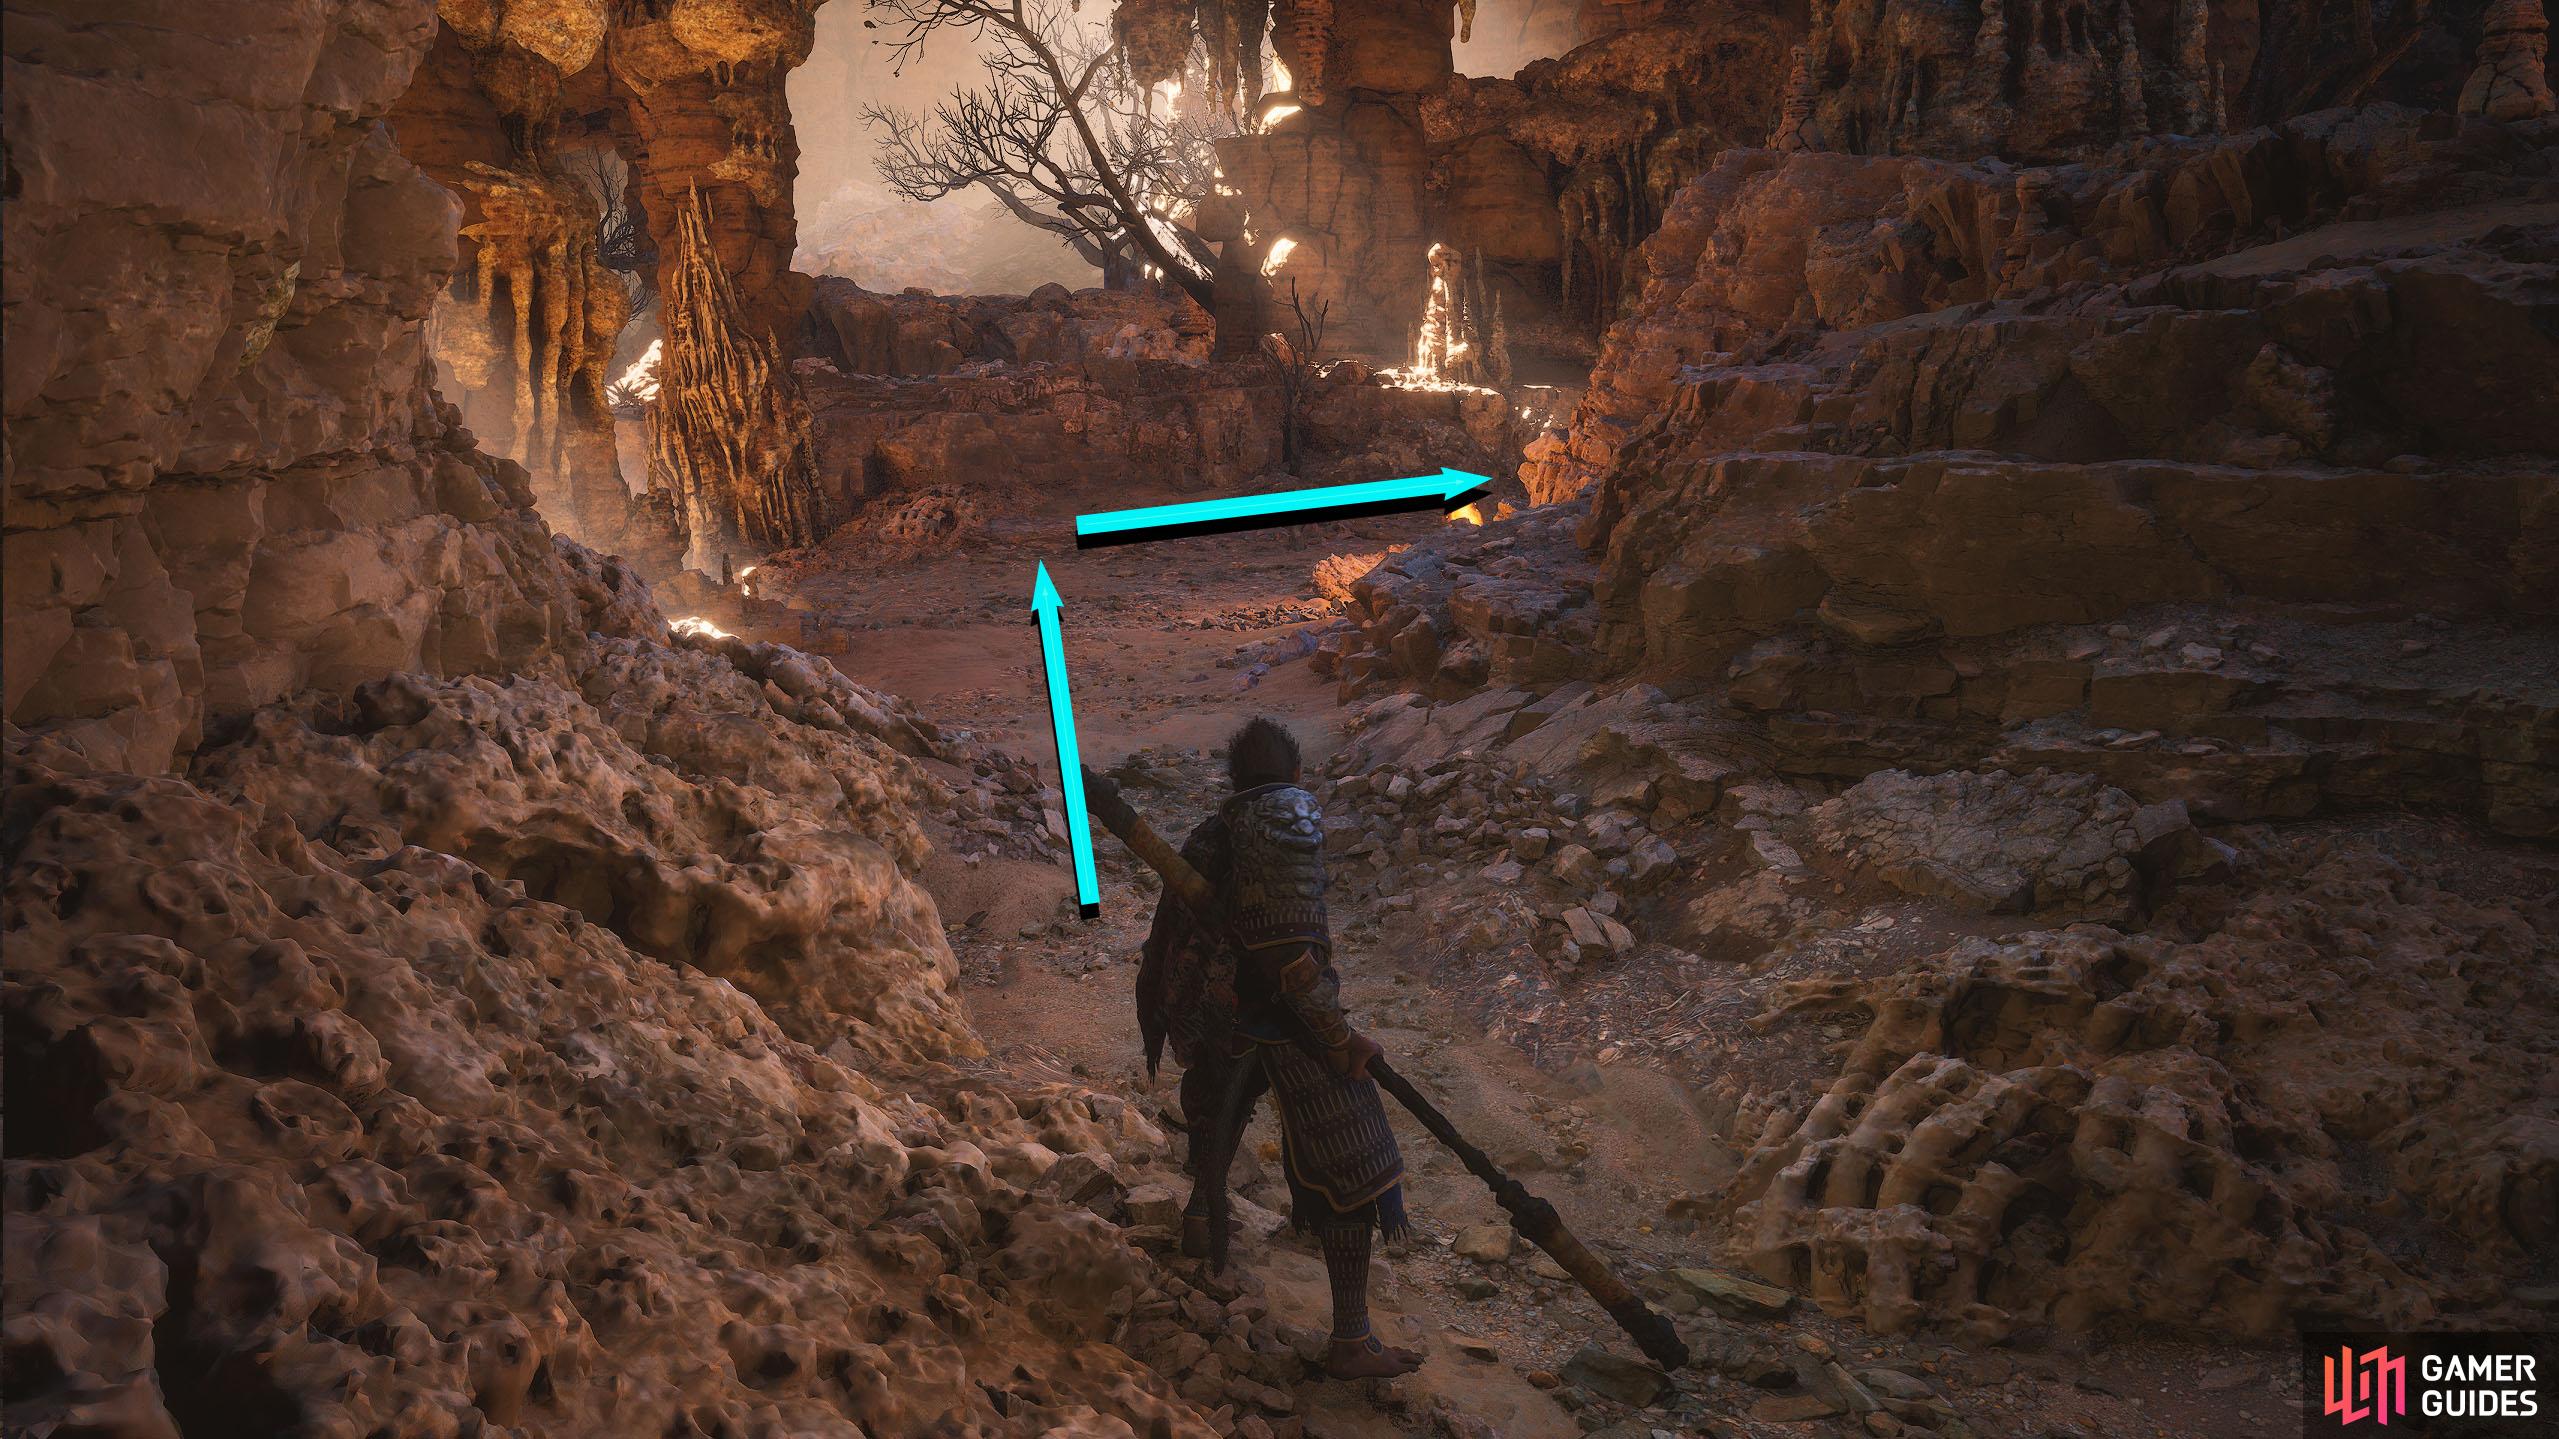
Once they’re defeated, follow the path outside and around the corner and slide down the path. This will take you to the “Cellar” Shrine. If you progressed Xu Dog’s quest near Sandgate Village (defeating the lightning frog), you can find him in the room to the right, where he’ll allow you to craft Celestial Pills. At the shrine, continue forward by sliding down the path ahead. To the left is the boss, but you’ll want to head right for the Meditation Spot. Follow the long path right, and eventually, you’ll find some statues as well as the Mediation Spot.

(1 of 3) At the Shrine, the right path will take you to Xu Dog, where you can complete his quest. Left will lead to the Meditation Spot.
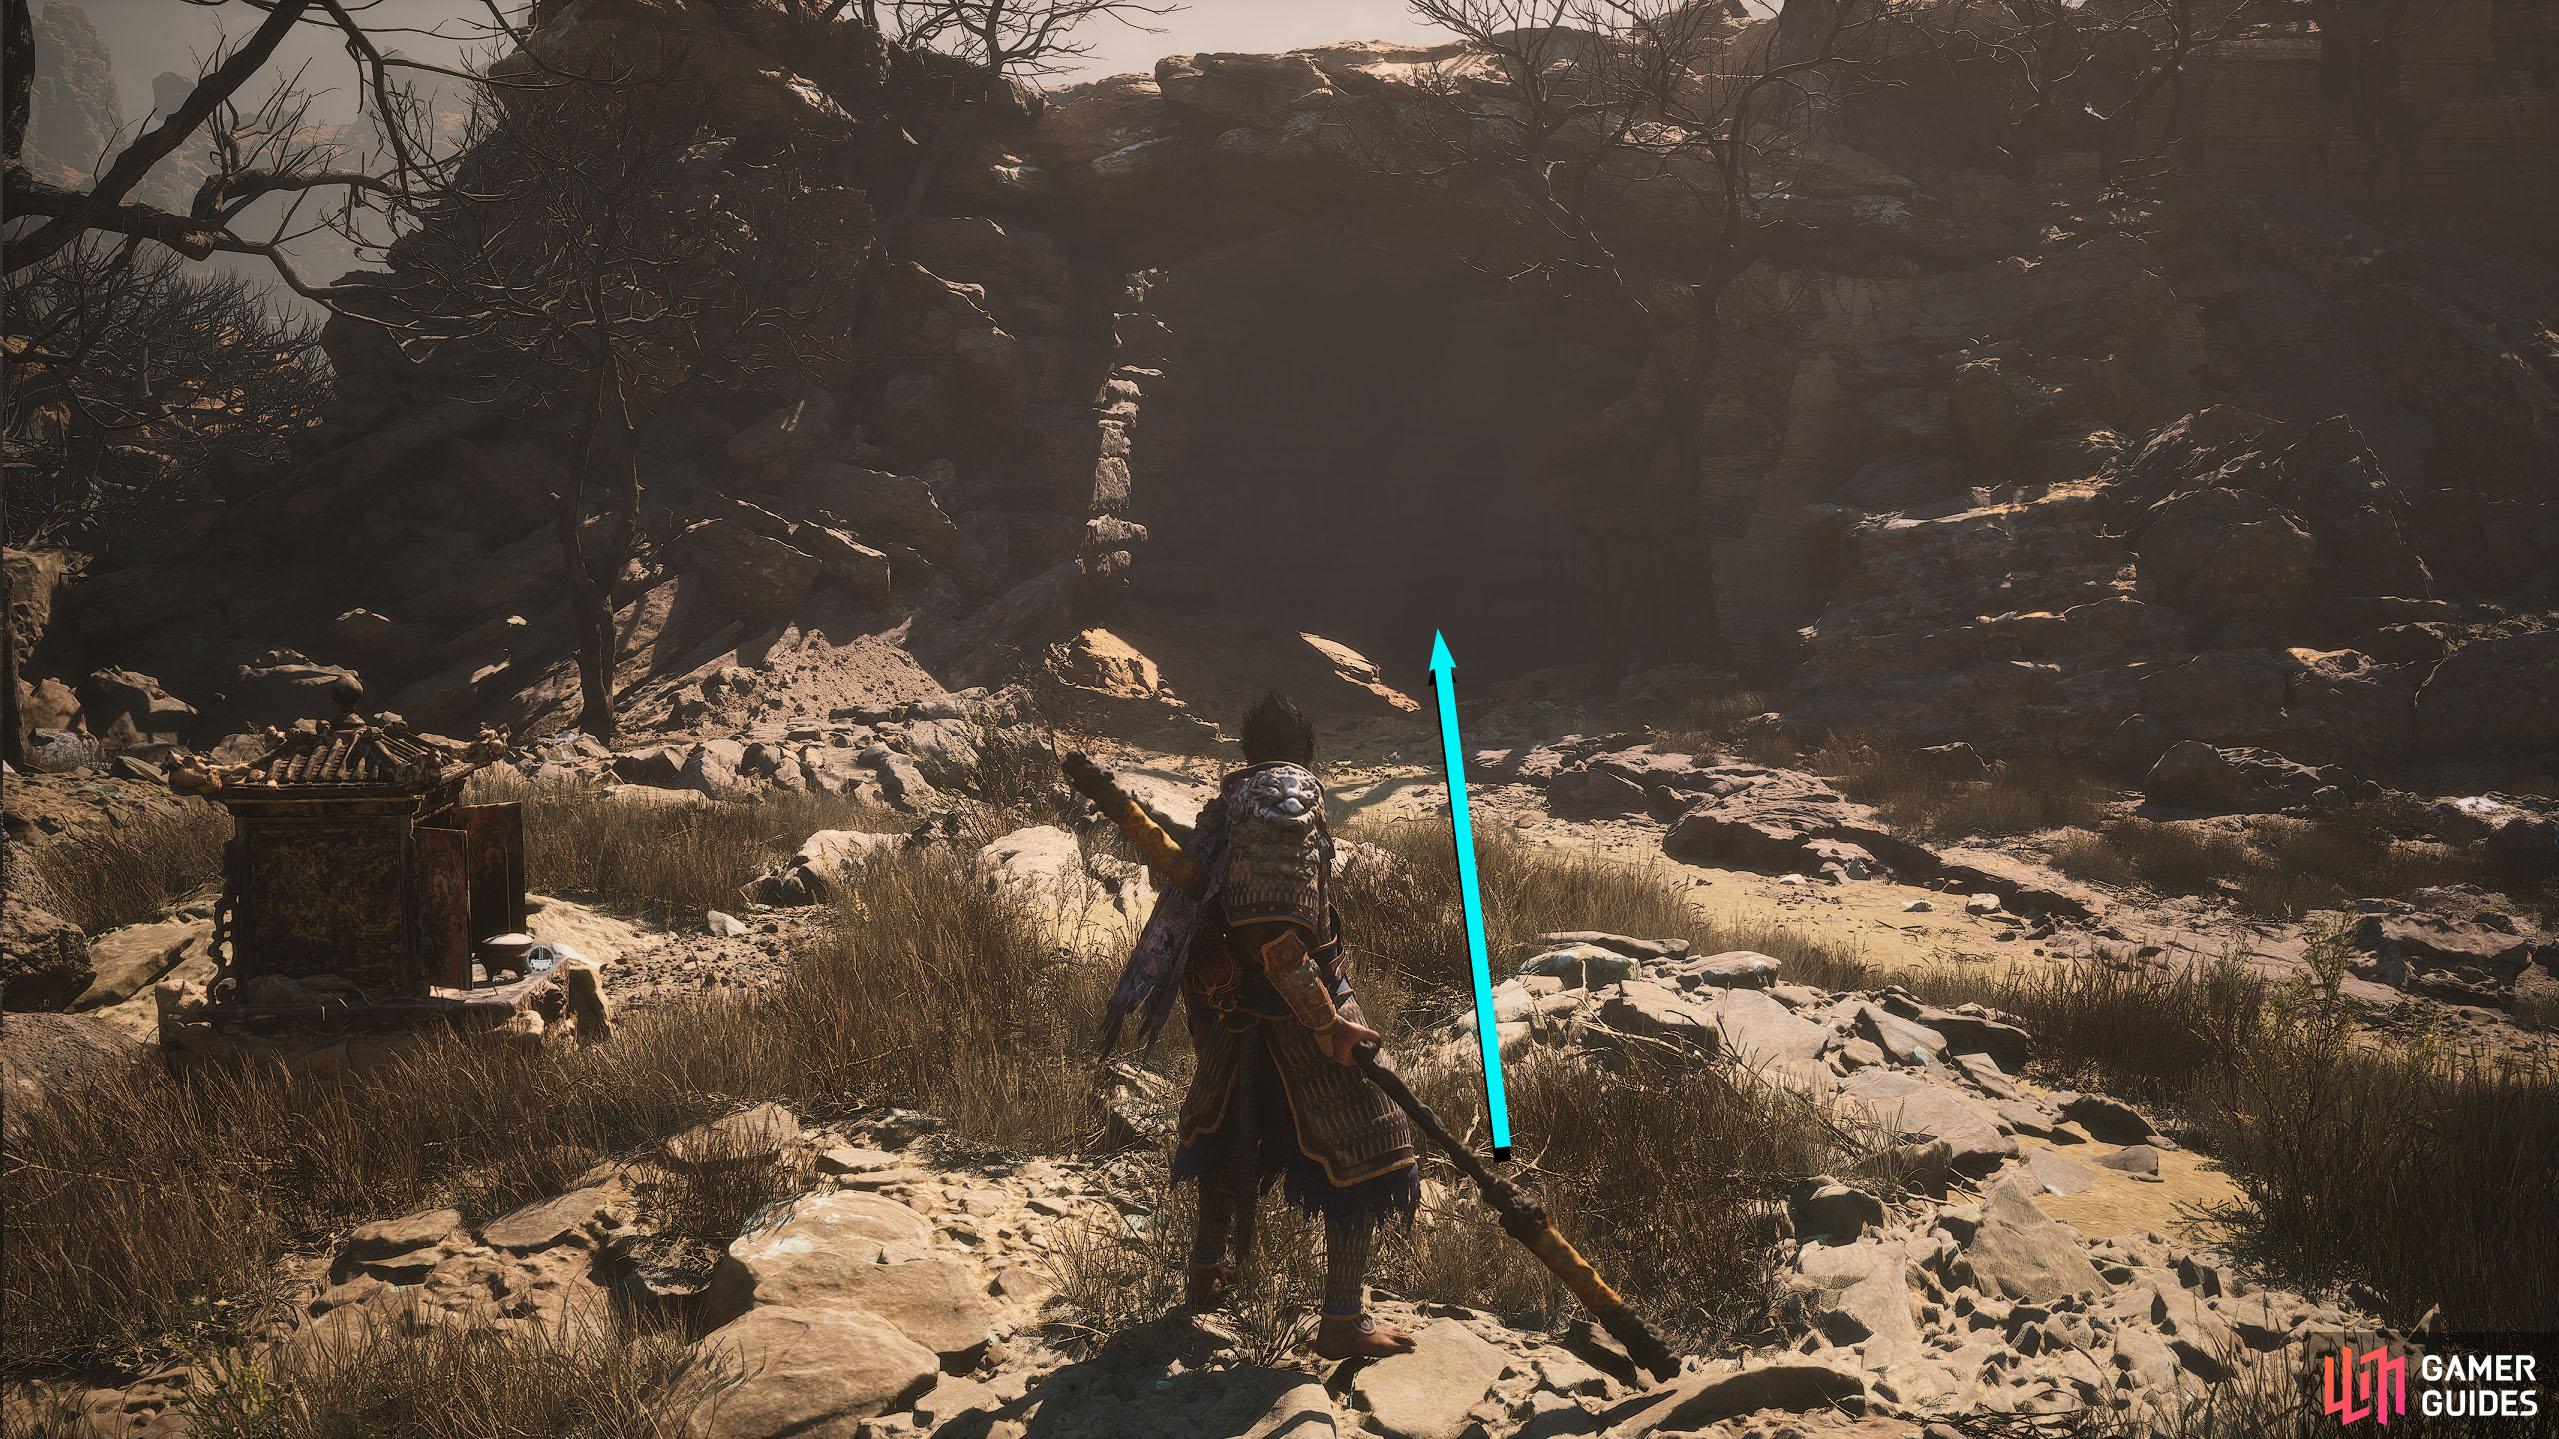
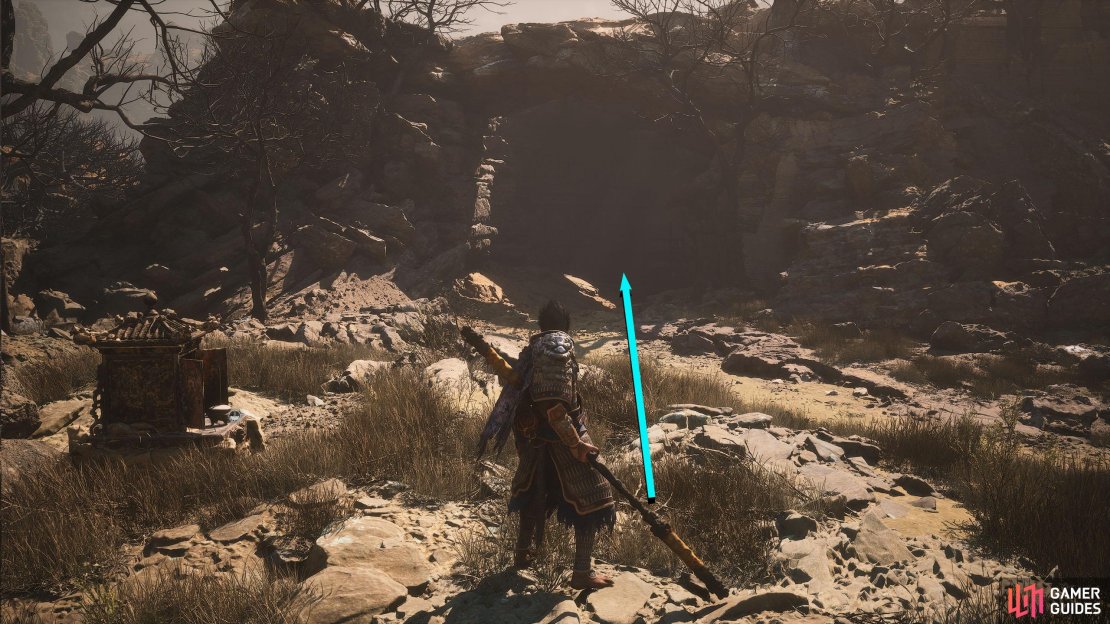
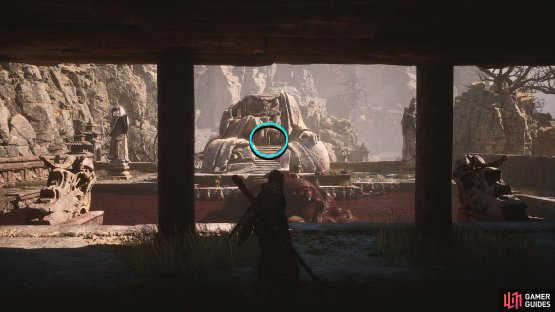
6. The Rock, Sandgate Bound Meditation Spot
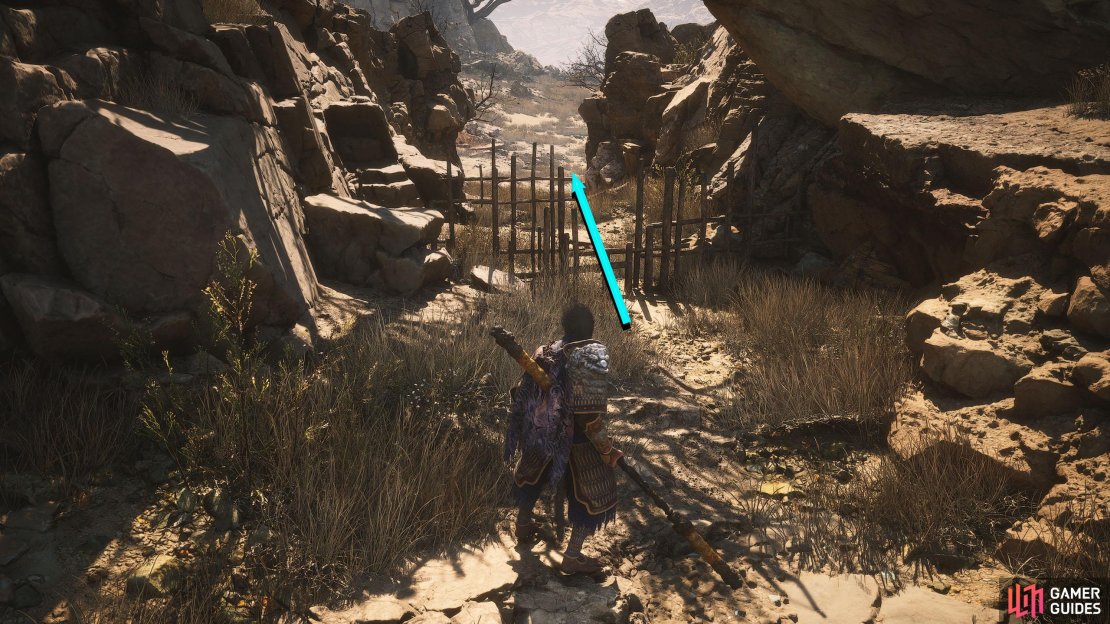
The last Meditation Spot can be found in the Secret Area: Kingdom of Sāhāli. To access this area, it requires you to complete a long side quest that spans the entire chapter. Read our The Drunken Pig Quest Walkthrough to find out how to achieve this.
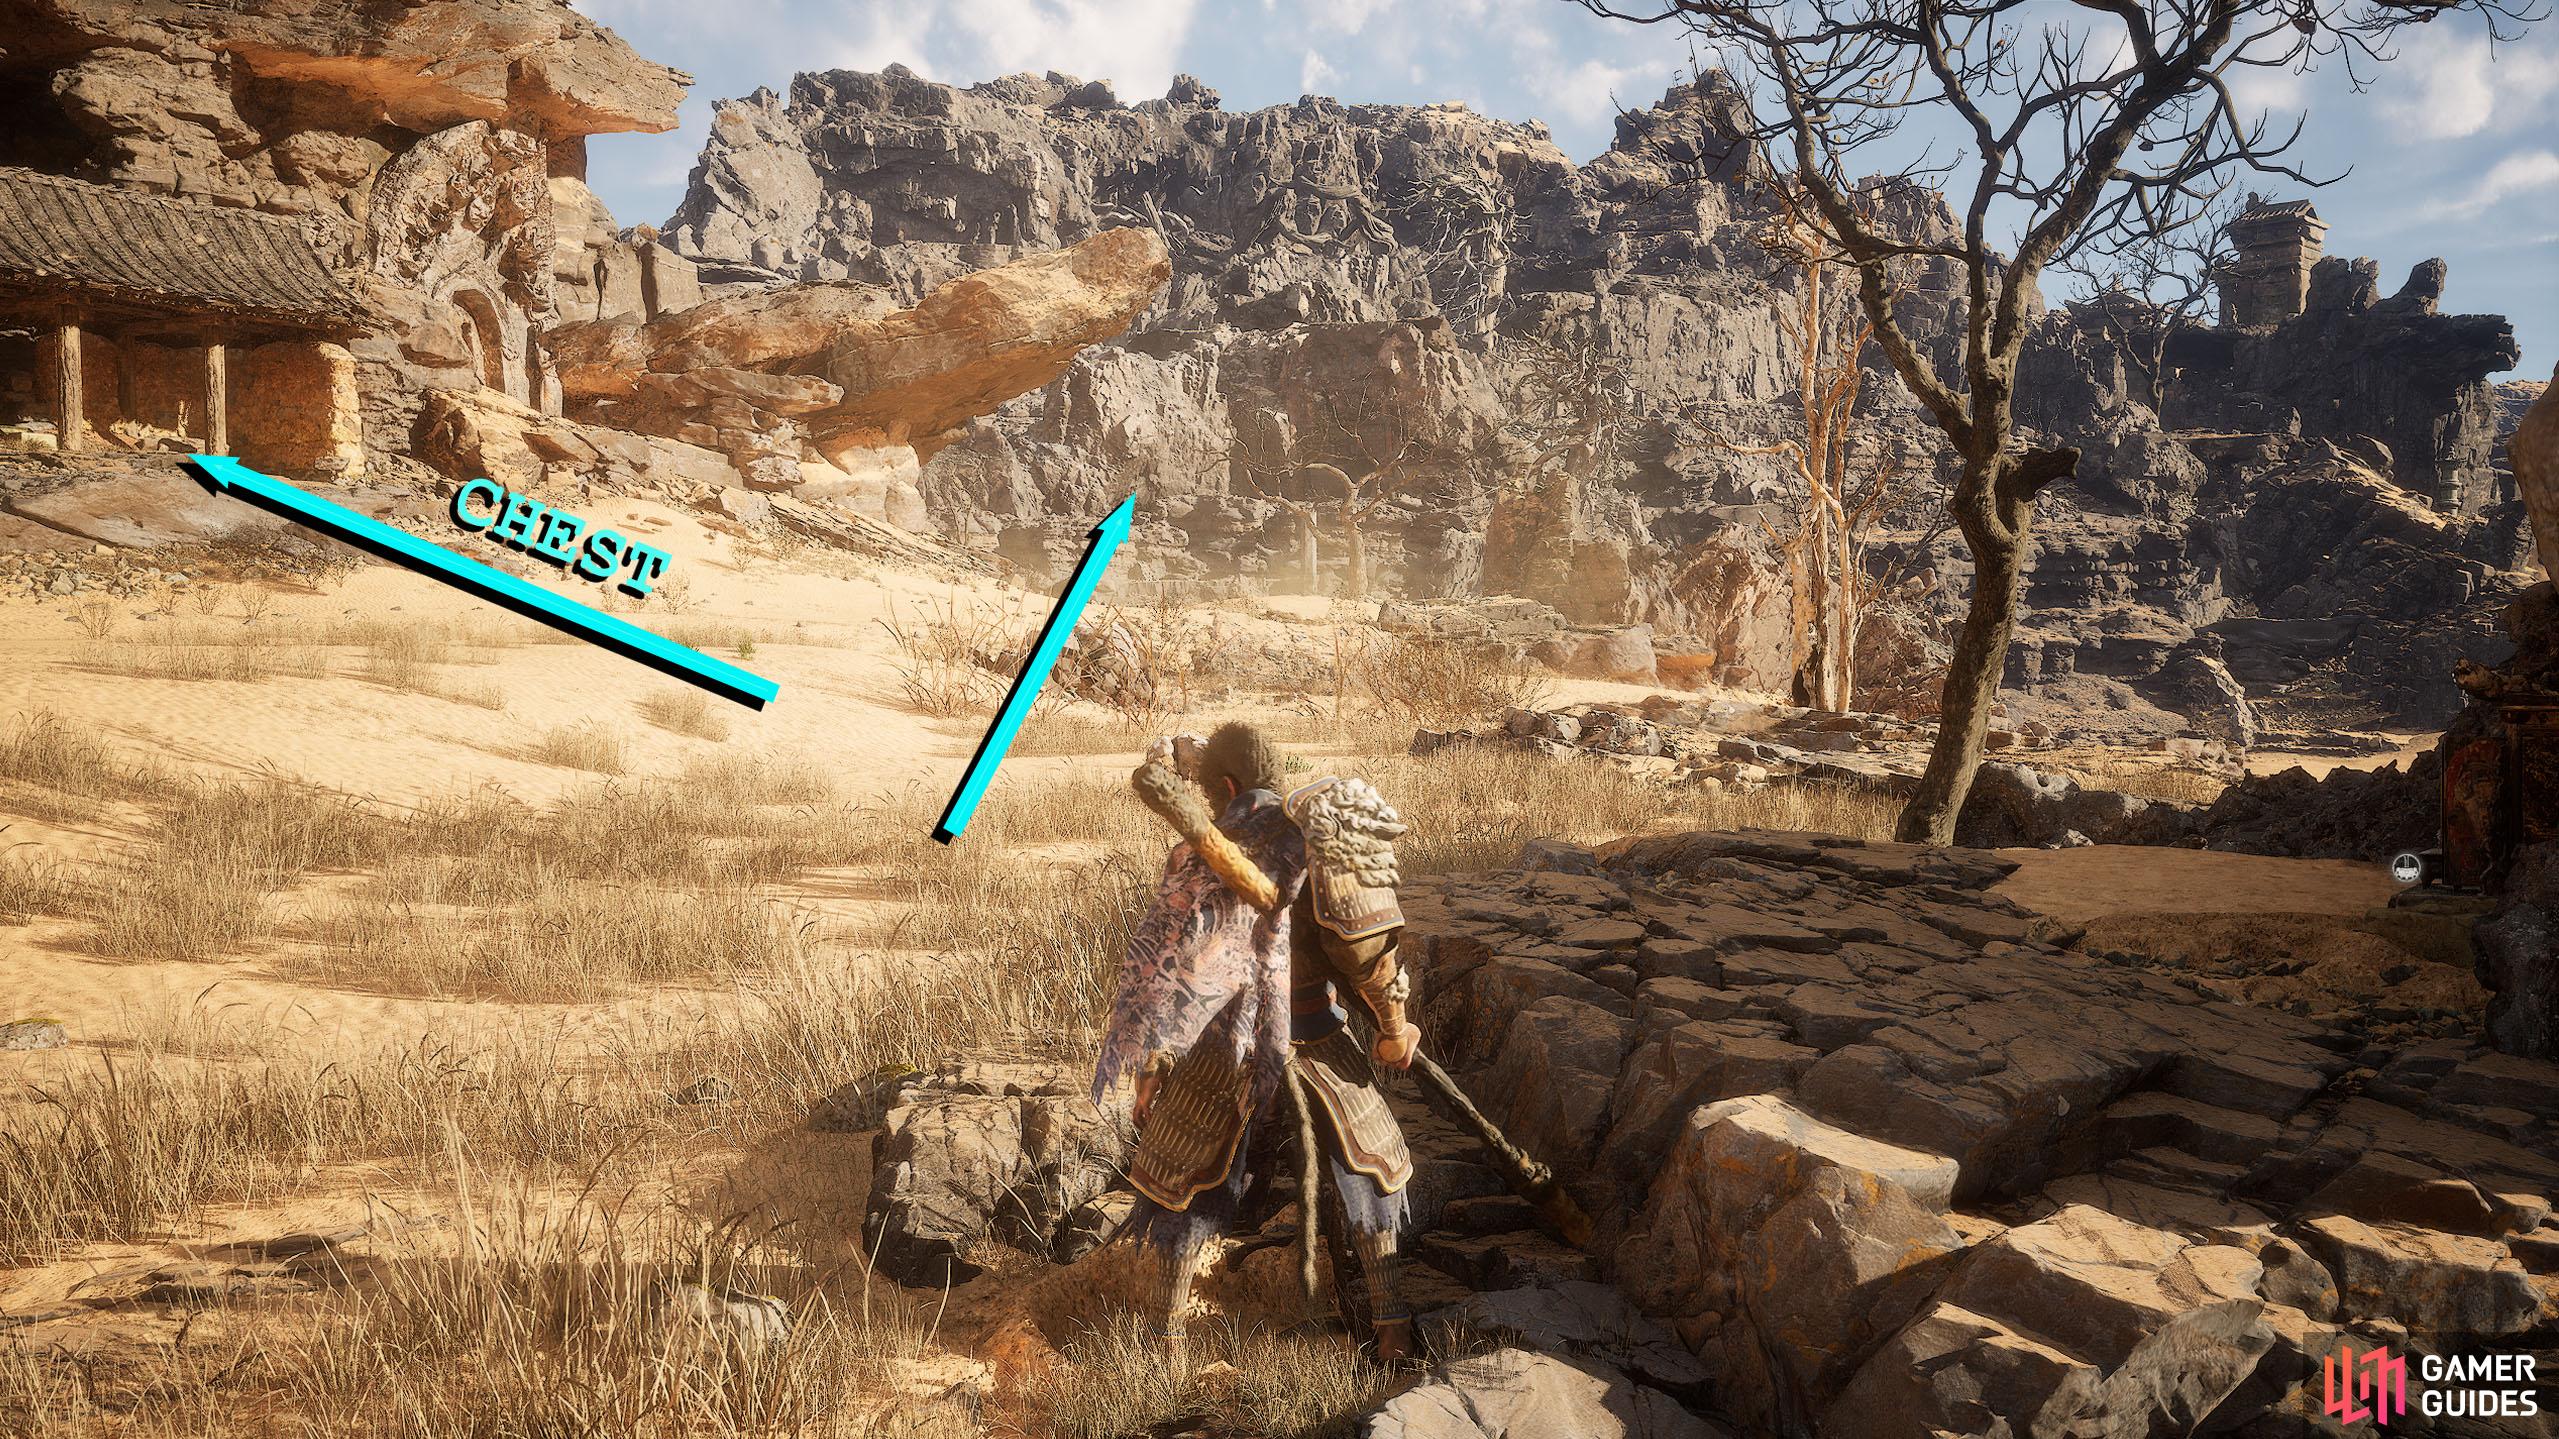
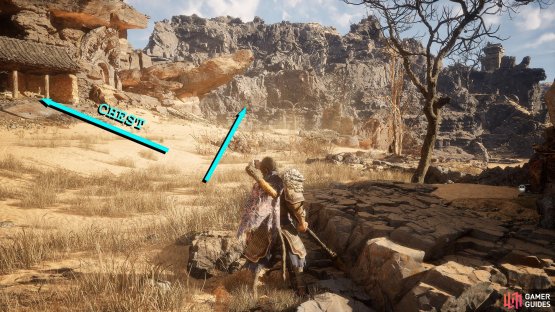

(1 of 2) From the Shrine, get the treasure before following the path to the end.

From the Shrine, get the treasure before following the path to the end. (left), Climb the rocky platform near the dead trees to find the Mediation Spot. (right)
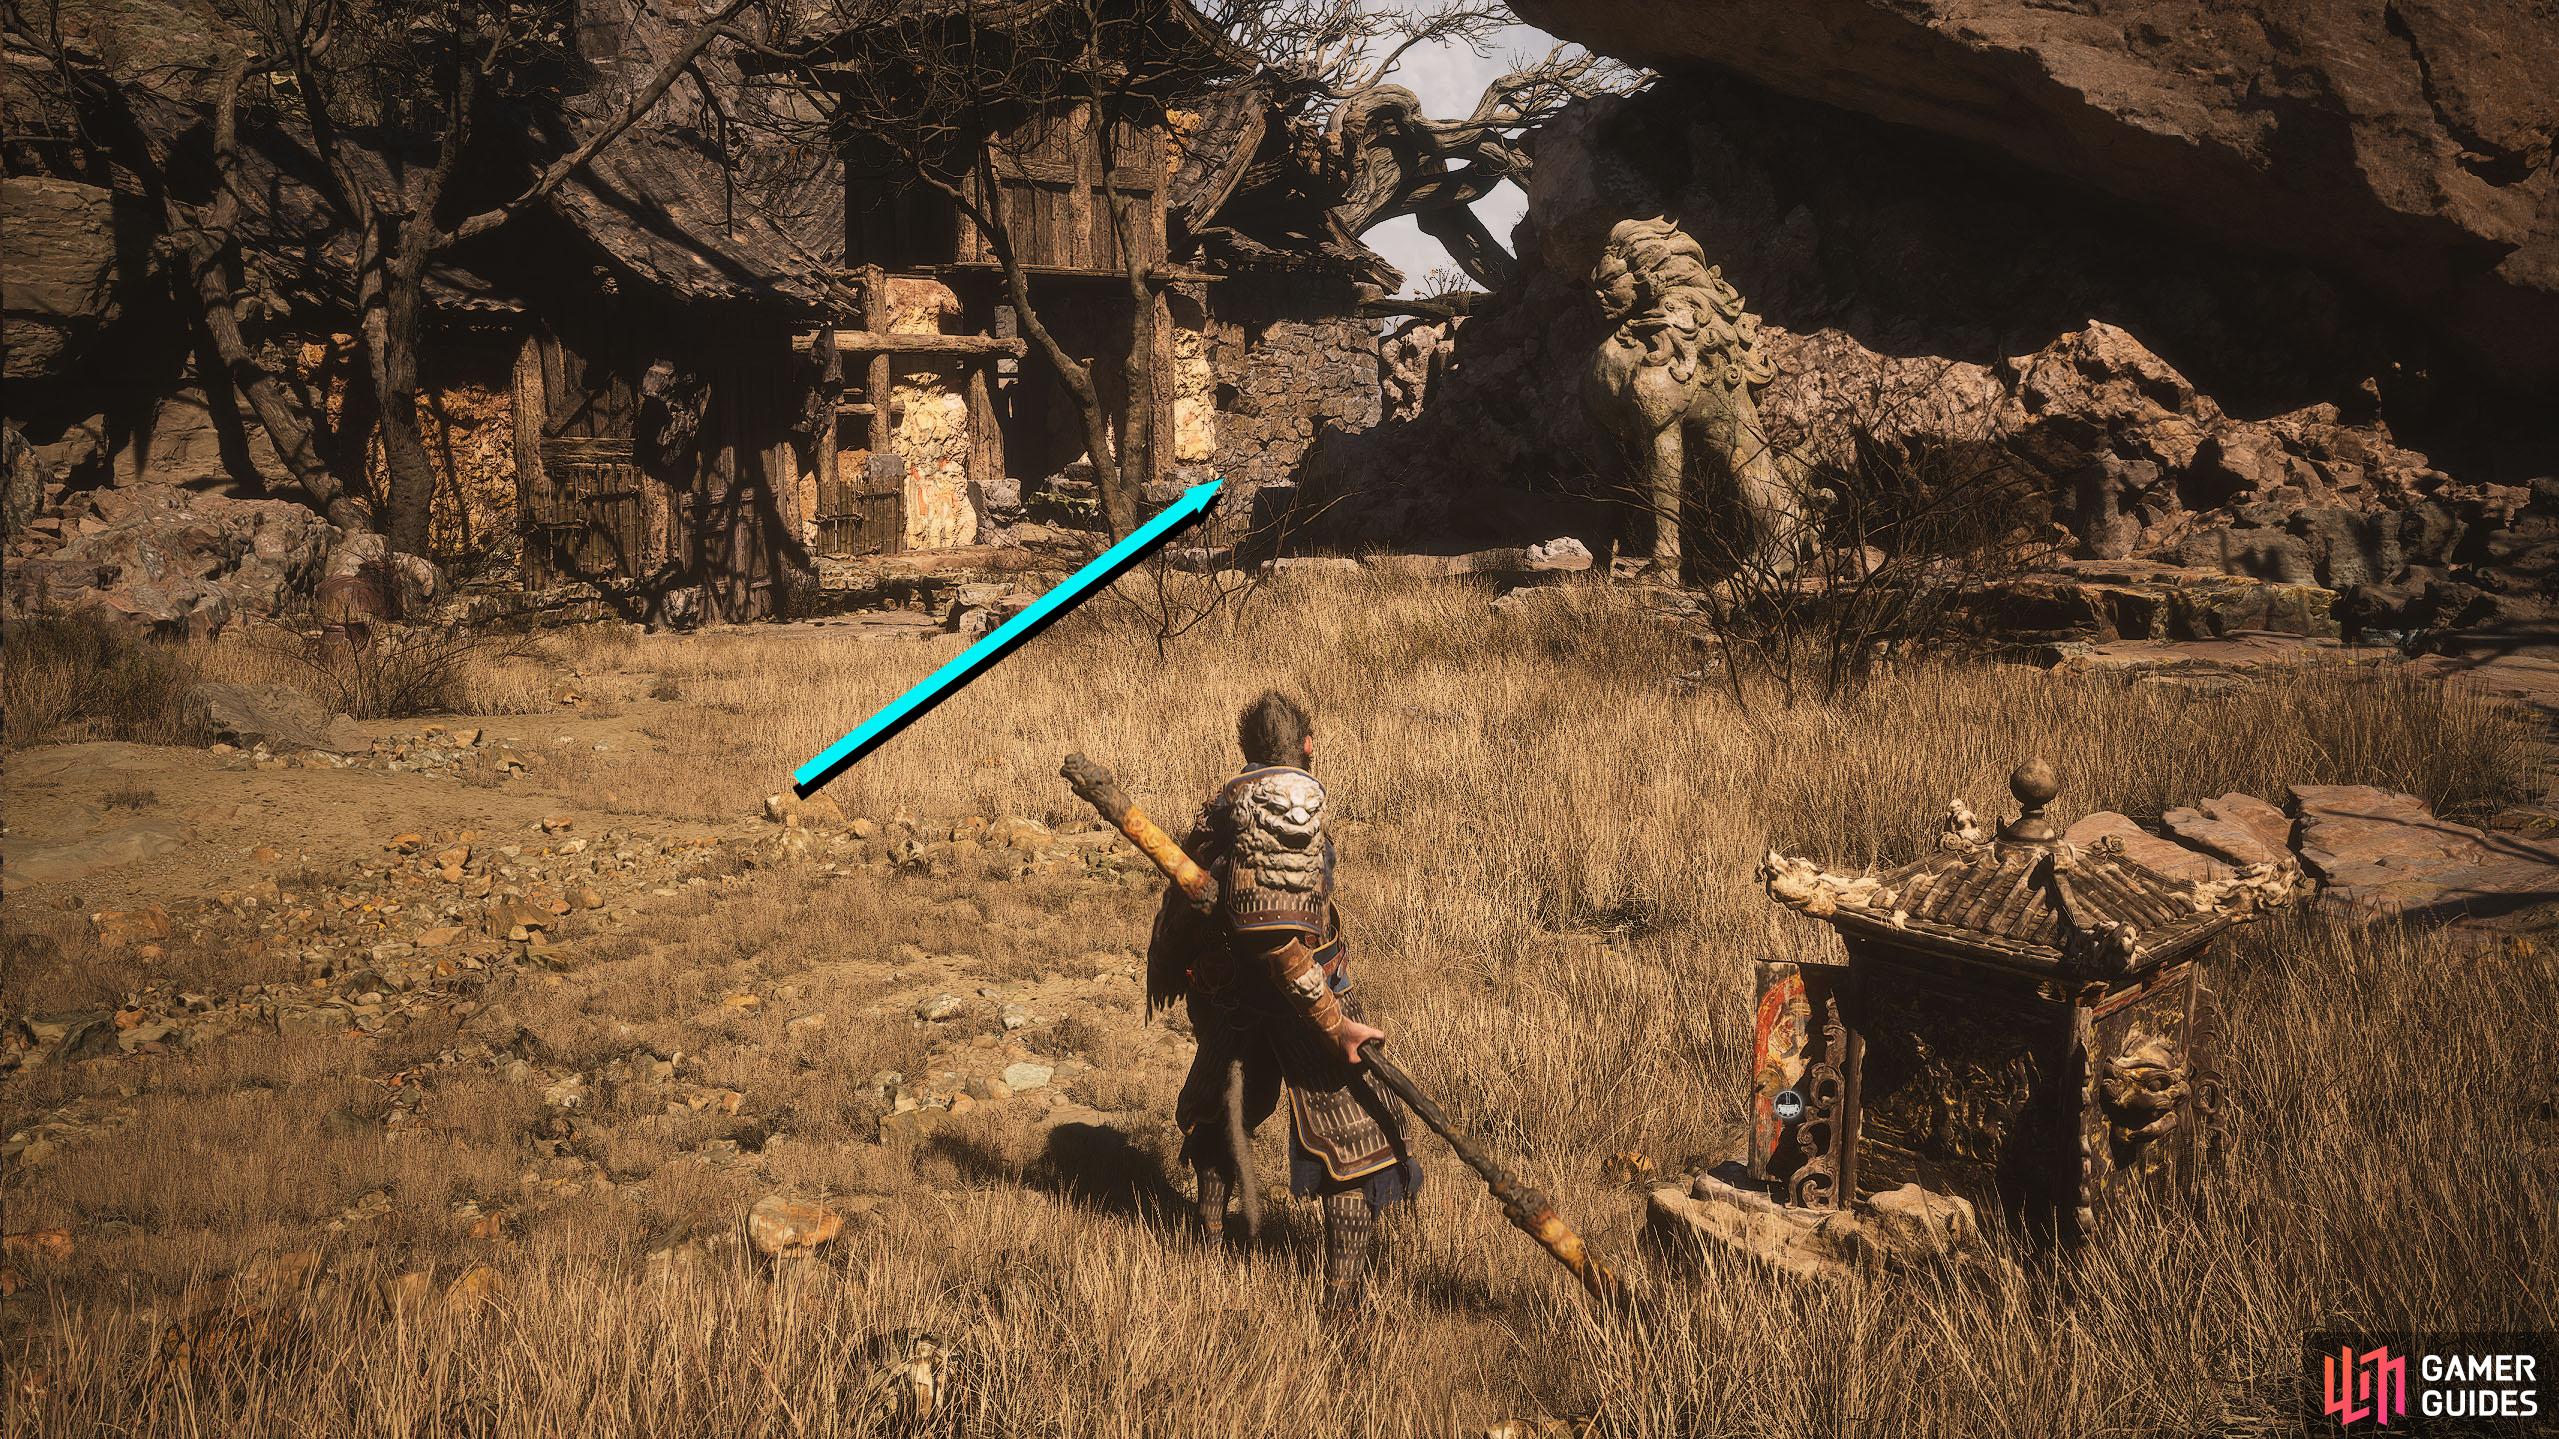
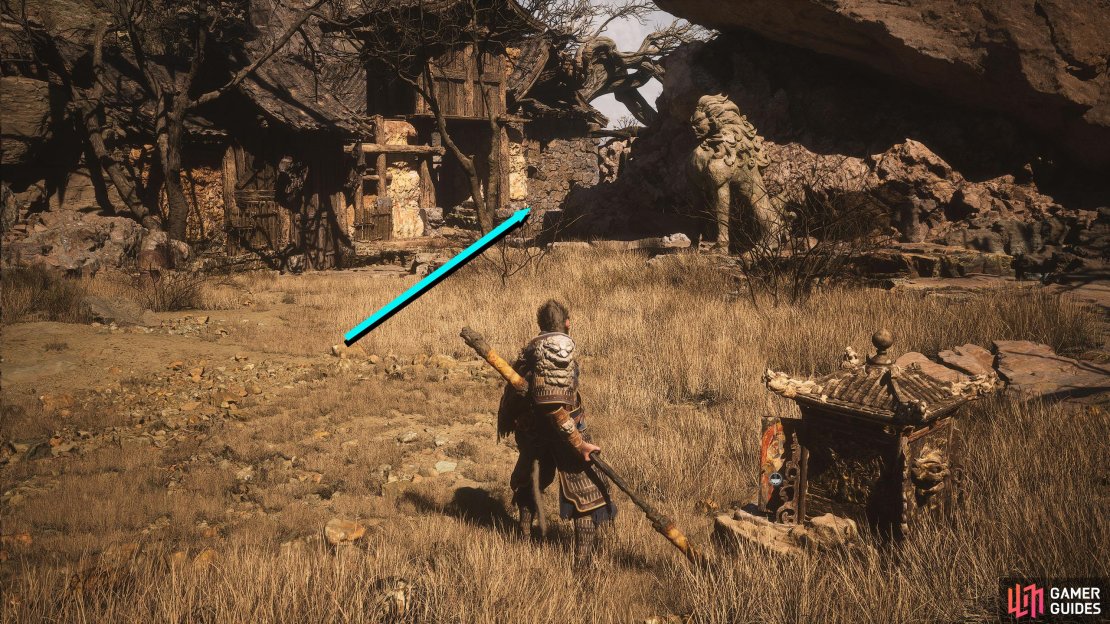
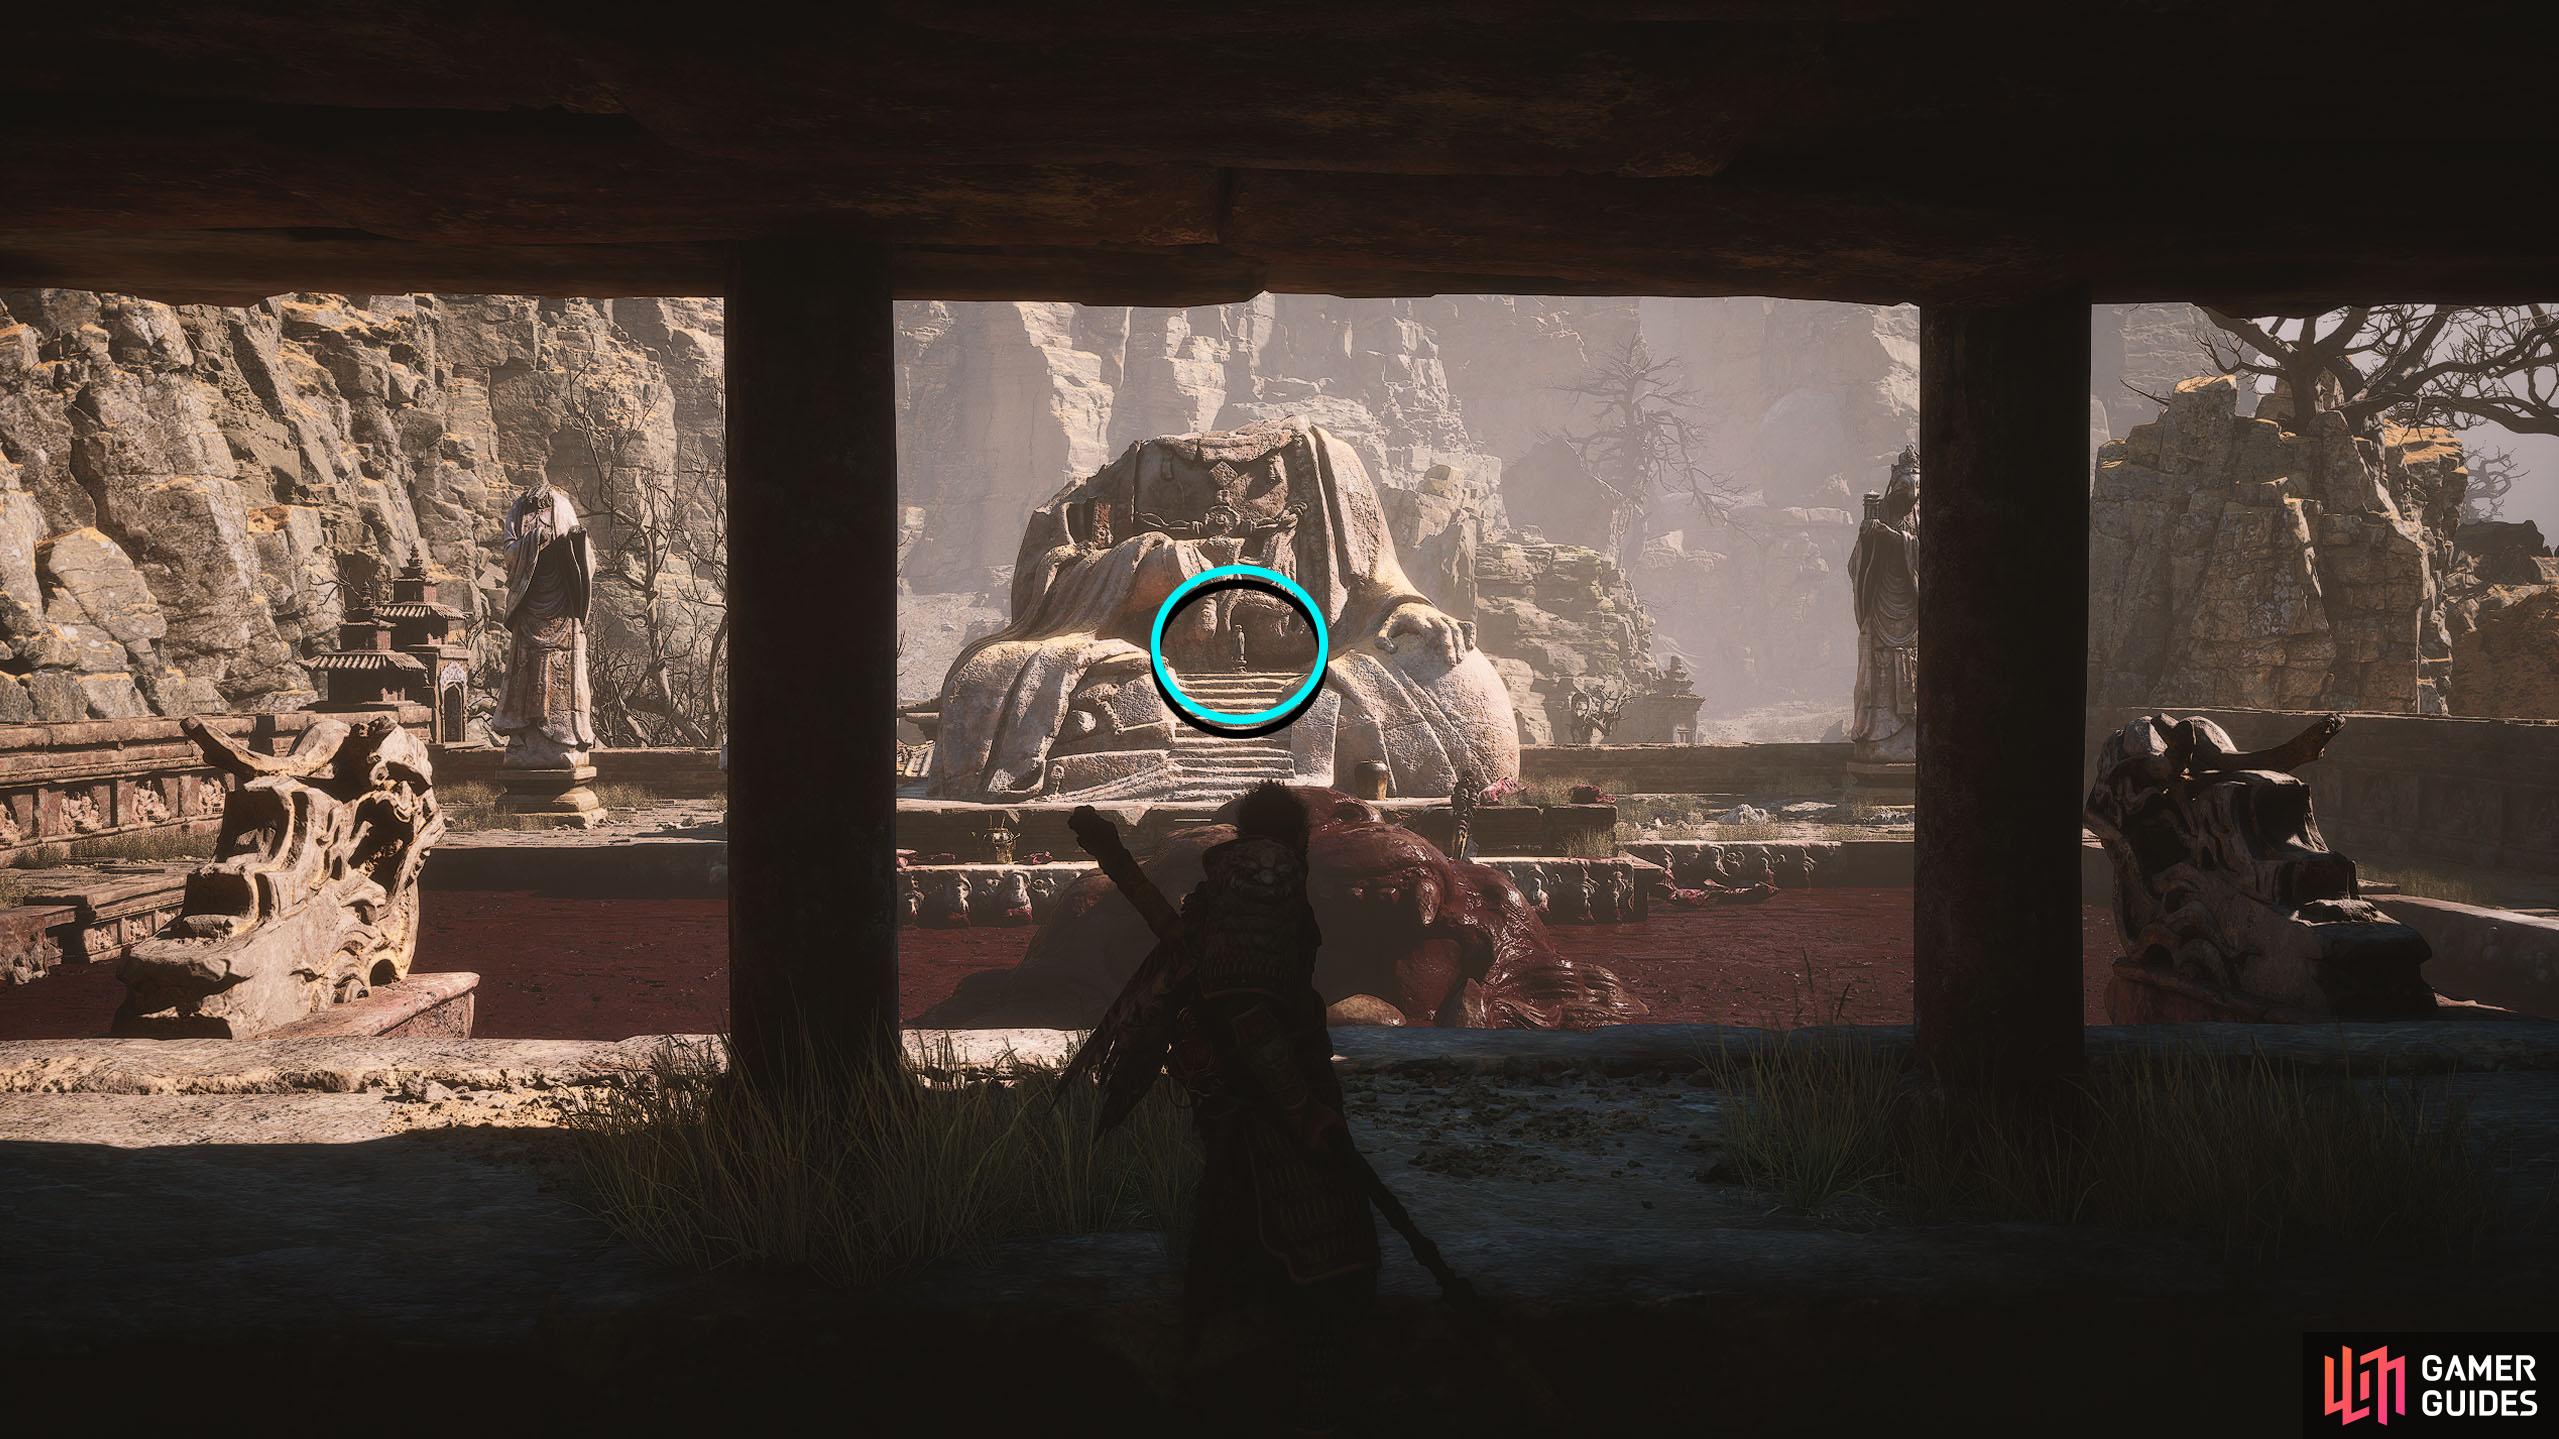
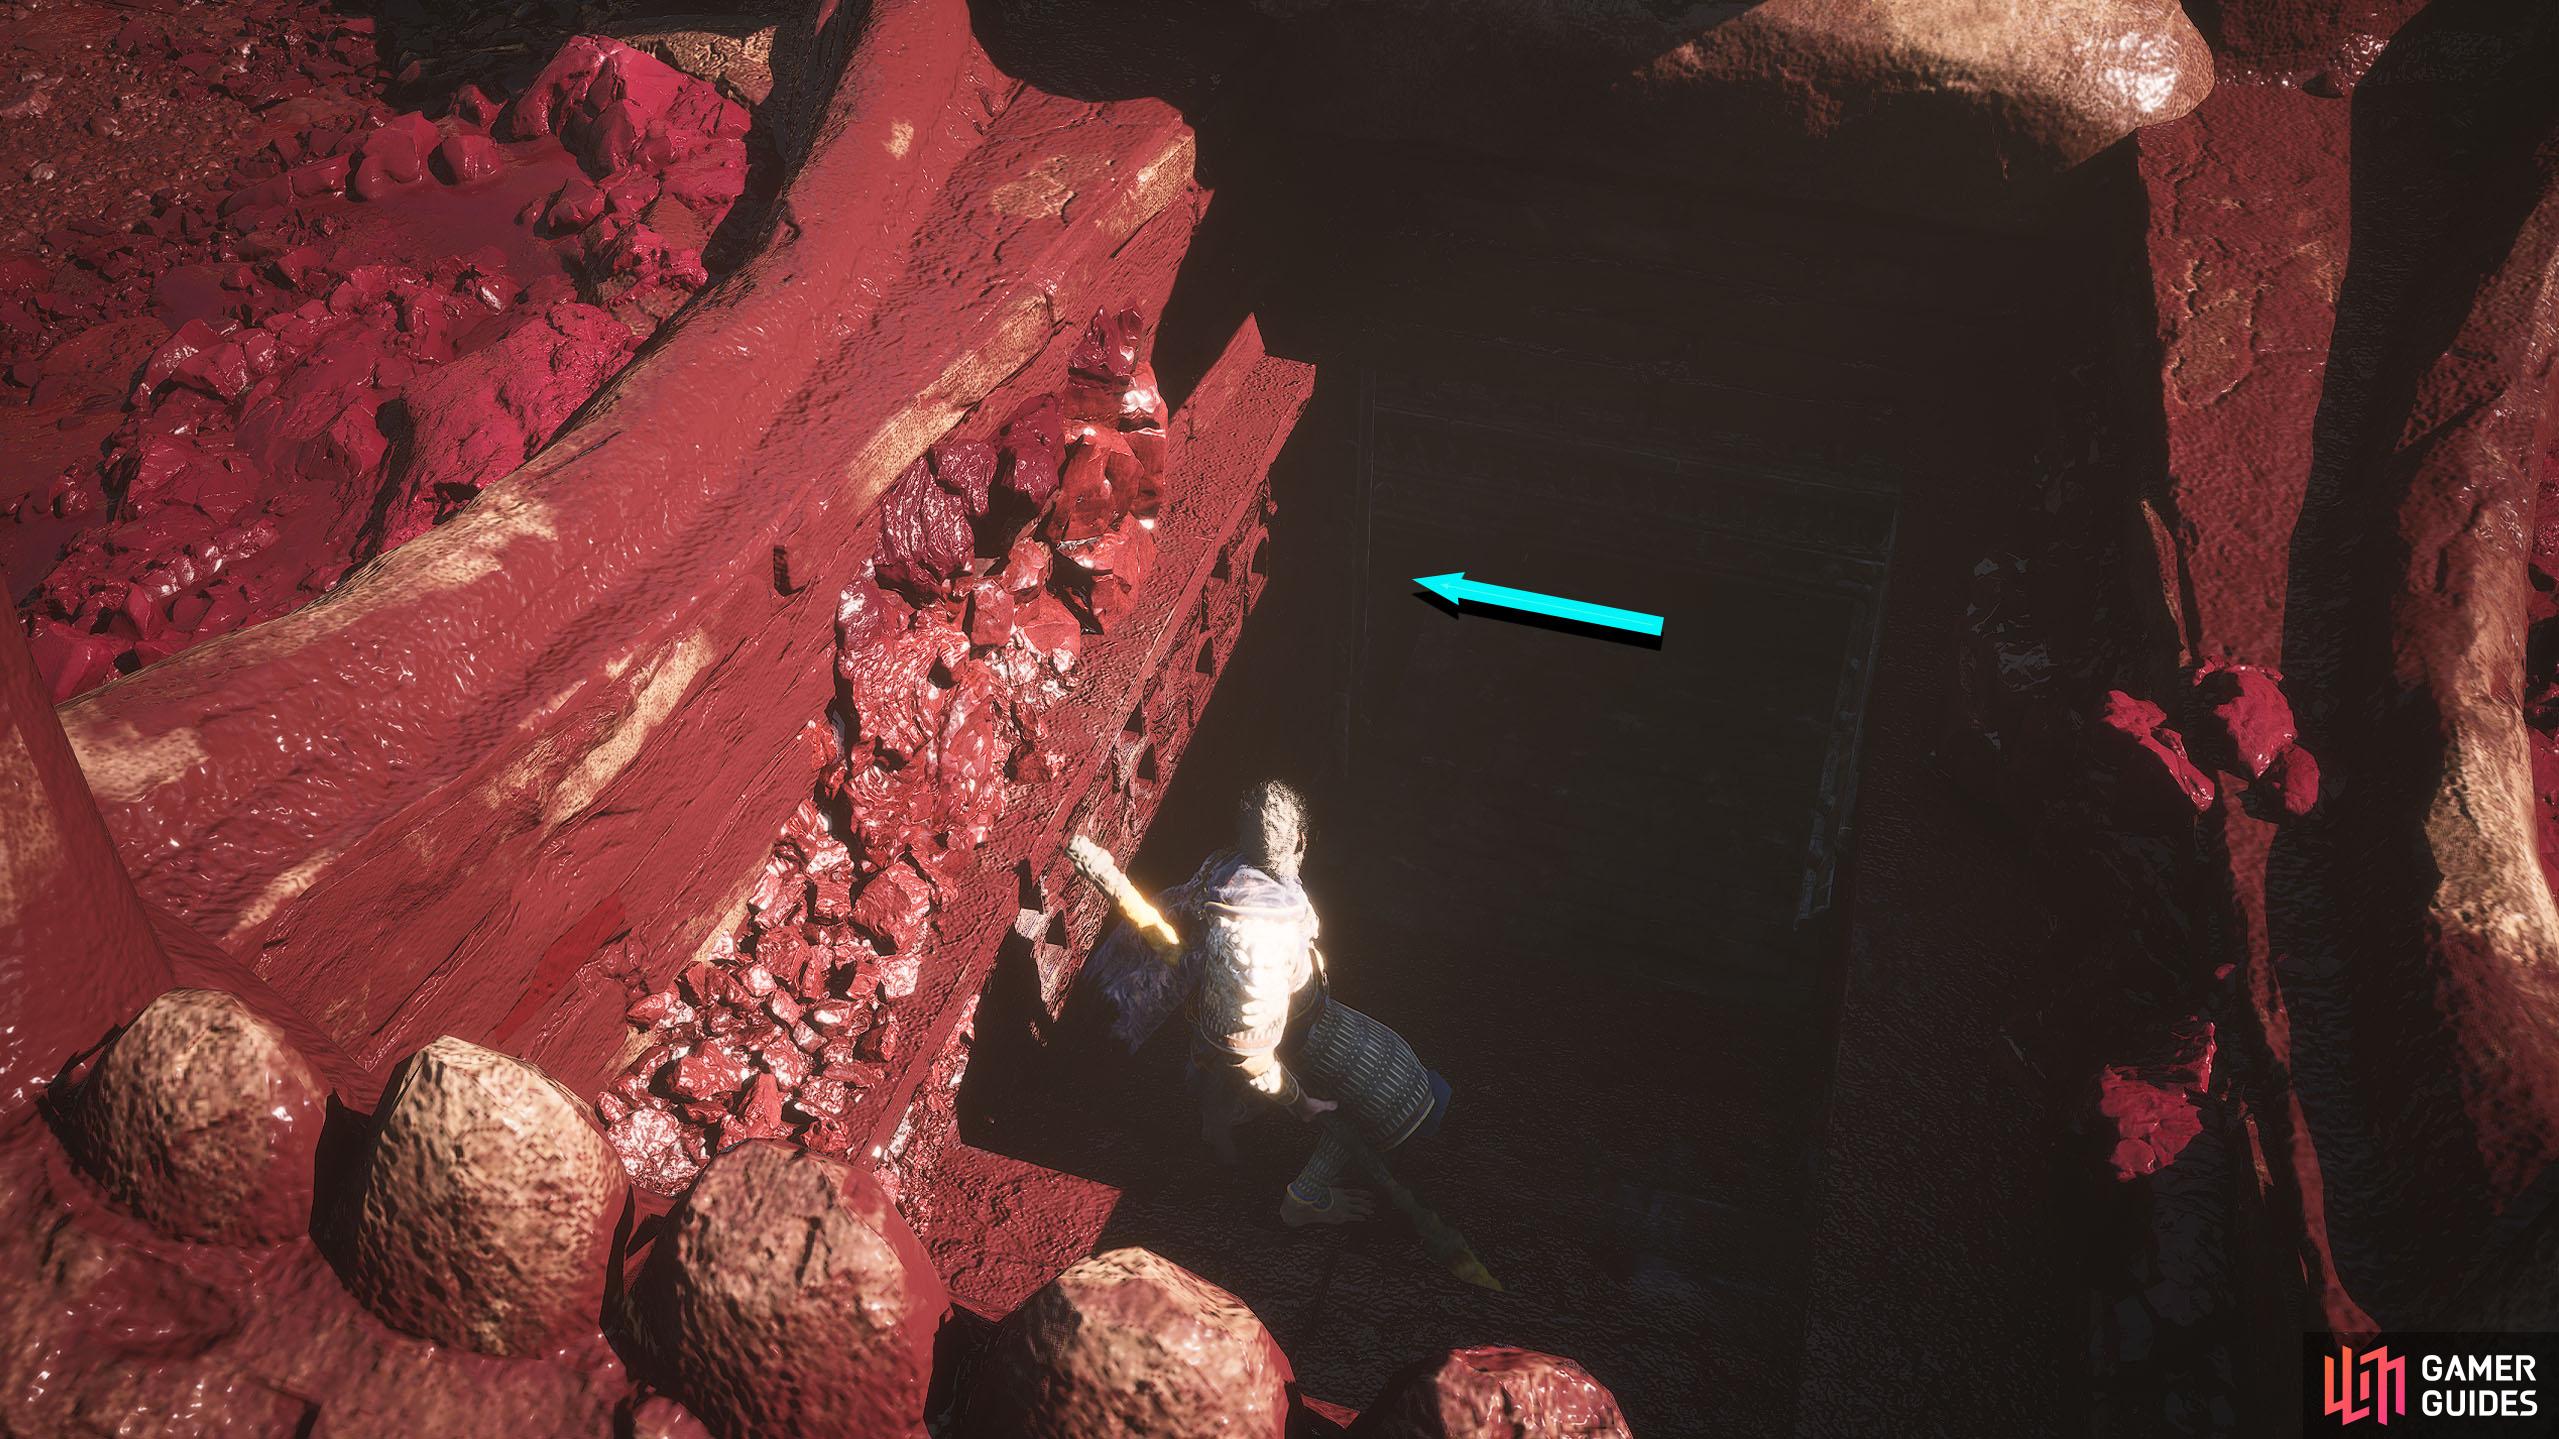
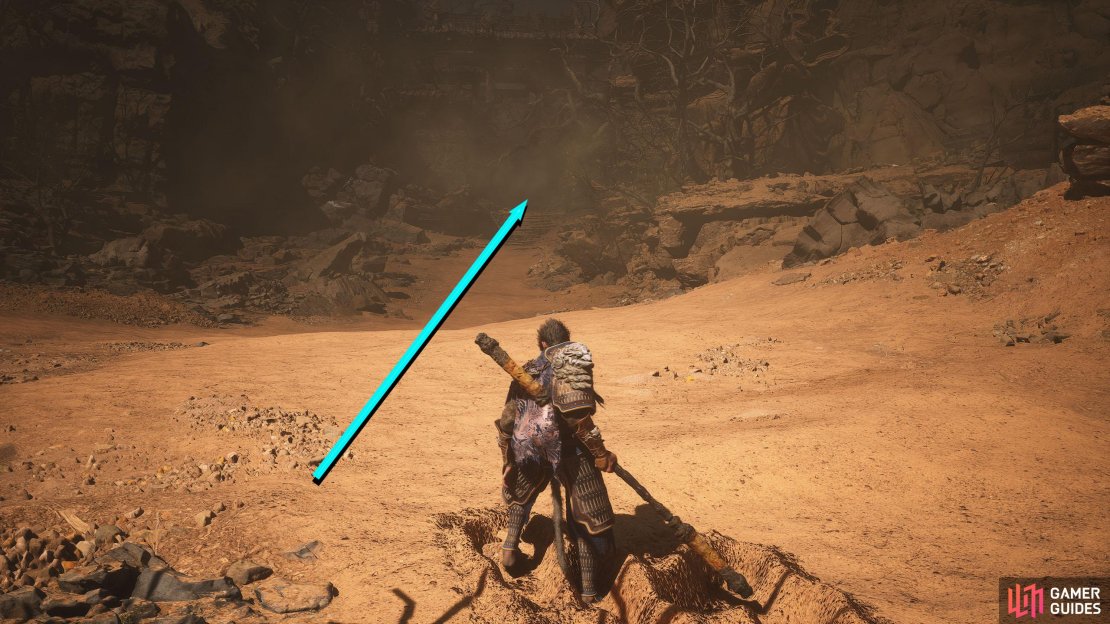
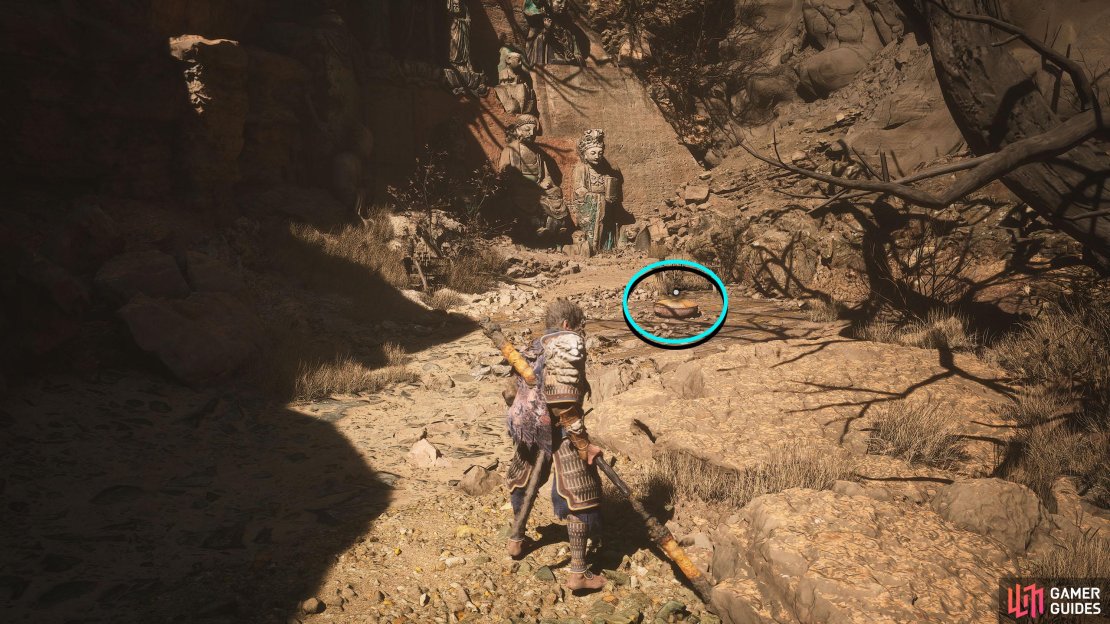
Make your way through the area, exhausting the dialogue from the NPCs until you reach the Sandgate Bound Shrine. If you look out from the Shrine, you’ll see a large barren area full of sand, which is obvious that you’ll fight a boss here. However, if you follow the path left around the edge of the center, you’ll find a treasure chest by the dilapidated building against the left wall. Keep following the path until you reach a couple of dead trees at the back. By the trees, climb up the rocky platform to find the Mediation Spot overlooking the boss arena.
No Comments