
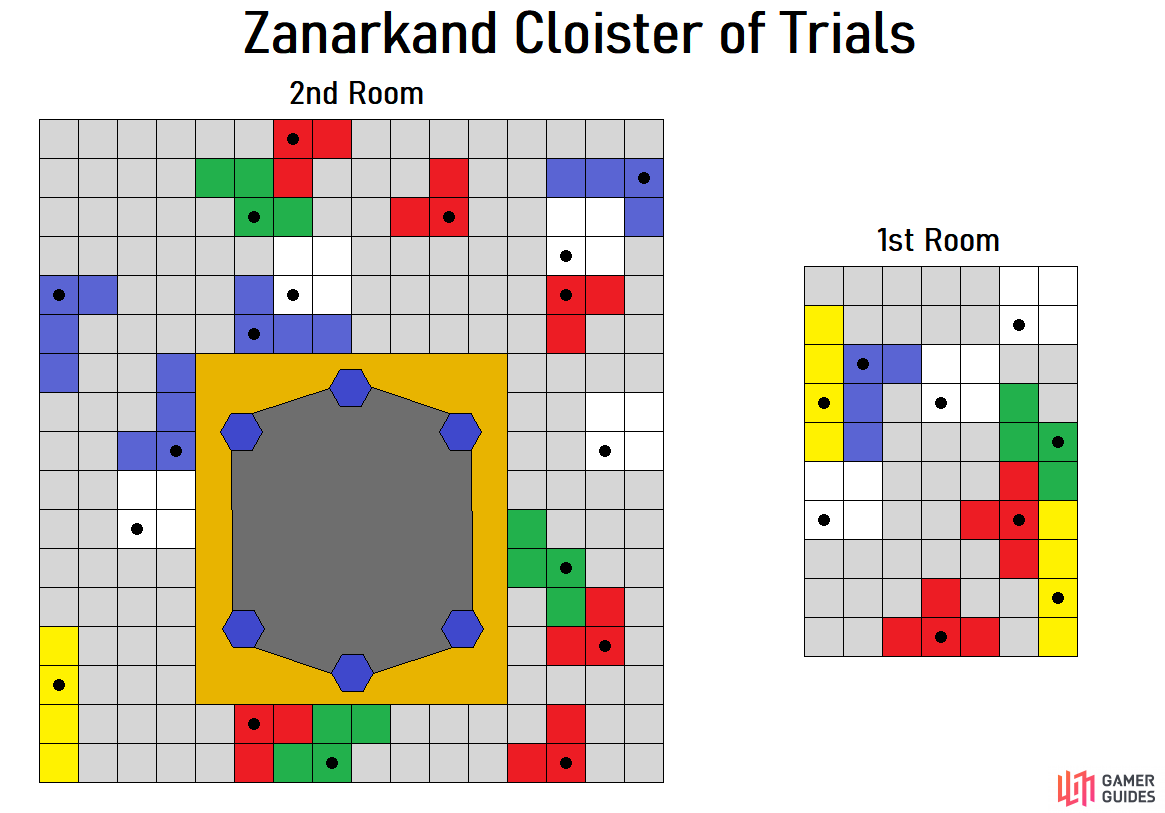
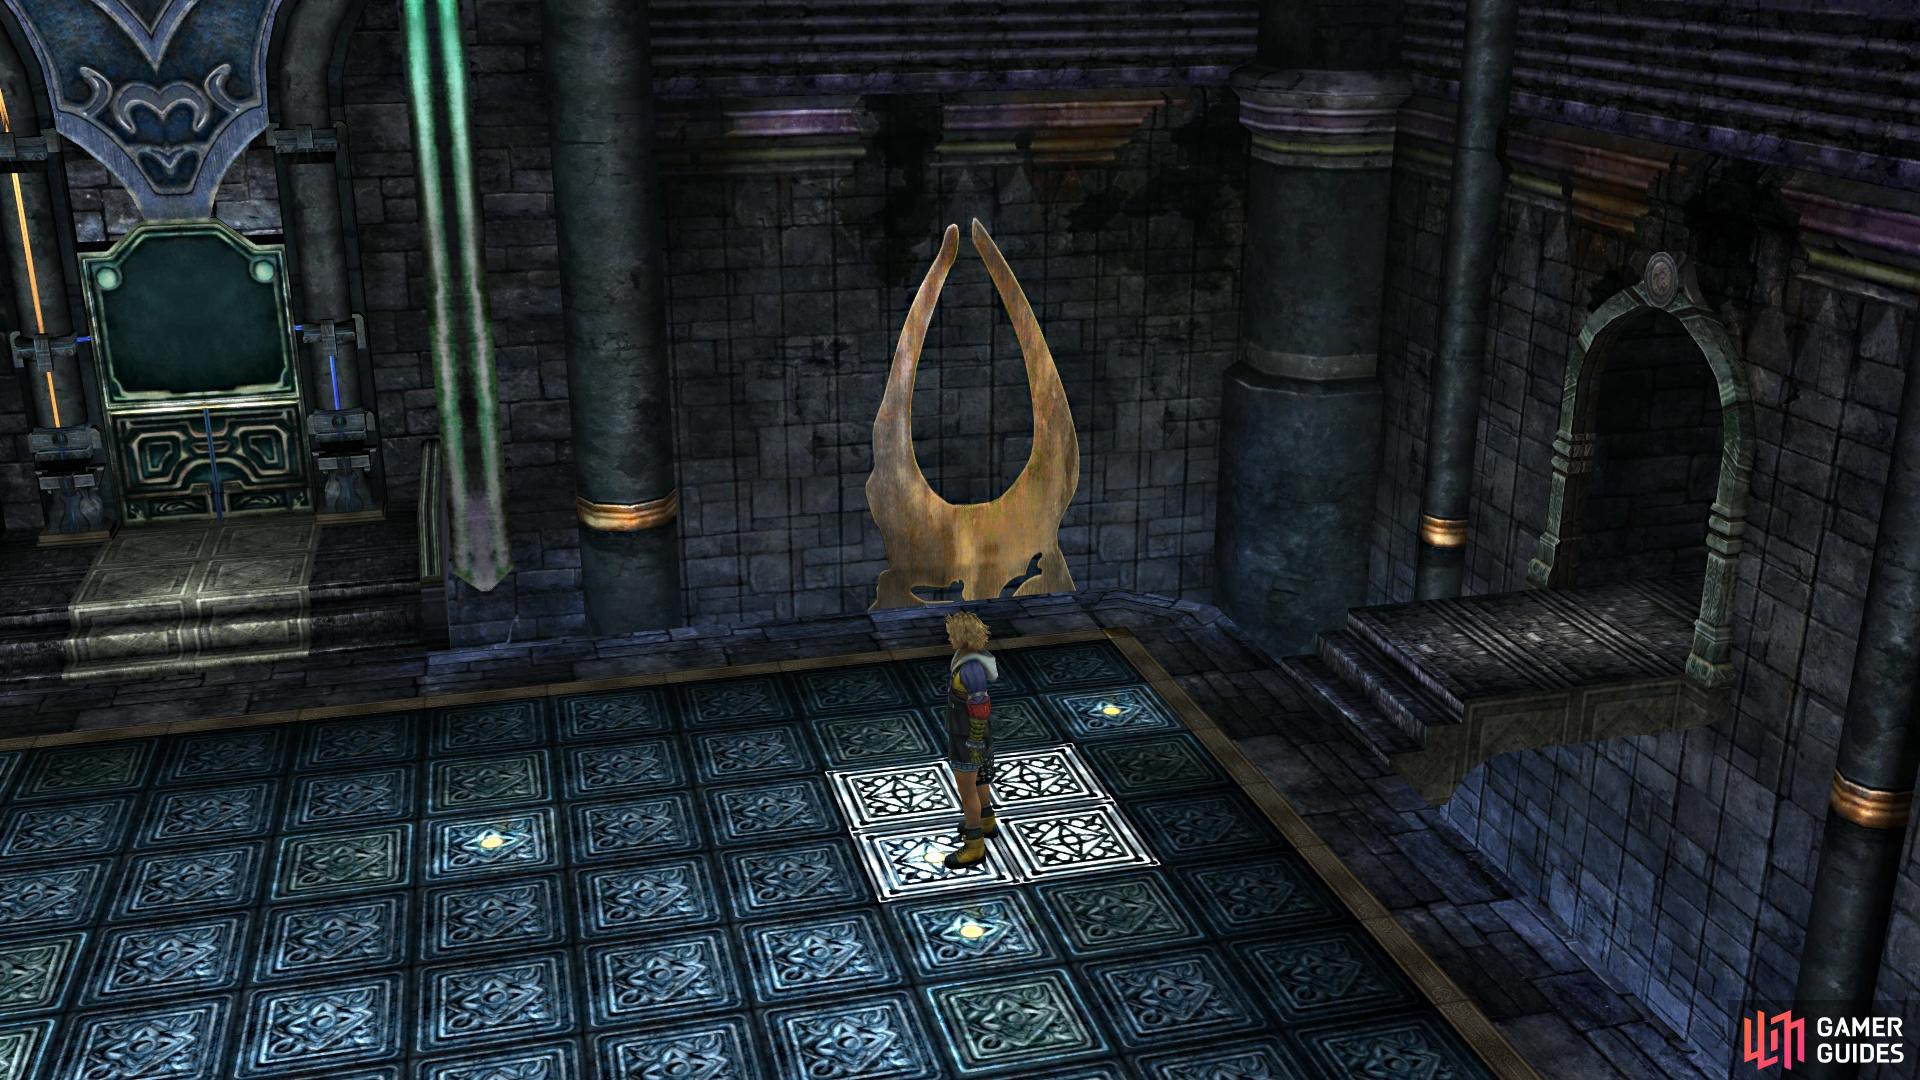
The Cloister of Trials in Zanarkand cannot be completed fully on your first visit, so you will be coming back here a little bit later. However, the actual puzzle you will need to do is a little bit different than in previous ones. Upon stepping into the trials, walk on the central block along the bottom row to make a series of tetromonoes appear on the screen on the opposite end of the room. Your goal here is to step on the spots on the floor with the dots, which will create a tetromono shape. Of course, the problem with doing this for the first time is that the shape you get isn’t known for you, so you have no idea if you’re creating one of the needed shapes on the screen.
Luckily, there is a diagram above that depicts the various shapes in each of the rooms. The smaller room is the one you’re currently in, so step on the correct panels to finish this portion, which will cause six pedestals to appear, as well as open the door to the next room. What you need to do here is push one of the pedestals into the wall, causing a puzzle to appear on the screen. You will go into the second room and do the puzzle in there. Upon completing the puzzle, a glyph will appear on one of the spots in the middle in the room. The catch is that the middle pedestals on either side don’t move, so you will only have four puzzles done.
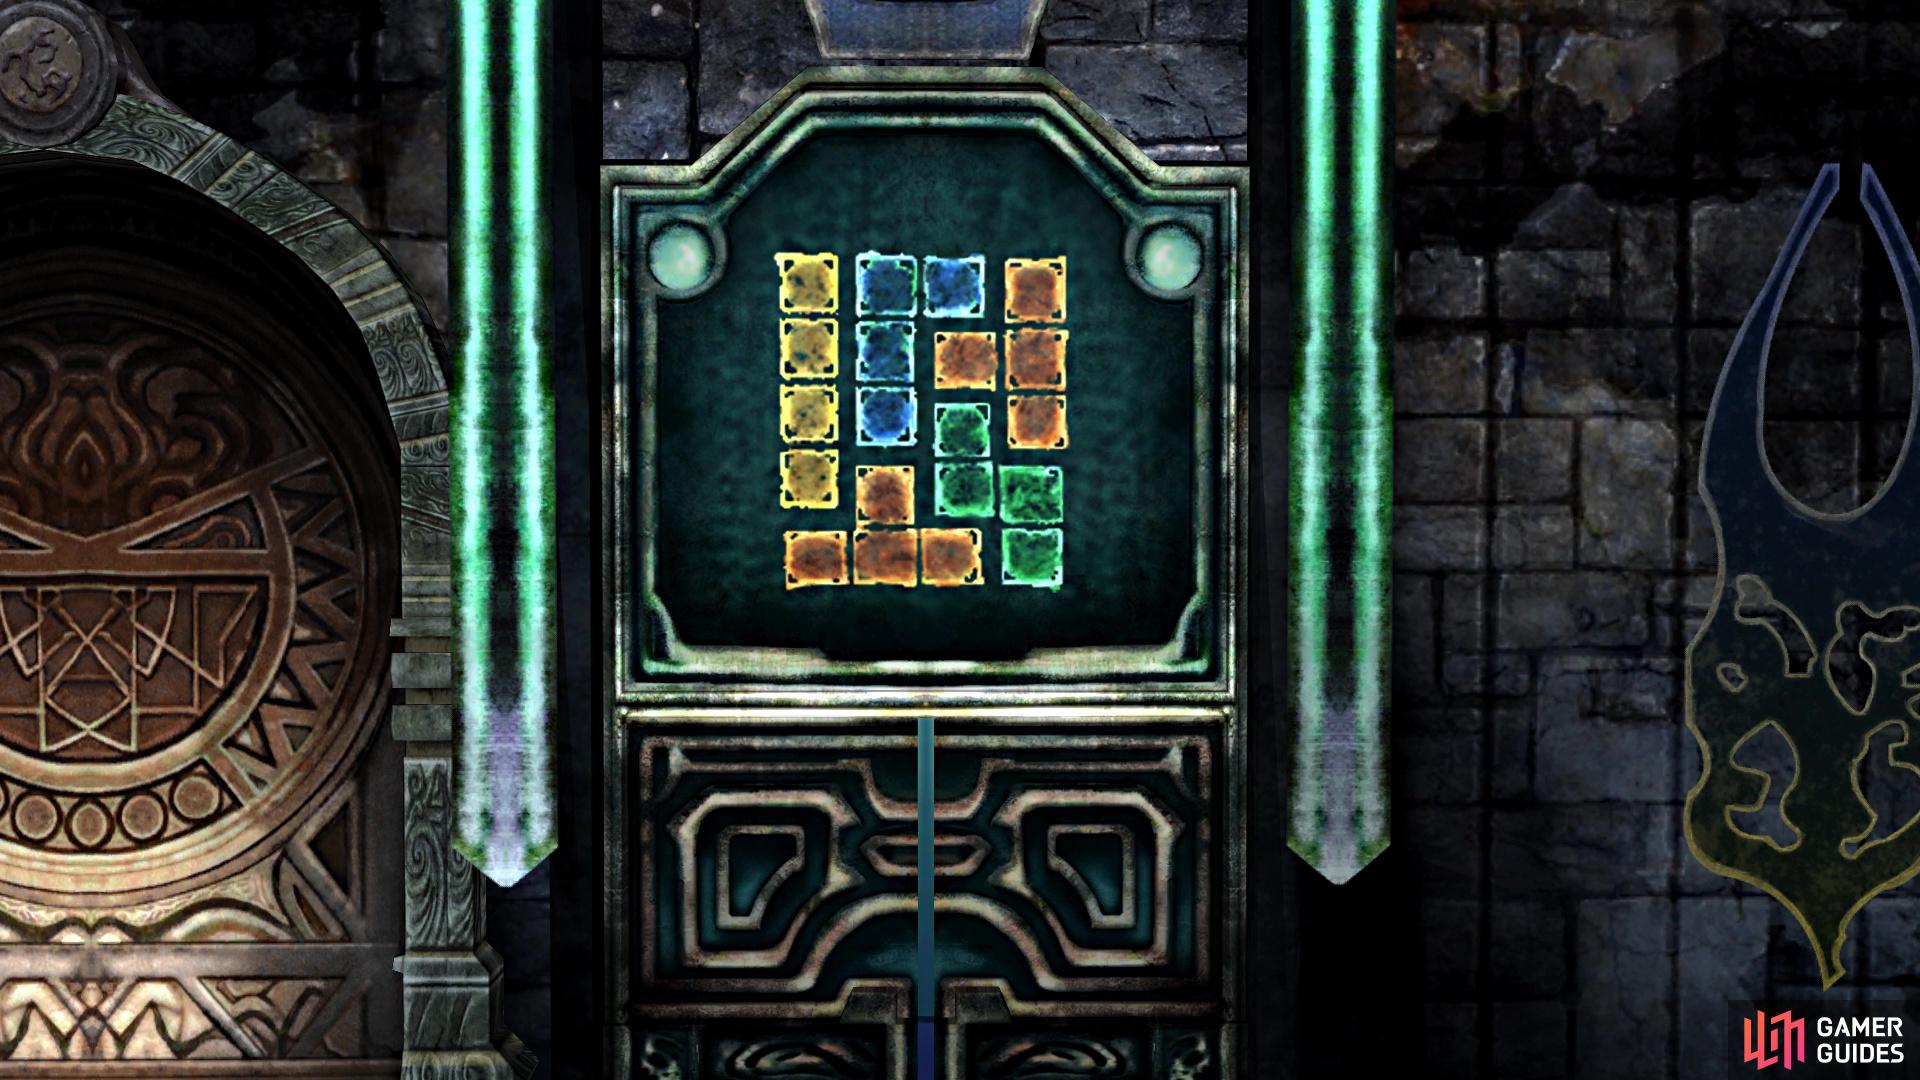
The screen will tell you the shapes you need
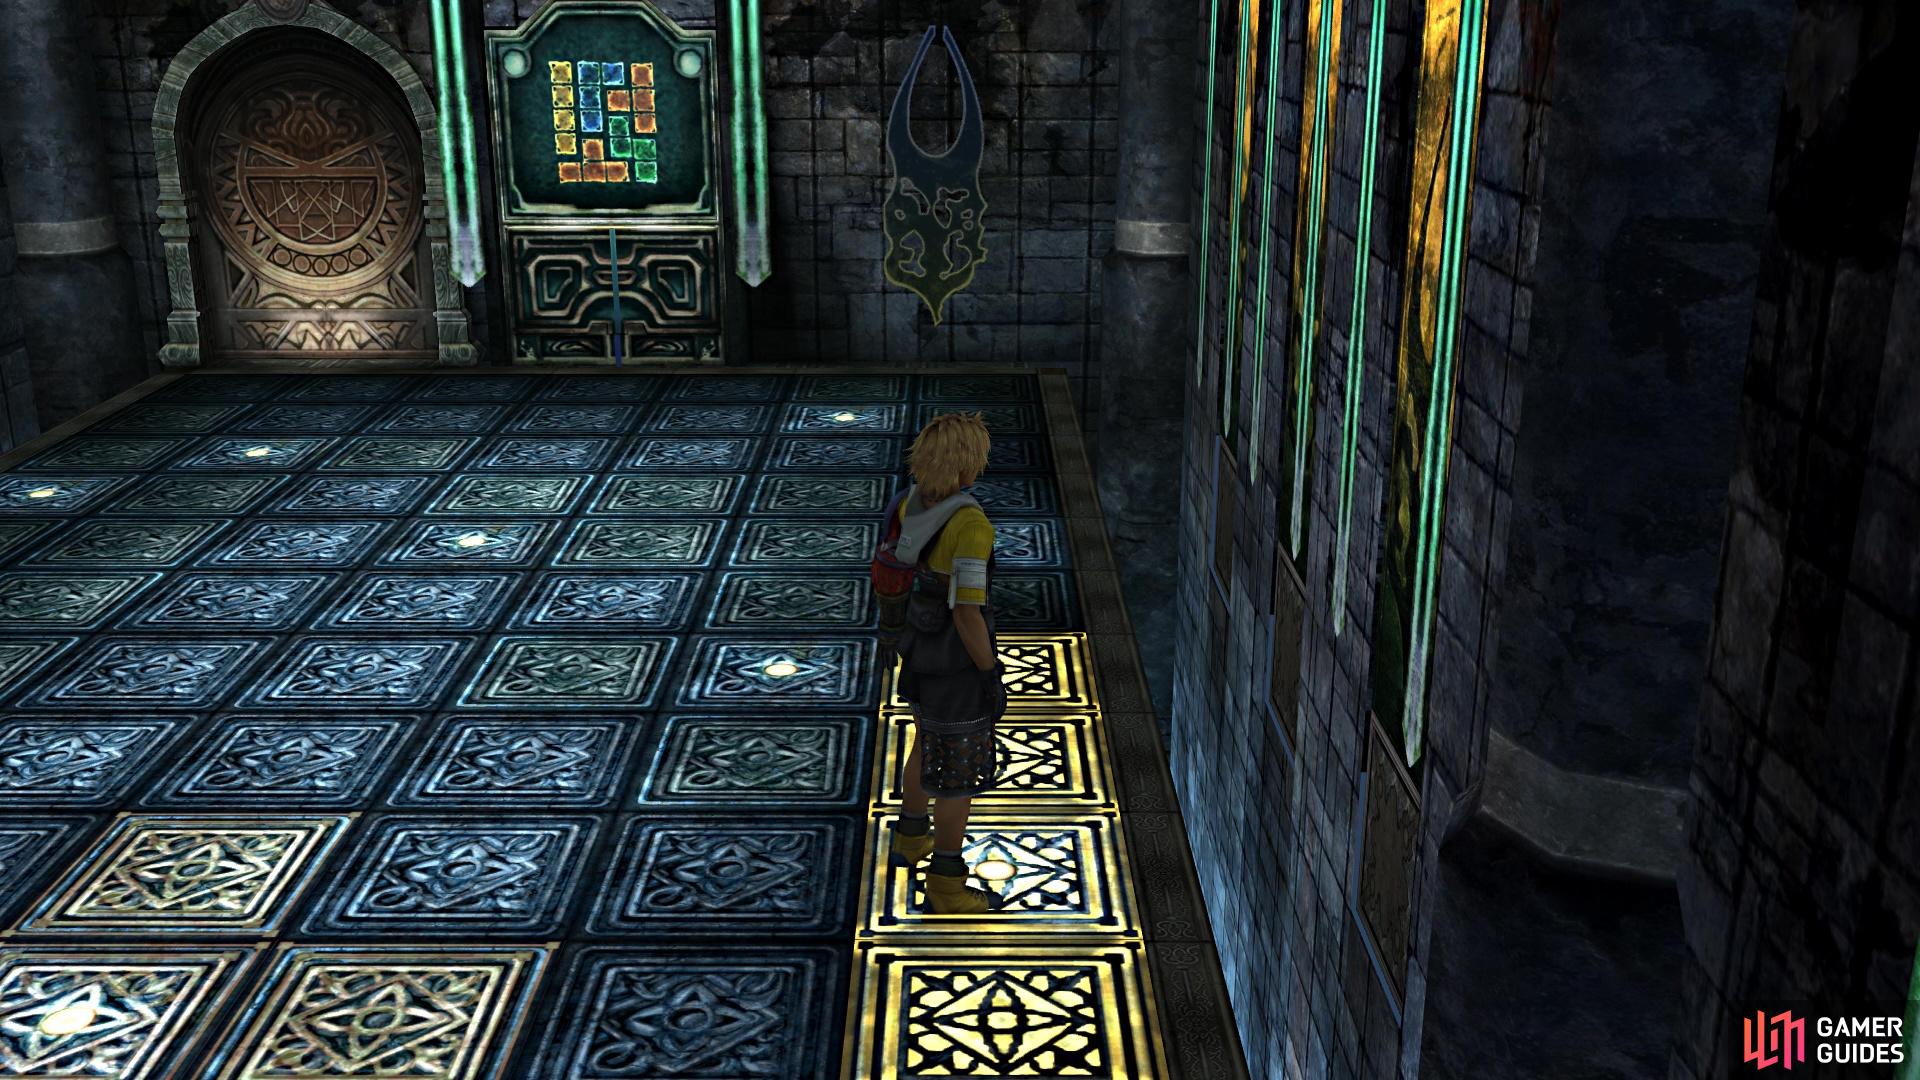
Simply walk on one of the dots to reveal its shape
When you’ve completed the four puzzles (see the image above for the locations of the shapes), go into the second room and look at the northern end, next to the screen. There’s a sphere to each side, so grab the Kilika Sphere from the left and bring it back into the first room, placing it in the middle pedestal on the left side. Return and grab the Besaid Sphere, then double back to place it in the middle pedestal on the right side. If you’ve done everything right, a Save Sphere will appear in the first room, so save your game before stepping foot in the second room, as a boss will trigger.
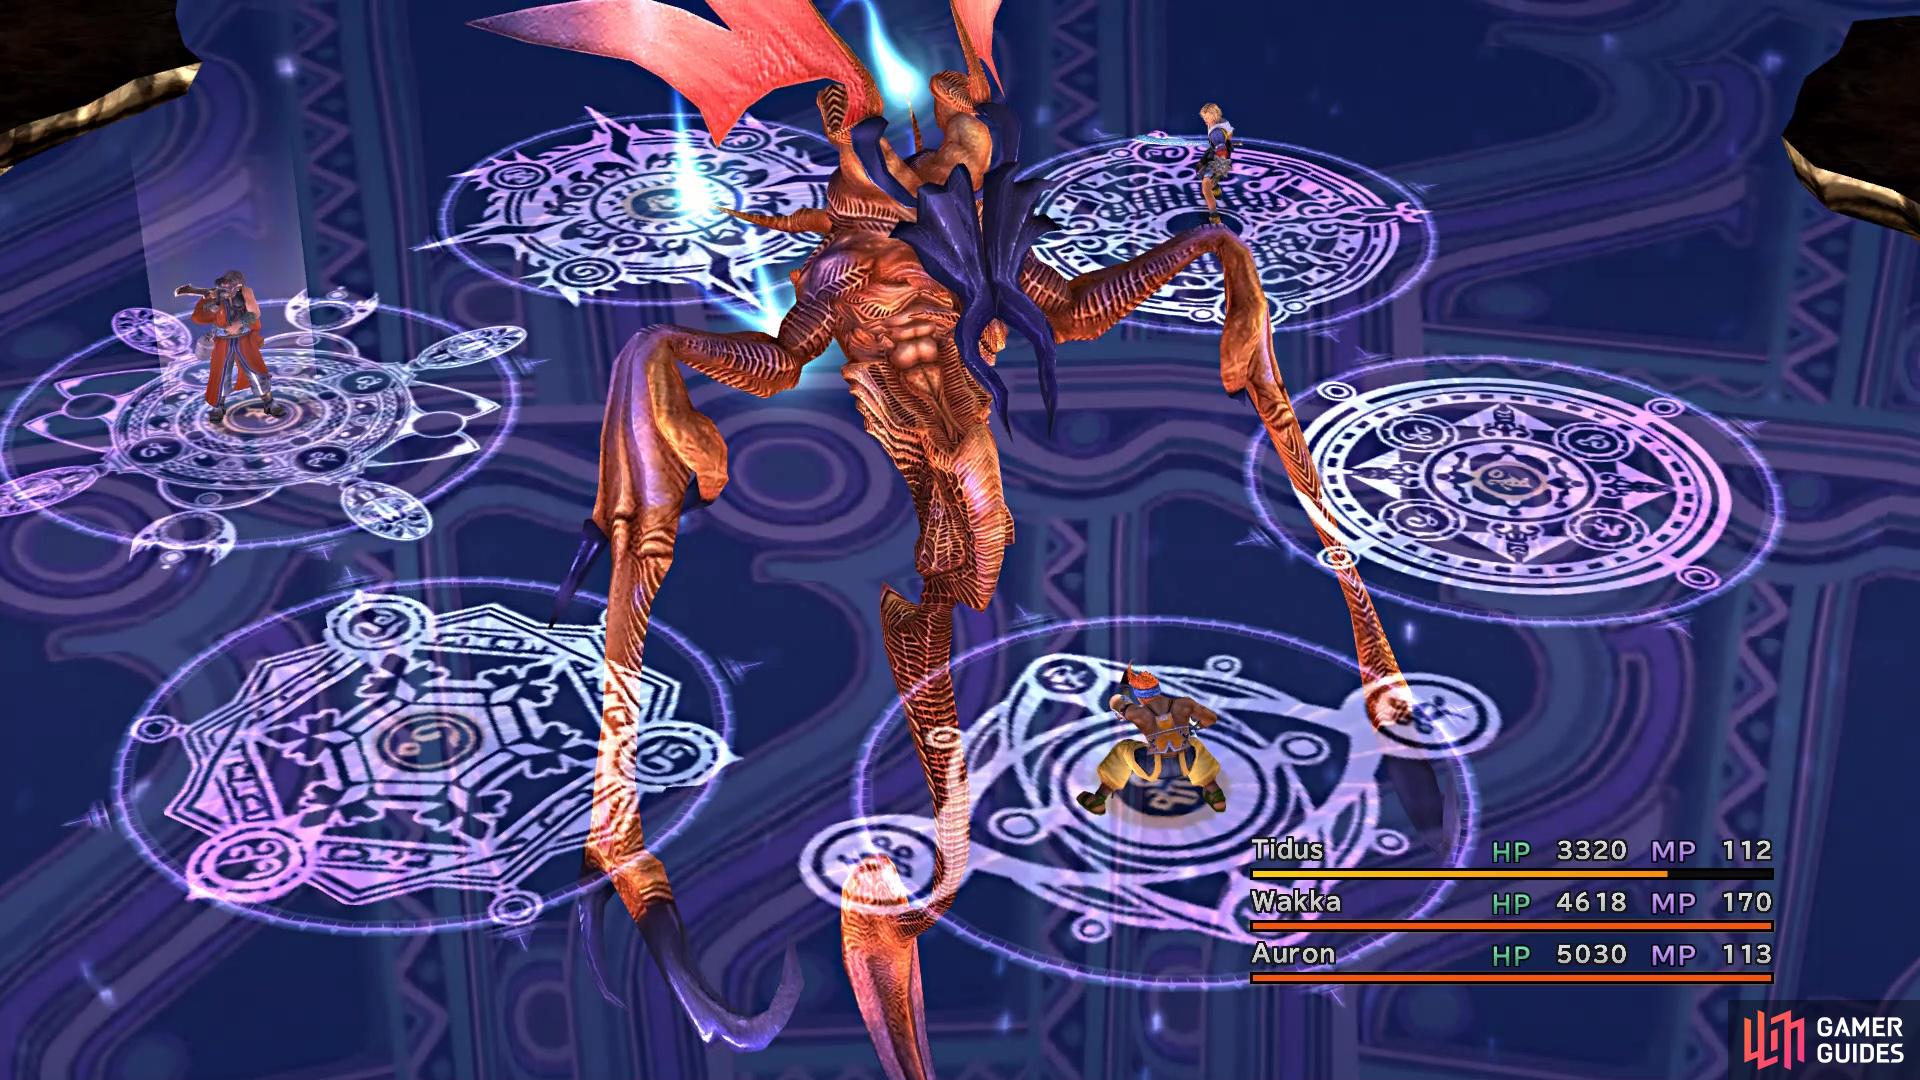
BOSS - Spectral Keeper
The Spectral Keeper can be an annoying boss, despite its limited arsenal of moves. Before diving into those, the arena for this boss is a bit special. Instead of just standing there and exchanging blows with the boss, you will be placed on the glyphs. You will see a Trigger Command here, called Move, which will let you move to another glyph. This will become important later, but the very first thing you will want to do at the beginning is move so there is one space in between your party members. The reason for this is because the boss will counter all attacks by hitting the three spots in front of it.
As an example, you start out the battle with your three characters all next to one another, right in front of the Spectral Keeper. Should you attack straight away, then the boss will counter and damage all three characters. The main move, though, for the Spectral Keeper is called Berserk Tail. This targets a random character and will strike them for physical damage, while also having a chance to inflict Berserk. Since you have no control over berserked characters, this can be bad if you’re trying to be cautious. Actually, if you have Berserk Ward on your armor, it seems that Berserk Tail won’t actually inflict the ailment.
After being attacked a few times, the Spectral Keeper will plant two Gylph Mines on the field, in random spots. If they are placed underneath a character, you will want to move them as soon as possible. The mines have their placement on the turn order, and will explode when it’s their turn comes up. If a character is standing on the mine as it explodes, they will be instantly KO’ed. As you can figure out, a combination of a berserked character and a Glyph Mine is a bad thing, but thankfully you can heal berserk with a Remedy or Esuna. That’s the extent of the offense for Spectral Keeper.
You should be keeping an eye on your health at all times, since you will receive constant counterattacks and also have to worry about Berserk Tail. The boss is not weak to any element, but is susceptible to Mental Break, so you can reduce its magic defense to nothing. You can also Provoke it, but it doesn’t do anything out of the ordinary. Putting Protect on everyone is ideal to keep them alive, as well as Haste to give them more turns.
Upon dispatching the Spectral Keeper, an elevator will take its place and allow you to go deeper into the Zanarkand Dome.
Destruction Sphere Treasure
In order to get the treasure from this temple, you will need to come here after obtaining the airship that happens very shortly. Upon returning to Zanarkand, make your way back to the Cloister of Trials, making sure to avoid going back to where you fought a boss right after that section, as Dark Bahamut will be there. Your goal in the trials area this time will be to highlight all of the white squares, instead of the other colored pieces. If you take a look at the map at the top of this page, you will see there’s three in the first room and four in the second.
You need to step on the spots that will reveal white squares
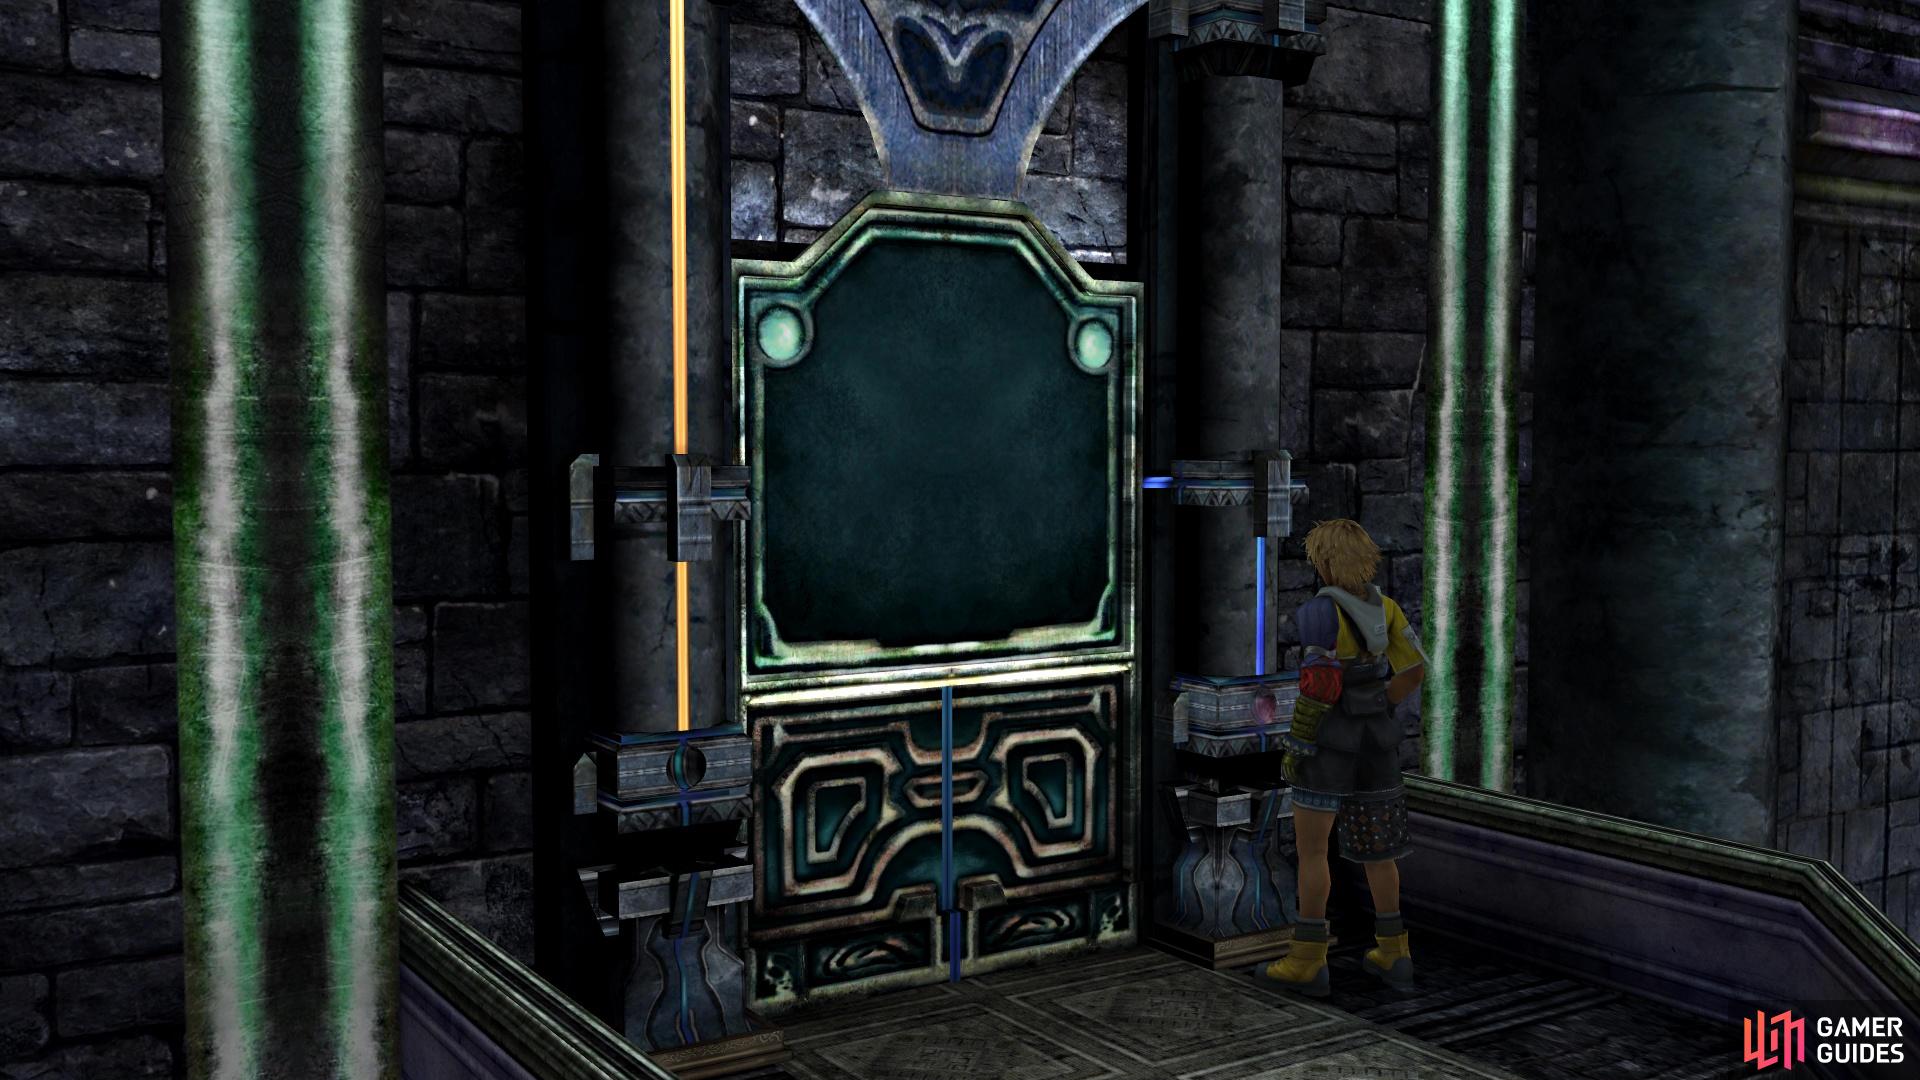
Place the Destruction Sphere here to get the treasure
Once you have done all seven, the Destruction Sphere will reveal itself in the first room. Go back and grab it, then return to the second room, where you will place the sphere to the right of the screen. This will reveal the treasure chest, which contains a Magistral Rod.
No Comments