
Earth Eater
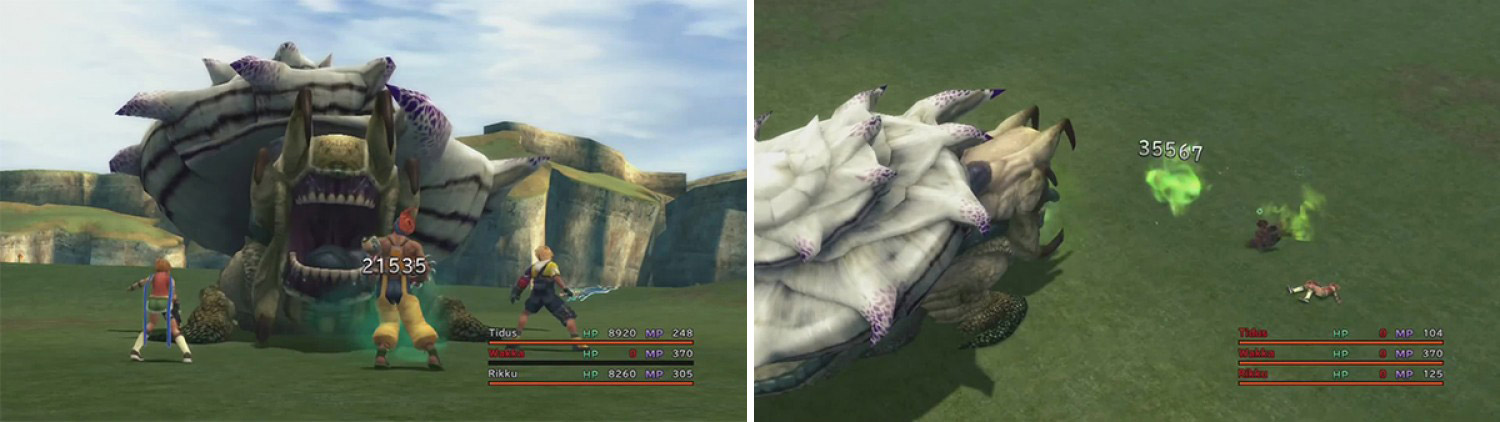
BOSS ANALYSIS : Oh, God, I hate this guy… He will typically be seen using Megaton Punch. It can be used once as a counter for ANYTHING, and twice during his normal turns, and it can induce KO immediately, or physical damage if protected against. Like the Chocobo Eater it mimics, you can hit it for 100,000 damage and it’ll fall down, after which it’ll just cast Flare for two turns before getting back up.
MAIN STRATEGY : I’m not kidding when I say this - if you do not have Deathproof or Ribbon on ALL of your armors now, get out of here and grab the items necessary for it. They’re virtually necessary to win this, unless you plan on every other turn being a Mega Phoenix. You will also want Auto-Haste, Auto-Shell, and Auto-Protect. Auto-Protect isn’t that needed, but it can help you survive a Megaton Punch; if you’re confident, swap for Auto-Potion with only X-Potions in stock since that’ll help deal with Flare later in the fight.
The only way I could think to win was a high-damage, high-speed strategy - in this case, you NEED to exceed over 100,000 damage in a single attack. In doing so, you will knock him and cancel the Megaton Punch counter you had coming, and then the two Megatons you had coming for the battle-finisher. Granted, Ribbon/Deathproof would let you sit through them, but, at a 117 Strength, that’s not a good idea, even with exorbitant (200+) Defense if you’re running 9,999 HP like me. You need to have the ability to execute such an offense as many times as you can, which means seven full Overdrive gauges, each wielder with Entrust, all heading to Tidus for a Blitz Ace averaging 11,112 damage per hit - if you can manage that, you’ve got an effective free 15 turns.
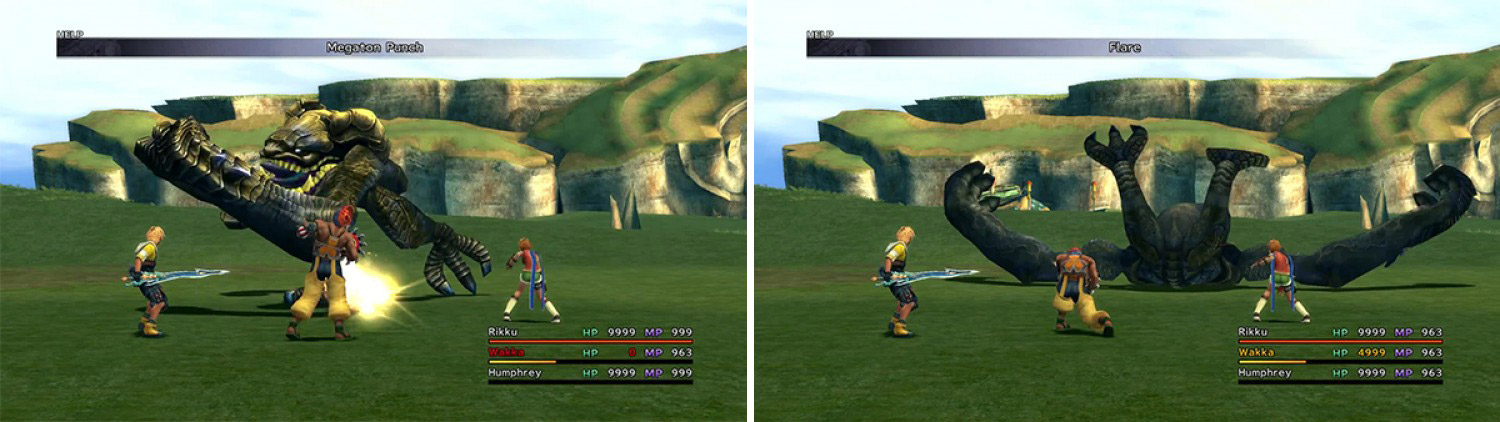
Megaton Punch can K.O. you without Deathproof. Once Earth Eater is knocked over, it will counter everything with Flare so make sure your M Def is high.
Once the Earth Eater is on his ass, he will begin countering everything with Flare - this will be Reflected off him, so don’t expect to block it, just have Shell/Auto-Shell/some kind of Mighty G up by then. Flare is a LOT more manageable than Deathproof’d Megaton Punch … IF you have Shell. Otherwise, expect a lot worse to come from it - SHELL IS NECESSARY TO SURVIVE!
At this point, you’ll want to be Quick Hitting as much as you can; you’ll be hit by Flare, but it’ll be halved by Shell and healed by Auto-Potion if you’ve got it. Keep Quick Hitting, too - the more turns you can get while the Earth Eater is on his back, the less you have you to deal with Megaton Punch. Screw that crap about not hitting a man while he’s down - this ain’t no man!
Eventually, Earth Eater will likely get up. Try to notice beforehand (keep a track on the CTB - it’s third turn is when it gets up) and Entrust another Overdrive gauge to Tidus (if Stoic/Comrade hasn’t already gotten him another lol) for another Blitz Ace. It gets up, you knock it back down in flashy style and Quick Hit it again and again to oblivion.
ALTERNATE STRATEGY - DOOM : Like a number of bosses in the Monster Arena, this one is vulnerable to Doom. This is the essence of a desperation tactic, however, because it will take 255 turns for the Doom to kill the boss. Still, if you prefer that, go for it!
Greater Sphere
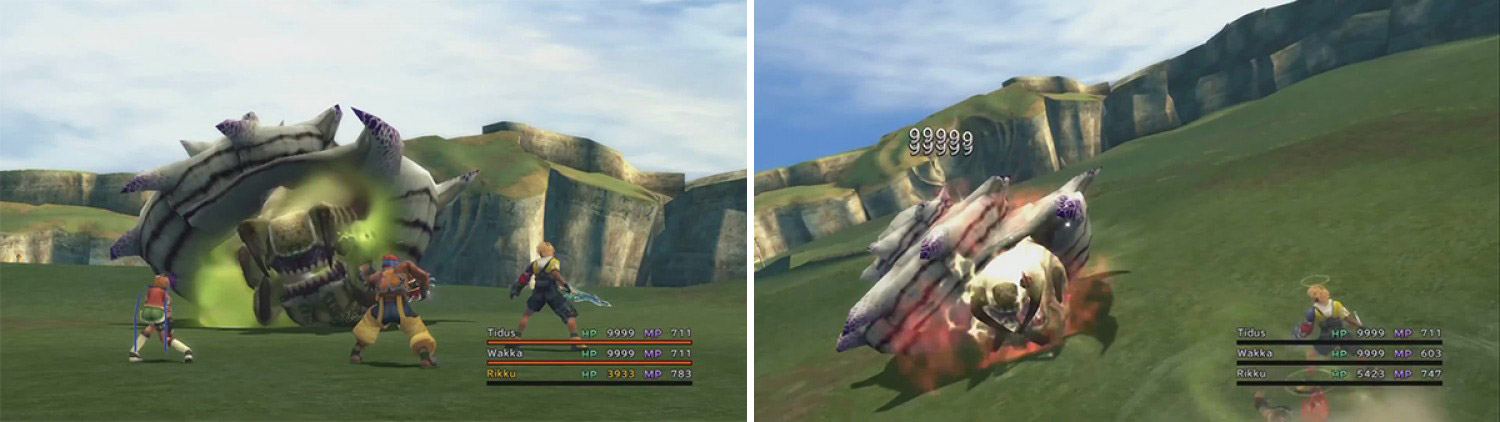
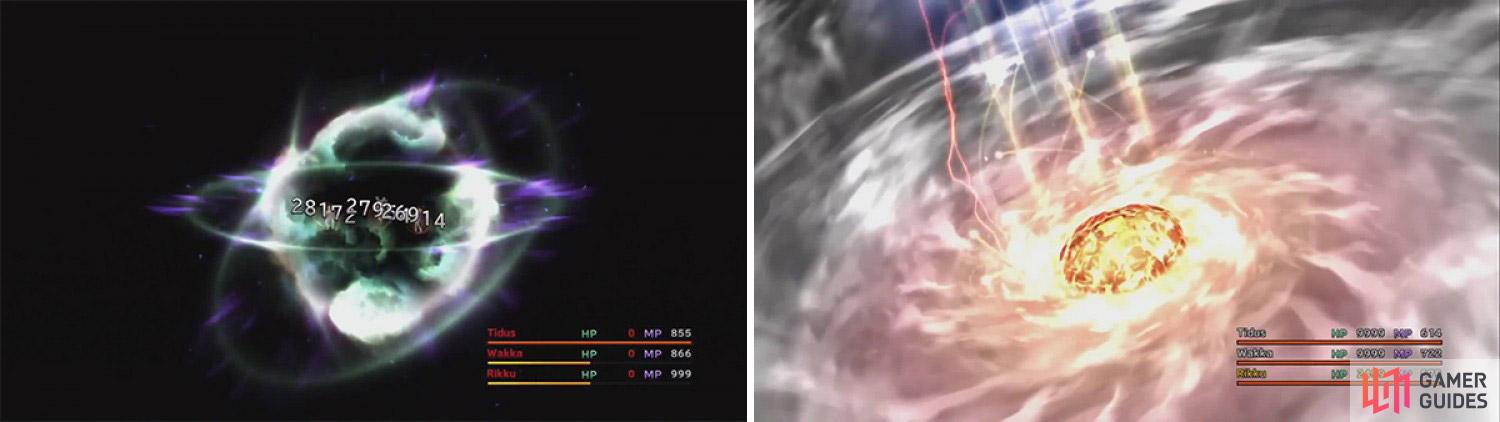
BOSS ANALYSIS : The Greater Sphere is basically super-buffed Spherimorph. You can expect a simple physical attack if you do nothing at all. It will cast Ultima on you if you hit it with most things - physical OR magical. If that thing happens to be an Overdrive, you will get hit with Hydraulic Press instead (also occurs at random), which rips off 93.75% of your max HP - not your current, your MAX. That means if you have less than 9,375 HP out of 9,999 left, you die. If you have less than 93,750 left of 99,999 left, you die. Ouch. (As a note of trivia, if you happen to deal 93,750 damage across each of 16 hits, you win.) Also, if you summon an Aeon, expect to see the basic “-ga” skills.
MAIN STRATEGY : This battle demands having no Break HP Limit, yet having Auto-Potion with only X-Potions in your stock. That way, you will heal fully after every attack, negating them all so long as you have enough Defense. Like with Spherimorph, this guy has a weakness, but it varies, and to know it you must get him to cast something … or do you?
As usual, there’s a slight flaw in the system regarding Elemental Shift, which we couldn’t abuse back against Spherimorph. Basically, like a number of other fights we’ve seen, Elemental Shift seems to not count counterattacks (including Reflected ones from you to it) for some reason. Thusly, hurry up and put Reflect on your party and have someone throw Fire against an ally. (Like usual, the Greater Sphere is weak to one element and absorbs the rest.) If it’s absorbed, big deal; if you dealt damage, though, you’ve found the weakness. And no Elemental Shift has occured!
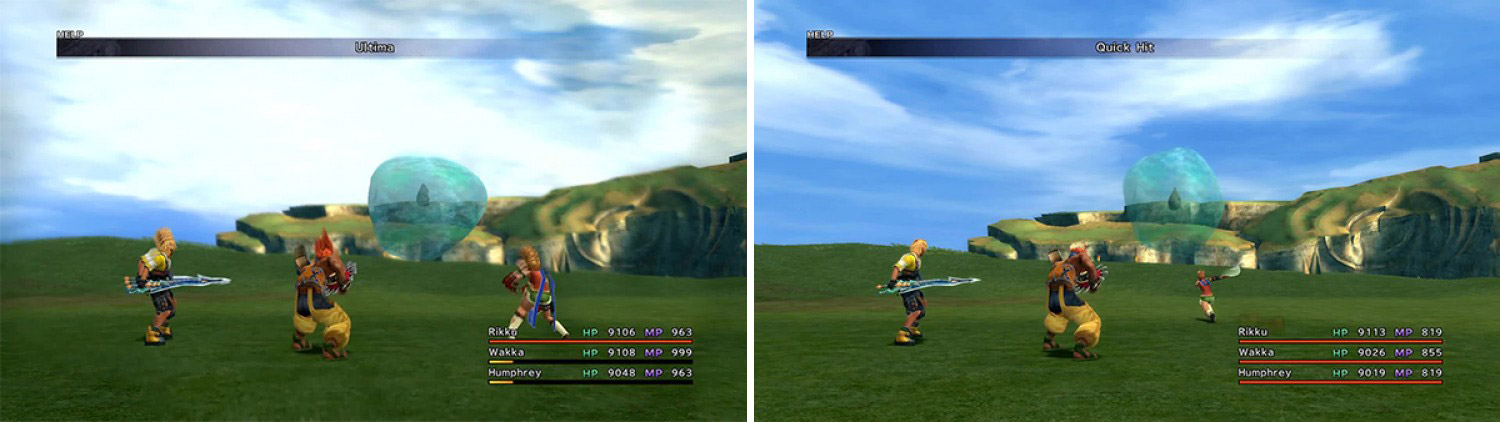
If you keep using Quick Hit with a high enough Strength to cause 99,000, Greater Sphere will just use Ultima. Providing you have high M Def, this fight will be easy.
You know what that means, right? A foolproof strategy! At 9,999 HP with 99 X-Potions (only kind of Potions you have in stock), you’ll get hit with a basic physical or Hydraulic Press, likely not die, and then fully heal yourself. Your offense? Doublecast the “-ga” spell the Greater Sphere is weak to on yourself and it’ll go to the GS Ball (lol), with no Elemental Shift triggered. Then you can Copycat it around and around and basically be invincible until you run out of X-Potions, which probably won’t happen if you have Hastega already on and decent Agility.
ALTERNATE STRATEGY - DOOM : Like a number of bosses in the Monster Arena, this one is vulnerable to Doom. This is the essence of a desperation tactic, however, because it will take 255 turns for the Doom to kill the boss. Still, if you prefer that, go for it!
ALTERNATE STRATEGY - OVERDRIVES/TRIO OF 9999 : Basically, you can abuse Overdrives and Trio of 9999 for this fight. There are three main ways to do so: Lulu’s Furies (9,999 per hit, 16 hits with Fire Fury = 159,984 damage), Tidus’s Blitz Ace (9 hits at 9,999 damage = 89,991 damage), and Wakka’s 2x-2x-2x Attack Reels (12 hits at 9,999 damage = 119,988 damage), and those numbers simply assume you don’t hit for 10,000 damage normally. (With Lulu’s Furies, you would have to hit for 2.5 times that 9,999 (25,000 or so) to hit 9,999 with the Fury.)
Thusly, you can bring in everyone and have them with full Overdrives. If you don’t normally hit or exceed 9,999, you will need Rikku’s Trio of 9999 Mix, and the third non-Overdrive-using person with Entrust. If you DO exceed 9,999 normally, you can just Entrust to that person twice for three uses. With this boss, to kill it in up to three uses of a single Overdrive type, below are the minimum damages you must deal to kill it with that many Overdrives. (Clearly, if none of the numbers are 9,999 or less, then you can’t use Trio of 9999 to win like this without additional Overdrives - if everyone came in with Overdrives (7), that’s seven uses, about half of the 3 Overdrives column value, so long as everyone also has Entrust.)
The only problem with this Overdrive strategy is that you’ll be hit with Hydraulic Press after one Overdrive! If you go multi-Overdrive, you MUST heal in-between the Overdrives, since Hydraulic Press is based on maximum HP and takes away HP from the party equal to 93.75% of that.
Catastrophe
If it matters to anyone, this is probably the easiest of the Original Creations … or at least the first one I ever beat.
BOSS ANALYSIS : The boss will stay in its shell for a good while, like the Sinspawn Geneaux we fought at Kilika, until we get rid of so-much (450,000) HP. Every two turns, it will use the Toxic Cloud attack: this can do some magical damage to all and inflict Poison, Confusion, and Curse. It will skip every other turn.
After breaking dat shell, it will use Toxic Spray as its first move. It will always hit the highest-HP character and inflict physical damage as well as Power, Armor, Magic, and Mental Break - you’ll need to Dispel them to get anything good from them. Next comes Demi, which you’re familiar with, then Hundred Thorns for some semi-nasty physical damage to everyone.
MAIN STRATEGY : For this battle, you’ll want to have Ribbon, Auto-Haste, Auto-Protect/Auto-Shell, and Auto-Potion (only X-Potions in stock) on your armor with pretty much no exception. Ribbon stops Toxic Cloud from making you kill yourself (though you have to manually heal Curse), Auto-Haste is nice, and Auto-Potion heals. Auto-Protect/Shell/Haste are used rather than simply instilling them in the battle solely because of Toxic Spray. The only way to rid yourself of the Full Break is Dispel, which would also get rid of Protect, Shell, Haste… You get me? If they’re Auto’d, then they don’t go away when you Dispel. Dispel is still a turn, but it could be a lot worse.
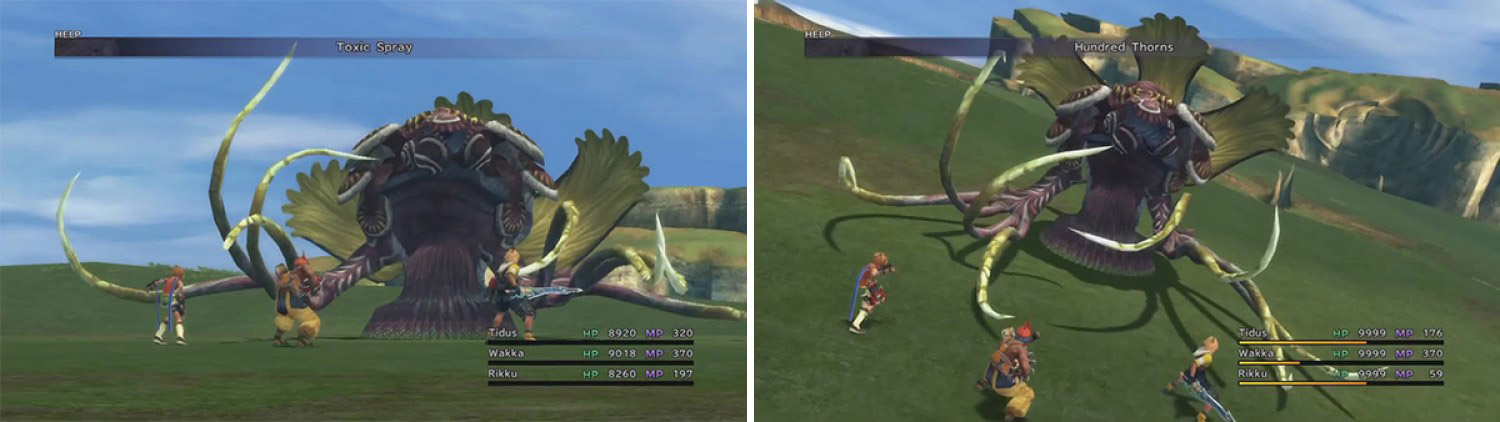
These two attacks once the shell is broken are very powerful without sufficient defense.
Anyhow, the battle strategy? Since Toxic Cloud’s main problem is prevented via Ribbon, you have nothing to worry about during this phase. Spend this time buffing up and even bringing on Cheer and Focus and all that good stuff before even bothering with the offense.
From 1.75 million HP on, you’ll have to deal with the real thing. Dispel any Breaks you get, but that will be the main thing you have to worry about short of the occasional healing.
ALTERNATE STRATEGY - DOOM : Like a number of bosses in the Monster Arena, this one is vulnerable to Doom. This is the essence of a desperation tactic, however, because it will take 255 turns for the Doom to kill the boss. Still, if you prefer that, go for it!
ALTERNATE STRATEGY - OVERDRIVES/TRIO OF 9999 : Basically, you can abuse Overdrives and Trio of 9999 for this fight. There are three main ways to do so: Lulu’s Furies (9,999 per hit, 16 hits with Fire Fury = 159,984 damage), Tidus’s Blitz Ace (9 hits at 9,999 damage = 89,991 damage), and Wakka’s 2x-2x-2x Attack Reels (12 hits at 9,999 damage = 119,988 damage), and those numbers simply assume you don’t hit for 10,000 damage normally. (With Lulu’s Furies, you would have to hit for 2.5 times that 9,999 (25,000 or so) to hit 9,999 with the Fury.)
Thusly, you can bring in everyone and have them with full Overdrives. If you don’t normally hit or exceed 9,999, you will need Rikku’s Trio of 9999 Mix, and the third non-Overdrive-using person with Entrust. If you DO exceed 9,999 normally, you can just Entrust to that person twice for three uses. With this boss, to kill it in up to four uses of a single Overdrive type, below are the minimum damages you must deal to kill it with that many Overdrives.
Thuban
BOSS ANALYSIS : Th’uban thankfully has a regular move pattern.
- It first will open with a basic physical attack.
- Next comes Rainbow, which is physical damage to all. You’ll also get Confusion, Curse, Sleep, Darkness, and Silence.
- The boss will then use Protect; if that’s on, then Shell; if that’s on, then Regen; if that’s on, turn is skipped.
- Fourth is Convergence, which is nasty magical damage to one character. Like a set 99,999, or 50,000 with Shell - expect it to kill without Break HP Limit.
- It loops from there.
You’ll also see Condemn - physical damage to all, plus Dispel that removes even Auto-Life to counter most things.
You will see Haste as a counter to statusing attacks.
MAIN STRATEGY : Beforehand, if you want a positive status, you had best let it be an Auto-thingy in your armor. I recommend Ribbon, Auto-Haste, Auto-Protect or Auto-Shell (whichever you want - personally, I stuck with my Auto-Phoenix armor), and Auto-Potion. Ribbon deals with that pesky Rainbow, the Auto-abilities to save time, and Auto-Potion with a X-Potion-only stock to heal.
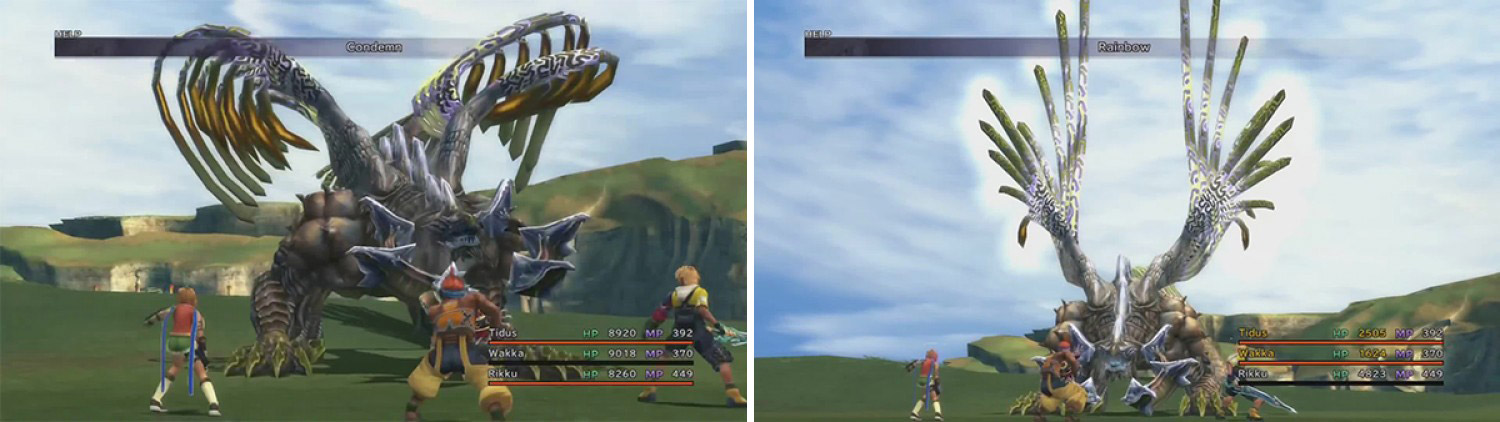
Rainbow and Condemn are especially powerful. Strong physical and magic defense are essential to the Original Species fights.
As it turns out, Condemn is NOT triggered by Reflecting attacks off of yourself, so if you want to go this route (the only really logical one), you’ll want to open by putting Reflect on everyone and, from there, simply Doublecasting Flare off your allies for a while. You’ll have to deal with some attacks and have to heal from them - hopefully Auto-Potion/Auto-Phoenix come into action! It’s simply that, really - let your armor heal you while you endless go on a Doublecasted Flare rampage. That’s about it - Dispel the Th’uban every two rounds of his loop (since that’s when he puts up Shell - Protect is irrelevant) and keep Flaring.
ALTERNATE STRATEGY - DOOM : Like a number of bosses in the Monster Arena, this one is vulnerable to Doom. This is the essence of a desperation tactic, however, because it will take 255 turns for the Doom to kill the boss. Still, if you prefer that, go for it!
The previous Trio of 9999 tactics also apply.
Neslug
In case you’re curious, the Neslug is the only enemy that can legitimately be called an “original” Creation, as everyone else is just based off other enemies’ sprites.
BOSS ANALYSIS : Neslug doens’t have a lot of attacks, to be honest. Outside of his shell, you’ll see a basic physical. You can also see Megaton then - it’s kinda like the Megaton Punch from Earth Eater, as it can KO, or Confuse if you have Deathproof (and neither if you have Ribbon). But even worse than that is Slime. It hits your whole party and will inflict Curse, Poison, Armor Break, and Mental Break, and its damage is not halvable. You’ll also see Curaga whilst the thing is in its shell, and nothing else.
MAIN STRATEGY : Open the battle with what you lack of Protect and Hastega on everyone (although you ought to have Ribbon, Auto-Protect, Auto-Haste, and Auto-Potion, perhaps, on your armor). WHATEVER you do - I repeat, WHATEVER YOU DO - do NOTHING until you Silence Neslug. I don’t care how you go about it - I went Silence Buster - but if you do not, your life will become a living hell after you deal 2,000,000 damage.
Without adequate protection, both the physical attack and Slime will be devastating.
After getting your buffs and Silence up, carefully keep track of the damage your moves deal for the next 25 turns or so. If you don’t, everything can go to hell. Granted, this strategy is not completely needed, but it makes it a LOT easier. Neslug starts with 4,000,000 HP - manually keep track on a piece of paper how damage damage you dealt and with whom; try to focus your offense to Quick Hit to make things a bit easier on you. Also grab a calculator to manually find out the boss’s EXACT HP each turn, and with each turn take a general estimate of his HP after the next attack. (Assume the next attack will be critical. Again, you have to be careful here.)
As a footnote, I had about 200 Strength on everyone and was rather consistent in 99,999 damage-dealing, which means 20 turns later, 2,000,020 HP was left.
As you near 2,000,000 HP gone or left - whichever you prefer, it’s the same thing - be extremely careful. When you are certain the next Quick Hit will exceed 2,000,000 HP taken (or lower the Neslug below 2,000,000 HP), STOP. At that point, have Tidus go into Blitz Ace, or Wakka into Attack Reels (which is less certain but more effective).
What you want to do at this point is to deal over 1,000,000 damage in a single hit. This will skip a LOT of hell the second phase gives you (and yuor potential failure is part of the reason we did Silence earlier). For Tidus to finish off Blitz Ace perfectly for this, he needs to hit for 99,999 damage for each of the nine hits, and no less - even then, it won’t work exactly, but you’ll be close enough to Entrust another Overdrive to him that it won’t matter. (For 2 perfect Overdrives, it’s 55,556+ per hit.) If you opt to use Wakka instead, it’s a bit more luck-based, but landing 2x-2x-2x on the Attack Reels is 12 hits, not 9. That means you CAN do it with a single Overdrive dealing 83,334+ per hit, or two for 41,667+ per hit.
After a while, Neslug will fall down. This is the moment you need to unleash with Attack Reels and bypass the shell phase completely.
If you happen to get stuck in the second phase, you might want to run unless it was a semi-failed Overdrive that brought you there. During this phase, Neslug becomes impervious to all physical attacks (except Overdrives), and can heal between 1 and 65,535 HP per turn through Regen. Ouch. There’s also a self-Curaga (which I could’ve sworn broke even the 99,999 healing limit once), but if you Silenced the boss earlier, no worries there. Basically, for this phase, you MUST keep Doublecasting Ultima with everyone in the party, stopping ONLY to use Slice & Dice, Blitz Ace, or Attack Reels again. You must deal 1,000,000+ damage in this phase, reducing the boss below 1,000,000 HP, to get this to end.
DO NOT SUMMON AN AEON DURING THIS PHASE ! I did that and had miscalculated my HP (my handwriting sucks), and it turns out 99,999 damage form the Magus Sisters wasn’t enough. You know what I saw in return? Over 150,000 HP healed by Regen - which means it CAN break the 99,999 healing limit, and it’s about ten times what you’d get from not having an Aeon.
After that, in the third phase, you’ll be back as you were with the first phase, really - same attacks, same way to respond and everything. Though this time, if you get an Overdrive like Blitz Ace one last time … use it. 1,000,000 damage is reachable here, especially if you broke the shell the first time.
Ultima Buster
BOSS ANALYSIS : During this fight from Ultima Buster (look familiar, no?), you should expect a basic physical as well as its namesake Ultima. When the head begins to move, the next turn will be Contamination , which is a TON of ailments to one character: Poison, Confuse, Slow, Zombie, Armor Break, Power Break, Magic Break, and Mental Break. That means that you’ll need Ribbon and some Holy Waters to stop the Zombie from REALLY getting hurt, and Dispel to remove the halved stats. Unlike normal, this can also hit Aeons, too - yeah, Zombified Aeons.
There is a regular pattern at least. When the head acts, it will sacrifice its turn to the main body to do a basic physical, charge turn, Contamination or nothing if the head is dead. With the main body, it’s a bit more complex, but it essentially can be Ultima or a basic physical every turn, or both. If the head is dead, then it’s always Ultima, with basic Attacks also occuring every other turn.
MAIN STRATEGY : After Sinspawn Gui, you’d be tempted to kill the head.
smacks you with newspaper* No, bad boy!
Ultima can be painful but with sufficient protection and stats, it is better than fighting contamination. Quick Hit will allow you to get in several hits before any attack anyway.
See, the problem with killing the head is that you’re going to be hit with Ultima every turn, and it pierces protection, remember? With the head alive, you’ll be seeing a lot of Attacks and the occasional Contamination, sure. However, Auto-Protect/Auto-X-Potion covers the Attacks aptly, and Auto-Med/Ribbon and Dispel/Remedy thereafter cover Contamination. It’s slightly more management, but Ultima every turn is not something you really want to deal with. Not to mention you can just hit the head when it starts moving to shut it up.
So, what do you want on your tombst– I mean armor? Ribbon, Auto-Haste, Auto-Potion, and Auto-Phoenix/Auto-Protect work well and keep things nice and quick.
As for attacking the arms? Yeah, sic ‘im with some Quick Hits when you begin the fight and you’ll get rid of the main protection of the main body. Quick Hit the main body thereafter. If you’re at around 200+ Strength, you’ll also see the head begin moving by this time, if not before - get Wakka in and Quick Hit it, or just hit it with some weak magic. Weak magic is probably better since the head could be one-hitted at 200 Strength and you want it alive. (I know, still sounds crazy typing it.) You’ll have to rekill the arms every three or four turns, so all the more reason for Quick Hit, no?
That really sums it up. Kill the arms, DON’T kill the head, and Quick Hit-and-heal-when-needed will manage to work. Doom and Trio of 9999 are still viable as well.
Shinryu
Ah, Final Fantasy V nostalgia all over again.
BOSS ANALYSIS : Did any of you play Final Fantasy VII? If you did, you’ll find this guy to play a lot like the Ruby Weapon from those days whose main strategy was to quickly eliminate two of your characters and pummel the third. The main way this is achieved is through Eraser, which Petrifies the target - AND it cannot be blocked, even if you have Ribbon or Stoneproof (or both, like it’d make a difference lol), so you might as well call ‘em Shattered since you’re underwater. What does this mean? Shinryu can use Eraser to eliminate your party one by one, until you have just one left.
Now you see Shinryu’s strategy, right? Use Eraser and someone’s gone. Do it again. Then hit ‘em with Shining - that’s 4.5x more powerful than a normal attack when you only have one person being hit. If the AI was programmed so that he simply did Eraser - Eraser - Shining you’d actually have an interesting problem. Sad he can be OD’d to death. … I meant Overdrive’d.

Shining and the physical attack aren’t too bad and you don’t need maxed out stats to kill him. You just have to hope he doesn’t use Eraser.
MAIN STRATEGY : Essentially, nothing short of high damage in a short time period will win this fight. If you can manage, bring in everyone with full Overdrive gauges and 180+ Strength, or at least enough to deal 99,999 damage in a single hit against this thing or whatever the below tactics say. You have several ways to go about it without being hit by Eraser (and, frankly, they’re the only ways I know to win this fight - any ideas?).
- Have Tidus use Blitz Ace, and Wakka use Attack Reels. If you get perfect on both (2x-2x-2x for Attack Reels), you need to deal 95,239 or more damage per the 21 attacks on average to win.
- This strategy takes a bit longer, but is less luck-based. Have Tidus use Blitz Ace, then someone Entrust him an Overdrive gauge, Blitz Ace, Entrust, Blitz Ace. You’ll need to deal 74,075+ damage per hit of the 27 attacks to win.
- This is the most luck-based of all, but requires the least Strength: essentially, it’s the same as the previous strategy, but with Wakka getting the Overdrives. With three perfect 2x-2x-2x Attack Reels, you get 36 hits. On average, you must 55,556+ damage with each to win.
Nemesis
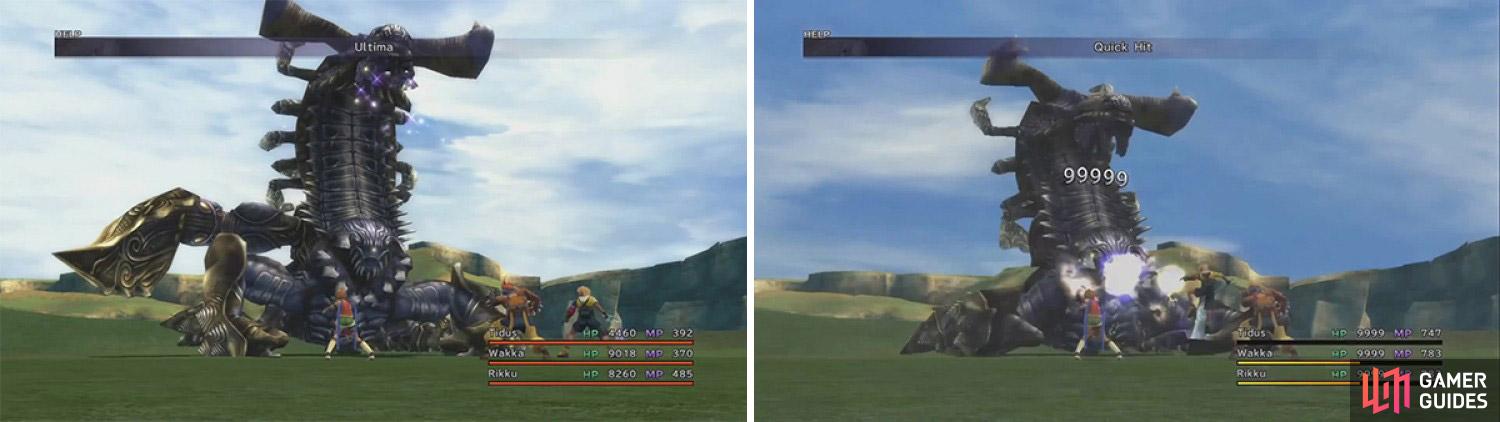
BOSS ANALYSIS : For the ultimate boss of the US FFX on the PS2, this guy has a simpler offense than would be expected. Nemesis can use a basic physical, Ethereal Cannon (non-elemental magic to one character), Ultima, and Armageddon . Armageddon always hits for 99,999 damage, so you have a problem there… There’s also Ultra Spark, which hits everyone and induces Power Break, Slow, Curse, and Poison; the damage is unhalvable, and Power Break, Slow, and Curse break through Ribbon. CRAP! All of these attacks are also extremely nasty at 255 Strength/Magic.
MAIN STRATEGY : Don’t bother coming here without maxed (255) stats or nearly so, or Nemesis will wipe the floor with your remains. I’m not kidding - short of Penance, this is the worst guy of the bunch. 255 Strength and Magic regularly will hit you for 10,000+ damage even then, and likely 99,999 without; 200 Agility is almost impossible to outspeed; 150 Defense/Magic Defense is the definition of sturdy in the Monster Arena; and he can absorb every element as well…
As for your armor? Auto-Potion with X-Potions only in the stock is critical; Auto-Haste keeps you fast without the need for Hastega; Auto-Protect and Auto-Shell will halve most of the damage, other than Ultra Spark and Armageddon, that come at you. Auto-Phoenix and Ribbon have their uses, but since your ultimate goal ought to be simply not dying, don’t really bother wasting that slot; all Ribbon helps with anyhow is Poison.
Ethereal Cannon hits one character with elemental. It is super powerful and probably insta-kill. Ultra Spark hits all characters for significant damage and also inflicts status ailments.
When the battle begins, you HAVE to open slowly - if you attack too early, you’ll likely get blasted by an Ultima (yes, it’s a counterattack), and there goes the neighborhood. With max stats, your only real worry is Armageddon, a nonblockable kill to everyone. To prepare for that, there’s little that can be done. Armageddon IS predictable, but the boss has a number of move routines. Basically, you can keep track of the moves he does from the start on his own turns and, after Armageddon (protect from it via the below methods before its 9th-12th turns), it loops.
One option is Auto-Life. With Auto-Life placed, you won’t die from the Armageddon, which used generally every ten of the boss’s turns. Auto-Life is most quickly instilled via Hyper Mighty G - if you have seven characters with Overdrive gauges, then you are essentially free for 70 turns; alternatively, you can keep some people in the main battle to use their Overdrives while the remaining four sit in the back row to swap in and Entrust when Rikku needs to Mix.
Alternatively, you can Summon an Aeon to take the brunt of the blow; this also grants you about 80 free turns (since nothing else other than this needs worrying) if you have all of the Aeons. When you Summon them, it’s best that you do it just before the boss’s 9th turn and simply open with their Overdrive; it’s slightly random on when Armageddon is used, but they’ll likely absorb the brunt of the blows dealt between the Overdrive and that if needed, especially the Magus Sisters.
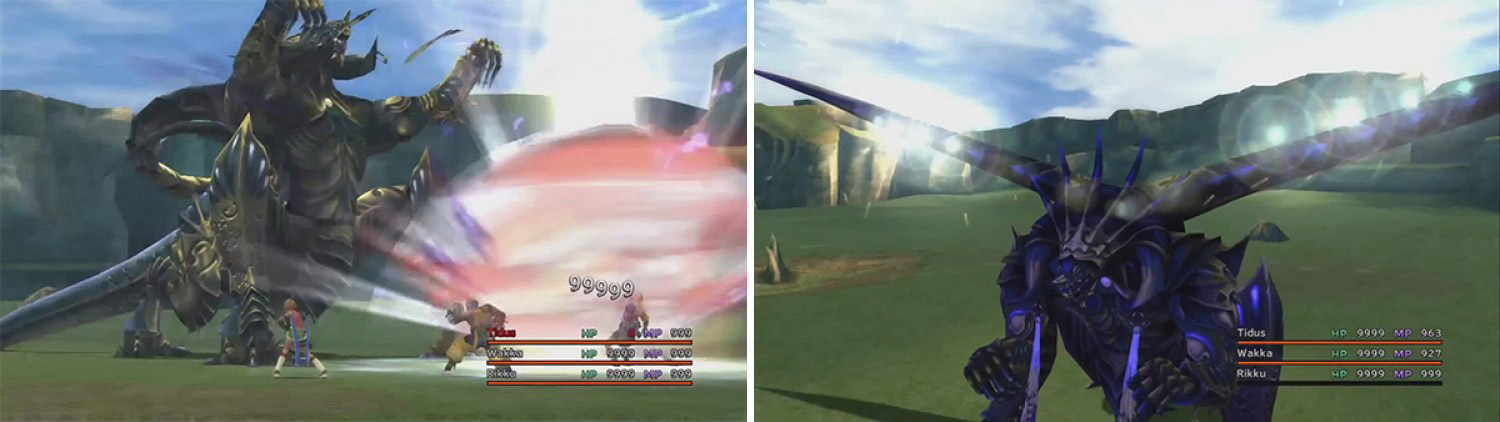
If you thought you’d seen a powerful Ultima so far, you ain’t seen nothing yet. Armageddon is insta-death for everyone so you must have Auto-Life before it hits.
Anyhow, once you are buffed - that means what you don’t have Auto’d of Haste, Protect, Shell, and Auto-Life - you need to continue buffing. Trust me on this - Cheer and Focus, each five times, will be a huge boost to your main statistics. (That’s +25 points to Str/Def/Mag/MDef, defying even the 255 limit, which is a 10% boost at those levels - not a lot, but it can be amazingly helpful to those running without Break HP Limit, as I recommend.) This is quickly done with Ultra NulAll as a Mix, which provides some other optional-but-helpful benefits.
So, then, onto killing Nemesis. Since you’re not breaking the 9,999 HP limit, you’ll be fine by getting Auto-Potion or Auto-Life whenever you are attacked, so that’s nice. For the most part, keep up a lot of Quick Hits and revive anyone who dies (Quick Pockets + Phoenix Down), then instill Auto-Life on them again. The only thing to keep in mind is to keep track of the boss’s moves and send in an Aeon or something as cannon fodder for when Armageddon is about to be used. Hopefully, you’ll win and get that Mark of Conquest to mark that you have “surpassed mortal bounds” … almost. Just one more thing left - the Dark Aeons!


No Comments