
There are 55 achievements/trophies to be obtained in ![]() Dragon’s Dogma 2, 46 of which are classed as Bronze, 6 Silver, 2 Gold, and 1 Platinum. On this page, we’ll provide an overview for how to complete each achievement in order, with categories for achievements related to vocations, pawns, combat and exploration, the main story, the post-game Unmoored World, and other miscellaneous achievements.
Dragon’s Dogma 2, 46 of which are classed as Bronze, 6 Silver, 2 Gold, and 1 Platinum. On this page, we’ll provide an overview for how to complete each achievement in order, with categories for achievements related to vocations, pawns, combat and exploration, the main story, the post-game Unmoored World, and other miscellaneous achievements.
If you want to jump to a specific section, you can use the links below. Note that these aren’t official achievement categories, but we’ve defined them to make it easier for you to identify which ones you might want to focus on first. You should be able to do all of the vocation, pawn, combat and exploration, and miscellaneous achievements at any time, but we recommend leaving the main story (aside from those you unlock naturally up until the ![]() A New Godsway quest) and Unmoored World achievements until last.
A New Godsway quest) and Unmoored World achievements until last.
- Vocation Achievements
- Pawn Achievements
- Combat and Exploration
- Miscellaneous Achievements
- Main Story Achievements
- Unmoored World Achievements
Vocation Achievements
There’s a total of 7 achievements related to vocations in Dragon’s Dogma 2.
Master of the Maisters
The Master of the Maisters achievement is unlocked once you’ve acquired all 12 ultimate skills which are associated with different vocations. You can do this by completing the quests noted in the table below, or you can install Crazy’s Shop mod to purchase each of them, which will make things much easier.
| Skill | Requirements |
|---|---|
| Complete Claw Them into Shape and |
|
| Complete False Sovran, make sure you speak with |
|
| All three of these can be obtained by completing the |
|
| Speak with |
|
| Enter the thief hideout beneath the manor in the |
|
| Complete |
|
| Complete the |
|
| Complete the |
|
| Once you unlock the |
|
| Give |


Versatile
The Versatile achievement is unlocked when you change your vocation for the first time. This is one of the easiest achievements to unlock and most players will do it naturally.

Duo Destinies
This one is unlocked when you specifically change your vocation to the ![]() Mystic Spearhand. You can see our page on How to Unlock Mystic Spearhand Vocation to see how the vocation is unlocked, then you can switch to it in the same way that you would any other vocation.
Mystic Spearhand. You can see our page on How to Unlock Mystic Spearhand Vocation to see how the vocation is unlocked, then you can switch to it in the same way that you would any other vocation.

Trickster of the Trade
Another one which is unlocked when you switch to a specific vocation, this time the ![]() Trickster. See our page on How to Unlock the Trickster to learn how to unlock it.
Trickster. See our page on How to Unlock the Trickster to learn how to unlock it.

Arrows and Incantations
You’ll unlock this one when you change your vocation to ![]() Magick Archer, and you can learn more about how to unlock this vocation on our How to Unlock the Magick Archer page.
Magick Archer, and you can learn more about how to unlock this vocation on our How to Unlock the Magick Archer page.

Jack of all Trades, Master of…All Trades
The final one related to switching to a specific vocation, you’ll unlock this achievement once you switch to the ![]() Warfarer vocation for the first time. See our page on How to Unlock the Warfarer for this one.
Warfarer vocation for the first time. See our page on How to Unlock the Warfarer for this one.

The Specialist
The Specialist achievement is unlocked once you reach the maximum rank in any vocation. It doesn’t matter which vocation it is, and for most players it will likely be the first one that they choose. Just keep playing until you reach rank 9 to unlock it.

Pawn Achievements
There’s a total of 4 achievements related to pawns in Dragon’s Dogma 2.
Wish upon the Rift
You can easily unlock this achievement by setting an active quest for your pawn to complete with another player. This can first be done by visiting any Riftstone.

A Badge of Honor
This achievement is related to the previous one since you can only unlock pawn badges by setting quests for them. The badges relate to how many times your pawn has killed a specific enemy while in another player’s party, and you can track the numbers each time they return from the rift.

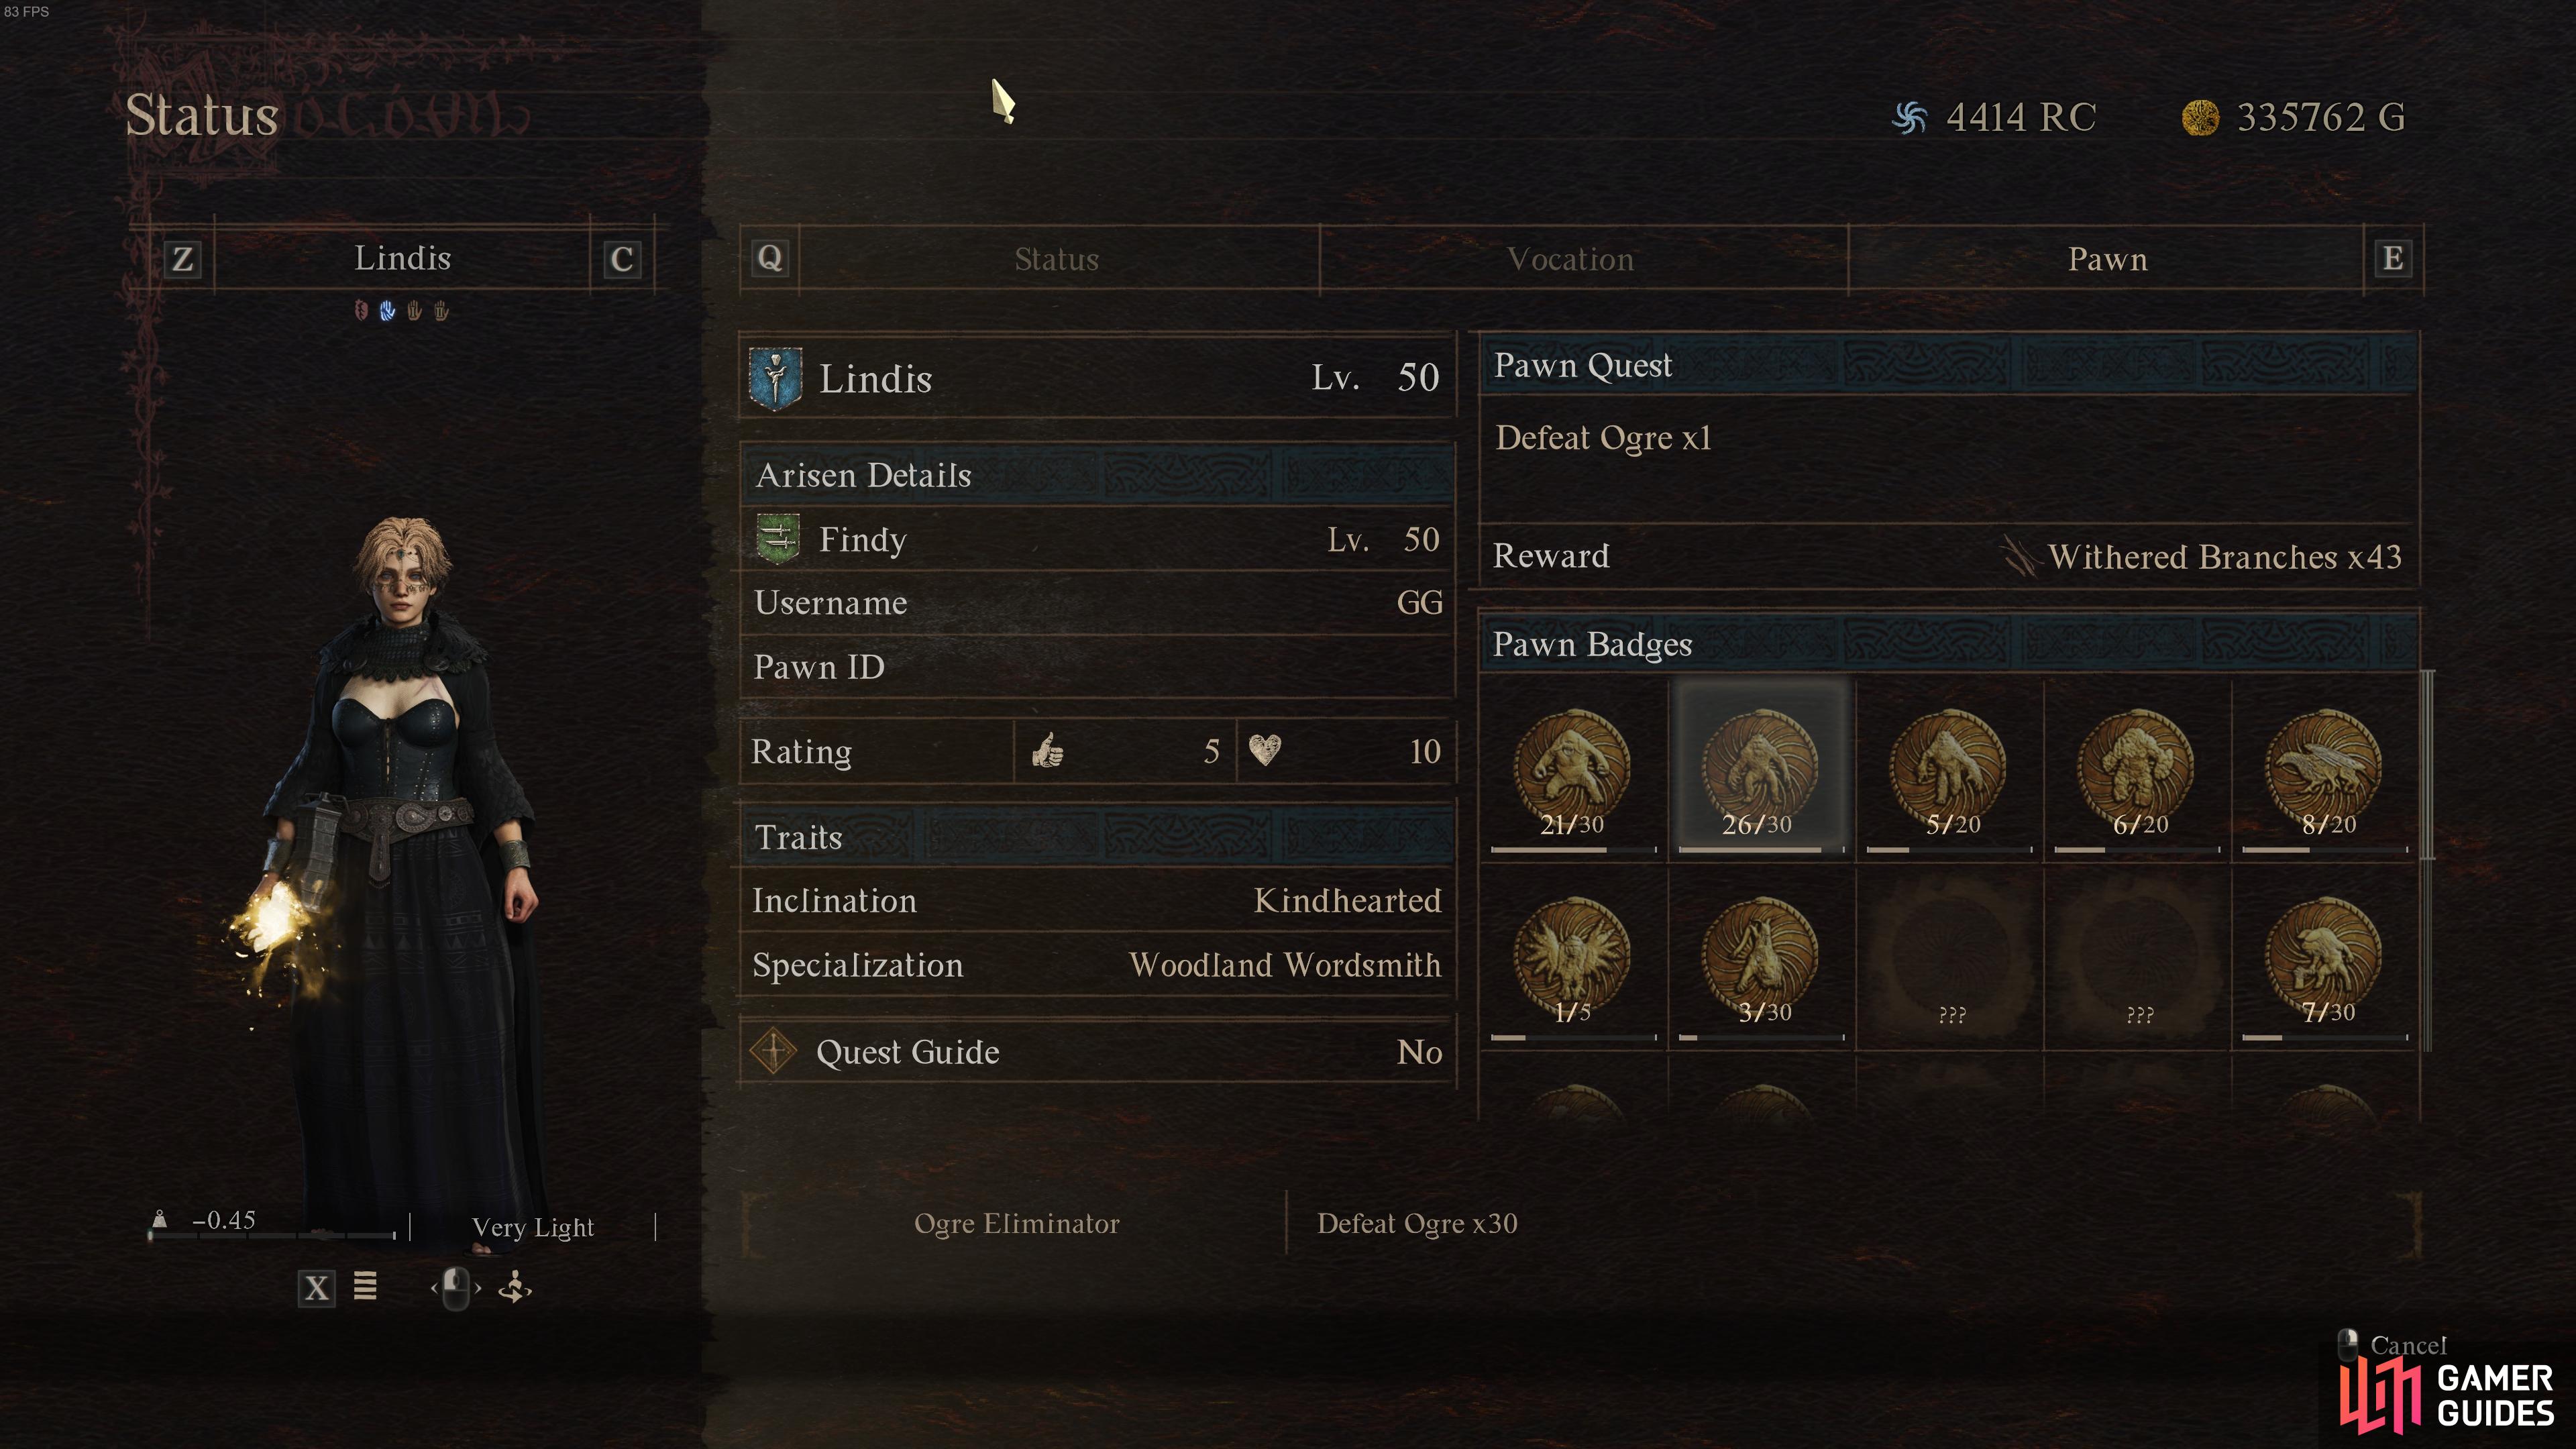
You can check your pawn’s status sheet to see the progress of their badges.
Quit Playing Dead
The Quit Playing Dead achievement is unlocked when you revive two pawns at the same time. You can only do this if you have two pawns die next to each other, then approach them and attempt to revive as you normally would. So long as the pawns are close enough together, you should revive them both at the same time. It’s possible that you’ll unlock this naturally while playing, but you may need to get creative by directing pawns toward tough enemies, such as Dullahans or Drakes, to ensure that they both die together quickly.

A Pawn of Many Talents
To unlock this achievement, you need to teach your pawn a new specialization. This can be anything you want, and you’ll find specialization scrolls by completing quests, earning them as rewards when improving your affection with NPCs, or by purchasing them. The NPC by the central Riftstone in ![]() Vernworth has plenty for sale.
Vernworth has plenty for sale.

Combat and Exploration Achievements
There’s a total of 13 achievements related to combat and exploration in Dragon’s Dogma 2.
The Collector
This achievement unlocks once you’ve discovered and looted at least 80 ![]() Seeker’s Tokens. There are a total of 240 Seeker’s Tokens to be found in the game, but thankfully you don’t need to get all of them to unlock this one, making it much more manageable. You can see our page on Seeker’s Token locations here or check our interactive map to see the locations for all 240 of them if you’re a completionist!
Seeker’s Tokens. There are a total of 240 Seeker’s Tokens to be found in the game, but thankfully you don’t need to get all of them to unlock this one, making it much more manageable. You can see our page on Seeker’s Token locations here or check our interactive map to see the locations for all 240 of them if you’re a completionist!

An In-Tents Adventure
This is one of the easiest achievements to unlocked, and it’s done when you use any type of camping kit to rest a campfire in the wilderness.

One Speed Only
The One Speed Only achievement is unlocked when you use an Oxcart to travel from one location to another for the first time. Another easy one.

Cyclops Abridged
This achievement is unlocked when you force a ![]() Cyclops enemy to fall through a bridge. The easiest way to do this is to find the Cyclops on the bridge located northwest of
Cyclops enemy to fall through a bridge. The easiest way to do this is to find the Cyclops on the bridge located northwest of ![]() Harve Village, and use a ranged weapon (either a bow or magic-based) to wake the Cyclops. As it runs toward you on the eastern side of the bridge, it should fall through the broken gap in the center, creating a platform. You can then walk across the bridge (and over the Cyclops) to unlock the achievement.
Harve Village, and use a ranged weapon (either a bow or magic-based) to wake the Cyclops. As it runs toward you on the eastern side of the bridge, it should fall through the broken gap in the center, creating a platform. You can then walk across the bridge (and over the Cyclops) to unlock the achievement.
If you fail to do this one on your first try, you can always rest a few days until the cyclops respawns, then try again.

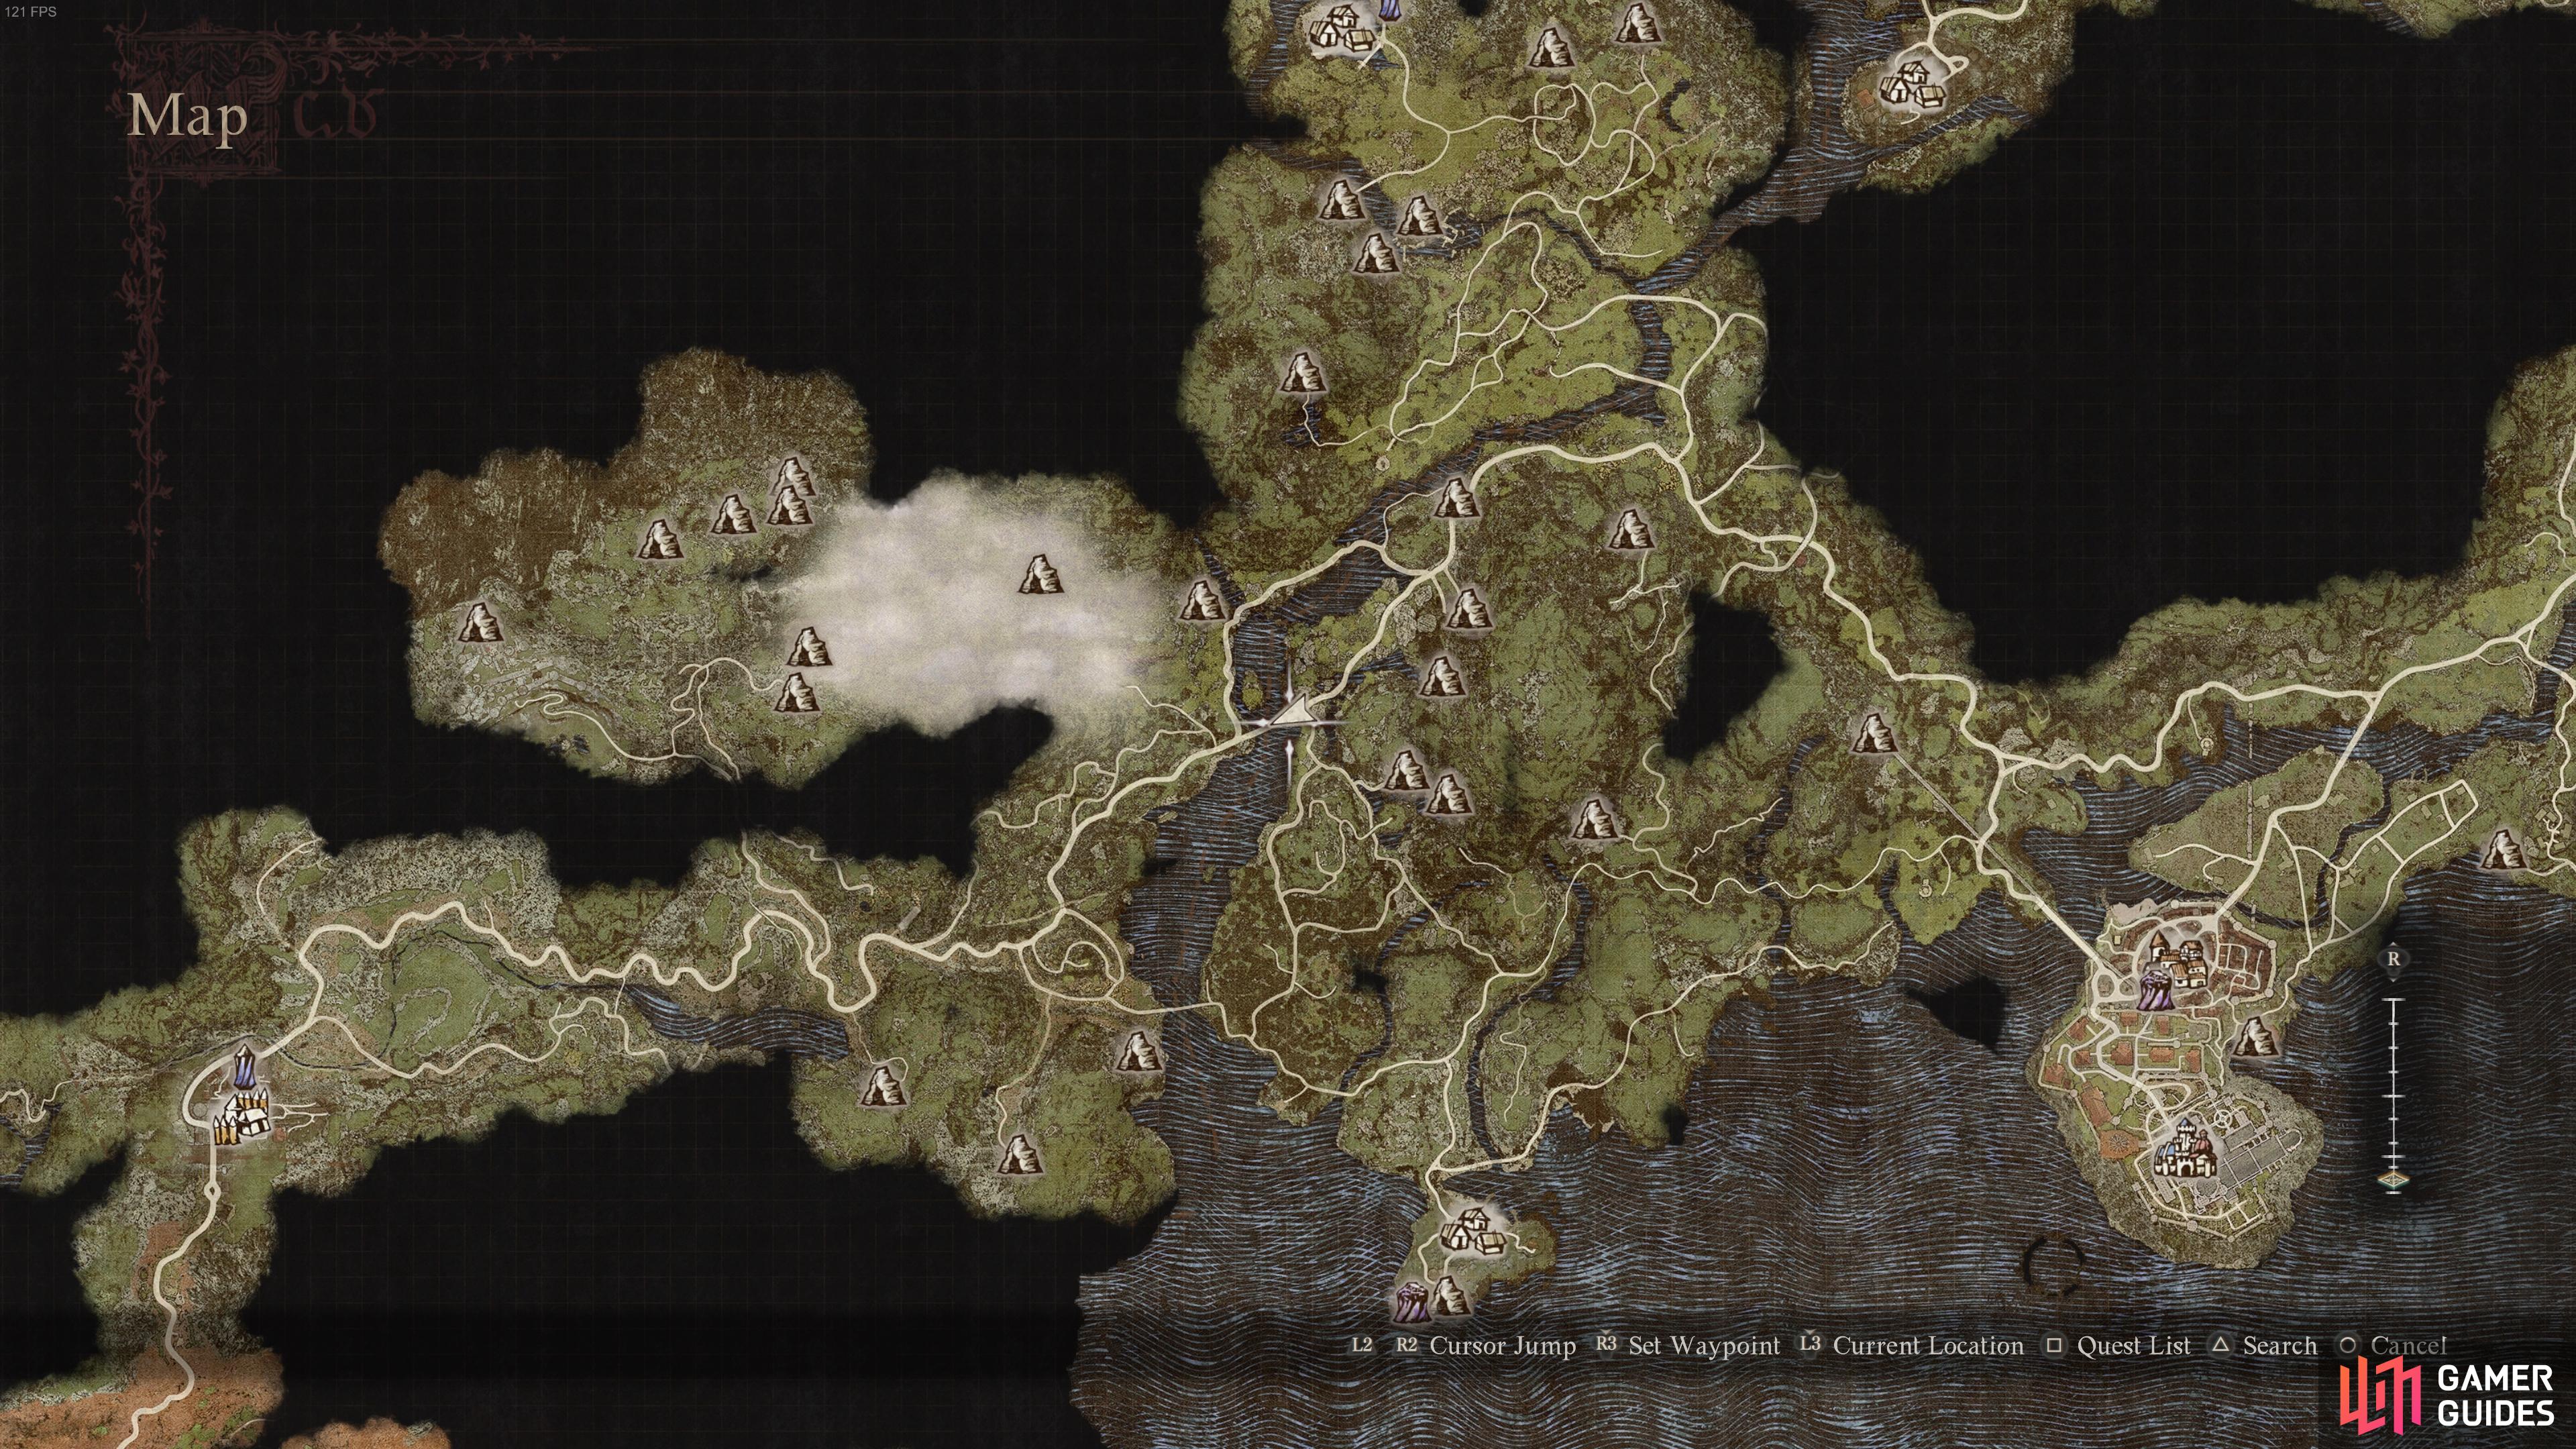
The location of the bridge with the Cyclops, north of Harve Village.
Dragon Forged
To unlock this achievement, you need to strengthen a weapon using wyrmfire, and you can do this with the Dragonforged NPC during the ![]() Flickering Shadows quest. It costs 15
Flickering Shadows quest. It costs 15 ![]() Wyrmslife Crystals to strengthen any weapon, so you’ll need to get some of these by defeating
Wyrmslife Crystals to strengthen any weapon, so you’ll need to get some of these by defeating ![]() Drakes or
Drakes or ![]() Lesser Dragons first.
Lesser Dragons first.

Hope You Brought a Lantern
To unlock this achievement, all you need to do is pass through Drabnir’s Grotto, which is located in the southeasternmost point of Battahl. It should be enough just to reach the cavernous path, but some players have stated that they needed to traverse it into the Volcanic Island region before the achievement unlocked for them.

Off with Its Head!
To unlock this achievement, you’ll need to decapitate a ![]() Medusa enemy, which you can learn more about on our How To Beat And Decapitate Medusa page. You’ll find a Medusa at the Caliginous Depths cave, located north of Wyrmsblod Forest in Battahl.
Medusa enemy, which you can learn more about on our How To Beat And Decapitate Medusa page. You’ll find a Medusa at the Caliginous Depths cave, located north of Wyrmsblod Forest in Battahl.

Getting a Head
This achievement is related to the one above, but you’ll need to make sure that you acquire a preserved Medusa head for it to unlock. You can do this by chopping off the head before the Medusa has lost its first health bar.

An Eye for an Eye
Another achievement related to a Medusa enemy, this one can only be unlocked once you’ve obtained a Preserved Medua Head, so you’ll need to complete the Getting a Head achievement first. You should put the head in storage so that it doesn’t decay, then rest between 5–7 days until the Medusa respawns. At this point you can take the Medua head from your storage, then return to the ![]() Caliginous Depths cave and use it to petrify the Medusa.
Caliginous Depths cave and use it to petrify the Medusa.
NOTE: If you happen to be a ![]() Fighter and you don’t have a preserved Medusa head, you can use the
Fighter and you don’t have a preserved Medusa head, you can use the ![]() Daughter of the Evening shield to petrify it instead. All you need to do is hold the shield up when the Medusa attempts to petrify you, and the attack will be reflected back onto it.
Daughter of the Evening shield to petrify it instead. All you need to do is hold the shield up when the Medusa attempts to petrify you, and the attack will be reflected back onto it.

Before Dawn Breaks
This achievement is unlocked when you defeat a ![]() Dullahan enemy. You might first encounter one during the
Dullahan enemy. You might first encounter one during the ![]() Till Death Do Us Part quest, but it will be difficult to defeat if you’re still a relatively low level. Dullahans have a random chance to spawn during the night, especially in the Misty Marshes, so you’re likely to stumble upon one while exploring at this time. However, they seem to be more likely to spawn in the post-game Unmoored World, so don’t worry if you haven’t found and killed on in the base game.
Till Death Do Us Part quest, but it will be difficult to defeat if you’re still a relatively low level. Dullahans have a random chance to spawn during the night, especially in the Misty Marshes, so you’re likely to stumble upon one while exploring at this time. However, they seem to be more likely to spawn in the post-game Unmoored World, so don’t worry if you haven’t found and killed on in the base game.

The Regriffining
This achievement can be unlocked when you fly on a ![]() Griffin for the second time. You’ll first do this early on in the main story, but to do it again you’ll need to climb onto the back of a Griffin and wait for it to fly off. There’s no shortage of Griffins in the world, so you shouldn’t have trouble finding one. However, to make this easier, you can dismiss all your pawns to ensure that they don’t kill it while you’re waiting for it to fly off.
Griffin for the second time. You’ll first do this early on in the main story, but to do it again you’ll need to climb onto the back of a Griffin and wait for it to fly off. There’s no shortage of Griffins in the world, so you shouldn’t have trouble finding one. However, to make this easier, you can dismiss all your pawns to ensure that they don’t kill it while you’re waiting for it to fly off.

To the Victor Go the Spoils
This one can be tricky to unlock, since you’re relying on a specific type of enemy (a ![]() Scavenger) to tackle you to the ground and steal some items from you. This will only happen if you ignore the Scavengers, and you can identify them by their hooded cloaks. They’re most frequently found among groups of bandits, especially in Battahl. Once again, you’ll have an easier time of securing this if you dismiss your pawns from your party first, but you’ll need to be sure that you can survive long enough in the fight to be tackled by the Scavenger, then kill and loot him to obtain the stolen items.
Scavenger) to tackle you to the ground and steal some items from you. This will only happen if you ignore the Scavengers, and you can identify them by their hooded cloaks. They’re most frequently found among groups of bandits, especially in Battahl. Once again, you’ll have an easier time of securing this if you dismiss your pawns from your party first, but you’ll need to be sure that you can survive long enough in the fight to be tackled by the Scavenger, then kill and loot him to obtain the stolen items.
It’s useful to note that Scavengers don’t wield any weapons, so they won’t personally attack you. The easiest way to get them to tackle you is to turn your back on them, so try to avoid facing them whenever you see one.


(1 of 2) An example of a cloaked Scavenger.
An example of a cloaked Scavenger. (left), You can loot your gear back after killing the Scavenger. (right)
The Tourist
This achievement is unlocked once you’ve visited at least 50 caves/dungeons. There’s no shortage of caves in the world, but you might still easily miss some in your travels. Be sure to check our interactive map if you need help finding more.

Miscellaneous Achievements
There are 13 miscellaneous achievements to be unlocked in Dragon’s Dogma 2.
A House? In This Economy?
The easiest way to complete this achievement is to complete the A Place to Call Home quest in Vernworth. You’ll be able to purchase your first house for 20,000 gold in this way, but if for whatever reason you were unable to complete the quest, you’ll have a few other opportunities to buy a house. See our page on How to Get a House for more information.

Just a Stone’s Throw Away
This is a simple one to complete since all it requires is that you use a ![]() Ferrystone to travel to a
Ferrystone to travel to a ![]() Portcrystal. There are two default Portcrystals located in Vernworth and Harve Village respectively, but you can place others in custom locations when you find them. Ferrystones are easy enough to get from chests in the wilderness, but you can also purchase them for 10,000 gold from most shops.
Portcrystal. There are two default Portcrystals located in Vernworth and Harve Village respectively, but you can place others in custom locations when you find them. Ferrystones are easy enough to get from chests in the wilderness, but you can also purchase them for 10,000 gold from most shops.

Are We There Yet?
This achievement can be completed by boarding the ![]() Phantom Oxcart during the quest of the same name. The main thing to keep in mind here is that you’ll need to take off all your armor and weapons before you can get in the oxcart, but you can see our The Phantom Oxcart Walkthrough for a more detailed guide.
Phantom Oxcart during the quest of the same name. The main thing to keep in mind here is that you’ll need to take off all your armor and weapons before you can get in the oxcart, but you can see our The Phantom Oxcart Walkthrough for a more detailed guide.

Harpy Joyride
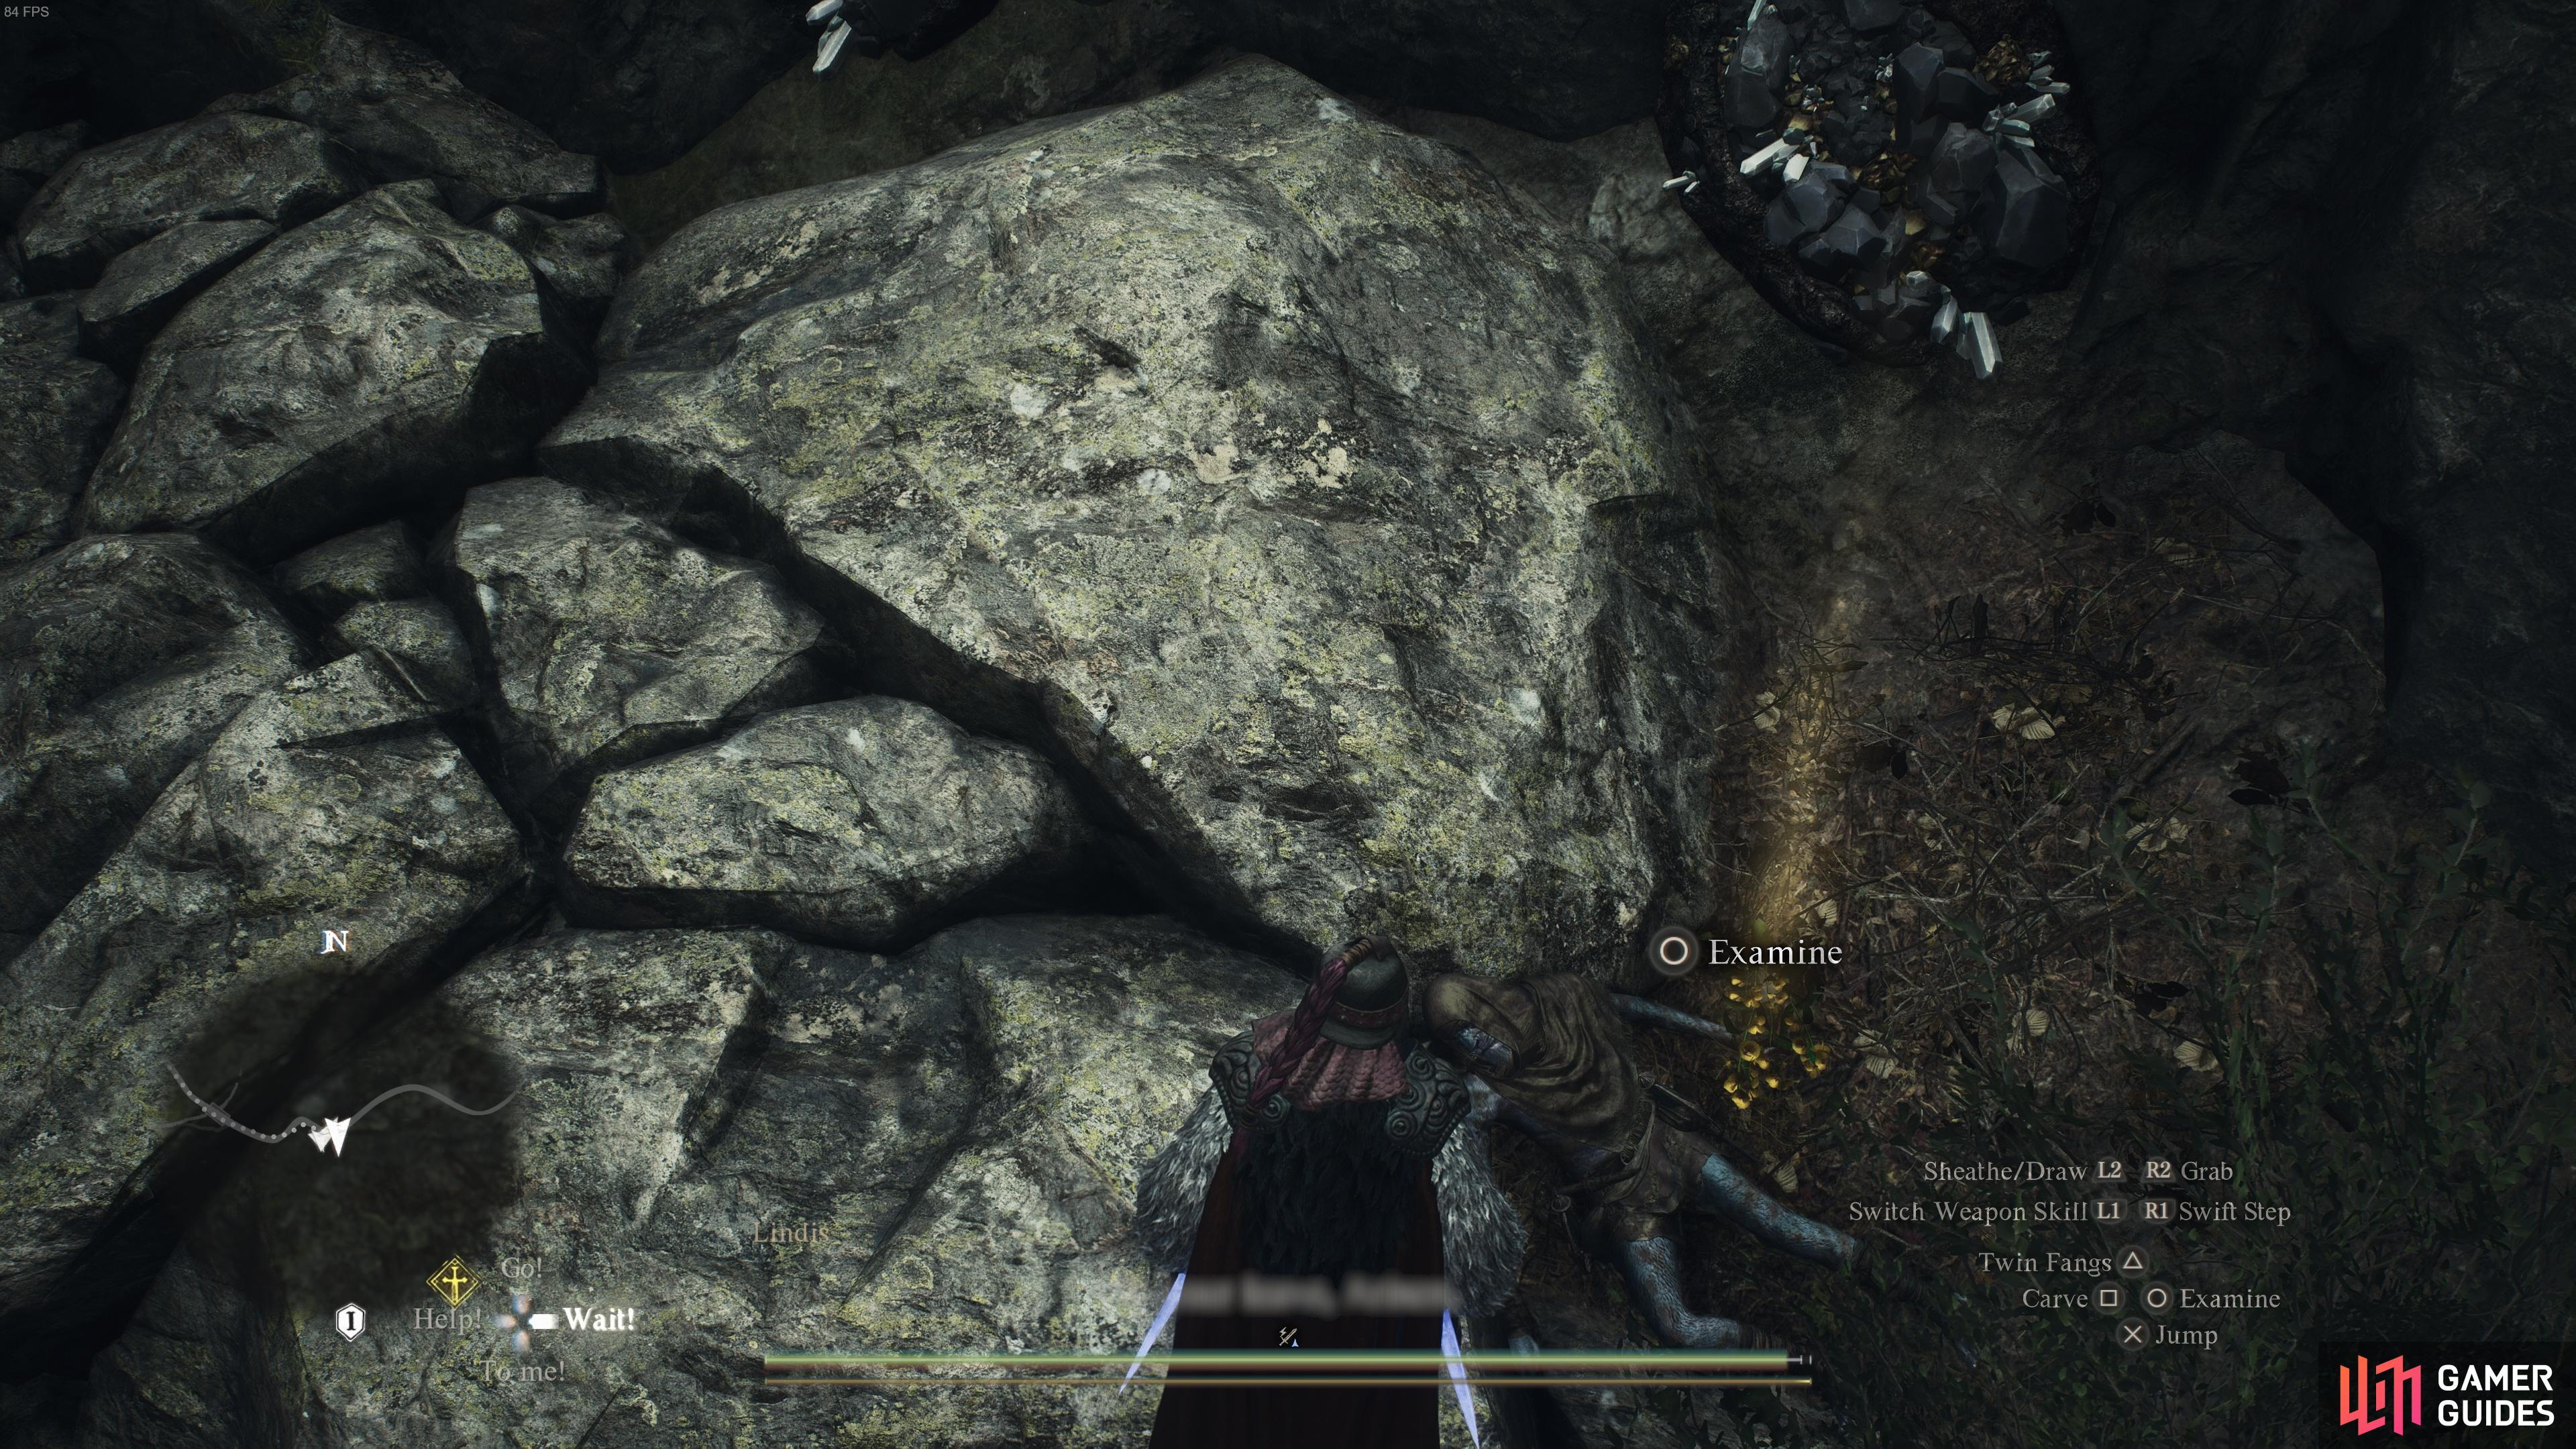
To unlock this achievement, you need to use a ![]() Harpysnare Smoke Beacon to summon a harpy enemy, then grab onto the harpy when it flies above you. The harpy should then fly off, and you’ll soon unlock the trophy. The beacons can sometimes be looted from chests in the wilderness, but you can also purchase them from shops or traveling merchants.
Harpysnare Smoke Beacon to summon a harpy enemy, then grab onto the harpy when it flies above you. The harpy should then fly off, and you’ll soon unlock the trophy. The beacons can sometimes be looted from chests in the wilderness, but you can also purchase them from shops or traveling merchants.

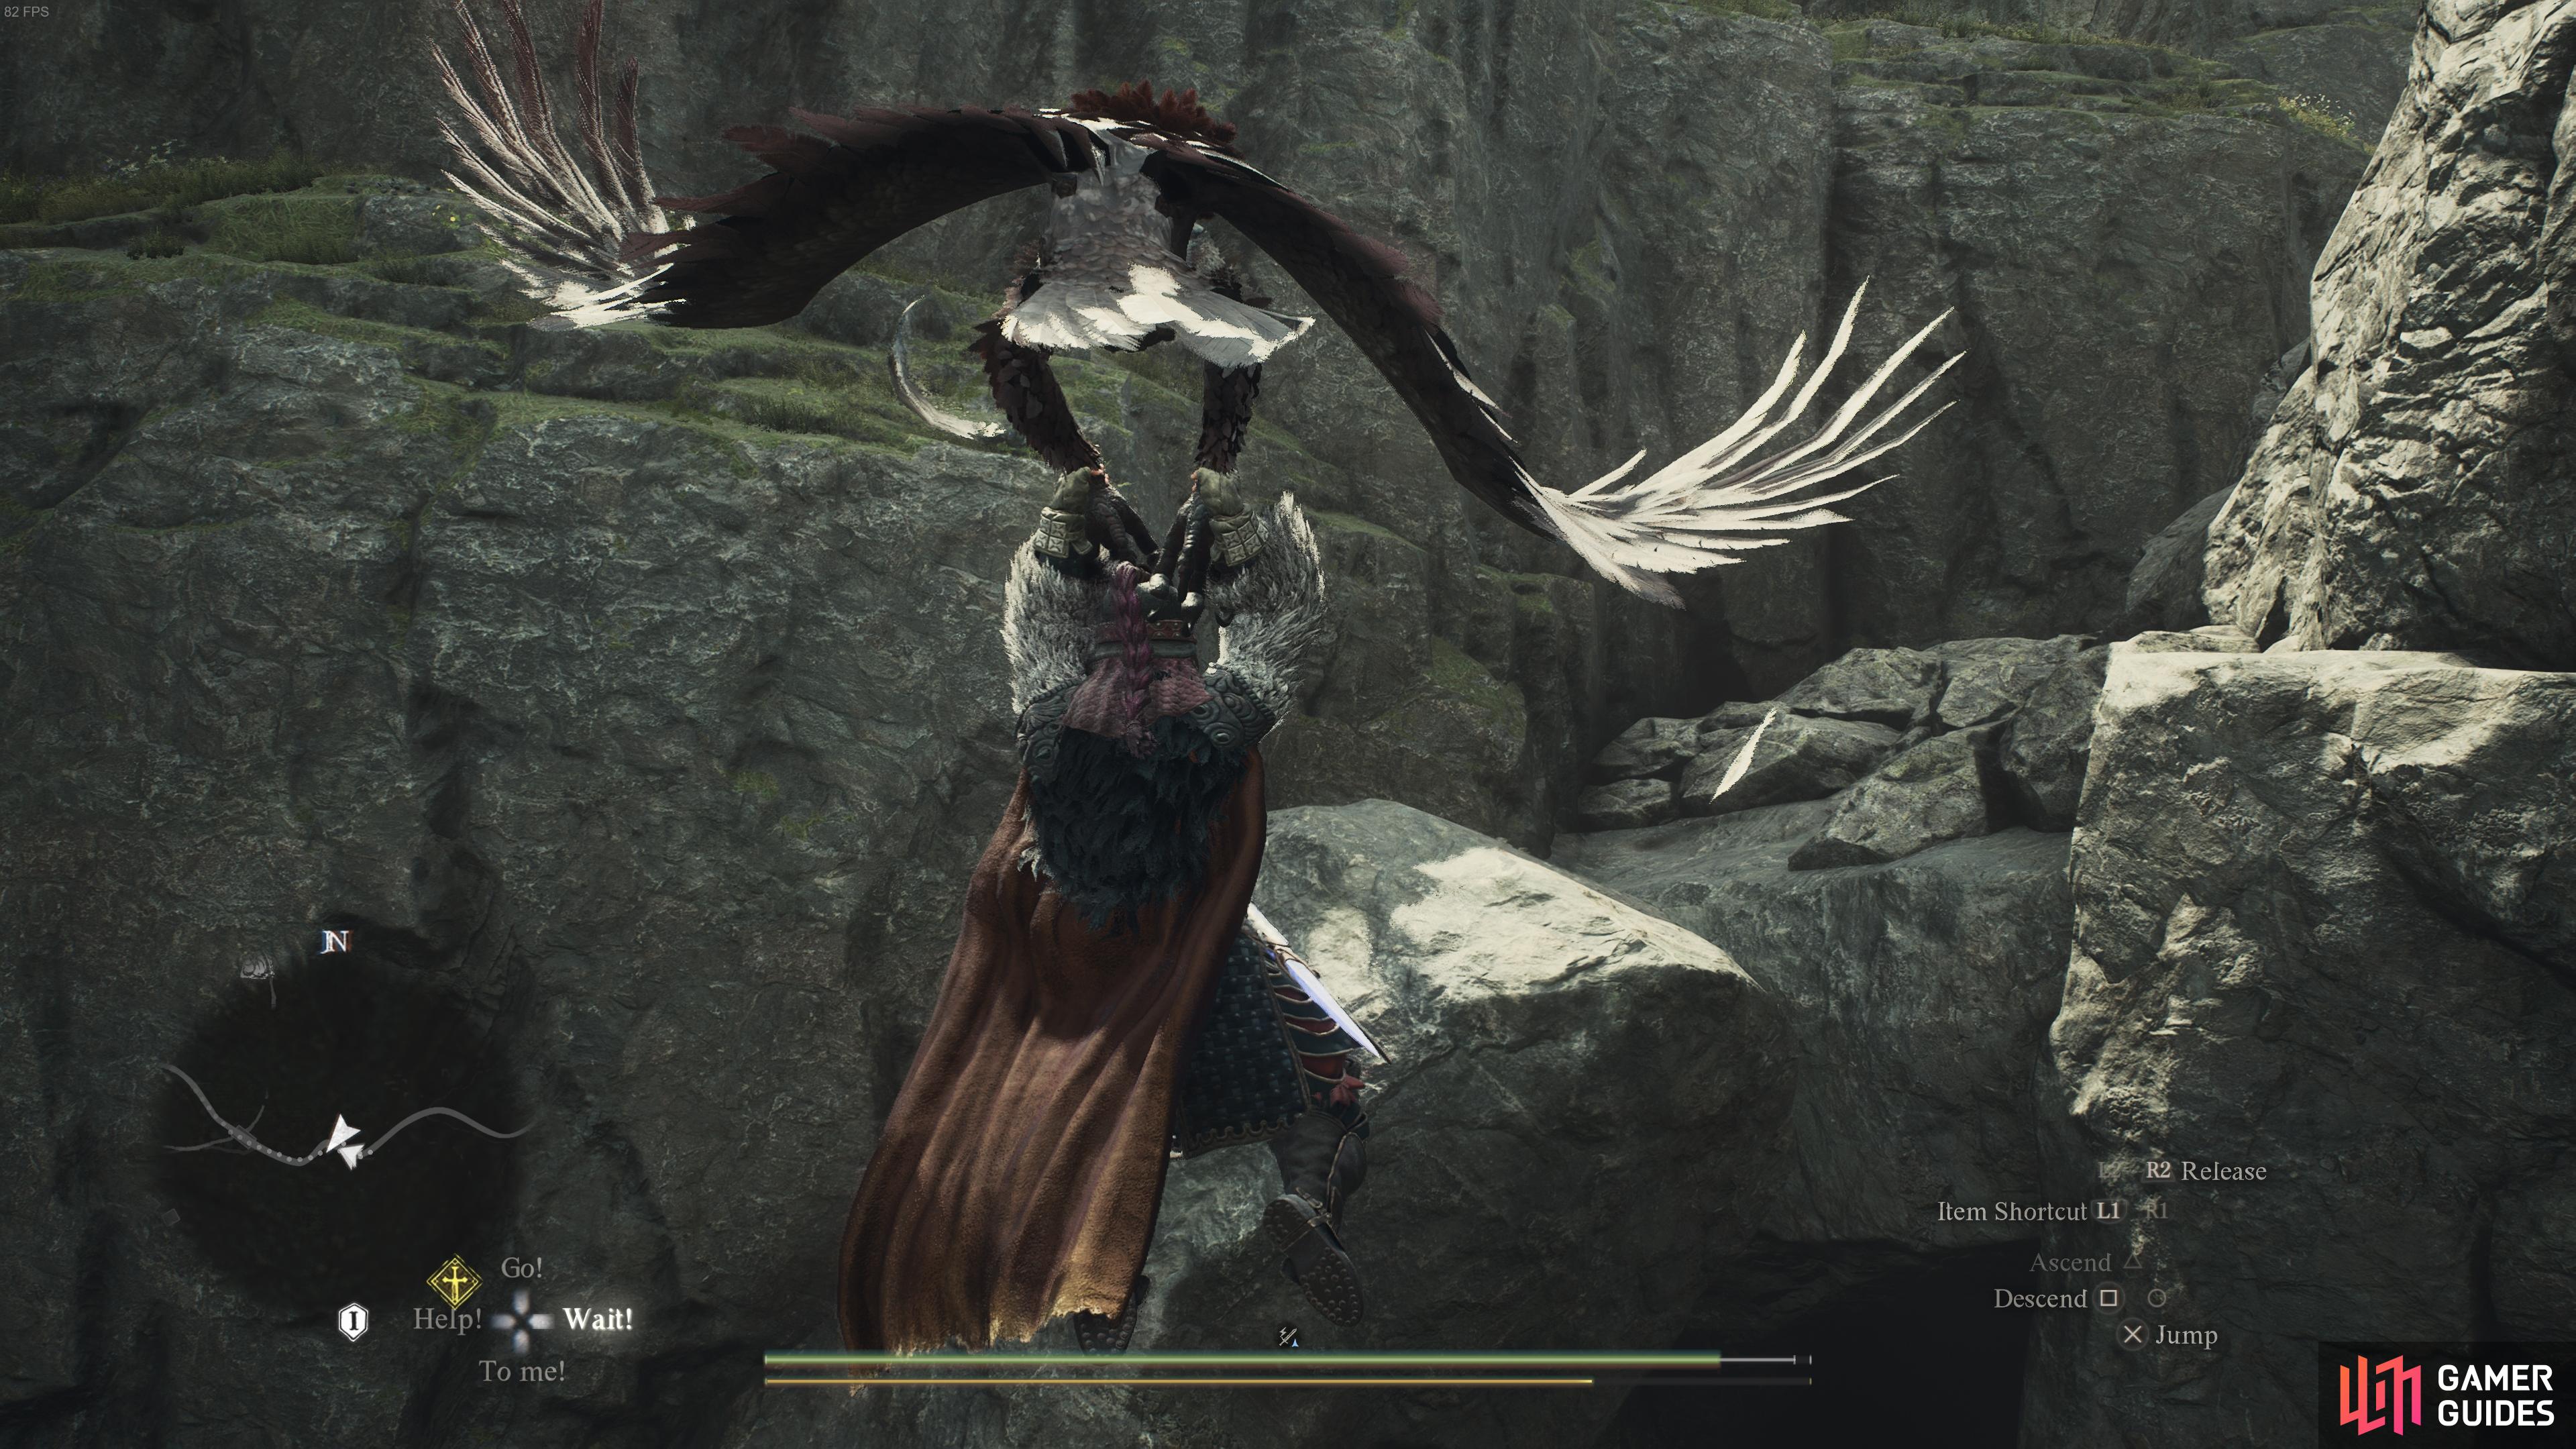
You need to grab onto the harpy willingly, rather than wait for it to grab you.
The Barbecue-Maister
To unlock this achievement, you’ll need to cook every type of meat, both during the day and during the night, which includes the following types:
 Scrag of Beast
 Aged Scrag of Beast
 Rotten Scrag of Beast
 Beast-Steak
 Aged Beast-Steak
- Rotten Bast-Steak
 Dried Meat
 Exquisite Dried Meat
You can get most of these meats by killing creatures in the wild, or you can purchase them from some shops. To get the aged versions, you need to keep the regular version of the meat in your inventory for a few days first. Note that you should complete this before entering the Unmoored World in the post-game, since you won’t be able to rest at campfires at this point.

Full Marks
This achievement is unlocked once you’ve completed all of the ![]() Sphinx riddles, part of the
Sphinx riddles, part of the ![]() A Game of Wits quest. It’s important to note that although you don’t need to kill the Sphinx to unlock this achievement, you will need to kill her to open the final chest for an
A Game of Wits quest. It’s important to note that although you don’t need to kill the Sphinx to unlock this achievement, you will need to kill her to open the final chest for an ![]() Eternal Wakestone, which is required for the next achievement. See our Sphinx Locations and Riddle Solutions guide for details on how to complete each riddle, and how to successfully kill the Sphinx without her flying off at the end.
Eternal Wakestone, which is required for the next achievement. See our Sphinx Locations and Riddle Solutions guide for details on how to complete each riddle, and how to successfully kill the Sphinx without her flying off at the end.

Reaper’s Scorn
This achievement is unlocked when you use an Eternal ![]() Wakestone to revive several people at once. You can try to do this naturally by waiting for a moment where you have the opportunity to revive NPCs that have been killed by an enemy, or you can speed things up by going to any settlement, killing a bunch of people in one place, then using the Eternal Wakestone to revive them.
Wakestone to revive several people at once. You can try to do this naturally by waiting for a moment where you have the opportunity to revive NPCs that have been killed by an enemy, or you can speed things up by going to any settlement, killing a bunch of people in one place, then using the Eternal Wakestone to revive them.
As noted above, you can get an Eternal Wakestone by defeating the Sphinx, so you can check our section on How to Defeat the Sphinx for the Eternal Wakestone for more information on this.

The Savior
This one is easy to unlock since all you need to do is revive any NPC with a regular Wakestone. There’s no shortage of these and you’ll have plenty of them throughout the game, so you should get this one naturally.

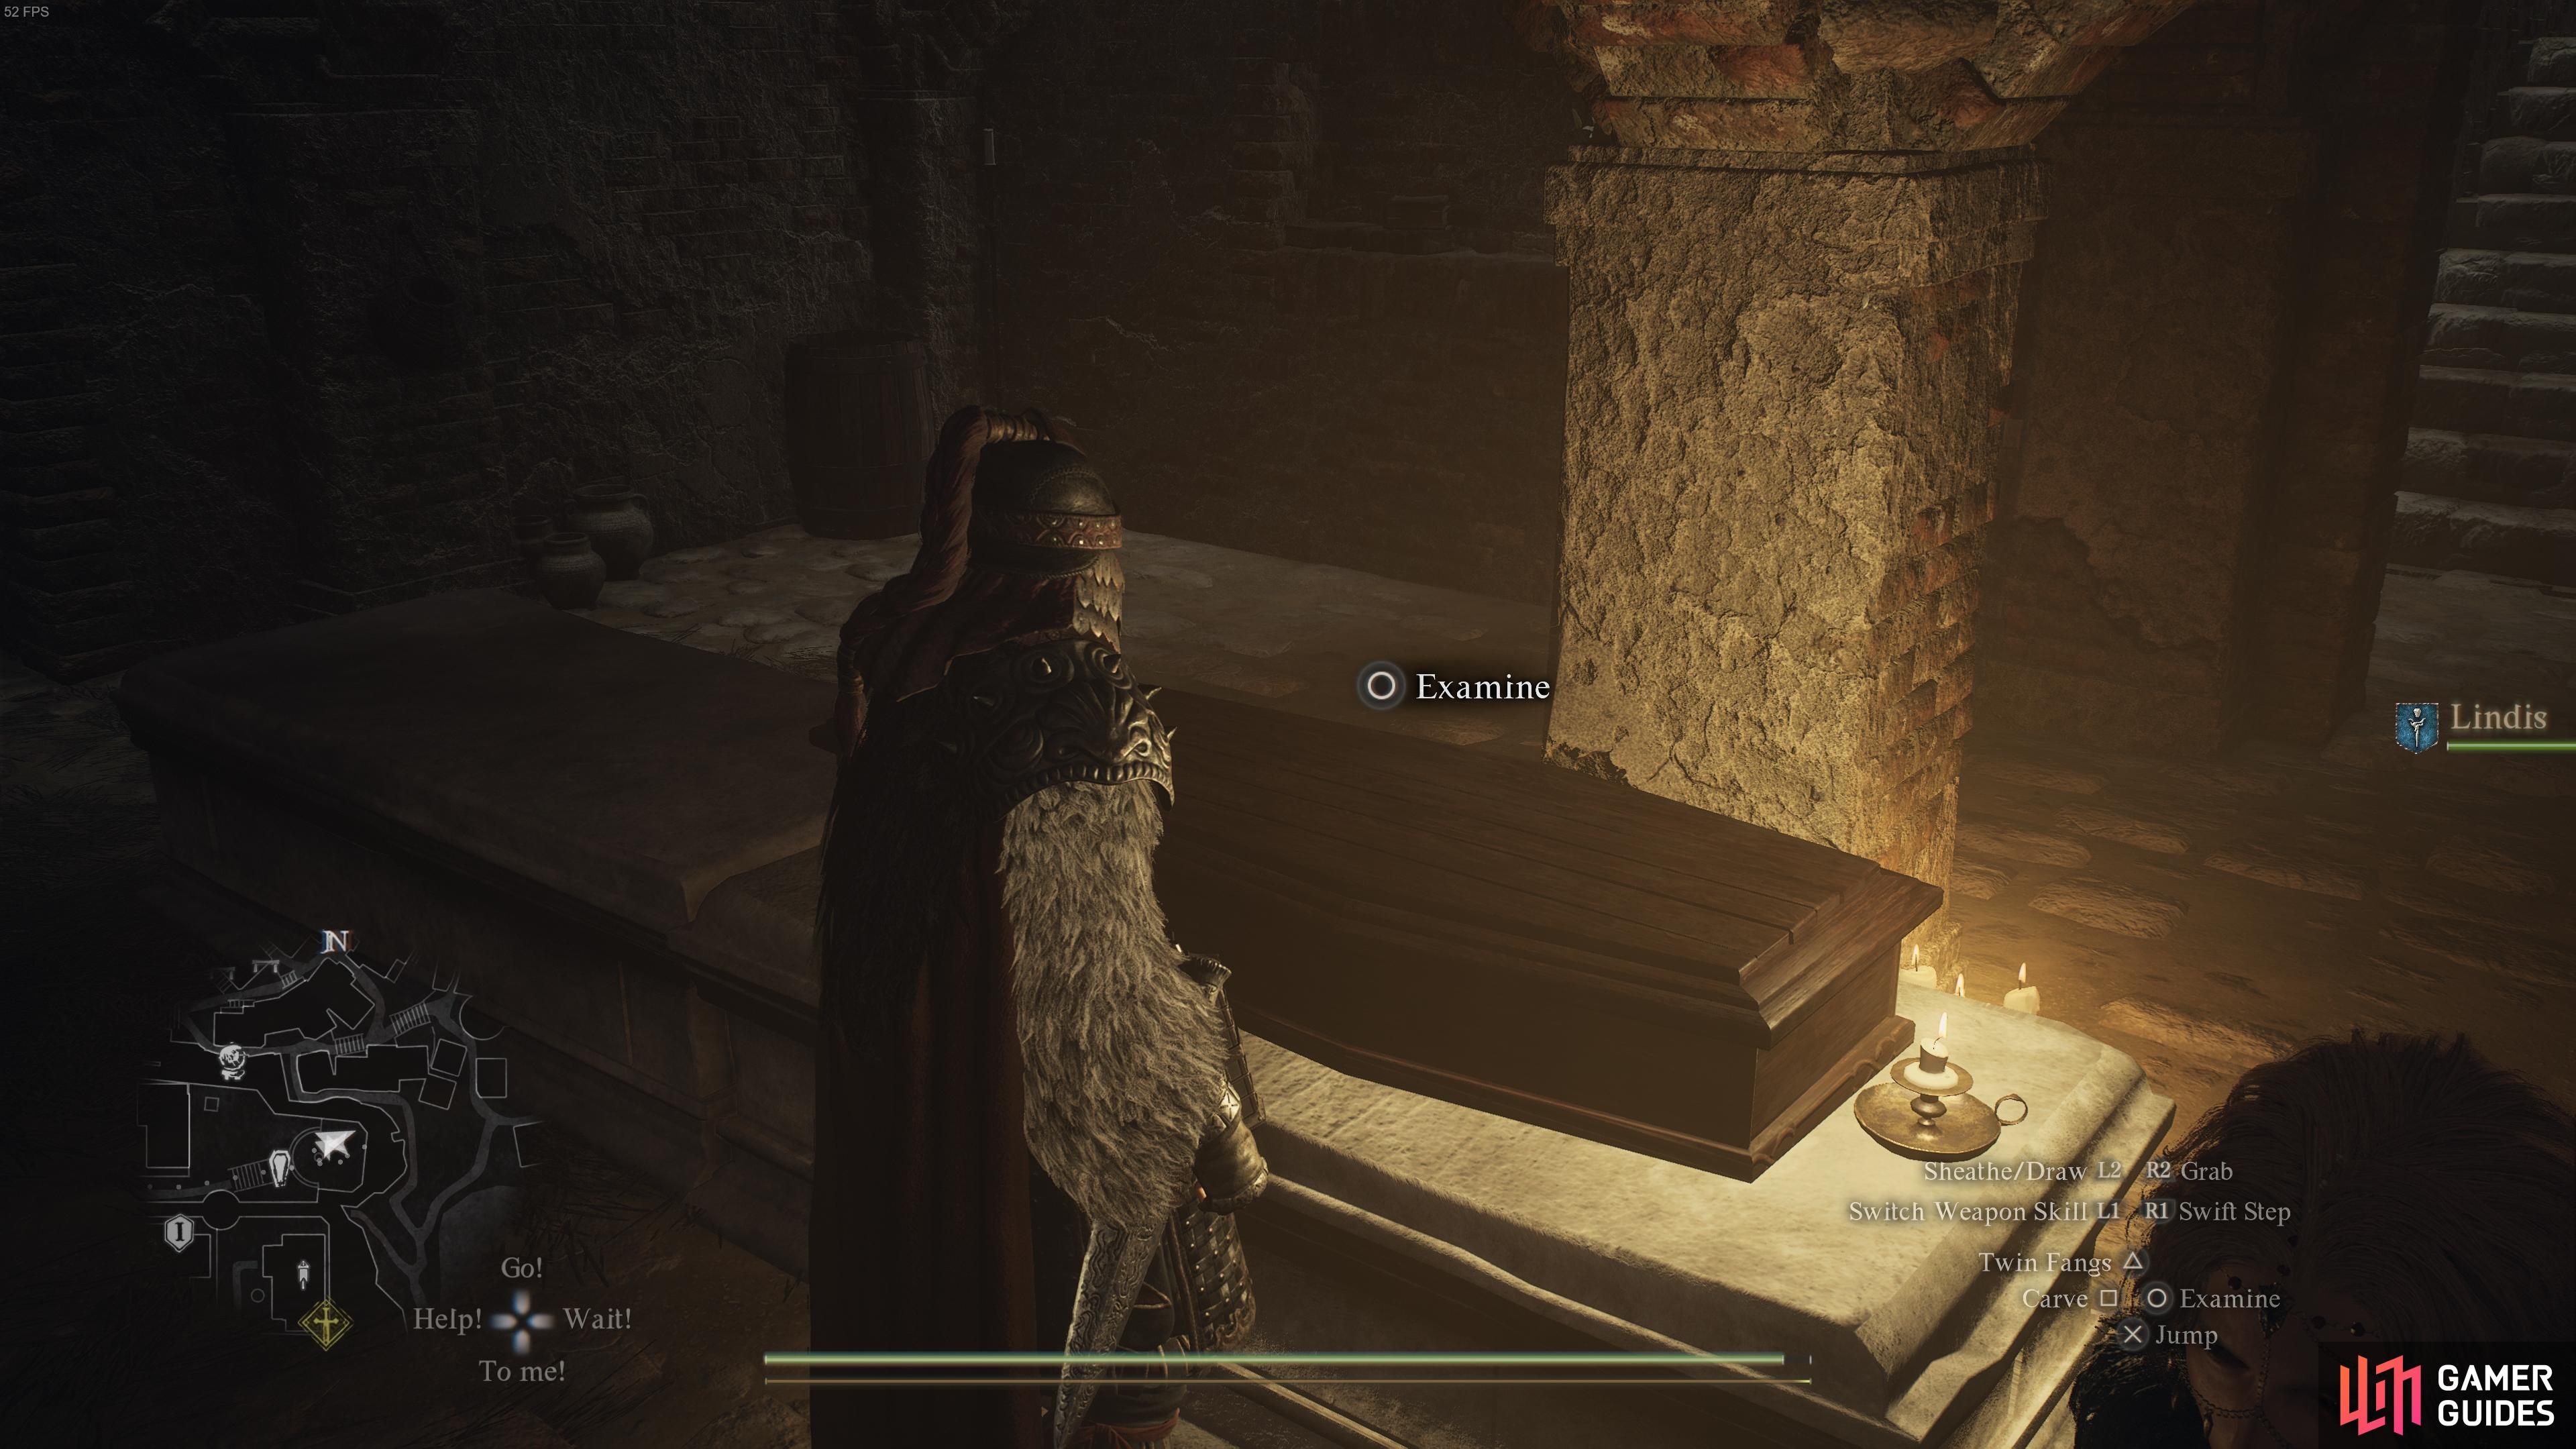
Thought I’d Lost You
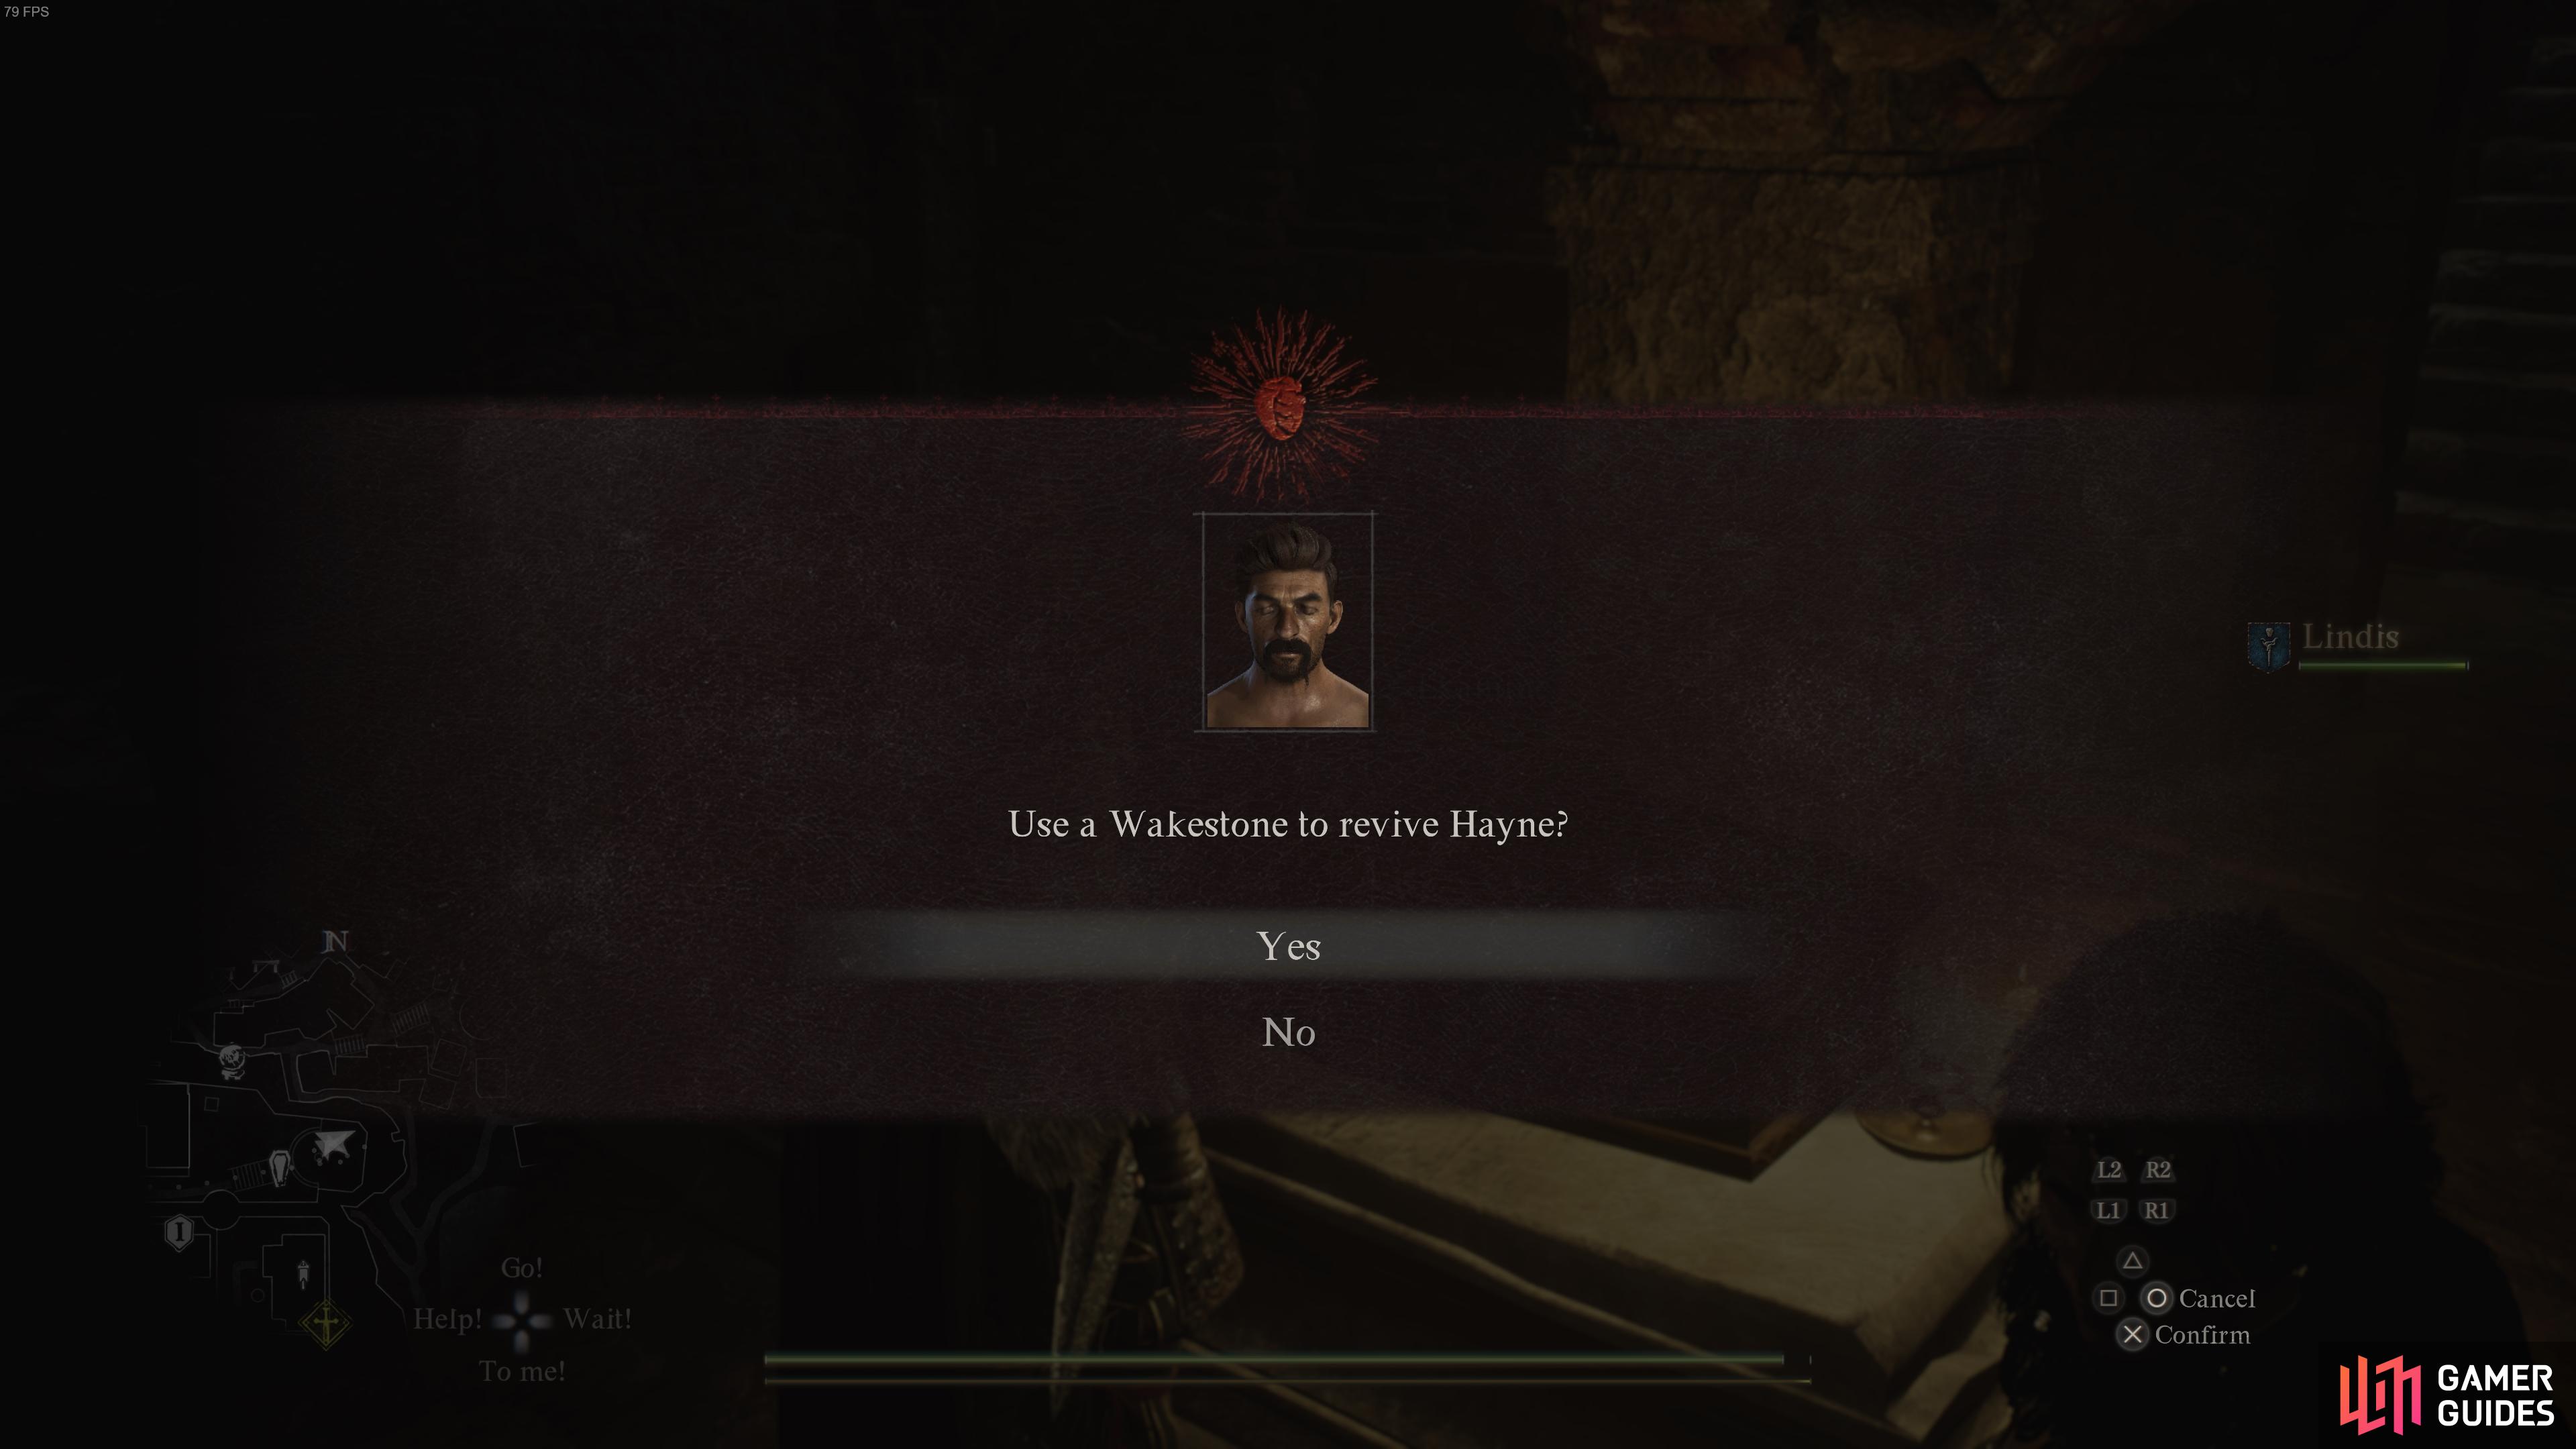
This achievement is similar to the above, in that you need to revive a fallen NPC. However, to unlock this one, you need to visit a morgue/charnel house to revive an NPC. You’ll find these in both Vernworth and Bakbattahl, and you can speak to the NPC inside to revive the fallen. The process requires you to pay a certain amount of gold to the NPC (usually 5000), at which point they’ll place a candle on the coffin of the NPC that you choose to revive. You can then approach the coffin and interact with it to use a Wakestone and revive them.
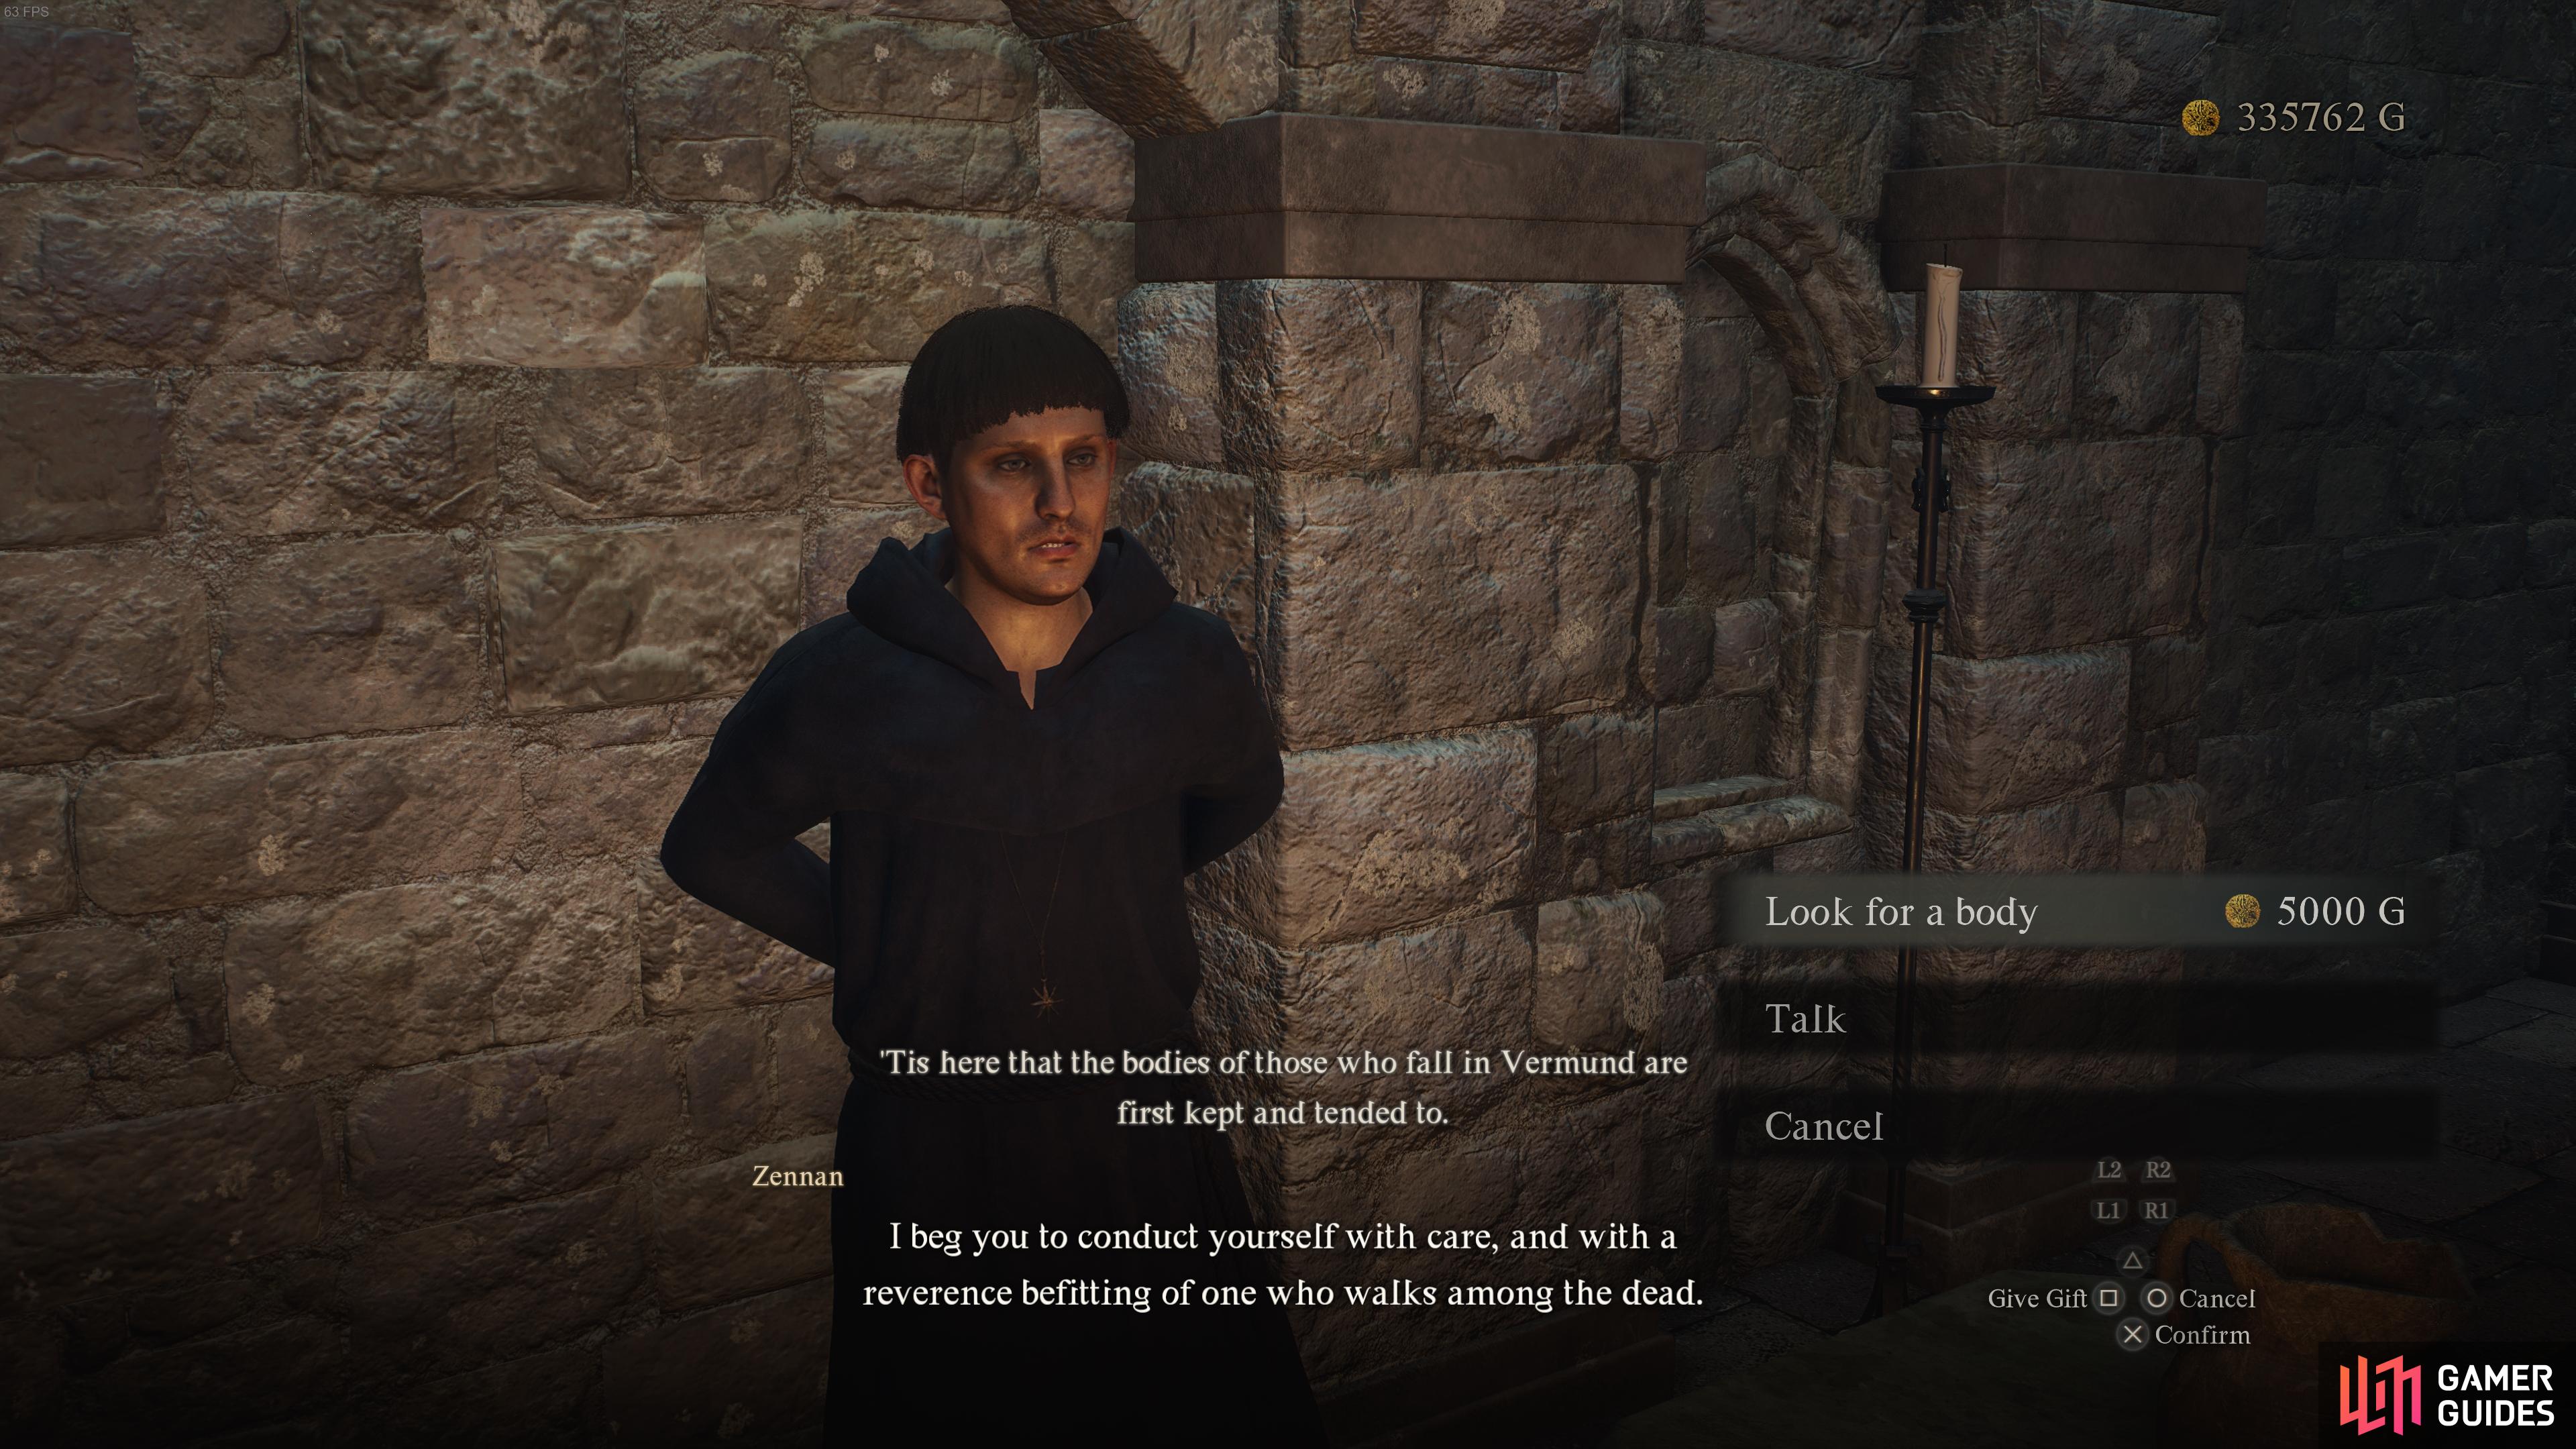

(1 of 4) Speak with an NPC at a morgue to pay 5000 to revive an NPC.

This’ll Cure What Ails Ye
This one is easy to unlock, but you need to visit the Volcano Island Camp and speak with the NPC at the Hot Springs to do it, so you’ll have to wait until you reach the Agamen Volcanic Island region.

Affinity and Beyond
You can unlock this achievement by increasing your affinity with any NPC to the maximum level. The easiest way to do this is by checking their logbook entry in the History tab of the menu to see what items they like, then provide them with items of that type. Their cheeks will glow red once you’ve reached maximum affinity. You may complete this naturally during the romance arc with Ulrika or Wilhelmina.

The Philanthropist
To unlock this achievement, you need to earn the affections of at least 50 people in the game. This may sound like a nightmare in light of what you have to do for just one person for the Affinity and Beyond achievement, but it’s actually much easier than you might expect. All you need to do is visit different inns at night time and buy rounds of drinks for everyone. You should only need to do this a handful of times, and you can repeatedly rest at the inn (or at your home for free) until nighttime to speed things up. Just make sure that you buy rounds of drinks at different inns so that you increase affection with as many NPCs as possible.

Plenty Arisen to Go Round
This is perhaps the funniest achievement of them all, and you can unlock it by taking two NPCs that you’ve earned maximum affection with, carry them to your house (any will do), then wait a few seconds for them to start fighting. As soon as the brawl breaks out you should unlock the achievement, but if it doesn’t work with one duo of NPCs, try with another just to be sure.

Main Story Achievements
The first thing that you should know about the main story in Dragon’s Dogma 2 is that it reaches a point of no return with the A New Godsway quest. For this reason, you should put off completing this quest until you’ve unlocked all the other achievements, aside from those for which we explicitly state otherwise, so that you don’t necessarily have to play through the game a second time to unlock them.
First Taste of Freedom
The First Taste of Freedom achievement is unmissable, and you’ll unlock it after escaping the Excavation Camp in the opening sequence of the game.

Arisen
This is another unmissable achievement that you’ll get when you return to ![]() Melve and recover your memories of fighting the dragon there.
Melve and recover your memories of fighting the dragon there.

Seat of the Proxy
The Seat of the Proxy achievement is obtained when you visit Vernworth, the capital of Vermund, for the first time. Practically unmissable.

Nobles’ Night Out
The Nobles’ Night Out achievement is one of the first that you can obtain as part of the main story which is actually missable. To get it, you’ll need to successfully attend a masquerade while wearing a set of the ![]() Courtly Tunic and
Courtly Tunic and ![]() Courtly Breeches during The Stolen Throne quest.
Courtly Breeches during The Stolen Throne quest.
You can see the links below for locations of Courtly Tunic and Courtly Breeches on our interactive map:

Myrmecoleon Delights
The Myrmecoleon Delights achievement is obtained when you visit the Rose Chateau for the first time. You’ll do this as part of the main story, so it’s practically unmissable.

I’m In
This one is missable and can be difficult to obtain if you don’t know some key details. The first thing to note is that if you have either the ![]() Beastren Border Entry Permit or the
Beastren Border Entry Permit or the ![]() Battahl Residence Permit in your inventory, you must place them in storage before you attempt to get this trophy. If you try to pass the border with them in your inventory, the achievement will fail to unlock.
Battahl Residence Permit in your inventory, you must place them in storage before you attempt to get this trophy. If you try to pass the border with them in your inventory, the achievement will fail to unlock.
To unlock this achievement, you’ll need to interact with the sign at the Oxcart Station in Checkpoint Rest Town. This will pass the time until the oxcart arrives, at which point you should rest on the bench opposite. This advances the in-game time to a point where the royal carriage arrives at the ![]() Checkpoint Rest Town, and it’s by entering this carriage from the rear, then waiting for it to pass through the gate to Battahl, that you can unlock this trophy.
Checkpoint Rest Town, and it’s by entering this carriage from the rear, then waiting for it to pass through the gate to Battahl, that you can unlock this trophy.
It’s important that you don’t confuse the arrival of the royal carriage with the regular oxcart, but the differences are rather obvious, so this shouldn’t be a problem. If you want to complete this trophy as soon as you arrive in Checkpoint Rest Town, you’ll go through a brief cutscene as the royal carriage arrives near the gate, and it’s more difficult to enter the carriage here, which is why we recommend the method of saving at the inn and waiting by the oxcart station, as mentioned above.

Across the Border
This achievement should unlock as you unlock the “I’m In” achievement, but you may have already unlocked it if you entered Battahl by any other means beforehand. This is essentially unmissable, since you’ll need to enter Battahl to progress through the game.

Roost of the Dragon
To unlock this achievement, you’ll need to visit the Dragonsbreath Tower at least once, which you’ll do as part of the main story. If you want to get there sooner, you can see its location on our interactive map by following the link above.

Back Where It All Began
This achievement is unlocked when you visit the Agamen Volcanic Island region for the first time, which is unavoidable as you progress through the main story.

Gigantus, I Hardly Knew Ye
Another achievement that can be missed, this one is unlocked when you defeat the Gigantus enemy during ![]() The Guardian Gigantus main story quest. It’s possible to leave the Gigantus and fail to defeat it while continuing with the story, so it’s important that you follow it and destroy it as soon as possible. The easiest way to do this is by using an
The Guardian Gigantus main story quest. It’s possible to leave the Gigantus and fail to defeat it while continuing with the story, so it’s important that you follow it and destroy it as soon as possible. The easiest way to do this is by using an ![]() Unmaking Arrow on it, but these are rather rare and can only be used by those with the
Unmaking Arrow on it, but these are rather rare and can only be used by those with the ![]() Archer vocation. As a result, you should obtain one of these arrows and switch to the Archer vocation before you start the quest if you want to make it as easy as possible.
Archer vocation. As a result, you should obtain one of these arrows and switch to the Archer vocation before you start the quest if you want to make it as easy as possible.
If you fight the Gigantus with any other vocation, the easiest way to defeat it is by using the ballistas that you encounter on the path. You should aim these at the crystals on the body of the Gigantus to make it weaker, and once you’ve hit all crystals, it’ll only take a few hits to bring it down. Alternatively, you can try climbing the Gigantus to slash or stab at the crystals up close, but this will require the use of numerous stamina potions. To ensure that you can unlock all achievements in one go, we strongly recommend the method of using an Unmaking Arrow. This is because if you don’t kill the Gigantus quickly enough, it will die by reaching the lava on the way to the ![]() Excavation Site, thereby preventing you from completing the I,
Excavation Site, thereby preventing you from completing the I, ![]() Talos achievement later on.
Talos achievement later on.

Peace
The Peace achievement is unlocked when you defeat the dragon and sit on the throne. You should not speak to the ghost at this point to ensure that you unlock the trophy first. However, you will need to speak to the ghost in order to enter the Unmoored World and complete the achievements there, so we recommend that you make a save at the inn in the Excavation Camp before attempting to complete this trophy. In this way, you can complete it, then return to your hard save and be free to enter the Unmoored World.

Unmoored World Achievements
There are just six achievements to be unlocked in the post-game Unmoored World of Dragon’s Dogma 2, but make sure that you complete all the others before going there!
Dragon’s Dogma 2
This achievement unlocks when you use the ![]() Empowered Godsbane Blade on your character while fighting the dragon at the end of the game. You need to do this when your heart glows while flying on the dragon on the way to the fight arena.
Empowered Godsbane Blade on your character while fighting the dragon at the end of the game. You need to do this when your heart glows while flying on the dragon on the way to the fight arena.

Dragon’s Dogma
The Dragon’s Dogma achievement is unlocked when you purchase the weapon of the same name, which can only be done in the post-game Unmoored World by speaking with the Dragonforged NPC. It’ll cost you 110 Wyrmslife Crystals, which is why defeating the dragon at least once first is a good idea.

I, Talos
This achievement is unlocked when you return to the site where you defeated the Gigantus enemy on the Volcanic Island. A brief cutscene will play, during which the achievement unlocks. Note that you’ll need to have defeated the Gigantus using an Unmaking Arrow, or by killing it quickly enough so that it didn’t die by the lava during The Guardian Gigantus main story quest.

The Hero
This one unlocks once you have overcome all the trials of the Unmoored World. This means that you will need to complete the three red pillars marked on the Unmoored World map, and you can do this by using the Godsbane Blade to begin a battle associated with them. Note that if the Gigantus enemy died by the lava, there will be two additional red pillars that you need to complete for this achievement.

The Guardian
This achievement is unlocked once you’ve successfully evacuated the settlements of Vernworth, ![]() Bakbattahl, and the
Bakbattahl, and the ![]() Sacred Arbor. There’s a quest associated with each, which you can learn more about in our Unmoored World section.
Sacred Arbor. There’s a quest associated with each, which you can learn more about in our Unmoored World section.

Closure
The Closure achievement is unlocked once you’ve completed all the tasks required of you in the Unmoored World, resulting in the end of the cycle with the Dragon and the Arisen. You can’t miss this one so long as you complete the Unmoored World content mentioned above.

The True Arisen
This is the final platinum achievement that you’ll unlock once you’ve unlocked all of the others listed above. Congratulations for completing the epic grind!

 Sign up
No Comments